In detail: do-it-yourself hp pavilion g6 laptop repair from a real master for the site my.housecope.com.
It is not difficult to disassemble the HP pavilion g6 laptop, the main thing is accuracy and care. The procedure requires a minimum of tools:
- Two Phillips screwdrivers, sizes # 1 and # 00.
- Tweezers
- A mounting paddle that can be replaced with a plastic card, plectrum, or other fairly flat object.
- It is not necessary, but it is better to prepare a tray for storing screws (so as not to get lost).
Disassembly should be carried out on a dry, clean and sufficiently wide surface. The less dust and foreign objects on the table, the better.
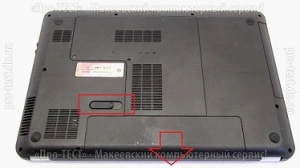
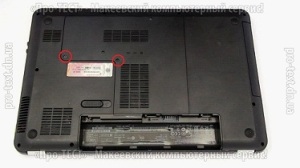
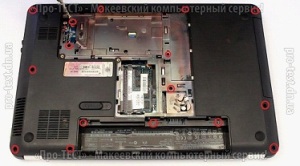
Before disassembling, you must completely de-energize the computer by unplugging and removing the battery. Then turn it over and remove the two screws on the service cover.
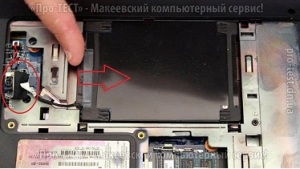
Under it will be the hard drive, RAM, and network card. The drive must be carefully pushed to the left and removed from the case. Then remove the screws for the optical drive (purple) and keyboard (green). A disk drive without a screw freely comes out of the case - just gently pull it out.
To get the RAM strips, you need to bend the latches on the sides. The boards will rise 45 degrees and can be removed from the connectors.
Now you need to turn over and open the laptop to remove the keyboard. It is fixed with latches along the perimeter.
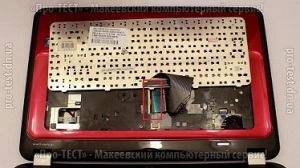
Then, without sudden movements, turn the keyboard over and disconnect its cable.
Putting the keyboard aside, close and turn the laptop back upside down. After that, you can unscrew the screws on the upper case cover. On the right there will be one (yellow), hidden under a plug, which is removed with a needle or paper clip.
| Video (click to play). |
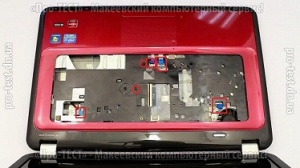
Another laptop flip. Now we need to disconnect the cables that were under the keyboard and, at the same time, unscrew all the screws there.
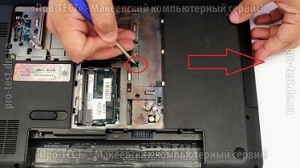
Then you can remove the top cover. To do this, you need to pry it with a mounting spatula, a card or a pick and carefully, but confidently, walk around the perimeter, snapping off the latches.
Now you need to disconnect the antenna wires from the wireless adapter.
At this point, the monitor and the main unit are only connected with hinged screws. If you unscrew them, you can remove the monitor and set it aside.
We turn off the speakers and take out their block.
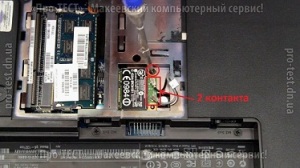
We unscrew the network card, which is then extracted as RAM.
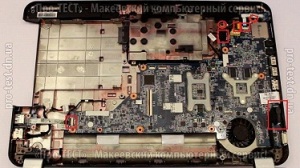
In the upper right corner of the motherboard, disconnect the power connector and the board cable with USB ports.
Unscrew the SATA board screws, remove it and put it aside.
Now the motherboard is supported by three screws, which can be removed from the case by unscrewing them.
To remove the cooling system, you need to unscrew the screws on the radiators above the CPU and chipset.
Hp-pavilion-g6-quanta-r23 won't turn on
No signal s5_on why? I tried to set no current at all on this 3v line.
Flooded laptop
Good night all. An unexpected situation has occurred: the laptop is flooded with liquid.
Lemonade-drenched laptop
Hello everyone. The situation is this - one friend brought a laptop that his night.
HP CQ71 (DA0OP6MB6D0) - Flooded
Good day to all! Presented the flooded laptop HP CQ71 mother DA00P6MB6D0.
Tea-infused laptop
Hi, not long ago I bought an ASUS X550D laptop, there was a nuisance, I spilled it on.
A few days ago another HP laptop received for repair with a diagnosis does not turn on. Yes, you understood correctly, in this article we will talk about how the hp pavilion g6 laptop will be repaired.
First you need to check the charger, as the 20V tester shows, i.e. everything is in order, we begin to disassemble. We will talk about how to disassemble a laptop in another article.
And so we got to the motherboard, now we need to find out the reason for the refusal to start along the chain.First, we check the central power circuit, 20 volts comes to the motherboard.
Next, we check the standby power supply 3V and 5V, simply on the chokes. And so there is food. then you need to look at the presence of power on the multicontroller and the BIOS chip.
We start with a BIOS flash drive. Since we are repairing an HP pavilion G6 laptop, then when the central power circuit is supplied to the motherboard, there will be power on the flash drive. We put the oscilloscope probe on the ground, the second on the 8th paw, the power supply should be 3.3v, if there is, then we go further.
Now the multicontroller. it is more difficult with it, in addition to the 3.3V coming to it, it has a lot of signals, both incoming and outgoing, that need to be checked using the laptop's circuit, if you don't understand this, then it's better to take the laptop to our service center.
If all the signals and power supplies are normal, then first let's go back to the BIOS flash drive, in this particular case the stumbling block was right there.
We turn on the oscilloscope, and poke it on the 5th leg and synchronize it. We press the start button, we can see how the request for a USB flash drive is going on, but in response there is no massive readout, this means that neither the cartoon nor the hub receive an adequate response to the request.
Next, you should download BIOS Dump on specialized forums or, in some cases, on the official website and flash the flash drive with a programmer, and in some cases, sew it on a new one. the old one is not working properly.
Well, since you, as a user, are unlikely to find a professional programmer at home either, the way to the service center is ordered in this case as well.
After the firmware, this laptop came to life and is already at the client's place and is actively being used.
In this article, we only superficially examined the repair of the hp pavilion g6 laptop, in future articles we will return to this model more than once.
Home »HP Pavilion G6 1321SE Laptop Disassembly. We clean it from dust and change the thermal paste.
Not a bad laptop fell to us under the next disassembly and cleaning.
We act as usual. We de-energize and disconnect the laptop. We take out the battery. Pulling the lock to the side, we take out the battery from the case.
Unscrew the two screws and remove the cover, which looks like a large letter G.
Disconnect the cable from the hard drive to the motherboard. Moving the hard drive to the side, and lifting it, remove the hard drive from the laptop case.
Disconnect the antenna wires from the wireless module. We unscrew the screw securing this module and remove the module from the connector into which it was inserted.
There is no point in getting rid of RAM modules, they will not interfere with our disassembly of our laptop.
Now, you have to unscrew all the screws that are marked in the picture. These screws secure the laptop case.
Be sure to take out the DVD drive. Unscrew the screw that holds the drive and lightly push the DVD drive out of the case.
The laptop keyboard is held in the case by four latches. Turn the laptop over as shown in the photo, believe me, this will make it easier to remove the keyboard. One by one we snap off the fastening latches and throw back the keyboard, as shown in the bottom photo. Disconnect the loop and now the keyboard can be safely removed to the side.
Further, under the keyboard, you will need to unscrew a few more screws and disconnect several loops. All this is shown in detail in the picture.
After that, you can disassemble the laptop into two parts, the upper part and the lower part. A motherboard will be installed on the bottom of the case, which we will also remove. To remove the motherboard, unscrew all the screws marked in the photo and disconnect all cables and connectors marked in the same photo.
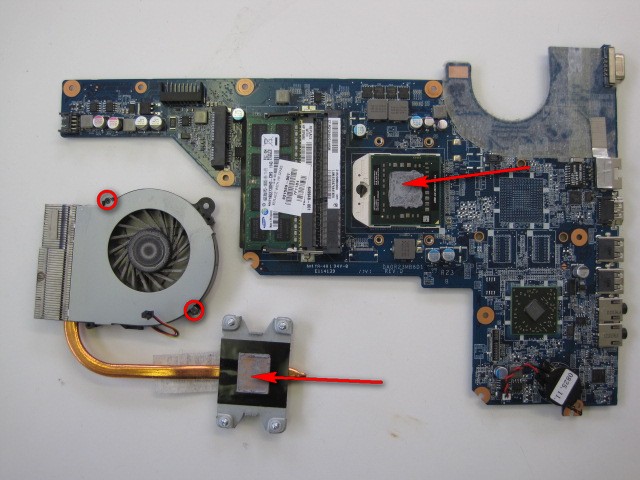
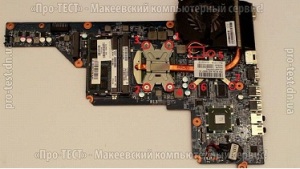
In the next photo we see how the removed motherboard will look like. To clean the cooling system from dust, as well as to replace the thermal paste, unscrew the screws marked in the photo. Remember to disconnect the cooling fan power connector.
And this is how the removed cooling system of the HP Pavilion G6 1321SE laptop will look like. For a more thorough cleaning, we will disassemble the cooling system into its components. How to do this is shown in the picture.
Naturally, we clean the contact pads of the cooling radiator from the old thermal paste. Indeed, when installing the radiator in the same place from where it was removed, we will apply a new thermal paste.
As you can see, there is nothing difficult in disassembling and cleaning this laptop.
An HP Pavilion g6 laptop came in for repair with a declared malfunction - it turns off just like that after a short time. Turn on, run aida 64:
We see that the processor temperature is 97 degrees. And this is no load. Naturally, the laptop turns off, because everyone wants to live. And the laptop too. Well, let's disassemble, clean it from dust.
Disassembling the laptop is standard: the first step is to turn the laptop over onto the matrix:
We remove the battery, unscrew the two screws of the cover that closes the hard drive and memory, remove it to the side:
We take out the hard drive connector:
Then we take out the hard drive itself:
Unscrew the screw that holds the DVD-ROM and take out the DVD-ROM:
We take out the memory and unscrew all the screws that we see:
I usually lay out the screws in the order in which they were screwed, that is, if the screw is from the upper left corner, I put it in the upper left corner:
Then we turn the laptop over and disconnect the keyboard - this is also a completely standard procedure - the keyboard is held on by latches, which we press with a screwdriver:
Beforehand, it would be nice to unscrew the screw that holds the keyboard on the back side (I didn't unscrew it right away - I had to unscrew it later):
After that, the keyboard easily moves away from the case. Disable the keyboard loop:
Then, using a pick, carefully, we open the laptop case along its entire length:
Finally we got to the insides:
Disconnect the 3 cables at the bottom of the laptop:
Disconnect the matrix cable:
Disconnect the power connector and USB cable from the right side of the laptop:
Unscrew the screw and take out the Wi-Fi module from the motherboard:
We unscrew one single screw that holds the motherboard:
We remove the motherboard and see that the hole through which we take air into the fan is clogged with something:
Subsequently, it turned out that chewing gum stuck to the air intake hole, which had to be completely torn off. If I had not pulled it out, then the air would have entered the laptop cooling system not in the required volume, which again is fraught with overheating. Here is a photo of the HP Pavilion g6 laptop motherboard:
Unscrew 4 screws from the processor heatsink and remove the cooling system assembly:
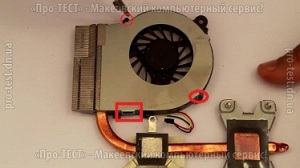
We unscrew two small screws and remove the fan to the side:
There is more than enough dust in the radiator:
Using a brush, we completely clean the radiator of the cooling system from dust. We also clean the fan blades and housing:
With a cloth, carefully remove the remnants of the old heat-conducting paste from the processor and from the heatsink:
We apply a new heat-conducting paste (I am using KPT-8):
We screw the processor heatsink into place:
Putting everything together in reverse order. Turn on, run aida 64:
39 degrees. Quite another matter. We try to load the processor - the temperature rises to 55 degrees, but does not increase further, so everything is working as it should.
This completes the disassembly and cleaning of the HP Pavilion g6 laptop.
All photos were taken with a Kodak EasyShare C1530 camera.
Computer Assistance Center> presents to your attention a video tutorial on disassembling a laptop HP Pavilion g6. One of the problems with this laptop was a strong overheating of the central processor and video chip.
To eliminate the malfunction, it took a complete disassembly of the laptop, cleaning the cooling system and the interior of the case from dust and replacing the thermal interface.

