VIDEO
Actually, it all started with the fact that the stove faucet broke down - it began to leak, and all the antifreeze dripped right under the feet of the front passenger. Refurbishment was needed. What to do? My thoughts were: disassemble the interior, throw out the old, soaked Shumka, put in something new, and throw out the tap. What to put new? Or maybe make soundproofing? This thought was flying in my head for about six months. Finally I made up my mind, bought the material in the spring and started. When I took apart the interior, everything was dry. Only the carpet was slightly saturated with antifreeze. In general, the process of noise insulation is a separate topic. In the process of studying the issue of noise insulation, I read all sorts of articles about the installation of acoustics and, in particular, the manufacture of podiums on the front doors. It has already become an obsession. In a dream, I dreamed of various forms, there are not women, but the forms of catwalks, women were sniffing at their side. And yet he made up his mind, especially after two friends talked about their work.
And so is the shape of the podium.Either simple and not beautiful - it is a round bulge for a speaker, or the podium should be a continuation of the pocket.
I drew it on a piece of paper, cut it out, attached it - something is missing, an unfinished look. Introduced himself as a designer of car interiors and decided to radically alter the door trim, so as in foreign cars - leather, and even with folds. Drawn, cut out, attach.
It seems to look normal. Let's get started.
What we need? The skin of a young dermantine, which necessarily stretches well, the fabric is beautiful - I chose blue fluffy to match the color of the car, soft material such as paralon, glue, Macroflex (or any similar material), patience. If we buy something later.
Since the shape of the door panel is slightly rounded at the top, the old panel does not fit, it is necessary to cut out a new base - from hardboard. And you will also need to file the plastic overlays. As a soft material, under the fabric and dermantin, I took the isolon remaining from the noise insulation. One large piece was cut out along the entire contour of the panel and two pieces in the form of decorative overlays. I decided to simply sew these overlays to the fabric base, placing an isolon. In what sequence do not ask what and how to attach, I cannot explain on my fingers, but I did not take pictures of this process. We glue the sewn casing with a thin layer of glue so that it does not completely saturate the fabric, we glue it over the isolon, the isolon is already glued to the hardboard. After much torment, this is what happened:
The base is ready, now you need to glue the podium itself and the top plate.
Since there will be two podiums with pockets, and only one is standard, I began to look for a second pocket for the second door. But he did not find a loved one, but he did find pockets from 41 Muscovites. You don't need to cut them, just screw it on and that's it.
The podium frame was cut out of 10mm plywood. For about
I made a lot of holes to make it easier. Correctly, the installation angles of the speakers need to be selected for a long time and persistently, experimentally. But I was not going to make a prize installation, and I intended to "steer" the scene in the future with the help of beepers, which is quite acceptable. Therefore, the shape and angle of inclination were chosen by eye.
The frame was fastened with PVA and, for fidelity, with screws. Now it remains to fill the frame with foam. The hardened foam itself is soft and easily perforated, so I used the wet foam technology - when applying the foam, I dripped a little water into it and stirred it with a spatula and shoved it into places with my fingers. The latter should be done only with latex gloves, the foam is very badly rubbed off, especially the hardened one - only together with the skin.
With this technology, foam took two large cylinders - a liter each, and that might not be enough. Cured foam, especially where it turns out to be loose, is easy to cut, and where it is very dense, it is difficult. Therefore, I grinded it with a coarse file.
After processing, voids appeared in the foam. It is necessary to putty. AND
I used a fiberglass putty. Since it dries quickly, it is necessary to putty in small portions. It took one 250g jar of two-component putty.
Since it did not work out perfectly to putty, and there was no need for more putty, but it was possible to continue. To make the surface of the podium at least a little soft, I pasted over everything with a cloth from my coat. It stretches perfectly and will repeat the shape of the podium, while hiding the disadvantages of puttying.
This intermediate result just made me happy. But then the most difficult thing was to sheathe the podium with dermantine. First, I cut out a pattern from a rag, then transferred it to dermantin and began to sketch. Here I almost lost it and sent this whole venture to X ... Therefore, there is only one photo of this process.
Hello everyone! My name is Mikhail, now I'll tell you a story about how I managed to exchange a dvenashka for a 2010 Camry.It all started with the fact that I was wildly annoyed by the breakdowns of the two, like nothing serious broke, but on little things, damn it, so many things that really started to enrage. Here the idea was born that it was time to change the car to a foreign car. The choice fell on the tayet Camry of the tenths.
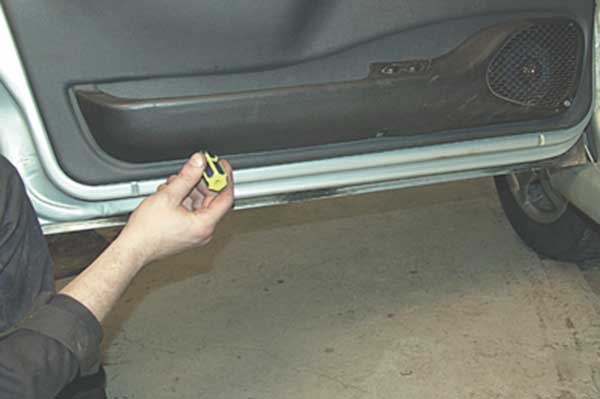
If it is not possible to restore the fastening of the clips, then you can fasten the door trims with self-tapping screws.
In order to get rid of constant fines from cameras, many of our readers successfully use Special Nano Film for numbers. Legal and 100% reliable way to protect yourself from fines. Having familiarized ourselves and carefully studying this method, we decided to offer it to you as well.
In order to get rid of constant fines from cameras, many of our readers successfully use Special Nano Film for numbers. Legal and 100% reliable way to protect yourself from fines. Having familiarized ourselves and carefully studying this method, we decided to offer it to you as well.
Have you ever repaired car door trims?
The salon, perhaps, suffers and suffers more inconvenience than all other components of the car. This is understandable, because it is in the salon that we, the people, are. In addition to the fact that we move inside the cabin as a driver and passengers, we eat, smoke, use lipstick and perfume, and sometimes clean our shoes.
Our children play and indulge in it. And when we need to transport something, the car interior turns into a dump truck body, especially when we move out of town: to the dacha or to a picnic. Naturally, all our vigorous activity in the cabin of our car does not pass without leaving a trace for the interior of the cabin.
Spilled liquid stains on the seat upholstery, scratches on plastic parts, scuffs and burnt areas of the upholstery, small or larger holes, or cracks on the dashboard and armrest are a familiar situation. In such cases, it is required to repair the car's interior trim.
There are only two options for repairing the car's interior trim: go to a car service, leave the car and go home for money. The bill for the repair of the salon will be rather big. Indeed, in addition to expensive materials for repairing the interior trim, the work of specialists will also be included in the bill.
The second option, of course, will cost you half the price - this is the repair of the car interior trim with your own hands. Based on what part of the interior trim is damaged, you select materials or repair kits for the repair. Of course, different materials for repairing the car interior are required for different auto materials that are used to sheathe the interior of the car. And sometimes it is required and car interior painting .
Textile ... The velor interior is restored using unique technologies, when a special glue base is applied, on which it is then applied with a brush or by spraying fibers of the same texture and color as the interior. Then a special teflon film is applied to the repair site and heat treatment is performed with an iron.
Leather ... Car interior upholstery repair made of leather or vinyl is carried out using a material such as "liquid leather". The process is not one-time.You will have to apply the substance to the damaged area several times in order to "cover up" the traces of damage. Then, after the repair of the leather upholstery of the car, a cast of the skin structure is taken with a special gel and the resulting film is applied to the repaired area. Everything. The trail of damage has "gone cold".
Plastic ... For plastic parts, the car interior trim is repaired using a plasticizer gel. A certain grain size of the gel allows you to accurately reproduce the texture of the repaired surface. The plasticizer gel has strong adhesion properties to plastic surfaces. After using it, it is difficult to distinguish a factory part from a repaired one.
Repair of the interior trim is carried out by hand using modern technologies and high-quality materials. All materials for repairs allow making it on site without removing the trim or dismantling parts of the cabin. Agree - it's very convenient.
the plasticizer has strong bonding properties to plastic surfaces.
sets of fibers - about 40 colors of fibrous velor for coloring with each other and further filling in the damage;
a variety of adhesives, such as A-Stitch glue for bonding damaged areas;
a hardener, type B-compound, used to fill damaged leather and vinyl;
teflon coating for heat treatment after repair;
B-gel transparent for repairing deep damage to plastic parts.
This list of materials used to repair the upholstery of the car interior can be enumerated indefinitely. Only one thing is clear - the modern manufacturer did not leave us alone with the problem of interior repair, which can be carried out efficiently and with minimal costs for the family budget.
VIDEO
Good luck with your car upholstery repair!
apnu temku.
besides epoxy / fiberglass, what technologies are there?
I didn’t say that it wasn’t suitable 🙂 I just never came across this kind of work. therefore the question. it means how it gets a little warmer - I will study this topic.
I do not like to disassemble the car many times, since I started - do everything at once 🙂
comrades advise who is in the subject.
before the vacation I packed up and took off the door trim. and an interesting joke turned out: in those places where an elbow was pressed, some kind of technological cutout in the skin was made. and this piece of sheathing crumbled into the trash under the cloth.
who restored this place how?
eh .. crooked hands do not know boredom.
We offer local repair of the casing, which will cost you significantly less than a full door constriction.
During the restoration, our craftsmen remove the most complex damage without leaving a trace, using the latest technologies and materials.
Car door upholstery repair is carried out on the same day. In some cases, the timing of the work can be as little as 1-2 hours.
The service of restoring this part of the cabin is, first of all, in demand among car owners who are faced with the problem of various types of damage. These can include cigarette marks, cuts, scrapes, scuff marks, discolored areas and stubborn stains that cannot be removed on your own. Also, the car door trim repair service is popular among those who wish:
change boring factory material;
improve the properties of the upholstery by replacing it;
give the interior more personality.
Our studio specialists are ready to solve any problem of salon restoration. If damage appears on the door of your car, our technician will conduct a thorough inspection of the part and assess its general condition. After that, a list of necessary works will be drawn up that will help restore integrity and attractiveness to the upholstery.
We use various technologies to repair car door trims
painting over stubborn stains and streaks with accurate color matching;
elimination of skin defects with special restorative agents;
restoration of fabrics and velor by spraying an adhesive composition;
hauling of handles, armrests, pockets, linings, bases;
removal of damage on plastic with plasticizer gels and films.
The absence of the need to dismantle the part and the local nature of the work allow a high-quality restoration of the car door trim during the working day.
The use of modern materials and methods of damage treatment guarantees a flawless result that will last for a long time.
The precise selection of texture and color makes the processing area invisible, ensuring the integrity and beauty of the interior.
To get advice or order the restoration of the car door trim, contact the masters of our service in any way convenient for you.
VIDEO
Alexey's channel - /> *
Padding of door cards Passat B5
The rear door repair of the car. Car rear door repair.
Of course, the most important quality of any car is reliability. However, for the aesthetic pleasure of the driver and passengers, it is simply necessary that the vehicle interior is clean and beautiful. The new car is fine with that. But over time, the colors of the upholstery fade, stains and abrasions appear during operation, which dry cleaning can no longer cope with. Light car interiors are especially susceptible to dirt.
New car interior trim
The simplest solution to the problem would be to contact a car service, where specialists will completely replace the interior trim and seats. However, it will be much cheaper to perform this procedure yourself. You can sew or buy covers for the seats and select the material for the new headliner, doors, armrests, rear shelves, torpedoes and other parts to match them. The new upholstery of the car interior is able to completely change the entire appearance of the passenger compartment and make it graceful and attractive.
Of course, leather upholstery in the car is just ideal. But this pleasure is very expensive and not every car owner can afford it. Let's consider what other materials (the price of which is available) can be used to update the interior design of the vehicle.
The most popular and frequently used materials for car upholstery are:
Carpet ... This is a fairly affordable and cheapest material, which is a non-woven base, on top of which a "decorative" layer of pile is applied. The advantage of this material is the presence of a large number of shades and the most simple installation.Alcantara ... Unlike the first version, Alcantara consists of a woven base made from fine-fiber threads. Manufacturing includes both textile and chemical processes. It is worth noting that this is a more durable and durable material with silkiness, softness and dirt-repellent properties.Leatherette ... This is an inexpensive option for interior trim, which, in addition to cost and attractive appearance, has only drawbacks. The main drawbacks of this material are a pungent odor (for quite a long time), increased elasticity, excessive susceptibility to mechanical damage and absorption of odors (sometimes quite unpleasant).It is very important to pay attention to the quality of the goods when purchasing material for a new interior upholstery. Check that the structure of the fabric or skin is uniform. If Alcantara is chosen, then when cutting out, it is necessary to take into account the direction of the pile. Otherwise, it may turn out that the details of one chair will have different shades.
Padding of the interior with leather, velor, Alcantara, Carpet or leatherette must be done in a specific sequence. To do this, you need the following tools, which you may need to buy:
scissors and a knife for linoleum;
screwdriver;
hairdryer;
glue;
a set of keys;
materials for noise insulation (if desired);
a sewing machine (if it is planned to replace the upholstery of the seats).
It should be understood that depending on what model of car you have, the process of covering the car interior with your own hands may be slightly different. But in general, the algorithm of work is as follows:
Initially, it is necessary to remove all fittings and all fastening elements. These are plugs, handles and visors.
Next, you should turn off all electrics inside the cabin and pull out the connectors.
Then unfasten the decorative trim panels and remove the old trim.
After dismantling, it is important to clean all surfaces of dirt, dust and rust.
Next, you need to degrease all plastic and metal parts.
Then it is important to correctly cut the new material. It is best to attach the old parts to the cardboard and cut them out. And only after you make sure that everything is done correctly, transfer the pattern to the selected material.
After that, install new cladding elements, coating the surfaces well with glue.
If necessary, steam new elements with a hairdryer to avoid creases. In addition to steaming, you can also slightly beat off the seams of the upholstery to make everything look more fitted and neat.
The conclusion will be the installation of fittings and fastening parts in their place.
The video shows the upholstery of the salon:
VIDEO
Seats ... In the event that the car owner plans to replace the seat upholstery, and not buy covers, most likely it will be necessary to divide the old upholstery into separate parts (rip at the seams) and cut out a new product along them. Then you have to use a sewing machine to sew everything together. It is much easier to purchase all the same covers, especially since auto parts stores offer a large selection of different variations.
Doors ... It is important when replacing the trim on the doors of the car after removing the old material to remove all dirt and dust. When cutting out a pattern, it should be borne in mind that allowances are needed (about 10 mm). It is very carefully necessary to cut the holes for the window handle and the door handle. Where the paneling is in direct contact with the door, glue should be applied.
Ceiling ... In order to change the headliner in the passenger compartment, it is important to completely dismantle all handles, plugs, lighting lamps and decorative trims of the pillars. This is necessary in order to carry out the installation of the new ceiling as accurately as possible. It is worth noting that if the ceiling is hanged with leatherette, then it should be slightly heated before work. Thanks to this, the material will become more elastic, easier and more convenient to install.
Sheathing of individual parts of the passenger compartment
Armrest ... To constrain the armrest, it must first be removed. Then, using the old elements, make patterns from the new material, leaving allowances for the hem. Then glue the products around the entire perimeter and secure the edges. To avoid creases, you can use a hair dryer to gently steam the material.
On the video - the banner of the ceiling of the car interior:
VIDEO
If there is a desire to perform additional noise insulation, then before installing the parts, you can lay either a layer of foam rubber or a layer of special insulating material under them.
Summing up all of the above, we can conclude that it is possible to change the interior design of your car on your own. Such a procedure, of course, will require financial costs and investment of time from the vehicle owner. But after the efforts made, the car owner will be proud of the fact that with his own hands he replaced the car's interior trim and changed its design.
Car interior upholstery repair - how to fix minor flaws
1. Repair of the car interior trim (or how MacDrive brings to the repair of the car interior).
2. Materials for the repair of the interior trim.
In the car showroom, our children are constantly indulging and playing. If we need to transport something, then the salon simply turns into a real dump truck (especially when going out into the countryside or to the country house). All these influences do not pass unnoticed for the interior upholstery.
There are two options for repairing interior trim:
1. Contact a car service.
2. Repair the interior trim with your own hands.
Firstly , materials for repairing the interior trim are not cheap. A, Secondly , somewhere the same amount will have to be paid for the work of a specialist-master (if not more). In addition, very often car services set additional markups for their services. In general, the amount is decent. You will involuntarily wonder whether you should not ride for another year or two with the old trim.
The second option will cost significantly less, because you do not have to pay extra for the work of the master (you will do it yourself). In addition, you will be able to save on materials (often car services additionally "wind up" the prices of the materials offered). But the materials and repair kits will need to be selected on their own, which is quite difficult. But don't be discouraged. Remember, you can always seek advice from a sales assistant at your selected specialist store. Sometimes, for a full-fledged repair, it may be necessary to paint some elements in the cabin. Car interior repairs are carried out with the use of modern materials and modern technologies. And this allows you to make repairs right on the spot, without removing parts of the cabin or dismantling its lining, which is extremely convenient.
Let's consider several options that can be used to restore various surfaces of a car.
velor interior , then it can be restored using a special technology. According to this technology, special adhesive bases are used, on which the fibers of the same color and texture are applied by spraying or with a brush. After that, a Teflon film is applied and treated with an iron.The result is a velor interior that looks like new.
Leather or vinyl interior can be repaired without completely replacing the entire skin. A special material called "liquid skin" will help to do this. But remember, the procedure for using such material will not be one-time. It will take several times to apply the substance to the damaged areas (in stages) in order to completely remove the traces of damage. For complete masking, you will need to take an impression of the structure of the material (from a well-preserved area) with a special gel. And apply the resulting helium film to the area that has been repaired. Damage and repair marks will be almost invisible.
Interior plastic surfaces repaired with a special plasticizer gel. There are gels with different grain sizes, which allows you to reproduce the structure and external texture of any surface with a high degree of accuracy. Such gel-plasticizers have very good adhesive properties and after their application it is simply impossible to distinguish between a repaired part and a factory one.
Instead of repairing, sometimes it is better to carry out a complete replacement of the car interior trim (since sometimes it happens that the trim cannot be repaired). When making a complete replacement of the skin, the scope for imagination is unlimited (especially if you are replacing the skin yourself). For example, if you had a velor interior, then you can make it velor again, or you can choose natural leather or suede, or artificial vinyl material as the material.
If you decide to repair the interior trim yourself, then it is worth remembering that this procedure is far from being as easy as it seems at first glance. To carry it out, you will need a sufficient amount of time, special materials and tools, as well as the utmost care, accuracy and patience. But what could be better than a brand new car showroom? Especially if it has been renovated on its own. In addition, self-repairing the interior of the car will serve you as a further lesson, and you will treat it more carefully in the future, as well as teach your family to do it.
The composition of the kits for the repair of the car interior trim:
1. Tools for dismantling the interior trim and parts.
2. Devices for removing radio tape recorders, dashboard parts, door cards.
3. Keys for dismantling the climate control.
4. Forks for removing caps.
5. Tools for dismantling other elements of the car interior.
Interior trim materials are very important to ensure the reliability and durability of the new coating. Among such materials, the following are the most popular:
1. Plasticizer (a substance with excellent bonding properties for plastic elements, for which it is actually used).
2. Different types of glue (intended for bonding different surfaces; for example, A-Stitch glue sticks together damaged areas).
3. Sets of fibers (intended for coloring and filling damaged elements; there are about forty different color schemes).
4. Teflon coating (intended for heat treatment after repairs).
5. Hardener type B-compound (needed to fill in damaged vinyl and leather surfaces).
6. Transparent B-gel (necessary for repairing severe damage to plastic parts).
Modern manufacturers offer a huge range of materials for the repair of interior upholstery. So that every motorist, with due attention and patience, will be able to independently make such repairs. The main thing is to correctly select all the necessary materials. It is worth noting that the technology for using materials from different manufacturers is very similar, but there are also nuances for each manufacturer. So the most correct option is to carefully study the manufacturer's instructions before using this or that material.
Video (click to play).
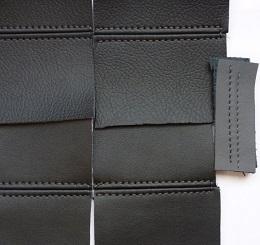
natural leather. The cladding will look good and serve for a long time, but the cost of the material cannot be called democratic. It is natural leather that is best used if it is supposed to trim the car interior with your own hands;

 natural leather. The cladding will look good and serve for a long time, but the cost of the material cannot be called democratic. It is natural leather that is best used if it is supposed to trim the car interior with your own hands;