In detail: do-it-yourself squeaky parquet repair from a real master for the site my.housecope.com.
Squeaking is considered the most common defect in parquet flooring. Moreover, sounds can be emitted by both local areas and the entire coverage as a whole. How to silence the floor material? First of all, you need to figure out what caused the "singing", and then look for ways to eliminate it.
First, let's define the terminology. Parquet floors include:
- Classic piece strips made of solid wood, laid on glue or hardware;
- Multilayer parquet board, mounted "floating", less often - by adhesive method;
- Solid (solid) floorboards that are glued or fastened to the base;
- Panel type parquet or engineering array, fixed in all three ways: castle, glue, hardware.
The reasons can be conditionally divided into three groups:
Manufacturers do their best to convey to buyers that wood products must be laid according to the instructions developed on the basis of engineering solutions and many years of research. But, unfortunately, most craftsmen prefer to install in the most convenient way for themselves. Result: the parquet floor in the apartment creaks annoyingly from the slightest movement and the question arises - what to do ?!
The list of factors in this group includes:
- Uneven base. According to Russian SNiP 3.04.01-87 / SP 71.13330.2011, surface differences should not be more than 2 mm for every 2 running meters. Exceeding this standard leads to the formation of a void under the floor finishing material. That is, the parquet has no support in this place, as a result of pressure, the lamellas bend, the creak of a parquet board or solid wood appears. This is especially dangerous for long coatings, laid "floating" or glued.
- Lack of expansion gaps around the perimeter of the room. Due to changes in humidity and temperature, the tree changes its linear dimensions. In order to avoid compromising the integrity of the floor, it is recommended to leave seams at the interface between the coating and the walls. Ignoring the advice of manufacturers leads to the appearance of cracks, squeaks, swollen areas.
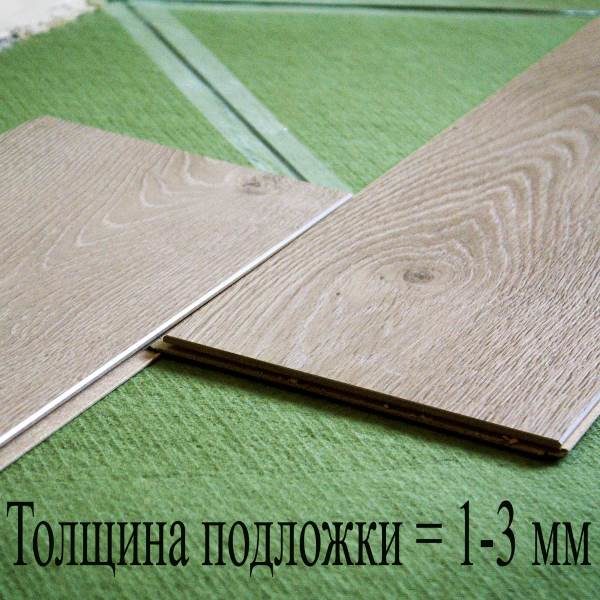
- Lack of underlayment or incorrectly selected underlayment (when laying independently). Most often, this is precisely the answer to the question "why does the parquet board creak". The intermediate material is necessary in order to avoid contact between the coating and the base, that is, constant crunching, creaking and other extraneous sounds. A too thick substrate leads to a backlash, for which the locks of the parquet board are not designed.
| Video (click to play). |
Important! The recommended thickness of the intermediate layer is 1-3 mm. The result of exceeding this standard is permanently creaking flooring and other defects that cannot be eliminated without a complete disassembly of the floor covering.
- Violation of the basic requirements for the formation of a structure for floors on logs. In particular, this may be too large a distance between the elements, sparse fasteners, poor-quality or deformed support, lack of waterproofing, and the like. To fix this type of error, you will have to completely disassemble the floor and look for the reasons visually, not by ear.
- Using an electrical (cable) floor heating system. Too high spot heating spoils the strips and causes an uneven change in geometric dimensions. And here there is no solution how to get rid of the squeak of the parquet, except for turning off the heating or bringing it to an ineffective minimum.
Parquet floors are aging over time and need to be restored. In particular, the following takes place:
- Deformation (drying out, twisting), destruction of cover strips, support logs, plywood;
- Substrate subsidence (when laying in a "floating way");
- Removing old parquet elements;
- Looseness or loss of fasteners (nails, pins, screws).
A number of factors can be distinguished into a separate group that are directly related to the characteristics of the floor material. In particular, squeaky floors can be the result of an improperly selected species or type of wood. For example:
-
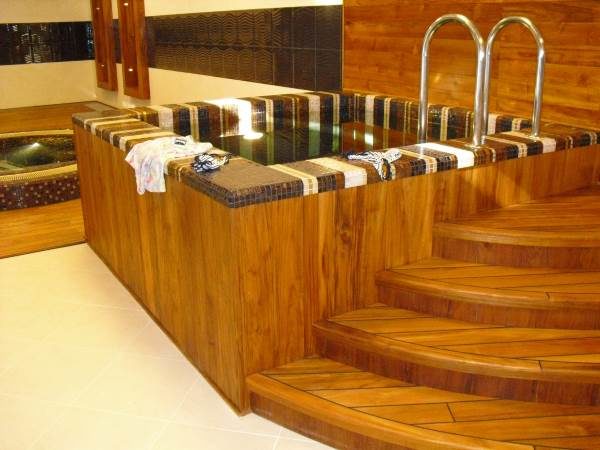
in rooms with a high level of humidity, including balconies and kitchens, it is recommended to lay parquetry from larch, teak, pressed bamboo or ash;
Moisture and water resistant solid teak
Even the level of humidity in the room affects the appearance of extraneous sounds. In winter, when the heating system is on, the percentage of moisture content in the air decreases, the slats dry out and begin to creak at the slightest load. In this case, special humidifiers will help.
It was not for nothing that at the very beginning we outlined the methods of installing floor coverings. The choice of the optimal repair method depends on this.
Correction of coverage deficiencies is carried out in several directions:
It is easiest to work with a floor that is formed by the "floating" method. It is enough to remove the skirting boards, carefully disassemble the material and engage in partial or complete repair of the base layer. In the first case, the bumps need to be cut off, and the pits should be filled with a cement-sand or quick-drying mixture. In the second, experts recommend full leveling with thin-layer bulk mixtures.
If the parquet floor is glued or fixed with hardware, then the work becomes more difficult. You can try to remove the flaws locally, that is, in the places of the strongest squeak, cut the lamellas with a cutting power tool, or split the strips with a hammer and chisel. Then the damaged elements are removed, the defect in the base is corrected and a new parquet is glued.
For a massive floor formed by lags, the method of eliminating defects involves:
- reduction of the spacing of the support bars and / or flooring of waterproofing material. The greater the distance between the beams or slats, the greater the degree of sagging of the board and the stronger the squeak. The optimal width is no more than 50 cm. To correct this deficiency, a complete disassembly of the coating will be required.
- replacement of damaged items. Twisted or humped lags deform the finish coating. Therefore, the floor must be removed, the supports must be replaced. If the reason is in the fallen out or rusted fasteners, then it is necessary to carefully examine the entire floor, change the fasteners to new ones, where necessary - "pull" the boards to the logs with additional nails or self-tapping screws. The latter gives a good effect on old coatings, since over time the lamellas move away from the supports and begin to creak strongly due to friction;
This method is recommended for floating roofs. Along the perimeter, you need to remove the skirting boards, cut off the edge of the lamella to the required width with a jigsaw or other cutting tool (up to 10 mm, the exact width of the seam is indicated in the instructions for the material). If there are swollen areas, planks with damaged locks should be replaced with new ones. Or you can partially sort out the floor, add fixing elements (for example, drive “pins” into the lock at an angle of 45 °), install decorative moldings back.
Cutting expansion joints.
The locks of a parquet board or panel board will stretch over time. Therefore, during the dismantling of the material, it is necessary to number each strip with a marker in order to then assemble the coating in the same order.
The disassembled floor must be temporarily removed from the room, carefully inspect the base for defects, sweep and prime. Next, you need to lay strips of waterproofing film with an overlap of 20 cm, mount the substrate and you can reassemble the finishing material.
Experts recommend carrying out a complete bulkhead of the parquet after 1-3 years of operation, since during this time the tree is fully acclimatized, all the shortcomings that can be easily eliminated will come to light. This is, of course, acceptable for coatings fixed to tool joints or fasteners.
What to do with planks that have become deformed or peeled off over time? There are two solutions here:
- remove damaged elements, split with a chisel with a hammer, glue in new ones, fill the joints and restore the protective layer of the surface;
- if the bar is intact, then you can drill a small hole in it, inject the adhesive with a syringe, remove the excess, fix it with a load for 12-24 hours. After the adhesive has cured, seal the gap with putty or repair wax.
The video below shows how to remove the creak of the parquet without removing it completely.
In the end, we note that the creak of parquet of any nature can be eliminated if you approach the matter thoroughly. Partial repairs such as "pulling" the cover to the joists with additional fasteners give a temporary effect. After a few years, the defects will reappear. You will have to either completely sort out the floor material, or replace it with a new one.
Advice! If you need repairmen, there is a very convenient service for their selection. Just send in the form below a detailed description of the work that needs to be performed and you will receive offers with prices from construction teams and firms by mail. You can see reviews of each of them and photos with examples of work. It is FREE and non-binding.
The creak of floorboards is easily comparable to a toothache, from which you urgently want to be cured. What is causing this, and what to do if wooden floors creak?
The essence of the problem is easy to understand on the example of floors in apartments of high-rise buildings built several decades ago, when chipboard (chipboard) was used for paving the floors, which was covered with fiberboard (fiberboard). Today, grooved boards are often used for flooring, on the opposite edges of which a spike and a groove are milled. A similar technology is used in the manufacture of modern laminate - high-density fiberboard-based flooring. Instead of chipboard, plywood with a thickness of 12 cm or more is used today, which is used as a flooring for laying new flooring on top of the old one. Plywood sheets are attached to the old floor with self-tapping screws in increments of 15-20 cm.
The highly regarded classic parquet of the Soviet period also suffered from similar problems with squeaking.
Wooden floors have always been distinguished by a lot of advantages - environmental friendliness of the material, high heat and sound insulation, durability - wood has served a person for decades, giving a room a special charm. Therefore, the desire to preserve it in the interior of the home remains for a long time. Let's look at examples of how to do this.
Before eliminating the cause, you need to know it. To do this, we identify and study problem areas of the floor. A light walk across the entire floor will help to do this, in which you can find the cause either in one floorboard or in a larger area. It is important to determine if certain communications have been laid under the creaky area of the floor. After all, for example, electrical wiring is sometimes laid under the floor, and not in the walls.
When installing floors, logs are used. These are flat wooden beams on which the floorboards are laid and then secured. The logs are laid on the so-called pulp - a soft covering, which in turn is laid on a concrete or other base for flooring. The pulp can become obsolete over time, and therefore sag in some places, which causes a creak.
Irritating sounds are most often emitted by individual floorboards, which are the weakest link in wood flooring.In case of disturbances in the stability of a large section of the floor, the reason for this may not be a separate flooring board, but a wooden base under it, that is, a long log that has undergone deformation or received a crack. No wonder, the floor is the part of the interior that is subjected to the greatest stress - daily, constant and dynamic.
The reason for the squeak can be the friction of the floorboards, deformation and drying of the logs and floorboards, the weakening of the nail connection of the floor elements, the absence of a gap near the walls.
If no defects are found when examining the floorboards, it means that the creak arises from their friction against each other. If deformed floorboards are found, it is not at all necessary to get rid of them.
Such a creak occurs, for example, under the influence of dampness; it would be logical to get rid of the dampness itself and its source. And then do the following:
- make a paste from components such as paint and sawdust in a ratio of 1: 4 (the color of the paint must match the color of the painted floor). Instead of a paste, polyurethane foam is also used, although it is less reliable and breaks down faster under load;
- with ready-made paste to close up all irregularities and cracks;
- after the solution has solidified, make sure that there is no squeak.
A floorboard that has rotted or cannot be repaired for other reasons should be replaced with a new one, after making sure that the log under it is intact. Fasten a new floorboard of similar thickness and structure in the same way as the rest of the boards and start enjoying the silence.
If the reason for the squeak is the friction of the floorboards, you must:
- define the boundaries of the "squeaky" area;
- Fill cracks between creaking floorboards with graphite powder.
If the substrate has lost its properties, proceed as follows:
- in the place of the squeak, measure the depth to the concrete with a wire by drilling a hole in the floor;
- screw in a self-tapping screw, a little longer than the depth of the hole in the floor, all the way into the concrete, followed by tightening the self-tapping screw until the squeak disappears;
- cut off the part of the self-tapping screw protruding above the floor surface and grind it;
- varnish or paint the places with a screwed in self-tapping screw.
A similar tightening with self-tapping screws is also used in the case of friction between logs (beams) and floorboards (floorboards). The lag is fastened to the board with several screws. Instead of a self-tapping screw, you can use a No. 8 screw. The holes for it are directed at an angle to each other, which provides additional rigidity to the connection of the board and the beam. Along with self-tapping screws, more reliable metal anchors are used to fasten the floor to a concrete base.
Repair when loosening beams is carried out as follows:
- it is required to dismantle the floorboards at the place where the squeak is found;
- prepare bars with a thickness corresponding to the thickness of the beam, with a height less than the height of the beam by 25 mm in case of laying communications, the length of the bar must correspond to the gap between the beams;
- install the bars as a spacer to reinforce the beams alternately in the central part of the span between the beams;
- fix the bars from the end with two nails (100 mm), the bar is attached to the wall on one side.
If the proposed work is done carefully, the problem of squeaky floorboards will be solved, and you can breathe a sigh of relief. At first, perhaps, you will carefully and cautiously step on your floor, expecting a possible squeak, which you will no longer hear. The habit of goodness comes quickly, and as a result, comfort will become commonplace for you.
What to look for when carrying out work on the repair of a wooden floor, find out in the following video:
Almost every parquet sooner or later begins to "sing". But these songs of a normal person can only infuriate. He has only one song, and it is called "parquet creaks" - let's figure out what needs to be done in this case!
The creaky parquet is like a tribute to the person who became the owner of the parquet flooring, for its purity and its natural origin. The fact is that wooden dies do not contain any additives that prevent drying out or, conversely, expansion. Wood, as a material, remains alive in a sense, even after hundreds of years! It breathes, absorbs and releases moisture, deforms and reacts to changes in room temperature.

This "life" of the parquet makes it a very flexible floor covering. Of course, these movements are not noticeable to the eye - somewhere the plate sagged, somewhere on the contrary slightly rose, or bent as a result of deformation. But the result can be heard in the sounds of creaking or crackling. It is important to take action as soon as the characteristic sound makes itself felt. As a rule, the creak appears on the old parquet, which has not undergone the renovation procedure for a long time.

Old parquet coverings that have come down to us from Soviet times were often mounted in large sections of boards with already glued strips, with a ready-made pattern. By the way, nowadays there is a so-called modular parquet, which is also laid in this way. So in the case of panel board parquet, as experience shows, it is better not to waste time - if radical measures do not help, it can only be replaced with a new parquet or other floor covering. If you are fortunate enough to be the owner of a parquet that was laid in place from separate dies, the situation can be corrected in many ways!
There is only one explanation why the old parquet creaks - the die or the strips have detached from the base and rub against their neighbors. The easiest way to solve the problem of how to get rid of the squeak of the parquet floor is to bypass the creaky area, which many do. However, over time, there are a lot of such sites, and it is no longer possible to get around - do not jump around the apartment!
If you don't intend to put up with a squeaky orchestra, you can take matters into your own hands. And they also carry out a small repair of the parquet, fortunately, most of the methods are within the power of everyone. To begin with, it is important to understand on what basis the parquet is located, and how much work you have to do.
From the foundations, parquet can be laid on:
- Concrete screed;
- Screed with plywood sheets;
- Bituminous-mastic coating;
- Wooden base.

Modern parquet floors are laid in a different way, but it is just the old ones that creak, so we are considering exactly the old foundations. If a squeak occurs in areas of parquet laid on top of a wooden base or concrete screed, the most popular solution to the problem is to screw one or more dowels into place with a fixing plug. To do this, drill a hole in the die and grab a few centimeters of the base, so that just the length of the dowel is enough. Then insert the dowel into the hole and screw in the self-tapping screw. The clutch will turn out to be reliable and durable.
And in order to return the decorative look to the parquet board, carefully cover the area with the hole with a special putty on wood. A similar method is considered even more reliable, only liquid nails are used instead of a dowel and a self-tapping screw. True, buying a whole tube for the sake of one squeaky die is not at all economical, and the free dowel must have been lying around somewhere.

If the base is made of screed with plywood sheets, an air gun and special studs for fastening the parquet will help to correct the situation with squeaky parquet. It will be even easier for owners of parquet flooring on a bitumen-mastic base. In this case, you need to lift the problematic die, add melted bitumen and return the die to its place, pressing it down properly.
However, the listed methods of solving the problem are suitable if several dies creak. When the whole floor or most of it has started to sing, the easiest way is to make a thorough repair - to dismantle it and carry out repeated flooring, scraping the parquet and varnishing.
Sometimes the tools at hand can come to your aid, but often the solution to the problem with a squeak will be short-term. If you have no time to tinker with creaking dies, and the result is needed here and now, you can do what you do with creaky doors - lubricate the creak spots! True, this requires a special oil composition, which is used to rub the parquet floors.
If your parquet is varnished, then it is better not to lubricate - this can cause peeling of the varnish layer. But you can apply another method - pouring polyurethane foam. The installation of parquet according to old technologies provided for the creation of an underground space, the height of which sometimes reaches 10 cm. If you pour polyurethane foam into this space, it will create a rigid cushion that will support the loosened sections of the parquet. However, over time, the foam itself will begin to sag and collapse, so that the squeak will occur again.

Pulling with self-tapping screws is considered one of the most effective ways to combat unpleasant sounds.
True, its use is possible only in cases where the parquet is installed on logs, and in those areas that pass directly above the logs. The most problematic moment in this process is to accurately detect the location of the lag. And then everything is simple - we twist 2-3 screws into the problem area, sinking the caps in the wood so that the places where they are screwed can be covered with putty.

Self-tapping screws, unlike nails, do not lose their grip over time, respectively, they do not generate a squeak. In the case of nails, by eliminating the unpleasant sound, over time we will get another reason for the squeak - a nail that has lost its grip. Replacing the nails with self-tapping screws solves the problem forever.
We figured out how to remove the squeak of the parquet, when it has already appeared, and now we will find out how to avoid the appearance of the squeak even at the stage of laying the parquet floor. A creak is possible where there are irregularities in the floor, otherwise the parts would lie tightly on the surface. Some 20-30 years ago, a perfectly flat floor surface was something unthinkable in the apartments of ordinary citizens - even with an accurate instrument, it was not possible to level the floor for various reasons.

Today we offer a perfectly flat surface in the form of self-leveling self-leveling floors. Quite often, such mixtures can be poured instead of a screed, or in combination with it. In any case, the costs can be small - sometimes a layer only 2-3 mm thick is required to obtain a flat surface. You can prepare and pour the mixture yourself, without the involvement of specialists, the subfloor and without their participation will be perfectly flat.

You can choose from plaster-based and cement-based self-leveling floors with the addition of polymers, which provide fluidity without adding an excessive amount of liquid. The resulting surface will serve as an ideal base for parquet flooring. All that is needed is to apply parquet glue to the surface and glue individual dies; there is no practical need for more time-consuming installation methods.
When the parquet floor creaks in the apartment, everyone should know how to eliminate the trouble, because often this can and should be done without dismantling the coating, on their own with a minimum of costs.
No matter how well the parquet was laid, after years of exposure to negative factors, it can begin to creak
Understanding the cause of the squeak will help determine how to fix the problem. That is why it is so important to identify it at the stage of examining the parquet with listening to the squeak. So why does parquet or parquet board creak? Typically, squeaking is caused by the following reasons:
- the tree dries up, decreases in size;
- the floor receives the maximum load, which leads to the weakening of the fasteners;
- during the installation of the floor, the conditions for the gap between the walls and the boards were not met;
- a big step between lags;
- thin wooden boards;
- air vibrations;
- violation of the rules of operation.
In all cases that are not related to a violation of the lag functionality, you can try to use one of the following methods to eliminate the squeak.
Parquet can squeak both in a certain place, as well as over the entire area of \ u200b \ u200bthe coating
When parquet creaks, what to do with cracks and noticeable potholes? Considering that the reason for the squeak is in them, it is worth considering a violation of the temperature and humidity conditions in the apartment. Most likely, during the installation process, the tree turned out to be relatively damp, while it dried out with use.
The solution to the problem in this case can be putty. With its help, you can remove cracks and potholes, followed by grinding and processing with a special casein glue with wood sawdust to match the color.
It is pointless to close up especially wide gaps, over time they will again make themselves felt. In such cases, it will be correct to replace the damaged strips with ones that are suitable for them in terms of parameters, texture and color.
A small pothole on the parquet that can be easily covered with putty
If the previous method to eliminate the squeak of the parquet did not affect due to the problem not with the coating, but with the base under it, then it is necessary to work in this direction.
To understand that the problem is precisely with the base, it is enough to examine the floor surface. When it is perfectly flat with gaps against the wall, as required by the installation rules, then it is worth moving on to finishing the base. The thickness of the plywood sheets should be no more than 1.2 cm, only in this case the floor will withstand the load during operation. From the tools, you will need to prepare a drill, saw, screwdriver or screwdriver.
Plywood sheets are laid on top of the boards on the base, fixed with self-tapping screws with a distance of 15-20 cm between them. The laying is carried out at an angle in relation to the mounted boards.
Study all the nuances well, watch the videos before starting work
It is worth noting that it is not necessary to disassemble the entire floor to fix the squeak problem in this way. It will be enough to identify the problem area and work exclusively with it. This area is marked out with chalk in the form of a square and then cut out for the next stages of work.
The method can be considered radical, nevertheless, of all the above, it is considered the most correct and practical.
It so happens that the squeak is eliminated by correcting the situation with the fastening of the planks to the beams. For this, wedges are used. The squeak as a result of friction between the boards can be easily eliminated by wedges driven in with a step of 15-20 cm, which do not protrude above the floor surface.
Replacing the wedges with graphite powder or talcum powder to fill the gaps can be considered as a simpler and equally effective option.
We are talking about filling with a special glue to get rid of the squeak of the parquet. To achieve a positive result, you need to prepare a set of tools for work in advance:
- electric drill (drill 2 mm);
- masking tape;
- syringe;
- polyurethane glue;
- rags;
- wax crayons;
- dowels.
Repair begins with marking. To do this, at a distance of 15 cm from each other, points are outlined and masking tape is applied to them. Holes are prepared in the marked areas using an electric drill. Glue is poured into them with a syringe, filling the voids between the base and the parquet surface.
A regular syringe is suitable for pouring glue.
It will take several hours for the glue to dry. After that, you can remove the tape and traces of glue with a solvent.
To enhance the effect, the parquet is pressed to the base with a load and for some time does not come into contact with the repaired area. A day after filling the holes with glue, they proceed to the final stage of the repair - using wax crayons. It is important that they are as similar to parquet in color as possible. They fill the holes and polish the finished floor with a rag.
Another effective way to indiscriminately renovate parquet is to use anti-squeak foam.It is poured inward and only if the underground space is not more than 9 cm.
Fill the voids with polyurethane foam through the cracks in the surface. Getting between the floor and the base, the material first expands and hardens over time, fixing the boards and preventing squeaking. An additional plus is the increased rigidity of the floor.
The choice of polyurethane foam to solve the squeak problem is convenient and effective, but not the most economical due to the high cost of the material. In addition, this method can hardly be called practical. The foam works for a certain time. Over time, under the influence of loads, the material is compressed and sagged, which leads to the resumption of the squeak.
Polyurethane foam is an effective, but only temporary way to eliminate the creak of the parquet
A fairly simple and at the same time effective method to remove the creak of parquet without removing the coating is the use of cement mortar. To do this, a hole is prepared in the floor with a perforator with a diameter of no more than 2 cm. Through it, a cement mortar is poured under the coating (it can be replaced with heated bitumen) so that the inconvenient die gets additional fixation.
More efficiency will be achieved if the holes are drilled against the log. Cement mortar is also poured inside, and after a day it is closed with a wooden peg so that its edge touches the floor slab. The excess of the peg is cut off to equalize in height with the parquet base. A layer of putty mixture is applied to the repair area, after which the parquet is polished and varnished.
Alternatively, to remove the squeak of the parquet without removing the boards, you can work with holes of a smaller diameter, using liquid nails instead of dowels and screws. The planks are glued to the base with special polyurethane mixtures, the holes are additionally processed, giving them an aesthetic appearance.
Stir the grout correctly so it does not crumble over time
An interesting and most importantly effective method that allows you to get rid of the squeak of the parquet indiscriminately is douching. In the framework of its application, a wax-solvent lubricant is used. The agent is injected under the coating through the micro-holes using a syringe.
A water-based lubricant is also an option. It is launched into the cavity between the base and the parquet under pressure.
A simple method to combat the squeak of a parquet floor on a concrete base is metal anchors. They are fastened only by hand. For this, a small hole is prepared with the installation of a metal shell, into which the element's pins are screwed.
A method that does not require serious costs only in the case of repairing small areas of parquet flooring. The more anchors you need, the more expensive the work will be.
Quite a budget option, suitable when panelboard parquet creaks in certain areas. Compared to nails used to eliminate squeak, self-tapping screws are more effective. Unlike nails, which cannot affect the elasticity of parts of the tree after splitting it, self-tapping screws will do this better. Fasteners destroy the structure of the wood less, since the screwing process is considered more delicate.
It is important to choose screws of the right length so that the floor holds well
In conclusion, it remains to be noted that the parquet floor may begin to creak after several decades of use or in rooms with increased daily loads, and this is normal.
The creak that appears several years or even months after the installation of the parquet indicates a violation of the installation technology at the stage of the floor installation or non-observance of the operating rules.
Violations of technology can be corrected by carrying out a complex of repair work. But in what exactly the procedure for operating the coating is violated - this will need to be clarified. The most common problems are temperature extremes, low or high humidity levels, and a rough attitude towards the coating.
Creaky floors were, are and will be. Unfortunately, the problem of squeaky floors is relevant at all times. The fact is that the sound of squeaky floors is very unnerving for many people, making their living in an apartment less comfortable. Someone just endures this creak, not wanting to hear anything about any kind of repair. Some residents believe that if the floors have creaked before, then this is normal and it is impossible to get rid of the creak, but this is not the case. So how do you fix an apartment's squeaky floors?

This also has its own logic, because squeaky floors are not so easy to replace or repair. Banal human laziness also plays a role, because not every person wants to bother with repairs because of some kind of creak, although for those people for whom creaking is something terrible, the solution can only be the complete elimination of this unpleasant sound.
There is a possibility that some simply do not know what exactly needs to be done in order to end the creak once and for all. So, what methods should be recommended to a simple layman who does not have any knowledge of how to repair creaky floors in an apartment, especially if they didn’t creak before?
It turns out that eliminating the creak is not so difficult if you approach this matter with intelligence and responsibility. Despite the opinion that it is extremely difficult to fix the squeak, in reality everything is not so sad. Of course, a specialist in the field of construction or repair will cope with a creak much faster than someone who has never even held a hammer in his hand, but there is nothing or almost nothing impossible in the repair.
Moreover, if the cause of the creak is small, then it will take quite a bit of time to eliminate it, and this is not about a top-end builder who is able to solve any construction puzzle in one hour, but about an ordinary person.
So what are the most common causes of squeaky floors? How to fix squeaky floors in a house or apartment?
One of them is the so-called drying of the boards. What is it all about? Wood planks tend to dry out over time. During this unpleasant process, the boards become smaller, as a result of which I cannot adhere to each other. As a result, gaps appear between the boards. If you step on such a board, a creak will be heard, and the board itself will come into contact with the neighboring one. As a result, because of this, an unpleasant creaky sound arises, which is quite difficult to get rid of, but more on this below in the text.

Another reason for the squeak is incorrect or simply poor-quality fastening to the logs or beams of the board. It also happens that the boards are completely fixed at completely different levels from each other. How to repair floors so that no extraneous sounds are heard? The thing is that some kind of debris can remain between the parquet board and the concrete screed. It is also often the case that the substrate is too thin. How can you eliminate such an unpleasant squeak resulting from this?
There are many methods for eliminating squeak, however, in total, 6 of the most common and accessible for the layman, and not for the professional builder, can be distinguished.
1. You can try to remove the entire floor and carry out a full constriction.
2. Another option is to put a special sheet of slate on the floorboards. Instead of slate, you can use plywood or even fiberboard.
3. Screws and nails can also be recommended. The main difficulty of this method is finding a place where you need to drive all the nails or screws.
4. The use of a wedge can also be recommended.
5. Graphite powder is also often used to eliminate any unpleasant floor sounds.
6. If none of the above helped, then you should turn your attention to polyurethane foam.
All methods are good in their own way, but the fastest and easiest (technically) way to fix squeaky floors is to use screws and nails. The most important thing in this method is not to forget that you can only drive in nails and screw in screws at an angle.
Moreover, all actions must be performed towards the adjacent board. In fact, there is nothing particularly difficult here, but neatness comes in handy here too. Screws that are used for wood are considered significantly more reliable than others, so if you made a decision in their favor, then remember that after screwing in the screw, you should cover the head with wood putty. After the putty is dry, you should sand it down as well.
If the reason for the squeak is the deformation of the board, then you should use the so-called wedge method. The creak due to deformation can be unbearable.
How can floors be repaired so that no squeak is heard? The first thing you'll need to do is drive a wedge right between one of the creaking floorboards and the beam. Unfortunately, this is not always possible, so be careful not to drive the wedge in the wrong place, otherwise you may ruin your wooden floor.
If the reason for the squeak is that the floorboards have dried out corny, then you should use graphite talcum powder. Powder can be offered as an alternative to graphite talc. Usually, cracks appear due to the drying out of the boards. In order to eliminate this defect, you will need to pour powder into the seam, and then cover the area with the seam with newspapers or some kind of paper. The rest is even easier: just walk a few times on the treated floor. This will help secure the seam even better.
It often happens that not the entire floor creaks, but only part of the floor covering. Usually these are the same places in any house or apartment.
For example, one of the most common squeaks is the passage from one room to another. What to do in such a case? The simplest and most effective solution is to drill a hole approximately 8 millimeters in diameter. It should be done at a 45 degree angle. Remember the importance of observing the specified parameters, because otherwise the foam cylinder, which should be in this hole, may not work as it should. As a result, the foam will not go at all. The fact is that this method will only work if the foam cylinder is in an almost vertical position.
After everything is done correctly, you should insert the tube into the hole under the board and start pouring the foam right there. Remember that you must first shake the can. This should be done not for a couple of seconds, as some believe, but for at least 30 seconds. The material will "grab" in a couple of hours, after which you can walk quite calmly in the place where the creaky floor used to be.
It also happens that literally one board creaks. In this case, the main problem can be finding that very creaky board. In order to determine which one, you may need to walk on the floor. This method works if there is a basement under the floor. It is best to take someone to help you, so that one person walks on the floor, and the other watches from below the movement of the boards in relation to the beams. When you can figure out the "culprit" of such an unpleasant sound, you should hammer the wedge right between the beams and one of the creaky boards. Remember that you should never try to lift such a board, otherwise it will be higher than the rest of the floor. It will look very ugly and messy.

Another method is to drill guide holes where the boards touch the joists. After that, you need to screw in the screws.The self-tapping screws that you will screw in must be of sufficient length and grip the lags.
With a special tool (doboinik) it is necessary to sink the "caps" of the screws as deep as possible into the floor. The dents that usually remain after such an operation need to be masked, otherwise your floor will look completely unattractive. For this, a regular putty is suitable. After it is dry, you should sand the entire surface to hide any imperfections. A floor that is pulled in this way is unlikely to squeak for the foreseeable future. In order to increase reliability, you can seal up any small gaps that you find with regular polyurethane foam.
If we are talking about logs located on a concrete base, you will need to drill through holes through the floorboard with a puncher, and then go deeper into the concrete. After that, using special bolts (anchor), you need to connect all parts of the floor.
The creak of the parquet floor indicates that the parquet riveting has undergone deformation. Here you cannot do without dismantling the entire parquet. Unfortunately, parquet flooring is quite difficult to repair, so this should be borne in mind before purchasing such a floor.
Of course, no one can guarantee 100% that the floor will not creak again after the repair, but the listed methods are quite suitable so that you do not need to make major repairs in the near future.

If you are not at all going to carry out any major (overhaul) repairs, you should use the listed methods, because they are the simplest and most effective. Almost anyone can handle them. Obviously, overhaul will be the most preferable option, because during overhaul, the problem area will not be hidden, but replaced. Hopefully every reader has an answer to the question of how to fix any squeaky floor in their own home or apartment.
| Video (click to play). |

