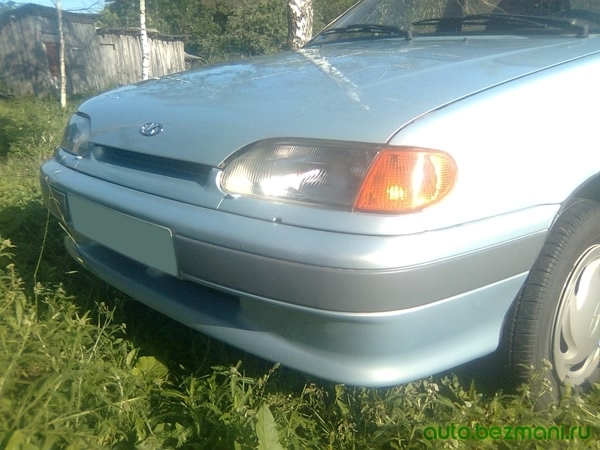
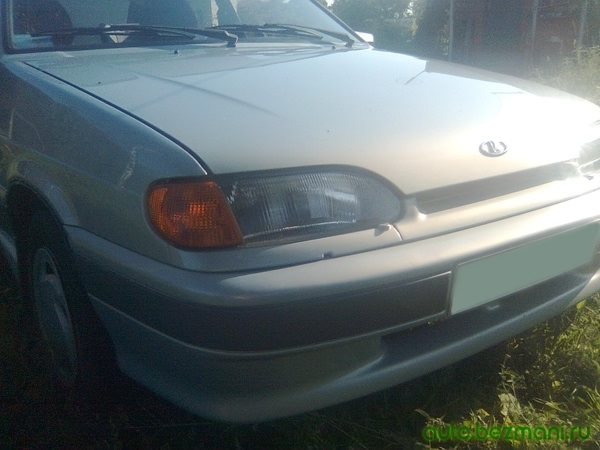
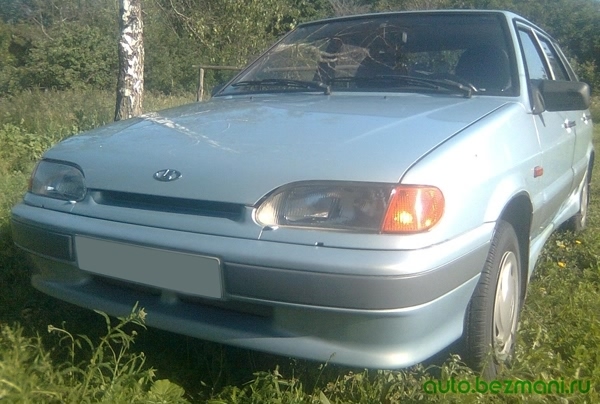
In detail: do-it-yourself repair of the front bumper of a VAZ 2114 from a real master for the site my.housecope.com.
Repair and painting of the bumper VAZ-2113, VAZ-2114, VAZ-2115
In general, I got into a small accident, one of the results of which was the split front bumper of the VAZ-2114. A courageous decision was made to make the bumper yourself. How to make and paint a bumper in the future will be discussed. Maybe someone else will come in handy as a visual aid ...
For repairs we need the following materials:
1. Skin of various grain sizes (400, 600, 1000, 1200);
2. Masking tape;
3. Solvent for surface degreasing;
4. Novol bumper repair kit (the kit includes epoxy resin and something like fiberglass, used to seal holes);
5. Putty on plastic, also Novol;
6. Primer for plastic parts Body Plasto Fix;
7. Decorant Motip for painting the gray stripes on the bumper VAZ-2114;
8. Metallic paint of the corresponding color;
9. Colorless varnish.
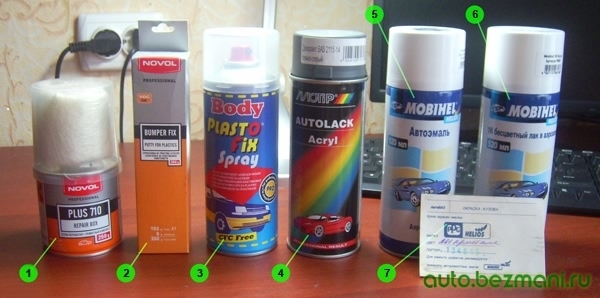
Materials for repairing and painting the bumper VAZ-2113, VAZ-2114, VAZ-2115:
1 - Novol bumper repair kit;
2 - Putty on Novol plastic;
3 - Primer for plastic parts Body Plasto Fix in spray cans;
4 - Decorant Motip in spray cans for painting the gray stripes on the bumper;
5 - Metallic paint MOBIHEL in spray cans;
6 - Colorless varnish MOBIHEL in spray cans;
7 - A plate with the brand of the paint used and the color number.
So, we have decided on the assortment, now it remains to figure out the quantity. Skins need 2-3 sheets of each size, wide masking tape - 1 pc., Solvent - 1 bottle. A set for repairing bumpers, putty for plastic, primer for plastic, decorant - all one bottle at a time. Metallic paint for 1 bumper takes 2 cylinders (I have 4 thin layers), varnish - 1 cylinder.
| Video (click to play). |
The cost of materials for repairing a bumper VAZ-2114
Bumper repair kit Novol - 200 rubles.
Putty on Novol plastic - 150 rubles.
Body plastic primer - 300 rubles.
Decorant Motip - 250 rubles.
MOBIHEL HELIOS paint, 2 cans - 480 rubles.
MOBIHEL HELIOS varnish - 190 rubles.
Skin, scotch tape, solvent - 130 rubles.
Total - 1,700 rubles (mid-2011 prices).
If you have a compressor, it seems to me that less materials will be spent. For example, MOBIHEL plastic primer costs 400 rubles (and who does not know, the gray strip on the bumper of the second samar is just the primer), and it will remain. As a result, we do not need a decorant and Body primer (550 rubles). The MOBIHEL paint itself in cans is very expensive, almost 500 rubles, and the varnish too. Compressor paint is cheaper.
I also had some pretty holes in my bumper, so I needed a bumper repair kit. If you just fill up cracks, then you can easily get by with one putty on the plastic.
I didn't pick up the paint, I bought the number and the brand that was painted at the factory. I have this number 281, crystal color. Brand - Mobihell. The color matched perfectly even though the car was six years old.
The color and brand of paint that was painted at the factory can be recognized from the paper that is glued at the factory in the spare wheel niche. A photo of the plate is shown below.
If there is no such plate, then we take some painted part from the car (usually a gas tank flap). We go to a paint store and select the closest color from catalogs. The varnish must be taken from the same manufacturer.
Bumper repair
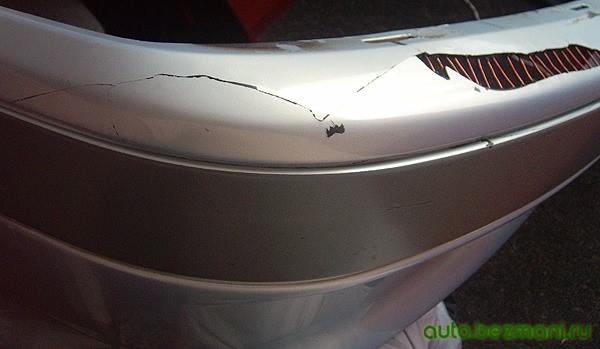
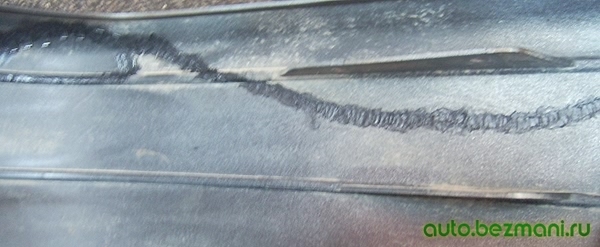
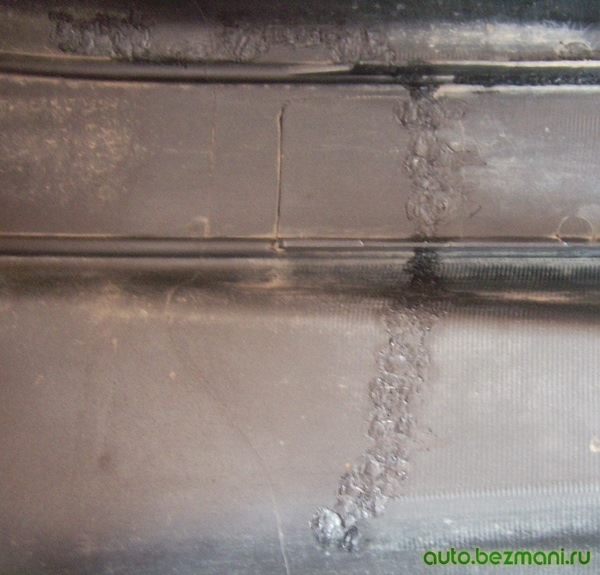
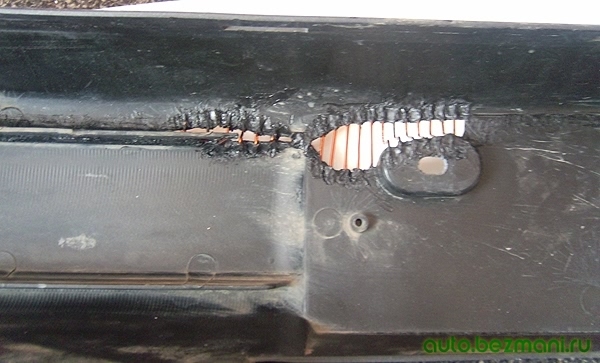
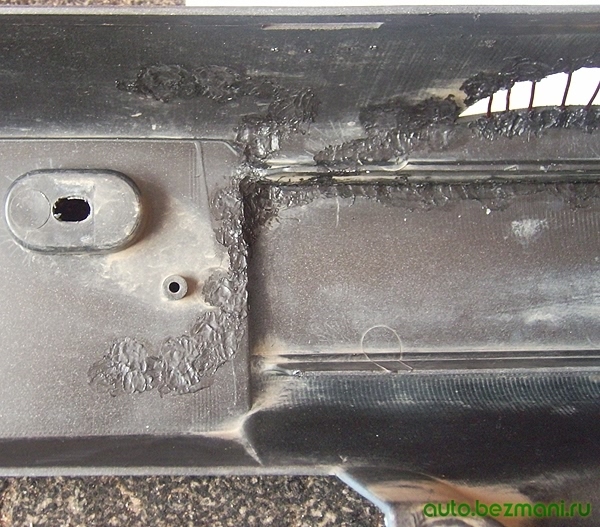
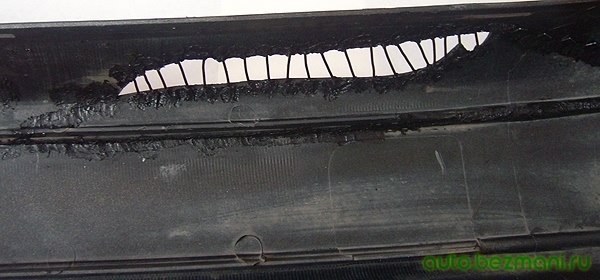
From the inside, we solder all the cracks with a soldering iron. Carefully, being careful not to burn through the plastic. We also solder the broken-off pieces with a soldering iron. I didn’t take a couple of pieces from the scene of the accident (it was not before that, and even then I didn’t consider it necessary), so I got two rather big holes.
This is not the first time I am convinced that everything should be taken from the scene of an accident. A couple of times already pricked on this. For the first time, when you glance at the damage, you think that the part is ready for replacement. And then, the next day, with calm nerves when examining the damage, you think: Why didn't I take a small piece from the headlight.You go to the store and buy a new headlight for 2500, although it was enough to glue a piece of the body and replace the glass for 200 rubles. In general, advice to all, everything that has broken away into the trunk (of course after registration), you will always have time to throw it out.
After soldering all the cracks, we solder pieces of wire into the holes from the inside. They are like reinforcement for fiberglass. You can take any wire that is at hand.
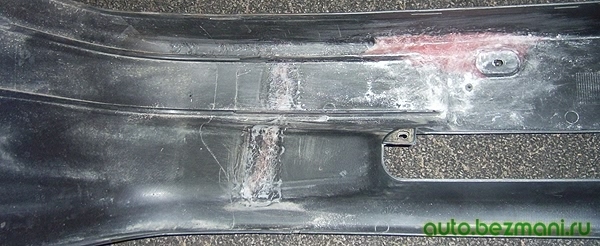
The next few photos illustrate the process of soldering cracks and reinforcing bumper holes.
Then I additionally reinforced all the seams with metal staples from the stapler. Not the smallest, but the bigger ones. I soldered them along all the seams, completely drowning them in the plastic. First one side, and after it cools down - the other.
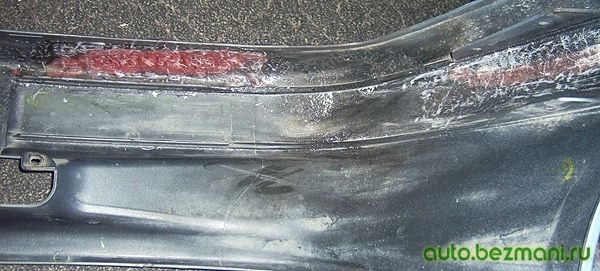
Next came the turn of fiberglass from the bumper repair kit. In places of holes, fiberglass is glued in 4-5 layers, in places of cracks in 2 layers for reinforcement. It turned out very solidly.
The method of application is simple. Degrease the surface with a solvent. We dilute the resin, apply it with a brush to the surface to be treated. Then we put a pre-cut piece of fiberglass on the smeared resin and saturate the fiberglass with a brush with resin. We wait until the layer dries and repeat as needed. Here's what happened.
Then I blew out the places of interference with the usual black primer left over from previous work. But this is more for aesthetics.
This is where we are done with the back of the bumper. We take up the front part.
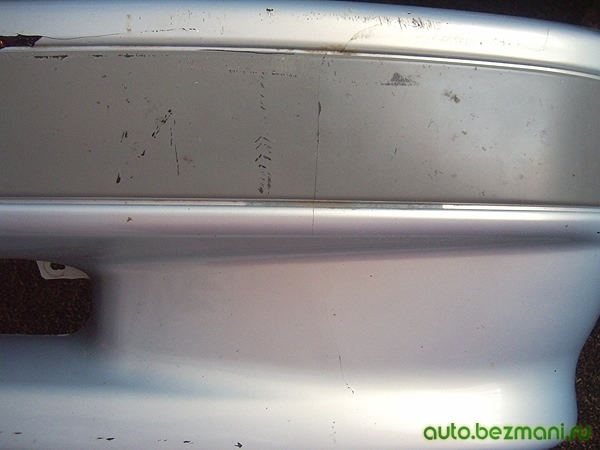
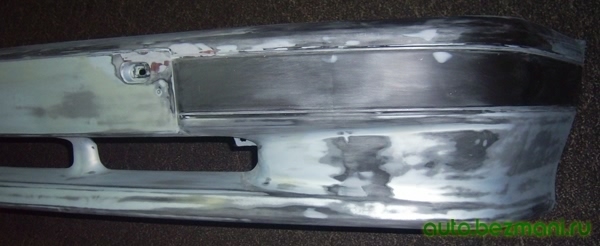
Everything is simple with the front part of the bumper. We degrease, put putty on the plastic with a spatula, wait until it dries, give the desired shape with a sandpaper. And so several times, as necessary, reducing the graininess of the skin. In general, stupid, tedious, physical work. We check with a finger, if the steps (risks) are not felt, then we blow it out a little with any paint, all processing flaws become immediately visible.
At the same time, remove the old paint. The bumper must be completely cleaned of paint. I was too lazy to do this, and then, after treating with soil on plastic, in some places the uncleaned paint blew up a little, I had to level the surface. By the way, the gray stripe on the bumper (which is the soil) is very easy to remove with regular alcohol.
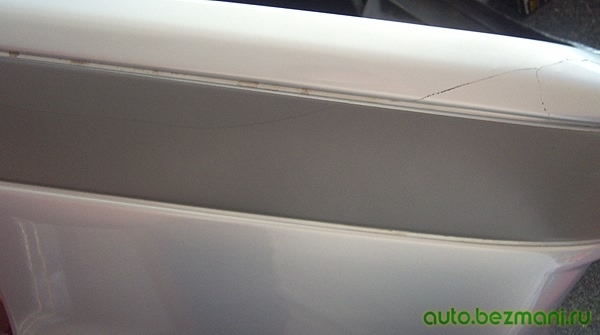
Photos of the bumper ready for painting.
Painting bumper VAZ-2114
Conditions for painting the bumper.
First of all, you need a well-ventilated room, it is desirable that there be as little dust, fluff, various insects and other nonsense that can ruin the painted surface. Temperature and humidity are also important factors. The optimum temperature is 20 ºС (minimum is not less than 10 ºС). Too humid is also bad, i.e. it is not recommended to paint after rain. It is very important that there is good lighting. Well, drying should take place at a temperature not lower than during the painting process. The ideal place is a spray booth, but since not everyone has access to it, people get scared as they can and it turns out very well.
The first step in painting a bumper is priming it. Apply the primer in one thin layer. On the cylinder with a primer it is written that you can paint immediately after applying the primer, but I did not risk it, and there was nowhere to rush, so I left it to dry for a day.
The second step is to apply a gray strip. With a decorant we blow out the bumper area where the gray strip will pass and a little more from all sides. We make 2-3 layers with interlayer drying for 10-15 minutes. Final drying - 24 hours.
The third stage, quite time consuming, is used to glue the gray strip with masking tape. The main thing here is not to rush and do everything smoothly. It takes a lot of time.
The fourth stage is metallic coating. Apply the paint in thin layers. We hold the spray no closer than 20 cm. We do not hold it in one place.My color has poor hiding power, so I had to apply four coats until everything was painted over, good lighting is very important here. Better to do another layer than apply a greasy layer right away. If you paint in thick layers, then the color turns out to be darker and it immediately catches your eye. Before painting the bumper, it is better to practice on something and at the same time see what color it turns out. Interlayer drying 10-15 minutes, final drying - 24 hours.
The fifth stage is varnishing. Everything is the same as with paint. In thin layers. Interlayer drying 10-15 minutes, final drying - 24 hours. I made two layers.
After a day, remove the masking tape. And you can put it on the car, just carefully! Since the paint is still fresh and fragile. For polishing, wait at least two weeks for the varnish to completely harden. Personally, it lay with me for three days, after which I put it on and the next day drove about 500 km along the highway and then the same amount back, after which I washed it with a sponge (I didn’t dare to wash it with a karcher) from the corpses of insects and dirt, there were no chips , although a couple of new ones appeared on the hood.
The result of repairing a bumper VAZ-2114
It turned out fine. The color matched, holes and cracks are not visible. Of course, not everything is perfect, if you look closely at some places, you can notice traces of processing, but this was not enough patience. The varnish is a little bumpy, but I think this will be corrected by further polishing. At the expense of durability and strength, it is too early to judge, then we'll see.
Was it worth repairing the bumper if it took 1700 materials alone, plus a lot of work and time? Or was it easier to buy a new one painted in color for 2500?
Everyone must answer this question for himself. There are some thoughts on this.
Firstly, when I started to make a bumper, I did not ask about the price of materials for plastic and the prices for them unpleasantly surprised me. For example, I did not expect that the primer for the plastic costs three hundred, the decorant - 250, etc. The price is twice as high as for similar materials, but only for metal. But since I started, I decided to finish it.
Secondly, it's nice to look at the work of their own hands.
Thirdly, what is being sold for two and a half thousand is mostly poop. I met many reviews that the bumpers did not fit, I had to pull them like condoms on the seats. When painting, cheap paint materials are used. The paint starts to fall off after a few months. I don't know how long my paint will last, but at least I primed it before painting.
Good factory bumpers with high-quality painting cost 3500-4000 rubles. If I did it well, then the savings are doubled.
In general, I don’t regret what the bumper did and painted, but whether I’ll do it again, if something happened (ugh, ugh, ugh), I don’t know. Probably, everything will depend on free time, desire and availability of free money, well, in general, as always ...
A simple photo and video instruction for those who plan to independently try to change the bumper on VAZ 2114, 2113, 2115 cars.
5. Unscrew the right side in the same way.
6. Disconnect the fog lamp wires.
9. Remove the headlight with the casing.
10. Through the holes of the fog lights, unscrew with a 13 to 2 nuts securing both sides of the bumper brackets to the body.
15. Install the bumper in the reverse order.Align the clearance before tightening the bumper-to-body nuts. The rear bumper is also easy to change.
Some motorists were faced with the fact that they had to change the front bumper for the VAZ-2114. This could be due to the fact that its structure was destroyed or the structure itself was altered. Of course, I had to go to a car service, where they took a lot of money for such a simple process. This article tells you how to change the front bumper with your own hands
The video will tell you about the process of replacing the front bumper of the VAZ-2114, and also tell about some of the nuances and subtleties of the process.
Front bumper device diagram
The front bumper of the car has a protective function, which is the first to absorb any possible impact. Recently, the trend of automakers is that it should be decorative and aerodynamic. In that case, what should take the blow?
For this, a special metal amplifier was developed, which precisely fulfills this role.
Before starting the replacement process, you need to decide on the tools. Which one will be required: a screwdriver with sets of nozzles or a set of screwdrivers, open-end and spanner wrenches for 8 and 10, a ratchet with a head for 13, a new bumper.
So, when the motorist has collected everything, you can proceed directly to the process.
Consider the step-by-step process of replacing the front bumper of the VAZ-2114:
- We install the car so that you can freely get to the bottom to perform operations. A pit or lift is ideal.
- We unscrew the bolts securing the radiator grill.
Radiator grille bolt pattern


Dismantle the side mounts of the front bumper
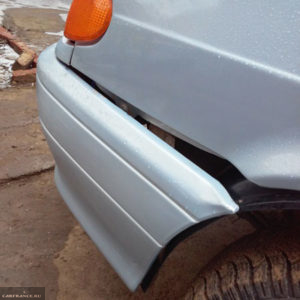


General view of the original front bumper
2113-2803015 - original catalog number of the front bumper manufactured by AvtoVAZ. There are no analogues of this part, so there are no options other than a factory purchase. The average cost of a product is 6000-7000 rubles.
There are several reasons why the front bumper will need to be removed. So, let's consider the main ones:
- Deformation , destruction or damage due to an accident.
- Dismantling in order to remove or repair elements that are under the protective element. This can be an amplifier, a headlight, a radiator frame or a side member extension, as well as other reasons.
- Dismantling a part for painting or refurbishment.
- Other reasons.
One of the options for tuning the front bumper
The dismantling of the front bumper is repeatedly required to improve performance, in other words, tuning. This is a fairly common practice, especially in the territory of the neighboring CIS countries.
Thus, the protective element can undergo a complete modernization, and sometimes completely change completely. There are a lot of tuning options, and each motorist independently chooses the design and modification option.
A minor revision of the bumper - installing the lip. Looks stylish and fits over a standard bumper
But, the only thing that remains unchanged in this case is the fasteners. Therefore, no matter how you change the appearance, the installation of the element is carried out as it was removed, only in the reverse order.
Removing and installing the front bumper on the VAZ-2114 is easy enough and even a novice motorist can handle this process, the main thing is that there is a desire and hands grow from the right place. Well, and if the process described in the article seemed quite complicated, then you need to contact a car service, where everything will be done for an immodest fee.
Repair of plastic bumpers - a popular and quite profitable service among specials. workshops that are engaged in the restoration of such products. This is not surprising, given the cost of these products, after an unsuccessful parking or meeting with a sudden obstacle - bumper repair is simply inevitable.However, as practice and a large number of photo reports show, repairing a bumper with your own hands is a completely doable task and there is no point in overpaying for the workshops, it is better to try to restore the bumper yourself and, as a result, save money and gain valuable experience that will come in handy more than once in the future.
Today I will tell you how to save and make repair of a plastic bumper at home on the example of VAZ 2114. A detailed photo report and step-by-step instructions will allow you to quickly and efficiently restore the bumper with your own hands.
- Solid soldering iron.
- Solvent.
- A lot of "sandpaper" (small and large), and better grinder or drill with the appropriate attachments.
- Body putty, primer, paint and varnish.
1. Work is performed on the removed bumper in order to solder or glue it, we need access to the back side. When the bumper is removed, make it and clean it from dirt, grease, insects, etc. The result of all work largely depends on the quality of this procedure.
2. Using a soldering iron, start soldering. Solder the crack and put all the pieces together, see photo.
3. Try to fold this "puzzle" as correctly as possible, your task is to minimize the thickness of the slots and give the pieces the most correct shape.
4. If some parts of the bumper are lost, replace them with pieces of the same thickness cut from something else, preferably the same composition. We glue everything with a soldering iron as shown in the photo.
5. For greater fidelity, I decided to use glue, which is heated in a special "gun", they need to go through all the cracks and seams.
6. Use a grinder or drill with attachment to sand. Your task is to prepare the surface for puttying and future painting.
7. After sanding, the surface is degreased with a solvent.
8. After preparing the surface, proceed with the filler. Apply a thin layer and let dry. You can repeat the procedure if necessary.
9. Now everything needs to be sanded, only this time the sanding should be of the highest quality, since paint will be applied to this layer, if you “screw it up” somewhere it will certainly be visible, so sand to perfect condition.
10. Now, it's time to soil. Treat the surface to be painted with a primer and let dry.
11. Painting - the final stage of our bumper repair. You can paint with a spray can or a spray gun, here it is more convenient for someone. The only thing I can advise is to try to pick up paint from specialists, this will allow you to avoid unpleasant moments when the tone of the body paint did not match the paint that was applied as a result of the repair.
12. Spray paint at a distance of 20-30 cm from the surface to be painted, be careful not to let drips. After applying one coat, let it dry for a few hours (5 to 24 hours depending on the type of paint and ambient temperature), then apply a second.
After painting, I recommend applying at least two coats of varnish.
After renovation:
The total budget for this repair was approximately 500-600 rubles. For comparison the price of a new bumper VAZ 2114 leaves about 2,500 rubles.
Often in the traffic flow you can find a car with a cracked or deformed buffer. What can you do, no one is safe from unsuccessful parking or a minor accident. However, this is not a reason to continue driving a car that has lost its "shiny" appearance - there is a practical experience of restoring the original state of this element.
The external plastic components are mainly made of thermoplastic plastics. The technology for restoring such products is based on welding, it is this technology that allows you to get rid of through cracks and even recreate broken fasteners. Actually, the procedure is not much more complicated than preparing and spray paint damaged area of the car body.
Some car enthusiasts assure us that we repair the bumper with our own hands using metal brackets. But the experienced car owner knows that like is treated like this, that is, repair plastic rods are used for soldering. Their composition, color and profile are different; the required core is selected according to the marking on the buffer.
Making the right choice means guaranteeing a high-quality repair, because the mismatch of materials will significantly reduce the life of the automotive element. To find out what the cracked bumper is made of, it is enough to carefully examine the inside of the part. Depending on the marking, the following conclusions are drawn:
- PP - polypropylene base.
- ABS (GF, PAG 6) are hard plastics.
- PUR - polyurethane.
Plastic welding requires high temperatures, for example, 400-450 ° C is suitable for propylene, and 500 ° C is necessary to restore an ABS structure. Many car owners will learn how to repair a bumper with their own hands in a video where craftsmen use an ordinary 100 W soldering iron.
You can also restore a damaged part using pieces from a bumper with a similar marking. They are cut into strips 8 mm wide for PUR, and 4-5 mm for polypropylene.
Almost any breakdowns are treated by welding, even broken parts are reanimated. However, no one canceled the economic feasibility of such work, because the restoration of numerous defects can hardly be called justified. The cost of a complete restoration and staining will be more expensive than a new buffer.
Certain tools are required to complete the repair. These can be both ordinary household appliances and professional tools. The ideal kit includes the following items:
- Orbital sander or sanding block.
- Grinding wheels of various grain sizes.
- Mini drill like Dremel or drill.
- Clamps and rubber spatula.
- Soldering iron and hair dryer.
- Metallic tape.
Of the materials for restoring a cracked buffer, you may need:
- Putty and primer.
- Brass mesh for crack reinforcement.
- A can of paint or a can of paint.
- Plastic repair rods of the required configuration and composition.
The damaged part must be dismantled in order to eliminate, firstly, excessive stress in the crack area. Those who have already done such work will say that now we clean the bumper and only then repair it with our own hands.
The cracked parts fit together. For reliability, they are fixed with metal tape from the outside of the part. If the breaks are quite significant, then clamps will be needed to clamp the edges of the cracks. Their number depends on the complexity of the repair.
When restoring PP-based parts, the reinforcing mesh is not used. The process begins with the fact that a nozzle with a nozzle with a diameter of 5-7 mm is installed on the hair dryer. In the future, work is carried out according to the following points:
- On the inside of the buffer along the crack joint, use a Dremel mini-drill to make a groove for the plastic rod.
- Using a hair dryer, melt and place the repair rod into the prepared groove.
- Clean the front part of the bumper with an orbital sander with P240 attachment and repeat the welding procedure similarly to the operation on the inside.
- Grind the cooled seam from the outside with a nozzle with the same grit P240, then remove dust from the surface.
- Even out irregularities with a special putty for plastic, try to keep the layer as small as possible.
- Dilute the primer with solvent 3: 1 and apply two coats to the degreased surface. Drying time for the first layer is 15 minutes.
- Apply a developing layer in a contrasting color, followed by sanding with a disc or sandpaper with grit P800 and P1000.
- Eliminate the detected defects with a nitro putty followed by sanding with P1000 sandpaper.
- Remove dust with a damp cloth and degrease the part, then paint plastic decorative paint with overlapping borders 50-100 mm.Apply the paint in 3-4 coats with intermediate drying cycles.
Anyone who is interested in how to properly repair a bumper in a video with their own hands should take into account an important detail. 30-40 minutes after applying the last layer of paint, the part should be varnished. Thus, we get a flawless appearance of the repaired part. Do not forget to follow a few simple rules:
- You should try to apply a minimum layer of putty.
- Take a temporary pause for complete hardening of the putty layer.
- To process the putty area with a grinding wheel or sandpaper with grit P800, and then - P1000.
- It is desirable to apply a developing layer of primer.
In the case of a polyurethane buffer, the preparatory stage in the form of grooving work is excluded. A brass reinforcing mesh is applied to the crack; steel is not recommended for use, because it is prone to corrosion. Alternatively, stapling staples can be used every 10-20 mm. They are recessed into the body of the part across the seam, it is imperative to make sure that the bracket does not go through the part.
Further, the repair technology does not differ from the restoration of a polypropylene part. Wire mesh or staplers should be sunk into the plastic. Only after that, the seam is filled with repair plastic and soldered from the opposite side. Some important points of technology should be taken into account:
- It is necessary to solder the mesh or staples carefully so as not to overheat the plastic, otherwise it may deform from the opposite side.
- For a complete DIY repair of a polyurethane bumper, the width of the reinforcing mesh should be 15-20 mm.
- It is better to press in the mesh or staples with a flat object.
- If the legs of the staples pierce the plastic through and through, then they should be shortened using side cutters.
- For the convenience of working with metal elements, you can use tweezers.
- To prevent the new enamel from peeling off, it is necessary to grind the paint over the entire plane of the part.
Puttying and painting are performed in the same way as described above - according to the traditional scheme. Repair work on the restoration of the buffer can be combined with painting the car , so the consumption of materials will be more rational. It is important to determine in advance the feasibility of carrying out restoration work. If there are significant costs in the future, then it is better to buy a new part.
The plastic bumper has an attractive appearance, its production is much cheaper, it weighs less than metal counterparts and, as practice shows, repairing a plastic bumper is much easier to perform. As proof of the latter, I bring to your attention a detailed photo report on the repair
plastic bumper VAZ 2114 with your own hands, that is, at home.
In order to repair a bumper at home, you will need:
- White spirit or solvent.
- Nice big soldering iron.
- Grinder (its presence is very desirable, and if the crack is large, then it is simply extremely necessary). It is quite difficult to clean everything manually, and it will take a lot of time. Alternatively, you can use an electric drill with attachments.
- A lot of sandpaper of various grit sizes, from fine to coarse.
- Putty, primer, paint and varnish.
1. The first step is to remove the damaged plastic bumper. After that, you need to clean it from dirt and dust for further work.
2. Using a soldering iron, gently solder the crack, see photo.
3. Pieces of the bumper that have been broken off must also be folded as accurately as possible and seamed using a soldering iron.
4. If you do not have all the fragments, you can get out using plastic of the required thickness, preferably the same in composition. Again, everything needs to be soldered and checked so that everything is held tight.
5. For reliability, I missed all the seams and crevices with hot glue "from a pistol".
6.Take a sander or sandpaper if you don't have the first one, and proceed to the most tedious and unpleasant (for me personally) work - sanding, that is, preparing the surface for putty.
7. Use a solvent to degrease the surface.
8. When the surface is prepared, take the filler and proceed to the filler of the bumper.
9. Apply a layer and let it dry.
10. Armed with sandpaper again, start sanding, this time you will have to seriously try, because after that a layer of paint will already be applied, which will show all your flaws and "jambs". See the photo and do the same.
11. Now that the bumper is plastered and prepared for painting, you can proceed to the final stage.
12. For painting the bumper, you can use both a spray gun and a regular spray can, the main thing is that the tone is chosen correctly and the application technique is correct.
13. Before painting, open everything with primer, then proceed to painting.
14. Hold the can with paint at a distance of 20 cm from the surface to be painted, make sure there are no smudges. Apply one coat, let it dry, then after an hour or an hour and a half (depending on which paint you paint) apply a second coat. If you do not want to paint the bumper completely, use masking tape, paste over the places that cannot be painted with it.
After finishing the painting, the bumper should dry for about a day, after which it is advisable to cover everything with two layers of varnish.
It took me about 300-500 rubles instead of 2350 rubles, which would have to be paid for a new VAZ 2114 bumper, to carry out an independent repair of the bumper.
Many motorists who are wondering how to remove the front bumper on a VAZ 2114 should study the information below as carefully as possible.
The front bumper is a particularly important part of the bodywork. If it is in poor condition, then the appearance of the car will leave a lot to be desired. However, this body element is not only a decorative part of the car. The bumper has a number of different functions to protect the engine as well as the driver. In the event of a collision, the bumper must absorb a significant portion of the impact force.
It also extinguishes any negative impacts that may appear during a head-on collision with another car or any object.
Another feature of the VAZ 2114 front bumper is the special design of the bumper edge. He plays the role of a kind of spoiler. This means that the bumper significantly increases all of the key downforce metrics when driving at very high speeds.
There are a wide variety of reasons why a front bumper may need to be removed, but some are more common. It is because of them that car owners have to seek professional help or solve the problem on their own.
- Damage to the bumper that could have occurred during an accident. Very often, after a head-on collision, the integrity of the structure is violated so much that an urgent replacement is required.
- Engine repair is another reason to remove the bumper. Many of the components in the engine compartment can only be accessed by removing the bumper.
- Sometimes car owners do tune the front of their car though. Removing the bumper is indispensable here.
- Installation of new light elements.
- Installation of mesh, as well as various decorative overlays.
When the bumper is still broken, there are only two options to solve the problem:
- Replace the old bumper with a new one.
- Try to restore a workable old bumper by all available means.
In order to start the withdrawal process, you need to acquire a whole range of auxiliary tools.
- Screwdrivers.
- Lift.
- Cross screwdriver.
- 10 to 8 box spanner. Alternatively, use an open-end wrench.
- The head has a collar of 13 mm.
Additional Information.Replacing the bumper of a VAZ 2114 is a simple procedure. In order to complete it, it may take 60 minutes, but if a person does not understand anything about replacing body elements, then you will have to spend much more time. In any case, the car enthusiast will save on the services of masters from service centers. It is recommended to perform this procedure on your own, since not every technician is responsible enough to replace body elements.
- At the first stage, you will need to open the protection, which is located on the front wheels. To do this, you will have to remove 3 screws. The easiest way to do this is to use a screwdriver.
- Now you need to remove the protection to the side and open access to the inside.
This can be done if you follow the entire procedure described in the reverse order, however, it is recommended to check the condition of the amplifier before installing a new front bumper.
This component must be in good working order. If this is not the case, then the car enthusiast will need to replace the amplifier before installing a new bumper.
In order to carry out this procedure as quickly as possible, it is necessary to dismantle several fastening nuts immediately after removing the bumper. This can be done with a 13 mm head. All shims must remain on the studs, and all brackets that are located on the side must be unscrewed. They can be used when installing a new bumper.
When this is done, you can start adjusting the new amplifier to the desired height. Then you need to set the gaps between the headlights, the amplifier itself and the wing. This can be done using slots.
New versions of the car have some differences. They are in contact with the bumper reinforcement. Under the headlights, as well as the grille, it has teeth. They are put on with special cuts. As a result, in order to remove the bumper without any damage, you will also need to remove the headlights along with the grille. This is very inconvenient, but you cannot do without it.
If you still need to replace the bumper with a new one, then you should very carefully choose the model of the new bumper. In no case should you buy metal bumpers. They pose a serious threat to the driver during an accident. Better to give preference to bumpers made of plastic.
We must not forget about the color. It must perfectly match the color of the entire body, otherwise the car with multi-colored elements will look just awful.
Advice. Some car enthusiasts are trying to save money on buying a new bumper and buy an unpainted bumper. It does cost a little less, but finding the right paint for this body element can be extremely difficult.
Interesting information on this issue is presented in the video below:
| Video (click to play). |
Fastening the front bumper of the VAZ 2114 will not be difficult if you act strictly according to the instructions presented. Installing a completely new bumper will restore the original look of the car, as well as increase the level of safety while driving.

