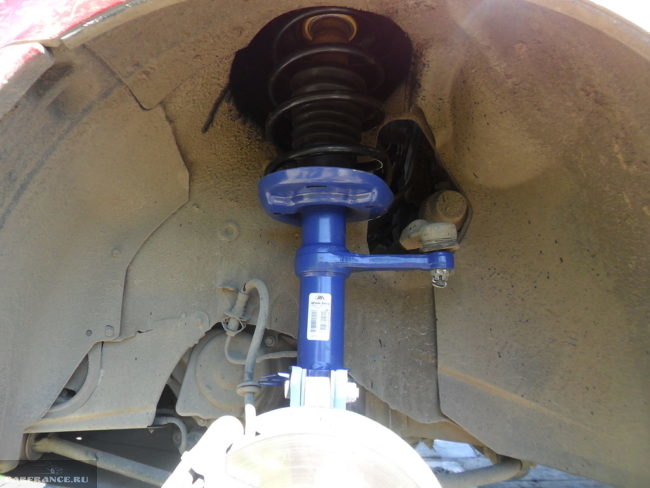
In order to replace at least one of the elements that is part of the Kalina front pillar, you need to remove the entire assembly from its seat. To do this, open the hood and with a 22 wrench rip off the upper support nut, while holding the shock absorber rod with a 9 wrench, it is not necessary to unscrew the nut completely yet. We also use a wheel wrench to rip off the wheel nuts and only then raise the car with a jack. Immediately you need to substitute an emphasis for insurance.
Now you can safely unscrew the wheel nuts and remove the wheel. The brake hose is attached to the rack, so it must be released from the mount so that it does not interfere when we take out the rack. Now the WD-40 comes in handy, we need to process all the bolts and nuts that have to be unscrewed. The main thing is to spray on the lower nuts and shock absorber bolts that secure the assembly to the steering knuckle.
Remove the steering tip nut and hit the ear with strong blows into which the ball pin of the tip is inserted, while inserting the mount between the steering tip and its mount on the rack.If there is a special puller, you can press out the finger with it. We unscrew the two self-locking nuts securing the shock absorber to the pivot arm. For this we use keys 17 and 19. It is better to use similar heads and crank.
After the nuts have been removed, it happens that the bolts do not come out. They have to be knocked out. They must first be knocked out through a wooden chock so as not to spoil the thread, and then, using a punch with a smaller diameter, knock out the bolt when it has already sunk into the steering knuckle.
VIDEO
Having taken out the bolts using a razor and a hammer, we separate the lower part of the shock absorber from the steering knuckle. Then you can proceed to the nuts securing the support to the body in the engine compartment. We unscrew the nuts, holding the stand from below with the other hand, lower it down and take it out.
DISASSEMBLY OF THE FRONT RACK KALINA
Before starting to disassemble the front pillar on Kalina, it is necessary to compress the springs so that they do not "shoot" when unscrewing the upper nut. To do this, use spring ties. They are of different types, but the principle of operation is the same for all. For clarity, a photo of a spring tie of one type is given below:
We place the ties on both sides of the spring, put on the hooks on the turns, then turn the studs with a key, evenly tightening on both sides to a height until the spring stops resting on the gasket.
Next, unscrew the upper nut of the shock absorber rod. Then you can easily remove the strut support on Kalina together with the bearing and other elements of the upper support. Remove the spring, and then remove the compression stroke buffer and protective cover from the shock absorber rod. To do this, you need to pull them up with a little effort.
Everything! We disassembled the old front strut of Kalina, now you can start assembling a new one ...
ASSEMBLING THE FRONT RACK KALINA
At the beginning of the assembly of the Kalina front strut, we first put on a protective cover on the rod of the new shock absorber, and then the compression stroke buffer, the so-called front strut bump stop.
Bump stop of the front pillar Lada Kalina (VAZ 1118-2902816-01)
We take new springs (if the old ones have become unusable), tighten them to the desired height and install them on the shock absorber. We install so that the lower extreme turn lies in the recess intended for it.
Supports of the front struts of Lada Kalina without bearing (VAZ 1118-2902822LV), with bearing (1118-2902820LV)
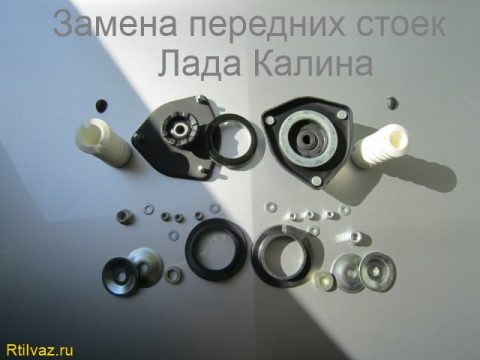
We turn the new support of the Kalina's front drain and insert the thrust bearing into it with the side on which there is an inscription or a mark "top". We put in the stop of the compression stroke and the spring cup.
Now it is the turn of the rubber gasket, the so-called "cushion" of the spring by auto mechanics. Having collected all the elements of the support of the front Kalina strut, carefully turn it over and, in this form, install it on the shock absorber rod. We set it so that the uppermost coil of the spring lies exactly in the groove of the rubber pad of the "pillow" intended for it. Then we tighten the upper stem nut.
After the ties have been removed, we check whether the spring is correctly positioned in the rack.
Next, you can install the front pillar in your regular place on the Lada Kalina car. We start by inserting the upper strut support into the body from below and attaching three nuts. Then we insert the lower part into the steering knuckle. To do this, you have to work a little, because the steering knuckle always fits tightly into its place on the bottom of the rack. It is very difficult to push the mounting bolts to the steering knuckle into place, due to the fact that the holes on the Kalina strut and on the knuckle rarely coincide.
We put the steering tip in place, tighten it and do not forget about the brake hose attachment.
After all this, you can finally tighten the lower bolts and nuts of the upper support. Performing all the same actions, we change the front pillar on the other side of the Kalina car.
IMPORTANT. Immediately after replacing the front struts of Kalina, be sure to go to the service and do the wheel alignment.Otherwise, due to the fact that the angles of the wheels will be violated in the most rude way, the tires on your car will wear out quickly and unevenly. Lada Kalina will not behave in the best way on the road, which can lead to an accident.
Finally, I would like to say that if you, following my instructions, replaced the front struts on Kalina, then in principle you can do the same, replace the same on other cars, especially VAZ-made ones. And many foreign cars have approximately the same design as on Kalina.
The same design of the front struts and Renault Logan. Only there the upper support is fastened with one nut, and the lower part is the same, except for the sizes of bolts and nuts. As shown in the article "Replacing the front struts Renault Logan". For those who have not read the article, I provide a link here.
So the rack began to flow. Found a man who fixes the racks. Today I put my car on stumps and took it for repairs.
Lada Kalina Hatchback 2010, petrol engine 1.6 l., 98 l. sec., front-wheel drive, manual transmission - DIY repair
why fix it if you can just buy new ones, the prices don't bite like foreign cars)
on collapsible racks, the cartridges change and that's it, they are several times cheaper, a thousand rubles a cartridge, and I bought a SAAZ 2800 one
What kind of patron for a thousand? I took a kayaba about 2 thousand
cartridge, on the collapsible racks you unscrew the lid, throw out the old cartridge that is leaking, insert the new one. I went to buy saaz racks on Saturday, I thought well 4100 - 4200 for two I'll give it back, I almost cried in the store when they said 6 thousand 2 racks and two bumpers
I know what a cartridge is, I'm talking about its price, it's certainly a little cheaper than a rack, but it's not worth a thousand. And so, in the mind does not fit, for SAAZ 6 thousand to give? I would have given it to me for free, I would have thought to put them or not, but for my own money, fuck it is not necessary)))
Aaa, I didn’t come across such. The only more convenient cartridge is the descent / camber after replacement, you can not do it
and it's easier to change, whatever you say, you don't need to get the sour bolts out of the hub
You need to fill the grease there initially, otherwise it's a kapets
Well, my racks, apparently from the moment of buying the car, were not removed and the collapse was unlikely to be done, but in 7 years there was a horror there.
Anyway. The first time I spontaneously changed in the service, they did not lubricate, after 2 years they barely knocked me out with a sledgehammer. Then I oiled them abundantly and stuffed them with new bolts. And the collapse on our roads, I do 2 or even 3 times a year. Goes away from a strong pit
well, I was not drawn either to the right or to the left, the rubber did not eat up, I didn’t bother
It does not always pull, if control comfort is lost in the first place, for example, on the highway you start to steer a little more and not just hold the steering wheel straight, the side wind is felt more, the steering wheel does not readily go to zero from the turn, etc.
hmmmm. like there is no deficit ... we do not live in a scoop
In Perm, in a circle, pump all the racks of 3 tr. costs.
The bump stops after the oil will still fall apart, they need to be changed
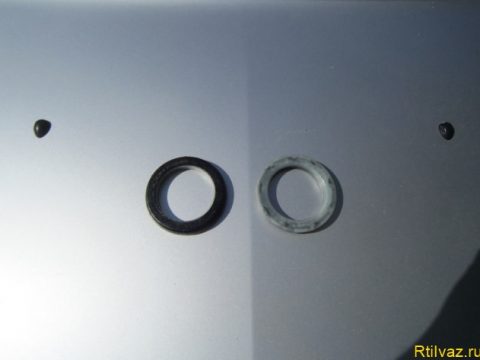
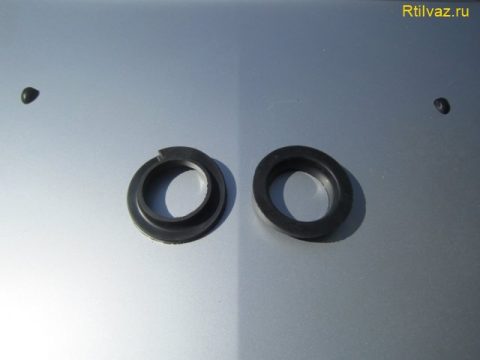
In the photo, other bumpers and anthers are separately in the photo.
The racks need to be changed) and not play repairs for half the price of new ones, or maybe more)
We remove and repair the shock absorber strut when the upper support, bearing, spring and telescopic strut itself are worn out.
The telescopic stand cannot be repaired - it must be replaced.
For removal and installation, you need keys for 13, 17, 19, head for 19.
The work is best done on a hoist, but can be done on level ground using a jack and a fall arrest stand.
It is advisable to replace the wallpaper of the rack, even if only one is faulty.
Apply the parking brake to the vehicle and place chocks under the rear wheels. Loosen the front wheel bolts. Raise the front part of the car with a jack and remove the wheel.
Disconnect the tie rod end from the strut pivot arm. For this:
- unbend and remove the cotter pin
3. Insert the mounting paddle between the pivoting arm and the tip, squeeze the tip away from the lever and,
9. Using a 17-mm socket wrench, unscrew the nuts of the bolts of the upper and lower fastening p
1
The support bearing of the front pillar at the Lada Kalina is a rolling element in the upper support located between the lower and upper cups. This part is intended for turning the front pillar, for the perception of axial dynamic loads, therefore this element is very important in the car's suspension.Replacing the support bearing at Kalina is a frequent event, the reason for this is the design feature of the product. The support bearing housing in the factory is made of plastic, inside there are balls, a cage and races with raceways. The presented material describes the reasons, as well as signs of breakdown of the "support", upon detection of which it is necessary to diagnose the front pillar and the upper support, and then make repairs and replacements.
Before replacing the support bearings on the Lada Kalina, you should make a diagnosis and make sure that the "support" is out of order so check out the signs of breakage:
Clicks, knocks of Kalina's "oporniks" (audible under the hood, when the shock absorbers are working);
A crackling sound is heard from the front side under the hood (when turning);
The handling deteriorates, the backlash at the steering wheel increases;
Bumps on the road are felt through the steering wheel.
In the event that such signs are present, then a 99% chance of replacing the support bearing of the Kalina front strut is inevitable, but first make a diagnosis.
Before disassembling and removing the Viburnum front strut with the upper supports, be sure to study the assembly of the assembly. The diagram shows the serial numbers (part numbers) of the front suspension components.
To remove the support bearings of the front struts of the Lada Kalina, you need a set of tools:
Replacing the supports of the front struts of Kalina begins the preparation of the car. Park the machine on a level surface, if possible on a lift or pit. Include first gear, release the parking brake. Dismantling sequence in order:
We unscrew the wheel bolts, then raise the car with a jack, or a lift, as in our case.
We get access to the brake disc, but you do not need to remove it, as well as unscrew the hub lock nut.
Moving on to the swing arm and steering rod. First, remove the cotter pin from the fastener. Next, unscrew the nut itself.
After that, we use a tip puller to press it out of the hole in the lever or, in extreme cases, use a hammer. We install the device, tighten the thread and remove the tip.
Now we disconnect the brake hose and speed sensor wire from the front strut.
Next, we find two bolts attaching the rack to the steering knuckle, lubricate them with penetrating grease.
To unscrew the nuts, we use a 17 spanner wrench, as well as a ratchet head.
The bolts will have to be knocked out, use a wooden guide so as not to damage the threads.
The bottom of the module is released, go to the top. We unscrew the three fasteners of the front pillar to the glass of the body.
While unscrewing the last nut, hold the stand, or place a stop under it, for example, a removed wheel. After that, we remove the module with the support and shock absorber assembly.
Install two ties on the springs of the removed suspension module. As shown in the photo, compress the shock absorber spring evenly on both sides.
We continue to compress the shock absorber, until the upper support is released from the spring tension, and only then unscrew the stem nut. We use the key at 19.
Now we remove the upper part of the support (cup), under which the "support" is located. We remove the old part and proceed to replacement.
Replacing and installing support bearings on Kalina begins with checking the condition of the remaining elements of the module: the lower cup, travel buffer, bumper, corrugation, shock absorber springs. They will need to be replaced if necessary. How to correctly put the support bearing on Kalina and change it is described in order below.
Before assembling the front jay, make sure that the ends of the shock spring rests against the special tabs at the lower and upper cups.
We put a rubber gasket on the top cup, on top of which a new "support", by marking the product we orient it up.
On top of the p / w we install the upper part of the support (cover).
Now we bait the nut of the shock absorber rod, which we tighten until it stops.
Unclench the shock absorber spring ties. We tighten the stem nut with a torque wrench, the moment indicated in the table at the end of the article.
We put the assembled module back, first we attach it to the glass of the body. We assemble in the reverse order: we fasten the steering tip to the lever, fasten the rack with two bolts to the steering knuckle, and at the end we mount the wheel. This completes the replacement.
Replacing the support bearing on Kalina without removing the rack is impossible, or will not be correct, but it is still possible to replace the part without further collapse. In this case, the technology for removing the rack will change:
After removing the wheel, unscrew the hub lock nut.
Disconnect the steering knuckle from the ball joint and steering rods.
Then we remove the steering knuckle from the CV joint with the strut and the shock absorber spring, thereby you will not break the camber bolts.
As practice shows, in most cases, they replace the upper support assembly. On sale there are three models of "support", which you should pay attention to when buying.
Watch the video on the review of spare parts:
If you still change the support bearing separately, installing it in the old support, then you should buy from trusted manufacturers, the summary table of which and photos are presented below. Catalog number (article) - 1118-2902840.
To complete the work you will need:
- ties for suspension springs;
- a device for disassembling the suspension strut.
1. We remove the rack from the car.
2. We clamp the rack in a vice.
Be careful! The compressed spring has great force and when the tie breaks, straightening can cause injury
3. We install the tie springs on opposite sides and evenly, without distortions, tighten the spring until the load is removed from the upper spring cup.
4. Holding with a key by 9 mm shock absorber rod from turning, with a key on the 22 mm unscrew its nut.
5. Remove the restrictor washer of the upper support of the rebound stroke from the strut rod.
6. Remove the upper support and the limiting washer of the upper support of the compression stroke from the rack.
7. We remove the bearing and the upper spring cup from the rack.
8. Remove the rubber gasket from the upper coil of the spring. Remove the spring from the rack (without loosening the tie).
9. Remove the compression stroke buffer and the shock absorber rod protective cover.
10. To replace the spring, loosen the spring ties.
Assembling the front suspension strut in reverse order.
Before assembling the rack, by hand fully extending and recessed the rod, make sure that the shock absorber is in good working order. If dips, jerks or extraneous sounds are heard when moving the stem, replace the shock absorber. Check the integrity and serviceability of all rack-mountable components. Replace a damaged or cracked shock absorber rod guard, a damaged compression bump, a cracked or weakened suspension spring. The springs of the front suspension are divided into classes according to their stiffness. The class of the spring is indicated by paint on the outside of one of its coils. The springs of the same class must be installed in the front suspension.
Replacing the rear struts with Lada Kalina do it yourself
Replacement of elements of the rear suspension, or rather the rear shock-absorbing racks should be carried out when the old ones start to "snot", or there is a desire to change the "stock" to racks with more comfortable features.
In the video, replacing the rear struts with Lada Kalina (in detail):
In order for the work to be performed in the shortest lines, it is not unimportant to have all the necessary tools at hand:
The key is on "6", "17", "19".
Flat screwdriver.
Spring ties.
Heavy hammer.
WD-40.
The collar and levers to them.
Crowbar.
New racks and components for them elements.
When all the tools are ready, you can start working.
We put the car on a flat surface and turn on the hand brake. The video guide shows you how to remove and install the rear door trim on a volvo xc90 with your own hands. Replacing the struts on the viburnum with your own hands. At the beginning of 2012, I replaced the Opel with a new Nissan Almera classic, with my own hands tuning. Replacing the front brake pads on VAZ 2101, 2107, 2106, 2105, 2103 and 2104. Video control for replacing the front brake pads on VAZ cars. The video shows how to remove the steering wheel, steering wheel switches and the ignition switch on an audi 80 with your own hands. Check its operation to make sure it is not loose and adjusted.
We suspend the rear wheels in turn, its order in this case does not matter.
Then we start working in the cabin, and by folding the rear seat with a flat screwdriver, we dismantle the decorative cap that covers the strut rod.
VIDEO
Replacing the front racks, supports and springs VAZ 2110, 2112, Lada Kalina , Grant, Priora, 2109Video self-management replacing frontal racks , supports and springs on front wheel drive vehicles.
VIDEO
Replacing the front shock absorbers. Do-it-yourself oil change for opel corsa d. The video shows how to remove the front door trim with your own hands, remove the column and put a new one on a 2009, 2011, 2012 toyota corolla. DIY air suspension for Mercedes Vito. Do-it-yourself power bumper on the field Front struts on the viburnum: on the Peugeot 308 do it yourself: video on the VAZ-2110 for replacement. I hope you will not make mistakes that happened on video .
Column decorative cap removed
With a little effort, the stem can be unscrewed.
To prevent the bolt from turning, you need 2 keys.
The new details are much more attractive.
It is up to you to decide whether to mount special noise isolators from the SS-20. replacement of struts, diagnostics with your own hands; replacement of the steering tip on the viburnum. Owners of Lada Kalina cars, note some changes in view of reducing unnecessary squeak from the touch of the spring with the rack thanks to the installation of this option.
After installing the stem nut, put the decorative plug in place, wrap the wheels and release the car from the jack.
It will be easier and faster to carry out work on replacing the rear shock absorber with the Lada Kalina with the help of an assistant.
Stand for replacement - leaked. There is no oil, the work of the stand will not be correct
Video (click to play).
Replacement necessary in case of wear, breakdown, and oil leaks from the strut housing. Replacing the front struts on the viburnum To the content ^ replacing the front parts with skoda octavia. To change the front hub bearings with your own hands on a skoda octavia tour a5 and a7 car, you must have a certain set in stock. Do-it-yourself replacement of the air filter, the procedure for replacing the air filter with a duster 2010. Do-it-yourself Renault Logan front struts replacement Diagnosis of wear on a vibration stand, or "by eye".
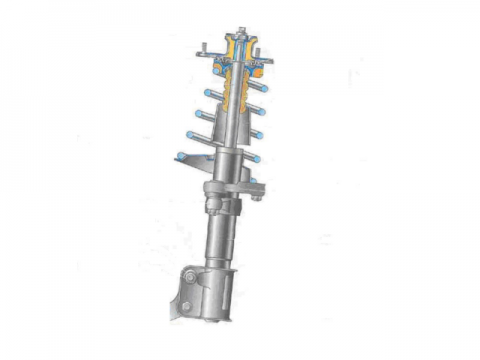 Look carefully at the detailed drawing of the front Lada Kalina strut to make the location of the parts clearer.
