In detail: do-it-yourself repair of the Makita 2470 perforator from a real master for the site my.housecope.com.
Makita power tools have long established themselves as professional, reliable and easy to maintain. In addition, it has good maintainability and a relatively low price.
Of all the lines of punchers, I want to dwell on the model Makita HR 2450... The tool is very easy to use, has three modes of operation and can withstand very long loads. For the author of these lines, the perforator has worked faithfully for more than six years without breakdowns. Moreover, it was used in the mode of intensive loads. But at one fine moment ...
As you know, nothing is eternal. And reliable technology breaks down. Somehow, in the midst of work, he stopped hammering. In spinning mode, the machine worked, but the blow suddenly disappeared.
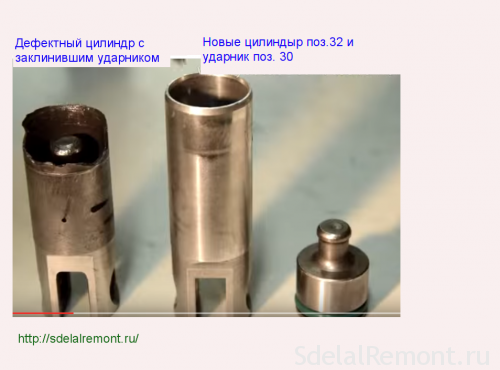
The gearbox was disassembled and the cause of the breakdown was identified. A bushing was broken in the barrel body, in which the striker (striker) directly carries out impact work. As a result, the drummer got stuck in the fragments of the collapsed bushing.
The service center advised to replace the barrel completely. It turned out that the bushing is pressed into the barrel at the factory and is not supplied separately. I had to buy an entirely new barrel.
In this article we will tell you how to bring the hammer drill into working order yourself after this, in general, simple breakdown. If you have the skills to repair power tools and a desire not to pay someone your hard-earned money, then we take the tool and start disassembling the machine.
You will need two regular flat-head screwdrivers and one cross-head. One of the flat screwdrivers should be thin and narrow, no more than 4 mm wide. You will also need a wire hook to remove the retaining ring. It can be made from a bicycle spoke, the main thing is that the wire is rigid and does not easily unbend. You will also need a rubber mallet or wooden mallet.
Video (click to play).
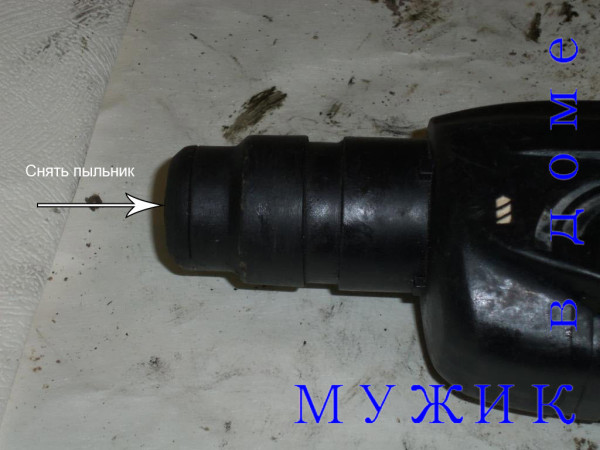
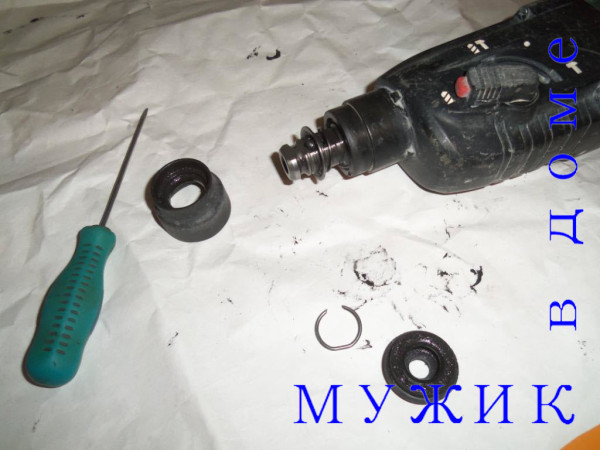
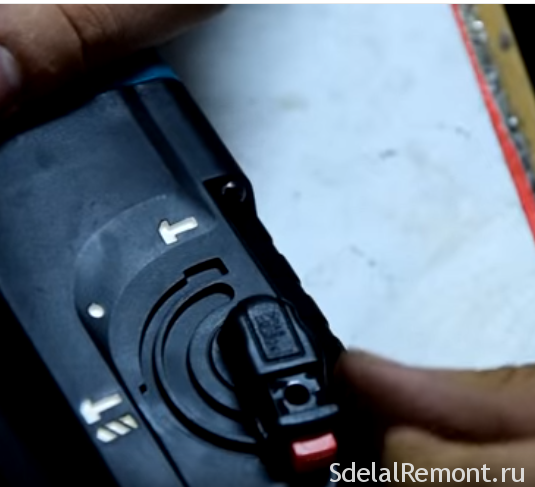
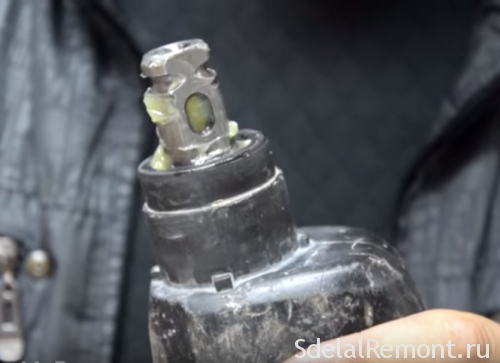
Disassembly of the punch should be started by removing the protective rubber cap - boot. It can be easily removed, just take it with your fingers and pull it off the barrel.
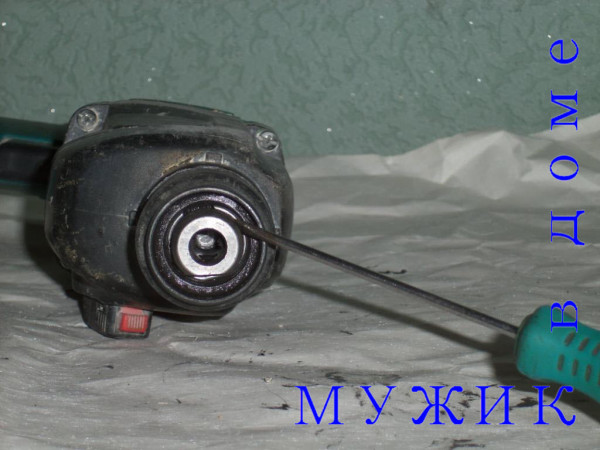
Then, pushing on the plastic cover and squeezing the spring of the SDS + mechanism lock, remove the retaining ring with a screwdriver.
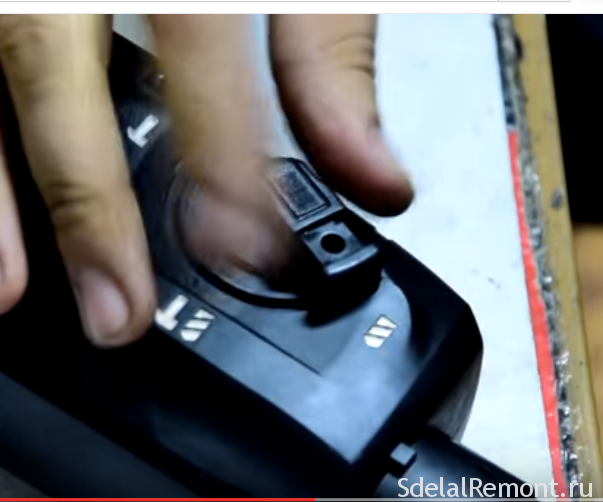
Remove the stopper using a screwdriver
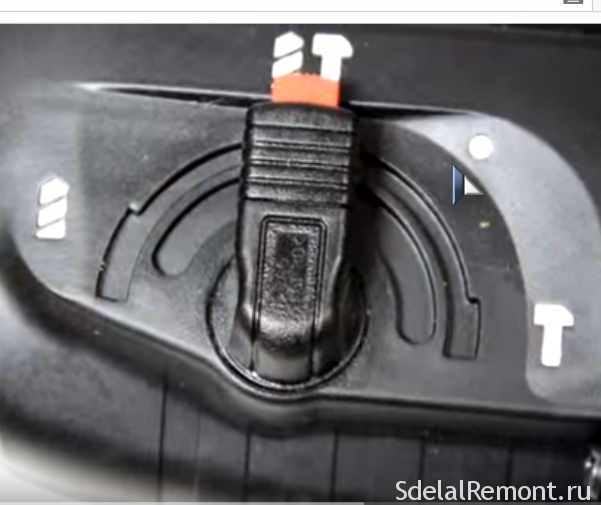
The cover is removed from the barrel, and behind it, again squeezing the spring, we take out the retaining ball together with the spring and the figured washer.
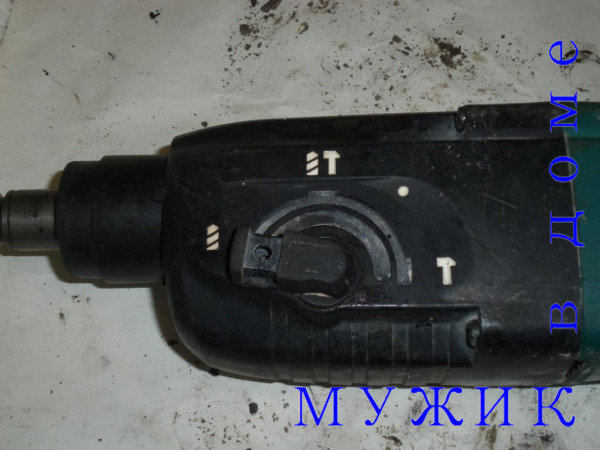
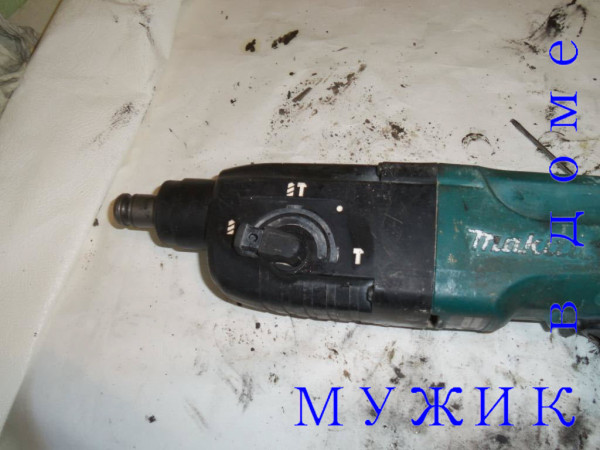
Then the mode switch is disassembled. There is a special slot for a screwdriver under the cover holding the red release button. By inserting a screwdriver into this groove and prying the cover slightly, first from one edge, and then from the second, carefully remove it. You should not make significant efforts here, the lid is still plastic and may break. The red button together with the spring is removed from the switch body, and it is moved to the left until it stops, a little further than the drilling mode. It is from this position that it is removed from the gearbox. For this operation, the switch must be lightly picked up with thin screwdrivers on both sides and removed together with the rubber O-ring.
Remove the punch mode switch
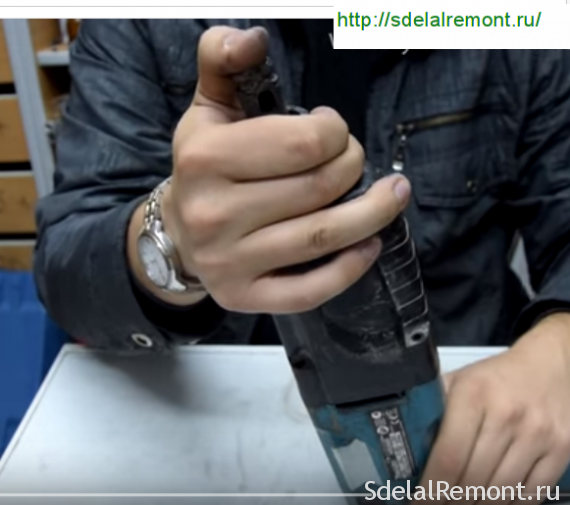
Now the gearbox is removed. Using a Phillips screwdriver, unscrew the four bolts connecting the box to the stator housing. Then, holding it with your hand, you need to lightly hit the end of the barrel with a mallet in order for the box to come off the gearbox.
Remove the gearbox
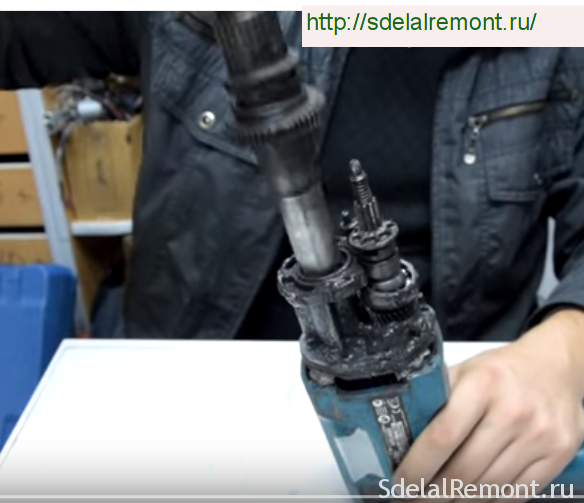
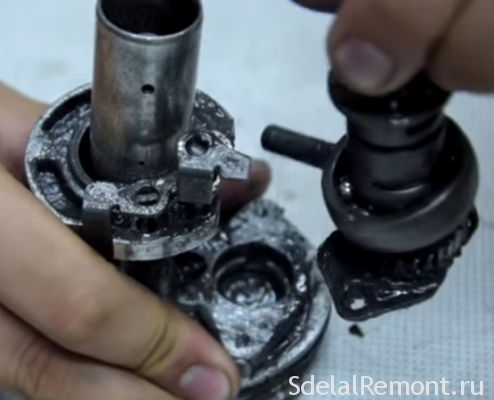
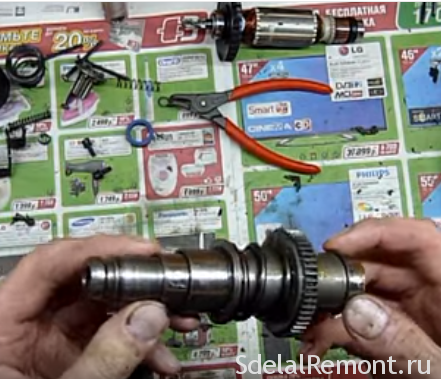
After removing the box, we take out the barrel from the gearbox. It comes off easily.
We take out the barrel from the gearbox
Remove the old grease with a rag, and rinse the barrel with gasoline or kerosene and wipe it dry.
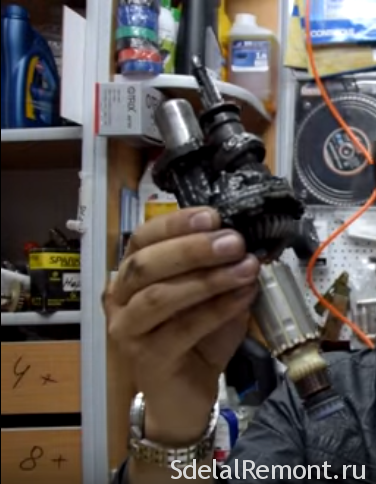
So, as mentioned above, it was required to completely change the entire barrel.However, this item, bought in a service center, turned out to be "naked as a falcon." That is, there was absolutely nothing on it and it was necessary to rearrange all the details from the old barrel to a new "blank".
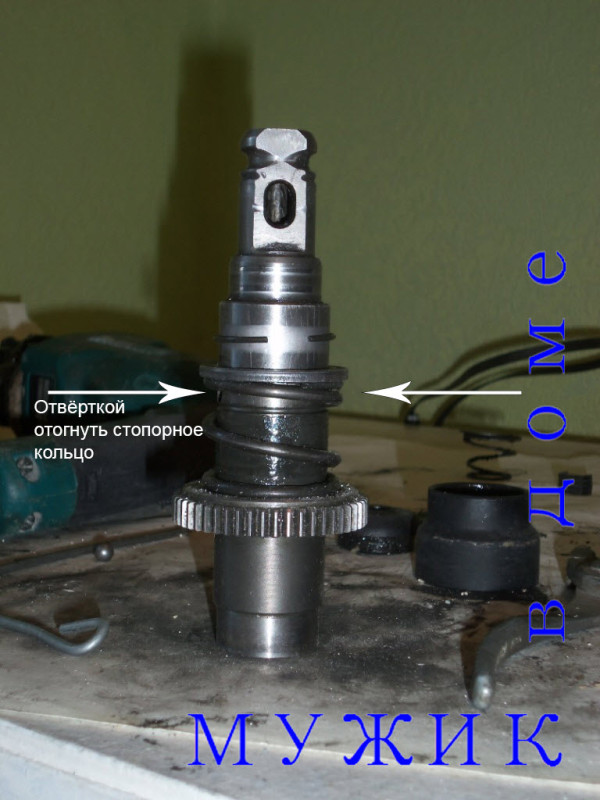
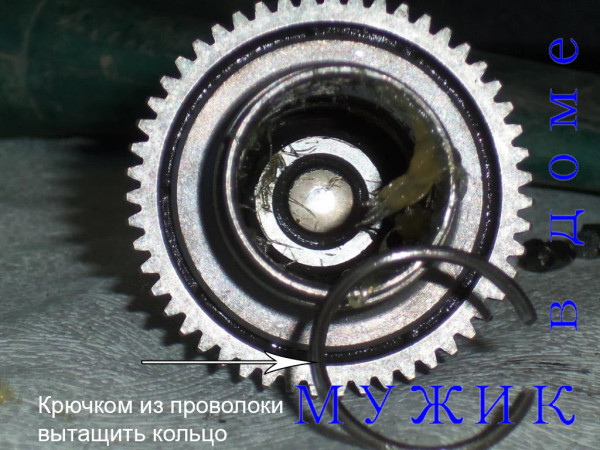
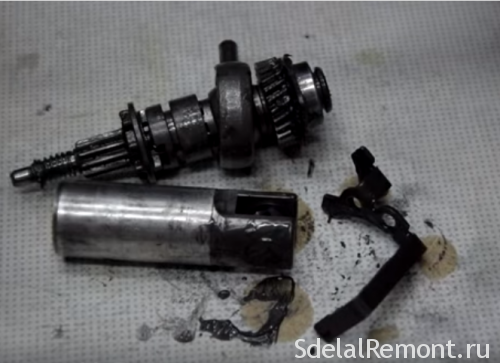
The most difficult operation was the extraction of the striker from the barrel body. There are special holes in the barrel body through which the retaining ring is visible. This ring holds the firing pin with rings and rubber dampers in the body seat. Insert a thin screwdriver into the hole and slightly bend the ring. We do this first on one side, and then on the other. The stopper should come out of the groove.
Use two screwdrivers to squeeze the stopper
Then, from the inside, with a homemade wire hook, we pull out the stopper into the light of day.
With a wire hook, remove the stopper from the inside
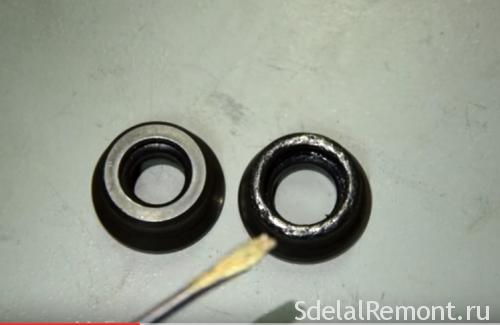
Next, we remove the firing pin with washers and rubber rings. It is necessary for the assembly to remember or sketch the location of all rings and washers. If something goes wrong, the photos and drawings from the article will help.
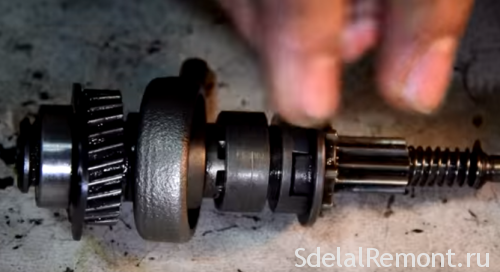
Now you need to remove the gear from the shaft. Pressing on the washer and squeezing the spring, use a thin screwdriver to remove the retaining ring from the groove. After removing it, remove the washer, spring and gear from the barrel.
The toothed wheel is pushed onto the new barrel and meshed with the splines. Next, a spring with a washer and a stopper are installed on it. It is necessary to insert the retaining ring and fix the mechanism in the working position.
To do this, take the barrel in both hands and, resting it in your palms, with your fingers squeeze the spring with force, while simultaneously moving the washer and stopper down. It is necessary to squeeze until the stopper enters the groove.
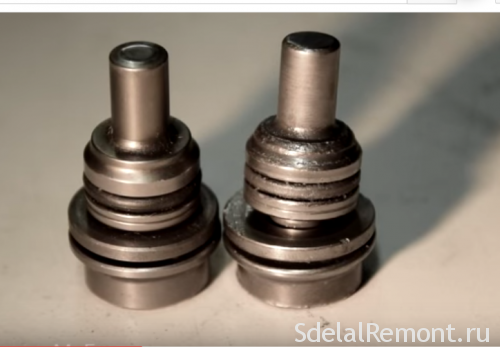
Then a firing pin with washers and rubber rings is installed inside the barrel in the order in which it was sorted out. But first you need to pay attention to the condition of the drummer, his appearance.
If the firing pin has dents and pits after a long period of work or because it was scratched on a broken bushing, then it should be sanded down a little. To do this, it is clamped into a drill chuck and processed with fine-grained emery cloth. But if the irregularities are too large, then the drummer will be easier to replace.
It is necessary to lubricate the firing pin with special grease before installation and then use the grease during operation. When inserting the drill into the hammer drill, you need to apply a little grease to its shank. This extends the service life of the machine.
Having installed the striker mechanism in the barrel, we fix it with a retaining ring. Using a screwdriver, we try to move the striker on both sides inside the barrel. It should walk easily in the canal and not jam.
The assembled barrel is installed in the gearbox housing. Putting it on a cylinder with a piston, we put it into mesh with the drive gear and insert it into the body. All parts should be well lubricated during assembly.
Installing the barrel into the gearbox
Then we install the gearbox, after having lubricated the needle bearing. With four bolts, we pull the box to the stator housing and install the operating mode switch in place. To do this, set it to a position slightly to the left of the drilling mode. Insert the red spring button and move the switch to the drilling mode. We snap on the plastic cover and check the operation of the switch.
Reinstall the mode switch
Snap the cover of the punch mode switch
Then, in a final chord, the SDS + mechanism is assembled. Having installed the spring of the mechanism, we put on a curly washer and insert the ball. Then, with a plastic cover, we squeeze the spring of the mechanism and insert the retaining ring. Putting on a rubber boot is no longer difficult.
Squeezing the spring with a washer, install the retainer ball
Installing the SDS mechanism
Trying the hammer drill under load. When the machine is operating, there should be no extraneous noise in the gearbox, the mode switch should be easily moved without jamming. In general, everything should work as before the breakdown.
The author of this article hopes that it will help dear readers to understand the repair of a hammer drill. Any breakdown can be simple if you find its cause.And then it all depends on your skill and diligence.
The author is fine, he described everything in detail, the only thing I forgot to write is that when you put the mode switch, you need to turn it counterclockwise so that it snaps into place. In general, thanks, I repaired my perf in half an hour, it turns out that the firing pin just jammed. As a result, I cleaned it, greased everything, everything works.
The article is kind, but I can't understand how the striker repair kit gum is located.
I have not seen a better description, thanks to the author.
instead of replacing the barrel, he replaced the bushing (broken), but on BOSH 1610290029 they call it a scraper. Assembled checked (drilled two holes for fasteners F8 works), let's see how it goes next. Cost 120R. and lubricants.
Please tell me how to remove the drill from the cartridge if it turns out to be defective and so as not to harm the cartridge
How long did you work with a drill jammed in a chuck? It can be assumed that the shank was riveted due to poor quality drill material. There is also a possibility of cranking in the chuck. You can try to pull out the stuck drill by holding it in a vice and, shaking it, pull the drill towards you. You can use any lubricating fluids. But in the case of a very strong deformation, this method is unlikely to help. Then it is better, if possible, to contact a workshop. An attempt to disassemble the hammer drill and knock out the drill yourself without appropriate experience can lead to the failure of the hammer drill itself.
Even very reliable Makita rotary hammers break down over time. Any breakage is eliminated, you just need to have straight arms and perseverance. In addition to electrical malfunctions, rotary hammers are also susceptible to mechanical damage. Operation of rock drills with hard materials in dusty environments will shorten the service life and require user intervention to perform preventive maintenance.
Any tool repair begins with determining the nature of the malfunction and disassembling.
The Makita 2450 and 2470 hammer drill can be repaired by a user who has basic locksmith skills and is familiar with electrical safety requirements.
This article discusses the mechanical part of the Makita rotary hammer, the main malfunctions and how to fix them.
Dismantling the mechanical part of the Makita 2470 rotary hammer
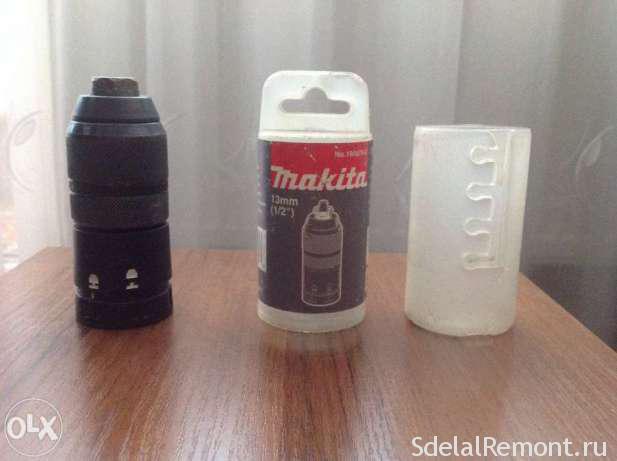
To get to the mechanical part of the hammer drill, you need to remove or disassemble the cartridge.
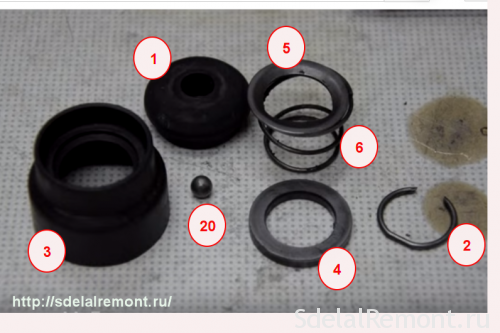
Dismantling the quick-release chuck Place the punch on the rear case cover on a tabletop covered with a clean cloth or paper. Using tweezers or a screwdriver, remove the rubber tip 35, item 1.
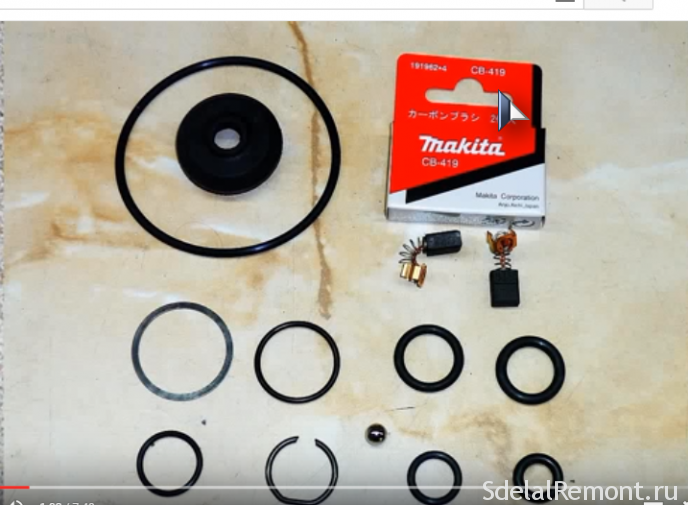
Carefully loosen the annular spring, pos. 2, the coupling cover, pos. 3, and the steel ring, pos. 4. You will reach a steel ball with a diameter of 7 mm pos. 20.
Now you can remove the housing of the mechanical part It is black. Using a screwdriver, unscrew the four screws at the end of the case.
Holding the black case with your right hand, press your thumb on the end of the shaft from which the cartridge was disassembled. The plastic housing can be easily removed.
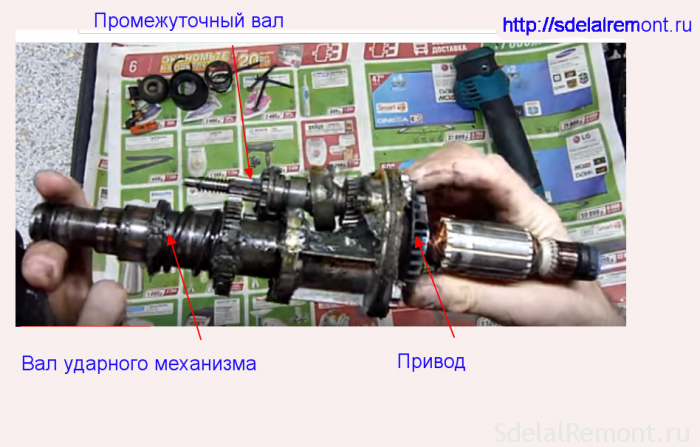
Next, you need to remove the gearbox shaft.
To disconnect the mechanical part from the electrical one, you must first remove the electric brushes. Remember! In the lower part of the housing, the rotor is held by electric brushes, which must be removed.
After checking that the electric brushes are disconnected from the rotor lamellas, use a screwdriver to pry the metal housing of the hammer drill at the border of the green plastic housing.
Now we turn to disconnecting the rotor from the mechanical part of the perforated
ra. The rotor is held mechanically by the helical gears of the reducer. If you take the rotor housing in one hand and the mechanical housing in the other and pull in different directions, swinging, you will separate these two units.
You will get such a unit in the old grease.
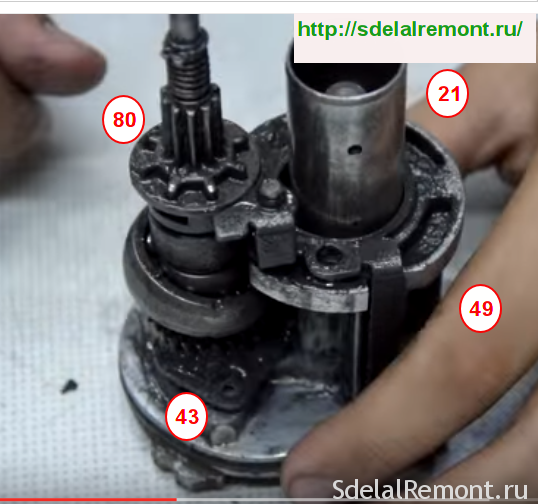
Then unscrew with a hexagon two bolts M4 × 12, pos. 43., art. 266273-7 with an internal hex head. Pull out the shaft with the intermediate spur gear 10 pos. 80, art. 226399-7. from the inner case, pos. 49, art. 153687-8.Remove old grease from parts.
You will get such a mountain of clean details.
Now carefully look through the details, discard the rubber rings immediately after picking up new ones. Replace the defective parts with new ones.
Frequent mechanical failures of Makit punchers include:
destruction of the quick-release chuck;
failure of bearings;
breakage of the striking mechanism;
drill barrel wear;
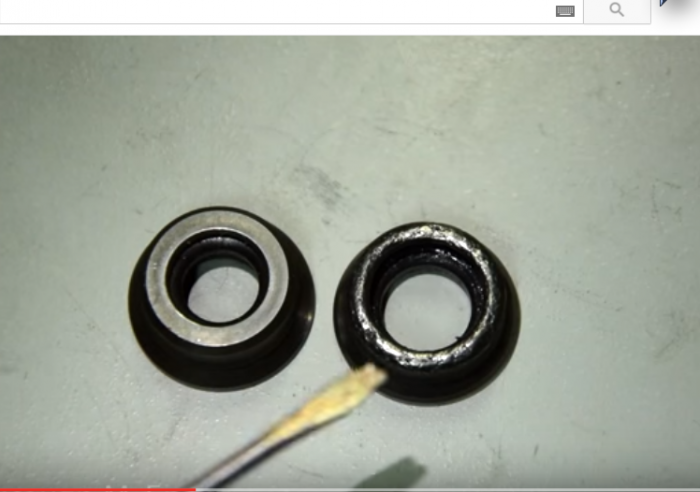
wear of striker and striker rubber bands;
breakage of gears.
The hammer drill chuck is repaired to replace the boot and rubber ring, as well as the conical spring and the steel ball, which secures the working tool (drill). This is indicated by what is a working tool? namely, the drill does not hold well in the chuck.
The main reason is the wear of the steel ball 7.0, item 20, art. 216022-2. The wear of the ball occurs from contamination of the bore of the cartridge due to the ingress of dust and dirt.
The general view and device of the Makit perforator cartridge is shown in the photo below.
Do-it-yourself repair of the makita 2450 perforator cartridge is easy. The cartridge must be disassembled, freed from old grease, discarded rubber parts, replaced defective.
More complex malfunctions require knowledge of the mechanical part of the Makita 2450 perforator.
Having determined the nature of the malfunction of the Makita perforator, proceed to disassemble the mechanical part, called the gearbox.
Disassemble the mechanical part according to the attached video. Free it from old grease. Carefully inspect all parts, their integrity, level of wear. All rubber products require replacement during any disassembly.
Consider repairing the barrel of a rock drill. Let's analyze the mechanism completely. Video of disassembly, lubrication and assembly of the Makita perforator
Remember! In the lower part of the housing, the rotor is held by electric brushes, which must be removed.
The next step is to disconnect the rotor from the removed mechanism. The rotor is simply disconnected from the mechanism by pulling it out, since it is held by the friction of two helical gears.
The result is such a dirty knot.
Now we need to separate the percussion shaft.
Most often, the rubber rings wear out, the firing pin pos. 24, compressor spring pos. 18. and cylinder parts.
This is how barrel parts wear out and break down when the tool is misused.
Consider the most difficult malfunction - the failure of the percussion mechanism. The characteristic signs of a breakdown of the percussion mechanism are the absence of a blow and the unpleasant noise of a working perforator in the "Blow" mode.