In detail: do-it-yourself tweeter repair from a real master for the site my.housecope.com.
Multimedia speakers Technics SB - CD 120.
Tweeters are simple in design but difficult to repair, especially branded ones. The cone of the tweeters is conical, domed, rarely flat, made of lavsan film for tape radiators. Usually diffusers are glued to the body and it is very difficult to peel off without damaging the suspension. The winding is wound with a very thin wire of the order of 0.05-0.1 mm. The frame of the coil is made of paper, which is destroyed when the coil burns out. There is also frameless winding, which is very difficult to repeat.
For our tweeters, iron filings in the gap are most common. Soviet speakers are easily disassembled and assembled, but repairs require painstaking accuracy, perseverance and, most importantly, experience in such work. Despite the seeming simplicity, it is not so easy to do this work without skills and skill.
Examples of speaker repair.
The speaker of Yamaha X 4228 CO did not work, you can hear high frequencies by ear. The diffuser is metal, the dome is made directly with the frame of the voice coil. The suspension is glued to the diffuser. Checking with the device showed a break in the winding.
Disassembled speaker Yamaha X4228CO
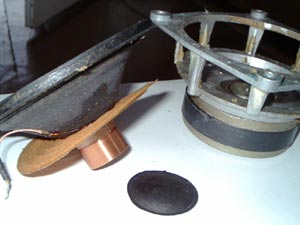
Disassembled speaker Yamaha X4228CO the winding is burnt.
Copper voice coil wire. I measured the diameter of the wire, rewound the winding. I dried the coil and soldered the leads. Collected the speaker.
Refurbished speaker Yamaha X 4228 CO
The speaker worked like new.
Car tweeter DLS UP -1 i voice coil burned out.
Tweeter DLS UP-1i
| Video (click to play). |
The diffuser is silk with impregnation, made with a suspension together.
Disassembled speaker DLS UP-1i
DLS UP-1i Suspension and Speaker Coil
The coil and frame are aluminum and glued to the diffuser. Copper voice coil wire.
Refurbished speaker DLS UP-1i
I rewound the reel. Collected the speaker.
Tweeter Eurolive 25 T 20 A 8 with horn from professional acoustics. It also burned out like other speakers.
Disassembled the speaker, removed the diffuser.
Disassembled speaker Eurolive 25T20A8
The usual story burned out the voice coil. Rewind the voice coil. I soldered the leads. I assembled the speaker, as they say in the reverse order of disassembly.
Assembled loudspeaker Eurolive 25 T 20 A 8 with horn
I checked it for performance, everything works.
The fashion for basses, subwoofers and other low-frequency acoustics slightly shifted the importance of tweeters to the background. But the mid and high frequencies are the body of the sound of many instruments. The tweeters are responsible for the readability of instruments such as cymbals and percussion, high notes from guitar and horns, high notes from vocals, especially female vocals. But the main function of high frequencies, which many people forget, is to give the mix "airiness", "transparency".
Without a well-working tweeter, the fullness of the picture from the music will be lost, and the middle and bottom will make the mix dense, but "dry". Anyone who loves to listen to music on good equipment should know what effect the upper part of the sound spectrum has.
The first, and probably the most common problem with this kind of speakers is the breakage of the coil leads. This problem often occurs due to overload and increased movement of the tweeter. The fact is that high frequencies are not designed for high pressure, their movable stroke is much less, and the design of the speaker assumes the presence of flexible leads made from the leads of the coil itself. Therefore, a cliff very often happens in this place.
Coil damage is the second most common defect that occurs when a buzzer breaks down. The coil suffers more often from overload. The tweeter should not be overloaded and should be closely monitored for this, peak power can overload the speaker. If, with the help of an equalizer, you send thirty-forty watts to the upper frequencies, then almost any tweeter will end its life there.
How to start repairing tweeters? The first step is, of course, dismantling. Dismantling the speaker is quite simple, the main thing is not to overdo it, and use only a high-quality instrument. The tweeter is much easier to disassemble than the mid and bass speakers. Simplicity is due to the size of the speaker and its design. You need to start disassembling the tweeter by removing it from the speaker system. Here you need to act carefully and not damage other elements.
It is necessary to disassemble the speaker itself from the removal of the bell, for this you need to pry the bell with a screwdriver, and snap it out of its regular places. This mount is not in all speakers, but only in some. There are often more complex types of socket fasteners.
A great deal of luck when disassembling the speaker is attaching the diffuser with screws, it is easy to disassemble, unlike rivets and other peculiar types of fasteners.
After that, we simply remove the suspension and release the moving component of the speaker. In the tweeters, you can also find a glued suspension - this will greatly complicate the disassembly process. You can also find a suspension seal with a sealed lubricant, which provides additional protection against vibration. The structure of the tweeter can be different, but the basic elements are still the same.
It is necessary to work on the repair of the tweeter very carefully, fully being aware of what, and how, should be arranged in the working version of the "buzzer". Often, such dynamics do not provide their own separate terminals, instead of them the coil terminals, for them there are usually grooves in the flange. When assembling, it is necessary to especially carefully lay the thin threads of the bobbin into the grooves.
One of the most common tweeter recovery methods is coil rewinding. Correct winding requires special tools and experience. The tweeter coil is wound just like any other coil. Coil winding requires good attention and concentration, for proper winding just good vision may not be enough, you often have to use optics. Rewinding the reel at home is far from the best idea, it is better to entrust this procedure to professionals. Lack of the right tools and winding experience can ruin the speaker.
The tweeter is assembled in the same way as disassembling it, but in the reverse order. After disassembly, it is best to clean all parts of the speaker from dust and other dirt.
Another nuance is gluing the coil leads directly to the gimbal. This method is used by a number of manufacturers, trying to make additional noise protection. For this procedure, it is best to use a special elastic adhesive such as rubber adhesive.
Has the speaker wheezed or stopped sounding and want to bring it back to life? First, diagnostics. We remove the speaker, disconnect the wires from the terminals, having previously marked the polarity. In the future, we adhere to this rule: everything that we disassemble, draw or photograph will help a lot.
We check the winding resistance with the device. There are three options here.
1) Break.
2) Nominal resistance.
3) Reduced resistance.
Now the second check. We put the speaker on the magnet and gently move the diffuser up and down. If you hear a rustle or creak, or there is no movement, the speaker will have to be disassembled.
If there is no grinding, and the winding is open - you need to check the conductivity of the flexible wires from the terminals to the soldering of the winding. They are made of threads intertwined with copper veins that break over time. They can be replaced without disassembling the speaker with M.G. T.F. a suitable cross-section or a braid tape to remove excess solder.
We solder the wires so that they do not stretch when the diffuser moves and do not touch it. We glue the place of soldering with Moment glue.
If the speaker needs to be disassembled, disconnect the wires from the terminals, put the speaker on the magnet and with a swab dipped in acetone, soften the glue around the protective cap and remove it, prying it off with a non-sharp scalpel. In the same way, peel off the outer edge of the diffuser and the outer edge of the centering washer. Carefully pull the diffuser straight up without skewing.
I do not recommend unsticking the coil frame from the diffuser and centering washer, so as not to disturb the centering of the speaker.
To rewind, you need to assemble a simple device, the device of which is clear from the figure. The hardest part is the spool holder. To make it, you need to contact a turner. Mandrel length 100-150 mm, material - any metal.
We measure the inner diameter of the coil (x). The mandrel for the spool should have a diameter of x + 0.5 mm at one end and x-0.5 mm at the other end.
On the large end, we drill a 3.2 mm hole and cut an M4 thread for attaching the handle.
We drill a 6.5 mm through hole for the stud. The surface of the mandrel must be sanded.
Now you can start winding. We need alcohol-based glue, for example, BF-2 or BF-6, paper from the MBM capacitor, wire and a lot of patience.
We dilute the glue with alcohol. We pierce the centering washer with a needle, thread the winding wire and solder it to the flexible wire. We fix the wire at the soldering point and at the beginning of the winding by gluing pieces of paper.
If the coil frame is made of metal, we glue it with a layer of paper from the capacitor without overlapping layers. We wind the wire coil to coil, gluing it before winding and over it. Remove excess glue with your finger. We try to wind not tightly, but tightly.
On the first layer we glue the paper from the capacitor without overlapping layers and perform the same actions in reverse order. When the winding is ready and soldered to the terminals, you need to connect them to a 4-5 Volt power source with a current of 1-2 Amperes to dry. The winding will heat up to 50-60 degrees, while the glue will dry and harden, the coil will expand slightly. This will help to easily remove it from the mandrel.
We check the free play of the coil in the speaker gap and start assembling.
We need to align the coil exactly to the center. There are 2 ways to do this.
1) Place a film or X-ray film gasket in the gap.
2) Apply a small constant voltage of 2-3 Volts to the coil so that it is slightly pulled inward.
Apply a layer of "Moment" glue to the outer edge of the diffuser and the outer edge of the centering washer and lower the diffuser vertically down without skewing and without radial displacement, press. You can turn the speaker over onto a flat table and while the glue dries, solder the wires to the terminals.
After the glue dries, remove the gasket and check the free play of the coil in the speaker gap.
If everything is in order, we glue the protective cap in place and enjoy the result!
In the process of installing a new speaker system, the owner may have the following task - how to connect tweeters (tweeters) so that they work efficiently and without problems? The crux of the matter lies in the complexity of modern stereo systems. For this reason, in practice, there are often cases when installed tweeters either work with distortions or do not work at all. By adhering to the installation rules, you can avoid possible difficulties - the procedure will be as fast and simple as possible.
Modern tweeters are a type of sound source whose task is to reproduce the high-frequency component. Therefore, they are called that - tweeters or tweeters. It should be noted that, with their compact size and specific purpose, tweeters are easier to install than large speakers. They emit directional sound and are easier to place to create high-quality detail and accurate soundtrack that the listener will immediately feel.
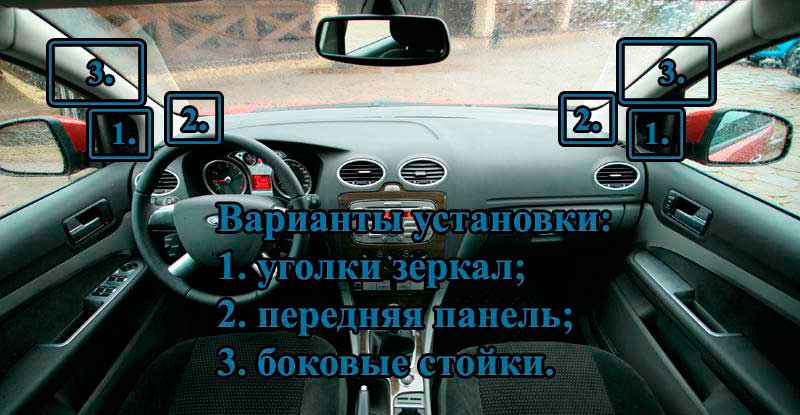
Manufacturers recommend many locations for tweeters, most often at ear level.In other words, aim them as high as possible at the listener. But not everyone agrees with this opinion. This setup is not always convenient. It depends on the specific circumstances. And the number of installation options is quite large.
- The corners of the mirrors. During the trip, they will not cause additional discomfort. Moreover, they will fit beautifully into the interior of the vehicle;
- Dashboard. Installation can even be done with double-sided tape;
- Podiums. There are two options here. The first is to put the tweeters on the regular podium (which comes with the buzzer), the second is to make the podium yourself. The latter case is more complicated, but it guarantees a better result.
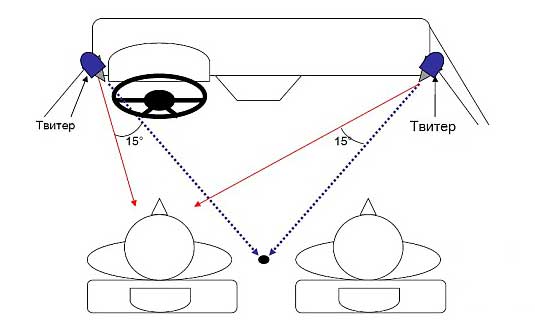
Where is the best place to direct tweeters? 
When designing car audio, you can choose one of two options:
- every tweeter is directed towards the listener. That is, the right squeaker is directed at the driver, the left one is also directed at him;
- Diagonal installation. In other words, the tweeter on the right is directed to the left seat, while the left speaker is directed to the right.
The choice of this or that option depends on the individual preferences of the owner. To begin with, you can direct the tweeters towards yourself, and then try the diagonal method. After testing, the owner will decide for himself whether to choose the first method, or give preference to the second.
A buzzer is an element of a stereo system, the task of which is to reproduce sound with a frequency of 3000 to 20,000 hertz. The radio tape recorder produces a full spectrum of frequencies, ranging from five hertz and ending with 25,000 hertz.
The buzzer can only reproduce qualitatively auto sound, the frequency of which is at least two thousand hertz. If a lower frequency signal is applied to it, it will not be reproduced, and if the power is high enough for which the mid and low frequency speakers are designed, the buzzer may fail. At the same time, there can be no question of any quality of playback. For durable and reliable operation of the tweeter, you should get rid of the low-frequency components that are present in the general spectrum. That is, make sure that only the recommended operating frequency range falls on it.
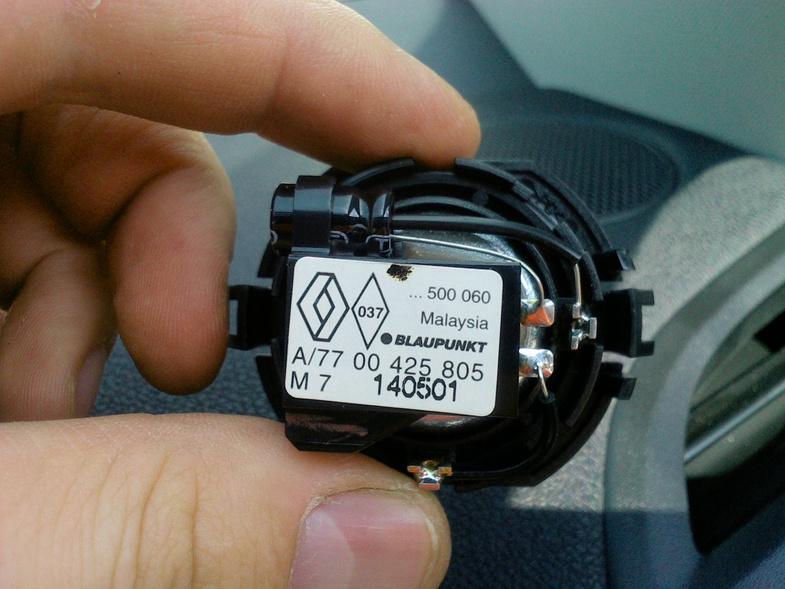
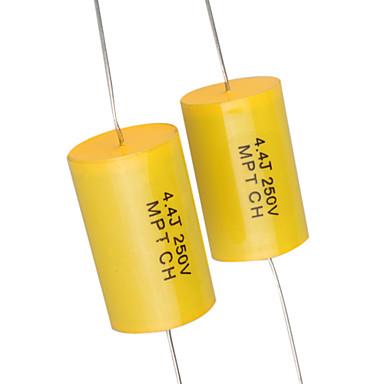
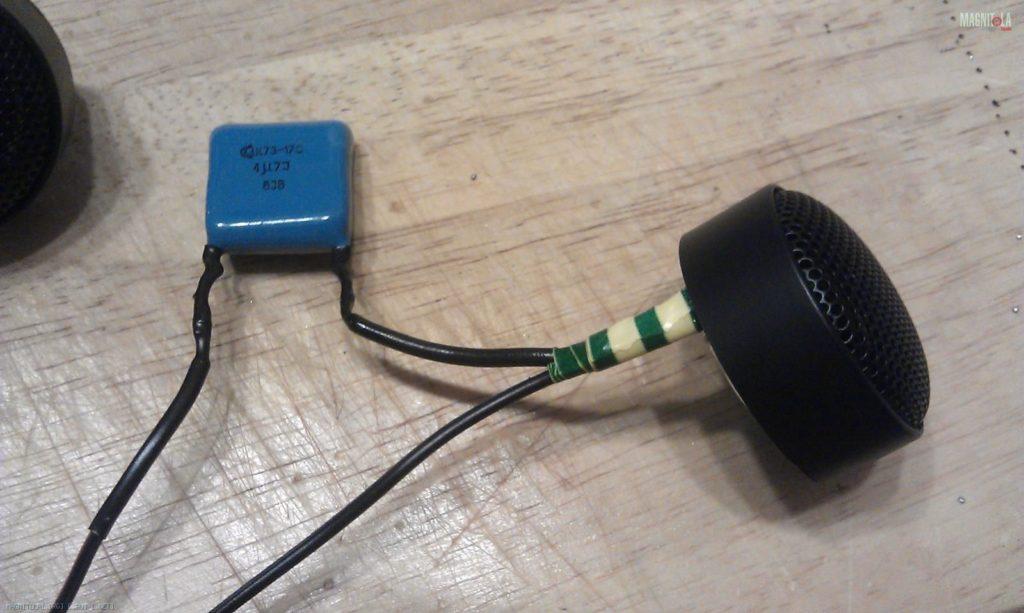
As a rule, the capacitor is already present in the speaker system, so it does not need an additional purchase. You should think about buying it if the owner decided to get a used radio tape recorder and did not find a capacitor in the tweeter kit. It may look like this:
- A special box to which a signal is sent and then transmitted directly to the tweeters.
- The capacitor is mounted on a wire.
- The capacitor is built directly into the tweeter itself.
If you did not see any of the listed options, you should buy the capacitor separately and install it yourself. In radio stores, their assortment is large and varied.
The range of filtered frequencies depends on the type of capacitor installed. For example, the owner can install a capacitor that will limit the frequency range supplied to the speakers at three or four thousand hertz.
Note! The higher the frequency of the signal fed to the tweeter, the more detailed the sound can be achieved.
If you have a two-way system, you can choose in favor of a cutoff from two to four and a half thousand hertz.
The tweeter connection looks like this, it connects directly to the speaker located in your door, plus the tweeter is connected to the speaker plus and the minus to the minus, while the capacitor must be connected to the plus.This is a practical tip for those who don't know how to connect tweeters without a crossover.
An alternative connection option is to use a crossover. In some models of speaker systems for cars, it is already included in the kit. If not available, you can purchase it separately.
Today, the most common tweeter option is the electrodynamic system. Structurally, it consists of a housing, a magnet, a coil with a winding, a diaphragm with a membrane and power wires with terminals. When a signal is applied, a current flows in the coil, an electromagnetic field is formed. It interacts with a magnet, mechanical vibrations occur, which are transmitted to the diaphragm. The latter creates acoustic waves, sound is heard. To increase the efficiency of sound reproduction, the membrane has a specific dome shape.
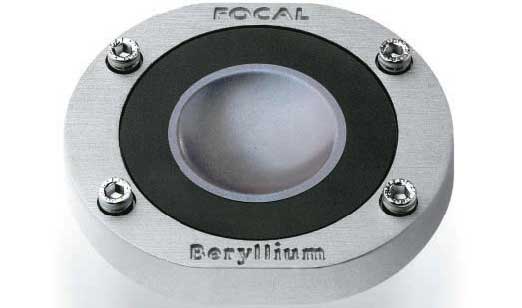
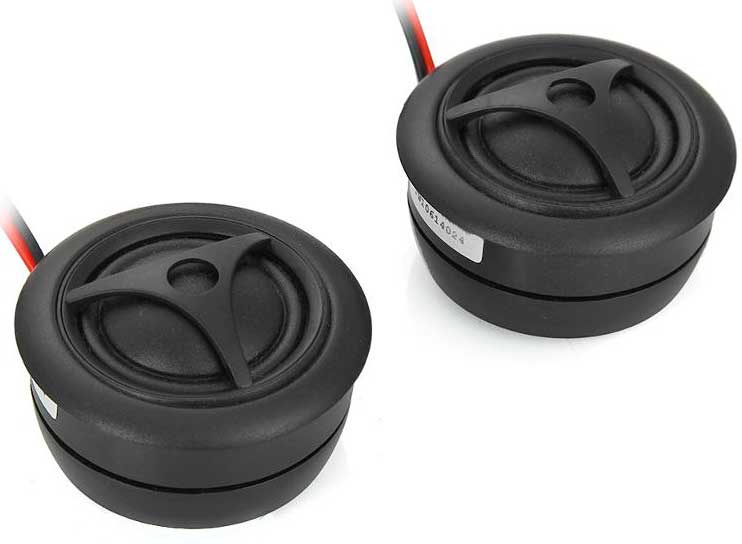 In the most expensive tweeters, the membrane is made of thin aluminum or titanium. You can only meet this on very prestigious speaker systems. They rarely come across in a conventional car audio system.
Do not forget that you can also adjust the buzzer using the radio. Even the cheapest models have the ability to adjust the treble. In particular, mid-range models have a built-in equalizer, which greatly simplifies the task.
How do I get my speaker repaired? FAQ Part8
Here you will find a description of the recovery process for the tweeter driver with illustrations.
Repairing tweeters differs from repairing tweeters and woofers, if only because the tweeters do not have a centering washer. Therefore, disassembling tweeters, even with a paper cone, takes much less time than disassembling the midrange and woofers.
Often, tweeters use a membrane made of synthetic materials instead of a cardboard cone. The membrane has a domed shape and, together with the suspension, is a monolithic structure.
This design ensures the minimum weight and maximum rigidity of the moving system, which is necessary for reproducing high frequencies.
Due to the very small travel of the moving system, the process of centering the HF heads is greatly simplified. And in most tweeters with a domed membrane, the alignment is provided by the very design of the dynamic head.
In most of the tweeters, the coil leads play the role of flexible leads, so maximum attention should be paid to their laying. One of the most common defects is the breakage of these conclusions. This is especially true for high-power tweeters, which, as a rule, have a larger movement of the moving system.
Another common defect is damage to the coil, which sometimes even leads to the destruction of the sleeve. This is most often caused by speaker overload.
The fact is that the HF heads have a relatively low power. For example, in a 100-watt 3-way speaker, the tweeter can be rated for a sinusoidal power of only 6-10 watts. If such a speaker is connected to a 100-Watt amplifier, and the user, using a tone block or an equalizer, sends even half of the amplifier's power to the HF head, then the HF speaker will only have to squeak for the last time.
For this section, a friend provided me with a pair of faulty 4GDV-1 tweeters. These speakers were out of order due to overload, and an interturn short circuit occurred in the coils.
I took some pictures while rebuilding these speakers and tried to comment on each one.
I started disassembling by removing the socket, which was attached to plastic latches.
The best repairable ones are tweeters, in which the diffuser is attached to the body with screws.
After dismantling the four M3 screws, it became possible to separate the centering plastic flange from the case and release the moving speaker system.
But, it is not always so easy to do it. Sometimes the suspension is glued to the elements of the case and then the moving system must be separated with the utmost care.
In other cases, the suspension is lubricated with some kind of thick grease to prevent the occurrence of unnecessary vibrations when the suspension is not firmly pressed against it.
In the dynamics of this design, separate flexible leads are not provided and their functions are performed by the leads of the coil.
To increase reliability, the coil leads are secured with a narrow paper tape.
The flange has recesses in which the coil leads are placed.
In this picture, you can see that the coil leads go through the slots.
The rewinding of the tweeter coil is done in the same way as for the speakers of other frequency ranges.
True, in the collection of my templates there was no mandrel of the required size, and I made a template from an electrolytic capacitor of a suitable diameter. How to do this is described in detail here.
But, if your vision is not very good, then you will have to use additional optics. The diameter of the wire used to wind the tweeter coils is usually less than 0.1mm.
In particular, the 4GDV-1 speaker coil is wound with a wire with a diameter of only 0.08 mm. In such cases, I use binocular glasses with additional attachment lenses.
The paper tape holding the coil leads turned out to be glued with 88th glue. In order not to damage the sleeve, when removing the old coil, I soaked the adhesive joint only in those places where the coil leads should have been laid.
After laying the leads, I closed the ends of the tape and glued them with BF glue.
In some tweeters, the coil leads are glued to the gimbal. This prevents parasitic resonance from occurring, which can accelerate lead destruction. In this case, you need to use the most elastic adhesives, such as "Rubber", "Elastosil" and the like.
The assembly of the speaker is carried out in the reverse order and does not present any difficulties, since the alignment of the moving system is ensured by the speaker design itself.
Before final assembly, you can check the phasing of the speaker, since, with such a small stroke of the moving system, it is more difficult to do this after assembly.
With correct phasing, the moving system should "jump" out of the body.
You can clean the coil leads from the varnish with the help of an Aspirin tablet. Here I have already described how this can be done, and here I have shown it.
Today, the number of good sound lovers who just throw out a wheezing speaker is not decreasing! At the same time, the cost of an analogue can be a tangible amount. I think the following will help anyone who has hands that grow out of the right place to fix the speaker.
Available - a miracle of design thought, once the former column S-30 (10AC-222), now serving as one of the autosubs. A week later, after the mutation, the patient began to show signs of the disease - he emitted extraneous sounds when working out the bass parts, and wheezed a little. It was decided to conduct an autopsy.
After autopsy, a diseased organ was removed from the patient's body - woofer 25GDN-1-4, 86 of release.The organ clearly needed operation - when gently pressing the diffuser, an extraneous sound was heard (very similar to a quiet click), and when ringing in various tones (generated by the nchtoner program), a clearly audible rattling-crackling sound was heard with a large diffuser stroke and when ultra-low (5-15Hz) ) frequencies. It was decided to trepan this organ
First, the patient's flexible lead wires were sealed off (from the side of the contact pads)
Then a solvent (646 or any other capable of dissolving glue, such as "Moment") was moistened with a syringe with a needle, the place where the dust cap and the diffuser were glued (along the perimeter).
... the place where the centering washer is glued to the diffuser (around the perimeter).
... and the place where the diffuser itself is glued to the basket of the diffuser holder (again around the perimeter)
In this state, the speaker was left for 15 minutes with periodic repetition of the previous three points (as the solvent was absorbed / evaporated)
Attention! When working with a solvent, safety measures should be observed - avoid contact with skin (use rubber gloves!) And mucous membranes! Do not eat or smoke! Work in a well ventilated area!
When wetting - use a small amount of solvent, avoiding getting it on the gluing area of the coil and centering washer!
Depending on the type of solvent and air temperature, after 10-15 minutes of the above operations, using a sharp object, you can gently pry off the dust cap and remove it. The cap should either come off very easily or offer very little resistance. If you need to make significant effort, repeat the operations with wetting its edges with a solvent and waiting!
After peeling off the cap, carefully pour out the remaining solvent from the recess near the coil mandrel (by turning the patient over).
By this time, the centering washer has time to peel off. Carefully, without using any efforts, we separate it from the basket of the diffuser holder. if necessary, re-wet the gluing site with a solvent.
Wet the place where the diffuser is glued to the diffuser holder. We wait. We wet again and wait again. After about 10 minutes, you can try to peel off the diffuser. Ideally, it should detach from the diffuser holder (together with the coil and centering washer) without effort. But sometimes he needs a little help (the main thing is accuracy! Do not damage the rubber suspension.)
We clean the gluing points from the old glue and dry the disassembled speaker. We examine the disassembled patient for a malfunction. We look at the coil. If there are no scuffs and loose turns on it, we leave it alone. When peeling off the coil, glue it back with a thin layer of BF-2 glue.
We carefully inspect the place where the lead wires are attached to the diffuser. So it is - the patient has the most common malfunction in old speakers with a large diffuser travel. The lead wire at the attachment point is frayed / broken. What kind of contact can we talk about when everything hangs on a thread passed into the center of the wiring!
Gently bend back the copper "antennae".
... and unsolder the lead wires.
We repeat the operation for the second wiring (even if he is still alive - the disease is easier to prevent!)
We cut the supply wiring at the break point.
... and we serve the resulting ends (of course - first we use rosin). Here you need to be careful! Use a small amount of low-melting solder - the solder is absorbed into the wire like a sponge!
Gently solder the wiring into place, bend the copper "antennae" and glue (Moment, BF-2) the place where the wiring adheres to the diffuser. Remember - you cannot solder the wires to the fastening "antennae"! Otherwise, how can the wiring be changed again in ten years?
We collect the speaker. We put the diffuser with the entire “household” into the diffuser holder, orienting the wiring to the places of their attachment.Then we check the correctness of the polarity - when connecting a 1.5V AA battery to the terminals, when connecting the “+” battery to the “+” of the speaker, the diffuser will “jump out” of the basket. We put the diffuser so that its “+” lead wire is at the “+” mark on the speaker basket.
We solder the lead wires to the contact pads. Please note that the length of the wires has decreased by almost half a centimeter. Therefore, we solder them not as it was at the factory - to the hole in the plate, but with a minimum margin to maintain the length.
We center the diffuser in its basket using film (or thick paper), which we place in the gap between the core and the coil. The main rule is to place the centering evenly around the perimeter, to maintain the same gap. The amount (or thickness) of the centering should be such that when the diffuser is slightly protruding outward, it freely rests on it and does not fall inward. For the 25GDN-1-4 speaker, 4 pieces of film are enough for this, placed in pairs in front of each other. The length of the film should be such that it does not interfere if you put the speaker on the diffuser. For what - read below. We glue the diffuser. We use the indication for the glue used (I recommend "Moment", the main selection criterion, so that the glue can be subsequently dissolved with a solvent). I usually stick out the diffuser 1-1.5 cm up so that the centering washer does not touch the basket of the diffuser holder, then I apply a thin layer of glue on it and the basket with a brush, wait and firmly push the diffuser inside, additionally press the washer against the basket around the perimeter with my fingers ... Then I glue the diffuser (in the retracted state, without skewing).
We leave the speaker upside down for several hours under load (this is why our film should not protrude beyond the plane of the diffuser!).
Then we check the speaker for correct assembly. We take out the centering and carefully check the diffuser travel with our fingers. It should walk easily, without emitting overtones (there should be no touching of the coil and core!). We connect the speaker to the amplifier and send low-frequency tones of low volume to it. Extraneous sounds should be absent. In case of improper gluing (misalignment, etc.), the speaker must be glued (see above) and reassembled, being careful! With a high-quality assembly, we get 99% of a fully working speaker.
We glue the edge of the dust cap with glue, wait and carefully glue it to the diffuser. Here you need accuracy and precision - a crookedly glued cap does not affect the sound quality, but it spoils the speaker's appearance very much. when gluing, do not press on the center of the cap. It can bend from this and you will have to peel it off, straighten it, coat it from the inside with a thin layer of epoxy for strength and stick it back.
We wait until all parts are completely glued together (about a day) and put the finished speaker in its place. We enjoy the sound, which is no worse than that of the new factory analogous speaker.
That's it, now you can see that fixing a speaker is an easy task. The main thing is slowness and accuracy! So in an hour, you can slowly repair almost any woofer or midrange speaker of domestic or foreign production (for gluing imported speakers, a more powerful solvent is often required, such as acetone or toluene, carefully - they are poisonous.) Having a similar defect.
Yes, after the operation, the former patient got a second wind and the cheerful yellow subs continue to do their hard bass work:
Hello everyone! My name is Mikhail, now I'll tell you a story about how I managed to exchange a dvenashka for a 2010 Camry.It all started with the fact that I was wildly annoyed by the breakdowns of the two, like nothing serious broke down, but the little things, damn it, so many things that really started to enrage. Here the idea was born that it was time to change the car to a foreign car. The choice fell on the tayet Camry of the tenths.
One day in my car for a wheezing (ripel) speaker I decided to just replace it with a new one. After I found out that good speakers are not cheap, I decided to give it a try. repair the old speaker yourself... To repair and remove the wheezing of the speaker we need:
- Screwdriver
- Acetone
- Double-sided tape
- Camera roll
- Knife
- Battery 3v
- Rubber glue (for example, "Moment")
- Syringe
- Scissors
- Piece of Whatman paper
Soak the upper gum and the lower diffuser from the glue... For this we use a syringe filled with acetone.
Peel off the upper membrane with a sharp knife, while gradually moistening with acetone. We do the same with the lower diffuser.
We unsolder contacts using a soldering iron.
Unscrew the central bolt and carefully extract everything.
If the coil winding is not intact, then you need to turn to the rewinder.
Wipe the coil from metal droplets and debris.
Need to rub around the core... For this we use double-sided tape. We glue it on a piece of narrow cardboard and try to collect the dirt inside.
Need to check, so that the core is strictly centered... You need to clearly center the coil during installation.
Therefore, during installation, the upper speaker will interfere with us, which also needs to be unsoldered.
My speaker rustled due to the fact that the inner part of the coil touched the core. (the trail is clearly visible in the photo).
Centering with photo film... The foil must be wrapped around the core so that it is no more and no less than it.
We carefully put it there so that later you can get it.
We clean the surfaces from glue and apply a new layer of glue... First, lower it to the lower part, where the membrane is located, and once again check the centering using a battery. When the contacts close, the diaphragm should retract.
Leave the glue to dry and check that the membrane is pressed. We do not touch the membrane so as not to knock off the centering.
Further glue the upper part. Apply glue and press for a day. For this I used a saucer that perfectly fit in diameter, a can of paint and my wife's flower 🙂
After drying take out a photo film and checkso that there is no rubbing when pressed.
After soldering everything back.
As a result, I saved on acoustics 2600 RUR
| Video (click to play). |
Loudspeaker repair video

