In detail: do-it-yourself repair of a plastic water tank from a real master for the site my.housecope.com.
Any fall or mechanical impact can lead to cracks. And a container that allows water to pass through becomes useless. But seal the plastic water tank it is quite possible that it will serve properly for some time.
It is quite possible to seal a plastic barrel at home. Let's consider two options for how you can eliminate gaps in plastic drums and other containers.
For work, you will need the following materials and tools:
- stainless steel mesh (you can take aluminum, copper),
- knife,
- scissors,
- soldering iron 100 watt.
- Cut off a piece of mesh with scissors.
- We fix the mesh at the site of damage to the depth of the mesh thickness.
- We align it along the seam, moving along the entire plane. At the same time, in parallel, we solder the mesh with a soldering iron, hold the free edge with a knife, immediately after soldering, cool it with a heat exchanger (knife) - this is an important rule so that the mesh does not bristle.
- Using this method, we introduce the entire mesh into the seam.
- At the end of the work, the seam is completely sealed and reinforced, which gives it strength.
- We repeat the procedure on the back of the container.
VIDEO INSTRUCTION
Option 2
If you have to repair a container, the water in which is under pressure, you can resort to another method.
- flexible plastic patch,
- construction hair dryer,
- protective gloves.


- We wipe the damaged area, remove dirt.
- We start heating with a hair dryer at low power, so as not to burn a hole, a place with a defect.
- Heat the patch on the side that will adjoin the crack with a hairdryer. We are already heating at a higher power.
- We apply a patch to the place of damage and continue to warm it up with a hairdryer, adding more power. Wear protective gloves on your hands to avoid scalding. It is important not to overheat the surface.
- Smooth the patch with your fingers and wait for it to cool. We fill in water and check the quality of work.
| Video (click to play). |


VIDEO ON TOPIC
The first technique has proven to be the most effective in practice. The second is more suitable as a temporary measure.
If the defect in the plastic container is small, you can use epoxy glue. Two-component epoxy adhesive can effectively solve the problem of a leaky plastic tank.
Differs in increased resistance to moisture and chemicals, polymerizes in just 1 hour, non-flammable.
It is necessary to cut off the required amount of glue, knead with clean hands until a homogeneous mass is obtained, mold a cone from it and insert it into the opening of the tank. Fix securely for a few minutes.
Then you need to wait 2 hours, after which the container can be used.
The epoxy clay-plasticine Contact has proven itself well. Can be used directly under water, resistant to moisture.
- restores the shape of products, as well as hermetically fills in voids,
- not afraid of not only water, but also oils, solvents,
- the repaired tank can be used at temperatures from -40C to + 150C,
- within 3-5 minutes, the glue lends itself to correction, and after an hour it can be cleaned, grinded and subjected to other mechanical influences,
- the glue is sold ready-to-use.
The cost of this composition is from 150 rubles per package of 50 g.
Also, similar properties are possessed by adhesives "General Purpos Permapoxy PERMATEX" (from 314 rubles for 25 ml) and Plastic Weld Permapoxy PERMATEX (from 320 rubles for 25 ml).
You can purchase epoxy adhesives at most hardware stores, as well as online.
Is it possible to close the crack with a more or less guaranteed result? And How?
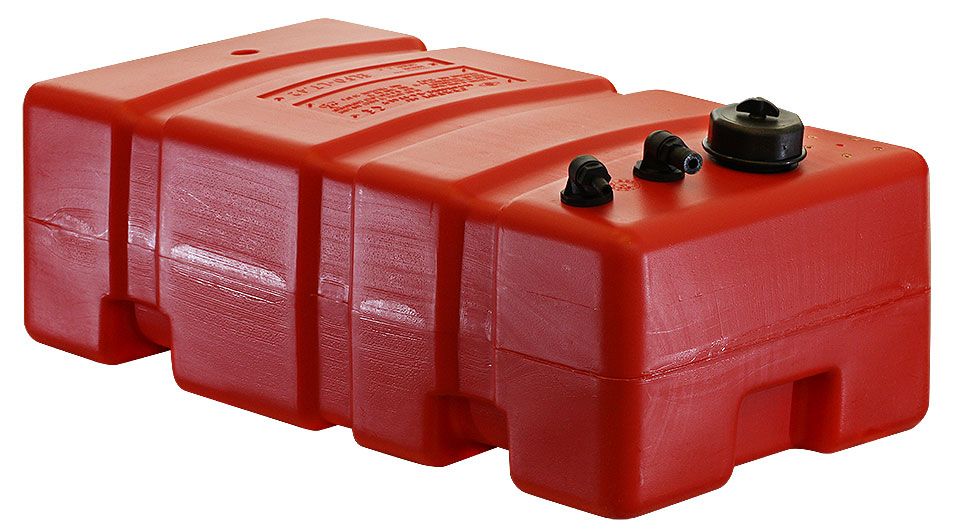
The tank is like that. In principle, the material is the same as that of the standard one, which is attached to the motor. It looks like polyethylene. Hard.
> Is it possible to close the crack with a more or less guaranteed result? And How?
It depends on where the crack is, if not on the threads and fittings, then easily with the help of a copper mesh and a powerful soldering iron and then all kinds of resins from epoxy to a 4-minute composition
Plastic repair mesh is sold in auto paint shops.
There is also epoxy with fiberglass.
There are a bunch of epoxy options.
Crack on the bottom. Thanks about the grid, I understand. But it's not a fact about epoxy - autoplastic is completely different, from this it will fly off 100%.
In general, little adheres to polyethylene, epoxy certainly does not.
Hi, try with a hairdryer,
I made amerikosovskie plastic drags for a snowball, plastic lends itself very well under a hairdryer. (after the repair, the season left)
Russian drags have a shitty plastic.
> Cracked bottom. Thanks about the grid, I understand. But epoxy is not a fact -
> autoplastic completely different, from this it will fly off 100%.
Either a hair dryer or a soldering iron with a mesh should help, and the resin is already a second time to maintain rigidity.
And so, yes, plastic, it is capricious, it does not always give in and does not always hold, but I assure you that I glued the pallet and I myself was shocked that it lasted three years ..
I bought two paired syringes.
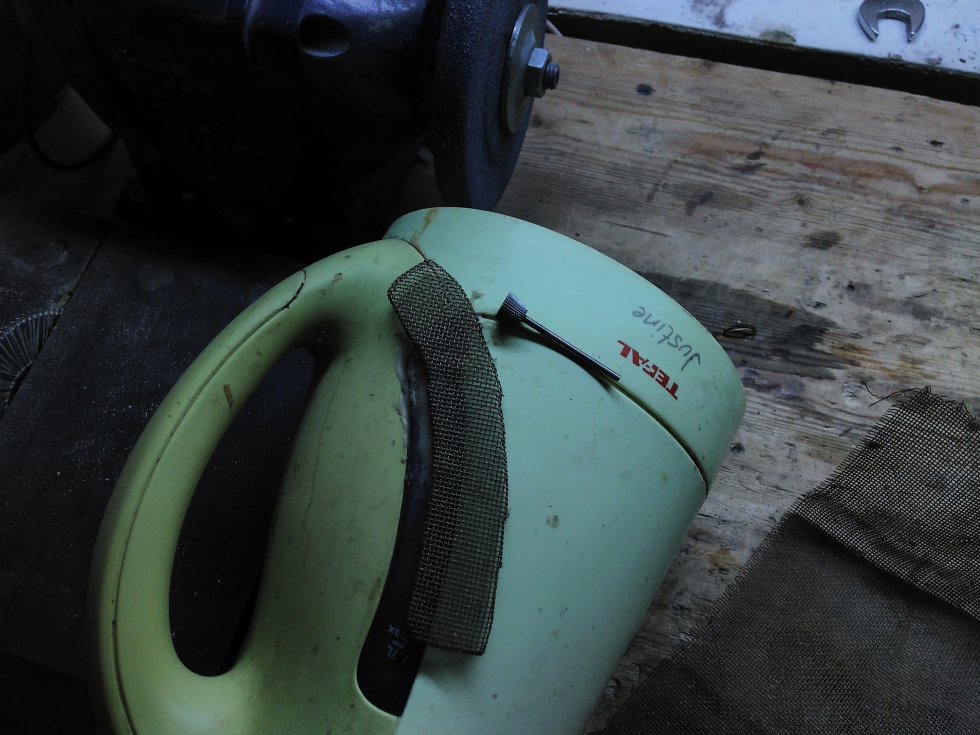
Right now I am repairing the kettle (crack on the "window")
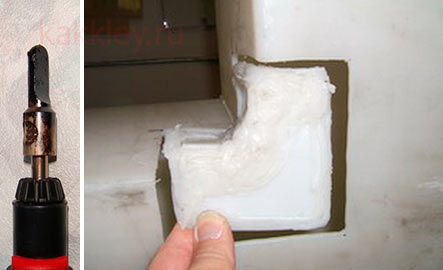
I will drown the mesh with a soldering iron. Then I dremel and with such a cutter (in the photo) I will crush shavings from the same plastic (there is a similar old kettle). Then mix with epoxy and cover everything on top.
(The case of the screwdriver did this - 3 years normal!)
.True, there is a polyethylene cistern, it looks like ... HZ, in short ..
Hmm, really. Did you try to throw away the kettle?
Or he himself returns to the garage))))))))
What do you! ..How can you ?! ..in the garage. ))
“Homeless people in the pharmacy serve funfirik boyars without a label ..
B. - “Wow. .. We should put it on the table! We will have ladies! ”” (C)
)))
Solder with a soldering iron, you can use a mesh. The Internet is full of videos and pictures about the repair of polypropylene products
> Hmm, too. Did you try to throw away the kettle?
>
> Or he himself returns to the garage))))))))
No epoxy, it's all hyunya, just solder and reinforce, add polyethylene overlay. And when soldering, both surfaces should be heated equally (part and additive).
Epoxy and polyethylene will live separately from each other, and even crumbling chips from the material of the product into epoxy is generally pointless.
And it is better to throw it away or adapt it under the sink, because this is fuel and the bottom of the tank in this case is not the best place for repairs.
I was repairing a cube water tank (such a white cube on a pallet and in a metal crate). The material is also something like polyethylene. Was pierced by a forklift forks at the very bottom. I took a blue lid from a 19 liter drinking water bottle, the material seemed similar, he heated up the damaged place and the lid itself. The lid became almost like plasticine soft, and sealed the crack. Then I walked around the edges with a soldering iron, it turned out that the lid was soldered into the cube material. It keeps everything normally, and the pressure on the patch is normal, a meter of water, and it can withstand deformations of the cube wall when you empty and fill the cube.
It seems to me that the title should be changed.
"Repair of a plastic tank - not possible"
There will be more whole boats and people.
No need to change, repair is possible. I bought two tanks at a flea market from one Novosibirsk "gentleman", both were broken. After some effort, it was still possible to brew!
For proper disposal, each plastic product is stamped with what type of plastic it is made of.You need a patch from the same material, you can cut the repair whips yourself. Apply a patch and boil the seam, warming up with a hairdryer. The main thing is to accurately observe the melting point. Internet to help.
Shl. The plastic of the gas tank is not the most convenient material, it is difficult to cook, but it does not accumulate electrostatics.
I propose to throw this zeteya tries. The sight of the burnt people is impressive.
DO NOT EXPERIMENT.
Sometime on the road or when you come to the boat: it smells of benzene and the tank is empty. (
If the toad crushes to give 3.5 for a new tank, buy an iron tank from the Soviet engine for. just like that you can find, wash, paint and be happy.
Or buy a stationary boiled from AMG for this money.
The question smoked. The scheme is something like this:
1) For a professional repair you need a special hair dryer + strips of "electrodes" from a strictly identical material. This is how plastic car tanks are repaired.
2) The capacity of my tank is 100L. At present it is 4000r.
If I’m lucky and don’t do it, then I’ll just wash the boat from the inside for these 4000. But that's if you're lucky.
3) The cost of a new tank is 12-13 thousand.
Perhaps it's true, well, it tries!
PS: it's a pity the washbasin won't work 🙂
Well, how have the tanks been soldered all their lives? poured with hot water and steamed, the water was drained and boiled.
> Well, how have the tanks been soldered all their lives? poured with hot water and steamed, water
> poured and boiled.
You can just steam with a hair dryer
Although I am against repairing the floor. Baka
Dim, he and his dreams are a lousy tank, he has no faith, they put the same as a temporary additional one, burst in the heat, and not full, they twisted the breather in the parking lot, though the sun was shining directly on him. ... After sealing the hole with a soldering iron, install it on the outside shower, its very place.
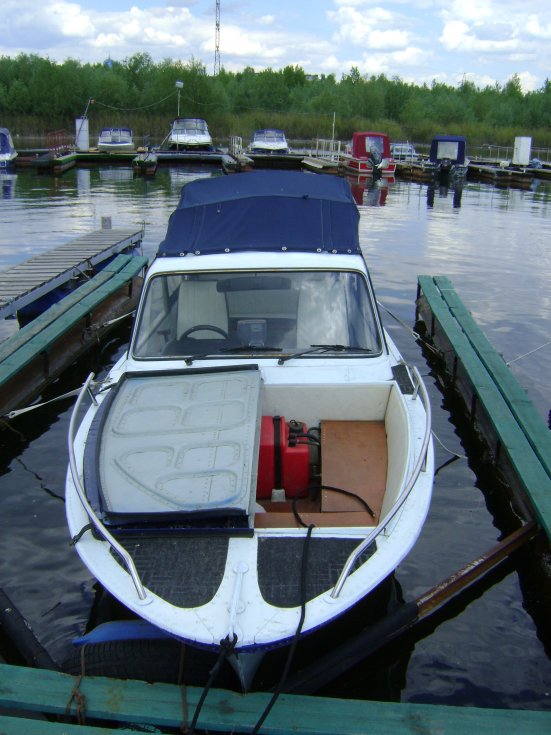
When restoring the photos, I found it with the flap folded down, as you asked, and with just such a tank, which burst there.
Go to an auto shop, ask for a two-component liquid plastic. You mix and slap the crack. Dries up within an hour. Holds with a bang any liquid, including gasoline. I accidentally hooked a plastic tank in my car with a jigsaw. A hole about 1 cm long was formed. I covered it up so that no one understood that there was a hole. For six months now and no problems. If you need a name, write to me in the mail, I'll take a look, unsubscribe.
And no nets, soldering irons, etc. are needed.
The decision has already been made - into the furnace! Oleg, it's a good idea about a shower 🙂
Not a single glue sticks to polyethylene, even a super-super-supernomolecular 8-component one. Heat welding only. If welded correctly, a homogeneous structure will result.
This is not glue. Liquid plastic fills the cavities of holes and cracks and remains there forever. Thus, it blocks the exit of liquid from the container. Here, you don't need to press and hold anything under the load, you just filled it in and let it stand for an hour and everything can be used. I didn’t believe well, and God is with you.
What's the point if there is no adhesion to the material? Well, will it fill, then there will be a microcrack, then there will be a spill and a fire? Who needs it?
Again. People who give advice on repairs that are known to be dangerous
objects, either stupid or bastards (see it or not it from him). Shl. brew is not a problem. Hair dryer and plastic. And who will guarantee that all this will not heat up in the sun, but will not jump out with fireworks?
You can brew it, kaneshna.
For example:
Link.
But I agree with the comrades - it's not worth it!
> Is it possible to close the crack with a more or less guaranteed result? And How?
there is such glue WEICON Easy-mix PE-PP
I glued a stainless steel flange to a tank like yours
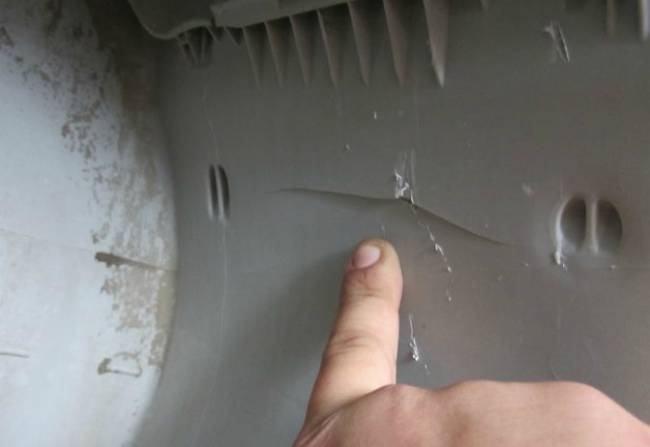
One of the reasons for damage to plastic water containers is installation irregularities. Uneven ground and sharp objects can lead to changes in the geometry of the tanks, cracks and leaks. Deformation can also be caused by mechanical influences, including shocks during operation.
Before gluing a plastic water tank, you need to know the composition of the material that was used to make it. Depending on the feedstock, the following types of polymers are distinguished:
- Polyethylene (PE-HD)... It is characterized by a combination of hardness and ductility, which simplifies the plastic processing process. Low pressure polyethylene is resistant to various organic and inorganic media and retains its parameters at temperatures from -50 .. + 80 ° C.
- Polypropylene (PP-H)... Differs in increased hardness, tensile strength and chemical resistance.
- Polyvinyl chloride (PVC-U)... Withstands temperatures in the range from 0 ... + 60 ° C, as well as exposure to oxidizing media and chemically aggressive substances. In addition, it has high strength and hardness values.
The type of polymer influences the choice of method by which damage and leaks of containers are repaired. Repair of plastic water tanks made of plastic with different compositions is performed according to certain technologies.
To repair plastic tanks, there should be no water in them.
The container is freed from liquid, and the damaged area is cleaned and degreased. Then the following operations are performed:
- heat up the plastic in the deformed area, melting it to a certain depth; • fill the crack with a heated rope or a piece of polymer;
- cool and clean the resulting seam from excess plastic.
The result obtained depends on the observance of the temperature regime and the skills of working with special equipment.
Recently I discovered that a crack of about 4 cm appeared in a plastic bucket at the very bottom.
Is it possible to somehow close it up so that the water does not leak?
Try to glue it with cold welding. If it holds water in the radiator of the car, then it will probably keep the plastic. But I tried to melt it somehow, nothing happens, some kind of plastic is now produced incorrectly))) Excuse me, previous authors.
If your plastic bucket bursts, you can glue or weld it, but this is all only for a while, since the drying out of the plastic is irreversible.
An easy way to resuscitate a plastic bucket: Try using plastic solvent as your glue. To do this, drop a few drops of solvent on both edges of the crack. The top layer of plastic will soften at this point. You will need to join and press firmly on both edges. After about a day, the bucket can be used.
It is important to select a solvent suitable for the type of plastic. From solvents I know toluene for polystyrene, dichloroethane for plexiglass, tetrahydorofuran for vinyl plastic. Pre-check on the rim of the bucket to see if this chemical will dissolve your plastic.
I once repaired a hole, and a rather big one, in a plastic bucket using an old soldering iron. I picked up a piece of plastic that was suitable in consistency and quality, and heated it with a soldering iron, distributed it over the hole, starting from the edges, gradually allowing it to solidify. The only problem is that the "overheated" plastic in this way becomes more brittle. But that was enough for a while.
I think that if this is just a crack that has not yet parted and turned into a hole, you can simply run a soldering iron along the crack from the inside and outside. This should be enough to ensure strength, restore tightness)
I myself did not try to glue the plastic buckets, but I saw how it is done. We take an ordinary plastic bag and use a soldering iron to seal the crack with this, smearing it. You can do this with a piece of plastic using a soldering iron again. At the dacha, they watered with such a bucket: the water did not flow.
Insert a plastic bag into the bucket.
The small size of the crack will prevent water from flowing through the bag. If the bucket is stationary, then this is the best method in terms of simplicity and implementation. This is how I repaired a plastic barrel.Instillation with molten polyethylene begins to occur upon deformation.
.already in cold-welding-to-scotch times, but when the plastic bucket had already shown a crack in the bottom, my dad took a piece of rubber from the car camera (well, that, hey, no, no), respectively. the size of a piece of sheet aluminum (var. - duralumin, brass) with a thickness of 1-2mm and made acc. a patch that completely covered the crack, drilled / punched holes around the perimeter for aluminum rivets, made right there in a vice from an electric wire 6-10_kv.mm, applied and riveted.
Dad died in November 2004 (Kingdom of Heaven). the bucket is still according to his brother at the dacha. functions. Soon it will be 14 years old as Dad died, and the "patch" - all 20 for sure.
And here I myself am sitting far from my parental house with a cracked bottom of a plastic bucket and looking for a recipe in the grid. grandfather caught a goldfish. yeah, but the grandmother's trough, damn it, cracked.
I'll throw it out, fuck him, huh? or for "mushrooming" will fit? perhaps.
happiness and health to all kind people and good luck!
So, how to fix a hole, a crack in a plastic bucket? I don’t know how about soldering plastic, small holes in a plastic bucket can still be somehow soldered, but large cracks are unlikely to be done well. There are other options for how to close up a crack in a plastic bucket, I myself do not do such nonsense, so I read it on the forum. To do this, you need to take some extra piece of plastic, then put it in some kind of dish (just not in plastic), pour acetone, close the lid and wait a little until the piece of plastic softens. Then add the Moment glue and quickly repair everything.
And also, in specialty stores, liquid plastic is sold in tubes, you can also close up a crack in a plastic bucket or whatever you have with it.
Some advise to apply epoxy glue to the degreased surface and glass fabric on top, and for reliability it is better to do it twice.
Plastic is a material that can be chemically neutral. And this characteristic allows the material to be used in almost any area of human life. So, most of the containers used for collecting and storing water are made of plastic today. The disadvantage of this material is its weak mechanical strength. On impact, a crack appears.
The easiest way out of the situation is to buy a plastic water barrel. However, until the crack has spread over the entire plane of the container with water, you can try to repair it yourself. There are several options. If the repairs are unsuccessful, the purchase option will remain as the only way out of the situation.
The fact is that it is almost impossible to solder the plastic by itself. From exposure to temperature, it changes its shape, which leads to the emergence of new holes. However, a reinforced seam will provide an opportunity to repair the crack.
It is recommended to use the following types of meshes for repairs:
- made of stainless steel;
- made of copper;
- made of aluminum.
The point is that the metal, even when exposed to water, does not have the ability to oxidize. The soldering procedure is as follows. The secret of success lies in immersing the mesh in the plastic exactly by the amount of its thickness.
To fix the net in the installed position, it must be quickly cooled. Surplus heat is taken away by means of a heat exchanger. An ordinary metal knife can act as the latter.
However, statistics show that in order to use this method, the owner of the damaged container must have some experience. Otherwise, a positive repair result is unattainable.
Almost all epoxy adhesives are two-component. Moreover, epoxy is absolutely neutral to moisture. This glue variant is ideal for container repairs.
It is necessary to prepare the resin in accordance with the manufacturer's recommendations (they may differ depending on the brand) and seal the resulting gap in the plastic container.
It will be possible to start operation in two hours (assuming normal conditions - pressure and temperature).
The video demonstrates the procedure for soldering a plastic bucket (the technology can be applied to the repair of large-capacity plastic containers):
Any vehicle wears out over time. This applies to all elements of the car, including the car tank. In particular, used cars may have a small crack or even a hole in the tank.
Of course, such a malfunction should by no means be ignored, since, firstly, it is very dangerous for the life of the driver and his passengers, and secondly, this is a very costly business (fuel will constantly flow out through the hole).
In fact, repairing the tank with your own hands is within the power of any car owner. There are several ways by which you can repair the hole in the tank yourself. To do this, he needs patience and a number of the following things: soap, solvent, cold welding, epoxy glue, glass cloth, soldering iron and solder, as well as a welding machine with electrodes.
1. If the hole is small, you can use ordinary laundry soap to seal the hole in the tank with your own hands. You just need to rub the entire surface of the tank in the area of the defect with laundry soap.
2. To use the following method, first it is imperative to stop the flow of fuel from the gas tank. Only then can you try to repair the crack in the tank using cold welding. In the event that it is not possible to remove the gas tank itself from the car, you can again use laundry soap and rub the defect with it. The fuel flow will be suspended for a while. Next, you should remove most of the soap with acetone and degrease the surface. After that, it is necessary to carefully sand the surface of the tank near the crack with sandpaper. This is done to improve grip. Now you can take cold welding and seal the hole, while capturing the edges a couple of centimeters.
3. Fiberglass is needed to improve the insulation of the gas tank. Before gluing the surface of the tank with this material, it should be soaked in epoxy glue. Fiberglass is applied exclusively to dried cold welding. This usually takes about fifteen minutes. Experts recommend gluing 3-4 layers of fiberglass to achieve the best effect.
4. If the hole is large enough, it must be soldered. Before you start soldering, you need to completely stop the flow of gasoline and, if possible, drain it as much as possible. After that, the surface around the defect is treated with sandpaper and degreased with acetone. Next, you should fill the hole with tin and a suitable sheet of tin, treated with emery. Now you can solder the hole. Tin the sealed place additionally with tin.
5. To ensure greater reliability, experts recommend to additionally weld a hole in the gas tank, having previously completely expelled fuel vapors from the unit. To do this, you need to put it on the exhaust pipe and thoroughly gas it. Now you can weld the place of the hole.
Buckets, basins, barrels and other household equipment are made of plastic. This material is practical, easy to use, but short-lived.
Any fall or mechanical impact can lead to cracks. And a container that allows water to pass through becomes useless. But it is quite possible to glue the plastic water container so that it will serve properly for some time.
It is quite possible to seal a plastic barrel at home.Let's consider two options for how you can eliminate gaps in plastic drums and other containers.
For work, you will need the following materials and tools:
- stainless steel mesh (you can take aluminum, copper),
- knife,
- scissors,
- soldering iron 100 watt.
- Cut off a piece of mesh with scissors.
- We fix the mesh at the site of damage to the depth of the mesh thickness.
- We align it along the seam, moving along the entire plane. At the same time, in parallel, we solder the mesh with a soldering iron, hold the free edge with a knife, immediately after soldering, cool it with a heat exchanger (knife) - this is an important rule so that the mesh does not bristle.
- Using this method, we introduce the entire mesh into the seam.
- At the end of the work, the seam is completely sealed and reinforced, which gives it strength.
- We repeat the procedure on the back of the container.
VIDEO INSTRUCTION
If you have to repair a container, the water in which is under pressure, you can resort to another method.
- flexible plastic patch,
- construction hair dryer,
- protective gloves.
- We wipe the damaged area, remove dirt.
- We start heating with a hair dryer at low power, so as not to burn a hole, a place with a defect.
- Heat the patch on the side that will adjoin the crack with a hairdryer. We are already heating at a higher power.
- We apply a patch to the place of damage and continue to warm it up with a hairdryer, adding more power. Wear protective gloves on your hands to avoid scalding. It is important not to overheat the surface.
- Smooth the patch with your fingers and wait for it to cool. We fill in water and check the quality of work.
VIDEO ON TOPIC
If the defect in the plastic container is small, you can use epoxy glue. Two-component epoxy adhesive can effectively solve the problem of a leaky plastic tank.
Differs in increased resistance to moisture and chemicals, polymerizes in just 1 hour, non-flammable.
It is necessary to cut off the required amount of glue, knead with clean hands until a homogeneous mass is obtained, mold a cone from it and insert it into the opening of the tank. Fix securely for a few minutes.
Then you need to wait 2 hours, after which the container can be used.
The epoxy clay-plasticine Contact has proven itself well. Can be used directly under water, resistant to moisture.
- restores the shape of products, as well as hermetically fills in voids,
- not afraid of not only water, but also oils, solvents,
- the repaired tank can be used at temperatures from -40C to + 150C,
- within 3-5 minutes, the glue lends itself to correction, and after an hour it can be cleaned, grinded and subjected to other mechanical influences,
- the glue is sold ready-to-use.
The cost of this composition is from 150 rubles per package of 50 g.
Also, adhesives "General Purpos Permapoxy PERMATEX" (from 314 rubles for 25 ml) and "Plastic Weld Permapoxy PERMATEX" (from 320 rubles for 25 ml) have similar properties.
You can purchase epoxy adhesives at most hardware stores, as well as online.
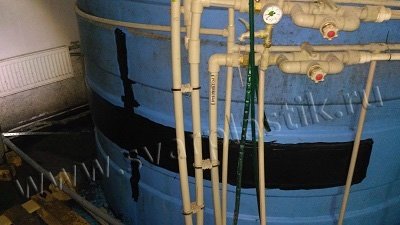
Our company is engaged in the provision of services not only for manufacturing, but also for repair of plastic containers any purpose.
For this, we use a powerful material and technical base, which allows us to eliminate faults of any level of complexity in the shortest possible time.
Professional repair of plastic containers of any manufacturer
However, what to do if required repair of plastic containers from another manufacturer?
Our workshop employs a staff of experienced professionals with more than 5 years of professional experience.
The craftsmen possess all the necessary knowledge and skills, as well as the nuances of repair for any plastic product.
Repair of plastic containers carried out in the shortest possible time.
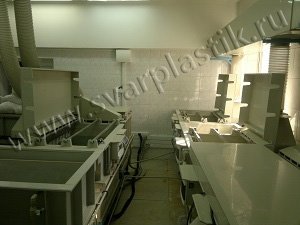
Such a solution allows not only to produce high-quality repair, but also return the product to its attractive appearance.
If the plastic has cracked, a hole has formed or the surface has burst, we can quickly fix everything.
The range of values for its normal functioning ranges from -15 to +120 degrees Celsius.
That is why you cannot use cold welding or any other adhesives that do not interact well with chemical elements in working with it.
Cooperation with us brings undoubted benefits!
Our experts will be happy to advise you online. To get answers to all your questions, please contact us at the number indicated on the website.
Before contacting, it is recommended to carefully study the list of services provided, as well as familiarize yourself with the detailed photos of our work.
Repair of a plastic container can be made in relation to any plastic product, including:
- plastic tank from 5 liters;
- containers of blue, green, white, black and gray colors;
- gas tank;
- large-capacity tanks (up to 50 cubic meters);
- diesel tanks;
- septic products;
- pipes;
- cellars.
This is especially beneficial in the financial aspect, because repairs require much less investment than buying a new product.
Plastic is both strong and brittle material, and if handled improperly, its breakage is inevitable.
With us you get not only professional and prompt repair, but also attractive prices that we make loyal and affordable for you. Call us and get answers to all your questions right now!
daily from 9-00 to 21-00 tel: +7 (499) 390-80-78; +7 925 299-10-39 mail:
RemPlast is a center for professional repair and welding of plastic products in the city of Moscow, the Moscow region and regions.
Repair of a plastic tank can be divided into 2 types: extrusion and bar (soldering with a hot air gun). The rest of the repair methods are ineffective (glue, sealant, foam, etc.).
Soldering gasoline tanks (gas tank) has its own characteristics. The gas tank from special equipment must be removed from the car before repairing. Some gas tanks can be repaired directly on the car, depending on the nature of the damage and the location of the fuel leak.


During restoration, polymer containers for water do not require special preparation, they must be drained, the place of damage must be protected from the ingress of liquid and cleaned of dirt deposits (if any).
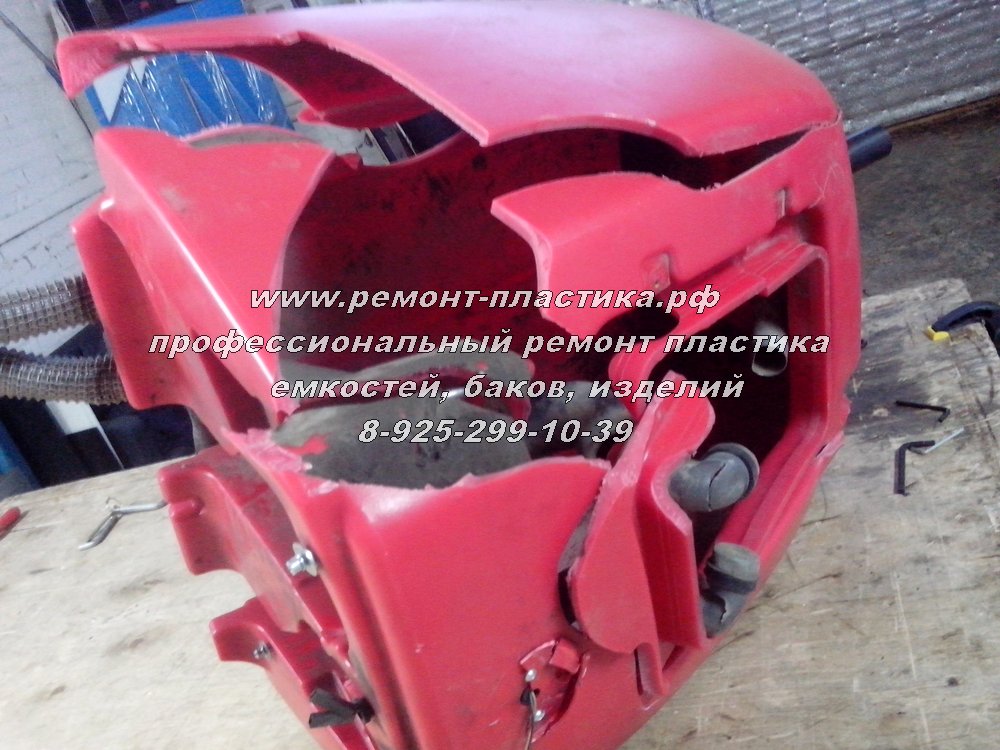
Extrusion is performed using specialized equipment. This method is used to repair loaded products (gas tanks of tractors, trucks and cars, containers with a volume of over 0.5 cubic meters and containers working under pressure). Products after welding do not lose their operational and strength properties - the service life after repair is unlimited.
Welding with heated air (using a hot air gun and a plastic additive) is a less effective method, usually not heavily loaded plastic parts are welded with it. The service life after soldering is from 1 month (depending on the load). This method, due to overheating of the repaired place, is not as durable as the extrusion method, but its unconditional advantage is its lower cost.
Professional restoration of a plastic tank is carried out as soon as possible, if necessary, with the departure of a welding specialist to the work site. Water tanks, fuel tanks, plastic expansion tanks, vertical tanks, storage tanks, large plastic containers, as well as containers for reagents and other chemical compounds are subject to restoration.
Most modern cars, tractors, construction equipment are supplied with plastic fuel tanks, which for a number of reasons break through, crack and break. The cost of gas tanks is quite high, plus the order and delivery of the product can take a long time, the cost of work allows you to avoid high costs and restore a damaged gas tank with minimal losses. Soldering the fuel tanks takes about an hour of your time. An example of welding a fuel tank is the repair of the JCB excavator's gas tank shown in the first photo, the tank was pierced with iron reinforcement, after the restoration of the properties and shape of the gas tank remained the same, the equipment works smoothly.
To weld a gas tank (fuel tank), the customer must provide certain conditions - the tank must be drained, dried from fuel (open the neck and other outlets for several hours, during transportation, keep it open for gasoline or diesel vapors to escape). We solder gas tanks of trucks and cars, snowmobiles, tractors, trucks, buses, truck cranes and other special equipment.
Independent restoration of polyethylene fuel tanks is impossible, if you are looking for something to seal the plastic container - do not try, there is simply no glue for polyethylene and polypropylene, and manufacturers claiming that glue or sealant can seal a crack in these materials are cunning. Polyethylene or polypropylene are repaired only by welding, if a guarantee and tightness of fuel tanks is needed, then it can be achieved exclusively by extrusion welding. There are no special conditions for soldering a plastic water tank, it must be dry. You are wondering - how to seal the plastic tank? - do not hurry! Due to a number of their properties, polyethylene and polypropylene containers do not stick together, sealants, glue and epoxy resins will not help you in solving this problem, and the deterioration of the surface quality due to non-professional repairs can increase the cost of subsequent work on restoring the product (see photo 3).
| Video (click to play). |
The plastic fuel tank is repaired by polymer welding using a welding extruder. Modern plastic containers are made from high quality polymer raw materials. Welding technology allows for the repair of tanks and gas tanks made of almost all types of raw materials. Polyethylene is usually used as the basis for polymer containers; it is known for its resistance to fuels and chemicals, as well as to shock and external loads.Polyethylene packaging is distinguished by its durability in use, storage of food and drinking water in a polymer container is safe for the human body, this is due to the fact that polyethylene does not emit toxic substances and practically does not decompose. Due to the unique chemical and mechanical properties of polyethylene and polypropylene, many manufacturers of agricultural, construction and special equipment have accepted polymer capacitive equipment for re-equipment instead of outdated metal equipment.

