In detail: do-it-yourself repair of the split system control board from a real master for the site my.housecope.com.
The summer threatening intolerable heat was imperceptibly approaching, but I remained in complete calm, contentedly glancing at the air conditioner hanging over my head ... Nothing foreshadowed trouble. On another hot day, I reached for the control panel, pressed the “Power” button and ... the air conditioner did not turn on.
The first shock was replaced by a thought of hope - something with the wiring. Having made sure of the presence of voltage in the network and the operability of the power supply, I sadly realized that I was deeply in trouble.
The repair instructions below are intended for the desperate minds, who are no strangers to the thrill of adventure and the accompanying spirit of adventurism.
The reader is already aware that I bought my old Toshiba from my hands, and then successfully disassembled and cleaned it. Having estimated all the delights of repairs in the service - paying for diagnostics / calling the masters at home / depressurizing the circuit - I gave up on these dubious pleasures and decided to figure out the problem myself, having enlisted the support of the "Old Brand" and weak knowledge of radio physics for the fifth grade.
Sweating (heat after all), I removed the front panel of the indoor unit (instructions for disassembly here).
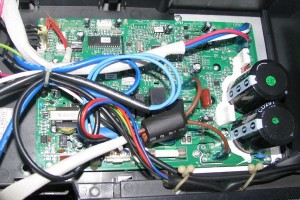
On the inside, the email is well located. scheme.
First of all, I decided to check the fuses, there are two of them.
To get to the fuses, we remove the control board, and at the same time the casing with the transformer.
To check, we use a regular tester for 200 rubles. The first fuse rings, and visually everything is in order with it.
And here is the thermal fuse.
When ringing, it shows a break. Bingo!
I short-circuit the hot one, start the system - everything works! The cold is coming, the breeze is blowing. But the happiness did not last long - after 30 minutes of test operation, the condo dies again. Carefully studying the diagram, I stumble upon the thermal relay of the fan motor of the indoor unit.
| Video (click to play). |
I give the air conditioner two hours to rest and try again. It turns on, but after 30 minutes of work, it goes out again.
The preliminary diagnosis is motor overheating. To test the hypothesis, I decide to experiment - I remove the motor and connect everything live, right on the table.
The motor was taped to the masking tape so that it would not fly off during operation. The launch was successful, but at the fifteenth minute, the wildest heating of the stator housing began to be observed. I did not wait for the thermal relay to work and turned off the circuit.
Disassembling the motor yielded nothing.
The rotor is blown out, and the stator, together with the control board, is thoroughly filled with either resin or ceramics. After hanging out on specialized forums, I found out that my diagnosis is 99% - interturn short circuit of the stator winding. Treatment is a complete replacement of the motor.
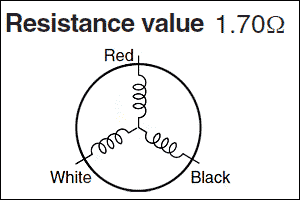
What should I do? Printed out the performance characteristics of the motor,
and went like a buffoon to the Kaliningrad service centers in search of a similar engine, because it is no longer realistic to find or order the original for my firewood.
Kaliningrad servicemen, when they saw me, turned their fingers to their temples as one and predicted to replace the entire outdoor unit. At the same time, the estimated cost of the repair work significantly exceeded the price of the air conditioner. Finally, having worn out my shoes, in some shack I managed to get a motor for a penny.
The device turned out to be from Kentatsu, with a long pulley, a slightly different geometry and, worst of all, with increased power and capacity characteristics.
Having connected a new motor to the control board, I ran into an unpleasant problem - the shaft was spinning, but very, very slowly. On the face of the increased power of the engine, clearly not consistent with my board.In the heat of the moment I wanted to evaporate the working container,
and replace it with 1.2 mF, but, having reasoned soberly, came to the conclusion that this will not change the weather. Cut off the signal wires from the Hall sensor at random
leaving power on the motor. The engine whined like a vacuum cleaner, pumping out a monstrous speed of rotation. My joy knew no bounds, but ... after two minutes of operation, the control board went into an error, having not received a signal from the Hall sensor. Plugged the contact group into place - continuous operation, but low shaft rotation speed.
After a little thought, I decided to install the motor in the indoor unit and try to start it under load (with a fan).
To begin with, I cut the rubber pads.
Now a neat cut for the fastening bolt.
As a result, the blade was securely fixed, and the engine became like a glove in the bosom.
I decided to leave the control board outside, connecting the motor power and the Hall sensor to it.
As a result, the engine, loaded with the blade, barely spun and did not create an air flow. The turnover on the signal from the remote control did not change either. When Hall was turned off, the motor picked up high revs, but after two minutes the board gave an error.
I almost went crazy with impotent rage when I discovered another problem - at low speeds, the compressor relay of the outdoor unit starts, but the radiator blower does not work, and again the error. Having consumed half of the Old Brand bottle, I decided to disassemble the new motor.
Removing the latches, took out the rotor.
Prying the back plug with a thin screwdriver, we managed to get to the speed control board.
And here is the main suspect - the Hall sensor!
Having finished the second half of the "Old Mark", I made a difficult decision for myself to crush the body of my native engine, get the Hall out of there and solder it into a new board. The operation to open the patient took place under the dull blows of a hammer - the ceramic shell turned out to be extremely durable. It was only by a miracle that I didn’t crumble the control board and the microcircuit.
Then I soldered the element into the board,
The motor began to spin perfectly, but it still did not change the rotational speed and, most importantly, did not start the external cooling fan. There was no limit to my disappointment. I was sad, the heat in the street grew stronger.
Finally, the brain came up with an idea - what if the indoor unit is driven in fan mode, and the outdoor unit is started directly from the outlet. And do not care about the inconvenience - the main thing is to keep it cool.
First of all, I removed the case of the outdoor unit.
On the back of the casing is the coveted wiring diagram.
Two minutes was enough to understand - the ground is supplied to the 1.4 connectors, the 2 phase to the connector.
Having found the phase in the socket with an electric screwdriver, I quickly connected the contact group.
After plugging the plug into the outlet, the compressor with the fan started up as pretty, starting to drive the refrigerant around the circuit. I immediately started the indoor unit in the “FAN ONLY” mode, because the evaporator began to freeze instantly. The long-awaited coolness poured from the blades.
And now the neat assembly and ...
And in the end we got a prefabricated semiautomatic device, which is not very convenient to use, but given the cheap costs, this harvester cools perfectly, and I don't need more.
In the autumn, at the end of the season, when the failed air conditioners will be like shit at the bathhouse, I will find myself a suitable engine and everything will fall into place.
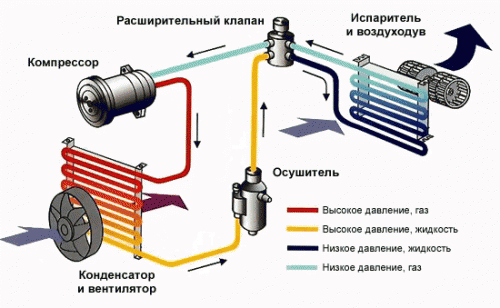
As you can see, the device of the household air conditioner is extremely simple and differs little from the refrigerator of the NO FROST system. Two fans, compressor and refrigerant circuit.
Therefore, having the simplest knowledge in the field of radiophysics, a meager set of tools and a bit of ingenuity, you can eliminate or circumvent some of the problems of a split system (for example, such as repairing an air conditioner board) with your own modest efforts ...
The air conditioner control board is one of the main elements that is responsible for the operation of all systems: starting the air conditioner, processing the information received from all kinds of sensors and the control panel, and sending signals to the corresponding systems and devices.
A common problem that some air conditioner owners face is a faulty relay on the control board. In this case, after turning on the air conditioner in the network, the fan of the indoor or outdoor unit immediately starts working, regardless of whether the air conditioner was turned on from the remote control or not. In this case, the relay must be replaced.
It also happens that after starting the air conditioner from the remote control, the fan of the indoor unit refuses to work - this means that the solid-state switch of the control board has failed, which must be replaced with a new one.
In inexpensive air conditioners of little-known manufacturers, in order to save money, sometimes control boards with poor soldering quality come across - this means that electronic control elements can have poor contact with the printed circuit board, as a result - irregular malfunctions and errors in the operation of the air conditioner. Moreover, work errors do not appear often and for no particular reason. In such situations, the board must be re-soldered.
Repair of the control board consists of identifying and replacing failed electronic elements - resistances, capacitors, relays, etc. In some cases, work is carried out to restore burned-out tracks of the printed circuit board or power elements of the control board. However, there are more severe cases when the central processor of the air conditioning control board fails.
Service centers do not repair and restore control boards with a faulty processor, and recommend completely replacing the board, which is quite expensive. However, our service center "RemonTechnik" is able to cope even with such a task. Professional and experienced craftsmen replace the central processor with its flashing. This avoids costly replacement of the entire control board and saves you money.
- Experienced and qualified craftsmen are able to identify all faults and eliminate them
- The workshops of the "RemonTechnik" service center have all the necessary diagnostic equipment, thanks to which the masters are able to quickly identify all faulty elements and replace them
- The presence of our own warehouse of electronic elements, which allows you to quickly repair the air conditioner control board.
- During the repair process, only original high-quality electronic elements are used, which, after replacement, are able to work properly for a long period of time.
- Service specialists repair control boards, regardless of the brand and model of the air conditioner - they will cope with any task!
Contact the "RemonTechnik" service center and you will be convinced of the quality of the repair and the high qualifications of our personnel.
Repair pulse control boards Mitsubishi-Heavy air conditioners are not so simple, since the control signal of the indoor-outdoor unit is transmitted not through 3 wires as on conventional air conditioners, but only through one.
On the terminal block, the control signal corresponds to number 3. The boards of both the indoor and outdoor units of the Mitsubishi Heavy household air conditioners are practically the same in the passage and generation of the control signal, i.e. interchangeable. Power supply for control boards - using standard switching power supply Fig. 1
Impulse Control Boards | Repair
Almost all components of this power supply circuit can be easily found on the printed circuit board of any inverter air conditioner or split system with a switching power supply. We check similar details of your board for integrity.
How this is done is described below using the example of a Mitsubishi air conditioner.
RUN light is on, TIMER light is flashing six (6) times:
- On the display of the wired remote control, the error number is E5
- Signal transmission error between indoor and outdoor units of the air conditioner;
- Causes of the error - Defect in the power supply circuit, breakage of the signal wire,
- defect in the board of the indoor or outdoor unit;
The conditions under which such a malfunction occurs, 6 times blinking is an error in signal transmission, i.e. between terminals 2 and 3 incorrect shaping of a signal, an impulse.
Potential measurement U = - 7 to - 14 V
No signal between the boards of the indoor and the control board of the outdoor unit of the air conditioner for 10 seconds. or more.How can I check this? How to understand whether a signal is being formed or not?
It's very simple: there should be a non-constant potential U = - 7 to -14 volts between Terminals 2 and 3, it is best and most clearly measured on an oscilloscope, setting the voltage value to 15 volts DC.
Air conditioner outdoor unit PCB
On the screen (upper part) you will see the formation of a signal by the indoor unit of the air conditioner, the lower part of the oscillogram - the response signal of the outdoor unit of the air conditioner.
As an example from practice: After winter, the Mitsubishi air conditioner is started, and it blinks like a Christmas tree. What is, what is the problem? After all, the machine was turned off, the split system was de-energized all winter.
-
Yes, this is so, but very few people know that not only the phase must be de-energized at air conditioners, but also zero (neutral) must also be broken, since the air conditioning control system goes through O, and it also has a potential in relation to the “ground” ...
For example: welding is underway, and ... as we usually do hard workers, one wire per phase, the other to the battery, everything can be welded. It is possible, only this is a test of a not completely disconnected device of a split system) for a “breakdown”.
A lightning strike, a strong wind shorted the wires on the poles, a tree fell on the wires of the external wiring ... The result was a broken control circuit on the boards of the external / internal blocks of the split system. Impulse control boards: we repair together, do it yourself
Board repair, check and replacement of a zener diode
Faulty Zener diode C39 (39 volts) for 1 W:
- external block; the designation on the ZD1 board is a zener diode - C39 resistance is 540 Ohm, when the resistance is measured back, it does not "ring", it is checked like a regular diode:
- interior; the designation of the zener diode on the ZD2 board, respectively, the resistance is 528 Ohm
If the resistance values zener diode are very different from the data, then we change the zener diode to another. In my case, I did not find a one-watt zener diode at 39 V, I put an analogue at 36 V (C36). The outdoor unit board is working.
Inverter outdoor PCB
Variants of a 470 V varistor breakdown are possible (in the diagram it is in a green protective plastic film), but then the air conditioner will not react at all to on. off We exclude this case in case of control circuit malfunctions, a faulty diode bridge will not give us a voltage of -14V.
The microcircuit is responsible for the formation of the signal, both on the internal and on the external unit, we check with an oscilloscope the passage of the signal sequentially from the power supply circuit of the control system to the microassembly. Perhaps the semistor is faulty, we do not exclude this option, but this is a completely different repair complexity.
Repair of inverter Mitsubishi-Heavy series air conditioners service manual, cervis_manual_GZ:
- SRK / SRC 20/25/35/50 ZJP -S;
- HotRodS SRC-20/25/35 ZJX-S;
- SRK / SRC SRC-25/35 QA-S
- SRK / SRC 20/25/35/50 ZJP -S;
- SRK / SRC 20/25/35/50/60 ZJX-S.
Arrangement of parts on the PCB of the inverter
Repair of printed inverter series of air conditioners is similar. In fig. the most vulnerable add-on components of the board are indicated. These are all the same zener diodes ZD1 and ZD2, a capacitor controlled by a diode d1.
All of the listed elements of the board are responsible for powering the microcircuit, which generates a control signal. By analogy with simple air conditioners, we carry out diagnostics of the board.
Repair of the inverter itself, - the power section of the Mitsubishi inverter-type air conditioner, see here tyk.
But, if the result of repairing the switching power supply of the air conditioner is negative, do not despair and do not give up. We always have a fast and objective search engine Yandex. As a rule, when we find ourselves in a difficult situation with the search, we choose. And what did we find quickly? - What you need:
Oh, found the site my.housecope.com/wp-content/uploads/ext/1193 On this site, the following text is given: Switching power supplies are used both on simple air conditioners and on split systems with constant performance, inverter type. At present, air conditioners are high-tech devices with complex control logic and many functions, a self-diagnosis system and an inverter compressor control.
All this is controlled by a microprocessor with a piping circuit, which requires a low voltage power supply.
Two options are used - circuits with a step-down mains transformer and pulse voltage converters. The main difference between switching power supplies is frequency conversion from 50 Hz to approximately 25-150 kHz, which significantly reduces the size of the transformer.
The main advantage of the transformer power supply circuit is the simplicity of the circuit, and the disadvantage is large dimensions and weight. Impulse control boards: we repair together, do it yourself
The advantages of a switching power supply are small dimensions, the ability to keep the board height low, and more accurate maintenance of the output voltage. Disadvantages - a larger number of parts, the presence of active components and, accordingly, the need to cool them, interference during operation, failure due to overvoltage, high cost of repair in case of breakdown.
The developers have eliminated or minimized most of the shortcomings of switching power supplies, and now they are modern solutions for powering electronic devices and are used in most air conditioning boards, transformers are used only in low-budget models and then less and less often.
a source:
Switching power supply circuits. Repairing pulse-controlled boards is not so easy, they are usually thrown away and replaced right away. But we will try and ... repair
Climate technology plays an important role in creating a comfortable home environment. Repair of air conditioners in case of breakdown is easy to do with your own hands, since these devices are quite simple to operate and work.
In household ventilation systems, a decrease in work efficiency is immediately felt. If some signals about the impending breakdown of home air conditioners may not be immediately noticed, then the deterioration in performance is noticeable immediately (especially in the hot season). The main types of air conditioner malfunction:
Separately, it must be said about the breakdown of floor-standing household air conditioners. Correct installation of climatic technology plays a very important role. If the installation was not carried out on a flat surface, then the drains will clog first, and then the radiator and engine will fail. The air conditioner will hum during operation and accumulate condensate, after which it will be almost impossible to repair it.
Video: how the air conditioner works
The easiest way is to clean and urgently repair the air conditioner radiator at home. Externally, the split-system radiator resembles a very fine mesh, which is located under the front panel of the device. Due to the fact that it is constantly exposed to dusty air, a large amount of debris from the outside accumulates on the mesh, which gets into your home during work. In addition, the equipment also builds up dust during downtime (winter and autumn), which also causes dust to appear on the radiator.
To be on your own clean and repair the air conditioner, need to:
- Remove the panel from the device. It is attached to threaded connections, they are removed with a screwdriver or wrench (depending on the brand). In some window air conditioners (Mitsubishi, Hitachi or Daikin), the panel is also secured with hidden locks;
Photo - cleaning the split system
- Under it are the first air filters, through which the air flow passes both from the street and from the house. Therefore, you need to remove and soak in warm water and soap for 30 minutes. During this time, fatty deposits and dust will peel off from them, and pathogenic bacteria will also be destroyed;
- A rotary fan is located under them. It is produced in the form of a roller and must be cleaned, since it is this part that helps to distill air. Its maintenance consists in wiping the blades with a damp cloth soaked in soapy water;
- Further, you will find yourself in the filters through which the air flow enters from the outer compartments into the inner ones. These parts are cleaned with a roller dipped in water and soap, you can buy a special tool or use a rag wound around a long tube.
Most often, warranty repair does not imply cleaning the radiators of air conditioners, so you will have to carry out the work yourself. It is advisable to repeat the process every six months for the best effect.
Instructions on how to clean the heat exchanger of a Panasonic (Panasonic), Samsung (Samsung), VAO and others air conditioner:
- It is necessary to remove the front panel and remove all parts of the external compartment. You need to get into the internal one, the heat exchanger is located exactly there;
- There are several ways to clean. For example, many even professional craftsmen simply blow through the radiator with a vacuum cleaner. If you do not have this device, then you can walk over it with a soft brush;
- To test its performance, dip the part in a bowl of soapy water. If bubbles come from somewhere, then the radiator needs to be soldered.
With rare use of the conditioner, or, on the contrary, after very intensive use, many owners notice that water drips from under the front panel. The problem is clogged drainage pipes... What to do:
- Repair of air conditioner hoses is carried out only in the warm season, in extreme cases, at a positive temperature, otherwise it will be impractical;
- If the problem was noticed after the winter season, then first you need to carefully warm up the branch with warm water and a rag - probably an ice plug has formed in the pipe;
- If the malfunction was discovered in the middle of the working season, then the pipe must be blown out. For this, special compressors can be used, which are output to the internal outlet of the tube or liquid. Read the instructions first to see if cleaning solutions can be used in your conditioner.
But the most dangerous problem that requires urgent repair and can affect the operation of the air conditioning compressor or its clutch is refrigerant leakage. The main insidiousness of a malfunction is that it is very difficult to detect. Not even all professional workshops provide such a service. Leakage signs:
- Noise during operation;
- Decreased cooling efficiency;
- Sudden changes in temperature.
Before starting the repair, you need to find the place of the leak. There are several ways to do this. The easiest is, again, using a soapy solution. It is necessary to lubricate the pipes of the refrigeration circuit with a special soap (you can also use the usual 1: 1 solution, but its effectiveness is lower), and watch where bubbles appear.
In some brands, a liquid is added to freon, which glows under ultraviolet rays. Of course, you will need to arm yourself with a UV lamp, but this is the fastest and most efficient option. It will not work to repair high and low pressure pipes on your own, moreover, if the problem is not detected in time, the repair will be more expensive than the cost of the equipment. Therefore, we recommend that you immediately contact the service center with this leak.
Very interesting to read:
Install the “winter kit” on the air conditioner yourself.
What are the reasons that the air conditioner refuses to turn on? How to find out the cause and fix it.
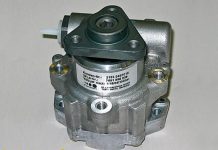
In the absence of an original compressor on sale, you can pick up a similar one in characteristics, but from a different manufacturer.
Consider the connection diagram of starting and working capacitors to motors, as well as their selection and calculation.
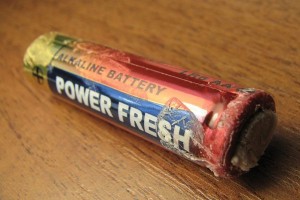
Sometimes the batteries bring us an unpleasant surprise - they leak and spoil the remote control. Read how to fix it and avoid it in the future.
The main language in which technical documentation on air conditioners is published is English. For the convenience of translation, we have compiled a table with the main phrases and terms from the technical documentation.
Where can I find out what resistance the compressor windings should have and how to measure it?
If you want to repair your air conditioner without calling a repairman, carefully study the possible malfunctions and how to fix them.
a) Drainage of water by gravity into the street (the hose is attached to the bracket of the outdoor unit)
b) Drainage of water by gravity into the riser (installed through a siphon)
c) Draining water using a drain pump (used when it is not possible to drain condensate by gravity)
- Locate the hose and make sure the hose is free of slack or kinks. The hose must be laid with a slope of at least 1 cm by 1 meter to ground level.
- After making sure that the hose is free of slack and kinks, remove its end and try to blow it with lung air. Then pour water into the condensate collection tray, as shown in picture # 1. And make sure the water is drained.
- If the water is drained, but water continues to flow from the indoor unit, then it is necessary to pull the unit away from the wall, as shown in Figure No. 2, and check the tightness of the hose connection with the air conditioner and at the same time check the tightness of the thermal insulation of the copper pipes.
- If the tightness of the thermal insulation is broken, it must be restored. To do this, use hydro-tape.
The next step is to replace the batteries in the remote control, even if there are no signs of dead batteries.
If, after carrying out the above manipulations, the split system does not turn on, we recommend calling the service department, since there may be a lot of reasons, for example:
a) Defective control board
b) Defective remote control
c) The receiver of the signal from the remote control is faulty
d) Blown fuse on the power line due to malfunction of individual components
Set the temperature setting on the remote control to 18 degrees and make sure that the room temperature is not lower than the set temperature. Set the operating mode to "Cool" or "Snowflake" and wait for a while, about 10 minutes. If the equipment continues to blow warm air around the area, check the following:
Try to reach the outdoor unit case, and make sure that it works compressor... You can understand this by touching the body and feel vibrations... And also see if it is spinning fan on the outdoor unit. If vibrations are present and the fan rotates, check that presence of heat from the exhaust air. If the heat is not felt, most likely, there was a leak of freon.
In the event of a freon leak, you must call the wizard for the search and subsequent elimination. If the master arrives and simply refills the air conditioner without finding a leaky unit, the freon will soon be released again. After eliminating the leak, the master must remove air from the system with a vacuum pump and fill the air conditioner strictly according to the weight indicated on the nameplate of the outdoor unit.
a) Recharging refrigerant. Some companies impose refueling of the air conditioner during maintenance. But this does not need to be done at all, since the system is sealed and does not require refueling. It is necessary to fill the air conditioner if the refrigeration circuit is depressurized.A large amount of refrigerant in the system puts an increased load on the compressor, as a result of which the consumption current increases, which can cause the circuit breaker to trip. Also, due to overcharging, the compressor can jam, which will also lead to a high current.
b) Compressor motor windings burned out. This is due to the operation of the compressor without freon or outside temperature tolerances and a number of other factors.
In case of poor cooling, it is necessary to carry out technical maintenance, namely, cleaning the air filters and, if necessary, the fan impeller of the indoor unit.
Check if the heat exchanger of the outdoor unit is dirty, there should be no fluff on it and it should be visible.
Our company carries out diagnostics of split systems and air conditioners. To call the master, you can call 8 (499) 490-29-26 or fill out the application form on the website.
If you notice a malfunction in the operation of your air conditioner, or it does not turn on at all, you need to think about whether it needs repair, and you can try to do it yourself, since the warranty period has long expired. Of course, you will not always be able to repair the air conditioner yourself. But still, there are such breakdowns that you can fix it yourself, even if you are far from being able to repair household appliances. By doing this, you will save money in your budget.
The term "air conditioner" is represented by two English words, these are "air" - "air" and "condition", which today is understood as a device that maintains a given temperature in a room. This name has been known for a very long time. The most interesting thing is that this word was first mentioned in 1815.
As history is glossing over, it was in this year that the French inventor Jeanne Chabannes was solemnly awarded an English patent for the invention of a method for "regulating the temperature in residential buildings and other buildings, that is, the method of air conditioning." And the first air conditioner was made not to maintain a certain temperature, but to establish a certain humidity.
For a very long time, US companies held the lead in production and in new developments, but in the middle of the last century, the leadership passed to Japanese specialists. Maintenance of an air conditioner nowadays requires a long wait for a master who has studied the manual for repairing an air conditioner, it is an expensive undertaking, so you can take certain independent steps before contacting the repair service
Before using the services of a workshop, you can try DIY repairs. You need to understand that self-repair of an air conditioner is not an easy task, but a complex and responsible procedure, which is limited by opportunities, lack of certain knowledge and the necessary equipment. But some breakdowns can be dealt with on their own without using the services of a service company.
First you need to find out if the faulty air conditioner is really a faulty one. Almost all modern models are equipped with special indicators that automatically notify major breakdowns. To find out which system failed, and how much it costs to repair the air conditioner, you can find out by the blinking and color of the failure indication lamp. The entire system of automatic diagnostics for the blinking and color of the lights should be described in the instructions, so there should be no problems with troubleshooting.
When an air conditioner malfunctions, the light blinks a certain number of times, according to the detected error. Common standard error codes for air conditioners with specific flashing light colors are shown below.
1 time - One of the thermistors of the indoor unit, which controls the incoming air temperature through the gas pipe, is out of order. It is worth checking the operation of the thermistors of the indoor unit of the air conditioner.
2 times - The outdoor unit thermistor is out of order, it is the temperature sensor of the incoming air or the gas circuit tube. To repair an air conditioner with your own hands, you need to check the performance of such thermistors.
3 times - The air conditioner works for cooling and heating the air, therefore it is so important to correctly set the operating modes of the air conditioner. Check that the cooling and heating control systems are working properly.
4 times - The compressor overload protection system is turned off. It is necessary to check the correct operation of the compressor protection against large overloads.
5 times - Errors in the exchange of information between outdoor and indoor units. Check the serviceability of the cable and the communication circuit of both units.
6 times - The power consumption of the executive devices of the external unit was briefly higher than the set rate. It is necessary to check the operability of the executive devices of the external unit and the main power transistors.
7 times - The total electrical voltage of the outdoor unit was above normal. You need to learn how to repair the air conditioner, check the refrigerant pressure in this system and the performance of the elements of the outdoor unit.


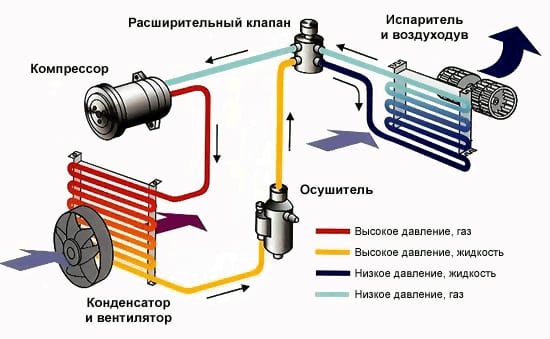
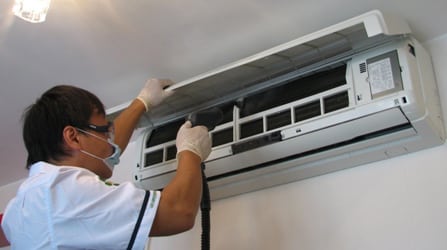
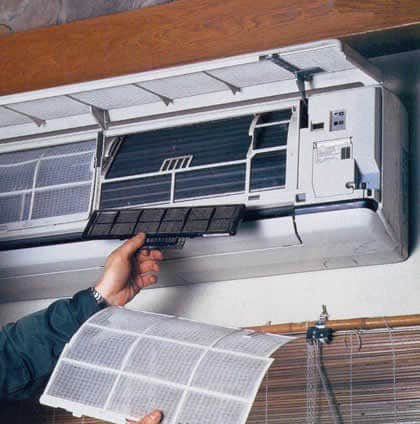 Photo - cleaning the split system