In detail: do-it-yourself repair of the Audi 80 b3 suspension from a real master for the site my.housecope.com.
Many elements of the front wheel suspension can be independently removed and reinstalled. For certain work, you still need tools from the workshop. In no case should the damaged parts of the suspension be straightened, let alone welded, they must be fundamentally replaced with new ones.
Removing the front suspension strut
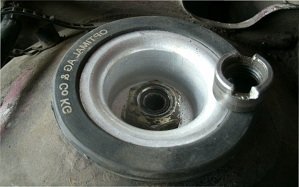
Removing the shock absorber at the top. After removing the cover (1), you can loosen the suspension strut mounting nut using a spanner wrench (3). To do this, hold the shock absorber rod with an Allen key (2).
Removing the shock absorber at the bottom. Shown are the stabilizer link bolts (1) and the wheel bearing housing bolts (2 and 3).
When removing the shock absorber, you should take into account: if you disconnect it from the wheel bearing housing, you will have to re-adjust the wheel alignment angles, which is possible only on a measuring stand in the workshop.
For this reason, we describe here the removal of the shock absorber strut together with the wheel bearing housing.
Another addition: to tighten the upper nut of the shock absorber strut, mechanics in the workshop use a VW 3078 socket wrench.
- Purchase a new self-locking nut and a new swing arm clamping bolt.
- With the vehicle standing on the ground, loosen the central securing bolt of the drive shaft in the wheel hub (center of the wheel).
- Loosen the wheel bolts.
- Raise the vehicle evenly at the front to avoid stress on the stabilizer bar. Secure the vehicle.
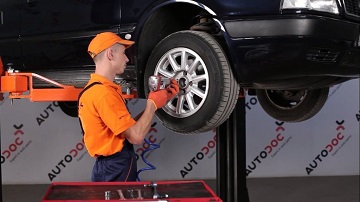
- Remove the wheel.
- Disconnect the stabilizer link from both suspension struts, press the stabilizer up.
- Disconnect the disc brake caliper and secure it to the body with a wire - the brake line remains connected.
- Disengage the track rod joint.
- Remove the axle joint clamping bolt at the bottom of the suspension strut.
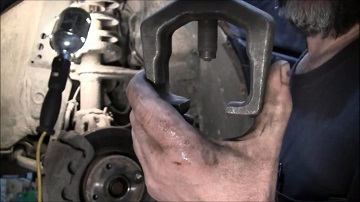
- Pull the pivot pin out of the strut using a pry bar. This separates the strut and the wishbone. In this case, under no circumstances should the slot in the wheel bearing housing be widened, for example with a screwdriver.
- Unscrew steering wheel and remove drive shaft from wheel hub.
- Remove the cover from the shock absorber cup in the engine compartment.
- Remove the nut of the suspension strut from the top of the rod. To do this, hold the stem with an Allen key.
- While doing this, hold the shock absorber strut underneath.
- Pull out suspension strut downwards and at the same time remove it completely from the drive shaft.
- For installation, use new self-locking nuts and a new clamping bolt of the suspension joint.
- Install the clamping bolt so that its head points forward in the direction of travel.
- Tightening torques: nut of the upper fastening of the shock absorber strut: 60 N • m, nut of the track rod: 30 N • m, clamping bolt of the independent suspension joint: 50 N • m, connecting rod of the stabilizer on the shock absorber strut: 40 N • m.
- If the same shock absorber strut is installed and the bolts connecting the wheel bearing housing and the shock strut remain clamped all the time, then there is no need to adjust the wheel alignment.
| Video (click to play). |
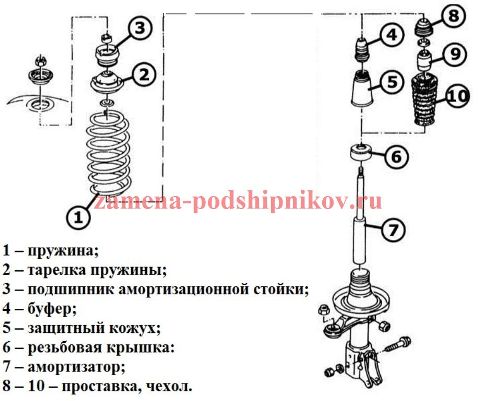
Elements of the front suspension strut and the sequence of their installation
- Spring;
- Spring plate;
- Suspension strut bearing;
- Buffer;
- Protective cover;
- Threaded cover:
- Shock absorber;
- 8 - 10 - spacer, cover.
Audi 80 front wheel suspension at close range
- Suspension strut housing;
- Bolted connections of the shock absorber housing and the wheel bearing housing;
- Wheel bearing housing;
- Axial hinge;
- Clamping bolt;
- Lower wishbone.
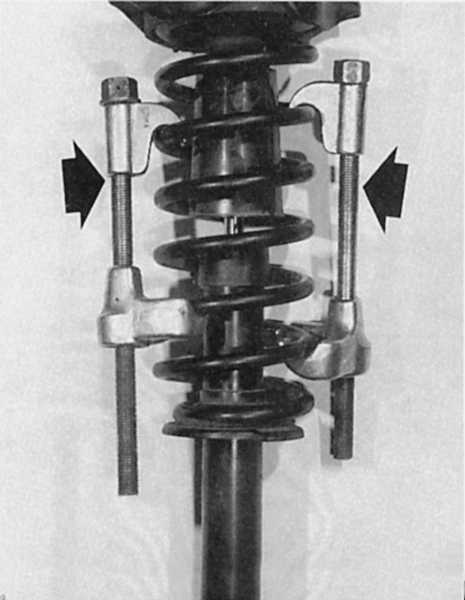
Left: Tie brackets are required to separate the spring from the shock absorber when the strut is removed.
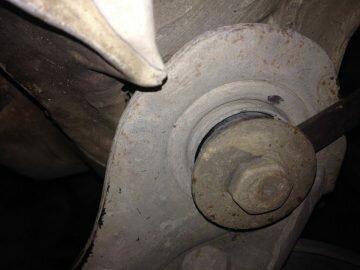
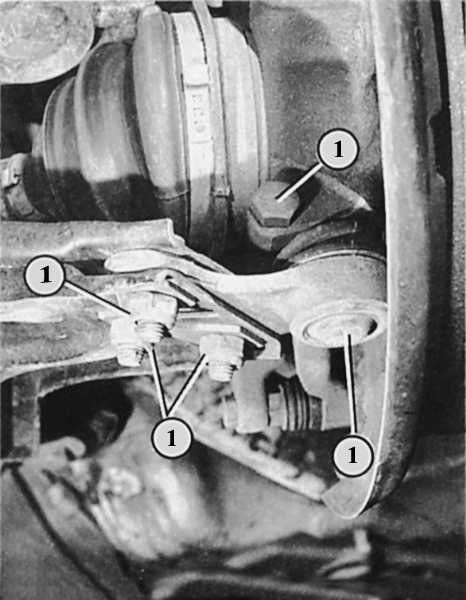
Right: The illustration shows the suspension joint clamping bolt (1) with which the suspension joint (3) is attached to the wheel bearing housing. Further indicated: the fastening nuts (2) with which the suspension joint is connected to the lower wishbone.
Replacing the front shock absorber
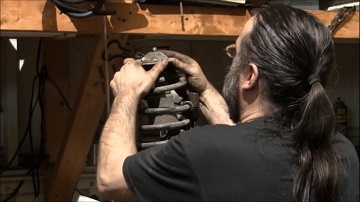
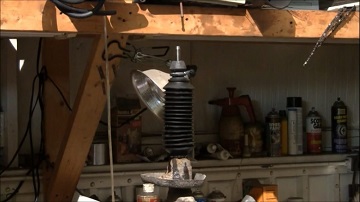
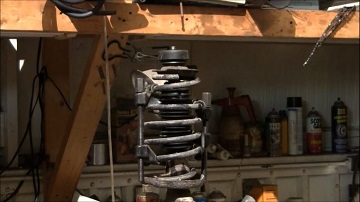
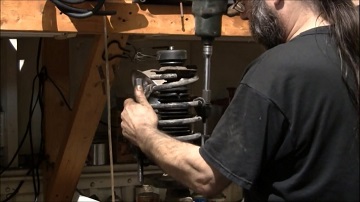
To carry out this work (with the shock absorber removed), a device for tension (compression) of the spring is required. You will need at least two pullers, even better three. Without the use of a spring tensioner, the spline nut at the top of the shock absorber rod must not be loosened, because the spring is in a state of strong pre-tension. Otherwise, the components of the shock absorber strut will fly apart as in an explosion - there is a great risk of accidents!
In addition, the uncompressed spring can no longer be reinstalled. Spring tensioners are available at parts stores. Next, you need the following special tools: a VW 524 wrench to loosen the spline nut and a 40-201 A tool to loosen the screw cap above the shock absorber. If you don't have them, you will have to help yourself with a large pipe wrench.
- Remove the suspension strut (see previous section).
- Clamp the shock absorber strut through the wooden wedges at the height of the steering knuckle arm in a vice. Never pinch the cylindrical section, otherwise you will crush the shock strut.
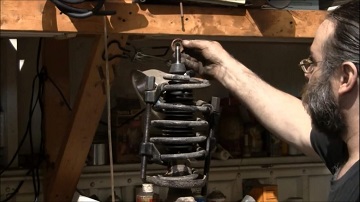
- Install the spring tensioner at the spring coils and compress it slightly.
- To prevent the spring tensioner from slipping, cover these turns with adhesive tape, if necessary.
- Now loosen the spline nut at the top of the suspension strut. Hold the shock absorber rod with a wrench.
- Remove the spring together with the suspension strut bearing and additional parts.
- Remove the screw cap at the top of the shock absorber.
- Pull out the shock absorber.
- The factory is fitted with liquid shock absorbers. In this case, you need to pour out the old fluid from the shock absorber (special waste!) And clean its stem.
- Install a new shock absorber cartridge without fluid.
- The installation sequence of the constituent elements is shown in the figure on the upper right. Next, note that the color coding of the springs indicates the bottom.
- Tightening torques: threaded cover of the shock absorber cartridge: 150 N • m, slotted nut on the shock absorber rod: 50 N • m.
Removing the front wheel bearing
The wheel bearing with its outer ring is pressed into the housing, the wheel hub is pressed into the inner ring. Under no circumstances should a new wheel bearing be driven into its place with a hammer, otherwise you will "install" the next damage together with the bearing. Therefore, it is better to remove only the shock absorber itself and disconnect the brake disc, as well as the casing. And you must entrust the actual removal and installation of the bearing to the workshop, which has a repair press at its disposal.
- Purchase a new self-locking nut and a new swing arm clamping bolt.
- Raise the vehicle evenly at the front to avoid stress on the stabilizer bar. Secure the vehicle.
- Remove the suspension joint clamping bolt at the very bottom of the suspension strut.
- Use a pry bar to press out the independent suspension pivot pin at the shock absorber strut. In this case, under no circumstances should the slot in the wheel bearing housing be widened, for example with a screwdriver.
- Mark the installation position of the pivot on the lower wishbone.
- Unscrew the axle joint securing nuts at the bottom from the lower control arm. Remove the hinge.
- When screwing on the axle joint, take into account the marks made when removing the mark; in this case, the adjustment of the wheel alignment angles will remain approximately the same.
- Do not forget the shims for the fastening nuts.
- Tightening torques: the nuts of the independent suspension joint must be tightened to a torque of 65 N • m, the nuts of the clamping bolt to a torque of 50 N • m.
- Carry out wheel alignment in a workshop.
Removing the wishbone
- All self-locking nuts will need to be replaced as well as the bolts connecting the wishbone supports to the axle beam. The wishbone can be removed with or without the axle joint. Which bolts need to be loosened in one case or another, is described in the previous section.
- Remove nuts for inner bushings for wishbone support.
- If the inner bearings of the wishbone have already worn out, then before installing the lever it is better to immediately press in (in the workshop) new ones.
- Installation: Fasten the wishbone from the outside to the wheel bearing housing or to the independent suspension pivot. You will find the tightening torques in the previous section.
- Tighten the nuts for the inner bearings of the wishbone loosely at first. Tighten fully only when the vehicle is on its wheels. Otherwise, the wishbone bearings may become skewed.
- Tightening torques for the nuts of the inner bearings of the wishbone: first 40 N • m, then turn another 1/4 turn (90 °).
The arrow points to the lower mounting bolt under the rear strut on front wheel drive models.
Top suspension strut mount on the rear axle for front-wheel drive models. The arrows point to the four strut mounting bolts, the number (1) indicates the strut itself.
Taking into account advanced age Audi 80 b3 repair this favorite of summer residents and fans of life on wheels is gaining special relevance. The simplicity of the design of the car is one of its main advantages, thanks to which it has gained popularity among millions of motorists in various countries.
The mechanic, who is familiar with the front-wheel drive Togliatti models, will easily understand the structure of the "barrel", as the people call the "eighty". There are also enough spare parts for cars of this family, both branded and not quite. In extreme cases, when repairing, maintaining or modernizing the "eighties", you can use parts from the products of the domestic auto industry.
A lot is suitable. For example, the rims are exactly the same as those of the Moskvich-2141, the suspension and clutch elements are perfect from VAZ cars. Thus, it is appropriate to talk about the high degree of maintainability of the "eighty" as one of its main trump cards. Armed with the necessary arsenal of wrenches, screwdrivers of various sizes and configurations of the working part, it will not be difficult to independently disassemble the entire nose of the car.
The doors also open freely into a pair of independent segments with a few light movements of the screwdriver. And lighting fixtures can be replaced on their own in a few minutes. It all does repair and maintenance of Audi 80 b3 business simple and even somewhat pleasant. Perhaps this is one of the reasons why this model has not yet ended up in the dustbin of history.
As for the list of the most common malfunctions, then it is rather short:
- Possible problems of heating and ventilation systems
- Broken steering gear
- Ignition malfunctions due to a sufficiently old age of the car
- Malfunctions of the brake system
- And the most vulnerable place of the "eighties" is the suspension
According to experienced craftsmen, the "barrel" is devoid of any purely individual, characteristic exclusively for this model of breakdowns and defects. Of course, German engines, like all other powertrains, are afraid of overheating, the use of low-grade fuel and lubricants, underfilling and irregular maintenance.
The cooling system requires constant monitoring of the level and chemical purity of antifreeze. Although many, in order to save money, pour Tosol into the car, it is not recommended to do this in order to avoid the failure of the unit and, accordingly, the need repairing his iron friend Audi 80 b3.
Electrical equipment and even more so electronics in the "barrel" is much less than in modern high-tech cars. In addition, all the electrics of the "eighties" are distinguished by excellent operational reliability and durability.
Increased attention is required mainly to the fuel supply system. Since the "barrel" is a car of the carburetor type, it is usually equipped with complex aggregates of two types:
These carburetors, having swallowed low-grade "dirty" fuel, show their capricious character, causing functional failures and arrhythmias in the operation of the power unit. And the system of injectors and the fuel pump "barrels" equipped with the KE-Jetronic fuel injection mechanism have the unpleasant property of being clogged with solid deposits contained in low-quality combustible substances.
Therefore, it is necessary to strictly monitor the quality of the used fuel and lubricants and other process fluids. This is the key to the operational durability of the machine. According to the masters, most of the problems in the operation of reliable German engines, which are equipped with "eighties" with the B3 index, are associated with the fact that some careless drivers, in order to "match" economy, fill the tank of their car with outright rubbish.
Basically, the suspension is the weak point of all Audi cars. However, this is due not so much to any structural defects of German cars, but to the frank uselessness of most domestic roads. "Barrel" is a car of a rather old age, so problems with the suspension are extremely common for it.
The very design of this mechanism allows you to carry out all repair work in parts and replace parts separately. If any element breaks down, it will need to be replaced. In no case should you resort to editing and restoration of a broken part. The main functional part of the suspension is the shock absorber strut. Therefore, all repairs, as a rule, consist in her dismantling and replacement.
This procedure is carried out according to the following algorithm:
- The vehicle is parked on a level horizontal surface, and then the fastener (bolt or nut) located in the center of the hub is unscrewed
- The remaining wheel bolts are methodically loosened
- The car is jacked up to the same height on both sides
- Then the stabilizer post is disconnected from the transverse suspension arm
- The brake caliper is removed
- The clamping bolt of the hinge device located at the bottom of the stabilizer bar is removed.
- The articulated steering linkage is disconnected
- The pry bar is used to remove the suspension rod from the shock absorber strut
- Next, a puller is installed, with which the drive shaft is removed from the hub
- And finally, in the engine compartment, the cap is removed from the dome of the shock absorber
Such work on repair of the suspension on the Audi 80 b3 can be carried out by one person in a garage. In general, the old "eighties" are surprisingly strong, hardy, maintainable and friendly machines.
Greetings, dear friends! Today's post, I decided to devote myself to the topic of replacing silent blocks and a stretcher Audi 80 b3 with my own hands.
Surely, many Audi 80 owners have a fairly common problem: clacking around corners from the driver's or passenger's side, when braking, the car pulls to the side, noise from under the front wheels, etc.
So the first thing to look for the reason is the big wear of salenblocks. Well, how to change them - you will learn from reading the article to the end!
To successfully complete all operations, you will need:
- keys 17 cap and curved;
- swivel heads 13, 27 and 17, as well as an extension for working with them.
On Audi 80 B4 cars, a front suspension of the type McPhersonborrowed from VolkswagenPassat. In the suspension, all units are standard, so they do not differ from the b3 / v3 models before 1991. Support bearing Audi 80 (B4 (B4), B3 (B3) is located in the upper part of the front shock absorber of the car, it provides rotation of the strut at the junction of the body with the shock absorber, and also serves to perceive axial loads.
Replacing the thrust bearing Audi 80 B4 (B4), B3 (B3) done by hand in the garage, for this, read the detailed instructions, photo report. Also watch useful videos, study recommendations on the choice of spare parts and repair (homemade modernization and how to strengthen the thrust bearings).
The support of the front pillar of the Audi 80 changes independently in the garage in 1.5-2 hours, without using a special tool, read the article with photos and videos to the end in order to avoid mistakes, correctly replace and strengthen the suspension.
In order to check and diagnose the Audi 80 front pillar supports, perform a number of operations in order:
- The shock absorber support of the Audi 80 is located under the hood, find it.
- Press down on the A-pillar support with your hand.
- Rock the car from top to bottom.
- When knocks, rattling, squeaking or clicks appear in the support, it can be concluded that it is malfunctioning.
Other signs of "support" breakage:
- Deterioration of vehicle handling;
- The rod under the hood protrudes from the Audi 80 shock absorber support;
- Bumps on the road are felt more strongly through the steering wheel;
- Knock, rattle, creak and clicks under the hood when cornering or hitting holes, potholes.
To reduce the risk of breakage, it is important to know the reasons why the shock absorber support is changing: the ingress of dirt and moisture inside the "support", poor-quality parts, frequent driving over pits and irregularities.
Before starting the replacement, study the device of the front pillars of the car.
To replace and remove the support bearing of the front strut of the Audi B3 and other models, you will need a tool:
- Spanners: 16, 21, 15, 17;
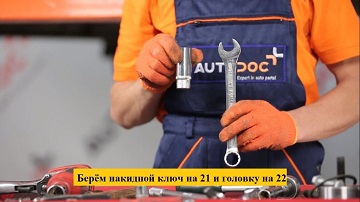
- Ratchet with heads: 17, 22;
- Tie rod puller;
- Ties for shock absorber springs;
- Jack;
- Vise, torque wrench (if possible).
- Replacing the bearing on the Audi 80 B4, B3, B3, B4 begins with removing the rack, first we loosen the wheel bolts.
- We lift the car with a jack or a lift, remove the wheel.
- Now we take the keys for 16 and 17.
- We unscrew the anti-roll bar bolt that secures it to the rack.

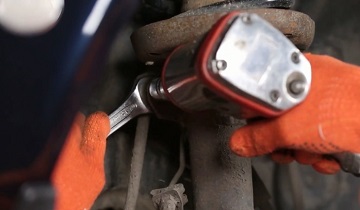
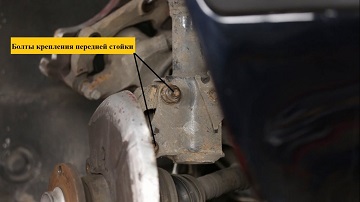
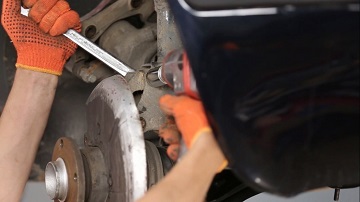
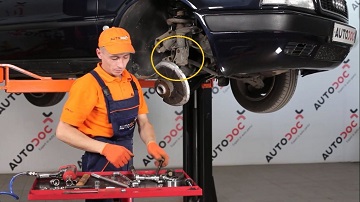
- Next, unscrew the two bolts securing the front pillar to the steering knuckle.
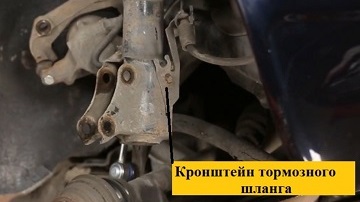
- We unscrew the bracket that secures the brake hose to the rack.
- We find a lever with a steering tip, unscrew the lock nut.
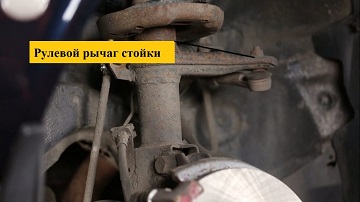
- Install the puller, press out the locknut from the lever with a tip.
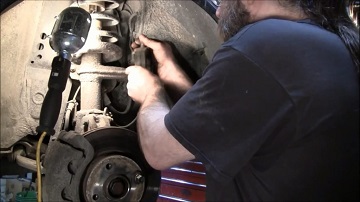
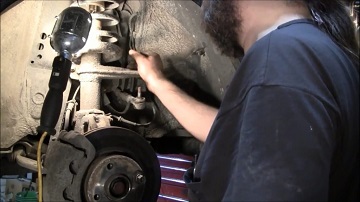
- The strut has been disconnected from the bottom, now we unscrew the rod nut that secures the front strut shock absorber support to the body glass. We use a hexagon and a spanner wrench.
- We remove the stand, fix it in a vice at the bottom. Next, we install the ties on the spring, squeeze it until the stem nut is free to unscrew.
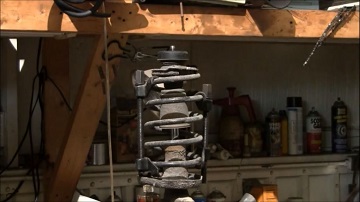
- After unscrewing the locknut from the thread of the shock absorber rod, disassemble the rack.
- We remove the support element, shock absorber cup, spring and dustproof kit: buffer (bump stop) and cover (boot). Next, we move on to replacing the support bearing.
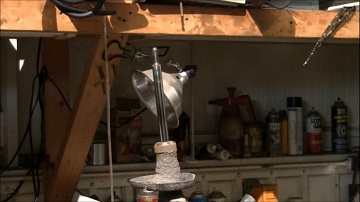
You cannot replace and install a new journal bearing without removing the stand. But if you remove the strut with a steering knuckle, then you do not need to do the camber. When dismantling the shock absorber module together with the steering knuckle, it is necessary to disconnect the knuckle from the ball joint, unscrew the hub lock nut, and then pull the assembly out of the CV joint. The above describes a method for replacing and removing a support without a steering knuckle, i.e. with unscrewing the breakup bolts.
- Check the shock absorber for leaks, clean it from dirt. Next, we put on a new dustproof kit: a cover (corrugation, boot), compression stroke buffer (bump stop). We fasten the cover to the stem with clamps.
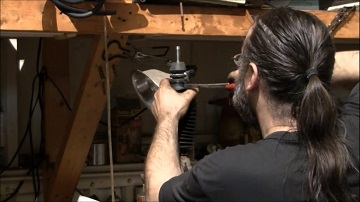
- Now we install the spring, washer, then the lower support bearing cup.
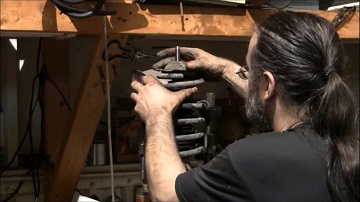
- From above we put on a new support bearing of the front strut, then we tighten the nut.
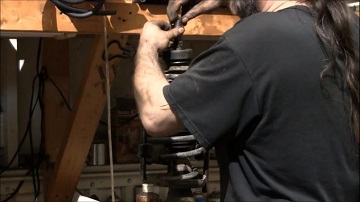
- We tighten the nut, remove the ties from the spring. The replacement is completed, the rack is assembled, we install it on the car in the reverse order. The assembly is shown in more detail in the video:
The housing of the upper support consists of durable rubber, inside there is a metal compartment for a single-row thrust ball bearing with seals to retain grease.
Not many manufacturers produce upper supports for the Audi 80. The table shows the recommended companies, ask for these models in stores. Approximate price per piece, product catalog numbers (article numbers), as well as the composition of the repair kit, all this is displayed in the table. Print it out before purchasing parts.
Dimensions of the upper support with original number 8A0412323D:
- Height - 41 mm;
- Inner diameter - 20 (14) mm;
- Outside diameter - 74 mm;
- Weight - 0.246 g.
- Required quantity per axle - 2 pcs.
1.What to start tuning Audi 80
2. How to increase power through tuning
3. Tuning the grille on the car
4. How to improve noise insulation
5. Tuning services
6. How to conduct economical tuning
If you are the owner of an Audi 80 and are thinking about how to increase the performance of the car and save money on repairs and maintenance of the car, then you need to familiarize yourself with the information on how the tuning of the Audi 80 is carried out and what basic features it provides. It should be noted right away that if you have the appropriate skills, you can carry out tuning work yourself, and if necessary, contact the service technicians for qualified support.
To perform some tuning work, special complex equipment and special devices are required, this should be taken into account when planning tuning work.
Before tuning the Audi 80, you need to bring the car to normal condition. For this, a high-quality visual inspection and regular technical inspection are carried out, aimed at timely identification of malfunctions and planning of car maintenance work. Visually inspecting the vehicle reveals that the engine is running low, the suspension requires maintenance, and the body needs to be protected from corrosion. All these problems can be solved before tuning the car. It is necessary to correct the main shortcomings, and only then proceed to tuning the car.
You should not resort to tuning when the suspension is about to fall apart, extra body kits will only put the suspension out of order before time. In this case, it is necessary to repair the suspension and only then proceed with tuning. By the way, at the stage of repair work, you can choose new wheels and tires for the car, which will significantly extend the service life of the wheelbase.
You can familiarize yourself with the video materials and photographic materials on the topic of tuning the Audi 80 in advance.
If you have been thinking about how to increase engine power for a long time, then it is worth considering that there are several tuning options that allow you to achieve high results. For example, tuning the Audi 80 and replacing the cylinder block with a more powerful one allows you to increase engine power. For replacement, you can take a cylinder block from a vehicle with a higher performance. Cylinders can be obtained from a Golf 2 9A, although they are more difficult to find than cylinder blocks from other cars.
If your plans include a serious increase in engine power, you can also convert the carburetor engine to an injection one. Despite the complexity of such work, the result will exceed expectations. To carry out high-quality tuning yourself, you will need a special lift, photos and videos on the topic of tuning. You can save a lot of time by seeking support from qualified technicians.
If you have a desire, you can include cylinder bore in tuning the Audi 80, which will also increase the power of the power unit. The total volume of the engine can eventually be increased to 2 liters. As a result, you can expect the engine power to rise to 150 hp. During this tuning process, you will need to replace the intake and exhaust system. However, for such work, you will need qualified support. As a result of the increase in the power of the power unit, you will need to measure the conventional disc brakes. This is also included in the tuning of the Audi 80 and allows for a better result.
Getting acquainted with the video materials on tuning the Audi 80, you can note that in the process of tuning, car owners also restore the front grille. If you also wish to tune the grille, you should cut out the entire interior of the grille and leave only the frame. It is recommended to use a suitable metal hacksaw. You can remove irregularities after this work if you put a special nozzle on the drill and walk over the irregularities. Paint prior to plastic must also be removed.
Further tuning of the Audi 80 continues with the purchase of a new radiator grill. You will also need to purchase degreasing wipes, black plastic paint, and putty. It is necessary to degrease the frame and putty it so that you end up with a flat surface. After the putty is dry, the frame needs to be sanded. It usually takes several hours for the putty to dry, depending on the ambient temperature. Then, in the upper part of the frame, on the remnants of the ribs of the middle part, it is necessary to make cuts, into which it is necessary to insert a new grating. You can paint the frame with two or three coats of new paint.
The new grate must be sized to fit the frame so that it can be inserted into the cuts and secured with wire. On the sides, you can cut off all unnecessary using the same hacksaw for metal. After such manipulations, the grille is ready for full installation in place. As you can see from this material, tuning the Audi 80 is great for transforming the look of an old car.
If while driving a car you hear how the body rattles and the engine works, then you should think about replacing the noise insulation. As the main materials used to improve the noise insulation characteristics of a car, vibration damper and noise absorber are most often used. Using these tuning materials, you will significantly improve your car and extend its service life. From the materials on the topic of tuning, you can judge that you can do anything you want with an old car. You can turn it into a convertible and completely change the doors, you can install new body kits and significantly improve the environmental class of the car.
If you are just planning on tuning your Audi 80, start with the following steps:
- find relevant materials on the topic;
- check the technical condition of the car and conduct an external inspection;
- eliminate the main faults and decide in which direction you will work;
- enlist the support of tuning professionals to provide the necessary advice on the topic.
After completing the preparatory work, it is necessary to determine the scope of work and choose a place for tuning. This can be your own garage or a professional workshop. In the first case, you must have a viewing hole or a special lift. In the second case, tuning is carried out by professionals, you need to tell about your preferences and choose the best tuning option. If you are concerned about the environmental friendliness of your car, you can upgrade your emission control system to a more advanced one. As a result, you can achieve a higher environmental class. After buying a car, you may notice that there is rust on the metal, which leads to corrosion. You can avoid this problem by polishing the body and external tuning.
Tuning Audi 80 provides ample opportunities to improve the operating parameters of the car. You can determine the scope of work and in a short time extend the service life of the main components, achieve higher power from the engine and solve problems, for example, increasing damping. It is recommended to start tuning the car with the simplest thing - with external tuning, which is carried out in relation to the headlights, the body in order to mask the newly installed equipment on the car.
In addition to replacing the grille on the radiator, you can use such a tuning element as suspension reinforcement. Reinforced suspension stiffness extends the service life of the shock absorbers and eliminates squeaks and vibrations. These tuning works include disassembling the rear and front axles and installing new plates that will significantly improve the vehicle's damping characteristics.
You can tune the Audi 80 at no extra cost if you create a retro car based on your car, which will have an attractive appearance and a set of spare parts from other cars, which together will increase performance. In any case, when planning a tuning, you should calculate your budget. Full-fledged tuning is sometimes comparable to the price of a car overhaul. However, a tuned car has a number of advantages: an increased service life of the main components, an attractive appearance and the possibility of saving on scheduled repairs and maintenance of the car. For the modern driver, these factors are essential when planning tuning.
Economical tuning of the Audi 80 can be carried out if you use not new parts and consumable components, but previously used parts with better performance characteristics. You need to make sure that the new component to be installed on the vehicle is compatible. Often on the tuning forums, you can read recommendations from car service specialists on the topic of what equipment and parts are suitable for performing tuning work. The information presented will be useful to you if you want to achieve from tuning not only the improvement of the operating parameters of the car, but also the creation of conditions for high-quality and safe driving.
However, tuning the Audi 80 opens up ample opportunities to improve your car. It all depends on what tasks are set for these works, and in what conditions the car will be used in the future. The advantage of high-quality tuning is that the car owner manages to significantly increase the cost of the car and count on a higher cost of selling the car in the future. This applies when you are selling a used vehicle through a showroom or through the marketplace.Buyers are paying close attention to cars with manual tuning elements, which significantly increase the attractiveness of the car and improve performance.
One of the most attractive areas of tuning has recently been considered airbrushing, which involves the application of colorful drawings to various parts of the body. Airbrushing has several advantages. Firstly, it allows you to protect the car body from corrosion due to high-quality paints and varnishes that are used for drawing pictures. Secondly, airbrushing is used to hide minor defects in body finishing; you should not pay special attention to the fact that many auto sellers refuse to repair and paint and resort to airbrushing. Audi 80 tuning and airbrushing in particular is used to make the car's appearance more attractive. This is necessary for a car owner who wants to stand out from others with his unusual car.
You can do airbrushing yourself if you have the appropriate skills or with the support of professionals who will perform all the work with high quality and provide the necessary guarantees. Therefore, if you have an Audi 80 in your garage, and you want to transform the appearance of the car and increase its reliability, then use the tuning tips and make your car unique. Today, hundreds of companies work on the tuning studio market, but you need to entrust your car to real professionals. Otherwise, the money invested will not pay off, and the result will forever make you doubt the need for tuning.
Quality tuning is a broad area that can achieve a wide variety of goals, from changing the appearance of a car to complex improvements.
Having set yourself the task of tuning, you can determine the scope of work and plan them in such a way as to achieve a high-quality final result.
And the resulting savings on maintenance and repairs will allow you to use new methods of tuning your car.
| Video (click to play). |

