In detail: do-it-yourself repair of kandy dishwashers from a real master for the site my.housecope.com.
Standard, narrow, compact Kandy dishwashers have a similar device and similar problems. Anything can potentially break down in this technique, but most often the following elements fail:
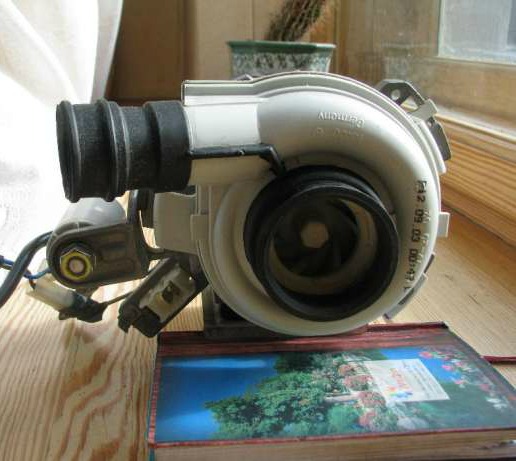
- drain pump;
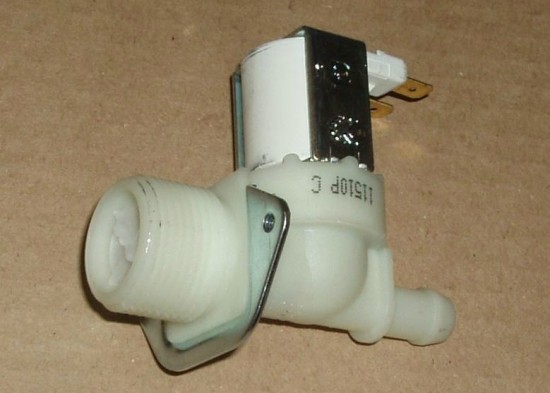
- inlet valve;
- a heating element;
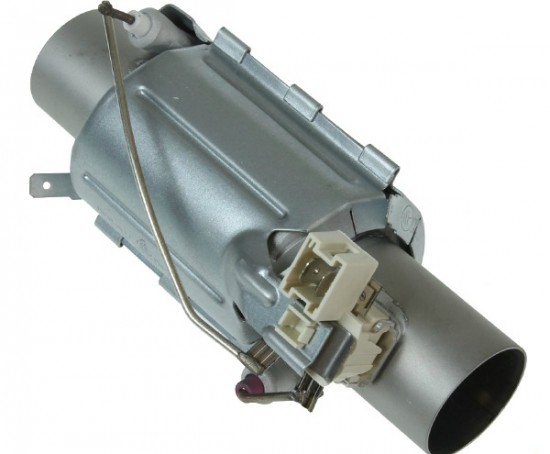
Often, the Kandy dishwasher flow heater breaks through, giving a leakage current to the case. If, touching the metal parts of the case, you feel an electric shock, immediately de-energize the machine.
- thermistor;
- a sensor that detects a leak.
When diagnosing a dishwasher for certain defects, remember that in all cases the problem may be hidden in the control module. Sometimes semiconductor elements fail, and sometimes the firmware just flies. In any case, if, as a result of your research, you find that the problem is precisely in the electronics, do not meddle yourself, contact a specialist. If you suddenly break a module, a new one will cost a third, or even half the cost of a new machine, depending on the model of the Kandy machine.
The pump can break in other dishwashers too. For example, in Bosch dishwashers, the pump has a rather peculiar impeller, on which hair is often wound, and various dirt, which ultimately blocks it. The pump rarely breaks from this, but it will not work until you clean it. In Kandy dishwashers, the pump, as a rule, is silent forever. It is enough to listen, at the draining stage, how it works and you can say with 90% certainty when it will end.
- unscrew and pull off the side wall of the dishwasher;
- we unscrew the narrow front panel, which is located under the door of the machine;
- having access to the pump, remove it by disconnecting the wiring;
- with our own hands we check the drain pump with a multimeter switched to ohmmeter mode;
- we throw out the faulty pump and put a new one in its place.
| Video (click to play). |
Perhaps, if the manufacturer had guessed to put a fuse on the pump, then it would have served at least twice as long, and so the average duration of its operation is 3 years. Sad but true. By the way, the self-diagnosis system of the Kandy machine determines the problem with the pump with the code E2.
Suppose the Kandy machine cannot pour water and start the washing program. This is immediately noticeable. Firstly, the inlet valve will snap violently in vain, and secondly, the dishwasher will almost immediately display the E1 error. How to check this detail?
- In the same way as in the case of the pump, we disassemble the dishwasher.
- We find the filling valve.
Finding the inlet valve is not difficult because the inlet hose is screwed to it. Look where the inlet hose fits in the machine body and you will find the part you are looking for.
- We remove the wires from the valve coil and check its contacts with a multimeter.
- Values close to zero will indicate that the part is broken and needs to be replaced.
- We unscrew the old valve and put in its place exactly the same new one.
On average, a filling valve on a Kandy dishwasher lasts 4 years, but factory defects cannot be ruled out. In addition, frequent voltage fluctuations in the Russian power grid do not at all contribute to the long operation of the machine's spare parts, so be on the lookout. Experienced craftsmen, in order to prolong the operation of the equipment, are advised to install dishwasher stabilizers. They really help, but you need to take into account the cost of these "priblud". While the Kandy dishwasher itself can cost $ 315, a good stabilizer will cost $ 240. Although it should be noted that two or even three devices are usually connected to one stabilizer.
Take out the thermistor first and check it with a multimeter, then check the wiring of this part. If everything is ok, then you can go to the heating element. We first check the resistance of the heater, and then for breakdown. HaveThe breakdown of the heating element can only be prevented by replacing the part, since burned-out heaters cannot be repaired. You need to loosen the clamps, remove the old heater, not forgetting to remember the location of the wires, then you need to put a new part in its place, carefully tighten the clamps and return the wires to their place.
The list of typical faults is completed by water leaks. Clamps and rubber gaskets, this is a real scourge of Kandy dishwashers, it's good that there is a leakage sensor, otherwise the neighbors below would have to say hello. The leakage sensor is triggered when the sump is partially filled with water. It turns off the water supply to the dishwasher and blocks its operation, saving your property and the property of your neighbors from the flood.
In some cases, the sensor works spontaneously, without water, but more often water actually appears in the sump. What should be done?
- It is necessary to turn off and disassemble the machine.
- Check the pallet, if there is water, you need to drain it by tilting the machine body to one side.
- Check fittings, hoses, rubber seals for leaks.
- Having eliminated the leak, you need to return the valve float to the operating position and check the machine for operability.
So, we have highlighted the main defects of the Kandy dishwasher. Each problem has a bunch of nuances that cannot be discussed in one publication. Ask your questions on our forum or in the comments to the article, our specialists will be happy to answer them. Happy renovation!
There is a dishwasher in almost every home - this small unit greatly facilitates the work in the kitchen, saving our time and effort on washing and drying dishes. But, like any household appliance, even the highest quality dishwasher begins to malfunction over time. Fortunately, most of the malfunctions that may arise during its operation can be eliminated independently without calling the wizard. In most cases, they are associated with wear of the main units and parts, as well as the consequences of improper operation. In any case, it is very worthwhile to understand the device and the principle of operation of a home dishwasher. This will save you from unnecessary costs for the services of a service center and washing dishes by hand due to a long downtime of a failed unit.
The design of household dishwashers is in many ways similar to the layout of washing machines.The main difference lies in the absence of a rotating drum in the dishwasher and in the presence of a number of specific functions that ensure the process of washing dishes.
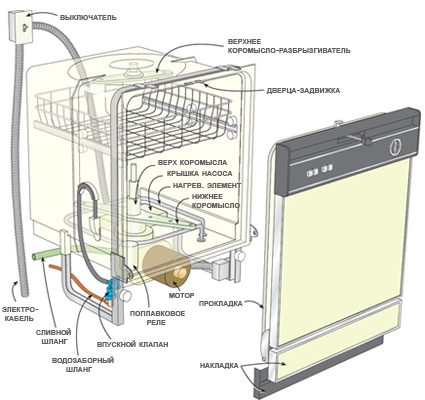
The interior of the dishwasher can be viewed by opening its front wall. The list of the main units and components of the unit includes:
- Control Panel.
- A board with a processor.
- Electric motor.
- Dispenser.
- Dryer air path.
- Turbofan.
- Upper and lower baskets.
- Cutlery basket.
- Upper and lower rocker arms.
- Discharge pump.
- Filter system and softener.
- Pallet and drainage.
- Heating element.
- Counterweight.
- Capacitor.
- Water supply valve.
- Top and bottom (side) nozzles.
- Detergent container.
- Float regulator.
- Ion exchanger.
- Salt container.
The basis of the dishwasher is a sealed metal case, covered from the inside with a stainless composition, insensitive to temperature fluctuations and the aggressive effects of detergents and equipped with sound and thermal insulation. The control panel is located on the front of the machine. It consists of a timer (microcontroller), control buttons and an indicator display.
Spray blocks (impeller) consist of a system of pipes and nozzles. Through them, heated water with detergent is supplied to the interior of the machine under pressure, which ensures high quality cleaning and washing of dishes.
The dishwasher float switch is the primary protection against leaks. The drain unit has a design similar to the drain in washing machines.
And one of the main components of the dishwasher is the water pump, which is installed in conjunction with the electric motor. The filtration system is no less important - it serves to catch food debris and other debris.
The dishwasher is hidden from view. You simply put the dirty dishes and cutlery in the baskets, add the detergent, close the front wall and turn on the start button. But knowing what is happening inside the unit when it washes the dishes does not hurt at all - this will allow you to determine the cause of the malfunctions much faster and correctly eliminate them.
The dishwasher works according to the following algorithm:
- Starting water drain.
- Water filling.
- Start washing.
- Adding detergents.
- Heating water.
- Washing dishes.
- Draining.
- Filling in rinsing water.
- Rinsing.
Rinsing dishes
- Final drainage of water.
- Drying dishes.
Washing programs - sequences of instructions executed by the microprocessor - differ in such parameters as:
- the presence or absence of the pre-soaking function;
- the degree of water heating (50-75 o C, sometimes higher);
- program execution time.
The operation of the dishwasher with the implementation of the functions of the selected washing program is carried out in the following order:
- The microprocessor checks that the door is closed and issues a flush command to the drain pump.
- After stopping the pump, fresh water is collected, the level of which is monitored by a special sensor.
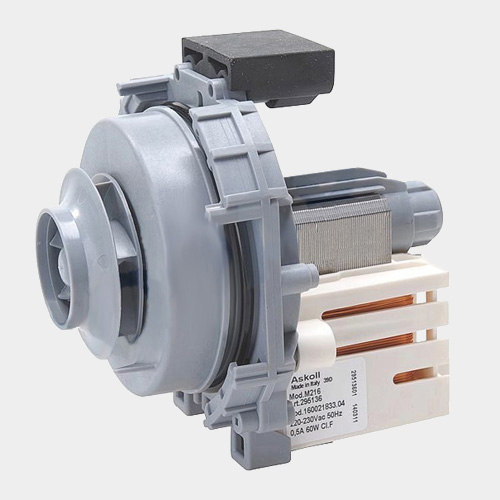
- A circulation pump is turned on, which creates pressure inside the housing, water enters the impeller, which begins to rotate under pressure. In the meantime, the dispenser opens and the detergent enters the interior of the machine.
Dishwasher circulation pump
- The heating element is heating the water.
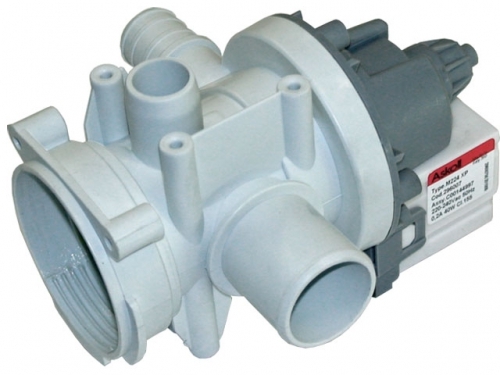
- The water is drained off using a drain pump.
Dishwasher drain pump
- A new portion of rinse water is added.
- After rinsing, the used water is emptied out and the drying function is activated.
- Upon completion of the drying of the dishes, a sensor is triggered, the signal of which forces the microprocessor to open the lock of the front wall.
Using kitchen equipment every day, you will inevitably learn to distinguish between how it works - properly or with some kind of malfunction. And not all of the latter are associated with obvious malfunctions in the technology itself.
If your dishwasher does its job poorly, it is quite possible that you are simply breaking the operating mode.
- White streaks and streaks on dishes
Streaks appear when the user has loaded too much rinse aid or salt. Dirty drips indicate the opposite - in this case, it is worth increasing the dosage of the detergent.
Food residues on the bottom of the dishwasher and on the dishes themselves are a sign of clogged filters. Manufacturers recommend cleaning them almost after every wash, after draining the remaining water from the system.
- Poor cleaning of dishes from food debris.
Any, even the best dishwasher is unlikely to cope with thoroughly burnt or not washed dishes for a long time - in this case, you should do a little work with your hands before loading into the machine.
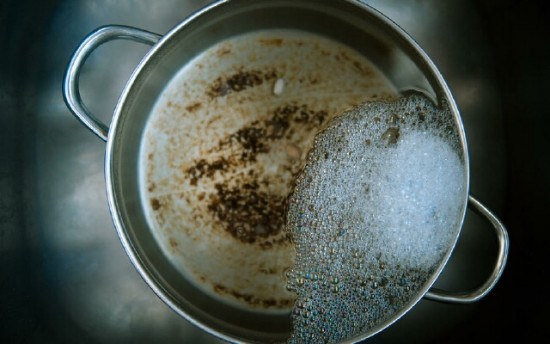
- Excess foam
If there is too much foam, then the rinse aid is far overloaded. Just adjust the machine's dispenser or add a little more powder, an excellent defoamer.
The reasons for the unsatisfactory cleanliness of the dishes after washing can also be:
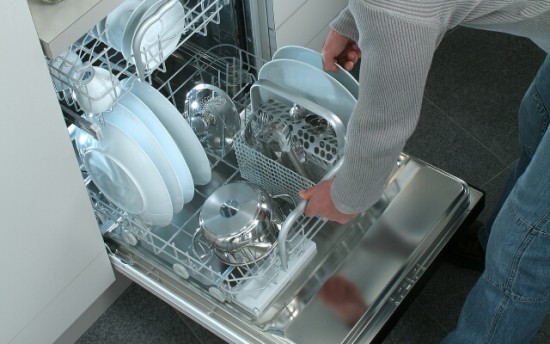
- improper placement of dishes in the interior of the dishwasher - water does not get on all surfaces;
Positioning the dishes correctly in the dishwasher
- the impeller does not spin - the sprayer is blocked by excessive loading or improper installation of the dishes;
- no detergent is being supplied - it is simply over, or its supply is blocked by dishes or food residues;
- no water is supplied from the impeller - you need to check the nozzles of the sprayer and, if necessary, clean them with a stream of water, after removing them from the machine;
- wrong choice of washing mode.
If you are sure that you have strictly adhered to the operating mode and even after checking and performing all the necessary service procedures, the machine still works very badly or refuses to wash the dishes altogether, this most likely means that there are technical malfunctions.
Diagnostics and elimination of malfunctions due to which the operation of the machine is impossible:
- The machine does not turn on or has an electric shock
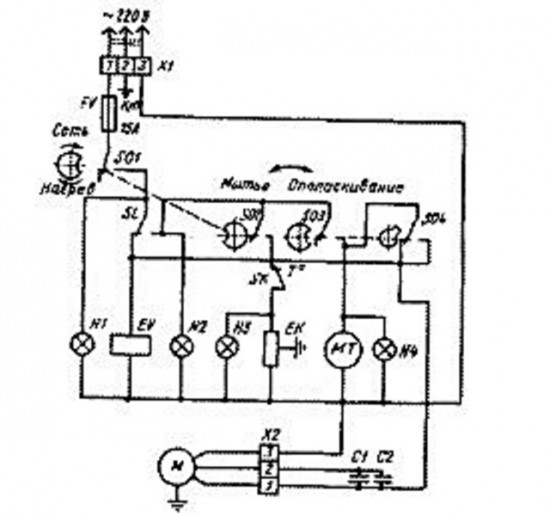
- in more than a third of cases, this means a break in the electrical circuit - the current simply does not reach the engine and, most likely, due to a blown fuse. It is also worth checking the integrity of the plug and power cord;
Wiring diagram for a simple dishwasher
- a frequent reason for the absence of signs of the life of a dishwasher is a loosely closed door;
- lack of water in the working chamber: you need to check the serviceability of the tap, the permeability of the inlet filter and the integrity of the supply hose;
Dishwasher filter
- if there is voltage on the outer metal parts of the machine, check the health of the heating element and the presence of water softening salt in the dispenser.
Heating element of a dishwasher of a flow-through type
- Defective programmer
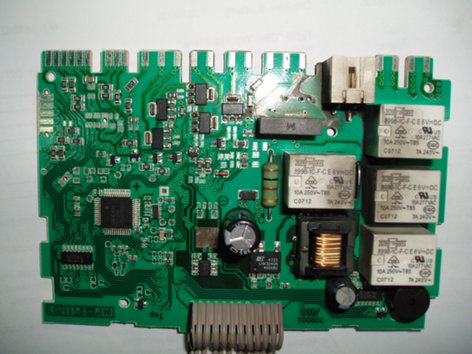
If the dishwasher board burns out, it will be possible to repair it only in the workshop - this will require special knowledge, tools and practical skills.
In most cases, the programmer must be replaced, but this can seriously hit your pocket. Therefore, it is worth asking about the successful experience of repairing household dishwasher boards from familiar craftsmen.
If you nevertheless managed to start the unit, however, it is obvious that it is not working correctly or does not perform its functions, the closest attention should be paid to the following points:
- Knocks and other extraneous sounds during the operation of equipment
Check the integrity of the gun bearings. The bearings of the main or drain pump unit may also knock.The first works periodically, pumping water into the system, the second - at the end of each cycle.
- Water does not flow into the cooking chamber
If the filter and water supply hose have nothing to do with it, most likely the culprit is a broken inlet valve that needs to be replaced.
- Pressure switch does not work
It is necessary to remove the terminals from this part and clean the branch pipe to which the plastic pressure tube fits - a working switch, when triggered, emits a soft click.
- Machine stops in the middle of a cycle
The reason for this is most often a faulty pump. But first, you should check the recirculation filters, the water intake path, the water heater or the thermostat.
- The dishes are washed with cold water
Most likely, your car does not have a thermal sensor, so its programmer did not notice that the heating element or the heating automatics were out of order. In this case, you will have to replace the broken electronics, which is recommended to be done at the service center.
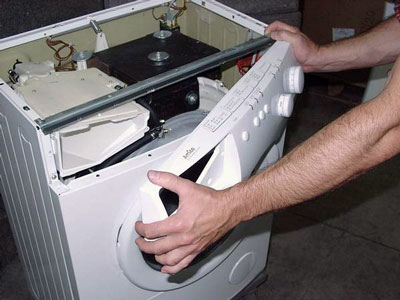
Dishwasher removal and disassembly must be carried out in accordance with the manufacturer's instructions.
Well-known brands provide more detailed data on the manufactured equipment, incl. in Russian. In other cases, you have to look for a sensible algorithm of actions on the Internet, or trust your technical instinct - after all, the dishwasher device is not super-complicated and anyone can figure it out using ingenuity and the tool necessary for work.
Strict adherence to the operating mode reduces the likelihood of damage to the dishwasher at least fourfold. Therefore, immediately after installation, thoroughly study the operating programs of the unit and explain to household members how to use it correctly.
Dishwashers "Kandy" have earned the trust of users for their simplicity and reliability. Therefore, in the event of a malfunction, repairs can be carried out by yourself. Breakdowns are different, so you need to diagnose the equipment.
Candy dishwasher error codes are collected and described in detail in a separate article.
The easiest way to determine the cause of the breakdown is by the error code on the display. If the self-diagnostic system has displayed a code, its decoding will help to find the malfunction.
Do the indicators on the panel blink erratically after switching on? A possible system failure has occurred - restart the equipment. How to reset the system:
- Unplug the machine.
- Wait 15-20 minutes.
- Connect the power cord.
Has the blinking disappeared? So there is nothing to worry about. If the indicators blink again, the reason may be in the control module.
Typical breakdowns of PMM Candy:
- The most common problem is a blockage. Poor cleaning of dishes from food debris leads to clogging of the filter, pump or pipe. The problem can be easily fixed by yourself.
- Water leakage in the area of the hopper door, most often, brings the sealant. As users notice, after a year of operation, it has to be changed. It's good that it's easy to do this without any help.
- The dishwasher does not work or freezes on the program setting - a malfunction in the electronic module. You may notice that the technique takes a long time to wash the dishes or the cycle does not end. We will tell you how to replace the module, but it is better to entrust its repair to a specialist.
- The water is not drained after the end of the program. This means that we need to check the drain path. You need to start with a filter, pump, drain pipe. If the dishwasher does not collect water into the tank, you need to check the intake system: hose, filter, inlet valve.
- If the PMM engine does not turn on and the wash does not start, check the tightness of the door closing. If the bin door is not completely closed, the cycle will not start. The wiring, fuses on the shield and control board are also checked.
- When you turn off the machine or knock out the counter, it is worth checking the heating element for a short circuit and breakdown to the case.
Why the technique breaks down, we figured it out. Let's find out how to repair the Kandy dishwasher with your own hands.
We will begin the repair with the elimination of simple malfunctions.
If the water does not go well not only in the dishwasher, but also in the rest of the sewage system, clean the siphon. In the case of a direct connection to the sewer, break through the blockage in the pipes with special means.
Before disassembling the machine, press the "Drain" button.
Check further:
- Inspect the drain and inlet hose. Maybe they are pinched or twisted.
- If water does not flow into the tank, check the shut-off valve, it may be closed.
- Disconnect the filler hose from the PMM body. Clean it under running water.
- Clean the inlet filter and check the filler valve.
Then open the hopper door:
- There is a drain filter at the bottom. Pull it out of the housing and remove the blockage.
- Remove any remaining water in the hole with a sponge.
- To check the pump impeller, remove the cover.
- To do this, press down on the cover and then pull it up.
- Wear gloves to clean the blockage of the impeller.
- Inspect the drain hose and clean if necessary.
Broken door or broken seal? Then we will tell you how to carry out the repair.
Replacing the side seals:
- Open the door.
- Remove the old seal around the door.
When loading the machine, the door does not close, although you press it firmly enough. The door lock needs to be checked and replaced.
- Open the door and remove the screws around the perimeter.
- Remove the control panel by disconnecting the connectors.
- A locking device is attached to the inside of the panel.
- Remove the two screws that hold it in place.
- Disconnect the wiring, install a new item.
When the door locks normally, but it is difficult to open and close, the problem lies in the hinges. They can be damaged if the open door is pressed strongly or an additional cabinet front is attached to it.
- Remove the top panel of the dishwasher by unscrewing the two screws at the back.
- After removing the bolts, remove the lower bezel and then the side cover.
- Having opened access to the loop, remove its spring from the hook.
- Remove the lock washer and detach the hinge from the body.
The installation of a new part is carried out in the reverse order. The main thing is not to confuse the left and right hinges, because they are different.
Is there a noise while the dishwasher is running? The rocker is likely clinging to the edges of the crockery. Check and place the cookware correctly or replace the nozzles on the spray arm:
- Remove the spray arm from the PMM housing.
- If the base of the nozzle is cracked and is no longer suitable for use, remove it.
- Squeeze it with pliers and remove it from the connector.
- Place a new base by pressing down on top.
- To install a new nozzle, cut a hole in the base using a knife.
- Install the nozzle into the base until the latches snap into place.
If the control module is defective, the Kandy dishwasher may not turn on. How to enable and run PMM? Replacing the main unit will help; it is not recommended to repair the board yourself.
- Remove the six screws on the inside of the door that hold the control panel in place.
- Lift the door and detach the control panel.
- Hang the panel on the cabinet.
- To access the module, disconnect the black wire from the sensor.
- Remove the screws securing the module to the panel.
- Disconnect the board wiring. Some wires are held in place with latches. Wring them out beforehand so as not to damage the wires.
- Install the new module in the reverse order.
With a sharp voltage surge, the relay on the board that controls the heater could burn out. If you decide to repair yourself, be careful. The electronic module is expensive, in some cases it needs a complete replacement, otherwise the heater will not work.
- Remove the unit from the panel as described above.
- Remove the control board by releasing the module latches.
- Pay attention to the burnt parts.
- Unsolder the relay contacts.
- Having unsoldered the legs (contacts), remove the relay. Depending on the model, there can be from 3 to 4 legs.
- Buy a new relay using the serial number of the old one.
- Solder the new relay in place.
Now you have an idea of the breakdowns of the Kandy dishwasher. Perform independent repairs or call a master - it's up to you. In most cases, malfunctions do not require specialist intervention. You can do it yourself to remove the blockage or replace the hose.
The dishwasher is simple, a number of maintenance actions have been developed that can be performed independently by the owner of the purchase. Filter cleaning, adjustment. We hope the tips below will help you do your DIY dishwasher repairs.
A number of standard operating modes are laid down, each model is equipped with a couple of specific ones. But the tentative algorithm is similar. The dishwasher draws water from the mains supply. The fence goes through a brine overflow softener. The brine compartment is usually located in the floor of the dishwasher, covered with a lid.
The flow enters under its own pressure, bypassing the inlet filter, and is regulated by a float valve or pressure switch. The required amount of water has filled the dishwasher - the inlet is closed and heating starts.
The required temperature is different depending on the technological stage of the cycle. For the last rinse, the value is traditionally higher. Designed to facilitate the drying process of dishes.
The heated water is pumped by the main pump (called the pump unit) into the working chamber. It gets there through sprinklers equipped with sprinklers. A thoughtful choice of the direction of the beating jets creates a reactive force that rotates the impeller. The dishwasher has two spray arms, one upper and one lower. The design is devoid of fundamental differences.
The waste water goes through two stages of cleaning, bypassing filters, then it is used for washing again. In the process described, a little powder is introduced into the chamber through the door of the detergent drawer. The exact amount is set by the program. The dishwasher uses water several times, cleansing the stream with two filters, at the end of the technological stage, sends it to the drain with a special drain pump.
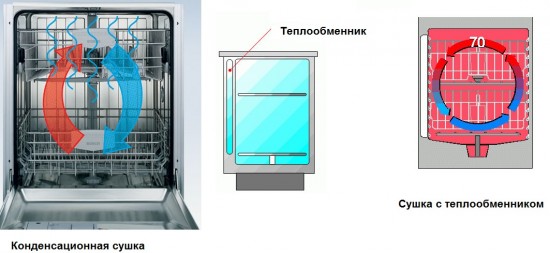
At the end of the cycle, drying is carried out. There are several types of procedure, mainly:
- condensation drying;
- turbo drying.
In the first case, the dishes dry due to the heating obtained by the last rinse, the steam condenses on the cold walls, flows down. The process is catalyzed by special substances contained in the rinse aid, which reduce the surface tension of the water. In dishwashers equipped with a turbo dryer, hot, humid air is forced out by a fan, speeding up the process.
It was mentioned above how washing powder, gel, tablets get into the compartment. The rinse aid is poured into a separate container, in some cases it may not participate at all in the process. The loop looks like this:
- preliminary wash;
- main sink;
- rinsing;
- drying.
It remains to mention that for washing, the dishes are laid out in special baskets, they lie motionless during the cycle. Water jets are poured from all directions due to the rotation of the sprinkler impellers. Below are a kind of guide to repairing dishwashers, practical tips for tracking the correct operation of the equipment.
It is recommended to entrust the repair of industrial dishwashers to professionals, what to do if the home model is stubborn, we will consider a little below. We see a number of typical signs manifested in the unsatisfactory appearance of the dishes after washing, which are not considered manifestations of breakdown:
Each owner has seen enough of a kitchen assistant, so they know how the equipment should work. Below are typical situations that signal minor malfunctions, simply calling for a do-it-yourself dishwasher repair.
- The dishwasher seems to be working, water does not flow inside. It is worth starting with the previous point, having examined the hose, filter. The reason may be more prosaic, unpleasant: the inlet valve has broken. The accessory is relatively easy to change, you have to buy a new one. The part follows the intake filter. You will need to disassemble the case.
- Defective pressure switch. Disconnect the element from the wire terminals, slightly blow the branch pipe to which the plastic tube fits. A slight clicking sound is heard when the device is operating satisfactorily.
- The machine stopped in the middle of a cycle, the case, in addition to the fuses and the presence of power, concerns a faulty working pump. Check the recirculating water filters first. The dishwasher will behave in a similar manner when slaughtered. The water intake path (see above), the heating element, the thermal relay are faulty.


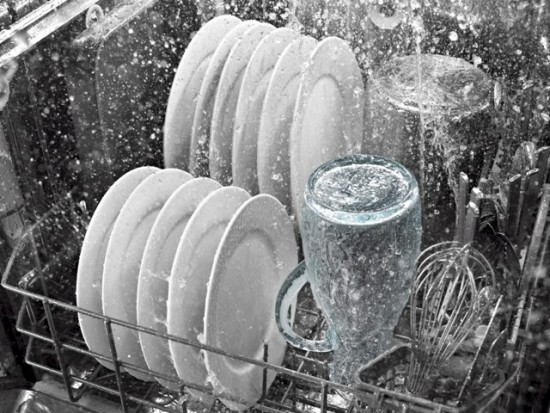 Rinsing dishes
 Dishwasher circulation pump
 Dishwasher drain pump
 Positioning the dishes correctly in the dishwasher
 Wiring diagram for a simple dishwasher
 Dishwasher filter
 Heating element of a dishwasher of a flow-through type