In detail: do-it-yourself drywall ceiling repair from a real master for the site my.housecope.com.
No matter how high-quality a thing or material is, sooner or later it loses its original appearance, or even breaks down altogether. Sooner or later, any finish needs correction. In this article, we will dwell in detail on the repair of plasterboard ceilings. Cracks or holes can form on it, it also happens that the structure as a whole sags. All this creates an unaesthetic appearance in the room. In order not to finish the ceiling again, you can simply repair it. And in this case, it is not at all necessary to hire craftsmen! It is quite possible to repair the plasterboard ceiling with your own hands. In this article, we will tell you about the reasons for the appearance of various defects and how to fix them.
Let's look at the reasons for the appearance of various defects on the ceiling. It is better to find out this information even before the installation of the structure. This will allow you to take everything into account in advance and, if possible, delay the repair of plasterboard ceilings.
- the technology of work during the installation of the frame or sheathing of the gypsum board was violated;
- the use of ordinary sheets instead of moisture-resistant ones, in rooms with high humidity;
- temperature fluctuations in the room directly during the installation period;
- flooding by neighbors from above;
- shrinkage of the building;
- poorly sealed seams between sheets;
- neglect of preliminary primer;
- frequent vibrations caused by various techniques;
- use of weak dowels.
All of these factors lead to the appearance of certain defects, which is why the ceiling needs to be repaired.
- Sagging of the whole structure
- Cracking
- Holes appearing
- Stains
| Video (click to play). |
Sagging happens for 4 main reasons:
- A rare step of the crate. When the sheet is fixed only at the edges, then quite often it sags under its own weight, and if it is also plastered, then this only aggravates the process.
- The result of flooding from above is that the gypsum board gains moisture and becomes heavier and softer.
- Incorrect fasteners - the screws are sunk so deep that the cardboard breaks.
- Poor profile that cannot withstand the load.
Small cracks appear due to improperly selected plaster, as well as due to the fact that the putty was carried out in a cool room. Large cracks appear at the joints of the sheets. This happens due to the fact that the reinforcing tape was not glued at the joints or the sheets were attached with a step exceeding 30 cm. Another reason is that the frame is made of wood, which deforms under the influence of moisture, causing a violation of the integrity of the sheets.
Holes, as a rule, arise due to careless handling - unsuccessful attempts to attach something to the ceiling, damage by dimensional equipment (cabinet, refrigerator, etc.). It even happened that the holes appeared from the champagne cork!
Spots appear due to flooding, or the appearance of mold or mildew in the room.
The source of all these defects is usually a human factor, therefore, by taking certain measures, you can always avoid them. But what has been done is done, and the defects that have already appeared must be eliminated, and this is not at all difficult. ... Repair of plasterboard ceilings can be done independently.
This defect can be eliminated in several ways:
- It is necessary to remove the sheets and additionally strengthen the frame. The drywall is unscrewed from the bearing profiles, and the frame is supplemented with profiles to reach cells of 50 × 40 cm. In this case, the sheet is fixed to the frame 5 times on each side, which ensures the strength of the structure.Now the ceiling will not sag even when flooded.
- Selectively replace damaged fragments if there are violations only in one area.
- Leveling the common surface with plaster mortar is the fastest, inexpensive and simple method. In this case, you do not need to disassemble anything. All that is needed is to apply gypsum to the depressions of the surface, gradually leveling everything. To fix the plaster on the ceiling, a reinforcing mesh is glued to the surface and putty.
Sag repair is one of the most challenging jobs faced when restoring a plaster surface. Such work will require not so much special knowledge as patience and effort.
It should be said right away that when a mesh of small cracks appears, there is no point in painting them over. For some reason, it is precisely such actions that occur to most people who have found such a defect on their ceiling. Painting will eliminate it for a very short time, so it is more correct to take more radical measures.
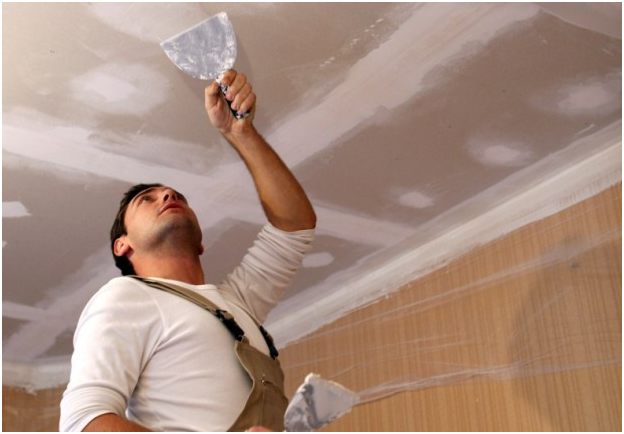
This defect is most effectively eliminated with putty. To strengthen the adhesion of the putty to the surface, it is better to widen the crack. This can be done with a nail or any other sharp object, the main thing is not to go too deep. After expanding the area, the surface is treated with a primer using a small brush. After a few hours, the damaged area can be putty with a special joint mortar (it is much stronger than ordinary plaster). Level the area to be repaired with a spatula to match the ceiling.
On a note! After drying, the putty shrinks, due to which the processing site may regain a sunken appearance. Therefore, as it dries, you need to apply a new layer of putty. As soon as after drying there are no cavities, the work can be considered completed.
Oddly enough, this type of plasterboard ceiling repair is one of the simplest. Depending on the size of the hole, there are 3 methods for sealing them.
Small hole. It can be repaired with old newspapers and gypsum plaster. This requires:
- align the edges of the hole and prime the surface;
- crumple a newspaper or other paper and fill a hole with it almost flush with the surface of the ceiling;
- coat the paper and the edges of the hole with starting putty;
- after 3-4 hours, the sealed area will become quite strong, and a couple more layers of the solution will need to be applied to it;
- after they dry, apply a finishing plaster;
- after it dries, the place is sanded, primed and painted.
If the damage is large, up to 50 cm, then this can be eliminated by inserting a patch. In this case, the procedure is as follows:
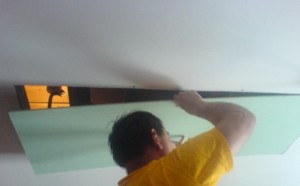
- a patch of the correct shape is cut from a sheet of drywall, slightly larger in size than the size of the hole;
- attach the patch to the ceiling and mark the cut points;
- cut out the patch of the desired shape with a jigsaw;
- sand the edges of the hole, and prime the ends;
- insert the patch and screw it to the strip pre-installed at the base of the hole;
- it remains only to putty the cracks with putty, grind, prime and paint.
There is no point in repairing holes exceeding 50 cm in this way. It is easier to replace the entire sheet.
If the stain is caused by flooding, it must be cleaned and painted. In this case, the procedure is as follows:
- clean off all affected areas of the ceiling that are peeling off;
- treat the surface with an antibacterial and then ordinary primer;
- apply a couple of layers of acrylic putty, after it dries, paint the treated surface.
As you can see, it is not so difficult to repair the ceiling surface. For this, many people love plasterboard cladding. For example, a stretch web is practically indestructible. In a word, this facing material allows not only to decorate the interior in an original way, but also to easily restore it. Moreover, all the work can be done independently.
Repair of plasterboard ceilings: causes of malfunctions, correction of errors in the device, removal of cracks from joints of plates and repair after a flood
Plasterboard suspended structures are one of the most reliable and practical ways to install ceilings in a house, however, they may require repair over time.
Because of what there may be a need to repair a suspended ceiling, as well as methods for eliminating structural faults, our repair school will tell you.
Repairing plasterboard ceiling
A plasterboard ceiling may need repair for a variety of reasons.
We will voice the most basic of them:
- Incorrect installation technology. Repair of a plasterboard ceiling is most often required due to the unprofessional arrangement of the plasterboard structure on the ceiling.
The problem usually consists in incorrect installation of the profile frame, which may not be aligned clearly in the horizontal plane, may be poorly fixed to the ceiling or guide profiles.
In addition, the frame pitch may simply be incorrectly calculated (unscrupulous installers saved on the profile). As a result, the ceiling in some place may sag, crack, etc. - Incorrect operating temperature of ceilings.
With sharp and constant temperature changes in the room, cracks may appear at the joints of the gypsum plasterboards, and then you will have to repair the ceiling with your own hands or call a master to your house.
Crack in plasterboard ceiling
- Repair of plasterboard ceilings is also necessary in case of a flood, arranged inaccurately by the neighbors from above. As a result, wet drywall sheets can bend.
Advice! Naturally, it will be necessary to repair the plasterboard ceiling even with the long service life of the old suspended structure, but most often it is necessary to simply remove the entire system, including the frame, and rebuild the suspended ceiling.
We figured out the reasons for the appearance of malfunctions of suspended structures made of plasterboard, now we will consider how you can repair the ceiling in each of these cases.
If the false ceiling is not erected correctly, you can repair it as follows:
- Drywall sheets are freed from finishing and inspected. Each sheet should be fixed around the perimeter with self-tapping screws in increments of no more than 30 cm.
If the fastening is done correctly, the sheets are unscrewed in order to diagnose the frame.
The main elements of the frame structure of the plasterboard ceiling
- The installation step of the profile is usually 60 cm, but no more. At the points of the cross-shaped connection of the profiles (if any), fixing to the ceiling using hangers should be provided.
The step of fixing the profile to the ceiling should in any case be 40-60 cm. All joints should be securely connected with self-tapping screws.
The frame is checked for breakdowns and for compliance with all of the above parameters. - Having corrected errors in the frame design, serviceable drywall sheets are fixed in their original place, and the faulty ones are changed.
The joints of the sheets are pasted over with a construction mesh and putty (see how to putty a plasterboard ceiling). After the putty has dried, the joints are sanded with fine sandpaper and a finishing finish is arranged.
Repair of such a ceiling when cracks appear at the joints is as follows:
- First, the crack is "stitched up", making it slightly wider to ensure better adhesion when applying a fresh layer of putty. Sewing is performed using an ordinary knife or nail, the end of which is pressed with pressure along the crack, expanding it by several millimeters. The result should be a deepening of the triangular section.
- Then the recess is treated with a primer solution using a thin brush.
- After the primer has dried, the seam is filled with putty to the level of the gypsum board sheet.
Sealing cracks in plasterboard ceilings
- Further, when the first layer of putty dries up and is slightly drawn into the crack, the second is applied - the finishing layer of putty. The putty should go slightly over the drywall sheets on each side of the joint.
- After drying, the putty must be sanded with a fine-grained sandpaper, and then finished.
After such an unpleasant incident, you need to be prepared for the fact that it will be required, in fact, to re-perform the repair of the ceiling. However, the process is still not as complicated as compared to the ceiling cladding from scratch.
Repair is carried out according to the following rules:
- After removing the finish from the surface of the plasterboard sheets, the degree of damage to the material is assessed. Moisture-contaminated sheets are removed and disposed of.
- Usually, the frame structure of the plasterboard ceiling does not suffer from moisture, therefore, after removing the moisture-damaged sheets, it is necessary to provide intensive ventilation of the room in order to get rid of moisture residues in the cavity of the plasterboard ceiling.
Replacing damaged drywall sheets
- At the end of the drying process, new ones are installed in place of the damaged drywall sheets. Then the joints are putty and the finishing of the ceiling is arranged.
Advice! Repair of the ceiling must be done after making sure that the old frame system is reliable. If necessary, it should be strengthened or unreliable elements replaced.
No one is immune from the troubles sounded above, however, if we are talking about plasterboard ceilings, then eliminating the problem is almost always easy to do, even with your own hands. To study the technology of repairing a plasterboard ceiling more clearly, watching a video on the relevant topic will help.
The content of the article:
- Types of defects and their causes
- Ceiling repair methods
- Eliminate slack
- Sealing small cracks
- How to remove large cracks
- Align the waves
- Elimination of small holes
- How to seal large holes
- Removing stains
- Recommendations for use
The appearance of defects on the plasterboard ceiling can be caused by carelessness during the installation of gypsum board, the desire to save on materials (as a result, insufficient rigidity of the frame), flooding by neighbors from above and many other nuances. In some situations, a complete dismantling of the structure is required, the correction of errors and the re-installation of new sheets. However, there are times when you can get by with a simple repair of an old plasterboard ceiling.
Most of the damage requiring repair occurs due to improper installation of the suspended ceiling and its improper operation, for example, the installation of conventional gypsum boards instead of moisture-resistant ones in a room with a high level of humidity.
The main defects that occur in suspended structures are as follows:
- Sag or waves... This problem is formed if the ceiling profiles are located with too large a pitch or the fasteners are too deep in the sheet, which has caused the cardboard to break through and the gypsum board to tear off from the profile. Also, drywall can take on a wavy appearance if neighbors are flooded from above. In this case, the structure of the material softens, and it becomes too heavy.
Cracks... Small cracks may appear if an unsuitable putty is selected or the installation work was carried out under the wrong temperature and humidity conditions. Large cracks usually form at the joints of the gypsum board, if they were not glued with a reinforcing paint mesh or placed not on the base. In addition, the reason may be a large attachment pitch (from 30 cm). If the crack did not start at the junction, but on the sheet itself, then this indicates the shrinkage of the building. Often this phenomenon happens when the gypsum board is fixed on a wooden frame. Changes in moisture levels contribute to wood deformation.
Through holes... Such defects are possible due to improper use of the coating. Most often this happens through negligence.Although drywall is a fairly durable material, it can be damaged during room renovation or installation of a cornice.
In order to properly independently repair cracks or holes, get rid of waves or spots, one must not only take into account the reasons for the formation of these damages, but also know some of the features of these processes.
If the formation of waves is caused by too rare a pitch of the profiles, then the crate must be strengthened in such a way that each cell has dimensions of 0.5 * 0.4 meters. This method involves significant costs, because the dismantled gypsum boards are not suitable for secondary installation.
-
Remove the finishing layer on the ceiling with a spatula.
We dismantle the drywall sheets.
We attach additional hangers for fixing ceiling profiles with dowel-nails.
We pull a strong thread perpendicular to the direction of reinforcement of the lathing at the level of installation of the rest of its elements.
Using self-tapping screws, we fix the bearing profiles to the guides and hangers, observing the level along the stretched thread.
If the waves have formed on only one or some of the sheets, then you can only dismantle them and reinforce the crate at the place of their attachment. But it must be borne in mind that even with such a repair of a suspended plasterboard ceiling, the putty and finish will have to be done again.
The "web" of cracks formed on the ceiling spoils the aesthetic appearance and usually reappears after painting. To get rid of this problem, we carry out the work according to the following instructions:
-
We completely remove the old finishing layer.
We prime the coating with acrylic compound.
We glue the joints between the gypsum board and near the walls with a serpyanka tape.
We glue the fiberglass with an overlap and draw a line at the intersection with a clerical knife, removing the remnants. Fiberglass is usually produced on an adhesive backing. For this purpose, you can also use a regular masking net. You need to glue it on PVA.
Apply the putty up to 1.5 cm thick.
In addition to replacing the finishing layer, you can get rid of cracks in the drywall ceiling by pasting the surface with foam or ceramic tiles. In the first case, liquid nails are used for fastening, and in the second, a quickly solidifying glue.
If the gap has formed due to a large step of fastening the sheet, then the old finish must be removed and additional screws must be screwed in, not forgetting to glue the joints with a reinforcing painting mesh.
In case of cracking due to natural shrinkage of the building, repairs can be performed as follows:
-
We embroider the cracks in the plasterboard ceiling before repairing them. To do this, we draw along the gap with a knife or a nail, deepening it by about three millimeters and expanding it by the same amount.
We remove dust and crumbs in the crack.
With a thin brush, we treat the gap with a deep penetration primer to improve adhesion to the putty.
We press the starting putty into the hole and level it with a small spatula.
We are waiting for complete drying, after which the first layer will shrink.
Apply the second layer and repeat the procedure several times, waiting for the previous layer to dry.
Sand the surface with fine-grained emery paper until the putty is flush with the rest of the coating.
If the crack is deeper, then it must be glued with a serpentine tape before applying the putty to make the coating hard and durable.
If the irregularities on the plasterboard ceiling are insignificant, then they can be corrected by applying a layer of gypsum plaster as follows:
We process the undulating areas with a belt sander to smooth out irregularities.
We prime the surface with a long-bristled brush.
We glue the serpyanka tape at the joints of the gypsum board.
We glue the entire surface of the ceiling with fiberglass for reinforcement.
We fix special pins-beacons in the sheets of drywall to determine the level of putty.
We apply gypsum solution according to the installed beacons.
This method will cost significantly less than complete or partial dismantling. However, if the irregularities are large, then applying too thick a layer of putty will make the structure heavier and may provoke other problems.
If the reason for the sagging was the incorrect installation of the lathing (or the use of untreated wood for the frame), then a complete dismantling of the structure may be necessary.
Repairing holes is considered one of the easiest processes. This method is only suitable for sealing small holes. If the area is inconspicuous, then the finishing layer can be leveled imperceptibly.
If the hole is small, then it can be repaired in this way:
-
We clean the edges of the hole from crumbs, chips and loose elements.
We stuff the crumpled paper tightly into the hole until it is flush with the plasterboard surface.
Lubricate the edges of the hole and paper with a starting putty and wait for drying for three to four hours.
We apply plaster mortar in several layers with alternating drying.
After the finishing layer has hardened, we wipe the surface and prime it.
If a hole is formed in a conspicuous place, it may be necessary to replace the entire finish (complete painting of the surface or re-gluing wallpaper).
Before making repairs to the plasterboard ceiling in case of a hole up to 0.5 meters in diameter, it is necessary to make a patch.
We carry out the work according to the following instructions:
-
Cut out a round or square patch from drywall, the size of which exceeds the size of the hole.
We apply the made blank to the surface and outline it with a simple pencil.
We cut out the gypsum board along the drawn contour using a jigsaw.
We insert several planks into the hole, screwing them to the drywall with self-tapping screws.
We fix the patch on these boards using the same screws as for fixing to the base.
We glue the cracks with a reinforcing tape and apply a putty.
We also cover with putty the place of deepening of the fastener caps.
After drying, we grind the surface and remove dust.
Usually, painting the surface or re-gluing the wallpaper does not bring the desired result, and dark spots still show through the finishing layer.
In this case, we proceed as follows:
-
Removing the trim from the ceiling.
With coarse-grained paper, sand the area where the spots are formed as deeply as possible.
We prime the surface and wait for drying.
We make a solution of starting putty.
We process the cleaned surface with the prepared composition.
After the layer of starting putty has dried, apply the finishing coat, trying to level the coating as much as possible.
After this procedure, the finish will have to be changed on the entire ceiling. However, this is the most effective method for removing mold marks.
It is not always possible to repair a plasterboard ceiling with your own hands.In some cases, it may be necessary to completely reinstall the coverage.
To avoid this, certain rules should be followed during installation:
-
It is not necessary to install a suspended structure in a new building. Better to wait at least a year for natural shrinkage.
Be sure to treat the basecoat with an antiseptic primer to remove rust, mildew and mildew stains.
Choose quality components that are appropriate for the site of use. For example, for a bathroom it is necessary to use not only moisture-resistant gypsum board, but also galvanized metal parts.
Accurately observe the step of fastening the profiles and drywall sheets to ensure a high load-bearing capacity of the frame.
Reinforce the surface with fiberglass to avoid cracking.
Leave the drywall indoors for a few days before installation to adapt to temperature and humidity conditions.
Carry out installation work at temperatures above +10 degrees and humidity below 70%. The same regime must be observed for the entire period of operation of the ceiling.
GKL is a fragile material that can be damaged by sharp and bulky objects.
How to repair a plasterboard ceiling - watch the video:

