In detail: do-it-yourself hp 1000 printer repair from a real wizard for the site my.housecope.com.
Note: the process of disassembling the printer and replacing the fuser can be seen in the video tutorial
| Video (click to play). |
It is necessary to prepare the workplace for work. First, you need to have the necessary tools. Secondly, to have enough free space on the table and nearby (fold removed parts and blocks, clean and process). Thirdly, it is necessary to be able to use a vacuum cleaner and cleaning fluids - the presence of neighbors talking on the phone or the absence of a hood will significantly complicate the process.
First of all, you need to pull out the cartridge and vacuum the printer well to remove the toner.
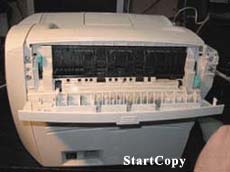
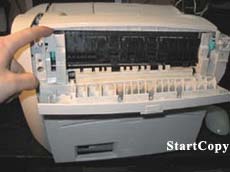
Now, with the back of the printer facing you and flip up the top of the back cover. Now you can see 5 silver screws and 2 green levers, which are usually in the up position, and in the down position they release the pressure in the stove and make it possible to pull out the paper. The screws must be unscrewed.
Now we move a little to the side the upper part of the right side cover of the printer (now it is on the left for us) and pull the back cover of the printer towards us. The green levers will interfere with movement and can be moved to the middle position. The back cover will be removed by us.
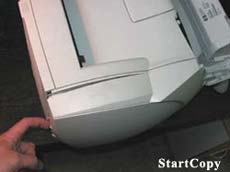
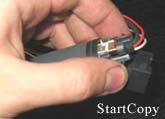
The next step is to remove the right side cover. To do this, press down on the latch located on the bottom of the printer (shown in the figure to the right). Under this cover are gears that transmit rotation from the motor to all rotating parts of the printer.
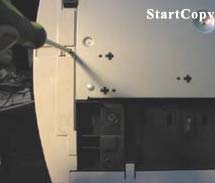
It remains to remove the top cover of the printer. To do this, unscrew 2 screws in the front of the right and left sides of the top cover (there are more screws there, but you need to unscrew only those that hold the top cover; you can recognize them by shaking the cover with a partially unscrewed screw - if the cover starts to move, then the screw is completely unscrewed, if not, then twists back). Under the top cover is the top of the printer with the laser unit (easily recognizable by the yellow warning sticker).
At this point, the simplest stage can be considered complete.
Stove (fuser) repair
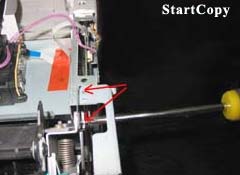
First you need to remove the stove. It is more convenient to do this from the back of the printer. At the top right and top left there are 2 corner-shaped parts; they are fastened with three screws each. Unscrewing the screws located in the depth can be seen in the pictures. The funny thing is that one of these screws is removed through the hole in the gear. After unscrewing the screws, both angled parts are removed, revealing access to the stove.
Now you need to unscrew the 2 large yellow self-tapping screws that hold the stove (fuser) itself. It is not difficult to find them - they are located on the side surfaces almost at the very edge. Then we disconnect (carefully!) The wires going to the stove from the bottom board.
Removing the fuser is now easy - pull it up, slightly spreading the side walls of the printer to the sides. Complications occur only when removing the stove gear from the printer gear system (it is more convenient to move the stove so that the gear moves into the printer).There are practically no easily damaged parts outside the stove, so you can not be afraid, although you should not commit atrocities.
And now the stove is in our hands; put it on the table and start disassembling. First, unscrew a couple of screws (the process is shown in the picture on the right) and remove the black plastic cover with the output shaft of the paper path.
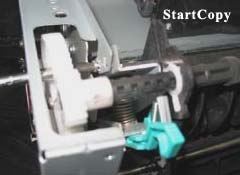
Now we can clearly see the whole green parts and black plastic plugs holding the springs for pressing the heating unit to the Teflon-coated rubber shaft (these units are not visible yet).
These plugs are the most interesting difference between the printers of this series and their counterparts. Remember well their working position: the retainer (part of the plug protruding slightly upwards) is located in the lower (left plug in the picture) and in the upper (right plug in the picture) groove.
Plugs are removed by turning 90 degrees counterclockwise while pressing the protruding part of the plug. And be prepared for the cork to be pushed out by a strong spring; the first time it is difficult and scary, but the second time it is much easier.
Do not lose the removed parts - it will be very difficult to replace them.
Now it's time to remove the springs holding the green plastic parts. This must be done carefully, firmly holding the removable end of the spring with tweezers. Remember well how the green plastic parts themselves stand (putting them back is the most difficult part of the oven prevention process for these printers).
To make it easier to understand the process of removing these green plastic parts, the following picture is shown. It shows how this part by the protruding lever is pushed through the hole deep into the stove. So far, I have never been able to remove this part in another way.
Unscrew another large yellow self-tapping screw and remove another black plastic part that separates us from the heart of the stove - the heating unit.
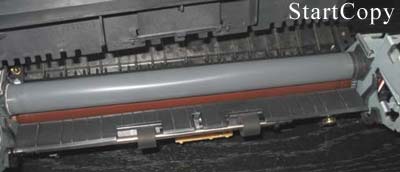
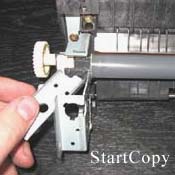 Now we can clearly see the gray thermal film (or what is left of it), inside it is a heating element, and under it is a red rubber shaft with a Teflon coating, pressing the paper to the heating element through the thermal film.
In order to remove the heating unit (heating element with thermal film), two metal pressure plates must be removed. Actually, it was possible to remove them a little earlier, but the essence does not change from this, and there is no possibility to postpone further.
After removing the pressure plates, the heating unit is carefully removed (do not damage the thermal film: it is easily wrinkled and punctured). I hope that the wires going to the heating unit are already pulled out of their regular places and do not interfere with the process.
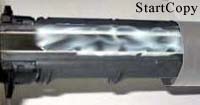
Now it is convenient to carefully examine the thermal film from all sides. Its surface should be uniform in color (except for a special strip about 5 mm wide along the edge of the thermal film). If there are bald spots of a different color or transparent areas, then the protective coating of this thermal film is worn out, and it's time to put a new one. The same should be done in the event that there are holes on the thermal film, even minimal ones - dust, dirt and toner will flow through them, which will destroy the heating plate. Kinks on thermal films are less scary, but the problem is they don't straighten; therefore, it is advisable to replace the crumpled thermal film.
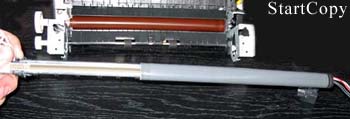 In order to remove the thermal film from the heating unit, it is necessary to move the black plastic cover (from the end from which several multi-colored wires come out); it takes some effort. After the cap is removed, you can remove the thermal film. In this case, the wires remain inside the thermal film, which complicates the process a little.
Now we have a view of what was once the lubricant of thermal film (white and semi-viscous), and usually gray, red or black (depending on the amount of paper dust and toner crammed into it).It is necessary to clean the heating element from old grease (if it is gray or dark); wipes and acetone will help with this (it dissolves the toner). However, acetone should be used only for cleaning the ceramic plate itself, it can spoil the plastic (to avoid this, you can mix acetone with FormulaA liquid in a 1: 1 ratio).
After all the old grease has been completely removed, the condition of the heating plate can be assessed. Ideally, there should be no transverse scratches on it (usually appear at the ends of the plate due to the ingress of toner and hard dust). If scratches are noticeable, it is advisable to change the heating plate, otherwise it will lead to rapid wear of the inner surface of the thermal film and frequent printing stops.
By the way - about the thermal film. Its inner surface must also be cleaned of old grease (with the use of acetone - there is nothing to spoil here). If the surface inside the film is mirror-like, good; if matte and scratched, it is advisable to replace it.
After the old grease has been removed, a new one should be applied. Different sources estimate the amount of lubricant to be applied to the heating element differently; my practice has shown that excess lubricant (if any) will simply squeeze out and not cause big problems.
It can be said that it is enough to apply grease 0.3-0.5 mm thick on the entire working surface of the heating plate. At the same time, 0.5-0.7 grams of this grease is enough for one time (for those who have grease in syringes).
After the thermal film is returned to its place, the black plastic cover is replaced.
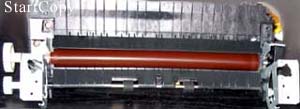
The Teflon protective layer should be examined carefully for damage, abrasions, scratches and tears. If you can see torn pieces or deep lacerated wounds, it means that someone climbed into this printer with sharp objects (scissors, knives, knitting needles, and so on). If pieces of rubber are torn out, the shaft must be replaced. If there are deep cuts, it is advisable to replace it. If the Teflon layer is damaged and peeled off (such places can be easily noticed by the adhered toner), then it is advisable to replace the shaft (at least wash it with acetone).
The assembly of the stove is carried out in the reverse order. The heating unit is carefully put in place (do not damage the thermal film!), The wires are placed in special channels. Then the pressure plates and the black lid are installed in place (there are plastic spikes on it, which should go into the holes on the side metal parts of the stove).
Now let's put the green plastic parts in place. If you have forgotten how they should stand, then you should return to the description of the procedure for removing them (there are explanatory pictures there). Next, we will return the springs to their rightful places (as carefully as they were removed). It remains to put large springs and plastic plugs (they are fixed by turning 90 about clockwise, snap into place with a click). Now put in place the outer plastic cover with the paper output shaft.
The assembled stove is put in place and attracted by yellow self-tapping screws. In this case, certain problems arise with the return of the stove gear to its place in the printer gear system; but if you yourself removed the stove, then you will be able to return it to its place.Now we will connect all the connectors that were disconnected before removing the stove.
It remains to supply two angular parts, which are more related to the chassis of the printer than to the fuser. On this, the repair of the stove can be considered complete.
The Master's Secret shares his successful experience in repairing a laser printer HP LaserJet 1010. The manual is suitable for HP LJ printers of the 1000 - 1200 series. The story is simple, the bought used printer (for 1000 rubles) worked for a year and was stupidly damaged by a sheet with a paper clip, it got dirty and began to rustle - it broke thermal film. Damage to the thermal film is easily confirmed by installing a replacement cartridge. Contacting the service center meant paying for repairs at least at the price comparable to buying a new printer. I also spurred the search for thermal film for the printer, sellers offered to buy thermal film at an unrealistic price of up to 1,500 rubles (its red price
100 rubles), plus the tricks of sellers in the absence of thermal grease in the repair kit and the sale of this component for repair also at an order of magnitude overpriced.
The thermal film was searched for within a month and was purchased for 300 rubles (2013) complete with thermal grease. Repair requires a simple tool:
The repair scheme is carried out step by step in the following order.
Step: 1 Check the integrity of the film and the presence of thermal grease. Pull the cartridge out of the printer. Unplug the power cord.
Step 1. Disconnect the power cord
Step 1. Remove the cartridge from the printer
Step: 2 The cartridge access cover is held in place by a rod. The stem must be separated from the cover by pressing on the inner edge of the plastic rivet. Hold the rivet while detaching.
Step: 3 Turn the printer towards you with the back cover and using a Phillips screwdriver, remove the three screws from the metal cover, two screws on the left and one screw on the right. See photo.
Step 3. Unscrew the screw on the left
Step 3. Unscrew the screws on the right
Step: 4 Remove the sides of the printer. The stacks are held in place by plastic clips that are located at the top, bottom, and back. The lid without buttons holds the strongest. Secret latches are shown in the photo.
Step 4. Wall latches with buttons
Step 4. Wall latches without buttons
Step: 5 Lift the cartridge access door and remove the two machine screws. Remove the cover.
Step: 6 Use a flat screwdriver to pry up the lower right edge of the metal back cover and remove it.
Step 6. Pry off the cover with a screwdriver
Step: 7 On the side of the power connector is the power board. There are four different connectors on the top of the board, unplug them. The connector with white thick wires will be disconnected only after pressing the latch, see the photo. It is also necessary to disconnect the red wire on the back panel. Just pull it up. Remember how it is fastened preloaded by a spring. Remove the wires from the organizer clips.
Step 7: power board connectors
Step 7. Latch for the fourth connector
Step 7. Fastening the red wire
Step 7. Red wire connector
Step 7. The wires are free
Step: 8 So we got to the stove. The stove is secured with three screws. See photo. We unscrew the screws. Hold the screws while loosening.
Step 8. The first screw that secures the stove
Step 8. The second screw securing the stove
Step 8. The third screw for fixing the stove
Step: 9 Take the right edge of the stove and pull it out.
Step: 10 Unscrew the two screws securing the stove top cover. Remove the cover by pulling it to the side.
Step 10. First cover screw
Step 10. Second cover screw
Step 10. The fuser cover is removed
Step: 11 Now we see the destruction of the thermal film. Remember the position of the planks with pins and levers! There are springs on the sides of the stove, we unhook the springs from below with long-nose pliers. We remove metal strips and plastic pressure levers on each side. Do not mix them up when assembling!
Step 11. Spring securing the lever
Step 11. Remove each spring
Step: 12 We release the white wires from the clips and remove the drum with thermal film. It just goes up.
Step 12. Remove the thermal drum
Step 12.The thermal drum is dismantled
Step: 13 We remove with our own hands the plastic tip from the side where thin wires come out of the drum. The cap is held on by the latches.
Step: 14 Remove the damaged thermal film and wipe the metal surface and the thermocouple with a damp cloth from old grease and dirt.
Step 14. Remove the thermal film
Step: 15 Apply a new thermal grease on the surface of the stove. Install the thermal film carefully. The end of the cylinder should be fixed to the opposite plastic tip. also carefully install the right tip. It is useful to remove leaked thermal grease.
Step 15. Apply thermal grease
Step 15. Putting on the thermal film
Step 15. Remove excess thermal grease
Step: 16 Assembling the stove in the reverse order. The correct position of the planks in the photo.
Step 16. The cover is installed
Step: 17 We put the stove in place and fasten it with three screws. We fill and connect all the wires to the connectors. Install the red wire correctly.
Step: 18 Install the back and top covers. Raise the plastic flags of the stove during installation. so that they fit into the corresponding grooves in the cover.
Step 19. Print a test page
Step: 19 After assembling the printer, we check the absence of unnecessary parts. We connect the power cord. We turn on the printer. First, we give the command to feed without paper, and then we print a test page, holding the green button a little longer. On the first few pages, grease marks may appear around the edges. The work was done unhurriedly for an hour. The money saved in such work will correspond to a salary of more than 100,000 rubles a month.
Repair such breakdowns yourself!
I myself changed dozens of thermal films for hp-I testify-it is written correctly.
And how to cheat a laser printer xerox 3140 I have a problem I bought a cartridge for it, I ran out of ink and started pouring new powder and then writes that there is supposedly no cartridge and the red diode has stopped printing and that's it / How can you not tell him to cheat?
DIY printer repair - what you can do at hometo save money on calling a master or sending a printing device to a service center? Not all problems can be solved on your own, but there are things that you can diagnose yourself. However, do not forget that a serious malfunction can be identified and corrected exclusively by the hands of a specialist with extensive experience and specialized tools for carrying out the corresponding work. Repair of printers by service center engineers YauzaOrgService guarantees high quality and speed of service delivery without overpayments. But what will it be possible to reveal at home?
• The most common cause of printer breakdown, whether Canon, HP, Epson, Oki, Samsung, Ricoh, Brother or Xerox, is to clean the machine irregularly. In simple words, it is dirt. It often leads to imbalance of the case, noise appears during operation, or paper picking stops. That is why it is recommended to clean the printing device at regular intervals and only when the equipment is off. But you need to know about the prohibition of the use of alcohol - for wiping we take only ordinary distilled water, a new sponge and cotton swabs.
• We check the correctness of operation: the printer must be plugged in, the tray is pushed in firmly to the very end, the sheet guides are set, the cartridges are correctly installed and there is no jam of foreign objects in the machine.
• Do not be afraid to inspect the inside of the equipment for paper debris or scraps, toner spills, plaster, sand, or water.
• Check the cartridge is full, if it has run out.
• If printer malfunctions are displayed as errors on the computer monitor, be sure to write down the code, number, or information on the screen for transmission to the wizard.
• Pay attention to the print quality of documents, whether there are additional streaks or spots, what color they are.
• Track the frequency of paper chewing.
• Listen for extraneous sounds, crackles, noises when printing.
Having considered all the above nuances, which often lead to the stoppage of the printer's functioning, you can speed up the process of correcting a malfunction, replace the repair procedure with preventive maintenance and save money on a specialist visit. Evaluation of the state of the equipment operability, the exact formulation of the problem and the listing of the problems that have appeared will allow the foreman to respond to the request as quickly as possible, since he will present the amount of work in advance. If this is not a serious breakdown and the situation allows you to repair parts, replace components or restore work quickly - printer repair can be carried out even at the diagnostic stage. By calling the phone number or sending an application through the website YauzaOrgService - assistance will be provided with the provision of a guarantee for all types of operations and services performed.
Laser printers of the HP LaserJet 1000/1200/1300 families are widely used both in various organizations and at home. Despite the fact that printers of these families were released a long time ago, they continue to be used. Although these printers have weaknesses in terms of reliability, but, as will be shown in this article, in the presence of elementary components, their repair is not difficult and cumbersome. Printers of these families have a similar appearance and a similar implementation of the main units of the device.
As part of this article, I want to consider an example of repairing an HP LaserJet 1300 printer, as the most common one.
The main malfunction with which printers come to service is a malfunction of the thermal oven (a printer assembly that thermally fixes an image consisting of toner on a sheet of paper). The customer's wording “Does not fix the seal”, “black line when printing”, “faint print”, “dirty print” - are most often associated with malfunctions of the thermal furnace, namely: wear of the thermal film, bushings (bearings) of the thermal valve, scuffing at the thermal valve itself and etc. A common cause of failure of a thermal oven is the ingress of foreign objects into the paper feed path (most often staples fall, but with sufficient experience with these printers, you can find anything in the paper path, both rulers and flash drives and earth from a flower pot). Thus, diagnostics and repair of such devices is reduced to disassembling the printer, removing the thermal oven and its detailed analysis and repair.
Notes:
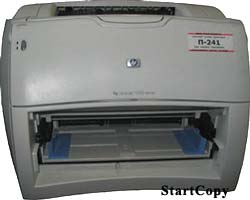
- in the figure on the left we see the appearance of the printer. In this picture, the closest to us is the left / front / top corner, and the farthest from us is the right / back / bottom. This terminology will correspond to the location of all internal components of the printer;
- all figures are numbered within the paragraph;
1.1. Open the cartridge compartment cover, remove the cartridge. We leave the lid of the tray in a slightly open state, because otherwise, it will interfere with the removal of the side covers of the printer.
1.2. Remove the left printer cover. To do this, pull on the tab on the back of the left cover (Fig. 1.) and press with some tool on the latch of the left cover from the bottom of the printer (Fig. 2). As a result, the printer without the left cover will look as shown in Fig. 3.
1.3. In the next step, we need to loosen the screws on the back of the printer (in Figures 2 and 3 are marked in red) that secure the upper case cover, and completely unscrew the screws that secure the right and rear covers (in Figures 2 and 3, they are marked in blue).
1.4. Remove the rear housing cover by slightly bending down the green levers pressing the heating element to the thermal shaft and releasing the latches on the back wall at the bottom of the printer (Fig. 1). As a result, the printer without a back cover takes the form as shown in Fig. 2. In fig. 2, the blue rectangle marks the appearance of the thermal oven, which we need to remove.
1.5. Remove the right housing cover by also releasing the latch on the bottom of the printer.
1.6. Unscrew the screws securing the top cover (Fig. 1 and 2) and remove it. As a result, the printer takes on a form sufficient for removing the thermal oven (Fig. 3).
Today, almost every family has a home printer that allows you to print documents and take photos from the comfort of your home. But, as you know, any office equipment needs maintenance and, if necessary, minor repairs from time to time. Therefore, in this article we will tell you how to do it yourself, at home, without much money and loss of time to troubleshoot printers. For example, consider the well-known brand - HP.
As you know, the Hewlett Packard brand is very popular in Russia. Printing devices of this brand can be found both at home and in businesses and offices. The high popularity is due to the reasonable price of printers and the reliability of their work. But any, even the most unpretentious device sometimes needs maintenance.
To begin with, let's look at the typical problems that arise with the active use of HP inkjet printers and how to solve them.
The first reason for possible malfunctions is internal contamination of the printer, leading to an imbalance of the moving parts, the formation of noise during operation and knocking during the movement of the carriage.
Even an ordinary user can fix this problem, the printer does not have to be disassembled - it is enough to buy a special lubricant sold in electronics stores and process all moving mechanisms.
To clean the printer from internal contamination, it is better to use ordinary distilled water; the use of alcohol for these purposes is contraindicated by the manufacturer.
If during printing the text moves to the side or the carriage hits the edges of the case - the reason may be dustiness or breakage of the positioning "ruler", along which the carriage is oriented in space.
In the first case, you just need to disassemble the back of the printer, get to the shaft and remove the ruler, then rinse it in warm water, wipe it with a dry sponge and dry it, then put everything back in the reverse order (remember how the ruler was originally located) Turn on the printer and check its performance. If the line breaks, it is better to contact a specialized service center.
There is also another malfunction - the carriage does not cling to the gear teeth, the motor is idling. The cause of the breakdown is simple - poor drive belt tension. The problem is solved by inspecting and correcting the tension spring on the belt gear bracket. Perhaps it is poorly fixed or simply needs to be replaced.
The next problem is jerky movement of the carriagecausing the printer to tear the paper. This is a serious malfunction associated with an imbalance in the printing mechanism - the printer shaft has lost its original correct position. To eliminate the defect, it is necessary to disassemble the printer - remove the carriage, ruler, shaft, toothed belt, clean all mechanisms by rinsing them in warm water, dry and collect everything in its original state, lubricating all friction points of the carriage and adjusting its free travel.
If your printer does not pick up the paper, for this it is worth cleaning the rubber rollers in the lower tray, and also adjusting the small spring that presses the paper against the roller.
If the printer produces a streak on the printed pages, you can safely say that the cartridge will soon run out, and to temporarily fix this problem, you just need to remove it and shake it from side to side.
If several horizontal stripes appear, you can clean the transroller yourself (black roller under the cartridge). It can be pulled out simply, but try not to touch it with your hands. You can clean the roller with cotton pads or a soft cloth, it is also allowed to use isopropyl alcohol.
Summing up, we can conclude that most printer malfunctions are eliminated by cleaning them from dirt and adjusting mechanisms even at home. Basic technical skills and patience are enough for this.
Hello everyone! After my previous post about repairing printers, I still have +10 subscribers) Although I do not pretend to be such respected pikabushniks as qepka and 80cats (I am far from them and their work profile is different), I am very pleased for your support. In this post I want to tell and show you about the repair of some printers that have visited our SC
Xerox WC3220, problem - after turning on it does not go on readiness, a message appears something like “system error: off / on. a printer". I also thought that everything is simple because with the same error, the same printers have already brought, the result - the heating lamp burned out. I noticed that recently they began to bring Sam / Xer printers with a burned out lamp, it seems to be understandable: it often turns on and off during operation (it was just that this was not the case before, and devices of about the same year of manufacture ¯_ (ツ) _ / ¯ ) During the repair process, it turned out that the lamp and the fuses were intact, and the reason was not a contact in the thermo unit connection socket:
Looks like the face of a robot with square eyes) The “teeth” of the robot are the contacts of the thermal sensor, the “eyes” are the contacts of the lamp. Two pins were just a little covered with oxides, I was too lazy to clean them and I put the whole socket from another disassembled thermo unit.
Next, the Canon LBP3110 printer, the problem is crackling when printing, jams. And here is a typical problem - wear of the thermo unit drive gear:
In the photo, another printer seems to be Canon MF5730, exactly the same gear in HP 1000/1200/1300 printers and many others
Instead of teeth, the gear has thin plates, naturally there is no normal engagement with the gear of the rubber shaft of the thermo unit. I think there are several reasons for this wear: different gear material, weak pressure between the gears, wear of the thermocouple, and the manufacturer himself is not interested in the nodes to serve for a long time
Kyocera ES 1370N printer. Customer complaint that the sheet comes out of the printer by about 2-3 cm and stops. This happens in about 5-15 sheets.
I found out that the Teflon shaft was worn straight to the metal on one edge, but after replacing it, the malfunction remained. Having crawled through the forums on this problem, I realized that either the optocoupler for the passage of paper in the thermal unit is faulty, or the forward / backward rotation switch of the output shaft is damaged (with double-sided printing). I checked all this - the problem remained. Further, suspicion fell on the registration clutch in the gearbox. It is a pity that then I did not take enough pictures because my hands were constantly greased from gears (there is a mechanism that is not easy to disassemble)
Further repair of НР Р2035. They printed until the last: after the thermal film broke, the rubber shaft broke, they stopped only when the printer began to jam the paper, the result: repairs for something about 3000 rubles, and it could be more if the heating element burned out (gray strip on photo) The photo shows that even the paper turned black from the temperature
If you open the rear door of the printer after a paper jam and notice such pieces of rubber roller or thermal film (sometimes they fall into the tray or at the exit from the printer), then turn off the printer and carry it to repair so that you will not spend even more on repairs.
Often, in HP / Canon printers, it is necessary to replace the bearings (bushings) of the rubber shaft of the fuser unit. They are made of heat-resistant plastic, in shape they can be left and right as half rings or one half ring, and the other on the gear side of the rubber shaft with a loop from scrolling in place.
Ball bearings familiar to many are also put into printers, but the price of such devices is usually several times higher. In the upper right corner of the photo, it broke when trying to get it - it was completely erased. Often they wear out unevenly, in which case a distortion occurs and the thermal film slides towards the worn one and over time its edge breaks.Also, when they wear out, the clamp between the rubbers. the roller and the heating element becomes smaller, which is why the toner does not adhere well to the sheet (the image is erased if you slide your finger over it). On the left side of the photo are two red bearings from canon 3110/3220/5730 and similar. The trick is that the one that is higher in our country is around 200 rubles, and with a loop it is already almost 900 rubles. (!) The wholesale price will certainly be lower, but still I do not understand what exactly is its high price, can any of the pikabushniks know?
The next Brother 7xxx series printer seems to be and the most common problem is poor print quality. It happens that a client calls and asks: "Why is my printer doing there?" Well, I don't like these printers, my parents have a DCP-7030R at home, my father rarely prints and all the rules, and in an organization where you need to print a lot, they constantly bring them with poor print quality. When I just started working in the service I tried to somehow fix the cartridge, clean it there, replace the photo roll, sometimes it seems to help, but more often, or when checking, the same thing again, or then a dissatisfied client will bring it again. The most reliable thing is to buy a new cartridge stupidly and not to steam. Moreover, the compatible cartridge is not much worse than the original, and the price is 3 times less
The cartridge itself consists of two parts: a toner cartridge (TN) and a photo cartridge (Drum). The photo shows a disassembled Drum without a photo. In general, cartridges themselves are consumables and manufacturers try to make them disposable in their own way, because this is just a gold mine for them. Someone, for example, puts chips with protection, which are blocked after printing a certain number of sheets, and Brother uses a mechanism instead of chips, which, in principle, is easy to reset to 0, in addition, they took some parts from the printer into the cartridge and made it as disposable as possible ... On average, 4-5 refills and the toner cartridge starts to crumble, and then the dram starts to print badly. As I said before, cleaning and repairing the cartridge does not always help. You can clean the toner cartridge (completely empty out the old toner, invigorate the seals, clean the magnetic roller, metering and cutting blade), but with the drum it is more difficult. As we understood, charge leakage begins and that's it.
Next comes the HP M400 printer - another example of how a manufacturer strives for disposable cartridges. Customer complaint: the printer breaks the teeth of the drive coupling for rotation of the photo roll (by the way, the cartridges are original)
Fortunately, the clutch is available, and it can be removed from the decommissioned ones. The trick is that on previous models with the same fotoval drive unit, such garbage was not observed. If you pull out / insert the cartridge, the printer starts to rotate the shafts, but sometimes the clutch slips and over time the clutch breaks. I had to work on a collective farm with a gear cover so that the clamping of the clutch and the drives was tighter)
True, then, after about 3-4 months, the client brought it again with the same trouble (and they print a lot). There are no further kolkhoz photos - another person took up the printer. In addition to this jamb, the printer has a dull touch display and log firewood - you wait almost an hour for installation, it reaches 99% and an error occurs that the installation takes too long, restart the computer (if there is firewood installed on the same printer, remove them completely and start the installation again)
Next on the list is the Toshiba e18 MFP. Quite a popular model with a reasonable price for an A3 paper machine. The client says he is jamming the paper in the fuser with an accordion. The client is to blame for this - when a jam occurs, the paper must be removed carefully, otherwise the seats of the paper separator fingers can be easily broken:
You can, of course, try to fix it with a thin drill, wire or paper clips (if you glue something, then with a special high-temperature glue, which we do not have 🙂), but in such cases we usually suggest replacing the entire lid of the thermo unit, there is no other way.If the printer displays a message about the need for service (after about 75 thousand pages) and the print quality suits you, the error can be easily reset, but still sometimes you look inside to see if everything is okay with it. By the way, I recently screwed up a lot with another Toshiba) I replaced the Teflon shaft, began to assemble it back, and at the stage of tightening the fastening screws of one of the heating lamps pulled my hand that broke the tip with the contact of the lamp (I'm a fool, I'm used to using an electric screwdriver, but it was necessary to tighten the usual one carefully) Naturally, there is no way to repair it, and the lamps removed from the old devices have disappeared somewhere. Fortunately, the boss did not swear much, advised him to look into the thermo unit of the old decommissioned model of Toshiba, which had been standing in the corner for a long time. I was lucky - although there was only one lamp, instead of two in the 18th, it matched the broken one in terms of parameters.
That's all for today, I think it's time to finish) Why didn't I have inkjet printers in my post? There was a time when our service refused to repair them altogether. there was little exhaust from them. Recently, they decided to take them again, but only to eliminate problems not related to print quality is a dirty business, and there is no guarantee of work (maximum start cleaning nozzles). Usually we reset errors, remove jams, change pick rollers, “diapers” and so on. Instead of cats at the end - fsh with Pikabu from which I blasted out loudly at work: Mitka Makkonokhov and Zhorik Letov
What I liked while working in the SC was the repair of printers / copiers. Although I started with a banal PC repair, then laptops, navigators, etc. As a result, I slowed down on the printer equipment, and for the last three years I have only been repairing it. Now I will explain a little to those who do not know:
1. It is much more interesting (and even more difficult) to repair a printer than computers and laptops (it’s not just me about laptop BGA soldering, etc. a child can handle soldering at a thermal soldering station).
2. Variety of breakdowns, each printer is something new and a drop of experience. Yes, there are repetitive repairs, but their percentage is not as large as when repairing PCs / laptops. There are instances (immediately the cold ran through the body) with which you f * ck for several days and knowing exactly the node in which the malfunction (from personal experience - SHARP, I picked it up for three days, as a result - on the gear already when measuring the gear it turned out that the teeth were licked evenly by 1 - 1.5 mm.) For 10 years of work experience in the SC, I have not yet seen a single laptop and PC which would take more than 2-3 hours to diagnose.
3. Each printer is endowed with a magical mind. And if you do not say at the end of the assembly and before the test check the phrase: “Well, bitch, just try to fuck, I won’t fucking disassemble you for the third time” - then there is a possibility that I didn’t finish something. The most important thing is communication with the printer, you have to feel it so to speak. (to know in which case in which area to get off the feet).
4. Incredible thrill when everything works. Especially the buzz is obtained from the repair of the mechanical part (there is the fiercest pi * ets just).
5. Copiers (these are such big infernal office machines) are the raisins for an employee of the SC. Since this is the same printer, only there are more details - ask where are the raisins? For the price of repairs, they are charged 10 times more expensive.
And finally, I would like to end with the following phrase: you can't just pick up and assemble so that there are no extra bolts left.

