In detail: do-it-yourself printer repair samsung clp 300 from a real wizard for the site my.housecope.com.
Self-elimination of printing defects in printers Samsung CLP-300 (as well as various multifunctional devices based on this printer, such as Samsung CLX-2160, CLX-3160), as well as its analogue printer Xerox phaser 6110 and its modifications.
All these devices are united by a common device "Imaging module". The device itself is quite complex and contains almost all the details that are responsible for the image quality, roughly speaking, if the print is not of high quality, then replacing this module will solve the problem. But the whole problem is that the cost of the imaging module is up to 80% of the cost of the device.
Samsung CLP-300 printer with open cover.
1) Imaging module;
2) Collector of waste toner;
3) Black toner cartridge;
4) Yellow toner cartridge;
5) Magenta toner cartridge;
6) Cyan toner cartridge
External view of the printer with the image forming module removed
To begin with, we remove the imaging module from the printer; to do this, pull the green lever at the bottom of the printer, it is in Fig. 1 at number 7. Figure 2 shows the printer with the Imaging Module removed.
Imaging module removed from the printer.
We remove it from the imaging module, the waste collection is shown in Fig. 1 under number 2.
Imaging module with removed waste container.
After removing the waste collector, unscrew the screw from the end of the Image Formation Module; it is circled in yellow in Figure 5.
| Video (click to play). |
Further, in the front upper part of the imaging module, see Fig. 6, unscrew another screw, then unscrew two more screws in the lower part that secure the contact pad.
After the screws have been unscrewed, it is necessary to disconnect the contact pad, see fig. 7
After disconnecting the contact pad from the end of the imaging module, pull the waste toner supply channel towards you, and then detach the drum unit from the rest of the structure to the side and remove it to the side, see Fig. 8. And Fig. 9
It should look like fig. 10.
Now you need to remove all four toner blocks by pulling on the edges, see fig. eleven
We actually needed these blocks, since the whole problem lies precisely in them, or rather, in the metering blades of these blocks.
We will not describe the parsing of each block due to the same design; we will describe the parsing of the block and its preventive cleaning using the example of a block with black toner.
So, take the black toner block and unscrew the five screws, see Fig. 12.
After unscrewing the screws, remove the steel metering blade and proceed to cleaning it. We take the metering blade in our hands (see Fig. 14) and with a little effort we drag along its edge with a finger to the touch, you will feel how solid carbon particles are peeling off the metering blade, and so on until the blade becomes smooth to the touch. Then degrease the edge of the metering blade with alcohol. On this, the prevention of Samsung CLP-300 can be considered complete.
Now ATTENTION when screwing on the metering blade, be careful, the metering blade must fit snugly against the black roller and under no circumstances should it rest on the seals at the edges. The metering blade should be on the side of the seals. See Fig. 15
If the dispensing blade rests on the seals, a gray strip will be printed on the sheet and over time the Imaging Module will literally be covered with toner.
Next, in the reverse order, we assemble the image formation module and enjoy high-quality printing.
And a little bonus for those who will remove their printer fuser.
The stove can be easily removed from the printer, four screws are unscrewed and here there is a slight subtlety ...
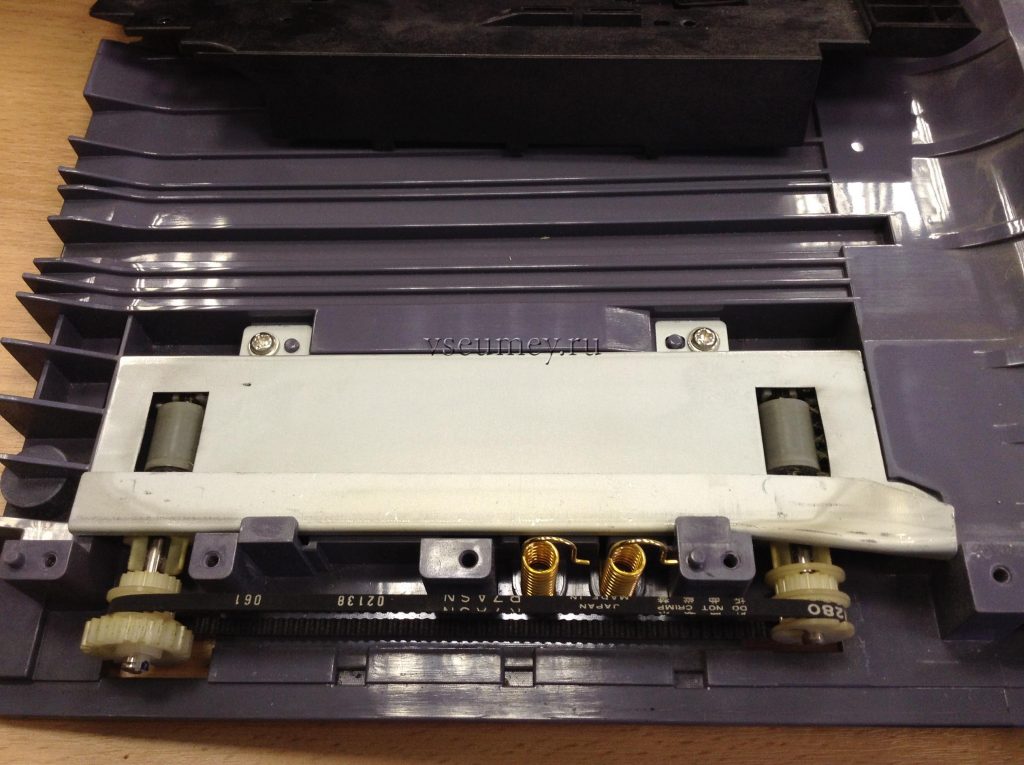
The drive of the paper exit roller will interfere with the complete removal of the fuser from the printer, fortunately for this you do not need to disassemble the entire printer as it moves to the side, see Fig. Below.
START COPY CONFERENCE
Printers, copiers, MFPs, faxes and other office equipment:
issues of repair, maintenance, refueling, selection
Actually, I'm interested in what is better to glue an inverted squeegee.
Well, I have no new ones, but I have to do it. Both squeegees, drum and belt are loose and cannot be cleaned. I turned them over and put them on double-sided tape, printed several images perfectly, and they peeled off, tried glue for bicycle cameras, almost does not hold. How to glue?
PS: please, no need to say that there are a lot of new ones around, and that I have nothing to do, I need glue. 🙂
I have a "crystal" moment, others have not tried it.
hello slavuns.
after sticking on double-sided tape, it is advisable to walk over it with an iron (or a hot hairdryer).
somehow I glued a new screen to the tablet on the factory Velcro in compliance with the technology - it fell off on the 2nd day.
and then remade and warmed up - it has been worth more than a year.
Yes, and scotch tape strife.
don't use the cheap one, take 3m.
(were you renamed there too?)
3) oh, don’t press on the corn, we are still Komsomol members! You were even called a river, but we were generally called a swamp.
I decided to try the old proven method, remaking the squeegee from another model. The closest I found was a copier cleaner 4118. But you still need a grinder. I'll try to saw it if the glue doesn't work. This is only for dram, I haven't measured the tape yet.
(4) Nothing, you will get used to it) Moscow is also not a very euphonious name, if you read where it came from)
If the squeegee just bent, and not scratched, I would not re-glue. I would cook it in a saucepan for a couple of minutes. Then, hot, put it under the press to cool down and take its original state. This is just an idea. I have not tried it myself. If it does not come off, it should work.
(6) I did this with the metering blades when they suddenly ran out. It helps, but it happens that the rubber “floats” on the E16 cartridge.
Strangely, I have tried flipping the rubber a few times, but the result has never been satisfactory. Therefore, I began to do it differently: I rip off the rubber band from the squeegees of the Samsung 2850 type and re-glue it onto the clp-300. Works great.
As for the glue, I put the gum on double-sided tape 3M, and along the edge adjacent to the base of the squeegee, I gently pass it with superglue.
And what does ethyl cyanoacrylate not suit you? It is clear that after it it is useless to tear it off. But by that time the client should be ready to fork out for a new squeegee.
serry (10): But by then the client should be ready to fork out for a new squeegee. By the way, this method has already restored more than a dozen squeegees for Panasonic DP. The only thing is that I do not turn it over (the inverted one does not work for so long), but I take a new plate. So the restored squeegee works many times longer than the new original one.
just bought a whole bag of glues and double-sided reinforced tape. I started by gluing the squeegee to the scotch tape, and spilling the edge, like the emulator in the video, with glue, this is exactly the place where the blade breaks, and it must be strengthened. I'll try, if it comes off, then go to plan B - ethyl cyanoacrylate, I also bought it, if it doesn't work out with it, I'll adjust the squeegee from 4118, or I'll tear off the rubber and re-glue it. Thanks everyone for the advice.
I did the same with transfer cleaning. This is the gluing of the edge, I think it is even more important than the fastening of the plane itself. It is along the edge that the pulling force itself goes.
I don’t know how on the 300th, but on the 310th squeegee the drama is on sale and costs a little more than a hundred, you can find it for three, but the result is the same, and for the transfer with the help of a hair dryer I remove the rubber band from the 2850 squeegee, and then at I put the help of the moment in place in the flower garden. If something went wrong, after drying, you can always heat the gluing with a hairdryer and fix it, re-set after cooling down. My hands are not crooked, but on 10 glued squeegees one will stick crookedly
Suhov (14): the 310th squeegee drama is on sale and costs a little over a hundred
On the 300th it is the same. Transfer squeegees have to be glued.
Finally finished.
The cleaning of the transfer was glued, and it sticks, there and the load on the blade is not so strong.
But plywood drum cleaning does not help. The blade is sagging, and in an inverted state it generally looks up, the load is large, and it was torn off from me again. Therefore, I modified the squeegee from the 4118 copier, there is the least amount of sawing, just remove the corners on the sides and that's it. I don't like such repairs, because then at night I have to think, but how is it tama ..
Nevertheless, everything works. I give the device away, and it can be considered a closed topic, especially since there are still new ones in nature, you just need to look in advance.
What is the distance from the working edge of the drum squeegee to the steel bar on which it is glued? I bought a printer from my hands - it seems it was not correctly re-glued.
(17) “Superfluous” is unimportant, as long as the blade reaches the drum.
It seems to me that it rubs a lot, but it does not clean the drum?
prevention did everything cleaned up. about the transverse strip I know this on the photo. and thin longitudinal stripes as if from rollers. I don’t understand why.
(21) I would wash the developer with soap on magenta and clean the dosage on it with passion.
Soldier
Group: Members
Posts: 7
User #: 5882
Registration:
7-January 12
General
Group: Members
Posts: 285
User #: 1403
Registration:
7-February 09
Soldier
Group: Members
Posts: 7
User #: 5882
Registration:
7-January 12
General
Group: Members
Posts: 285
User #: 1403
Registration:
7-February 09
Soldier
Group: Members
Posts: 7
User #: 5882
Registration:
7-January 12
General
Group: Members
Posts: 285
User #: 1403
Registration:
7-February 09
Soldier
Group: Members
Posts: 7
User #: 5882
Registration:
7-January 12
Soldier
Group: Members
Posts: 7
User #: 5882
Registration:
7-January 12
General
Group: Members
Posts: 285
User #: 1403
Registration:
7-February 09
Soldier
Group: Members
Posts: 7
User #: 5882
Registration:
7-January 12
Download / Print topic
Download a theme in various formats, or view a printable version of the theme.
At one point, the printer that served you faithfully stopped working normally. What to do? Take it for repair? Will they be able to establish the cause of the breakdown. Will they impose the replacement of serviceable parts instead of those that really need to be changed. It is not known whether the broken part will be replaced or whether they will make it work, install another, which has worked out its resource by 50%, or order a new one. Can you try to disassemble and repair it yourself?
In this article I will talk about typical malfunctions of laser printers using the example of the samsung ml-3050 printer. And also I will tell you how to disassemble it. And most importantly, how to repair it!
The Samsung 3050 printer is an office printer with an average print volume.
Let's start with the fusing unit. It bakes toner on paper at 180 degrees. As a result, the powder applied to the paper is not smeared.
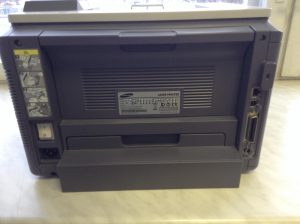
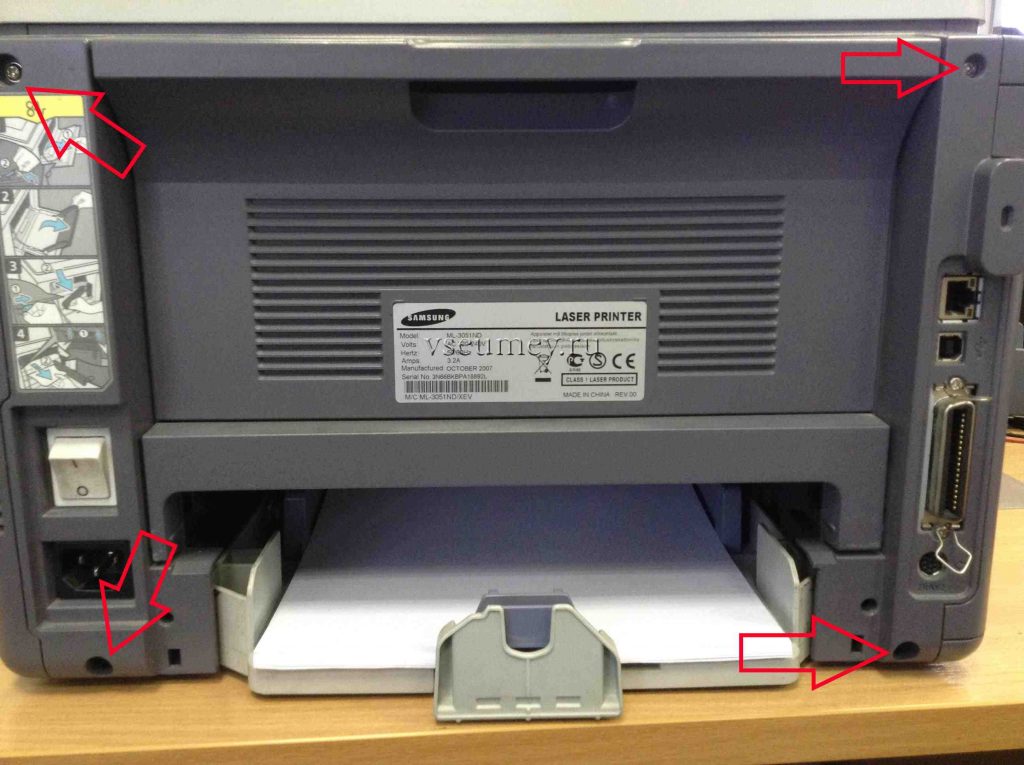
It is filmed on this printer very simply. Open the back cover and unscrew the 4 bolts that secure the assembly.
We take out the fuser. It is connected to the power supply with a connector on the inside.
- The printer screen says "High temperature. Restart the printer."
The malfunction is eliminated by replacing the temperature sensor. It is fixed with 3 screws and connected with screw terminals.
- Worn gear that drives the fuser shafts. It is accompanied by loud noise and crackling.
In order to remove it, you need to disassemble the fusing unit. The photo below shows 2 gears, I decided to change them too.
Remove the terminals from the halogen lamp inside the heating shaft.
And we unscrew the bolts fixing the lamp.
We carefully take out the lamp.
Slightly separate the halves and take out the gear from the heating shaft.
The gears of the stepper motor, which drives the shafts of the printer, also wear out. To replace them, you will have to disassemble the printer. First of all, we take out the duplex printing module.
Next, unscrew the 4 bolts of the back cover.
We turn the printer over, open the front cover, as when installing a cartridge, and unscrew the 2 bolts securing the top cover.
We unscrew the side cover bolt, disengage it at the bottom and remove it.
We unscrew the engine bolts and disconnect its cable.
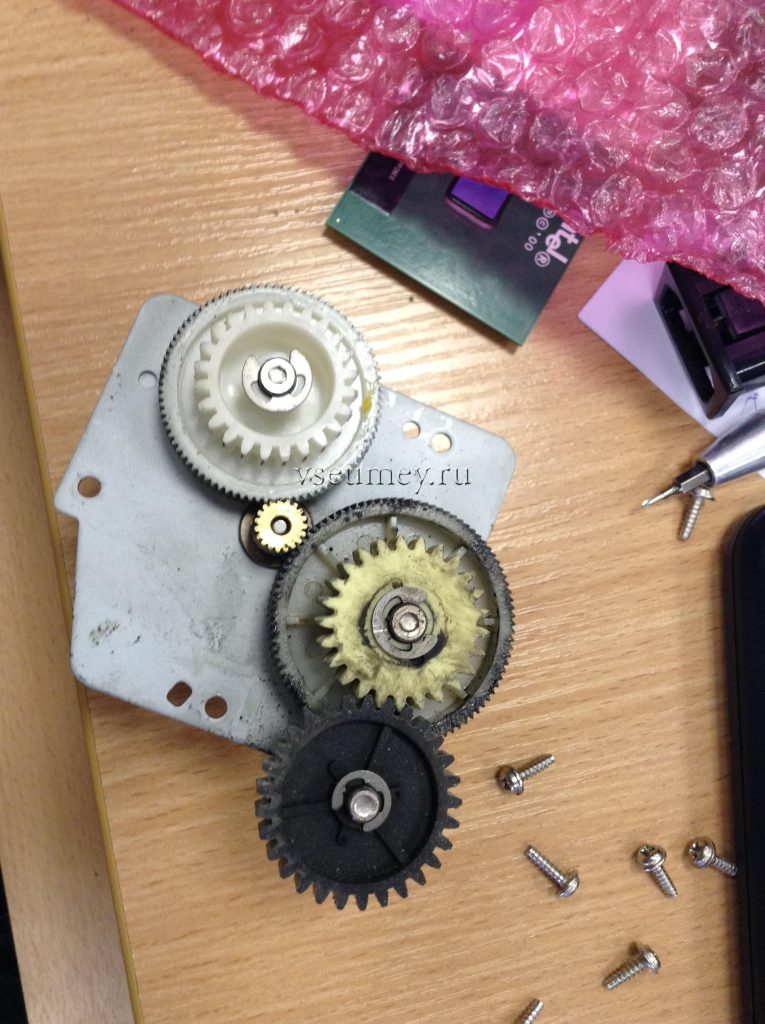 We inspect and replace worn gears. To do this, use a slotted screwdriver to pry and pull out the retaining ring. The block touches the fuser gear with one of the gears and sets it in motion.
Some more malfunctions associated with the shafts.
- Carbon deposits on the heating roller, due to the adhesion of toner (usually this is due to a non-original cartridge, more toner is applied than necessary and the excess remains on the roller).
- Peeling off the film from the pressure roller and sticking to the heating one leads to paper jams.
- Uneven baking on the sheet, resulting in toner smearing in places. In the photo below, the shafts are even more or less in working order!
- Stripes on the heat roller result in stripes on the sheet when printed.
Problems associated with the movement of paper through the printer
- if the printer picks up several sheets from the paper tray at once, then it is necessary to change the brake pad.
It is not difficult to shoot and changes to a new one.
- if the paper jams during the pick-up process, you need to change the pick-up roller. It can be removed very easily, bend the plastic retainer and remove the roller from the shaft.
The surface of the roller should be slightly rough. The roller with rubbed rubber must be replaced!
- if the paper jams during duplex printing, the problem is with the duplex unit. I described how to remove the module above. Let's see how to disassemble it.
Unscrew the 4 bolts on the black plastic part and remove it.
Remove the rubber roller with the shaft. The hard rubber roller needs to be replaced. It is necessary to find its part number in the spare parts catalog for this printer and order it on the Internet. Most likely it will be together with the shaft.
I had rollers for the Samsung 3710 close at hand. The gum itself is the same. I decided to rearrange them.
I remove the gum with pliers.
The photo shows the difference between the new and the old video.
Replacing the two rollers should resolve the paper jam problem.
The last stage where paper can get jammed is the fusing unit, the repair of which is described above.
Another very rare, but possible malfunction: black sheets exiting the printer. The problem is solved either by replacing the cartridge or caratron (the unit that forms the image on the drum of the cartridge).
In order to remove it, you need to disassemble the printer as when replacing the gears on the engine, but you need to remove the opposite side cover and disconnect its loop from the control board, and of course unscrew it yourself.
The cartridge can also cause poor print quality and replacing it will fix the problem.
call within Russia is free
In this article, we want to show you how the Samsung CLP300 fuser is disassembled.
First, unscrew the 4 bolts, Figure 1.
Picture 1.
We move the latch and remove the fuser, Figure 2.
Figure 2.
Note the two sensors, the burst and the temperature sensor, Figure 3.
To check the burst sensor, you need to set the multimeter to 200 Ohm, Figure 3. If it shows an infinitely high resistance, then it is not working properly. Remove it, blow it back to its original state, check it again with a multimeter, it should show zero resistance.
To check the temperature sensor, you need to set the multimeter to 100 kΩ and the resistance should decrease to heat the sensor.
Sometimes they bring a Samsung CLP-300 printer cartridge with a broken gear. It would seem that you can answer the client: “Buy a new one!”, But then you do not earn money at the gas station. But the repair will cost a penny and will only take 15-30 minutes.
The photo shows a cartridge without a gear.
We bring the broken gear with sandpaper to the required diameter so that it fits snugly into the tube from the telescopic antenna.
In the photo - a gear processed with sandpaper.
A hacksaw blade for metal was used to prepare the tube. The cut must be made to match the thickness of the agitator at the attachment point.
The photo shows the telescopic antenna tube after processing.
In the photo - a gear after repair.
This is what a gear cartridge looks like:
You will need two washers with an inner diameter of 6 mm. It is necessary to make cuts in the washers, as shown in the photo.
Washers perform two functions: they do not allow the entire mixing structure to move outward (which was previously done by a sealing washer made of plastic) and strengthen the antenna tube at the cut.
In the photo - processed washers.
You will also need a third washer. Please note: it is thinner.
START COPY CONFERENCE
Printers, copiers, MFPs, faxes and other office equipment:
issues of repair, maintenance, refueling, selection
Help the poor man who can do anything.
After cleaning the Samsung CLP-300 printer and replacing the cartridges, the prints have light streaks at the edges and streaks in the image. As far as I could understand from the conferences, the problem with the drum. I can't find my home in my city. Tell me, with which one is it interchangeable, and is there any reason at all to change it? The printer is not new, it has already passed 8 recharges. Which is more profitable, to repair, or send it to a landfill. and buy a new one?
Kotofey (0): Which is more profitable, to repair, or send it to the landfill. and buy a new one? Depends on your erudition. But judging by
Kotofey (0): After cleaning the Samsung CLP-300 printer, and replacing the cartridges, the prints appeared. maybe it's easier to buy a new one. However, in any case, you know better.
(1) The answer, of course, is lengthy and explanatory. Thanks!
Couldn't duplicate it in Russian. and with well-reasoned arguments?
(2). when you pose the question in (0), such as which is more profitable, to repair faulty cartridges or throw out the device itself (and the option of replacing a set of used cartridges with new ones is not considered at all), it is difficult to say anything reasoned.
No one except you knows your conditions, namely, what prevents you from repairing cartridges (photo drums can also be ordered through online stores, you do not have to look for them in stores in your city ... but in general, the ability to get some spare part no longer depends on their availability in nearby stores, but from a real desire to get them) or replace them, so what advice can you give? - you know better on the spot what is more profitable for you.
(0) What did you clean? Was IU disassembled?
Show how he types. Scan it and dump it to a file hosting service.
(3)
CAT (3): No one except you knows your conditions, namely, what prevents you from repairing cartridges (photo drums can also be ordered through online stores, you do not have to look for them in stores in your city ..
Kostya, he has one drum unit. It does not happen separately, and IU is more expensive than a new printer ... So, after 30k (this is the declared unit resource by the manufacturer), the printer is doomed. I have never met a user who would agree to a replacement ..
(4) Disassembled the mechanism, wiped the dispenser blades.
Here is a link to the files with scanned impressions on the site:
(4) The text is printed perfectly, but the image is with stripes and risks.
(4) Da Wan, one.I spoke in general, and not only about a specific device 🙂 - about the fact that the lack of spare parts in nearby stores is not a reason to throw out the device - spare parts can also be found in Internet stores (and sometimes much cheaper than in your city).
As for the users who ordered dramas for this model through our office, I won't say that there were a lot of them, but there were. ... it's a pity I didn't have time to take a picture of them - I would have posted pictures for you to look at: D.
(5). it would be better if you put it on some file sharing service, sharpened for a photo, like or similar - it's not very convenient to download a file to see a picture.
Doesn't look like a photo drum. Clean well metering blades, wash deflop rollers
(9) Found instructions for cleaning rollers. I did not understand one thing, how to wash them, if you can not touch them, in order to avoid scratches.
(10) Window cleaner can also be cleaned with a cloth. You can not touch, so as not to leave greasy prints.
When you roll your roller, it should be evenly coated with toner.
Kotofey (10): Found instructions for cleaning rollers Such “findings” are always alarming, especially on the vastness of the endless Internet. It seems that so many people have already "come across" so many heresies in the net, such as a way to "clean the magwal with sandpaper in a cartridge" or "rinse the head with a syringe under pressure" that laughter is already obtained through tears. Yes, you don't have to go far, here:
Kotofey (0): As far as I could understand from the conferences, the problem with the photodrum, while from (8), as it turned out, did not lie nearby. So maybe
emulator (1): is it possible that it is easier and buying a new one is not so far from the truth? In your case?
(12) Well, not everything that is published in the Internet is heresy. Otherwise, you can completely abandon the computer.
Alas, advice
mhz86 (9): Clean well metering blades, wash deflop rollers with no results. As there were stripes, after cleaning and washing, they remained. Apparently, after all, the drum. So, now this printer is only suitable for printing texts.
By the way. I have already bought a new one, HP Color Laser Jet CP1215, now I treat with questions about its registration on a computer How to deal with the software for the HP Laser Jet: CP1215 printer?
Can you give your opinion about the device and give advice on software?
Kotofey (13): Well, not everything that is published in Internet is heresy - not everything, but ninety percent IMHO, and it is sometimes difficult even for a specialist to separate the grain from the chaff.
(13) I would like to express my doubt about the clp300 that the drum creates the same image in text (black) mode and in color. So how does he manage to print decently in black and strip in color so well? After all, he is one and the same. However, the new device is the right decision. Especially if you feed him with new original cartridges. otherwise options will appear again.
PS By the way, what you don’t want to give to the service - to repair it? For example, I would fix the problem for 500 rubles.
(14) Thank you, of course, for the offer, but oddly enough, the text typed in the Word, for some reason, it really prints great, so I'll type texts on it. Looked at the drum - indeed, roughness is visible on it. I would gladly take advantage of your offer, but I live in Kazakhstan, in Alma-Ata, therefore, you can hardly help me. And in our city they don't. And why, if I have a new print now. I'll keep this one until the cartridges run out.
Kotofey (15): And in our city they don't take it - it's wonderfulO... It seems that it is not difficult, and not for long, and it is economically feasible. why not? Maybe the wrong ones were addressed? Take a color copy, go through the services, show with the question "can you help?" According to the print, everything is clear there, what is the problem (see (9)) Just do not give it to those who offer to carry out diagnostics first for money - they can hang noodles and not do it. And the problem is IMHO 95 percent in the razorblade.
(5) Disassemble again, and all the developing rollers, wash with acetone or solvent ... also wash the dispensers, and it will print like a young one :))
t32 » 18:01 – 05.02.17
one.The "ghost" of the previous page on the next printed. When the next page is printed, the text of the previous printed page is visible.
2. Sometimes (but not always) such a longitudinal daub appears along the entire length of the page, as in the photo below.
The printer has disassembled to the bins.
1. I cleaned the dispensers (I put the lids under the foam cushions), did not remove the shafts, did not clean;
2. I vacuumed what I saw dirty.
3. Wipe the transfer tape with a lint-free cloth moistened with alcohol. The “drawing” of the page remains on the tape. Not in the know, maybe this is normal, or it should still be perfectly clean after running through the squeegee.
Yes, in a stop test, the drum seems to be clean.
Vladimir A. » 19:28 – 05.02.17
Mishel01 » 22:24 – 05.02.17
t32 » 09:10 – 06.02.17
The radius depends on the phase of the moon, but it seems like it is in growth - it should work out.
One thing I want to clarify: the squeegee in question is a silicone tape that removes the toner directly from the tape, like in the photo, right?
I read it, they re-glue it corny by turning over the same tape. And something else happens to replace.
Mishel01 » 15:31 – 06.02.17
t32 » 15:58 – 06.02.17
I did not wait for an answer, I took it apart to the laces.


Mishel01 » 17:14 – 06.02.17
- Related Topics Replies Views Last Post
- Xerox WC3550 “deputy. at the bottom of the door. print " Solution. With photo.
Ded01 in forum XEROX 10 10214 ckent
10:53 – 14.01.16 - Epson R300 Inkjet Printer - Problems After Installing CISS
in the forum Inkjet printers 18 12468 all4printers
11:34 – 22.03.07 - Problems with Epson Stylus CX7300 after installing the CISS
Ilgam in the EPSON 3 3932 Oleghek forum
13:52 – 12.08.12 - Brother 20X0R Laser Printer - Long Life Issues
1 , 2Nicolai in the forum BROTHER 34 13537 wital
18:51 – 19.02.07 - problem after refueling Canon PIXMA iP43 problems
Help a newcomer to the forum CANON 6 2880 Amishka
09:40 – 05.12.07
Users browsing this forum: no registered users and 1 guests
optimist builder
Posts: 8229
optimist builder
Posts: 8229
optimist builder
Posts: 8229
optimist builder
Posts: 8229
optimist builder
Posts: 8229
optimist builder
Posts: 8229
and what is the distance from the edge of the blade to the iron bar. if I glue it below it will not reach the drum if it is higher then it will rub hard, I don’t know where the marks from the factory squeegee are. I had 8.5mm
555_cr.jpg 21.28 KB Downloaded: 114 times
Warnings: 1
Posts: 9
Repair of color printers Samsung CLP-300 in St. Petersburg
Repair and maintenance of Samsung CLP-300 color printers produced by craftsmen with many years of experience. We use only original spare parts for repairs.
The table below shows the prices for repair work of individual parts (assemblies) color printers Samsung CLP-300... Prices are indicated for work only, excluding the cost of spare parts. The exact cost of repairs is agreed with the client after diagnostics and identification of worn parts and blocks, with recommendations for their replacement.
Diagnostics of other service centers or a description of the problem by the client is not a guarantee of an accurate determination of the reasons for the breakdown of the printer or mfp, but if you clearly formulate the problem, describe as accurately as possible after what actions the device failed, prepare a scan of a document with a print defect - by these actions you will significantly reduce the time required to carry out repairs. It will also help to identify cases when repairing a printer or mfp is impractical.
Departure of the engineer to diagnose the device - from 1,200 rubles.
Descriptions of the names of repair services for Samsung CLP-300 color printers, given in the table above:
Diagnostics - identifying malfunctions in the operation of the device, making reports, making recommendations for the further operation of the device and replacing worn-out spare parts;
Partial disassembly maintenance - routine maintenance of the device, cleaning the rollers, cleaning the paper path from toner and dust, restoring rollers, etc.It is necessary to do it without fail when the device gets for repair;
Complete disassembly maintenance - performance of all routine maintenance, plus cleaning and lubrication of hard-to-reach units (thermoblock, laser, gearbox, electronic boards);
Paper Pickup Repair - replacement of the pick-up and separation rollers, brake pads from the main trays, is necessary when paper feed defects appear (does not take paper, takes it, but does not stretch it to the end, in some cases a "jam" error appears);
Registration node repair - replacement of worn-out components of the registration unit, cleaning registration sensors, replacing registration flags, etc. These jobs are necessary if the machine incorrectly detects the paper size, the image is not printed from the beginning of the sheet, or vice versa, if the paper is jammed inside the machine, in some cases the error “jam ";
Imaging unit repair - work on the repair of drum cartridges, copy cartridges. Replacement of photo rolls, squeegees, charge rollers, etc. Performed if streaks appear during printing, smears along the edge of the sheet, or defects are visible on the print at a certain interval (not in all cases);
Image transfer unit repair - replacement of corotrons, transfer rollers, transfer roller bushing, etc .;
Repair of laser optics unit - cleaning the laser, replacing the laser, replacing the laser polygon, etc. It is necessary when a vertical white line appears, in some cases the device swears at the laser;
Repair of the fusing unit (stove) - replacement of thermal film, teflon roller, bushing, thermoelements and heating lamps, separation fingers, etc. Required in case of printing defects, with visible smearing, repetition of text at a certain interval, sometimes vertical stripes across the entire sheet;
Repair of the gear unit and kinematics - replacement of gears, motors, couplings, etc. It is performed when extraneous noise, crackling appears, in some cases there is no paper grab;
Exposure unit repair - scanner repair. Replacing the scanning ruler, scanner glass, etc .;
Repair of the ADF unit - repair and elimination of malfunctions of the automatic document feeder unit. Replacement of pick-up and rebound rollers, brake pads, etc .;
Duplex unit repair - performed when defects appear during duplex printing, jams, etc.;
Electronics assembly repair - repair of power boards, formatting, replacement of electronic components.
Customization - adjusting the device, adjusting the contrast and brightness, calibration.
To pinpoint the culprit of the problem, after printing the sheet, remove the cartridges and look at the unit itself. The stripes on the sheet will line up with the remaining waste layer on the drum surface.
This indicates an overflow of the mining bunker, but what about the resource, the calculations? The reason is different - the operating conditions, design features of the printer and the relatively low sintering temperature of the toner.
The front plane of the block is located close to the oven of the image fixing block. Under conditions of poor ventilation or heavy load on the printer, the temperature in the working compartment rises significantly. The waste is gradually fused into a solid lump, which blocks the possibility of further compaction of the material throughout the entire volume of the hopper.
In this case, the seal lever often jams, and the gears of this mechanism, slipping, emit characteristic clicks during operation.
To rectify the malfunction, the imaging unit must be disassembled and cleaned.
The first thing to remove is the drum unit. To do this, pull off the locking washers on both sides of the axle and remove it in the indicated direction.
If you take out the axle in the opposite direction, you can break or bend the contacts located inside. They are needed to electrically connect the working surface of the drum to the axle. In addition, a recess is machined on the axis for these contacts. Later, during assembly, the axle will need to be installed with the correct side - with the groove to the gear.
When the drum unit is removed, you can immediately see where the streaks appear on the sheet.Waste toner has filled the entire volume and just spills out.
Inexperience it may seem that the solution to the problem is simple - it is enough to remove the working off with a vacuum cleaner. But this approach will only give a temporary solution, the development will quickly fill the cleaned volume and the defect will appear again. And the seal mechanism will remain jammed and knocking as before.
For a high-quality repair, the unit must be disassembled completely.
Now you need to remove the left cheek. It is held in place by three fastening screws indicated in the photo.
And another screw that connects the cheek and cleaning blade.
Access to the second blade screw, on the right, is blocked by a bar, it also does not make it possible to remove the charge shaft and its cleaning roller.
After the left cheek was removed, the transparent strip was released. Slide it off to the left (yellow arrow in the photo, above) until it comes off the right guide pin. Also, it is now easy to remove both shafts.
Access to the right screw is still blocked by the same plastic guide pin, pull it until it exits the seat.
After removing all obstacles, unscrew the ill-fated right screw and remove the squeegee. Next, unscrew the three screws securing the right cheek and also remove it.
Clean out any hardened waste to release the metal seal arm. Remember to clean the gears of the mechanism.
To compact the waste, the lower lever drives the conveyor mechanism, it moves the toner from the bottom of the hopper into the free volume of the handle. Hardened toner interferes with these parts, causing waste to accumulate in a small amount near the drum unit.
For further cleaning, the parts of the hopper must be separated. They are held together by two screws, which are marked in the photo above with yellow circles and two latches on the bottom.
It is easy to remove all remaining waste from the compartment of the removed handle. After cleaning, you need to check how freely the conveyor bar moves.
| Video (click to play). |
The entire cleaning operation described above is also necessary when replacing a worn drum unit with a new one.

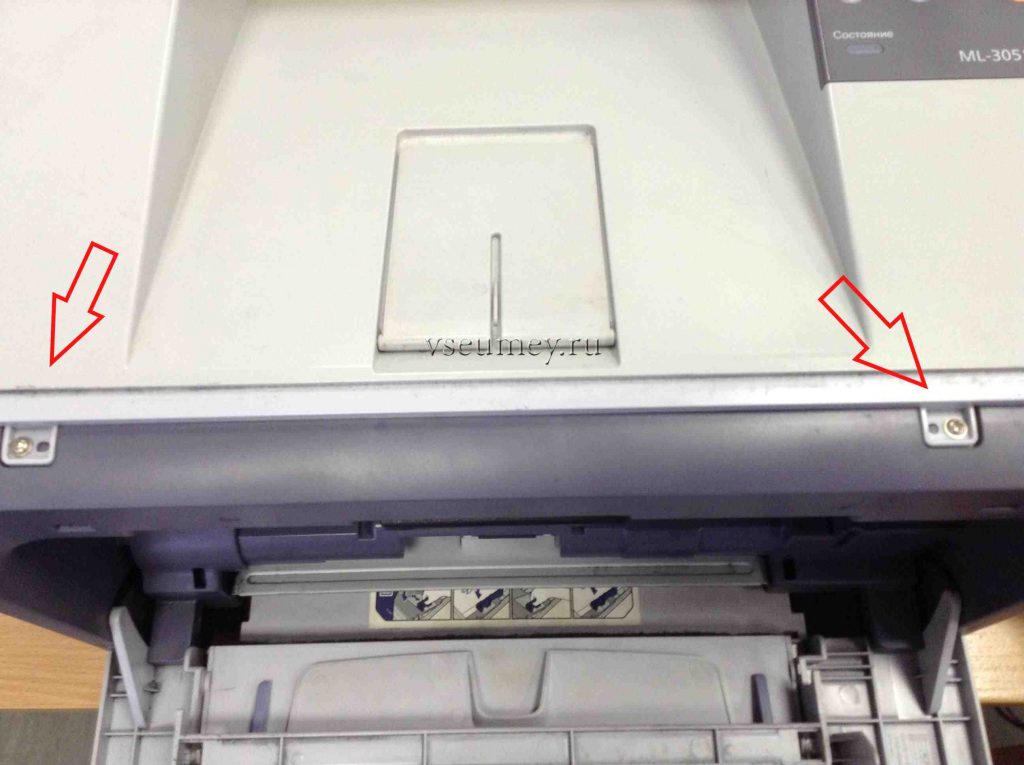
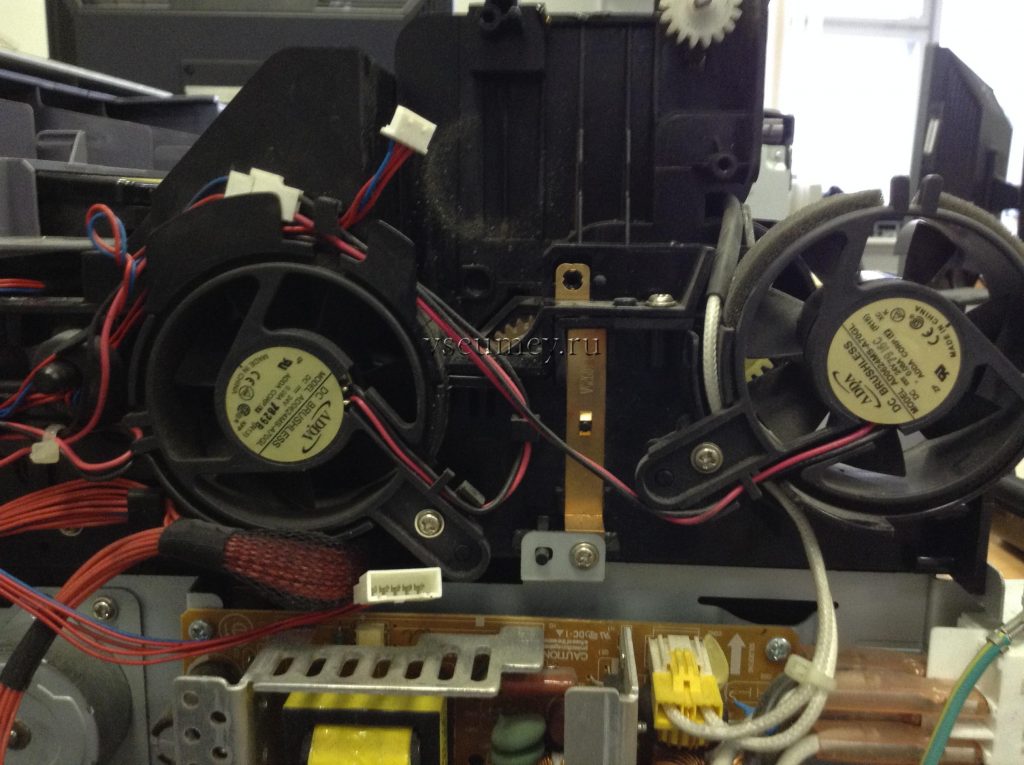
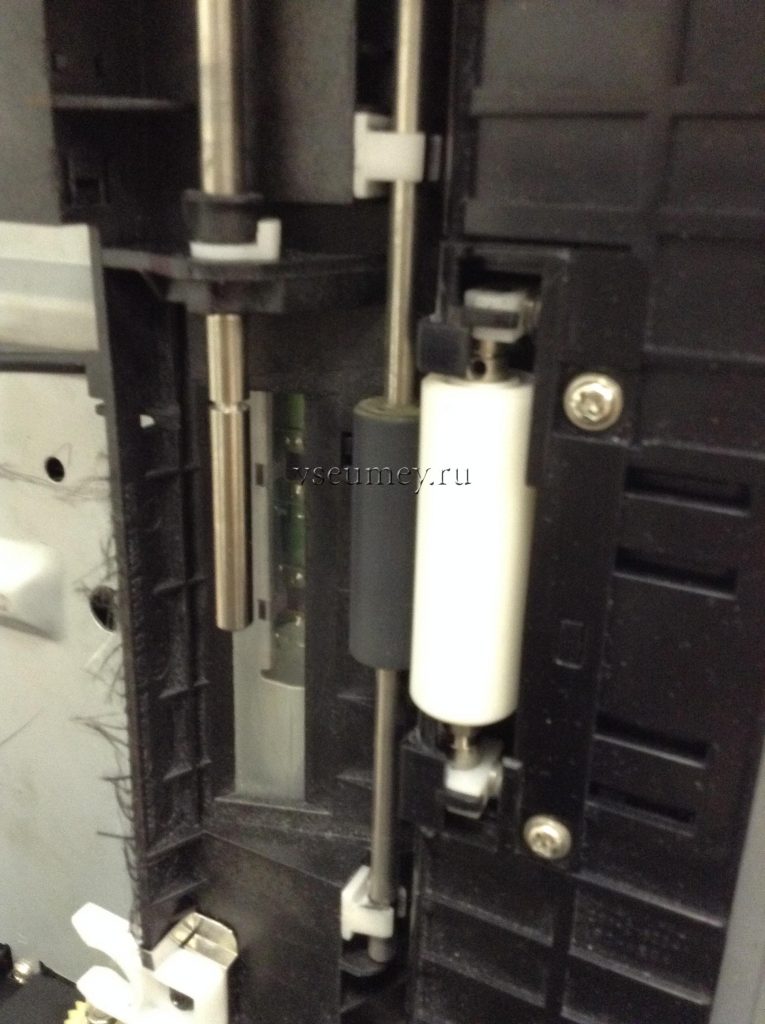
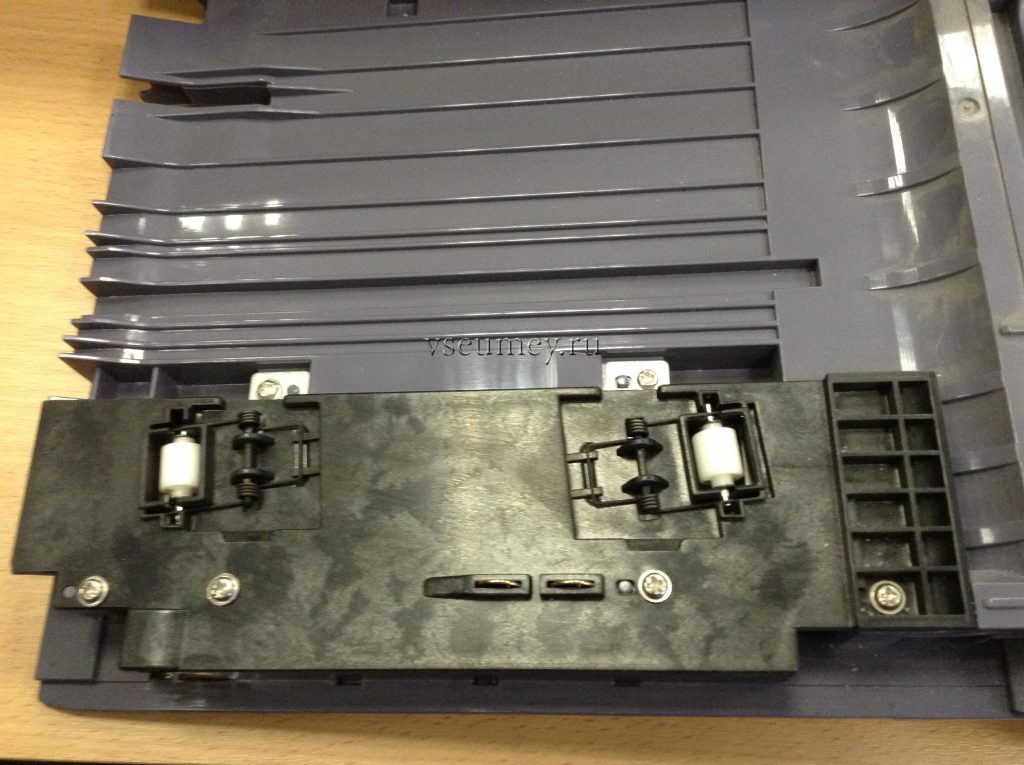 Unscrew the 4 bolts on the black plastic part and remove it.