In detail: DIY Lacetti radiator repair from a real master for the site my.housecope.com.
We remove the radiator to check it for leaks (if a leak is suspected) or replace it if damaged.
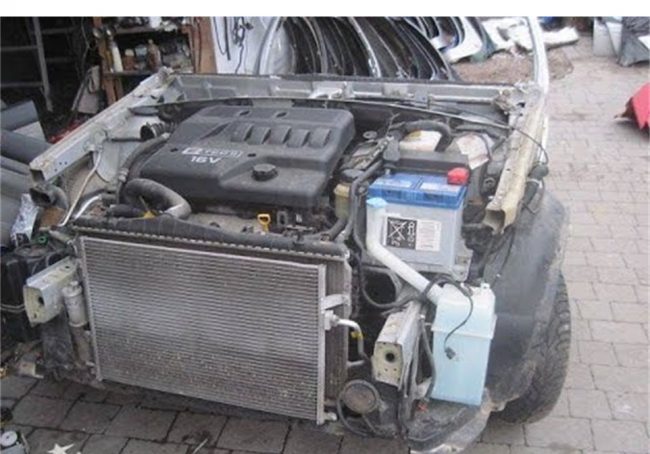
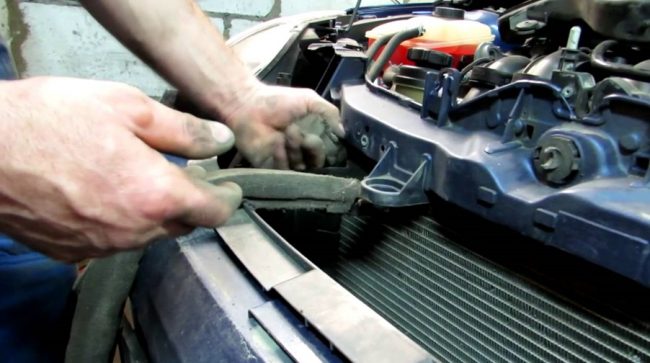
The radiator can be removed as an assembly with a fan, or by first dismantling it. We show the removal of the radiator assembly with the fan.
We drain the coolant (see Replacing the coolant). Remove the radiator lining (see Removing the radiator lining). We remove the headlights (see Removing the headlamp unit).
Disconnect the engine control system wiring harness block from the fan motor wiring harness block (see Removing the radiator fan).
Slide the engine control system wiring harness block and remove it from the holder on the lower radiator tank.
Using sliding pliers, squeeze the ends of the hose clamp and slide the clamp along the hose.
Remove the outlet hose from the radiator pipe.
Using the "10" head, unscrew the two bolts of the lower fastening of the air conditioner condenser to the radiator.
Using the "10" head, unscrew the bolt securing the air conditioner condenser to the radiator.
Similarly, unscrew the bolt on the other side of the radiator.
Using the "10" head, unscrew the four bolts ...
… And move the upper cross member of the radiator frame to the side.
Using the “10” head, unscrew the two bolts securing the brackets for the power steering pipe.
Squeezing the ends of the clamp with pliers and sliding the clamp, disconnect the steam hose from the expansion tank.
Using sliding pliers, we squeeze the ends of the clamp for the radiator inlet hose and slide the clamp along the hose.
Remove the supply hose from the radiator pipe.
| Video (click to play). |
Raising the condenser, we remove its brackets from engagement with the brackets on the radiator.
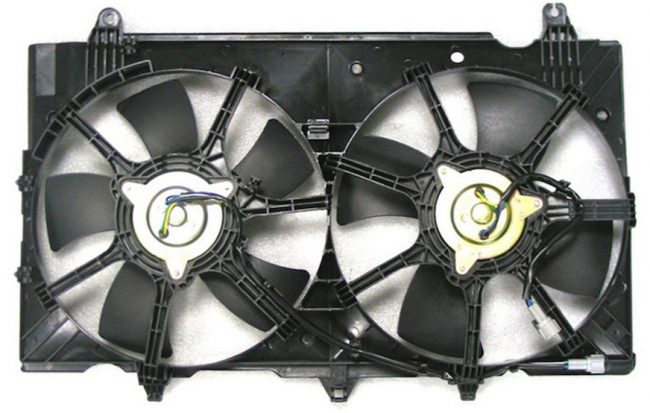
... and remove it from the engine compartment complete with a fan.
After unscrewing the four bolts, remove the fan with a casing.
Remove the rubber cushions from the lower radiator dowel pins.
Using sliding pliers, squeeze the ends of the steam hose clamp and slide the clamp along the hose.
Remove the steam hose from the radiator hose.
Install the cooling system radiator in reverse order. Before installing the radiator, insert the pillows into the holes in the lower cross member of the radiator frame. If the pillows are torn or have lost their elasticity, they should be replaced with new ones. Fill the coolant in the cooling system and bring the level of the liquid in the tank to normal (see Replacing the coolant).
Symptoms: excessively fast refrigerant from the cooling system, leakage from the radiator of the engine cooling system.
Possible reason: damaged radiator of the engine cooling system.
Tools: a set of wrenches, pliers, a set of screwdrivers, a compressor.
1. Disconnect the negative cable lug from the battery.
2. Drain the coolant from the engine cooling system.
3.Use a Phillips screwdriver to remove the six screws securing the engine cooling grille.
4. Pull the grille forward and remove it from the vehicle.
5. In order to facilitate further work, dismantle the left panel of the engine compartment.
6. Using a 10 wrench, loosen the four bolts securing the upper cross member of the vehicle's engine compartment, and then move the cross member to the side.
7. Remove the oxygen concentration sensor wire harness connector from the radiator.
eight.Use a pair of pliers to loosen the clamping clamp, and then disconnect the lower outlet hose from the radiator of the cooling system.
9. Disconnect the upper supply hose from the cooling system radiator in the same way.
10. Disconnect the steam outlet pipe from the cooling system radiator.
11. Remove the upper bolt securing the air conditioning radiator to the left side radiator of the engine cooling system, and then remove the bolt on the right side (this operation is only required on vehicles equipped with an air conditioning system).
12. Remove the lower bolt securing the air conditioning radiator to the radiator of the engine cooling system on the left and then on the right (this operation is necessary only on vehicles equipped with air conditioning).
13. Hook the air conditioner radiator to the left and right side of the radiator grille frame.
14. Tilt the engine cooling radiator back slightly, then lift it up out of the engine compartment.
15. Inspect the rubber mounts on the radiator and replace damaged ones (only necessary if the radiator will not be replaced).
16. Check the radiator for leaks. To do this, prepare a container of a suitable size, fill it with water and immerse the radiator there for at least 30 seconds, having previously muffled its pipes and supplying air to it under a pressure of 0.1 MPa. A leak in the radiator will be detected due to air bubbles escaping from it.
You can also check the tightness of the radiator as follows: fill the radiator with water, muffle its pipes and supply compressed air to it (the pressure should not be high, it is enough that it is able to "drive" the liquid through the radiator). In this case, the leakage of the radiator will be expressed as a leak.
If any defects are found, replace the radiator with a new one. It is recommended that it be replaced rather than repaired.
17. Install the removed parts in reverse order.
18. Refill the engine cooling system.
If a car's radiator leaks, then most of us resort to replacing it. However, in most cases it is possible not to change, but to repair the radiator. Sometimes no skills are required, but sometimes it is impossible to do without knowledge in the field of welding or soldering. We learn to determine the condition and try to restore the radiator with our own hands.
The most common problem is when the radiator leaks due to old age. Coolant (coolant) runs out of the joints between metal and plastic, which automatically leads to overheating of the engine. It is not always possible to find a replacement radiator, and repairs will cost at least 2 times cheaper than a new one.
Further we will talk about car radiators in general and it does not matter if it is a repair of a heater radiator, an air conditioner radiator or a radiator of the engine cooling system.
Repair of a radiator with chemistry. Minor damages can be repaired with special products known on the market as radiator refurbishing fluid, radiator sealant, or powder reductants. The principle of operation is approximately the same: pour the radiator reductant into the engine cooling system (SOD). The resulting mixture will seal cracks when exposed to air.
Chemistry is different from chemistry, therefore, it is impossible to answer for the quality of such a method as a whole. For example, a low-quality reductant may not help, but, on the contrary, harm it by clogging up the entire SOD. For example, the stove will stop heating and it will be necessary to flush the SOD or change the radiator of the stove. Better chemistry is able to eliminate radiator leakage only for a while (from several days to several months). Thus, chemistry for repairing a radiator is only a temporary solution to the problem.
There is a popular method for repairing radiators.It consists in patching holes using cold welding (a material similar to plasticine, which hardens after use). It is better to close up a small hole in the radiator after degreasing the work surface well. If the hole in the radiator is large, then a piece of tin can be used as a patch, which is again glued with cold welding.
We repair the radiator honeycomb with a mixture of epoxy resin and hardener. Degrease and pour the substance into the damaged honeycomb and level it with a spatula. Now the holes in the radiator are 100% sealed.
In general, the folk method involves the use of many materials for sealing, I just showed the main ones. Whether this approach can be called a high-quality radiator repair, decide for yourself.
The following instruction assumes knowledge of basic welding and soldering skills.
To repair the radiator permanently, it must be removed, but before that, the coolant must be drained from it (described in detail in the article on cleaning the radiator). Now that the radiator is dismantled, we can determine its condition, whether the radiator can be repaired or replaced with a new one.
Repair the radiator by soldering. We clean the place that will be restored well and solder a piece of sheet brass (brass radiators). Here you need to resort to using a gas torch and a soldering iron.
If the radiator tubes are cracked, then it is better to replace them with new ones. We heat the solder until it becomes soft and take the tube out of the tank. In its place we solder a new one. The disadvantage of this method is the effect of high temperatures on the elements of the radiator, which leads to its internal deformation. Therefore, it is better to use argon arc welding (argon welding).

Repair of a radiator with argon welding. The filler material here is a special welded aluminum wire. Special equipment is indispensable here. It should be noted that places treated with argon will be protected from oxidation.
Repair of a radiator using gas-dynamic spraying. When a special powder is accelerated along the inside of the radiator at a very high speed, a 1-1.5mm thick coating forms on the damaged surface. It makes no sense to describe these two methods, because they cannot be done at home.
There are various ways to repair a car radiator, each of which has its own advantages and disadvantages. In one case, there will be a short-term repair of the radiator, and in the other for a long time. If you doubt your abilities, then it is better to entrust the mission of restoring the radiator to specialists and argon welding. They will not only repair, but immediately clean the radiator and, if desired, install a brass tank.
If the radiator is damaged after a frontal collision of the car, then repairs will cost a pretty penny. It is more correct in this case to buy a new high-quality radiator.
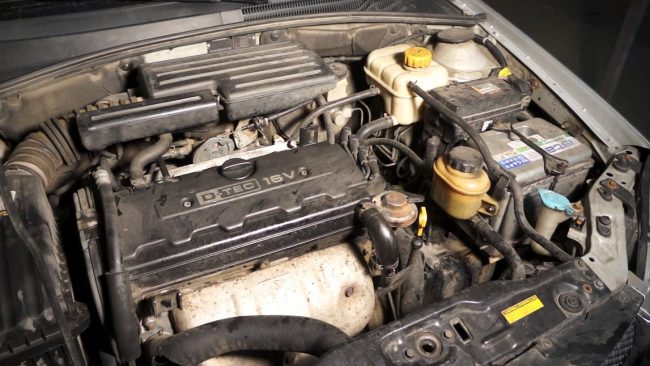
An engine cooling radiator is a complex component device designed to remove heat from an internal combustion chamber. The design of the radiator consists of a cooling part, a system of pipes, as well as expansion tanks, inside which coolant circulates.
Failure of the cooling system negatively affects the service life of the engine, which leads to deformation of the valves in the combustion chamber and increased oil consumption.
ATTENTION! Found a completely simple way to reduce fuel consumption! Don't believe me? An auto mechanic with 15 years of experience also did not believe until he tried it. And now he saves 35,000 rubles a year on gasoline! Read more"
An air-type radiator is installed on the Lacetti, which transfers the heat of the engine to a surface cooled by counter air currents and a fan.The core of the device has a lamellar-tubular structure, inside which there are copper or brass lines that distribute heat.
Note! It is advisable to buy a radiator for the Lacetti by the VIN number of the vehicle or after checking the compatibility of the part numbers on the official website of Generous Motors. Otherwise, there is a risk of insufficient functioning of the cooling system and further engine overheating.
The procedure for replacing a radiator with a Lacetti can be done at home with one pair of hands - no specialized tools and professional skills are required to install new components. To change the cooling parts, you will need a set of wrenches, a set of screwdrivers, as well as a hammer and pliers, and the whole procedure will take no more than 2 hours of free time. In order to install a new radiator on the Chevrolet Lacetti, you must:
- Drain the coolant from the expansion tank and pipe system;
- Dismantle the cooling grill after unscrewing the fixing bolts;
- Next, we remove the engine mudguards to ensure free access to the cooling system;
- Then, with a key "10", unscrew the bolts on the upper cross member of the engine and take the part to the side;
- Then we disconnect the power cables connected to the oxygen sensor and detach the cooling hoses;
- Then we unscrew the bolts fixing the radiator itself, dismantle the product and install a new part.
At the end of the assembly, coolant is poured into the reservoir and the system is tested: first, we bring the engine to operating temperature at idle speed, and then, after the engine has cooled down, we carry out a control trip.
The original tank for the Lacetti has a dense textured plastic and a manufacturer's hologram applied to the end. Dealer components are produced exclusively under a quality guarantee and in the event of a breakdown or chip can be replaced free of charge.
It's important to know! It is not recommended to buy an expansion tank from the aftermarket, as there is a risk of purchasing the product from the car after an accident. Used cisterns can be micro-damaged, which will turn into cracks during the first cold snap.
After purchasing the tank, it is advisable to rinse the tank with technical alcohol to remove dust and small abrasive particles that can damage the cooling system.
Note! In the case of buying a non-original expansion tank, you should pay attention to the quality of the plastic. The part should have a uniform, translucent plastic that does not slip to the touch - if there are mechanical defects, it is better to refuse to purchase. Low-quality plastic hi to an early breakdown in the tank and coolant leakage.
The cooling fan is designed to forcibly reduce the temperature of the antifreeze when operating the vehicle at high engine speeds or low speed. The exit from the fan triple reduces the efficiency of the cooling system, which leads to early overheating of the engine and limits the functionality of the car.
- Excessive engine temperature;
- Extraneous noise under the hood during the operation of the engine;
- A working overheating sensor or motor diagnostic lamps.
The reasons for the fan exit from standing are blown fuses, as well as damage to the fan electric motor or its impeller.
It's important to know! If there is mechanical damage to the fan design, it is advisable to replace the product with a new one.Self-repair of components reduces the efficiency of the device and can cause breakdown of the cooling radiator in case of repeated failure.
The procedure for installing a new device will take about 1.5-2 hours and will require a set of wrenches, Phillips and slotted screwdrivers, pliers and an auto-tester.
Now we assemble the device in reverse order and carry out the final test of the system. The cooling fans should turn on when the car's engine reaches operating temperature.
Damage to the trunk pipes is a common problem in a car's cooling system. Symptoms of antifreeze pipe breakage are:
- An increase in the consumption of coolant - indicates the presence of a breakdown in the tubes, which leads to the leakage of antifreeze. Visible leakage of antifreeze can also be caused by deformation of O-rings and gaskets or failure of control valves;
- Insufficient cooling or chronic overheating of the engine - blockage in the pipes of small abrasive particles. It is necessary to change the coolant and flush the expansion tank and the line with technical alcohol;
- Low level of antifreeze in the expansion tank - it is required to change the rubber gaskets and add liquid to the minimum level.
Note! You can add coolant to the tank only of the type that was used before - the use of incompatible fluids reduces the cooling efficiency. In extreme situations, it is allowed to fill the tank with distilled water, however, it is not recommended to fill more than 0.5 liters at a time.
We remove the radiator to check it for leaks (if a leak is suspected) or replace it if damaged.
The radiator can be removed as an assembly with a fan, or by first dismantling it. We show the removal of the radiator assembly with the fan.
We drain the coolant (see Replacing the coolant). Remove the radiator lining (see Removing the radiator lining). We remove the headlights (see Removing the headlamp unit).
Disconnect the engine control system wiring harness block from the fan motor harness block (see Removing the radiator fan).
Slide the engine control system wiring harness block and remove it from the holder on the lower radiator tank.
Using sliding pliers, squeeze the ends of the hose clamp and slide the clamp along the hose.
Remove the outlet hose from the radiator hose.
Using the "10" head, unscrew the two bolts of the lower fastening of the air conditioner condenser to the radiator.
Using the "10" head, unscrew the bolt securing the air conditioner condenser to the radiator.
Similarly, unscrew the bolt on the other side of the radiator.
Using the "10" head, unscrew the four bolts ...
… And move the upper cross member of the radiator frame to the side.
Using the “10” head, unscrew the two bolts securing the brackets for the power steering pipe.
Squeezing the ends of the clamp with pliers and sliding the clamp, disconnect the steam hose from the expansion tank.
Using sliding pliers, we squeeze the ends of the clamp for the radiator inlet hose and slide the clamp along the hose.
Remove the supply hose from the radiator pipe.
Raising the condenser, we remove its brackets from engagement with the brackets on the radiator.
... and remove it from the engine compartment complete with a fan.
After unscrewing the four bolts, remove the fan with a casing.
Remove the rubber cushions from the lower radiator dowel pins.
Using sliding pliers, squeeze the ends of the steam hose clamp and slide the clamp along the hose.
Remove the steam hose from the radiator hose.
Install the cooling system radiator in reverse order. Before installing the radiator, insert the pillows into the holes in the lower cross member of the radiator frame. If the pillows are torn or have lost their elasticity, they should be replaced with new ones. Fill the coolant in the cooling system and bring the level of the liquid in the tank to normal (see Replacing the coolant).
The heating system of any vehicle requires periodic maintenance. Otherwise, it will fail exactly when it is most needed - in severe frost. The Chevrolet Lacetti is no exception, the design features of the heating system of which make it difficult to access the stove radiator. Nevertheless, it is possible to replace the radiator and other elements of the heating system without the involvement of car service specialists.
The Chevrolet Lacetti has two radiators: the main one and the heating one. The main radiator, located at the front of the engine compartment, receives hot antifreeze from the engine cooling system. Further, the antifreeze is fed through the hose system to the stove radiator. The latter is blown by a plastic fan, with the help of which heated air is forced into the passenger compartment through the air duct system.
In other words, the Chevrolet Lacetti oven radiator is a compact air-cooled heat exchanger.
In the Chevrolet Lacetti, the stove radiator is located under the front panel of the passenger compartment, which cannot be called successful. To provide access to it during repair or replacement according to the technology offered by the manufacturer, it is necessary to completely disassemble the central panel. It is quite difficult and time consuming. However, craftsmen have found a way to replace the heating radiator without completely dismantling the central panel, which is described in detail below. This algorithm is suitable for a vehicle with or without air conditioning.
The radiator of the Chevrolet Lacetti stove is quite simple and is a system of hollow steel tubes and thin metal ribs installed on them.
Coming from the main radiator, hot antifreeze continuously heats up the tubes, which, in turn, transfer heat to the fins. The latter are made of metal with high thermal conductivity. With the help of the stove fan, a stream of warm air is blown into the interior of the car.
Stove radiators are usually classified according to the metal from which the ribs are made. On this basis, radiators are distinguished:
In the very first models of "Chevrolet Lacetti", copper radiators were installed. However, now this metal is practically not used by manufacturers due to its high cost. In addition, the copper heatsink is notable for its considerable weight, which creates additional difficulties when dismantling it. The advantages of copper products include good heat dissipation and high maintainability.
Almost all modern Chevrolet Lacetti models are equipped with lightweight and cheap aluminum radiators, the disadvantages of which include susceptibility to mechanical damage and low maintainability. If such a radiator leaks, it is almost impossible to solder it without special equipment.
The most common malfunction of a stove radiator is a leak, which can occur both due to mechanical damage as a result of strong vibration or direct shock, and due to corrosion. Rust eats away at the center steel tubes and they start to leak at the junctions with the aluminum ribs. As a result, the driver finds traces or even pools of antifreeze in the passenger compartment and in the engine compartment. It is not possible to solder an aluminum radiator in a garage. Therefore, the problem is usually solved by replacing it.
Another common malfunction of a stove radiator is its clogging. If cold or slightly warm air enters the passenger compartment, and the level of antifreeze is sufficient, and the fan is working properly, then the radiator is clogged. The fact is that scale forms on the inner surface of the central tubes of the radiator over time. In addition, when using low-quality antifreeze, the impurities contained in it are layered on this scale. As a result, a thick crust with low thermal conductivity is formed, which does not allow the radiator to give off heat at the same rate. To remove this crust, some motorists use special flushing fluids, the effectiveness of which leaves much to be desired - they simply cannot clean the radiator completely. For this reason, many car owners prefer not to mess with flushing, but replace the clogged radiator with a new one. The aluminum radiator is quite inexpensive.
To replace the radiator of the Chevrolet Lacetti stove without completely dismantling the front console, you will need:
- new heater radiator;
- set of socket wrenches;
- flat screwdriver;
- set of open-end wrenches.
- We open the salon. Move the front seats back as far as possible.
- Pulling up, remove the plastic protective cover of the central tunnel under the gearshift lever.
To remove the protective cover from the gear lever, simply pull it up with your hands
- Remove the gearshift lever drive. To do this, open the hood and use a 14-point open-end wrench to unscrew the lever pull from the wings.
The gear lever pull is unscrewed from the wings with an open-end wrench 14
- Use a flat screwdriver on the gearshift lever to loosen the clamp.
The clamp on the gearshift lever is loosened with a flat screwdriver
- We unscrew the four bolts securing the lever drive to the car floor. We remove the lever together with the drive.
The gear lever actuator is fixed to the floor with four bolts.
- We remove the central part of the front console, under which the stove radiator is located. To do this, first unscrew the two nuts securing the console to the floor, then two more nuts located at the top under the console.
To remove the central part of the front console, unscrew two nuts on the floor and two at the top
- We get access to the heating block. Unscrew the four screws and remove the duct cover.
Remove the four screws to remove the duct cover.
- We unscrew the four bolts securing the stove radiator. Since they are located very far under the center panel, we use a 12 socket wrench with a long knob.
The four bolts of the stove radiator are unscrewed with a 12 socket wrench with a long knob
- We remove the stove radiator through a niche in the front console, carefully pulling it towards you.
On the removed radiator, mechanical damage is clearly visible
- We replace the defective radiator with a new one. The assembly is carried out in the reverse order.


