In detail: DIY repair of an engine cooling radiator from a real master for the site my.housecope.com.
Sooner or later, every car owner may face the problem of coolant leaks. The source is most often the engine cooling radiator. Not sure how to repair a leaking radiator? It is believed that if it is made of aluminum, there is only one way out - to replace it with a new one. Whether this is so, and what repair methods exist, you can find out from the proposed article.
Before considering how to restore a damaged device, you should tell a little about its device. The design of the radiator consists of two tanks connected by a series of tubes through which coolant (coolant) flows. The location of the tanks can be both horizontal and vertical. The cooling tubes can be round or flattened in cross-section.
To increase the cooling surface, flat plates or loop-like belts are used to fill the entire space between the tanks. Heat dissipation of plate radiators is worse than strip radiators, so they have been used less frequently recently. The material is copper, brass or aluminum, which is most commonly used today.
Due to the higher thermal conductivity than brass or copper, aluminum tubes are made wider, which increases the strength of the product.
Structurally, the product is made both solid-soldered and composite (prefabricated). In prefabricated devices, there are a large number of joints that reduce the rigidity of the structure and are a hotbed for the formation of oxides. Cisterns of composite radiators are sometimes made of plastic. The reliability, durability and heat dissipation of brazed radiators are higher.
| Video (click to play). |
It is no exaggeration to say that the radiator plays a central role in the cooling system of an automobile engine. While it is serviceable, most drivers even forget about its existence. But the conditions in which this device works are far from hothouse.
The radiator, in addition to being subject to constant temperature fluctuations, especially in winter, also takes on all the blows of the elements: the effects of chemicals from the roadway, insect attacks, bombardment with stones from the wheels of oncoming cars, and finally, pricks of dry branches when driving on forest road.
Unsurprisingly, there might be a leak one day. This will be noticeable by reducing the coolant level in the expansion tank. What could be the reason? Basically, it is caused by malfunctions of the engine cooling system:
- mechanical damage to the tank or cooling pipes as a result of external influences (accident, hitting a sharp object, careless handling when servicing the engine unit);
- cracks in the pipes due to natural wear or as a result of increased pressure in the system (the safety valve of the filler neck acidified, the breakthrough of hot gases through the punched gasket of the head of the block, engine overheating);
- loosening of the clamping clamps on the coolant inlet and outlet pipes;
- leakage of the gasket between the reservoir and the expander (on combined structures).
So, the unexpected did happen. Accidentally or naturally, the radiator has leaked. As one domestic politician used to say: "This has never happened, and now again!" Now you need to take some measures, otherwise the engine cooling system may need to be repaired.
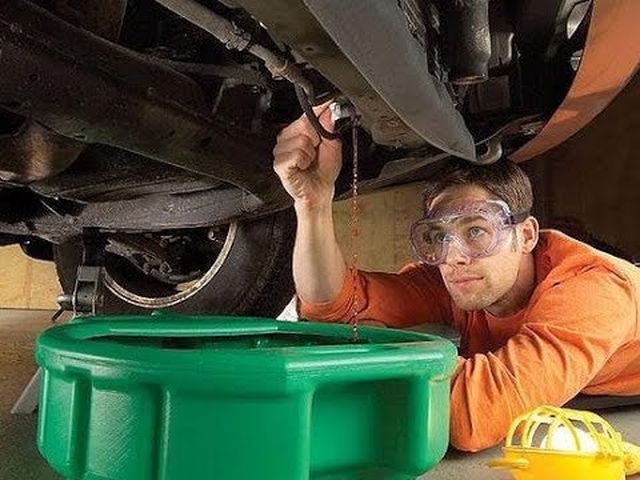
The first step is to remove the unit from the engine compartment.For this, antifreeze is first drained from the system into the substituted containers. To do this, open all the drain plugs located on the block and the lower tank of the cooling device, or remove the rubber hose from the lower branch pipe.
The filler caps of the radiator and expansion tank must be open while doing this. Before removing the engine cooling fan, disconnect all hoses and electrical connectors.
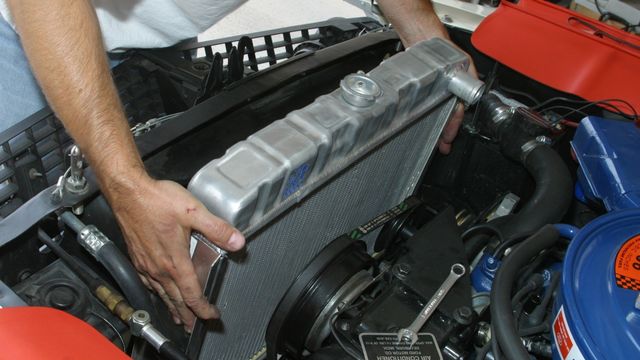
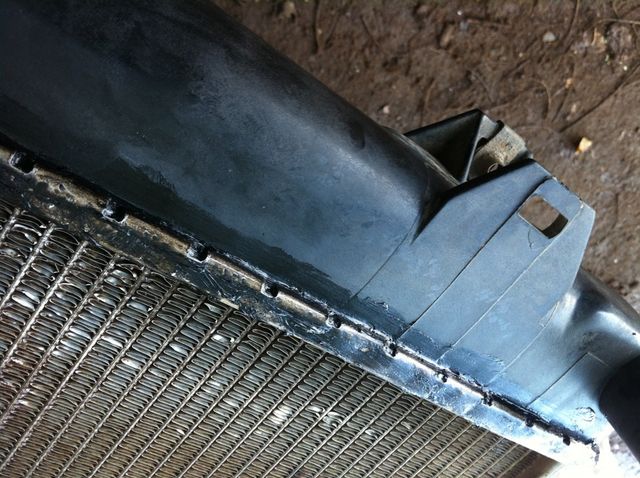
After completing these operations, unscrew the fasteners and remove the device. His condition is visually assessed. When the radiator is rather dead as a result of an accident, the purchase of a new device is definitely required. If the damage is minor, the radiator can be repaired.
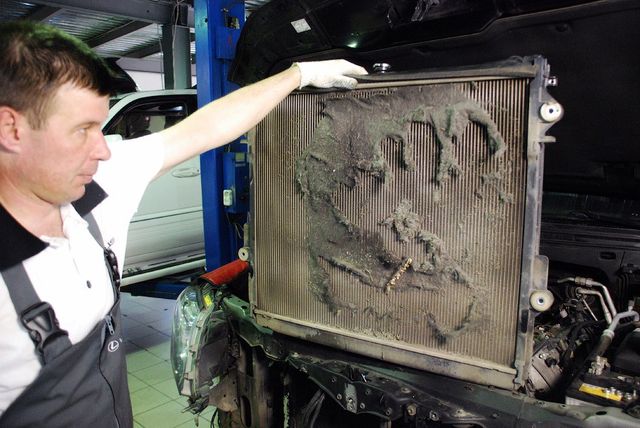
If you have a garage and minimal skills in handling a soldering iron, repairing the engine cooling radiator can be done by hand. Before starting repairs, it is necessary to clean and wash the radiator externally from insects, dirt, debris, fat and oil deposits. To do this, you first need to clean the air gaps with a thin wooden stick, then blow them with compressed air and rinse with a stream of water.
To determine the location of the damage, plug all inlets and immerse the radiator in a container with water. For greater reliability, you can pump air into the housing through one of the holes. After the damaged area is identified, it must be prepared for repair: clean the metal surface with a steel brush and degrease with solvent or gasoline.
There are various products on the market for treating small cracks and holes in the cooling system, called differently: liquid sealant, powder crack restorer, radiator repair fluid. The principle of their action lies in the fact that, being poured into the coolant, they dissolve in it and come out in places of leakage, where they polymerize.
Experts confirm that microcracks and small damages heal within 2-10 minutes. However, these funds can lead to clogging of narrow channels in the radiator and other elements of the cooling system. Therefore, they can only be considered as a temporary measure to get to the garage or repair service. And after repair or replacement of the radiator, the cooling system must be flushed.
Caution: Do not use folk remedies like water-swelling mustard powder, which after repair will be very difficult to wash off completely.
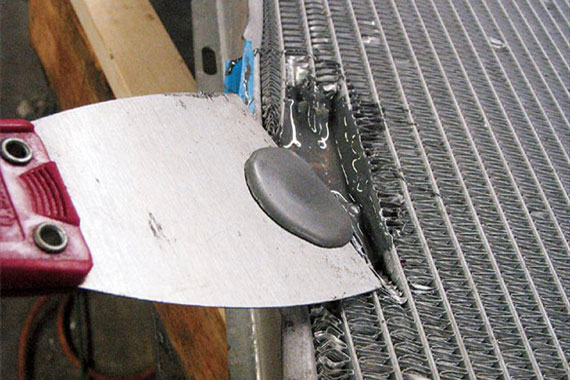
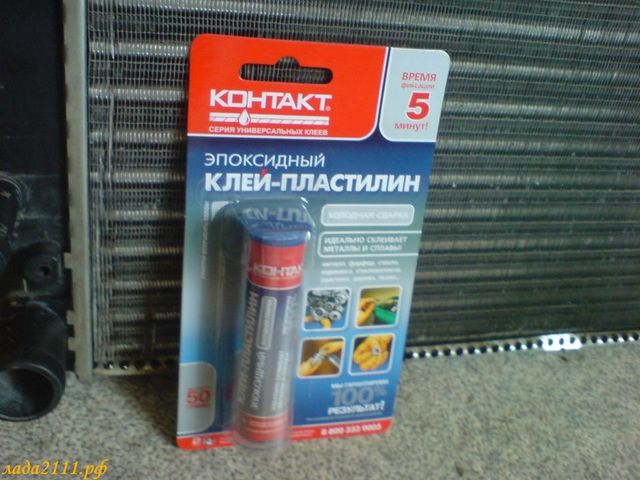
The so-called "cold welding" is a rather effective and at the same time not requiring special skills repair method. It is a two-component glue, with a preparation method somewhat reminiscent of the "epoxy" familiar to many. In contrast, this composition has the consistency of plasticine and is more convenient to use. There are both target compositions (for gluing metal, plumbing, plastic), and universal.
There is cold welding specifically for the repair of the radiator of the cooling system. The package contains two briquettes. As the explosion of an atomic bomb occurs after the two parts of the nuclear charge are connected, so this glue begins to harden only after the combination of both components.
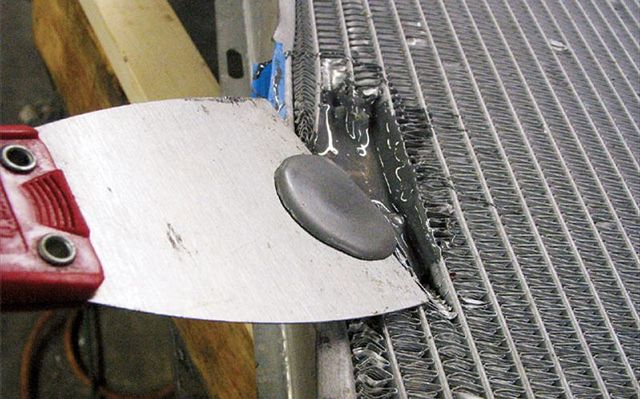
To do this, they need to be folded together and thoroughly kneaded with your fingers for 3 - 5 minutes so that they mix together. After that, the plastic composition is rubbed with any available tool onto the damaged area.
The glue hardens after a few hours. An important quality of cold welding is that it adheres well even with large adhesive thicknesses. The strength of the seam is comparable to the strength of the bonded material. However, the durability of the repair seal is not stable (the adhesive is prone to cracking). A refurbished radiator can last for several years, or maybe a month.
Another type of composite adhesive, which is also formed from two constituent elements: epoxy resin and a hardener. It differs from cold welding in a more liquid consistency. When mixing the components, it is necessary to maintain the proportion indicated on the package. After mixing, the damaged area is poured with the resulting solution. For greater strength, a piece of fiberglass or strong canvas is sometimes embedded in the adhesive layer.
Epoxy glue will seal the damage more hermetically, and its strength is higher than that of cold welding. If you do not know the skills of soldering, especially aluminum parts, the use of "epoxy" is perhaps the most suitable repair method, and for plastic tanks it is the only possible one. The disadvantage is that the preparation of the composition is more laborious, dirty and unhealthy.
Caution: When using epoxy glue, it is necessary to protect the respiratory system, eyes and skin, as resin is a toxic element. Work only outdoors.
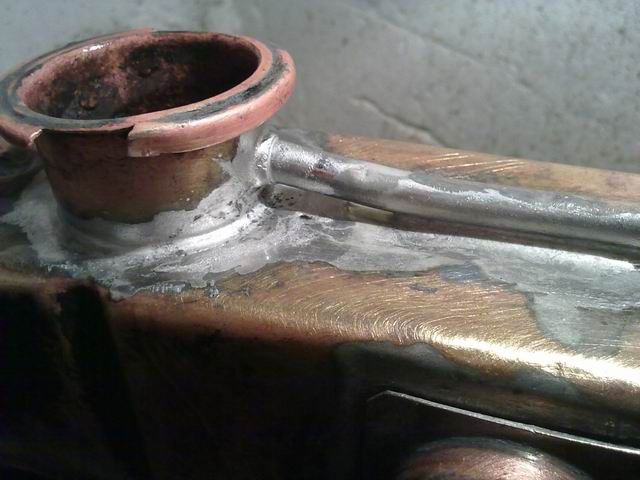
The highest quality repairs are made using soldering. Soldering a brass or copper heatsink is easy. Almost every man at least once in his life took a soldering iron in his hands to connect a broken or burnt wire. The difference lies only in the size of the product.
To warm up the soldering point, you should use an electric soldering iron with a power of at least 250 W or copper, which must be heated with a blowtorch or gas torch. Traditional rosin is used to dissolve the solder oxides. Sealing cracks or leaking pipes can be done with conventional lead-tin solder. If the tube is damaged of considerable length, it is advisable to plug it and solder it on both sides.
Refractory solder (copper-phosphorus or brass) is required to repair cracked fittings or massive power elements. In this case, a temperature of 500 to 1000 ° C is required, which can only be achieved with a gas burner or autogen.
As for the soldering of aluminum radiators, it is quite possible, but it is fraught with some difficulties. The fact is that the surface of aluminum is always covered with a thin film of aluminum oxide Al2O3, which, after removal, immediately forms again.
Nevertheless, aluminum products can not only be cooked in argon, but also soldered. For this, several soldering methods are used. Within the framework of this article, it is not possible to give a detailed description of them. Below are just a few of the methods:
- Under a layer of special flux for soldering aluminum (F-59a, F-61A, F-64).
- Under a layer of self-prepared iron rosin flux. For its preparation, they take iron filings and rosin in a ratio of 1: 2 and prepare the mixture in a cast iron crucible.
- Using soldering acid and tin, zinc, copper and bismuth alloys. As an example, 3 recipes are offered: zinc - tin (2: 8), copper - tin (1:99), bismuth - tin (1:30).
- Homemade flux based on potassium and lithium chloride, cryolite, sodium sulfate, and table salt is used as a flux. Soldering is carried out under a layer of flux with tin-lead-bismuth solders POSV 33 or POSV 50.
Before installing a repaired radiator in place, check it for leaks in the same way as when looking for a place of damage.... Before connecting all communications to the radiator, you should make sure whether the cooling fan has been repaired.
As follows from the article, the amount of upcoming radiator repair work can vary widely. Before getting involved in this adventure, you should soberly assess your potential. It is advisable to repair only minor damage with your own hands.In other cases, it is worth resorting to the help of a repair shop or a familiar specialist.
An article on how to repair a car cooling radiator - causes of malfunctions, methods of troubleshooting. At the end of the article - a video about the professional repair of the radiator.
The content of the article:
- Causes of cooling radiator malfunctions
- Typical malfunctions
- How to pinpoint a radiator leak
- Repair methods
- Video about professional radiator repair
After the fuel is burned in the engine, about 70% of the generated energy is converted into heat. Some of the heat goes out through the exhaust pipe, but most of the heat stays inside the engine, heating it to a high temperature.
A cooling radiator (heat exchanger) is used to prevent engine overheating and dissipate heat into the environment, which is the main component of the vehicle's cooling system. A healthy and well-maintained (clean) radiator maintains optimum operating temperature in the engine, allowing it to run at full capacity.
However, the radiator, like all other elements of the car, can fail and stop performing its function. But at the same time, it is not at all necessary to immediately contact a car service for repairs. As practice shows, in most cases, a heat exchanger malfunction can be eliminated independently. To do this, you just need to identify the cause of the breakdown and know how to eliminate it.
There are not so many reasons causing problems with the radiator, and conditionally they can be divided into three types:
- mechanical damage;
- improper operation;
- normal wear and tear during operation.
You can also add a factory marriage, but this reason is extremely rare. In most cases, the above reasons lead to one consequence - a violation of the tightness of the radiator. That is, it simply starts to leak.
But there is another "result" of breakdown, which can be more likely attributed to improper operation - fouling of heat transfer plates... Simply put, the radiator becomes so dirty that it stops exchanging heat with the environment, since an adhered and dried layer of dirt (dust, insects, poplar fluff) prevents heat from separating from the heat exchange plates.
In this situation, it is hardly appropriate to talk about repairs, because the problem is solved by simply flushing the radiator fins with a stream of running water. By the way, dirt can form not only outside the radiator, but also inside it in the form of blockages, scale and corrosive deposits.
A small stone that accidentally flew out from under the wheel of a car, as well as a serious accident with a head-on collision, can damage the radiator mechanically with the subsequent violation of the tightness. Also, the inept maintenance of the radiator by an inexperienced car owner, when he accidentally damages the housing, heat exchange elements or other parts, can also be attributed to mechanical damage.
Incorrect operation can consist not only in untimely cleaning and washing of the radiator, but also in the use of low-quality coolant.
Poor quality of the liquid can lead to its freezing and "defrosting" of the radiator, even with a slight frost, with a subsequent violation of the tightness. Or the composition of a low-quality liquid can be so aggressive that it corrodes metal. And this eventually leads to the same defect - depressurization and leaks.
In a car, as in other technology, there is nothing eternal. And the cooling radiator is no exception. He and its accompanying parts are also susceptible to corrosion, destruction, blockages during operation.
Typical radiator malfunctions can be divided into two types: external and internal.
External:
- violation of the tightness of the pipes for the delivery of coolant to the radiator tanks;
- the formation of cracks on the radiator pipes for the supply / removal of coolant;
- violation of the tightness of rubber seals.
Internal:
- the formation of blockages in the conductive pipes that prevent sufficient cooling of the liquid.
Before starting to repair the radiator, you need to determine the nature and location of the malfunction itself. Almost all external malfunctions of the radiator (except for the usual pollution) consist in a violation of its tightness, which means that there must be a coolant leak.
The intensity of fluid flow from the radiator can be different, and at the initial stage it is visually imperceptible, but a rapid decrease in the level of fluid in the tank is noticed almost immediately. After all, a decrease in the level of antifreeze or antifreeze leads to overheating of the engine, which will be immediately signaled by a special temperature sensor on the driver's instrument panel.
There are two ways to pinpoint the location of a fluid leak. In this case, you will need to completely drain the coolant from the radiator, and disconnect the radiator itself, remove it from the car and rinse thoroughly.
-
It is necessary to plug (close) all radiator inlets and leave only one. Pour water into the radiator through the left hole. Through the same open hole, using a pump or compressor, create excess pressure in the radiator. A stream of water will begin to come out of the hole in the damaged area.
There are several ways to repair a radiator, but not all of them are available and are suitable for independent "garage" or "field" repair. Below we will consider the most simple and common methods of self-repair in simple conditions, without special professional equipment.
For exterior repairs to a cooling radiator, a heat-resistant adhesive sealant with metal powder is often used. Such a composition is often called "cold welding" or "metal sealant". On the market, such sealants can be offered ready-to-use or as separate components, which then need to be mixed until a homogeneous mass is obtained.
Repairing a radiator using external glue-sealant is quite effective, but only subject to compliance with the relevant technological requirements at each stage of work:
- the coolant must be completely drained from the radiator;
- the outer surface intended for repair must be thoroughly degreased and lightly treated with a file or emery cloth until a slightly rough surface is formed;
- to seal large holes (more than 2 mm), metal patches with a degreased and treated surface can be used.
A sealant is applied around the hole (crack). Initial hardening occurs within 2-3 minutes, and full hardening within 24 hours. The product can be used after 24 hours.
The advantage of a metal sealant is that its coefficient of thermal expansion is close to the coefficient of metal, and if everything is done correctly, then the sealed radiator can serve for several more years.
"Chemical sealants" are sometimes referred to as "radiator reconditioning fluid" or "powder reducing agent". Accordingly, such sealants are powder and liquid.
Eliminating a leak with a sealant (from the inside) is not a difficult process. The sealant is poured into the cooling system, after which it comes into contact with air and creates a polymer plug, which clogs the hole at the leak.
However, this method has a serious drawback - the sealant clogs the cooling system., after which a complete flushing of the system (and an air conditioner with a stove too) is required. Therefore, the internal use of a sealant is advisable only in an emergency, when the leak is urgently needed to be repaired. You can drive with such a sealant no more than 100 km.
Repairing radiators using soldering is considered not only more reliable, but also more difficult and time consuming. However, this self-repair method is not suitable for all radiators. For example, it is better not to use it to repair radiators made of aluminum alloys, which are very difficult to repair under normal conditions. It is better, easier and faster to seal such radiators with metal sealant. Brass devices are considered the most suitable for home repair with a soldering iron.
To solder a brass radiator you will need:
- a soldering iron with a power of at least 50 W;
- soldering acid (acid and zinc solution) - for cleaning metal from oxide;
- borax powder (flux) - to neutralize the oxide film and better spreading of liquid solder;
- solder.
- metal brush, sandpaper or file.
The surface for applying the joint layer must be pre-cleaned from dirt and dust. Signs of corrosion and oxidation are removed with a wire brush. The working surface is treated with an emery cloth (or a file) to a shine, to improve the adhesion (adhesion) of the metal to the solder. The soldering iron tip must be clean and free of old solder and scale. The work surface must be warmed up immediately before starting soldering.
Important! Soldering can only be carried out at a certain distance from the factory seam, since brass has a high thermal conductivity and can melt the factory seam.
The process of soldering a radiator is not as easy as it seems at first glance. If you do not have sufficient minimum skills to work with a soldering iron or you are not confident in your abilities, then it is better to contact a specialist.
If the cooling radiator has extensive damage, but at the same time it is localized (that is, located in one place), then the problem can be solved by plugging the damaged pipes.
Usually, the damaged tubes are tightly squeezed (flattened) with pliers on both sides as close as possible to the damaged area. In this simple way, the leakage of coolant from the defective holes is blocked.
As a rule, such radical actions are taken in the "field" conditions when there is no other way out of the situation. It should be remembered that it is impossible to operate the car for a long time after such a radical repair, and the number of plugged tubes should not exceed 3-4 pieces.
The most recent car models are increasingly equipped with cooling radiators with plastic barrels and an aluminum alloy center section. It should be remembered that it is not necessary to waste time on the repair of such radiators, since they cannot be repaired at all - they must be changed immediately.
Video about professional radiator repair:

