In detail: do-it-yourself hand-out repair Niva 2121 from a real master for the site my.housecope.com.
The transfer case of the Niva car and some other off-road vehicles is designed to distribute the torque of the wheels both between the axles and between different wheels of the same axle. This is done in order to increase cross-country ability on particularly difficult sections of the track. In the language of specialists, this device is called a "demultiplier".
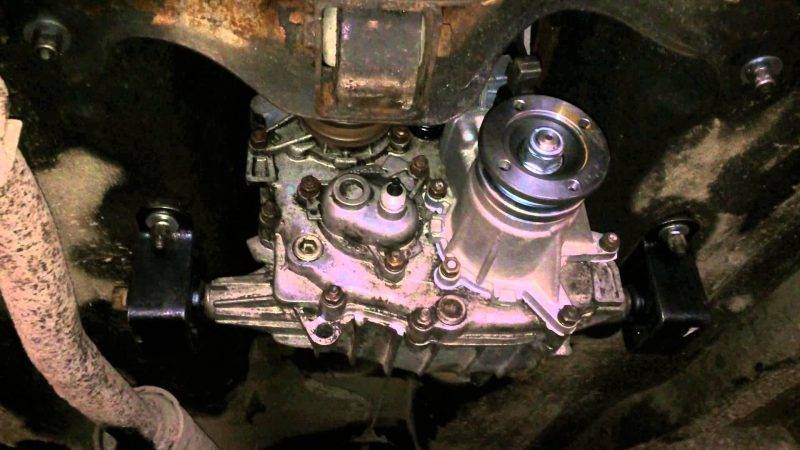
The location of the transfer case in the car Niva 21213
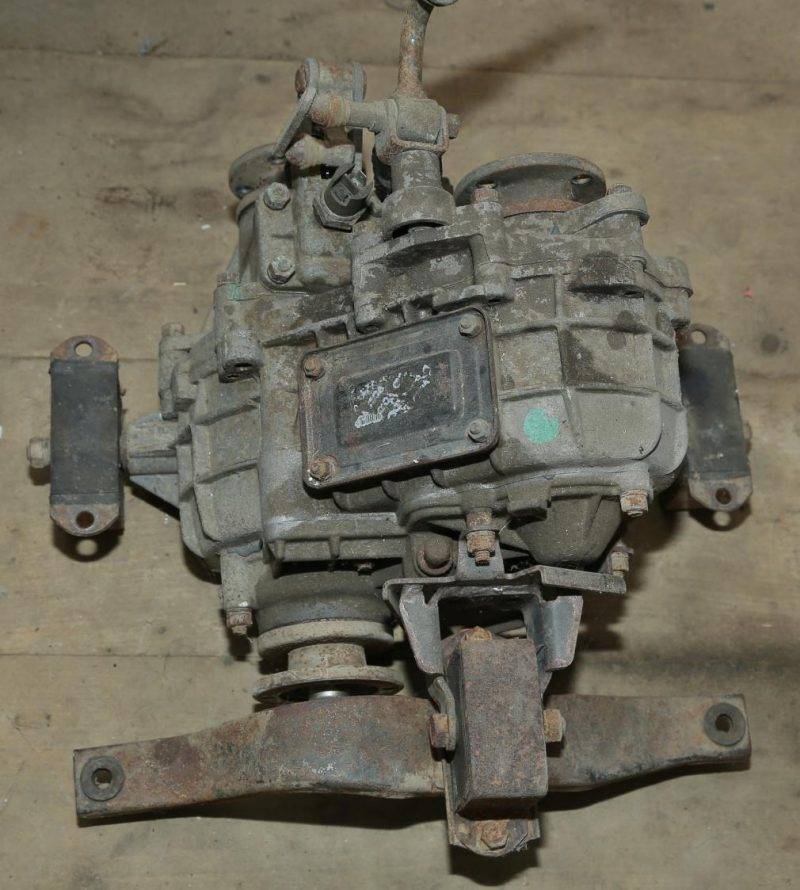
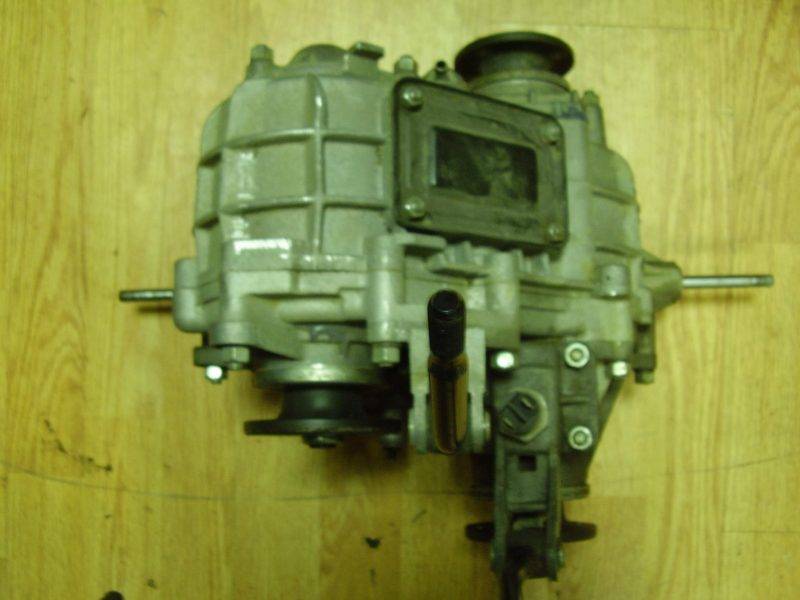
The transfer case takes an intermediate position in the vehicle transmission between the gearbox and the propeller shaft. It has its own body in which its component parts are located.
The distribution box helps to realize the capabilities of the SUV, such as:
- Center differential lock.
- Disconnection of the driving axle.
- Increasing the torque of the driving wheels.
- Distribution of torque along the wheel axles.
Violation of the normal operation of the transfer case of the VAZ-21213 can be assumed by the following signs:
- Delays when connecting the front wheel drive.
- Overheating of the transfer case.
- High consumption of transmission oil.
- Spontaneous disengagement of the front axle.
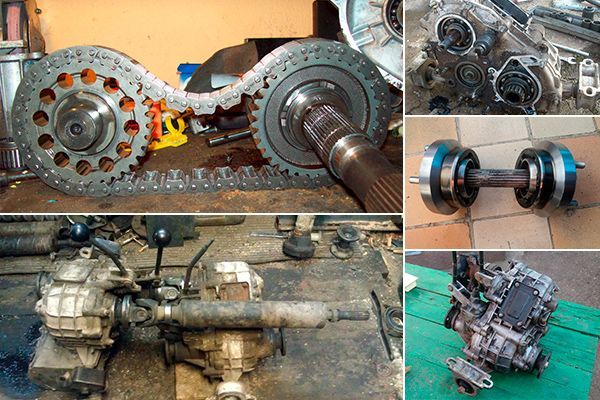
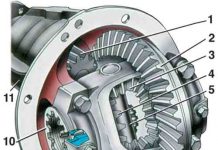
There is nothing fundamentally complicated in the demultiplier device, except that it itself is not attached to the main gearbox as on more modern all-terrain vehicles. Intermediate propeller shafts extend from the transfer case to the manual transmission. The rest of the device is represented by gears, satellites and bearings. Also included in the design is a free differential with a lock.
- The machine must be installed on an inspection pit or lift.
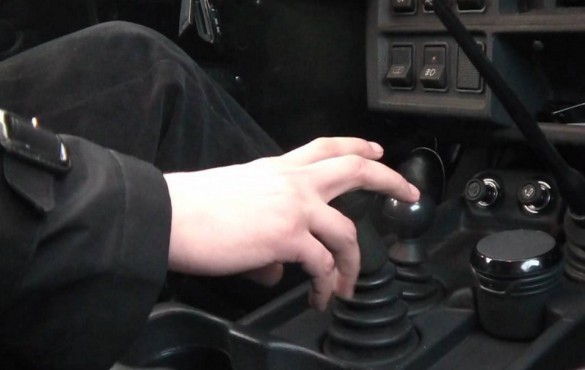
- The transfer case levers are set to neutral.
- The lining of the central floor tunnel is removed.
| Video (click to play). |
The tunnel cover must be removed to gain access to the hatch of the transfer case levers
Handles and covers of all levers are neatly removed
We get access to the insides of the dispenser
It is necessary to remove the sensor connected to the speedometer from the distributor
Drive shafts fit to the front and rear transfer case
When removing the box, the main thing is not to overdo it.
- Install the engine mount brackets correctly.
- Install the transfer case without tightening the bolts of its fasteners to the end.
- The flanges of the drive shaft of the box must match the intermediate propeller shaft.
- Install the transfer case supports and secure the fasteners.
- Connect the transfer case to the front and rear driveshafts, reinstall the differential lock sensor.
Centering the demultiplier can be done in different ways. The classic version of centering is that the car is installed on a lift or a viewing hole, and all operations are performed by two people, one of whom is sitting behind the wheel. The procedure is performed as follows:
-
The fourth gear turns on, the blocking is turned off.
We put the distributor in neutral position, turn on the 4th gear of the manual transmission
To center the range with a 15 key, weaken the fasteners
The assistant gets the whole brunt of the centering work, it takes strength and dexterity
Repair and alignment of the dispensing unit should be carried out subject to experience and knowledge in the field of construction and repair of a specific transmission of four-wheel drive machines. It is necessary to center the demultiplier after each reinstallation. The correct position of the box is judged by the presence of vibration.
All off-road enthusiasts purchase all-wheel drive off-road vehicles to overcome various obstacles. Four-wheel drive is a system for distributing speed and power along two axles of the vehicle.Cars equipped with all-wheel drive have permanent all-wheel drive or plug-in. To ensure the transmission of angular speed to all wheels, a transfer case is installed in cars of this type. There will be a further article about her.
Almost every novice auto mechanic can repair the razdatka
The transfer case is the mechanism that distributes the torque from the engine to the drive mechanisms, that is, the differentials. Most often, the transfer case is used in off-road vehicles, as well as in some sports cars, which increases their stability on the road.
In SUVs, the transfer case performs the following functions:
- Distributes the moment between the axles, which ensures the best cross-country ability of the car, and in this way the full potential of the engine is fully realized. The possibility of such a phenomenon as power circulation is automatically eliminated.
- Increases torque to the drive wheels by using a downshift, this helps drivers overcome serious off-road obstacles.
- Provides a stable position and movement of the car at low speed when all the torque is involved.
Transfer cases can be divided into several types:
Niva has excellent off-road potential, and that is why it becomes an indispensable assistant when going out into the wilderness. But, as with any car with a domestic SUV, problems can also occur.
Like any mechanism, the dispenser also fails, and by the following symptoms it can be easily determined:
- Delays when turning on the front axle, turning it off abruptly. This situation can only happen in the case of early modifications with a demultiplier. All Niva cars have permanent four-wheel drive, but many craftsmen upgrade their cars, after which they have the opportunity to turn off the front axle.
- Constant overheating under load. A possible reason will be a low oil level, if the reason is in it, then the oil must be added, if not, then this is caused by increased friction of the parts.
- Increased oil consumption for the gearbox. The reason is any leakage due to wear of the oil seals, loose crankcase bolts, or simply not completely tightened the drain plug.
- Looseness of the transfer case and gearbox mountings. Leads to strong vibrations in the passenger compartment. May be associated with fastening mechanisms or centering the transfer case.
- Vibrations can also be caused by damaged transmission mounts, this issue is solved by simply replacing broken parts.
- Looseness of the flange bolts, as well as its wear. It is solved by replacing or tightening the bolts, in the worst case - by purchasing an intermediate shaft. This breakdown leads to noise and vibration at first only when starting from a place of a car, later it turns into a constant hum at a speed of over 80 kilometers per hour.
- Seized propeller shaft joints. Breakage occurs due to the drying out of the elements; in order to eliminate it, you will have to renew the lubricant with the help of a syringe. If the re-injection did not help, then you will have to replace the whole part.
- Similarly, the CV joint can jam, this is either due to a lack of lubrication, or due to deformation. In case of severe wear, you will have to buy the entire intermediate shaft, if it was only a grease - you can simply replace it.
- Cardan backlash is solved by replacing.
- Differential wear can lead to noise and crackling when cornering, only replacing the differential will correct this cause.
- Satellites and their obstructed movement often become a possible cause of cornering noise. This is due to burrs, which can be removed with a file.
- Often, it is not the transfer case itself that fails, but the lever, rod and fork, which impede full control of the unit. Also, these parts can simply stick, for this they must be cleaned of dirt or, in case of severe wear, replaced.
Also see detailed information on how much powder painting of wheels costs.
There is nothing complicated in removing and repairing the demultiplier, this procedure can be carried out by any person who has the right tool. The main difficulty of this car is that the transfer case is not attached directly to the checkpoint itself, like in modern SUVs, in Niva they are connected by means of intermediate shafts.
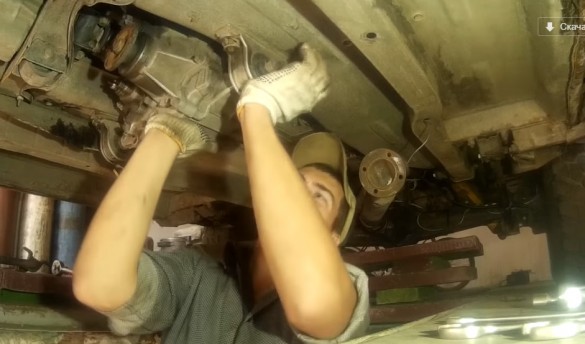
The dismantling of the unit itself is quite simple; for this, the car is driven into the inspection pit. All levers in the passenger compartment are set to neutral. Then the plastic cover is removed from the tunnel and all covers and handles are removed. Then the hatch is unscrewed, which opens access to the distributor. The speedometer sensor is also removed, after which the driveshafts are disconnected. At the end, it remains to unscrew several fasteners of the box itself, and then remove it. After the mechanism is removed, you can proceed to disassemble it for further replacement of worn parts. In general, the installation is carried out in the reverse order, but it is worth paying attention to centering the transfer case with the gearbox, that is, it is necessary to convince the flange of the gearbox drive shaft to be connected to the transfer case intermediate shaft, after which you can tighten the mounting bolts of the range itself.
Niva has permanent four-wheel drive, and the car itself is inexpensive. And that is why, in terms of reliability and price, it is the best choice for outdoor enthusiasts. Maintenance of an all-wheel drive for this car will cost symbolic money, nevertheless, the very design of the mechanism has a fairly high reliability for such a price.
The transfer case on the VAZ 2121 "Niva" car and its modifications provides an angular transmission of speeds to all wheels. When the transfer case is connected, it connects the front and rear axles, distributing the torque equally. The presence of a crawler gear increases the torque at low speed, which is an undoubted advantage in off-road passage.
The "Niva" car has a serious potential for an off-road vehicle, but as practice shows, the transfer case often does not withstand the load and breaks down.
It is possible to determine the malfunction of the transfer case by the following symptoms:
- long delay when connecting the front axle, as well as disconnecting it on its own;
- overheating of the RCP at medium loads, the cause of which may be an insufficient oil level, or increased friction of parts;
- oil drainage from the crankcase due to worn out oil seals and gaskets;
- strong vibration in the passenger compartment due to worn out mountings for the transfer case;
- hum at speeds over 80 km / h, as well as vibrations at low speeds due to loosening of the flange bolts, which leads to a complete replacement of the intermediate shaft;
- worn cross-pieces of the propeller shaft due to insufficient lubrication in the bearings;
- all kinds of malfunctions of CV joints and backlash of the propeller shaft;
- the rod and fork of the transfer case often play, therefore it is difficult to engage the differential lock or low gear.
- To remove the RCP, you will need a “13” wrench (open-end or ratchet), a flat and curly screwdriver. For convenience, the removal is carried out in the inspection pit.
- In the salon, using a screwdriver, you need to remove the decorative trim for the levers. Under the cover there will be a boot of two shift levers, which is also removable.
- The driveshafts are being dismantled. This is done using the key at “13”. The front and rear gimbals are disengaged in the same way. Before removing the shafts, mark the seat with the universal joint yoke so that after installation there is no vibration.
- The speedometer cable is dismantled by unscrewing one nut and swiveled to the side.
- Next, unscrew all the bolts securing the transfer case through the supports to the body and remove the RCP.
Full repairs will require an automotive tool kit and a transfer case repair kit (bearings, seals and gaskets, possibly some gears), a hammer, and a bearing puller.
- Remove the front and back cover of the RCP body. To do this, you need to loosen the nuts securing the covers, and using a pry bar, pull the cover towards you from all sides. On the other side of the box, we do a similar operation. The front cover will come out with the shaft responsible for the differential lock, and the rear cover with the shaft responsible for the downshift.
- Using a hammer, knock out the differential assembly from the case. The design of the differential inside the transfer case is similar to that found in the axles. Having unscrewed the nuts securing the main pair, we open access to the satellites. If there is wear on the teeth of the satellites, then we must change all the parts.
- We check each bearing for abnormal sounds during rotation. If there are any, then we remove the nut of the shaft on which the bearing sits, and with the help of a puller we press out the old bearing.
- In the reverse order, the internal parts of the transfer case are installed. It is recommended to use new bolts and nuts for sufficient torque of shafts and casing covers.
- After assembly, fill in new semi-synthetic oil, not lower than GL-4 classification - 0.9 liters.
After any operations on the removal and installation of the transfer case, it must be centered. This will require:
- loosen the attachment of the transfer case so that it “sits” more freely and can move slightly;
- accelerate to a speed of 80 km / h, after which the razdatka will sit on its seats;
- tightening occurs as soon as possible and with the engine running, so that by means of vibration, the RCP does not have time to take an unsuitable position.
After such a repair, the transfer case can serve faithfully for a very long time. Unfortunately, the work of the transfer case under conditions of increased loads, often significantly affects the reduction of the resource, due to its weak design. To increase the reliability of the RCP, a subframe can be installed, which will allow the transfer case to be firmly placed in its place, as well as to exclude strong vibration from the transmission.
The ready-made subframe for "Niva" has ready-made holes and fasteners for attaching it to the body. Also, to increase reliability, an additional support for the transfer case is installed. To install the subframe, you will need to place a jack under the transfer case, loosen the mounting nuts and lower the transfer case. Next, the stretcher is fitted on the seats. I strongly recommend that the holes in the bottom be well lubricated to prevent possible corrosion. The subframe is screwed onto the transfer case, and the box itself is screwed onto the subframe. Due to the fact that the subframe is rigidly connected to the body, vibrations will still be transferred to the body, but not so significantly. Thanks to the reinforced bearings and high-quality rubber cushions, the transfer case will lose its tendency to leave the seat, which means that all elements of the chassis will last much longer.
It is quite easy to repair the transfer case of the Niva car. If you have the necessary tool and minimal knowledge of the RCP device at hand, then in a few hours your transfer case will heal a new life. Installing a subframe will eliminate many problems and prevent premature wear of all parts, assemblies and transmission units.
The transfer case on the Niva car is removed not so difficult. But it takes quite a lot of time, since in addition to the handout, some more details will have to be removed.
Below is a list of tools that will be needed to remove the transfer case on the Niva:
- 13 open-end wrench
- 13 spanner or ratchet wrench
- Flat and Phillips screwdriver
First, it is necessary from the car interior, where the locking control levers are located, to remove the plastic cover on the floor tunnel, having previously unscrewed 4 self-tapping screws that secure it:
After that, you need to unscrew the three self-tapping screws that secure the cover under the levers:
And then we turn off the handles of the levers:
And now you can remove the cover under the control levers along with the rubber bands:
And also note the two wires that are connected. They can be clearly seen through the opening from the passenger compartment. They need to be disconnected:
We have nothing else to do in the car, now we need to either drive the Niva into the hole, or raise it on a jack and crawl under it, as I did.
To free the transfer case of the VAZ 2121, it is necessary to disconnect the cardans from it, both the front axle and the rear. And also disconnect the drive from the gearbox.
So, all cardan joints are disconnected in the same way, so I will show the result immediately after disconnecting the rear axle:
The front axle cardan is disconnected in the same way. It is necessary to unscrew all the fastening nuts with a 13 wrench. If the bolts rotate, then you need to insert a flat screwdriver between the base and the bolt head itself:
To unscrew all the other nuts, we turn the cardan by hand for easier access to them. And now you can pull it off with your hand:
Next, take out the speedometer cable by simply unscrewing its locking nut by hand:
And we take it out by slightly pulling to the side:
After that, we disconnect the transfer case from the gearbox, also unscrewing a few bolts:
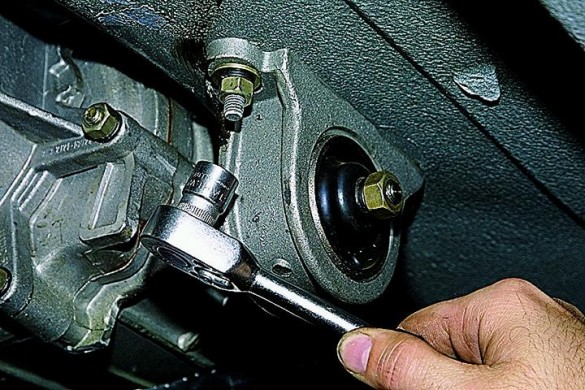
The final step in this instruction is to remove the transfer case from the outboards on each side.
But first, it is better to substitute something under the distributor so that it does not fall after removal.
It is most convenient to unscrew the outboard nuts with either a ratchet handle or a similar wrench. In this case, the Ombra ratchet wrench helped me a lot, a set of which I recently purchased:
When all the nuts are unscrewed, you can remove the transfer case from the car by carefully lifting it down from the support you have prepared for it. You can cope on your own, even without outside help.
In case of replacement with a new one, you will have to fork out, since the price of a new handout for the Niva is about 15,000 rubles. It is not on sale in every city, so you will have to look for it. Or, as an option, look for a used one, but do not count on a very low price. You can't find a cheaper price than 5,000 rubles. Installation is carried out in the reverse order, but with an assistant to support it during replacement.
The relatively complex scheme of the distribution of torque from the internal combustion engine to the wheels is explained by the universal purpose of the Niva 2121 - if used correctly, it is comfortable to move around in the city and along a muddy country road.
Similar properties are provided by the presence of a transfer case with a center differential lock, complementing the 4- or 5-speed "mechanics", depending on the year of manufacture. Lever located closer to the torpedo, is responsible for disabling / enabling the center differential, the second "Small" lever controls the range and has 3 positions: high and low rows, as well as neutral.
The transfer case mechanism includes more than 60 independent parts, which is confirmed by the presented drawing. Therefore, it is prudent to name the main elements and their purpose.
A pair of gears are tightly seated on the drive shaft, one of them (large) is designed for high gear, the second (small) is responsible for low gear. They have cut teeth with a straight and oblique profile. The first - in contact with the clutch, the second - with the intermediate shaft. The inclusion of one row or another sets in motion along the hub in the horizontal direction of the coupling, after which it connects to the gear on the drive shaft of the transfer case.
The intermediate position disconnects the box (reducer open), the movement of the car in this mode is impossible. The front helical gear on the intermediate shaft is used to control the differential.The engagement of the blocking, or rigid coupling of the shafts of the drives of both axles, is carried out through the coupling. The design is typical for modifications 21213 and 21214, the latter being additionally equipped with a speed sensor drive.
In the current state (when the transfer case is connected to the lower gear) the gear ratio in the first stage changes from 4.4 to 7.83, the second - from 2.52 to 4.58, the third - from 1.63 to 2.9, in the fourth - from 1.2 to 2.14, fifth - from 0.98 to 1.75, which is reflected in an increase in tractive effort on the wheels.
Normal position for RC grips to provide adequate road performance of good quality:
The inclusion of a special mode of operation of the transmission is made not long before the car begins to overcome an obstacle (track, mud, ford or rise). The transition to the lower row must be performed while stopping. Returning to top gear is allowed on the go, although it causes problems for beginners due to the lack of the usual synchronizer.
It is somewhat more difficult to properly handle the forced manual center differential lock. On the contrary, it turns on with a small (up to 20 km / h) movement of the machine due to the mismatch of the grooves on the blocking clutch, satellites and the ring gear. For a simplified engagement of the lever in the desired position, taking into account the Niva 2121 dispenser device, pick up a low speed, then, shaking the steering wheel, pull the handle towards you.
Problems can also arise when disengaging the lock, since the clutch teeth literally mesh with the ring. Engage reverse gear and, swinging the steering wheel, push the lever away from you. This action is performed immediately after overcoming a difficult section in order to avoid overloading the checkpoint. It is most effective to turn off the differential together with the transition to lower stages. At the same time, only diagonal hanging of the wheels will be able to stop the Niva 4x4, since the standard cross-axle blocking is not provided.
Performing the listed operations, one should not give vent to physical strength. An attempt to "push through" the transmission is highly likely to result in costly repairs.
Severe exploitation, insufficient attention to how to use the distributor on the 2121 field, lead to the appearance of:
- Body vibration in motion
- Vibration at start
- Gula
- Noise when maneuvering
- Tight inclusion of modes
Experience shows that the culprit is: insufficient oil level, incorrect centering of the RK, loosening of the mountings and damage to the rubber bands. An additional influence is exerted by the condition of the cardan and the engine itself.

