In detail: do-it-yourself repair of the UAZ 469 front axle gearbox from a real master for the site my.housecope.com.
Almost no special tools are needed for repairs. All work is carried out with a minimum set of tools available to each driver.
Do-it-yourself front axle repair UAZ Loaf and UAZ 469 uncomplicated. Most often, during operation, it is necessary to carry out various preventive work. As a rule, they do not require removal and disassembly of the bridge. The care list includes:
- The pivots are checked for gaps;
- Threaded connections must be periodically tightened;
- Convergence is checked;
- The requirements of the parts lubrication tables are followed.
Be sure to visually inspect the main nodes. Particular attention is paid to the serviceability of the fixing bolts. Also, all locking elements must be securely fastened. Check the maximum steering angle of the wheels. It should not exceed 28 degrees. If the values differ from those indicated, adjustments must be made. Also, always check that the king pins are properly tightened and functioning properly. Untimely elimination of minor faults may lead to the need for a major overhaul of the front axle.
Repair of this node begins with the dismantling of the bridge. On a loaf and a goat, these works are performed identically. There are only small differences. When performing repairs, you need to be extremely careful. Removing the bridge is a series of simple steps:
- You should start by ensuring the immobility of the car. For this, anti-recoil brake pads are installed;
- Further on the "goat" the brake pipes are disconnected from the hoses. On the Loaf, the tubes have transition pipes. In this case, the hoses are disconnected from the nozzles;
- Remove the nuts securing the lower shock absorber cups. This item is the same on both machines.
- Next, unscrew the bolts connecting the drive gear flange and the front cardan. Before this, you need to fill in the WD-40 threaded connection;
- Remove traction from the bipod. The nut located on the ball pin is twisted;
- Twist the nuts that secure the spring ladders. Disassemble them with overlays;
- They will jack up the frame in front of the car, roll out the bridge.
| Video (click to play). |
Some UAZ 469 cars are equipped with springs. In this case, the penultimate paragraph will look a little different. The penultimate action removes the anti-roll bar by disconnecting from the suspension arms located along the longitudinal. The levers and cross rod are unscrewed from the bracket.
Repair. After disassembly, all parts are washed in gasoline and lubricated. Faulty ones are replaced with new ones. The assembly takes place exactly the opposite, while it is necessary to clarify some of the nuances of the process.
When replacing the pivot bushings specifically in the ball joint, it is necessary to tighten them up to 25 mm at the end of the pressing. Lubricant needs to be put in. Do-it-yourself repair of the front axle of the UAZ Loaf and UAZ 469 is not so difficult, but accuracy is needed. For example, when installing a ball seal, the ring for it must be impregnated with hot oil.After assembly, the operability of the bridge is checked using a stand.
Many Internet users in Yandex or Google enter a similar request - "repair of the UAZ 469 front axle." This means that they are interested in how to repair the front or rear axle on the Oise themselves. Of course, the procedure for disassembling and repairing the bridge is described in special books on repair and operation, which are not a problem to get now. However, to disassemble with your own hands what is the front, what is the rear axle to the last screw is, to put it mildly, not an easy task. It may turn out that you just need to replace some small part, to access which you do not have to disassemble everything.
Here are just some of the possible options for breakdowns of bridges on the UAZ 469 (Hunter, Patriot, "loaf"):
- Worn differential, bent gearbox housing
- Critical wear of the main gear in the gearbox
- Wear of the steering knuckle (ball joint, trunnion) on the front axle
- The appearance of large gaps in the pivot joints
- Wear of bearings, as a result of which they need to be adjusted and replaced
- Injection of elements requiring lubrication
It can be difficult to understand which of the above happened to your car, however, it is often possible even by ear to approximately localize the problem. If increased noise is heard from the side of the front or rear axle, a hum (even in neutral gear) - the gearbox is most likely worn out (repair is required), or the bearings require lubrication. If your car “scours” from side to side and at the same time the steering is in order, the problem may sit in the trunnion, CV joint or in the incorrect installation of the pivots that fix the ball joint, as a result of which there is play and the wheel starts to “walk”.
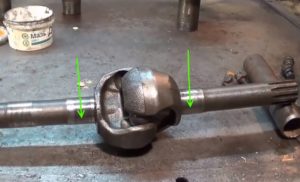
A very common malfunction is the departure of ball bearings that are in the CV joint. They fly out just because of the incorrect adjustment of the pivots, as a result of which the geometric center of the CV joint and the trunnion do not match. As a result, the axle shaft “walks” in the seat and gradually breaks. The joint itself is also damaged. And when turning from the side of the wheel, a crunch is heard and at the same time the wheel can wedge. Some masters in the process of repair simply throw out all the balls, except for the centering one (additionally welding it) - in order to get rid of the problem of their constant flying out.
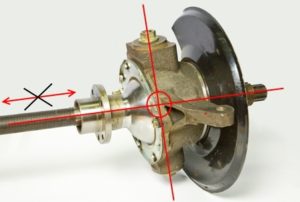
But this does not save for long, there are even cases when the welded ball breaks off during the ride, the loads are so high there. It is much more effective to do the adjustment of the pivots. It is necessary to achieve such a state in which the line passing through the pivots and the center of the axle shaft will intersect at one point. And it is at this point that the center of the CV joint should be located. The displacement of the axle shaft to the left and right, as shown in the figure, is unacceptable, it must be rigidly fixed; for this, thrust rings and bushings are provided in the design.
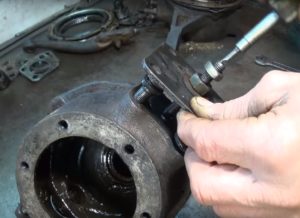
And now we will consider the process of removing the kingpin on the UAZ 469. For this procedure, you can use a special puller, however, it is quite possible to make it yourself. All you need is a plate with a bolt hole, a washer and 2 nuts. The plate will rest against other bolts around the perimeter, and the center bolt will just pull the kingpin out of the seat.
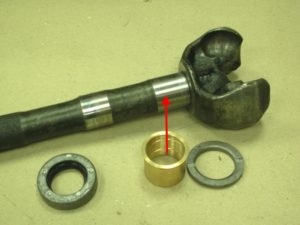
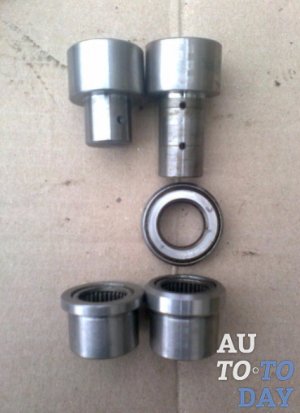
Before you start adjusting, prepare everything you need: bushings in the trunnion (if there is a working on the trunnion), thrust bushings 4 pieces, as well as oil seals. The main condition for adjustment is that the two halves of the CV joint do not dangle, both in straight-line movement and when turning! The procedure is as follows:
- Take the ball joint and press the bushing in there so that half of the CV joint does not hang out in the ball joint.
- There is a thrust washer on top, be sure to put a new one, even if the old one looks in good condition.
- Take a metal shaft (you can make it from a valve, for example) on both sides of which there are cones and put a washer on it with a diameter like a central ball, that is, 27 mm. With one edge, rest it in the center of the kingpin. Ideally, the second edge should also fall on the center of the kingpin. If this is not the case, put the shims in the same place where the thrust is, or rather, under it.
During the assembly process after repair, it is necessary to lubricate all the bolts with nigrol so that the next time everything is easy to unscrew. All mating surfaces (the junction of the trunnion and the steering knuckle housing) must be cleaned of dirt. It is not recommended to lubricate the CV joint with grease, as it is thick. When heated under the action of centrifugal force, the entire grease will scatter along the walls of the ball joint, but it is necessary that the CV joint balls are abundantly lubricated. To do this, it is recommended to dilute the grease by half with nigrol.
After the final assembly and repair, one more important adjustment needs to be made. It's an adjusting screw. This is the bolt that limits the maximum angle of rotation of the wheel. It is important not to overdo it, do not tighten the bolt all the way - otherwise the wheel will wedge. Tighten almost to the end, and then try to turn the wheel (more precisely, the shaft on which it will stand). It is necessary to unscrew the bolt back until the wheel stops wedge. In this case, the angle of rotation should not be lower than the factory one. Well, now you yourself can repair the front axle on 469 UAZ!
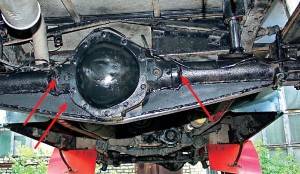
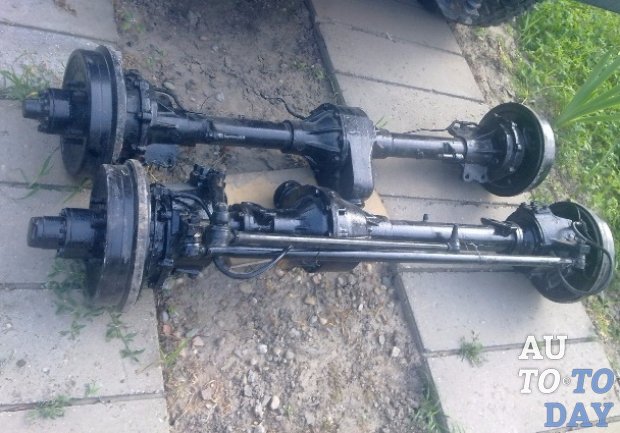
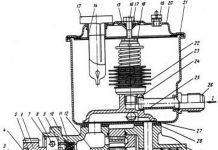
If we consider the design of the UAZ 469 front axle from the point of view of the arrangement of the middle part of the bridge beam, differential and main gear, we can draw an analogy with the rear drive axle. The front axle differs primarily in the design features of the wheel control drive, which includes a gearbox and cardan joints of equal angular velocities (see Fig.). A flange is used to connect the axle housing (1) to the ball joint (3). The hinge body (5) is attached to the support using two pins (4). Gearbox cover (6) is attached to this housing with bolts, on which pin (11) and brake shield (12) are installed.
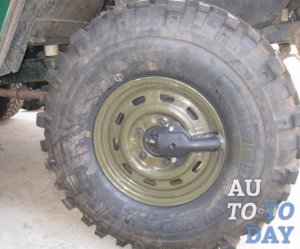
To reduce the wear of the axle elements and fuel consumption while driving on a hard road surface, it is recommended to turn off not only the UAZ front axle, but also the front wheel hubs. For this purpose, the protective caps are removed and the bolts are unscrewed from the shaft hole. As a result, the coupling is installed in such a position that the annular signal groove present on its surface is located in the same plane as the flange end. After the coupling is installed in the desired position, you can begin to tighten the protective cap.
The inclusion of the front wheel is carried out by securely tightening the bolts. The scheme of the bridge device provides for strictly simultaneous switching on and off for both wheels. In order to turn on the UAZ 469 bridge, you must first turn on both wheels without fail.
Repair of the front axle used on a UAZ 469 car requires knowledge of the wheel gear device, the scheme of which is similar to the rear axle wheel gear. The main difference lies in the mounting and fastening of the drive gear, as well as in the design features of the ball bearing installed in a special glass.
Repair and maintenance of the UAZ 469 front axle during operation requires, first of all, periodic checks and adjustments of the following parameters:
- threaded connections that need to be tightened from time to time;
- checking pivot joints for gaps;
- bearing regulation;
- gear clutch repair
- convergence check;
- compliance with the requirements of the lubricant table.
A visual check of the steering knuckles involves a thorough inspection of the assemblies for serviceability of the adjusting bolts, limit stops for turning the wheels, and checking the reliability of the locking of these elements. The scheme of the front axle device provides for the maximum angle of rotation of the left and right wheels in the respective directions, which is 28 ° for UAZ 469 and 27 ° for UAZ 469B. A larger value of this parameter causes damage to the knuckle joints, as a result of which the repair becomes much more complicated.
At the factory, the knuckle pins are pre-tensioned. At the same time, the same number of special gaskets are installed from below and from above. During the operation of the bridge, special attention must be paid to the state of tightening the kingpins. The tightening loosens as a result of wear of rubbing surfaces. Axial gaps appear between the support rings and the ends of the pivots, which must be eliminated by removing the same number of gaskets in the upper and lower parts. The total thickness of the gaskets at the top and bottom should be almost the same, the maximum allowable difference is 0.1 mm.
Unscheduled repair of the front axle may be required if the correct angles of the front wheels are not properly controlled. Not only the handling and stability of the car on the road, but also the degree of tire wear depends on these angles. In order to check the correctness of the angles, the machine is placed on a horizontal surface. The scheme of the leading front axle provides for the following wheel alignment angles:
- longitudinal slope of the pivots - 3 ° ± 30 ′;
- wheel camber - 1°30'±15'.
The values of the angles of the lateral slope of the kingpin:
- for UAZ 469 - 8 °;
- for UAZ 469B - 5°30′.
Wheel alignment is checked depending on how worn the rubber is. In order to adjust the toe-in, the machine is placed on a horizontal surface, the wheels are turned in the direction of forward movement. The convergence value, shown in the photo as the difference between distances A and B, can be from 1.5 to 3 mm. To check and adjust the horizontal toe-in, loosen the left and right-handed lock nuts, and then change the length of the tie rod.
Repair of the UAZ front suspension
Before performing work, it is necessary to remove the front axle from the machine and disassemble it. Repair includes washing parts, assessing their condition and suitability for subsequent operation. The crankcase, differential and main gear are repaired in the same way as the elements of the rear axle. In case of deformation of the casing of the axle shaft, the restoration is carried out only in a cold state.
The front axle UAZ 469 is dismantled in the following order.
- Blocks are installed under the rear wheels of the car.
- The tubes of the brake system mounted on the side members are disconnected from the flexible hose connected to the brake mechanisms of the wheels. Unscrew and remove the nuts with which the hoses are attached.
- Remove the nuts holding the lower parts of the shock absorbers.
- Unscrew the bolts with which the cardan shaft is connected to the drive gear flange.
- Disconnect the rod from the bipod and remove the nut on its ball pin.
- Unscrew the nuts securing the stepladders of the front springs, after which the lining, lining and stepladders are dismantled.
- The front part of the UAZ 469 is lifted by the frame.
If the axle is equipped with a spring suspension, steps 1-5 are performed, after which the anti-roll bar is disconnected from the trailing arms, and the transverse link and trailing arms from the corresponding brackets.
The process of parsing the front axle includes the following steps.
- Install the axle on the stand, twist the wheel nuts and dismantle the wheels.
- Remove the nut with which the thrust pin is attached to the knuckle lever.Dismantle the bipod traction.
- Unscrew the screws that allow you to remove the brake drums.
- Dismantle wheel couplings.
- Having straightened the edges of the locking washer, twist the nut and locknut, and then remove the washer together with the inner ring and rollers of the outer bearing of the wheel hubs.
- Dismantle the hubs.
- The bolts securing the brake shields are twisted, the trunnions and shields are removed. Take out the steering knuckle joints.
- Remove the steering link rod by unscrewing the nuts securing the fingers.
- The bolts connecting the ball joint and the semi-axial casing are twisted. The stops that limit the rotation of the wheels are removed, the supports are pressed out of the casings.
- Remove the lever and shims on the knuckle housing by twisting the nuts.
- Remove the nuts that secure the adjacent knuckle kingpin pad on top, and then remove this pad along with the adjusting shims. Similarly, remove the bottom lining along with the gaskets.
- The ball joint seal is dismantled by unscrewing the bolts.
- The pins are pressed out using a special device, and the fist housing is removed.
Lubrication in the steering knuckle is required
If it becomes necessary to disassemble the steering knuckle without removing the front axle, perform the following steps:
- pads are placed under the rear wheels of the car;
- using a jack, raise the wheel on the side where disassembly will be performed;
- perform the procedures listed in paragraphs 2-10;
- twist the nuts securing the turning lever, or the bolts securing the upper lining of the body king pin, dismantle the lining or lever, including the adjusting shims;
- similarly remove the bottom cover;
- twist the bolts securing the gland of the ball bearings;
- the pins are pressed out and the fist housing is dismantled.
Back to index
The assembly of the front axle used in the UAZ 469 is carried out in the reverse order. In this case, the following nuances must be taken into account.
Before assembling and installing the ball joint oil seal, the felt inner ring is impregnated with heated engine oil.
The absence of overheating, high noise levels and oil leaks in the seals, cuffs, covers and connections indicates the correct assembly.
- How the UAZ front axle is arranged, its disassembly and repair
- How the UAZ front axle works
- Possible bridge malfunctions and their causes
- How to remove the front axle
- How to disassemble the bridge
- Dismantling the steering knuckle without removing the bridge
- How to extend the life of the front axle, operating tips
The front axles of the old model, which include part of the UAZ-3741 design, do not differ much from similar new elements of the Spicer type. The fundamental differences between them lie only in crankcase design, dimensions of the components of the final drive and differential, as well as in some of the parts used.
The main part of the old bridge is a split crankcase, which consists of two divided halves, each of which has casings pressed into them with axle shafts inside. The casings also provide for the presence of safety valves, which are responsible for limiting the growth of oil pressure in the system.
Along the edges of the crankcase are pivot assemblies, which include ball bearings with housings of pivot pins (or steering knuckles) on them. On the side opposite from the axle shaft, the trunnions themselves are attached to the trunnion bodies, in which the wheel hub is mounted by means of two bearings. In the housings of the ball bearings there are constant velocity joints (CV joints), the outer pins of which are located in the hubs.
The main feature of the UAZ front axles is the presence in them of a mechanism for connecting the wheel hub with the axle shaft, which is made in the form of a coupling, with which you can connect or disconnect the hub and the hinge pin. This is what guarantees the transmission of torque from the differential to the wheel.
When the clutch is disengaged, the wheel hub can rotate freely on the trunnion, which means that the car will have a 4 × 2 wheel formula. When the clutch is engaged, the wheel hub through the CV joint will be connected to the axle shaft and differential, and the car becomes all-wheel drive - 4 × 4. The front axles of the old UAZ representatives, the design features of which are also characteristic of "loaves", were equipped with hubs with drum brakes installed on them. To control the wheelbase on the bridge, there are steering knuckle levers (located at the top of the steering knuckle housings) and steering rods connected to them.
As for the most common cause of various malfunctions of the UAZ 3741 front axle, in most cases, the basis for their appearance is a violation of the axial clearance of the pivots. To check whether it is broken or not, it is enough to raise the front of the car with a jack and try to shake the wheel up and down. If axial play is observed, then the pivot clearance will have to be adjusted.
Given that the UAZ-3741 has a frame structure, then dismantling the front axle will not be particularly difficult. To complete the task, you will need durable and high-quality jack, stops, which can withstand one and a half tons, and a special liquid WD-40, to loosen rusty nuts.
- Chock the rear wheels to make sure the vehicle is secure.
- Disconnect the right and left brake pipes from the rubber hoses directed to the brake drums of the front wheels.
- Unscrew the nuts securing the brake hoses and dismantle the hoses themselves.
- Unscrew the fastening nuts of the lower ends of the shock absorber and the bolts connecting the cardan shaft to the drive gear flange.
- Loosen and unscrew the bipod ball stud nut and disconnect the rod from it.
- Now you should unscrew the fasteners (nuts) of the front spring ladder and remove the part (ladder) along with gaskets and linings.
- At the last stage of work, lift the front of the car by the frame and remove the bridge from under it.
On this, the removal of the part can be considered completed, and if you decide to repair the front axle, then you can proceed with your plan.
Domestic off-road cannot scare UAZ car owners, but for their proper operation, it is necessary to adhere to certain operating rules.
So, for example, UAZ ("loaf") has a front axle, the device of which imposes certain requirements on the control of the machine. Among other things, such axles provide for disabling wheel hubs and axle shafts, which helps to increase the resource of axle parts when the front drive is turned off. Therefore, to turn on the UAZ-3741 front drive, you will have to perform two actions: by turning the clutch, connect the wheel hub to the axle shaft, and then, using the lever, turn on the front drive.
As soon as the machine overcomes the problematic section of the road, perform all the steps in reverse order: stop the vehicle, turn off the front axle using the lever and turn the clutch caps to the “4 × 2” position. After that, the car will be able to continue its movement as a normal rear-wheel drive vehicle.
Nevertheless, in the off-season and with the constant use of the UAZ-3741 in off-road conditions, the clutches can not be turned off, it is enough to adhere to a moderate speed limit.
Particular attention should be paid to the transmission oil poured into the bridge, which must be replaced in a timely manner (according to the manufacturer's recommendations - every 40,000 km or more often, depending on the specific operating conditions, the age of the vehicle and the quality of the lubricant being filled in). It is also necessary to periodically change the oil in the CV joint, wheel hubs and steering knuckles, and in the Spicer-type drive axles, the guide bushings of the disc brakes are additionally lubricated.
Regular maintenance and proper operation of the front and rear axles of the UAZ-3741 is the key to reliable operation of the car for many years.
Assemble the differential in the following order:
1. Before assembling the differential, lubricate the gears of the axle shafts, satellites, thrust washers and the axles of the satellites with gear oil.
2. Install thrust washers on the axle shaft gear journals.
3. Install the axle gear with thrust washer assembly into the left satellite box.
4. Install the satellites on the axis of the split cross.
Rice. 7. Pressing out the outer ring of the differential bearing
5. Install the split cross (fig. 1) with satellites in the left satellite box.
Rice. 8. Installation of boxes of satellites by labels
6. Install the axle gear with thrust washer assembly into the right satellite box. Holding the axle gear, install the right satellite cup on the left one so that the marks (Fig. 2) (serial numbers) of both cups are aligned.
7. Connect the halves with bolts and tighten them. Tightening torque 32–40 Nm (3.2–4.0 kgf).
8. Install the final drive gear on the pinion box, aligning the bolt holes. Install the bolts and tighten them. Tightening torque 98–137 N m (10–14 kgf m). At the assembled differential, the gears of the semiaxes must be rotated using a splined mandrel from a force of not more than 59 N (6 kgf) applied at a radius of 80 mm. Adjust the differential bearings (if they are replaced) in the following order:
Rice. 9. Pre-pressing the inner rings of the differential bearings
1. Press on the inner races of the bearings (Fig.9) differential on the necks of the assembled differential so that there is a gap of 3.5–4.0 mm between the ends of the satellite box and the ends of the inner rings of the bearings.
Rice. 10. Rolling of differential bearing rollers
There is no blocking, there is a free differential.
This is what the nuances that are not written about in modern books mean
d.Vasya, and if the place of the guide hexagon is to carve the guide into the ball and the diameter under the bearing in the pin, and thereby the kingpin will be adjusted and everything will be centered.
Everything is fine, but the measurements are too rough.
The differential, of course, in the geared bridges was not initially self-locking, except that someone prikolhozil blocking from armored personnel carriers IN THIS BRIDGE. however, the autopsy will show) We are waiting for the second part)
Thanks for the science, we look forward to continuing with a self-locking differential. If not difficult to describe the principle of its operation. How the differential and how it works with forced blocking is understandable, but there is no understanding with the self-blocking.
I'm looking forward to the second part of the video.
You speak so clumsily, it’s so hard for you to see that my head hurts 🙂 no offense, but such an impression. Better speak Ukrainian, as I understand it is your native language. Well, apart from that, everything is fine, you tell in an interesting and intelligible way.
The correctness of the formulation of sentences and in general speech will improve over time. Keep it up, don't stop - all "reviewers" go through this. Few people studied to be an announcer.
C me like and subscribe. Another question: I put a UAZ collective-farm bridge on a home-made mini tractor, and if I change it to a military one, will the mini tractor go back in forward gears due to reverse in the wheel gears?
Uncle Vasya everything is fine))) Thank you))))
I learned a lot, I thought I know everything aa nnnet okatsa))) thank you! well done very appreciative
Vasily, well done. Your lessons are just right. I have great respect for such people who try and film such instructive lessons. Peace to your home!
e. Vasya, share the drawings of the fixtures for installing the centers, those that are on the video there are two of them. Thank you.
That's what Master means. Video fire, learned a lot. Thank you
there are no blockages in the drain on the “military bridges”. where this story came from is not known.
There is a bronze bushing in the trunnion. Only it on the other hand is not 18mm deep. After installation, go through a 32mm reamer. I didn’t see a spring ring in the trunnion that presses the bearing5ik
In modern products, there is no bronze bushing in the ball joint. It is possible that it was staged a long time ago, in the 70s. For some reason, the cage under the CV joint support bearing enters the steering knuckle housing very easily. It should not be.
Mdaaa. It seemed so harsh to fuck Google translator, it seemed not real, but no) . Bravo!
Vasily explained coolly, so to speak, the manual for adjusting which is small, or maybe not!
Author stop talking like a robot
as Rugelerovka steering UAZ Hunter
Please tell me how and how to remove the small bearing that you pressed in at 22:50 I can’t do it at all - I can’t put on the puller, the gap between the cage and the gear is tiny.
why the rear Grishka of the military bridge is unscrewed
Why did a self-block suddenly appear on the military bridge by default. What nonsense, there is the same satellite unit as in the collective farm or in the spicer.
Good health to you Vasily! We are waiting for the giveaway! )))
tell me please, what is the difference between the ball bearing of a military bridge and a collective farm bridge
Thank you for your advice, you explain everything in a very detailed and understandable way, good luck to you.
Hello, please tell me if the collective farm and the warriors have the same sizes of CV joint balls or not
please tell me, is the ball joint (ball) from the collective farm bridge to the military one suitable?
thank you all very competently and manly
Hello! Vasily, please tell me what improvements are needed in order to put military bridges instead of collective farm bridges on the UAZ-452. Thanks in advance!
Vasily, good afternoon. Thank you for the video. During the repair of the front axle, I decided to replace the bearings with imported ones.The problem is that in our stores there is no imported roller bearing 304, there are ball bearings in the same sizes SKF and NSK. Is it possible to install ball instead of roller? What do you think about this?
Thank you for such instructions, I think I can fit instead of a washer with a diameter of a ball which, drill the ball itself, grind it off and drill it a little from the sides, you can let it go and then drill it, even it seems to me this washer does not show the center exactly. thank you.
Say, in the video at 22m35s, you install a thrust ring between the bearing and the gear. When dismantling his bridge, such a ring was not found. I didn't find it when browsing the online parts catalog. How important is this thrust ring or can it be dispensed with?
respekt gute arbeit gruss aus salzburg respectfully good job
Greetings Vasily! You are not adjusting the clutch correctly. In theory, everything seems to be correct, but on real bridges, if you put 207 and a small roller bearing, the axle shaft will look to the side and rest against the gland cage and will wedge. It is necessary to give 1 - 1.5 mm from the center when adjusting the pivots. It’s easier to turn the onboard axle shaft up after that and move the pivots so that the axle shaft is exactly in the center. But in this position, a slight backlash will appear in the central ball, if the backlash is selected in the center position. But it's not bad either. There should be a backlash of 0.1 -0.2 mm.
Good day. What is better to put gaskets on salidol or sealant?
Steering knuckle repair, disassembly, troubleshooting
Want more video tutorials? Repair of the bridge-replacement of the main pair of UAZ. Overview of a mini-tractor - the main thing is to want and everything will work out. SHRUS UAZ, Bierfield/Weiss/Willis/Cross. rear axle uaz ► GAZ 66, UAZ 469, NIVA, Pajero, LuAZ 969 in the swamp [Off-Road 4×4]. UAZ 469 - Repair of the military front axle - Part 2. UAZ - replacement of pivots and restoration of parts. Body restoration. Repair errors. Building UAZ from A to Z. UAZ / GAS / GAZEL - Bridge repair - Part 2 - Adjustment and assembly. UAZ 469 - Repair of the military front axle - Part 1. UAZ - all-terrain vehicles. They swim and ride where the roads end. UAZ 469 Living off-road legend. Front axle of tractor Belarus 82.1. UAZ against off-road | mud cars. Installation of KR VOiN 4x4, on UAZ civil bridges.


