In detail: do-it-yourself repair of the vaz 21053 rear axle gearbox from a real master for the site my.housecope.com.
The torque from the gearbox is transmitted to the rear wheels of the “seven” through the rear axle reducer. The gears installed in the gearbox wear out over time and begin to make noise when driving. In this case, you will have to change or repair the gearbox of the rear axle VAZ 2107.
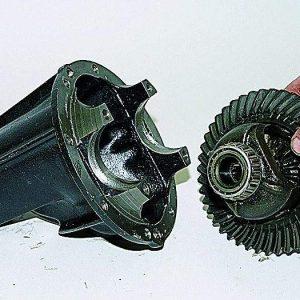
As the name implies, the VAZ 2107 gearbox is located in the rear of the car. It is located inside the rear axle, and is bolted to it with eight bolts. On the other side of the gearbox, to the flange, the propeller shaft of the car is screwed.
A gearbox is a rather expensive part, and its repair is a laborious and complicated process. Therefore, you should first make sure that the cause of the noise is precisely a gearbox malfunction. This can be done as follows:
- Choose a flat section of the road and gradually accelerate on it from 20 to 90 km / h. While driving, you should listen carefully and note the appearance and disappearance of extraneous noise from the side of the rear axle gearbox.
- Release the gas by starting to brake with the engine. While the speed is decelerating, you should also note the moments when the noise appears and disappears.
- Accelerate the car to about 100 km / h and switch to neutral, turn off the engine. While the car is rolling by inertia, note the presence and disappearance of noise.
[tip] If the rear axle hums with both engaged and disengaged gear, there are no problems with the gearbox. If the noise is observed only when the gear is engaged, repair or replacement of the VAZ 2107 rear axle gearbox is necessary. [/ Tip]
To verify the presence or absence of a mono problem like this:
| Video (click to play). |
- Park the machine using wheel chocks.
- Jack up the rear axle.
- Start the engine, turn on the speed and add gas so that the wheels rotate without load, and the speedometer shows the same speed as when tested on the move.
If, when running without load, the noise remains the same as under load, the problem is not with the gearbox. Check other components of the rear drive.
If the gearbox does not make noise without load, you will have to deal with its restoration. Worn gears only start to make noise under load.
The design of the gearbox is quite reliable and the "seven" can travel 100-300 thousand kilometers without repairing the rear axle. Premature wear of the gears only occurs with improper use:
- untimely replacement of transmission oil;
- the use of low-quality oil;
- operation of the bridge with insufficient oil level;
- frequent vehicle slippage or operation under extreme load conditions.
To repair the rear axle of the VAZ 2107, you will need:
- a set of spanner wrenches;
- chisel;
- drift;
- hammer;
- bearing ring puller;
- pencil;
- container for transmission oil;
- torque wrench;
- set of probes:
- calipers.
Work must be carried out on a lift or inspection pit.
Before removing the gearbox, it is necessary to drain the transmission oil, which is poured into the rear axle of the VAZ 2107. To do this, place a container for oil under the drain hole of the axle and unscrew the drain plug.
Important: after repairs, fill the gearbox with new gear oil.
The subsequent procedure is as follows:
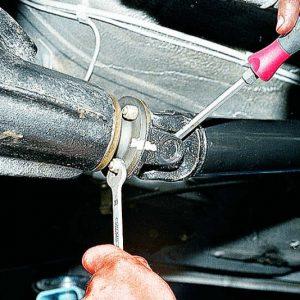
- unscrew the bolts securing the cardan to the gearbox flange;
- undock the back of the cardan and lower it down;
- jack up the car (if it is not on a lift) and remove the rear wheels;
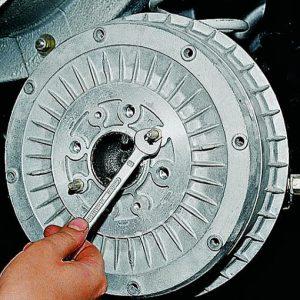
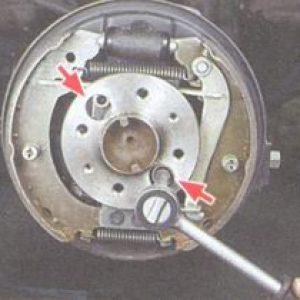
- unscrew the guide screws of the brake drums;
- remove the brake drums;
- unscrew 4 bolts securing the axle shafts;
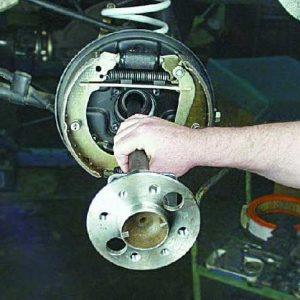
- pull out the axle shafts by freeing the gearbox;
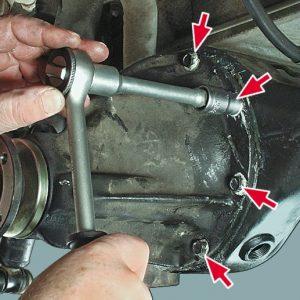
- unscrew the 8 bolts securing the gearbox;
- remove the gearbox.
[tip] Tip: after removing the axle shafts, it is worth checking the condition of the bearings and, if necessary, replacing them. [/ tip]
Adjusting and repairing a gearbox requires some skill and careful adherence to technology. You also need pullers, stands and special tools. If this is not the case, you should entrust the work to professionals.
If your qualifications are insufficient, it is better not to start working with the gearbox. Assembly and adjustment work requires fairly high locksmith skills. It is not difficult to disassemble the VAZ 2107 bridge, but it is one of the few nodes of the “seven” that require highly qualified service. It is not worth saving on these works.
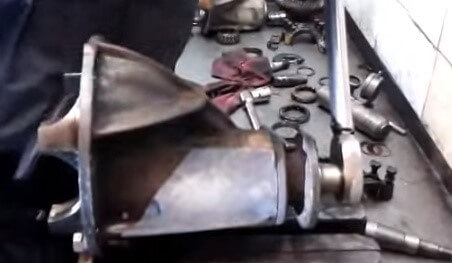
Disassembly of the gearbox is carried out in the following sequence:
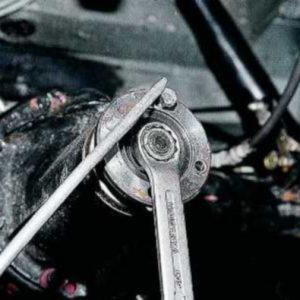
- unscrew the shank nut;
- remove the flange and take out the drive gear and adjusting rings;
- remove the oil seal, oil deflector, inner ring of the bearing;
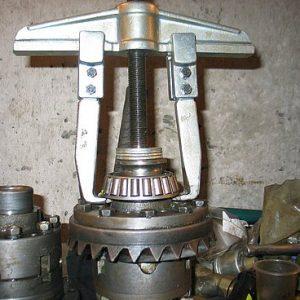
- press out the outer rings of the bearings with a puller;
- disassemble the drive gear with the differential (the spacer sleeve must be replaced in this case).
When disassembling the gearbox, it is necessary to make marks on the bearing caps in order to then reinstall them in their previous position. To do this, you can use a core (which is more reliable) or a pencil. Marks must be applied to the covers and to the case, so that later during assembly they must be combined. You should also mark the left and right covers so as not to confuse them in places.
This can be done as follows: on the covers, in addition to the marks opposite the marks on the case, apply numbers or letters with a pencil. The method is bad in that when cleaning the cover, the marks will be erased. Therefore, it is safer to simply make the marks with a core. For example, one on the left cover and two on the right.
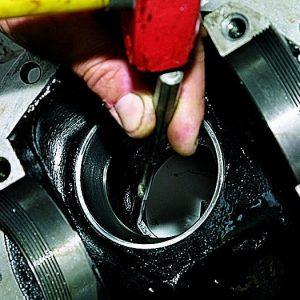
The inner rings with a cage are removed with a hammer and punch. It is necessary to knock out the rings by lightly tapping on different places. If you hit only one place, the ring cannot be pulled out.
Usually the repair consists of replacing the bearings or the main pair. These parts are most likely to fail.
The main pair is produced in several variations and determines the gear ratio of the gearbox. The higher the gear ratio - the more traction, the lower - the higher the maximum speed of the machine. There are three standard options for the main pair used on different VAZ models.
All VAZ-classic cars are rear-wheel drive, the movement of the car is carried out by the rear axle, which is the leading one. The VAZ rear axle reducer is the most important part in the transmission, it is in it that the main gear is located.
In order for the car to move, it is necessary to transfer the rotation of the engine to the wheels. But the engine speed is too high, and in order to correctly distribute the torque, a mechanism is needed that changes the gear ratio. Due to the gearbox and the different number of revolutions of the internal combustion engine, the speed of the movement changes, and the main pair of the rear axle takes over the rotation and transfers it to the wheels through the gears.
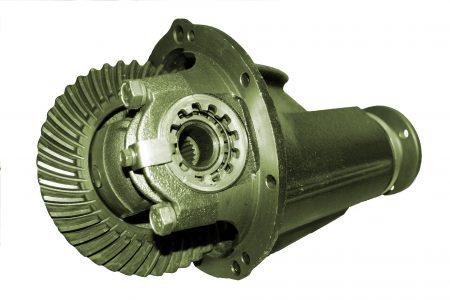
- flange, it is fixed on the drive gear (shank) of the REM, is an intermediate link between the propeller shaft and this gear;
- the main pair shank, at one end of which there are splines for pressing in the flange, at the other end there is a bevel gear with a small number of teeth;
- the driven gear (planetary), it is in mesh with the driving gear, it is with it that it forms the main gear;
- center differential, which allows the rear wheels to rotate at different angular speeds.
The differential device is very simple - the mechanism consists of two semi-axle gears, two satellites and a pin of the satellites. From the ZM gearbox, the movement is transmitted to the axle shafts, on which the wheels are fixed.
REMs differ in the gear ratio of the main pair; in total, there are four types of gearboxes on the VAZ-classics:
The most "slow" is RZM 2102, its drive gear has 9 teeth, on the driven gear there are 40 of them. To calculate the gear ratio of the gearbox, the number of planetary gear teeth must be divided by the number of teeth on the drive shaft, for VAZ 2102 the PCh turns out to be 4.44.
The "penny" gearbox (2101), respectively, has the number of teeth on the gears 10/43, so its frequency converter is equal to 4.3. The next, more high-speed, is REM 2103 - it has a ratio of 1041, which means that the gear ratio is 4.1. And finally, the "fastest" gearbox will be 2106, with 11/43 teeth and 3.9 gears, respectively.
Many owners of VAZ 2101-07 strive to install the fastest gearbox, but this is not always necessary. If the car often carries a load, that is, the car is a "workhorse", high speed is useless, but high torque will come in handy. It should be noted that RZM 2102 was not supplied in spare parts, it was installed only on station wagons "deuces".
VAZ 2107 is the last car from the series of rear-wheel drive VAZs - it began to be produced later than anyone else and was produced from the whole "Classic" for the longest time, its production ended in 2012. All types of gearboxes were installed on the machine, except for 2102, the choice of REM depended on the type and power of the engine.
The main disease of REM is increased noise (hum), and the gearbox can hum for various reasons:
- there is not enough oil in the bridge, or it is completely absent;
- the gap between the gears of the main pair is not adjusted;
- gears are worn out, they have chips and other damage;
- the main pair has a factory defect, the gears are not lapped from the factory;
- the shank nut has been unscrewed or loosened;
- the bearings are worn out.
The main malfunction of the center differential is the wear of the gears of the axle shafts and satellites, when the surfaces of the parts are very worn out, a backlash forms between the gears of the differential, but the rear axle usually does not make noise due to wear of the differential gears.
ZM gearboxes on VAZ-classics can be repaired, but only if there is no wear on the gears. If the mechanism is already beyond repair, it needs to be replaced. Replacing the gearbox of the rear axle VAZ 2106 on the "seven" is carried out as follows:
- we install the car on a pit or a car lift, changing the gearbox on the ground is extremely inconvenient;
- if the vehicle is installed in a pit, both sides must be jacked; in any case, the rear wheels must be removed. If the work is not done on a lift, you should install stops under each side of the car (in the back);
- we unscrew the drain plug in the REM, drain the transmission oil, having previously prepared a container for it;
- remove the rear brake drums (two guide bolts on each side), after removing the car from the parking brake. The drums can be difficult to remove, they are dismantled by tapping from behind with a hammer through a wooden block. Do not knock on the drum with a metal hammer, the drum may crack;
At this, the removal of the ZM gearbox can be considered complete, now it remains to either repair the mechanism, or install a new one instead.
Increased backlash in the REM can form due to wear on the pin of the differential satellites - if you grab the propeller shaft and turn it clockwise and counterclockwise, you can feel this backlash. Also, an increased clearance can form due to wear of the splines inside the housing of the differential itself.
If the gaps in the main pair of ZM are not adjusted, a characteristic noise occurs when the car is moving:
- with an increase in the load (a sharp increase in speed), a characteristic howl in the bridge is heard;
- when the gas is released, the noise disappears.
The ZM can buzz in a different way, but the above-described characteristic feature can most often be heard on VAZ-classic cars. The worn out teeth of the main pair are clearly visible on the "planetary" - they become rounded, and traces of rust are often noted on them.
If the main pair in the gearbox is worn out, it must be replaced.But you can't just put the gears in place, the clearances in them must be adjusted. In total, two types of basic adjustments are performed:
- the thickness of the adjusting sleeve (washer) is selected for the shank (drive gear). The washer can be between 2.6mm and 3.5mm thick;
- the gap between the gears of the main pair is adjusted by two adjusting nuts of the differential housing.
The washer for the shank is selected in such a way that the shaft with the leading bevel gear rotates in the gearbox housing without play with a hand force (0.3-0.4 kg). In this case, the shank nut should be tightened with a force from 12 to 26 kg, usually 18-19 kg are tightened.
The last step is to adjust the preload of the differential bearings, the adjusting nuts are tightened from the sides. Such work must be done with an indicator, the device should show from 0.14 to 0.18 mm, the gap between the gears should be within 0.08-0.13 mm. After the performed operation, the adjusting nuts are fixed with plates so that they do not turn.
Car owners of VAZ classics often cannot decide what is better to do - to buy a completely finished REM assembly or purchase individual parts, repair the gearbox. It is really difficult to decide here - the price of a new gearbox is, of course, higher, but the owner of the car is freed from the headache with adjustment. The thing is that it is not so easy to find a good master of VAZ gearboxes, and there is no guarantee that the new main pair will not hum.
If the car owner buys a new gearbox, and it hums, the part can be exchanged under warranty, but the owner of the car loses money on the removal and installation of REM. In the case of acquiring a defective main pair, the repair itself is more expensive - you will have to pay the master for the secondary bulkhead of the ZM gearbox.
On VAZ 2101-07 cars, the factory locking of the center differential is not provided, but the industry is already producing both differentials with locking and fully assembled ZM gearboxes. The most common today are REMs with a screw lock, in which the differential gears are locked depending on the load. In such rear axle gearboxes, a preload clutch is installed, it connects the axle shafts of the wheels with a certain effort, and acts as a blocker.
Blocking the VAZ rear axle gearbox gives the following advantages:
- increases cross-country ability, allows the car not to slip on difficult road sections;
- allows the car to accelerate faster at the start;
- the car passes corners more confidently.
But ZM gearboxes with screw locking also have their drawbacks:
- fuel consumption increases slightly;
- when accelerating, the car is less controlled;
- the differential and the assembled gearbox with blocking are much more expensive than standard parts (the price is approximately 2-2.5 times higher).
Car owners of VAZ 2101-07 should be aware that after installing a REM with a lock, the car will not become an SUV, and it will not be able to move on difficult terrain.
- Thank you
- I do not like
- Thank you
- I do not like
Specialists tell me, there was roughly noise from the bridge, when you press the pedal, it is not there, and as soon as you coast in gear it appears, although it does not look like a hum. What could it be?
Check the shank first, it looks like the final drive.
- Thank you
- I do not like
- Thank you
- I do not like
another option, the cross is loose on the cardan
If there is a cross, then it will click when starting off.
- Thank you
- I do not like
- Thank you
- I do not like
- Thank you
- I do not like
Guys, tell me, please.
Begin to squeeze oil out of the gearbox. I entrusted the car to the wrong hands, replaced the shank oil seal and the spacer bushing. He began to howl where from 20 km per hour. They said to unscrew the cardan and loosen the nut there. I did, the howl changed to some kind of noise from 40, and the howl started from 60. for that, when braking, there was a noise. pulled it back - everything remained.
In the city, no service is undertaken to regulate. They say hemorrhoids and there is no stand
A few months ago I changed the oil in it, a howl appeared from 60 km per hour, but after a week or two it disappeared - I thought I worked it in.
I'm afraid to disassemble myself, tell me with such noises how long can I drive?
And if you change it to a bu, then the adjustment will again be required during installation? It is dangerous to invest money like that.
dude, I thought this is what you can start a business with. There are many classics, but there is a problem. you can earn more than one million on this
- Thank you
- I do not like
If there is a cross, then it will click when starting off.
And here is the question. I was buzzing for a while so I was thinking about the gearbox. But suddenly the buzzing stopped, and a quiet tapping sound appeared when coasting at a speed of 20 km / h and below. With propeller shaft frequency and rear. Is it a crosspiece? In other modes, nothing is heard.
- Thank you
- I do not like
Or you can give a link to the article, otherwise I was looking for it and did not find it. Maybe he just asked the wrong question.
We welcome motorists of classic vaz models in the autoblog.In these videos, we will consider the vaz 2107 gearbox and adjustment. Nikolai Vladimirovich dedicated the video to the owners of rear-wheel drive cars, since today there is a trend in the rear axle gearbox. The gearbox of the rear axle VAZ 2107, a common domestic car, was shown as a visual aid for repair and adjustment.
The main elements of the gearbox are helical gears of the main drive, these are the so-called "beetle" and "planetary gear" that make up the main gear pair. The plant produced four versions of the main steam:
- Low-speed, installed on a VAZ 2102. The pair has 9 teeth on a bevel gear and 40 planetary gears. The torque transfer number is 4.44, this is a slow-speed option. Out of production;
- On the vaz 2101 - the famous "kopeck", the main pair had 10 teeth on the "tip" and 43 on the "planetary", with a gear ratio of 4.3, discontinued;
- VAZ 2103, respectively, 10 teeth on the "tip" and 41 on the "planetary";
- VAZ 2106 - 11 teeth on the "tip" and 43 on the "planetary", gear ratio 3.9, is considered a high-speed reducer.
It should be noted that the main pair with a gear ratio of 4.44 for the VAZ 2102 for spare parts, generally speaking, was not produced and was intended only to complete the gearboxes of the VAZ 2102 on the factory conveyor.
The planetary gear is attached to the differential housing. The differential consists of two semi-axle gears, two satellites and a pin. The main, most common differential malfunctions are the wear of the pin of the satellites (backlash) and wear of the splines on the gears of the axle shafts.
On a car, the backlash of the pin of the satellites can be determined by turning the propeller shaft by a quarter or more, if there is no backlash, then the shaft practically remains in place when you try to turn it in one direction or the other.
It's also worth noting that there is never any noise from the differential.When moving forward (in a straight line), the differential rotates as one whole and it turns out that there is simply nothing to make noise there.
The reason for the noise from the rear axle reducer when adding gas and the disappearance of noise after the gas is released is (almost 99.9%) wear of the teeth of the main pair. This is clearly visible on the removed gearbox. The portion of the side of the teeth that is used for the forward travel has significant wear, while the side for the reverse travel is practically not worn.
If, after disassembling and troubleshooting the parts of the main pair, wear of the teeth is found, then no repairs will help and it will just be a waste of time and money. Only the replacement of the main pair is required.
The gears of the main pair are selected at the factory according to the contact patch, noise and other parameters and are marked. For example, the planetary gears are stamped - vaz 2103 (model), 10 41 (gear ratio), 4091 (pair number). The main pair number 4091 is also marked on the bevel gear.
After marking these parts, they became the "main pair" and are not installed one without the other, that is, "relatives". On the "tip" is also marked "- 6", this is a correction for the assembly of the main pair in the gearbox. When troubleshooting the differential, its bearings are also checked for wear and, if necessary, replaced. Often, bearing wear is provoked by an unprofessional replacement of the gearbox oil seal.
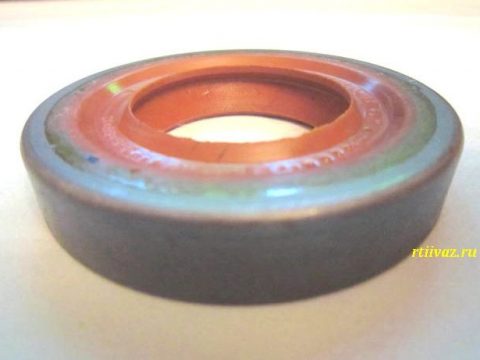
As a result, after a short mileage after replacing the shank oil seal, the gearbox noise appears. Only in this case the “hum” noise in the gearbox is constant and unlike the noise from worn out teeth of the main gear. In this case, the hum goes on constantly, regardless of whether gas is added or discharged.
During assembly, the gearbox is regulated by 4 parameters:
1. Selection of the adjusting ring
Parameters from 2.6 to 3.5. The ring serves to adjust the depth of engagement of the teeth of the "tip" and "planetary", which is strictly specified. This is where the -6 correction is needed for this main pair, which was mentioned above. Of course, this correction will be individual for each main pair.
In this video, the adjustment of the main pair will be performed using a special device. It is clear that the overwhelming majority of motorists do not have such a device, and this is only a clear example of adjusting the engagement depth parameter. An option will also be given for adjustment without "adapting".
The device is also equipped with a "fit" with a micrometer, imitating the gear wheel of the main pair. The indicator is set to zero. Then the indicator leg is transferred to the bearing bed, and in this case the indicator shows a value of - 3.25, which is not good, as it should lie within - 3.0. On the second landing plane it turned out - 3.45. Arithmetic mean - 3.3. To adjust, we will use the correction on the "tip" - "- 6". In this case (- 3.3) + (-6) = 3.36. The thickness of the adjusting washer is required - 3.36 mm. Using a micrometer, select a washer of the required thickness.
Note. When the shank bearing is worn out, it starts to turn on the body of the “tip”. As a result, the bearing end, the shim and the shank gear bodies wear out. It turns out that when replacing the oil seal of the shank, even with the correct tightening torque, the adjustment of the depth of engagement of the teeth of the gears of the main pair is lost and the "howl" of the pair is ensured, as is its early failure.
2. Adjusting the preload of the shank bearings
The shank bearing sits on the "tip" and a NEW spacer sleeve is ALWAYS installed. The video clearly shows that the new bushing is flat without any deformation, and the previously standing one is deformed. The following happens. When the shank nut is tightened to the prescribed torque (from 12 to 26 kgf), the sleeve takes on the tightening force and, being deformed, works like a spring, creating an interference fit.The tightening force of the VAZ 2107-e gearbox nut is significant and the shank must be secured against turning.
In the video we see what kind of "adapt" the master uses. It is necessary to tighten the shank nut until the backlash disappears. With the correct tightening of the nut, the shank should turn with a resistance force of 0.3-0.4 kg, therefore, the bearing preload is correct. This assembly rule applies to old (used) bearings.
A differential with bearings is installed and secured with covers (tightening torque is about 8 kgf) and the adjusting nuts of the differential bearings are attached.
3 and 4. Simultaneous adjustment of the thermal clearance of the main pair and the preload of the differential bearings
For these purposes, another "adaptation" with two indicators is needed. The adjusting nuts in the video are good and everything is shown, we move the planetary gear to the teeth of the "tip", achieving the required clearance. Factory data for clearance adjustment from 0.08 to 0.12 mm. However, such a gap is provided for the new main pair ("tips" and "planetary"). The clearance is checked in 4 planes by turning the gear. The clearance for the main pair in operation is 0.13-0.14 mm after adjustment.
After making the adjustment, the adjusting nuts are locked with special plates, with one or two "tendrils". This completes the assembly and adjustment.
Do-it-yourself adjustment of the rear axle gearbox without using special tools (the VAZ 2107 gearbox is the same).
In this case, it is necessary to select the thickness of the adjusting washer.
So: Instead of the device, we install the "native" shank and turn the nut to a slight stop, leaving a gap. A differential with a planetary assembly is installed, bearing caps and their fastening bolts are tightened.
When replacing the shank seal, a number of incorrect actions are allowed, which ultimately lead to the failure of the gearbox ahead of time. Before releasing the shank nut, according to the technology for performing work on replacing the oil seal, it is necessary to remove the axle shafts (which is almost never done, since the volume of work will increase many times over). Although according to the price list, the removal of the axle shafts will most likely be included in the statement and a fee will be charged for this, since this is required by the technology of the plant to replace the oil seal. This is a necessary condition, since the axle shafts will create resistance when tightened and it will simply be impossible to achieve correct adjustment.
Before releasing the shank nut, it must be secured against turning and with a torque wrench check the nut tightening force, in the region of 12 kgf. Before installing the gland, if its outer surface is not rubberized, then you need to use a sealant for warranty. So, the risk of 0.15 mm on the gear stocking will be sufficient for oil to pass through the outer surface of the oil seal.
Adjusting nuts are placed and the gap on the main pair is preselected (final working gap 0.08 to 0.12 mm). Then paint is applied to the teeth of the planetary gear from an aerosol can, and using the shank, it is necessary to perform several movements in different directions in order to fix the contact spots along the paint.
Now, having turned back the planetary gear wheel, you can clearly see the contact patch on its teeth with the teeth of the “tip”. The contact patch (in this case) shows that the adjusting washer on the shank costs a greater required thickness. We slightly tighten the shank nut, thereby moving its bearing, which makes it possible to move the gear teeth towards each other, that is, as if "reducing" the thickness of the adjusting washer. Using the differential bearing adjusting nuts, set the approximate clearance (slightly decreasing).
Then we again apply paint to the teeth of the planetary gear and again begin to turn the shank (or gear) in different directions to print a contact patch between the teeth.It can be seen that the contact patch has slightly risen, but still not enough and it is necessary to re-tighten the shank nut a little. Similar actions with paint and turning the gear should be carried out until the contact patch is located exactly in the middle of the teeth, and the sound of the teeth being turned becomes quieter.
After correct (final) adjustment, the sound will be almost inaudible.
Do not forget to tighten the differential bearing adjusting nuts each time you tighten the shank nut. As a result, the contact patch was located exactly over the entire surface of the teeth. It should be noted that this condition is the location of the contact patch for old (working) pairs. For new main pairs, the contact patch, as mentioned above, should be located in the center of the teeth.
Further. The covers for the planetary attachment are given and the differential is removed. The shank nut is unscrewed and removed. Since the shank was installed only with a bearing without an adjusting washer, there was a gap between the bearing and the shank gear, where the washer would fit. A set of probes measures this gap, thereby calculating the required thickness of the shim.
It turns out, as in the case with the use of instruments and devices, the size for the desired adjusting washer was also 3.36 mm. The shank bearing is removed, an adjusting washer (3.36mm) is placed, the bearing is put in place and the gearbox is assembled. The shank is put, the shank nut is tightened, min 12 kgf. A differential with a planetary gear is installed, the covers and bolts are tightened, but not completely.
By the way, the covers should not be confused in places. The adjusting nuts of the differential bearings are placed and the gap is preset on the main pair. Then the differential cover bolts are tightened completely. The gap in the main pair is finally adjusted and the adjusting nut retainers are installed.
Video 3 replacing the gearbox oil seal on the rear axle:
This completes the work on assembling and adjusting the gearbox of the VAZ 2107.
The rear axle reducer consists of several units, mainly the main gear and differential. The final drive is a mechanism by which the gear ratio of the vehicle's transmission is increased. What it is, what it affects and how the maintenance of the reduced gearbox is carried out, we will consider in this article.
Let's take a closer look at the gearbox device, which consists of two parts that we have already mentioned. The main gears are classified into single and double, which have one and two gear pairs to transmit engine torque to the wheels, respectively. Double main gears are central (simple design, greater gear ratio, but a large load on the system elements) and spaced (more complex in design, but more efficient, more compact, allows the car to have a higher ground clearance). Single main gears are:
- cylindrical (gears in one plane, maximum efficiency, gear ratio 3.5-4.2);
- bevel (gears are perpendicular to each other, which makes the design take up a lot of space, high efficiency);
- worm (compact, quieter, but low efficiency, heavy to manufacture);
- hypoid (lighter in weight, smaller in size and more reliably transmit engine forces to the bridge, but the efficiency is the most average of the given types of transmissions).
A differential is a mechanism that distributes torque between the drive wheels and the drive axles. The differential assists in slipping and slipping by using different wheel speeds.
The gearbox can fail primarily due to bearings made of bronze, they are located in stockings that are attached to the gearbox itself. If such a bearing breaks down, the stockings are damaged and they begin to bend the shafts. As a result of this bending, the main gear can be skewed.If it is skewed, fractures in the gear teeth or chips can appear on it, and subsequently the gearbox itself can jam, and if the shaft flies out of its place, it threatens to break the gearbox housing.
The cause of the breakdown will also be the oil not poured into the rear axle gearbox in time, to be more precise, its absence or its untimely renewal. The transmission oil is usually changed every 35 thousand kilometers.
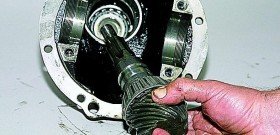
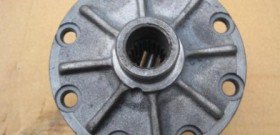

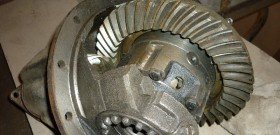

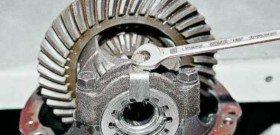

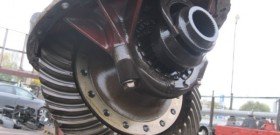

It is very easy to notice a gearbox malfunction, when cornering, a sharp deceleration or, on the contrary, acceleration, noise periodically occurs in the area of the rear axle... Do-it-yourself repair of the rear axle gearbox is not so difficult. Let's consider it on the example of a classic VAZ car. The first step is to drain the transmission oil from the rear axle gearbox. While the oil is draining from the housing, we disconnect the propeller shaft.
The next step is to dismantle the axle shafts and for this, first of all, we remove the rear wheels and brake drums. Then we unscrew the bolts securing the gearbox with the bridge. When installing a new gearbox, we use a sealant and do not forget about a cardboard gasket. Fill the gearbox with oil. The gearbox flange must fit snugly in place, as well as the bearings.
The rear axle reducer device itself is not so complicated, and, mainly, a hypoid look is found on rear-wheel drive cars. The whole difficulty lies in the fact that when removing the brake drums, a problem with rust can arise, and in some places the metal can be pressed very hard. But brute masculine power and a few tools will easily solve this problem.
If you are purchasing a new gearbox yourself, you should pay attention when buying that the same models can cost completely differently. This difference lies in only two letters OP (general bulkhead). This means that a factory check revealed a defect, and then the mechanism went to the bulkhead and is now in perfect order, but is sold at a reduced price.
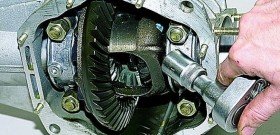
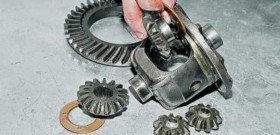

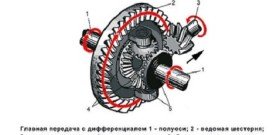



The rear axle gearbox is adjusted in cases where it began to bother you with a characteristic hum, which is heard already at a speed of 30 kilometers per hour (at KamAZ up to 80 kilometers per hour). The very reason may appear due to large constant overloads of the car or with constant driving with trailers, or maybe ordinary mechanical damage. Therefore, your next reaction will be a visual check of the unit.
Oil seals and flanges, bearings, satellites (a star-shaped element in the differential) and their axles - all this is removed and inspected, in case of wear it changes. You can ask how all these parts should look in the car manual, if you have not had to hold them in your hands before. For VAZ, the replacement will be inexpensive, if you took up a foreign car, then first, look around the current price lists.
Now that all the parts have been checked individually and are considered to be in good working order, we begin to assemble the gearbox. The drive gear will go first, to it - an adjusting washer, a spacer sleeve with bearings, a flange. Now you need to tighten the nut with a certain effort, for this you can use a special key with a built-in dynamometer, if there is none, you will have to constantly use a measuring lever with a steelyard. Those. every millimeter of the lever travel will have to be accompanied by measuring the pressure on it using a steelyard, it is troublesome, but caution and accuracy are needed here. The nut must be tightened 1 Newton... In this case, the flange must be stationary, it is fixed with a specialized wrench with spacers just suitable for the grooves of this flange.
Now we put the driven gear in its rightful place, i.e. into the differential housing and tighten the bolts. Now the direct adjustment of the backlash begins. After everything is installed, the nuts are tightened to the minimum stop, and the driven gear turns. After that we see if it has a slight backlash, for this we swing it from side to side.The backlash should be, but small! This is a kind of reserve for heating the gearbox while driving, so that nothing bursts.
| Video (click to play). |
Now for the final stage. We check the distance between the bolts that hold the nuts we recently tightened. Use a vernier caliper, we need accurate numbers. Having measured the distance, we approach from the other side of the plane and now tighten the nuts, preferably by the same amount, for example, by 1 groove. We measure again the distance between the bolts, it should have changed by a small amount of about 1.5-2 mm. If this is the case, it remains to check the gear for play, it is important that it remains the same as we just configured it. This completes the adjustment.

