In detail: do-it-yourself repair of bag handles from a real master for the site my.housecope.com.
You have a problem with the handles of your favorite bag. Indeed, bag handles wear out much faster than the bag itself. For some, this is an unnecessary reason to buy a new one, for others a headache about additional costs. The solution I proposed to this problem will probably suit both. Cope with the repair of the handle of the bag completely on the strength of excellent white-handed women and even you can show your irrepressible imagination not only with shabby handles, but also with completely new ... For example, you can trim the handles to match gloves, accessories, or shoes. The idea is the old-fashioned way of wrapping the handles with braid or strips of leather. The whole trick lies in the fact that not a single knot or connection is visible anywhere, and this is with excellent structural strength and at the same time its flexibility. The question of durability is determined only by the quality of the material used.
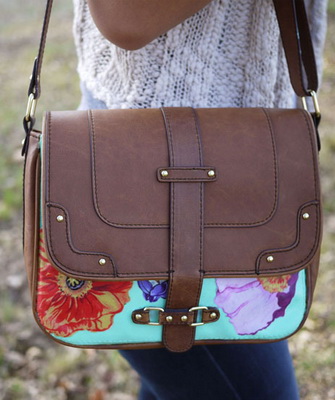
So here's the bag with the ill-fated handles:
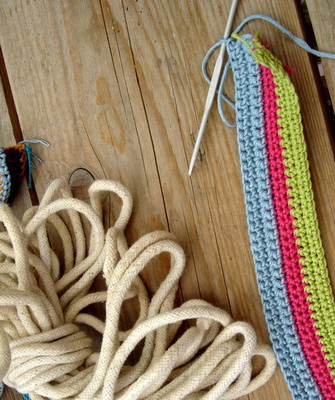
In order to start acting, you need to choose a ribbon of a suitable color or lace. For such handles, a 12-meter cord was used for both handles. A similar one can be purchased in a store that sells jewelry:
Before starting work, it is necessary to determine from what place we will start wrapping the handle, retreat a little to the middle and pierce a hole with scissors. If a hard core is inserted inside the handle, then the hole can not be punctured:
Then you need to push one end of the lace through the hole made and fold it with a loop to the opposite end of the handle and back so that the free end protrudes about 10 cm beyond the hole.
| Video (click to play). |
This operation must be done very carefully, because the entire success of the business started depends on it:
Adjusting the lace to the size of the handle
Now we begin to wrap the handle along with the laces.
Important: leave the free end on the right, pre-roll the entire lace into a ball so that you can freely pass it through the handle, wrap both laces with a handle at once. In addition, I advise you to wind very tightly, shift the turns periodically to the right and keep the lace under tension all the time:
After you have completely tied the desired part of the handle, you need to push the remaining end into the resulting loop:
Fully tied handle section
Now you have to, holding the end of the lace threaded through the loop with your left hand, with your right hand at the other end, pull the loop under the winding by two to three centimeters. If this does not work for you, then you need to grab the right end with pliers and pull. In the end, you can do this operation together. This is how it should look like:
The protruding ends of the lace must be cut flush so that they are not visible, then you get such a handle. With the second handle, you need to do exactly the same procedure:
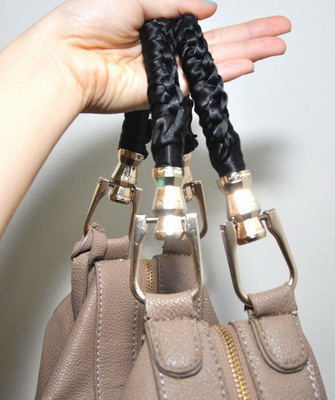
Refurbished handles bag
I hope that this method of repairing bag handles will help you in solving similar problems. In the future, when you master the skills of this method of winding, you can dream up and simply decorate the handles of any bags to your taste. You can also read a similar article: Home Repair Briefcase Handle or Wicker Basket Handle Repair.
HOW TO DECORATE THE BAG HANDLES
Using the example of another bag, I want to show how this method can be used for decorative purposes, namely, to change the appearance of the bag handles as you wish:
This photo shows that the bag has normal handles and that there is no need to repair them at all, at the same time they are clearly thin for such a bag and have a shabby look.This bag was matched with leather tape in a color that almost perfectly matched the color of the bag itself. To strengthen the handles of the bag, we need bast tubes of cream or toothpaste, as well as a medical plaster of any size:
Then we take any tube and cut off the end part from it, after that the head part and cut it along the middle. As you can see from the photo, there is still enough cream left in the head of the tube, which it was no longer possible to squeeze out. The same picture will be with the dental post and any other contents, i.e. We simply throw away part of the paid products, although you can cut off the head part and part of the tail part, and then close it like a lid. This method can save 5 to 10% of the contents of the tube:
Since the handles are very soft, we reinforce the area where the tape will be wound with segments from the tube and wrap it with a plaster, the handles are prepared for decoration:
Prepared bag handles
Further, according to the method described above, we lay the loop along the handle and wrap it with tape, only part of the winding is shown here, because I wanted to show the complete winding of the handle:
Next, an option is considered with a complete winding of the handle, while such a handle requires 5 meters of leather tape, first, from the material of the tubes, the cut strips are wrapped with a plaster along the entire length and wrapped:
Full length prepared handle
The fact is that the handles are very soft and when wrapped they would immediately curl up into tubes and the decoration effect would not be the same, but in this case the handle looks like a flat shape:
We do the same with the second handle, then you should get approximately the same kind of handle:
Dear women, unfortunately I cannot fulfill your orders for the repair or decoration of pens, because I am not engaged in this type of earning - this is firstly, and secondly, I have absolutely no time for this. Try it yourself or with someone's help and I am sure that you will definitely succeed.
Now there is another article on the repair of bag handle holders, if anyone is interested, you can look at the link Bag handle repair
Do you want to know how to update an old bag with your own hands without spending a lot of money and time on it? Use this simple method using these materials:
- wet wipes;
- napkins for decoupage;
- glue and varnish for decoupage;
- thick soft brush.
This method, how to update a bag with your own hands, is great for products that have small cracks or scuffs. First, clean the surface of your favorite purse using wet wipes. We will return an attractive appearance to the accessory with the help of varnish, so the surface of the product must be thoroughly cleaned of dust and other contaminants.

After that, you should take decoupage napkins with which you will decorate your handbag. How to update a leatherette or genuine leather bag using this method? Cut out elements for decorating the accessory from the napkins of the desired size to hide the defects that have arisen. Roses or other flowers will look beautiful. Do not forget that these elements have two functions - they decorate the product, renew it, and hide existing cracks and scuffs. The cut out parts must be carefully glued using special decoupage glue. It must be applied to each element in the center with a brush, and then spread over the entire surface and glued to the selected place. The purse must be left for 5 hours so that all elements of the updated product are completely dry and securely fixed.
After 5 hours, you should take the varnish and apply it over the entire surface of the renewed bag.For such work, you should use a special varnish designed for processing leather surfaces or other materials, depending on what kind of handbag you have. The varnish dries for at least 8 hours, after which this procedure should be repeated. Then, in the same way, you need to decorate the other side of your favorite accessory.
Your leatherette handbag has deteriorated, but, despite the low cost of the product, you do not want to part with it? Use simple ways to update your leatherette bag with your own hands and give the product another life.
For such work, you will need the following materials:
- thing that needs updating;
- knitted pieces in which you can wrap your purse;
- thread, needle;
- knitting needles;
- flowers for decoration.

Sew knitted pieces to the accessory along the top edge of the bag. You also need to carefully trim the handles of the bag. This is one of several simple methods for updating the handles of a bag with your own hands, even if the whole item looks new. After the defects of the handbag handles are hidden, it is necessary to sheathe the other side of the accessory with a cloth, and then join the two knitted pieces together with a neat seam using knitting needles. This method of restoring the appearance of the accessory is suitable only for skilled needlewomen; this work will not take them much time.
The finished handbag can be decorated to your taste, the flowers sewn at the bases of the handles will look beautiful.
How to update a leather bag is a question that interests many women, because such accessories made of genuine leather are always expensive. In the photo, how to update a bag with your own hands, this process goes through several stages:
1. Cleaning the surface of the material. Before doing anything with an old product, you should thoroughly clean its surface from various contaminants. Wipe the skin with soapy water in which a small amount of ammonia is diluted. Then traces of moisture must be removed by wiping the purse with a towel. If you have greasy stains on your purse, try removing them in the following way: sprinkle the crushed chalk on the dirty areas, leave it overnight, and in the morning remove it. It is better to clean a suede bag with a special brush designed to care for such material.
2. Glycerin treatment. An effective way to renew the skin on a bag is to treat the surface with glycerin. You can buy it at the pharmacy, you should moisten a swab in this product and thoroughly wipe the entire surface. Your old but beloved product will immediately take on a new look, become shiny and attractive. If your bag is made of genuine patent leather, you do not need to process it with glycerin, just wipe it with a dry clean cloth.
3. Replace hardware. The fact that the bag is already old is often indicated not by the leather, but by frayed fittings. You can get rid of it yourself and replace it with new elements.
4. Get rid of the old lining. A worn-out lining makes the bag inconvenient to use, because often many things fall into holes, and it is not so easy to get them out of there. It is not difficult to make a new lining yourself, but if difficulties arise, you can take the product to a sewing workshop.
5. Mask up defects. Many decorative elements can be used to hide minor imperfections on your favorite piece. However, not all women love flowers, beads, rhinestones and other jewelry, in which case it is better to use liquid skin to mask defects. When choosing such products, pay attention to the matching of shades so that the treated areas do not stand out on the bag.
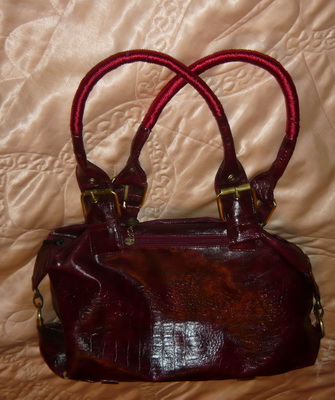
Sometimes the skin will peel off only on the handles, and the whole product remains attractive. In this case, you should find out how to update the handles of the bag so that the accessory can be used for several more seasons. The easiest way is to wrap them with braid, matching it to the color of the product.

Knowing how to update a leather bag at home, there is no need to spend money and time buying a new accessory.
Use leather paint. Dyeing frayed leather will give your bag a new look. You can buy paint in any specialty store, but when painting it is important to follow the instructions. Never try to paint a bag in a completely different color, the paint is intended only to update the product, not to change its appearance. Using paint is the most effective way to update a white leather bag, making it crisp white.

The desire to update a woman's handbag may arise just like that, even if the accessory has an attractive appearance, but is already a little tired of its mistress. Above in the photo, how to update an old bag, there are several original ideas. You can decorate a handbag made of white or any other color fabric with beautiful embroidery or painting.


Having chosen the drawing you like, you should mark it on the fabric using chalk. The pattern can be embroidered with threads, beads, beads, buttons or fragments of jewelry. If you decide to decorate your bag with painting, use acrylic paints designed for the fabric.
For a very long time I was looking for a summer bag in a bright cornflower blue color. And finally I found one on the Internet, ordered and brought from an online store this purse, declared as leather, with the corresponding price. I liked her very much and I would have lived in perfect harmony for many years, but no. The handles were clearly not leather and soon cracked like this.
The little head got twisted - well, I was not ready to part with cornflower-blue beauty in any way!
A way out, of course, was found and the bag makes me happy again. I didn’t come up with anything new - I sewed the covers for the pens now as if from leather, since it was not difficult to put them on. The process itself did not take much time, the most difficult thing was to turn the handles inside out onto the face. But what can't you do for the sake of your favorite handbag. Improved her quality of life quickly and inexpensively:
- cut and cut blanks from it;
- glued them with a thick cotton cloth with ordinary all-purpose glue;
- I also glued the tips and wrapped them inside out;
- the blanks are ready, folded in half and sewn on a typewriter;
- a needle special for leather, in stores for sewing these are on sale;
- well, now the handles are already in place, also bright and pleasant to the touch;
I think someone will use my simple experience of returning a second life to a purse.
Leather craftsmen will surely give you more practical advice - it will be interesting to read them.
Do you like our site? Join or subscribe (notifications about new topics will be sent to the mail) to our channel in Mirtesen!
How to update frayed handles on a bag with your own hands quickly and easily!
This is always the case: there are bags and there are a lot of them, but the handle is out of order just for the one that is needed every day. I thought and wondered what to do with the bag, where to look for the master. And now it turns out that I myself can fix it! I am sharing a wonderful master class. All you need is a satin ribbon.
Beige and blue looks great, but my bag is black and the handles will be black. And by the way, you can try to replace the fabric tape with a leather strip ...
In my opinion, the author of the idea has an ingenious resourcefulness.
You can even fasten it with nail polish! And most importantly, it is tighter to lay the weaving.
Click "Like" and get only the best posts on Facebook ↓
The content of the article:
- Repair
- Leather and chain
- Designer accessories
- Knapsack
- From old jeans
- Patchwork style
The bag is an important accessory for any woman. But if the handles are frayed, you have to buy a new one. However, not everyone can afford such expenses in a crisis, but you can save money if you repair the bag yourself. There are many ideas that will help you make a stylish women's clutch bag yourself.
Usually, bag handles wear out first. There are a lot of ideas that will tell you how to make new ones. Here are some of them. You can convert to this part:
- one or two waist belts;
- neckerchief;
- pieces of leather, fabric;
- braid;
- chain;
- beads, etc.
If the handle one and the second are made of leather or leatherette, and these elements have slight abrasions, then a product sold in some shoe stores will help out. It is called "liquid skin". The composition must be of a suitable color, then with the help of it you will carry out minor repairs of the bags. The tool will help mask stains, scuffs and on the main canvas.
If the handles are thoroughly worn out, then replace them with 2 identical waist belts, measuring and cutting them to size. This idea is also good because you can adjust the length of the handles, which is very convenient.
If you have one long handle on your bag, then use one strap, sewing it on with a thick needle and strong thread.
If you have strips of leather, strong braid, then wrap the handles with any of these materials, gradually greasing them with glue.
To implement the following idea you will need:
- pieces of skin;
- 4 or 2 rings (depending on whether there are two or one long handle on the bag);
- large chain;
- scissors;
- needle;
- strong thread.
Cut the leather into strips of equal width, sew them together on a typewriter or on your hands. Then grease the inside out with glue, fold in half. When the glue is dry, you can start designing.
First, wrap them around one and then the other side of the chain. The second leather and chain handle is made in the same way.
To attach them to your bag, thread the 2 free ends of the leather strap through the ring, fold and stitch at this point. To attach a ring with a handle to a bag, take a wide leather strip, thread it through the ring so that it is in the center of this strip, sew to the bag.
You can use a simpler option. For him you will need:
- leatherette;
- foam rubber;
- needle and thread;
- wire;
- scissors.
Cut out the strips to the desired length. Their width should be 2 times the desired one, plus seam allowances. Fold the first handle in half lengthwise, step back 5 cm from the end, stitch to the edge from the inside out. Leave the same amount unsewn on the other side of the workpiece.
Turn the handles right out. Place a strip of foam inside, using a piece of long, thick wire with a curved edge to help you. Use an awl to make holes on the two unsewn sides of the handle. By passing the needle through them, you will sew them to the bag.
Fashionistas pay big bucks to buy one-of-a-kind items. And you can, having carried out the repair of bags at home, turn them into stylish works of authorship. Here's one idea.
You can turn ordinary bags into designer bags by replacing old handles with such original ones. They consist of:
- lace;
- beads;
- rings.
These are the materials you need to prepare at the beginning of work.
So that the edge of the cord does not wrinkle, it is convenient to put on beads, grease it with glue or varnish. When these funds are dry, you can begin the main work.
String the beads onto decorative ropes so that the handles of the bag are identical. Tie to the free ends of the string around the ring, hiding the knot under the thread. Further, the rings are attached to the bag using strips of leather, as described above when describing how leather handles are made on a chain basis.
An interesting designer thing will turn out if you use a silk scarf. Old handles are wrapped around them, thus hiding flaws.
If the handles are not very worn out, then make turns at a small distance from one another so that the material can be seen between them. Tie knots on the right and left, then the scarf will not slip.
If you have a bag with handles that are in very bad shape, fight back. Attach 2 scarves in their place.Tie the corner of the first one on the ring on which the first handle was attached. Do the same with the opposite corner, securing it to the second ring. You will create the second handle in the same way.
If you twist 3 cords, they will also create a new long handle for the bag. If you make two smaller sizes, they will also perfectly replace the old parts of the reticule.
If you have old wooden or plastic beads with the same round fragments, they will come in handy when you make a new one from an old bag.
Take a strip of fabric, wrap the beads with it, cut off the excess, leaving a seam allowance. Stitch the 2 edges of the fabric together, thread the beads inside the resulting steering wheel. Separate each from the next, marking the gaps between them, tying them with thread. It remains to sew the handles into place and praise yourself for making a new one out of the old bag.
With such a bag, you can go to nature, go to the store. It is very roomy, when you need it, you will unfasten the buttons on both sides, increasing the size of the bag.
We start cutting out. Cut 2 large blanks out of dark fabric. You can sew a fabric bag with a rounded bottom or make it rectangular.
In addition to two canvases, cut out from the main fabric:
- a rectangle for a pocket measuring 17x28 cm;
- 4 bag handles made of dark fabric measuring 5x76 cm;
- 2 white linen handles of the same size.
Fold the strips of pen fabric as follows: first in half lengthwise, then fold the edges inward. Iron the workpieces or sew on a typewriter to prevent the ribbons from unrolling.
Now take 2 strips of dark and one of light fabric, weave the first braid from them. Create the second one in the same way.
Align the edges of these parts, cut off, excess, sew along the edges. You should have 2 handles that are 58 cm long.
Take a piece of the pocket, frame it with tape for edging, and pin it with pins.
After finishing the pocket, pin the edging tape to the top of the canvas. Insert 2 edges of one handle between the edging and the canvas, pin them with pins, sew using white thread. In the same way, wrap and attach the handles to the second canvas of the bag.
On the seamy side of one of the knapsack cloths, attach the pocket, while still using pins.
Fold the top edge of the first and second sides of the bag inward by 2.5 cm, make 2 parallel stitches, the first along the edge, and the second will be 2 cm lower and go through the light edging.
Fold 2 canvas knapsacks right sides to each other, trim the edges and bottom with edging tape, sew.
This concludes the creation of the bag with our own hands. It remains to iron the sidewalls of the top, sew buttons to them, and a roomy, comfortable designer thing that will always come in handy is ready.
Well, of course, a reticule, a simple pattern will help with this. You can create a new item from the tops of your pants. Spread them, cut out a rectangle with sides 28 and 42 cm. Then set aside 7 cm from the larger side, and 2 cm to the left and right. Cut out a semicircular "tongue". Fold the large side 2 times to create a small denim bag. One and the second of which have dimensions of 28 x 17.5 cm. Close the clutch by fastening it with a button with a loop.
But such a bag can be sewn from jeans, heavily frayed from time to time, or from several trousers. Strips are cut from integral pieces and intertwined with each other. If the ribbons are small, connect them while weaving from the back side by stitching.
For such a bag made of jeans, created using checkerboard weaving, the canvas is folded in half, sewn on the sides. Then you need to sew on the handles, and another fashion accessory is ready.
Denim bags can be made not only of trousers, but also of a vest, shirt. In the latter case, the sleeves of this garment must be ripped off.
Cut the vest to the desired length, sew the front and back together at the bottom, and the armholes together. You will make such an original long handle to the bag from a piece of wire. Beads are strung on it, and metal rings are fixed at the ends, which are fixed on the bag in the holes. They can be framed with wide rings in metal repair.
If you will be doing this part of the work yourself, then sew the handles with two strips of strong tape or leather. They are pushed through the handle rings and then sewn onto the bag.
Check out some other ideas for inspiration, you might immediately want to make the same denim bags.
Fabric scraps will also help you create a stylish designer accessory. It can be created from jeans. For such a thing you will need:
- pieces of jeans;
- wide decorative braid;
- lace;
- the cloth;
- 2 wooden beads.
This ladies' accessory is made of old denim pieces. They are cut into squares, which are then sewn into ribbons. Now you need to sew these strips so that they turn into a complete canvas.
Attach it to the fabric, cut it to fit your jeans. Fold the fabric in half, sew on the wrong side of the sides, and turn it over your face. Do the same with the not yet fully finished denim bag. Insert a fabric knapsack into it, grind the edges of these two blanks.
Having stepped back 7-10 cm from the top, sew the braid to the front side. Pass a string through it, at the ends of which put on a bead so that they do not fall, tie a knot on this side of the rope.
It remains to grind the handles, and you have one more new thing made from the old ones. Now you know how to sew a bag from jeans of this style.
The patches will help us create another patchwork model. The stripes can be horizontal.
But on our model, they will be located vertically.
Cut strips 3–5 x 50 cm from the fabric. Sew them together on the seamy side. Then attach a synthetic winterizer to the wrong side, iron everything together. Stitch from the right side along the seams of the fabric tape.
To sew the fabric bag further, proceed to cutting the handle. Cut a strip of 4 x 30 cm from a dense material. From a colored cloth - a tape 10x30 cm. Wrap a flying strip of dense fabric, wrap the side edges inward, sew.
Make a lining to fit the bag, sew on handles, a zipper, this is the end of the job.
You can sew a bag not only from jeans and fabric, but also from leather. It's nice to create, for example, such a model with your own hands.
In conclusion, we offer you useful videos that will tell you how to sew a bag out of jeans, from a broken umbrella; how to make new handles for it:


