
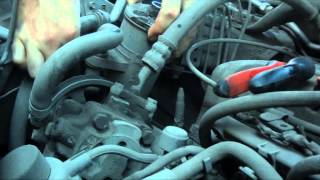
In detail: do-it-yourself sable steering gear repair with power steering from a real master for the site my.housecope.com.
Gazelle Sable. Power steering adjustment
Adjustment includes two operations: adjustment of the propeller thrust bearings and adjustment of the gearing.
Screw Thrust Bearing Adjustment
In order to determine the need for adjustment, set the steering wheel to the middle position.
We disconnect the longitudinal steering rod from the bipod (see "Replacing the steering rods and their hinges", p. 108).
. while constantly shaking the bipod, we control the backlash until it is completely eliminated.
We lock the adjusting nut with a beard, upsetting sections of its shoulder into the grooves of the crankcase.
Gear adjustment
The gearing is adjustable only after the play in the propeller bearings has been eliminated.
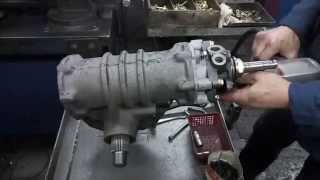
On a vise-mounted mechanism.
. holding the key "16" input shaft.
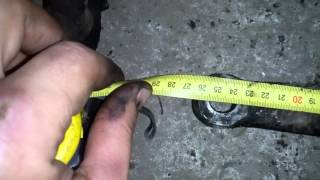
. we swing the bipod. The backlash should not be felt by hand (exceed 0.3 mm at the end of the bipod).
Otherwise, remove the bipod from the sector shaft. We process the connection with a penetrating liquid.
Adjustment of the steering gear is needed when the car's directional stability is low at high speed (you don't feel the steering wheel at high speed).
This defect is associated with a violation of the adjustment of the propeller thrust bearings, and in a pair of rack-piston - shaft-sector of the steering mechanism.
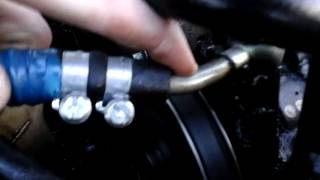
After adjustment, the force required to rotate the input shaft should not increase noticeably. During operation, you should constantly monitor the condition of the hoses, especially high pressure. In case of cracks, swellings and cuts, the hoses must be replaced. You should also check for leaks of the working fluid (oil) from under the hose clamps, steering gear covers or power pump.
| Video (click to play). |
With an increase in pressure in the system due to jamming of the bypass valve, it can squeeze out the technological plugs in the pump housing, so you should monitor the system and the quality of the working fluid being filled in, top it up, replace and change the filter in time.
Do not hold the steering wheel in extreme positions for a long time. This can damage or even seize the booster pump.
Weak noise during the operation of the amplifier is not a sign of a malfunction.
We remove the steering mechanism without removing the bipod.
1. We clamp the mechanism in a vice with the fittings down and drain the remaining oil into the container, turning the mechanism shaft with a key by 17.
2. Pressing the spool shaft with your hand, we swing the bipod. If at the same time axial play of the shaft is felt, adjust the thrust bearings.
3. To do this, we straighten the collar of the adjusting nut through the beard or drift, which is centered in the grooves of the crankcase.
4. With a special key, turn the nut clockwise until the gap is eliminated.
At the same time, we control the moment of rotation of the shaft, which should be no more than 0.2 kgcm.
5. To do this, with a dynamometer hooked to the key at 17, we measure the moment of turning the spool shaft.
With a lever length of 200 mm, the force should not exceed 1.0 kgf.
6. With a beard we bend the collar of the nut into the groove
7. We shake the bipod of the steering mechanism with our hand. If there is a gap, adjust the gearing
To facilitate the management of Sable, the manufacturer installs a hydraulic booster. If you have any difficulties when repairing the Sobol power steering with your own hands, our video will tell you quick and effective ways to restore the power steering to working capacity.
If the owner notices that the power steering pump is not working, further repair of the assembly on Sobol should begin by determining the causes of the failure. The main ones are described below, as well as recovery options.
- Poor system strap tension. The solution to the problem is to adjust the position or replace.
- Problems in the mechanical component. In this case, the repair of power steering (GUR) Gazelle, UAZ, Sobol, Volga must begin with a diagnosis of the condition of the components.
- The steering wheel does not turn well. The reason for this may be either a low oil level in the system, or a worn belt. You should also pay attention to the engine speed and the condition of the filter - it may be clogged.
- The pump refused to work. To restore the power steering pump of a Sobol car, you need to purchase a new repair kit and replace all seals / seals / other parts.
- The presence of extraneous sounds and clicks. The reason is the strong wear of the controls. To view the power steering repair instructions, open the video on this page.
- Lack of normal working fluid pressure. Practice shows that this is due to poor pump performance, or the presence of a leak in the system.
- Tire wear or damage. The only solution is to install a new kit. It is strongly not recommended to drive on damaged tires.
For further repair of the power steering pump quickly with your own hands, our video will always be useful. The master gives detailed explanations, and also shows the sequence of actions when repairing power steering on Sobol.

And what is the first thing to change?
I have it brand new, but only 98 years of release, number 222.
It's been in the garage all this time.
After reading the reviews about the leakage of liquids from our precious domestic creations, I decided not to take risks, but even to sort it out.
applied to companies in this specialization, they announced 3 thousand, I don’t understand just for WHAT? -)
oil seals need to be changed, this is understandable. I found two of them.
Does anyone have experience in overhauling and what needs to be replaced for every fireman?
The post has been edited by Shurik 60: 29 May 2013 – 23:15
In fact, nothing complicated, but you need to find a suitable set of oil seals for your power steering. I usually change all the seals at once - a set of only 200 - 300 rubles. And what then to disassemble again.
I will try to describe the process later - there are pitfalls there, just now there is no time. wait a bit, and maybe someone else will unsubscribe.
In general, this is real, and even without a garage and adapt. I went over it several times right on the street, but it is necessary that garbage and sand do not fly into the insides, the atoms will scratch the surfaces and throw out the power steering.
I will now describe my process, and it may not be the same as the tutorials. Forgive me if I confuse terms and names. Maybe someone will fix it later.
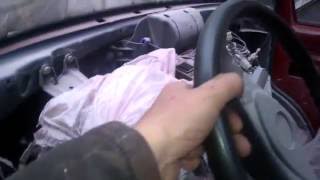
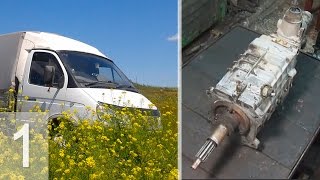
1. Removing GUR. First set the wheels in a straight position.
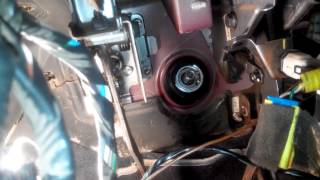
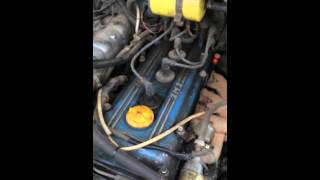
a. I drain the oil first. To do this, slightly unscrew the oil pipe fitting at the outlet of the power steering - (what goes to the oil tank).
b. Disconnect the paint hoses (unscrew the bolts)
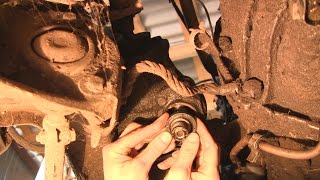
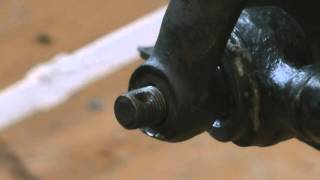
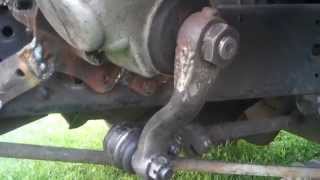
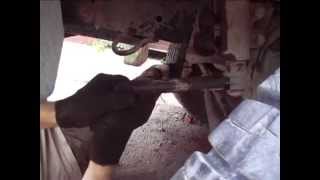
v. Disconnect from the steering shaft and rods. It's easy on the top, but a puller may come in handy on the bottom.
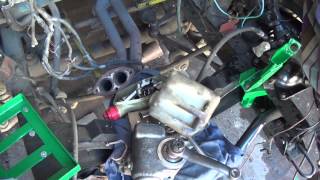
G. Unscrew the power steering and remove.
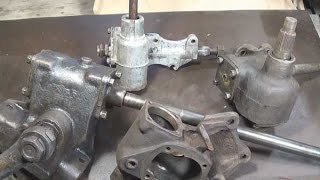
2. GUR analysis. The main thing is to remember what was where.
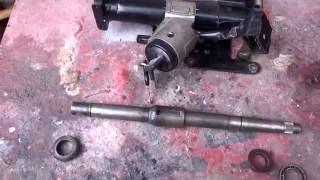
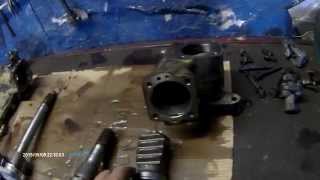
A. First, the driven shaft is removed.
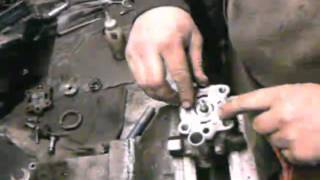
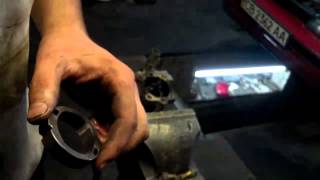
To do this, unscrew the locking bolts that hold the side bearings, and remove the retaining ring, where the shaft sticks out stronger and where you will knock it out, then use a screwdriver and a hammer to turn the side bearings so that the center of the driven shaft shifts further from the main part of the power steering. In general, in order for the gears to move further apart, when you knock out the shaft, it will rub off the surfaces in the power steering housing and then you will have to grind it to put new oil seals and they do not bully. Then just knock out the shaft. Be careful, roller bearings will immediately fall - do not lose them.
B. Now we disassemble the drive shaft.
To do this, unscrew the four bolts on the top cover and remove the shaft.Then unscrew the lower bearing nut and remove it.
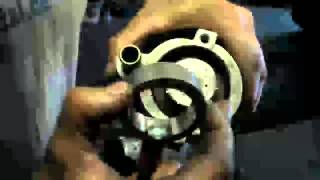
B. Dismantling the piston of the drive shaft: (This is if the power steering wedges in both directions and generally does not work well). There is only one oil seal and it is never in the repair kits.
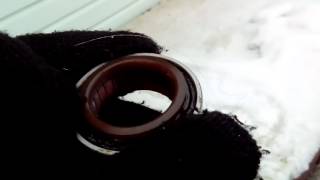
G. You change all the seals that you see with new ones. Be careful with the bottom PTFE. It can be stretched a little to fit. If you pull it, it will twitch. The seals are inside the side bearings on the shaft, and on the housing for the same bearings. One stands on the piston and two in the top cover. Another one on the bottom of the drive shaft (I wrote about it above)
3. Assembly GUR.
Everything is in the reverse order, only at first the top cover is screwed on, and then the lower bearing is placed and the lower bearing nut (with two holes) is screwed up to the stop. Then the driven shaft is placed. It is worth noting here that at first the upper bearing is assembled and put on the shaft, then the lower bearing is inserted into the power steering housing and locked with a retaining ring (again, the center of the driven shaft has shifted further from the main part of the power steering). Then the lower bearing is formed and the shaft with the upper bearing is carefully inserted. It is important that the rollers do not fall inside the power steering. You can check - shake. They will rattle inside the hull. Then install the snap ring.
After assembly, you need to check if anything interferes? To do this, you need to scroll the drive shaft - it must make four turns.
4. GUR adjustment. Unfortunately, I do this by eye.
First I tighten the lower bearing until it stops. It has to be twisted with a hammer and a drift (I did not find the key). But you can not overtighten so as not to crush the bearings.
Then I bring the eccentrics of the side bearings. They should rotate in the same direction, that is, if one is clockwise, then the other is counterclockwise) traces of the locking bolts can be a guideline - they must be combined with the bolts themselves. Then try to tighten it almost to the stop, but so that the rotation of the bearings is the same. It is also impossible to overtighten - the seals will wear out quickly.
Stop after that.
5. GUR installation
Here everything is as in the analysis. The only thing is that the steering wheel is connected first, then turn the steering wheel all the way, and then two turns in the opposite direction - this will be the central position and then put on the bipod.
6. Oil filling and pumping.
Do not start the car until the oil is filled.
When you fill the tank full of oil, start the car, but do not turn the steering wheel. The oil will go right away. Top up until it stops leaving and there is less foam. Then drive a little by turning the steering wheel to the sides (but not in place) this will expel the remaining air, add a level, and small bubbles will go away on their own. And enjoy the soft work of GUR.
Sorry for the unprofessional language. Maybe someone else will clarify and advise.
I went through my power steering 4 times over 150,000 km. Another 10 times on another machine. A friend helped and dismantled the drive shaft to the screws, but assembled it incorrectly. It took me a long time to find the right combination.
And what is the first thing to change?
I have it brand new, but only 98 years of release, number 222.
It's been in the garage all this time.
After reading the reviews about the leakage of liquids from our precious domestic creations, I decided not to take risks, but even to sort it out.
applied to companies in this specialization, they announced 3 thousand, I don’t understand just for WHAT? -)
oil seals need to be changed, this is understandable. I found two of them.
Does anyone have experience in overhauling and what needs to be replaced for every fireman?
Look, I'm sorry I didn't read your question right away.
New - unused? Or used and leaked? If it has not been used, then it is better not to touch or disassemble, but to install and ride until it leaks. And it flows from above, where the steering shaft enters. There, the oil seal can be easily changed without removing the power steering.
And below through the side bearings on the driven shaft. if they are old-style, then you need to replace them with a new one with fluoroplastic gaskets - these do not flow longer. To do this, you need to disassemble the power steering.
But even so, it’s better to train until it starts to flow - once again it’s better not to climb. The power steering is disassembled only in case of leaks and poor performance.
Thank you very much. I did just that.
I put it on and don’t touch it. It works, it doesn’t flow, and thank you Lech, who adjusted it to me-)))
Admins.
I think that the GUR overhaul advice should be posted for everyone to see for everyone.
Well written and very detailed.
- Like
- I do not like
. And it flows from above, where the steering shaft enters. There, the oil seal can be easily changed without removing the power steering. .
Sergey, can you tell me more about the upper oil seal without removing the power steering, it just flows there. Thank you.
Sergey, about adjustment -
They should spin in the same direction, that is, if one is clockwise, then the other is counterclockwise)
No error? And if both are rotated clockwise, what's the trouble?
In other words, either both “away from you” or “at yourself”, depending on where you look, but it threatens to be skewed, they work like eccentrics.
Sergey, can you tell me more about the upper oil seal without removing the power steering, it just flows there. Thank you.
Disconnect the steering shaft, hoses, unscrew the four bolts on the cover and remove it, change the oil seal.
when installing the cover back, be careful with the o-ring, well, you screw everything back and connect it. Don't forget to download.
- Like
- I do not like
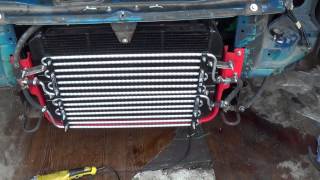
And interestingly, the hydrolab puts some “own” repair kits in Moscow. I now think that even a new one needs to be sorted out and look for good cuffs. Almost everyone wedges: some to the right, some to the left, some in all directions. The reason is the wear of the seals, not the pump and the HP flexible hose. https://my.housecope.com/wp-content/uploads/ext/2735/i137/1004/63/dbced.
Yes, they put it. And again they put their details. I installed a power steering with them at the beginning of 2008. Since then, I have not even added a drop of oil there.
- Like
- I do not like
Yes, they put it. And again they put their details. I installed a power steering with them at the beginning of 2008. Since then, I have not even added a drop of oil there.
You tell me the main thing, how their seals work at speed, I mean the steering wheel became wadded at speed or how was it? They write that when they are overhauled with their repair kits, the steering wheel becomes, as it should be, wadded at speed. What about you?
- Like
- I do not like

May 12, 2010
- Like
- I do not like
. guys, and another question, what wears out in the power steering pump ?, what can be changed there ?, the fact is that the amplifier itself in my Sable works fine, but when turning it makes such a rumble that the cop sirens rest. Especially cold. Filled with "dikstron".
could the belt be slipping? play can be checked at the pump shaft.
. guys, and another question, what wears out in the power steering pump ?, what can be changed there ?, the fact is that the amplifier itself in my Sable works fine, but when turning it makes such a rumble that the cop sirens rest. Especially cold. Filled with "dikstron".
The rotor blades wear out mainly, but the noise may not be due to them, the filter, valve, air in the system are clogged.
The belt usually "screeches".
Post has been edited by sharky5: 13 May 2010 – 17:28
We remove the steering mechanism (see Removing the steering mechanism with hydraulic booster), without removing the bipod and extension of the inlet hose.
We clamp the mechanism in a vice with the fittings down and drain the remaining oil into the container, turning the shaft of the mechanism with the “17” key.
If at the same time axial play of the shaft is felt, adjust the thrust bearings. For this…
... through a beard or drift, we straighten the collar of the adjusting nut, which is centered in the grooves of the crankcase.
With a special wrench, turn the nut clockwise until the gap is eliminated.
At the same time, we control the moment of rotation of the shaft, which should be no more than 0.2 kgf.m. For this…
... with a dynamometer hooked to the “17” key, we measure the moment of turning the spool shaft.
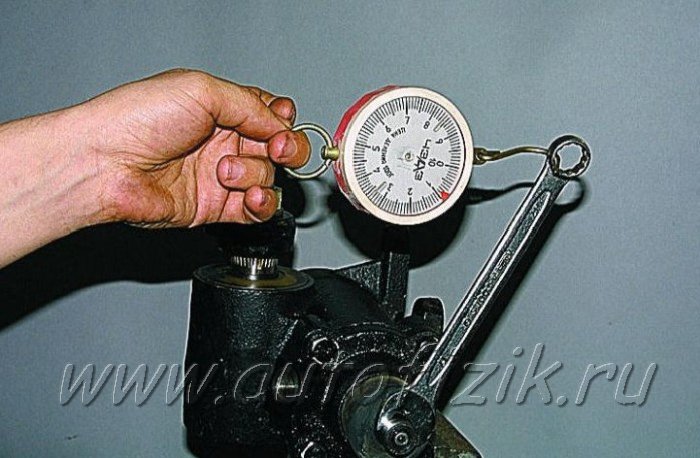
With a lever length of 200 mm, the force should not exceed 1.0 kgf.
With a beard we bend the collar of the nut into the groove.
We swing the arm of the steering mechanism.
If there is a gap, adjust the gearing.
For this…
... remove the bipod from the sector shaft (see Removing the power steering mechanism).
Prying with a screwdriver or a knife blade, remove the top ...
Using the “13” wrench, unscrew the lock nuts of the locking bolts.
Using the “12” key, we unscrew the locking bolts by 2-3 turns.
With a special key, we turn the adjusting eccentric cages of the sector shaft bearings.
ATTENTION
When adjusting, the possibility of misalignment of the sector shaft should be excluded, therefore, we turn the clips alternately at a small angle until the gaps in the engagement are eliminated.
Install the steering gear in reverse order.
Steering wheel puller
The steering wheel is tightly planted on the splines of the steering shaft and it is not easy to remove it. This work will be facilitated by a homemade puller. Plate material - steel, standard bolts. In the manufacture of the puller, you can do without welding. To do this, use a plate with a thickness of at least 6 mm. In it we cut the thread for the central bolt.
The purpose of power steering is to provide more comfortable steering wheel control. Today, the power steering system is installed on the Gazelle and on many modern cars. You can learn more about the device, malfunctions and repair of the node at home from this material.
Both the electric power steering on the Gazelle and the power steering are designed for more comfortable steering. To begin with, we will analyze the power steering device on the Gazelle. We are talking about both the Gazelle Business with a 405 engine, and other models of this line.
So, what device of the system:
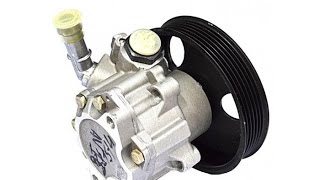
- GUR pump. This element of the circuit ensures optimal circulation of consumables in the system, as well as pressure.
- Steering gear with distribution element. This device allows you to provide an influx of air flow necessary to direct the oil into the desired cavity of the cylinder or back into the tank.
- Another component of the system is the cylinder. With its help, the pressure of the consumable is converted into the movement of the piston, as well as the rod.
- The consumable itself, that is, oil. The fluid transfers force from the power steering pump to the cylinder. In addition, the oil provides lubrication of all rubbing elements of the device.
Like any node, power steering can fail from time to time.
The main malfunctions and methods for their elimination are given below:
- The drive strap of the system is worn or loose. In this case, the belt is either changed or its position is adjusted.
- The steering wheel does not turn well, this may be due to both strap wear and a low oil level in the system, a reduced number of engine revolutions, and a clogged filter. In addition, the problem may be low pump pressure or an air lock in the lines. Depending on the problem, the solution may be to add a consumable, adjust the idle speed, replace the filter, repair the pump. It will not be superfluous to check the tightness of the connections.
- Mechanical failure in the operation of the steering system, it is necessary to diagnose it.
- If the pump does not work, you need to either repair it with a rem (repair kit) or change the seals.
- Wear of steering elements or violation of drive geometry. Defective parts must be replaced.
- If the working fluid is expelled through the relief valve, you need to find the leak and fix the problem. The reason may lie in the inoperability of the pump, its working pressure should be checked.
- Damage or wear of tires, it is necessary to determine the faulty elements and change them or repair them.
As you might have guessed from the previous paragraph, if the power steering on the Gazelle does not work, then this is due to the pump. To repair this element in a car with your own hands, you will need to purchase a repair kit in advance. You can buy it at any theme store. The main difficulty in repair is that the pump is not collapsible.
The repair procedure is as follows:
- Dismantle the pump and disassemble in accordance with the instructions that come with the kit.
- Clean the device from dirt, it is possible that there will be types of reasons for failure on the case. Usually the problem lies in the wear of the oil seal, then it will be necessary to change it. When installing a new stuffing box, the roller should be modified.
- The gland can be installed in several ways. You can build a special groove on the outside of the element, drill a corresponding threaded hole in the wall of the device, and then fix the gland with screws. You can also fix this part in the middle of the pump using specially bent ends of the casing.
- When the replacement of the element is completed, it will be necessary to assemble the system in reverse order. Please note that after the repair is completed, during the operation of the power steering, you may hear noise that is uncharacteristic for this. This is the grinding of a new oil seal, so you should not worry about this. When the repair is completed, it is necessary to change the oil in the system.
The steering gear on Gazelle cars is installed regardless of the presence of a hydraulic booster. It increases the reliability of movement, the safety of the driver and passengers. Consider the signs of malfunctions and ways to adjust the Gazelle steering gear.
Control units wear out first of all, because they are constantly under severe stress. The steering gear in this respect is the most risky node. After a certain period of operation, signs of wear appear:

- The occurrence of extraneous knocking or vibration felt by the driver through the steering wheel.
- It takes a lot of effort to turn the steering wheel.
- The presence of backlash is more than 20 ° for passenger cars or 25 ° for trucks.
- The appearance of an oil leak from the gearbox. To some extent, there is always oil on the body, but a noticeable release is a sign of oil seal failure.
The fact that these signs are present indicates that the Gazelle steering gear needs to be adjusted. You should not delay this procedure, since some malfunctions will inevitably create the ground for the appearance of even more serious problems.
The composition of the Gazelle control unit:
- A wheel mounted on a shaft and located inside a column that has the ability to adjust the height and angle of inclination.
- Rotation mechanism.
- Drive unit.
Repair of the steering Gazelle is carried out as needed, mainly when the first signs of a malfunction appear.

The gear mechanism is compact and quite simple. The work does not require high qualifications, but should not be done as the first step in setting up.
The fact is that in order to remove the problem node, you will need:
- Loosen the front wheel mounts
- Hang the front axle, substitute the support.
- Knock out the pulls.
- Remove the gearbox along with the bipod.
Since these actions are quite difficult, the process of adjusting the steering gear must be started after some preparatory operations:
- Checking the tie rod ends.
- Wheel alignment adjustment.
- Setting the position of the column and the driver's seat.
Steering adjustment on the Gazelle begins with the adjustment of the backlash. The plastic casing is removed, 4 fixing bolts are unscrewed with a head of 13 and the metal protection is removed. Under it are shims, with which the slack is eliminated.

One gasket is removed, the assembly is assembled, and the presence of play is checked. If it has not disappeared, then the procedure is repeated until the slack is completely eliminated. It is necessary to check it with the middle position of the steering wheel, when it is at its minimum. The adjustment is made until the maximum ease of rotation of the shaft with minimum play is achieved.
After the backlash is eliminated, the repair of the steering Gazelle continues. The clearance of the ball nut with the sector shaft is being adjusted. To do this, put a bipod on the shaft, turn the steering wheel shaft 2.5 turns in any direction, check for free play. If it is, you will have to adjust the position of the bearings. Angular contact bearings are used there, so the gaps should be minimal (ideally, absent).
A noteworthy circumstance is that the ball nut with the screw cannot be dismantled, which in the first years of operation of the Gazelle car was a significant drawback due to the lack of spare parts. Today, this issue has been completely resolved, the market has a sufficient number of parts, which allows for repairs or adjustments at the first symptoms of a malfunction.
The following malfunctions were identified during the actual operation of power steering systems on Volga 3110 and 3102 vehicles.
These malfunctions relate mainly to the power steering units themselves. Front suspension failures are not mentioned. Some more steering malfunctions and information on the power steering device are given in the brochure “Steering of GAZ-3110 and GAZ-3102 cars with hydraulic booster”, Koleso publishing house, Moscow, 2000.
When using materials from the site, an indication of the original necessarily!
Designed by Copter Studio 2001
It is more convenient to work together.
Drain the oil from the hydraulic booster system (see section "7.1.3. Maintenance of the hydraulic steering system").
Remove the cardan fork from the steering shaft. If necessary, move the steering column up (see section "7.1.1. Checking the technical condition of the steering and steering column").
We disconnect the longitudinal link from the bipod (see section "7.1.2. Steering shaft cardan joints, steering rods and pendulum levers").
Disconnect the thin hose from the reservoir of the hydraulic booster (see section "7.1.3. Maintenance of the hydraulic steering system").
We loosen the “19” head ...
... and with a key of the same size, we unscrew the three bolts securing the steering mechanism to the bracket. At the same time, the assistant holds ...
...and removes the steering gear.
We clamp the mechanism in a vice, ...
... with the “22” key, we unscrew the bolt fitting ...
... and remove the drain hose.
Install the mechanism in reverse order.
Adjustment includes two operations: adjustment of the propeller thrust bearings and adjustment of the gearing.
Screw Thrust Bearing Adjustment
We are working on a viewing hole.
In order to determine the need for adjustment, set the steering wheel to the middle position.
We disconnect the longitudinal steering rod from the bipod (see section "7.1.2. Steering shaft cardan joints, steering rods and pendulum levers").
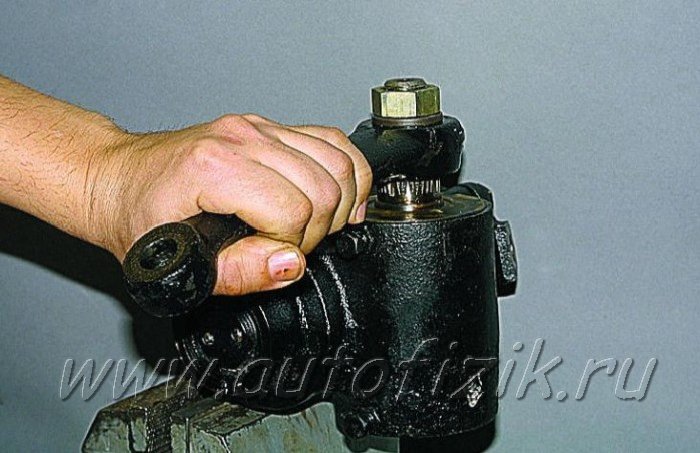
Holding on to the cardan yoke of the input shaft of the steering mechanism, swing the bipod with the other hand.
If the input shaft has a noticeable play, adjust the bearings.
To do this, remove the steering gear (see above "Removing the steering gear with hydraulic booster") and fix it in a vise.
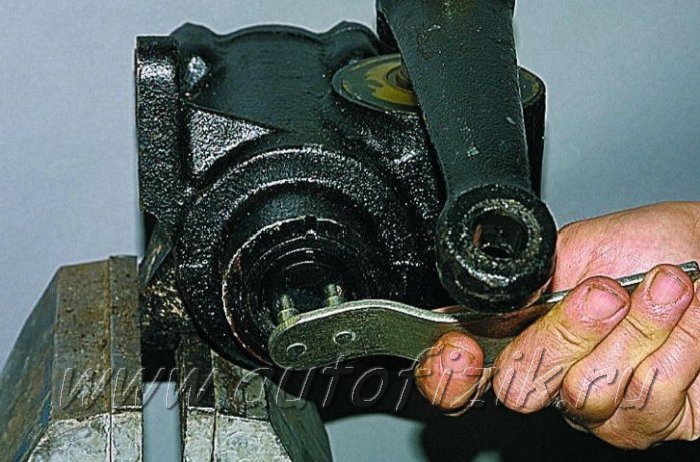
We straighten the upset shoulder of the adjusting nut with a beard.
With a special wrench, turn the nut clockwise, ...
... while constantly shaking the bipod, we control the backlash until it is completely eliminated.
We lock the adjusting nut with a beard, upsetting sections of its shoulder into the grooves of the crankcase.
The gearing is adjustable only after the play in the propeller bearings has been eliminated.
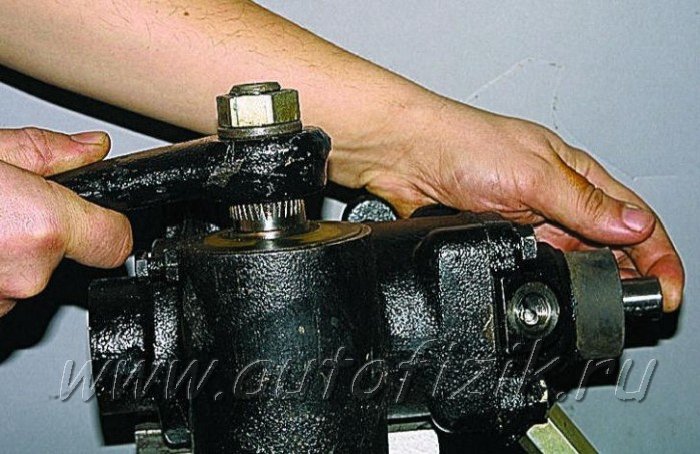
On the mechanism installed in a vise, ...
... holding the input shaft with the key "16", ...
...we swing the bipod.The backlash should not be felt by hand (exceed 0.3 mm at the end of the bipod).
Otherwise, remove the bipod from the sector shaft. We process the connection with a penetrating liquid.
We mark with a center punch the mutual position of the bipod and the shaft-sector.
Using the “32” wrench, unscrew the bipod nut and remove its spring washer.
We install the puller on the bipod and shaft.
By tightening the puller screw and applying sharp blows to the side of the bipod, ...
…remove it.
On the shaft are made.
…four double slots,…
... and in the bipod hole there are four double slots.
We remove the plastic covers from the slotted ...
... and the opposite end of the shaft-sector.
We loosen the lock nuts with the “13” key and unscrew the two locking bolts with the “12” key.
With a thin beard with a blunt end, we straighten the holes on the covers of the outer rings of the sector shaft.
Using a special key, we turn the outer eccentric rings of the bearings in the crankcase holes clockwise from the side of the splined end of the sector shaft. At the same time, we shake the input shaft with the “16” key to determine the moment of increasing resistance to its rotation, at which we stop the adjustment.
When adjusting, it is necessary to exclude the possibility of misalignment of the sector shaft, for which we turn both bearings alternately through a small angle until the gaps in the engagement are eliminated.
Putting the bipod on the splines of the sector shaft, we finally check the absence of play.
We fix the eccentric rings from turning by bending their flanges in the crankcase holes with a beard.
Remove the rubber seal of the input shaft, clean it
and, filling with any lubricant, set in place.
We assemble and install the mechanism by applying SHRUS-4 or SHRB-4 grease to the spline joint of the bipod.
Drain the oil from the hydraulic booster system, remove the hoses from the tank nozzles (see section "7.1.3. Maintenance of the hydraulic steering system").
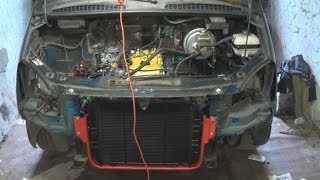
Remove the engine mudguard (see section "9.1.1. Removing and replacing external body parts").
Using the “22” wrench, unscrew the bolt-fitting from the hydraulic booster and remove the drain hose (see above “Removing the power steering gear”).
Using the “17” key, unscrew the fitting of the injection hose.
For clarity, all subsequent operations are shown on the removed power steering pump (see section "7.1.5. Power steering pump").
We install new hoses in the reverse order, after which we fill in oil and pump the hydraulic system (see section "7.1.3. Servicing the hydraulic steering system").
Repair gur with sable part 7
My Sable, problems with power steering
Replacing the epiploon of the power steering reducer
My Sable: Steering (with and without power steering)
Steering repair
gur 4331 assembly, adjustment, stand
Power steering pump repair, for all GM brands
WORLD blog: GAZ Sobol, I remove the backlash of the Sterlitomak power steering gearbox

Gur-Gazelle Cummins- fluid replacement.
Gazelle steering column repair
UAZ - Steering column repair (steering gear)
Pendant GAZelle, Sable. Repair, remove knocks.
Alteration of the Gazelle to the power steering with your own hands.
Gazelle steering column repair
WORLD blog: GAZ Sobol steering column repair (Barguzin, Gazelle.)
Steering gear adjustment UAZ Patriot
steering wheel troubleshooting part 1
Replacing the bearing of the power steering pump Chevrolet Aveo No. 47.

Power steering “Barguzin” 4x4 (technical video)
Power steering pump repair
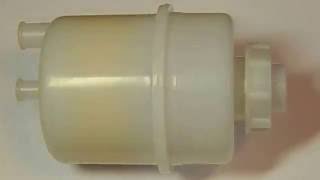
Expansion tank of the hydraulic booster (gur) Volga, gazelle
Weird power steering issue
Dismantling a gur from a sable Part 1

Repair Gazelle. Modernization of a sliding door on a gazelle. DIY repair
Gur GAZ 66 on an all-wheel drive gazelle, installation, features, steering tuning
Replacing the fluid in the power steering (detailed video instruction)
How to disassemble the power steering pump Chevrolet Aveo 1.6 Shanghai assembly.
GAZELLE/VOLGA - Gearbox Repair - Part 1 - Disassembly
UAZ power steering installation
The power steering pump howled. What to do? There is an exit!
Power steering pump
Steering gear repair.

Repair of the handbrake on the Gazelle (part 1)
How to replace the high pressure power steering hose?
Gazelle steering pin replacement on a short link
Dismantling gur sable part 5
| Video (click to play). |
🚘 Auto ☞ Magazine №5 The partition burst. Repair Strengthening of seams welding #GAZ_2217 #Barguzin #Sobol 🚘


