In detail: do-it-yourself steering rack repair for a Skoda Felicia from a real master for the site my.housecope.com.
Removal, overhaul and installation of the steering gear
Steering gear assembly
1 - Oil seal
2 - Screw (7 Nm)
3 - Spring washer
4 - Crankcase cover
5 - O-ring
6 - Sealing gasket
7 — Adjusting washers
8 - Ball bearing
9 - Gear
10 - Gear rack
11 - Bushing
12 - Retaining ring
13 — Carter of the steering mechanism
14 - Support washer
15 - Spring
16 - Adjusting shims
17 - Sealing gasket
18 - Cover
19 - Spring washer
20 - Bolt (7 Nm)
Steering gear housing
1 - cardan intermediate shaft steering rack
2 - Bolt (5 Nm)
3 - Protective sheet
4 - Sealing gasket
5 - Oil seal
6 - Nut (60 Nm)
7 - Tie rod end
8 - Retaining ring
9 - Protective cover of the ball joint
10 - Ring
11 - Castellated nut
12 - cotter pin
13 - Left tie rod
14 - Clamp
15 — Protective cover
16 - Connecting link
17 — Carter of the steering mechanism
18 - Rubber cushion
19 - Clamp rubber cushion
20 - Bolt (25 Nm)
22 - Right steering rod
Location of power steering components
1 - Steering pump
2 - Reservoir
3 - Steering gear with distributor and power cylinder
Steering gear with hydraulic booster
1 - Power cylinder
2 - rack and pinion
3 - Distributor valve
4 - Reservoir
5 - Steering pump
1 - Rotor
2 - Stator
3 - Housing
4 - Cover
5 - Pulley flange
6 - Safety valve
Models without power steering
The rack and pinion converts the rotation of the steering column into the movement of rods that turn the steered wheels of the car.
| Video (click to play). |
The steering box is made of aluminum alloy. The transmission consists of a drive shaft-gear and a gear rack.
The steering drive shaft is equipped with a gear and mounted in the rack and pinion housing in two PLC 03-29/1 bearings. The shaft assembly is in constant engagement with the gear rack rigidly connected to the steering rods. The rotation of the shaft causes the rack to move to the right or left. Together with the rack, the steering rods also move, forcing the front wheels of the car to turn.
The crankcase of the steering mechanism is closed from above by a cover fixed with two M6x20 bolts. The cover is installed on the sealing gasket. A hole is provided in the middle of the crankcase through which the steering gear drive shaft passes. In order to seal the assembly, an oil seal 17x28x7 is installed in the hole.
In order to select the backlash of the shaft bearings, shims with a thickness of 0.1 and 0.2 mm are used.
The side opening in the crankcase is also closed with a cover, which is fastened with two M6x20 bolts. A sealing gasket is installed under the cover. A bolt passes through the hole in the middle of the cover, designed to adjust the gap in the engagement of the shaft with the gear rack. The position of the bolt is fixed with a locknut. The required gap in engagement is maintained by a spring-loaded cracker and equipped with a 28x20 O-ring.
The right side of the crankcase of the steering mechanism is a pipe, inside of which a bushing is planted. A gear rack is placed in the sleeve. The ends of the rack are connected to the steering rods.
Rubber protective covers protect the steering mechanism from contamination, and also prevent the leakage of lubricant, which is filled in the crankcase.
The steering gear is attached to the bracket by the cross member of the front suspension beam on two rubber bearings, which are installed in clips. Each of the clips is fastened with two M8x20 bolts.Both the bearings and the cages are different (larger components are mounted closer to the steering gear).
Models with power steering
Power steering components are manufactured by TRW Dusseldorf.
The system includes a rack and pinion steering mechanism, combined in one housing with a power cylinder and a control valve, a steering pump, a hydraulic fluid reservoir and connecting hydraulic lines.
Tie rods are somewhat shorter than those used on models with manual steering. The total steering wheel travel (lock to lock) is 3.0 turns (versus 3.6 turns for manual models). The decrease in the number of shaft revolutions is associated with a lower gear ratio of the rack and pinion mechanism.
In view of the foregoing, in the event of a failure of the hydraulic booster system, the steering continues to work, however, it requires great effort when making turns.
When the wheel hits an obstacle (for example, a curb or a stone), the control valve tends to move to the middle position, the fluid pressure decreases, and the effort on the steering gear increases. The driver strives to keep the wheels in the right position; in this case, the control valve is displaced from the middle position and directs the fluid flow into the corresponding cavity of the cylinder, preventing the rail from moving. Thus, feedback is provided from the wheels to the driver.
The working path of the hydraulic booster system is filled with a special Pentosin CHF 11 S fluid in the amount of 0.9 l, which simultaneously acts as a lubricant for the components of the steering mechanism and pump. Hydraulic lines laid between the pump, control valve, power cylinder and hydraulic fluid reservoir are made of metal tubes and rubber hoses. Each section is equipped with special fitting tips.
The main working element of the system is the vane steering pump. The rotor with movable plates rotates in a specially shaped stator. When the pump is running, the liquid enters from the rarefaction side, enters the chamber formed by the rotor plates and the stator walls. The volume of the chamber gradually decreases as the rotor turns, the pressure of the liquid increases and it begins to be pushed out through the connecting line into the distribution valve. When the maximum allowable pressure is exceeded, a safety valve is activated that connects the working cavity with the rarefaction chamber. The pressure then drops abruptly. The maximum performance of the pump is achieved at a rotor speed of 500 to 700 rpm. The maximum pressure developed by the pump is 20 kPa. The pump is driven by a multi-ribbed belt, which is also used in parallel to drive the A/C compressor, generator and pump.
The power cylinder, combined with the steering mechanism and the control valve, is attached to the suspension transverse beam with M10x1.25 bolts (as opposed to M8 bolts in the case of a manually operated steering mechanism).
The power steering is equipped with diesel models and petrol models of 1.6 liters. The difference lies only in the route of laying the connecting lines.
1. In the car, give the fixing nuts and remove the foot rest assembly from the clutch pedal.
2. At the appropriate complete set bend back a carpet, give the screw and a nut of fastening of a finishing casing of the basis of a steering column. Remove the casing to provide access to the lower cardan joint of the intermediate shaft.
3. Use paint or marker to mark the position of the pivot in relation to the rack and pinion drive gear, then remove the pivot assembly pinch bolt.
4. Give nuts, remove washers and release the sealing plate and gasket installed around the drive gear.
A damaged gasket must be replaced.
5. Firmly apply the parking brake, then jack up the front of the vehicle and place it on jack stands.Remove both front wheels.
6. Remove the cotter pins, then give the nuts securing the tie rod ends to the hub assemblies. Release the tips from the pivot arms of the hubs - if necessary, use a ball joint puller.
Models without power steering
1. Turn out fixing bolts and remove collars of fastening of the steering mechanism from a stretcher.
2. Separate the rack and pinion assembly from the intermediate shaft and remove it from under the vehicle. Remove rubber mounts from steering gear (pads are not interchangeable). Remove the sealing plate with gasket from the car interior.
Models with power steering
1. In order to minimize the loss of hydraulic fluid, use special clamps or clamps to pinch the supply and return hoses near the steering pump reservoir.
2. Having marked the connectors, unscrew the nipple bolts on the steering gear assembly (prepare a drain container to collect the flowing hydraulic fluid). Disconnect both hoses and remove sealing washers.
During assembly, the sealing washers must be replaced without fail. Seal open hose ends and steering case openings immediately to minimize hydraulic fluid loss and prevent dirt from entering the system.
3. Release hydraulic hoses from intermediate clamps and take them aside from assembly of the steering mechanism.
4. Turn out fixing bolts and remove collars of fastening of rack assembly from a stretcher.
5. Separate the rack and pinion assembly from the intermediate shaft and remove it from under the vehicle. Remove rubber mounts from steering gear (pads are not interchangeable). Remove the sealing plate with gasket from the car interior.
a) Remove the rubber boot clamps;
b) Bend back the edges of the covers and drain the oil from the crankcase into a clean container;
c) Slide the boots towards the tie rod ends;
d) Bend the flat lock washers tabs holding the nuts on the ends of the rack;
e) Using a screwdriver, pry out the indentation on the edge of the adapter sleeve in the rail groove;
f) Give the nuts and disconnect from the traction rail;
g) Unscrew the two bolts securing the side cover to the crankcase, remove the spring, cracker and rubber sealing ring;
h) Remove the steering gear shaft with the upper bearing from the crankcase (clamp the shaft in a vise with soft jaws and pull on the crankcase; if necessary, use a soft-faced hammer);
i) Using a puller, remove the bearing from the shaft;
j) Remove the gear rack from the steering box;
k) Using the special tool, remove the lower bearing from the crankcase.
8. After replacing the defective components, assemble the mechanism:
Models with power steering
1. Follow the procedures in the Removal subsection.
2. Install new sealing washers on both sides of the hydraulic hose nipple connections, then screw in the nipple bolts and tighten them to the required torque without removing the clamps/clamps from the hoses.
3. Replace the wheels, then lower the vehicle to the ground and tighten the wheel bolts to the correct torque.
4. Add fresh hydraulic fluid to the steering pump reservoir (see Section Removal of air pockets from the hydraulic path of the power steering system).
5. In conclusion, check the angles of installation of the front wheels, if necessary, make the appropriate adjustment (see Section Vehicle wheel alignment - general information).


Last winter finally exhausted the suspension on my typewriter. Ball joints rattled, tie rods and it is necessary to check the steering tips. The ball joints were replaced in 40 minutes, but the steering gear took a little longer.
1. So, we have a bunch of spare parts at our disposal, namely, steering rack anthers, tie rods, steering rack bushings, clamps.
2. It all starts with raising the front of the car, removing both wheels.Then the lock nut is unscrewed, and behind it the thrust from the tip (you can also use your hands). This operation is repeated on the second side.
3. If there is a need to remove the steering tips, then first you need to remove the cotter pin from the tip nut, and then unscrew the nut. Then we should make several sharp blows to the lever with a heavy hammer, which will allow us to knock out the steering tip.
The cause of my baby's illness was a torn anther.
4. Skoda Felicia steering rack is fastened with 4 bolts. They are unscrewed with a 14 head. Then we unscrew the locking bolt on the steering shaft cardan shaft (in the cabin) using a 12 wrench. It is very inconvenient to unscrew the fastening bolts - there is practically no room to turn.
The spline connection of the rack with the steering shaft is disconnected and the rack is removed (it is removed in the direction of the right wheel).
A couple of years ago I tried to tighten the rail, view from the side of the adjusting nut. This is how it looks after that.
5. We begin to remove the anthers, unscrew the old traction. To do this, the rolling is cut down and unscrewed with a key of 32.
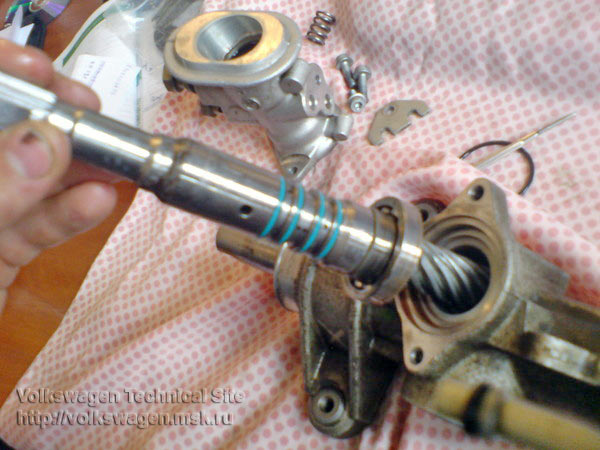
6. The bushing is changing. From the right end of the rail it looks like this:
To replace the steering rods, it is necessary to unscrew the steering wheel all the way to the left. The retaining ring is removed using round nose pliers. Using a flat screwdriver, we burst between the shaft and the sleeve and turn the steering wheel to the right - the sleeve should come out with the shaft.
Then we fill it all with FEOL-2 grease, press in a new bushing, controlling the position of the grooves.
7. We begin to fasten the rods (do not forget to lock them). The shaft is lubricated with FEOL-2 grease, anthers are put on. We can say that the new rail is almost ready.
8. The rail is installed in place, the rods are screwed into the tips. First, several turns are baited, the steering wheel is set straight - the steering wheel is turned all the way in one direction, the turns are counted all the way, then in the other direction and we set everything approximately in the center (most likely the steering wheel spokes will not be correct, but this can be corrected later). Then the rods are screwed into the tips, the wheels are put on (we set them approximately exactly relative to the wings). Using a tape measure, we measure the size between the wheels - this will be useful to us so that you can at least be able to get to the collapse.
The counters are twisted. We drive a little to put the car straight. Change the position of the steering wheel to a straight line.
9. Immediately go to the similarity collapse!
And do not undertake to do repairs yourself if you are not confident in your abilities. Sometimes it is cheaper to contact the Service Center or Service Station.
Conference of the Club of Car Lovers “Skoda”
There is no factory repair kit.
the shaft itself and the worm wear out.
The shaft and worm can be brought from the Czech Republic, but it will really be much more expensive than a non-original rail.
Replacing the bushing will do nothing.
Added after 1 minute 12 seconds:
Thought visited.
buy a non-original rail, disassemble it, heat treat the parts correctly and assemble it, it will last two or three years instead of one.
Well. I have a new non-original in the store for 2500.
I don't need to tell you what to do or not to do. I can’t say for sure if there are people here who, like me, have been riding Felicia for 10 years since the salon itself, but I think not very much))) So I have more experience than some. In addition to 10 years of experience with Felicia, I still look at these parts every day.
And the fact that you say that you have Chinese traction in good condition is not a fact that in a week you will run for new ones.
But about the statement that the used original will be restored and it will ride for 10 years, then you tell fairy tales to your children)))) For 10 years I have changed three rails, and the first one after 5-6 years. the rest were manufactured by TRW, i.e. almost original. they didn't live long.
The fact that “non-original” is now being sold is all designed for a year at the most.
And I have been plowing the original for 14 years (moreover, I have 1.6, and it will be a little heavier), on Favorita - I plowed almost 20 (until the car crashed), so no need la-la about 5 years. Everything is much simpler - you got a defective one. This is third.
Firstly, no one is forcing you to buy a TRV, buy the original. True, the tips will still be TRV.
And firstly, the previous posts were just an attempt to put it mildly that heating Chinese rails is a stupid idea.
Do not take Chinese rails for 2500 and do not take for 4 thousand, I myself took General Ricambi - Italy supposedly)))), y.y., after twenty thousand km.
:
1. roar in the area of a pair of rail-worm
2. the steering wheel eventually walks back and forth (even on a flat road)
3. hitting a stone with a wheel - hitting the steering wheel
I’ll tell you for sure - AsMetal tips are good, but look inside the thread, you come across a marriage, and the rods are gorgeous for this price, they have been running for two years (with a mileage of 60 thousand) in all “directions” and still running
P.S. unfortunately, the restoration of the factory river, even with non-original spare parts, is more expensive than any non-original one up to 4 thousand.
Added after 12 hours 57 minutes:
Is there a person here who went through the rail himself ?, I need advice!


Hello! I have a Skoda Felicia combi 1.6 and 1997. You need to put a steering rack without power steering. Nothing gets through Vin! Help, which rail to put, if possible, the part code, the cheapest. Thank you.


Thanks for the puller drawing. I ordered it from a turner, they made it, turnkey 32, everything according to the drawing. And I came across the fact that the top of this nut is 26mm, and the inner diameter is 22 on the drawing. Maybe you have a different nut)) accordingly, the puller did not fit)) correct the drawing


Come! Steering diagnostics - free of charge!
- Narrow specialization
- All work guaranteed for at least six months
- Huge accumulated experience and technological base
Repair cost with spare parts (rub.)
Play in the steering rack is a fairly common failure of this unit. Adjusting it with your own hands is easy. You just need to find the adjustment mechanism, remove the wrenches, tighten with a hexagon. But then questions arise about the pull-up force, the location of the gap. Professional motorists are not advised to make significant efforts during this work - the steering assembly will begin to “bite”, it will turn tightly to its original position, and as a result, an impressive overload of the pump, the power steering and other elements of the steering device may break. The steering rack is a specialized axle. Change its location - and problems can occur with the entire steering.
That is why the repair of the Skoda Felicia steering rack should be entrusted to competent craftsmen, but even more importantly, to determine the breakdown of the assembly in advance, because safety on the highway depends on it. There is a simple way to identify the presence of an excessive free play of the steering rack, which is used both when checking on your own, and during a technical inspection in car workshops. The machine is installed on a lifting mechanism or on a pit, the engine is turned off, the driver turns the steering wheel in different directions, and his assistant from below visually determines the location of the gap. Please note that you need to check only when the engine is turned off, since during its operation the amplifier almost completely fills the gap between the worm screw and the rack, and it is very difficult to feel it with the steering wheel. Repair of the Skoda Felicia steering rack can be more or less labor-intensive, for example, if there are backlashes in the steering shaft bushings on both sides, repair work consists only in replacing these elements.
Perhaps the unit will need to be replaced, so for repairs, immediately look for those service stations that offer, in addition, the sale of steering racks.
1. Remove the steering gear from the vehicle (see subsection 5.5.1).
2. Clamp the steering gear in a vice with soft jaws or install it in tool 67.7820.9536 for assembly and disassembly.

Car service "Voltazh", which is located in Kirov, offers its assistance in all repair or installation issues. We are confident that we can deal with any breakdown and get rid of it as soon as possible.
From year to year we improve on the service of maintenance solely for the convenience of our customers.
We pay special attention to the steering and its components.
Despite the fact that you are the owner of an excellent car model that can boast of its practicality and quality, control and periodic diagnostics of the vehicle is simply necessary if the calculation and rate is for a long service life.
For example, the steering rack is responsible for the relationship of the steering wheel and wheels. In order not to be in a risky situation, we recommend that you do not start with a repair if the device has failed.
Signs indicating a broken steering rack:
A "tight" steering wheel or turns jerkily in only one direction.
There are oil stains on the asphalt in front of the car.
Noise in the power steering.
Knocking and vibration in the steering wheel.
These are the main signs that "scream" about a broken rail.
Don't wait for the weather by the sea. The sooner you arrive, the less likely it is that the rail will be in a too neglected state or require replacement with a new analogue.
Pay special attention to: oil seals, crackers, support bushings, distribution gear and main shaft.
How much does it cost to repair a steering rack on a Skoda Felicia
Our clients have never complained about the inflated prices. We always try to select the best prices that do not scare people away, but rather pleasantly surprise and attract.
You must understand that if you have to buy a new steering rack, the price will increase.
For regular customers we provide discounts and bonuses for further favorable cooperation.
Steering rack price for SKODA Felicia
We hope that we were able to interest you and soon we will be able to help you.
Hello! I have a Skoda Felicia combi 1.6 and 1997. You need to put a steering rack without power steering. Nothing gets through Vin! Help, which rail to put, if possible, the part code, the cheapest. Thank you.
Thanks for the puller drawing. I ordered it from a turner, they made it, turnkey 32, everything according to the drawing. And I came across the fact that the top of this nut is 26mm, and the inner diameter is 22 on the drawing. Maybe you have a different nut)) accordingly, the puller did not fit)) correct the drawing
Replacing the thermostat is pretty easy. And for this you do not need to crawl under the car and drain the coolant (coolant).…
Why is the power steering rack dying? If it rattled or leaked, is it worth repairing it ...
A short video review on the operation of the Skoda Felicia 1.3 or How I chose my first car;…
Replacing the steering rack with electric power Skoda Octavia
How to remove the tidy on Felicia
Skoda Felicia favorite Alteration, Starter Trambler. Carburetor! From VAZ! Not expensive. quickly. With their own ...
dismantling the steering rack Volkswagen transporter t4
Equipment for the repair of car switchgear units. Learn more: Russia:
Once I started noticing coolant leaks (coolant) near the right front wheel. For a long time I could not understand ...
Overview of the car Skoda Felicia 1998, 1.3, 68 hp Since this kind of activity is new to me, ...
Equipment for the repair of car switchgear units. Learn more: Russia:
the cost of a car in good, fully operational condition is 70,000-75,000 rubles, of course there are prices for 150,000 rubles, but ...
Steering rack repair Skoda Felicia
Removing the steering rack skoda fabia 1
Steering rack without power steering Skoda Favorit, Skoda Felicia SK 101
Steering rack repair on Skoda Fabia. Steering rack repair Skoda Fabia in St. Petersburg.
Replacing the steering rack with electric power Skoda Octavia
Steering rack adjustment for Skoda Fabia 1
Removal, installation of the steering rack Skoda Octavia Tour
Knocking in the steering rack with Skoda electric power steering: a malfunction or a norm?
Replacing the backstage (thrust) Skoda felicia 98
Steering rack, Tie rod, Tie rod end, Skoda, Felicia, Trw, General ricambi, Zf Lenksysteme, Used steering, Steering rack for Skoda. Available 1 item. Steering rack Skoda Felicia without gu.
Owner's story Skoda Felicia - self-repair. Skoda Felicia 1,3 Jan › Logbook › Troubleshooting and complete overhaul of the original Skoda Felicia steering rack.
Skoda Felicia steering rack for sale. Contract, new and used auto parts for Japanese, Korean foreign cars, domestic cars. Search for spare parts for special equipment and trucks.

The requested topic does not exist. You have disabled JavaScript, the site will not work correctly. Incidentally mortgages in the spar and subframe inserted, brewed. You are viewing the site for all regions.. Steering rack repair for Skoda Octavia in St. Petersburg.
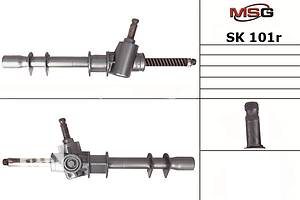

Approached the fact, because of which he turned the whole front — to the steering rack! The rack was original factory. And, most likely, no one removed it and never repaired it. Thrust raskernil and unscrewed with almost no problems. By the way, they are also native, as are the tips, most likely. The rods are in pretty good condition, as are the tips.
But I will definitely replace this with new ones, since under load they may tap. The rods and steering tips have been new for a long time. Native rubber anthers-corrugations of the steering rack in perfect condition! Rubber bands under the clamps too!
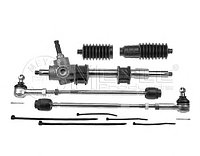
I decided to disassemble the steering rack completely. He unscrewed the adjusting nut-cover for pressing the rail-worm pair. The plastic base is in excellent condition. He took off the retaining ring on the side, pulled out the plastic sleeve - worn out. The new VAG bushing has been in store for a long time. He put forward the rail itself — the condition of the teeth is perfect.
But it is bent like a crescent in the middle of the teeth of the notches. I thought it was a defect and appeared after a side impact on one of the wheels. But it turned out that everything is as it should be, this is a design feature. The bend is made for the best contact with the worm and more pressure. I decided to take out the worm itself and see its condition and the condition of the bearings.
To do this, it was necessary to unscrew the lid of the worm. It was cordially ground at the factory and had grooves for unscrewing only with a special key. We drilled out all the cores with a drill, began to thresh with a punch on the protrusions in the lid. Everything was bent, the lid refused to move.
They made a key from a pipe with teeth. And they did not manage to rip it off, since the duralumin corroded and even spilling VDashka did not help. After long blows and unraveling the lid, she moved and got out.
We twist back and kern without problems. The two thrust bearings were also in perfect condition. The worm itself is also ideal. I managed to wash all the parts and the body clean with gasoline, put in a new lubricant, and made everything.
I installed a new VAG bushing, it came in with an interference fit, as it should. The old one dangled - hence the knock. Bottom line: in the original factory rail, only the plastic bushing was worn out. She just got replaced. Why buy a new Chinese one? My rake rattles terribly, it's good that I found your entry about the restoration of the original. Here's another bushing catalog number: Isn't this one? There is no time for photography at all.
I myself did not expect that the design of the steering rack is so simple. If you pick up the rail assembly and read my entry, then everything should work out. And I will try to take a photo.
| Video (click to play). |
blockchain:
1FLCr5AdPHQouJoVkbezp76hTqLjcG4nNb How to remove the steering rack from the car. Tavria Slavuta ZAZ. Replacing the bearing of the front wheel hub Skoda felicia. Škoda Felicia minor repairs.Repair backstage Skoda Felicia. The distributor retired in a Skoda Felicia. Steering rack repair with power steering for Ford and Mazda. Removing the dashboard on the Skoda Felicia. Skoda Felicia favorite Alteration of Starter Trambler. Carburetor! From VAZ. Dismantling and assembly of a steering rack Part 1. Repair of a steering rack. Toyota Prius 20. HOW YOU KILL THE MOTOR WITH YOUR HANDS. About Skoda and Volkswagen engines - IMPORTANT! How do you KILL the steering rack with power steering! Is it worth it to REPAIR. Just about the complex. HOW YOU KILL A DUAL-MASS FLYWHEEL. Skoda felicia, nuances in the repair of levers.

