In detail: do-it-yourself bosch in-line fuel pump repair from a real master for the site my.housecope.com.
Injection pump pump number 059 130 106D was installed on cars:
Volkswagen Passat B5.5 / Volkswagen Passat B5.5 (3B3) 2001 - 2005
Volkswagen Passat Variant B5.5 / Volkswagen Passat Variant B5.5 (3B6) 2001 - 2005
Volkswagen Passat B5 / Volkswagen Passat B5 (3B2) 1997 - 2001
Volkswagen Passat Variant B5 / Volkswagen Passat Variant B5 (3B5) 1997 - 2001
Audi A4 B5 / Audi A4 B5 (8D2) 1995 – 2001
Audi A4 Avant B5 / Audi A4 Avant B5 (8D5) 1996 - 2002
Audi A6 C5 / Audi A6 (4B2) 1997 – 2005
Audi A6 Avant / Audi A6 Avant (4B5) 1998 - 2005
information is suitable for repair and other cars.
Hello everyone! I decided to write a report on self-repair of the Bosch VP44 injection pump, number 059 130 106D, Audi A8 D2 2.5tdi V6 car, but this pump was installed everywhere, Audi A4, A6, VW, BMW, Opel, on trucks It often breaks down - so I think the information will not hurt.
I didn’t have any experience with high-pressure fuel pumps - therefore I bombarded specialists with questions on various forums - thanks to everyone who helped with advice!
A major role was played by the report of the owner of the Opel Vectra - Mitrofan (Thank you). The progress of the disassembly process is displayed there.
I want to talk about my experience and my own “rake”, so that no one jumps on them once again.
So, after pumping a pear or something from the nozzle tubes, when scrolling with a starter, nothing presses - then you are here, you have problems with the mechanics: the most likely option is damage to the membrane (or cutting rings), the second option is a defect in the booster pump . You will see all this later in the photo.
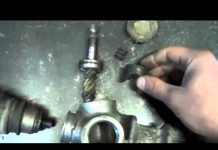
Whoever has everything in order - here you can consider the high-pressure fuel pump from all angles, incl. his most intimate places
| Video (click to play). |
To begin with, while the pump is on the machine, we set the timing and injection pump to the “basic” position so that the hole for the stopper coincides with the hole on the pulley (we shine with a flashlight), you can rotate the timing either by the crankshaft or by the camshaft (but with a force of no more than 75 Nm (! ), smoothly, with pauses or a gearbox, hanging out the muzzle, rotating the wheel. Then we loosen the nut on the 27mm gear, put a clear mark on the shaft and the gear. We may need it during reassembly. The gear itself sits firmly on the “cone ”- even without a nut it won’t move a single gram, it doesn’t need to be pressed yet, for now we only need a mark with an awl:
The decision on whether to compress it or not will be made later (so as not to do unnecessary work).
Then we unscrew the pump from the car - we close the fitting with something and thoroughly rinse it with a Karcher, then blow it in places with a carb cleaner and blow it with compressed air so that there is less dirt during disassembly:
Unscrew the "brains" and 2 el. valves (details from Mitrofan), for this we need Torx 10,25,30 (later T20 is also possible). Before unscrewing, knock on the Torx with a small hammer, if it doesn’t go, it’s better to continue knocking, because when you break the edges, you will have to drill and drive in the “M” bit.
When pulling out the central valve (with a screwdriver like a lever), you need to make sure that it comes out without distortion, if it warps, we push it back and try again while supporting it from below.
Then we bring the gear wheel (which is still firmly seated on the cone) to the mark into which the stopper is inserted (or, as for the collective farm, a 6mm drill), unscrew the T50 bolt, remove the washer under it and twist it all the way, thereby blocking the movement of the shaft, the stopper take out:
In this case, the back will be in this position:
Next, to extract the distribution head according to Mitrofan, we burst and swing with screwdrivers, but I, so as not to spoil the al. the case was simply rested with a screwdriver and knocked down with a hammer:
We remove the distribution head and see the very defect due to which the pressure is gone - damage to the outer plastic part of the membrane:
If you see such a picture (or just a crack) - then you don’t need to disassemble it further - we change the membrane and rubber rings and assemble it back.Bosch membrane repair kit 1 467 045 032 . But there are important nuances, read Here
Since I didn’t notice right away due to inexperience, I took it apart further:
Next, to remove the bearing according to Mitrofan - we pull with a thick wire, I just spread the newspaper on the floor and hit it with the body - by inertia the bearing and 2 washers came out:
Then you need to unscrew the plug, wrap the top with paper or a rag and pull it out with pliers:
With punches or something handy, we turn the cam washer and piston to the position in which cool. the puck will move up (in the photo you need to turn it a little clockwise and it will rise):
After extracting cool. washers - we take out the piston - this is how it looks from all sides (if it doesn’t work out well, you can swing it with punches for 2 holes, which are in the photo at the top left, just don’t put it deep into the hole):
Now we press the gear wheel from the shaft (at the same time, the shaft is “pressed” with Torx50, which was mentioned above, otherwise the shaft will shoot like a bullet when removed - both the shaft and the housing can be damaged). You will need a GOOD puller, the effort is HUGE, we put good pieces of rags under the paws of the puller so as not to leave a “jam”.
After pressing, loosen the T50 and take out the shaft.
. and the puck (what's under it). The booster pump remains in the housing.
Now, with the help of T20, we unscrew the bolts (we need a long and thin T20, preferably):
It is desirable to “shake it out” by hitting the case against the newspaper - then it will fall out “assembly”. If you try to push from behind with your fingers, then most likely it will fall out “in parts”, this is bad:
As they say, it is undesirable to confuse the blades in places, otherwise they can wedge at speed.
More photos of him:
It is serviceable, the only thing is a small defect - chipping, but this is not criminal:
I took the booster pump from a spare donor pump, it fell out “assembly”, we wash it with pts. carb:
Then I washed the empty case with “Karcher” (without bringing it close to the channels), then very good. Carba through the channels and compressed air dried. Purity:
The booster pump (donor) is installed in place:
We put the washer and insert the shaft (in the photo the washer hangs on the shaft):
Gear wheel ready for installation:
We combine it according to our scratch mark with the shaft, then rotate it until the hole for the stopper is aligned and block T50:
Slightly (!) Stuff the tooth. wheel on the shaft, lightly bait the nut by 27mm. We put catalogs and a damper tooth on the table. wheels to position the injection pump conveniently for further assembly.
In this case, the picture is as follows, the shaft is locked in the “base” position:
The piston was taken from a donor pump, the scratches were slightly polished with scissors P800, 1500, 2000. It is advisable to grind the sleeve itself in the injection pump housing with P2000 (but this is before washing).
As you can see on the left - the piston ring interferes with assembly - just wrap the piston with a plastic film, squeeze it with your fingers and put it in:
We set the piston so that the cam washer is “filled” into it (yellow arrow). The second connection point cool. washers - black arrow:
And here is the cam washer itself, these 2 pins must be “introduced” into the holes:
There is no more complex and responsible unit in a diesel engine than the fuel injection system, more precisely, its main part - the high pressure fuel pump. Many mating parts, highly loaded units, the presence of a precision dosing system make the repair of high-pressure fuel pumps a difficult task even in service conditions. It is all the more difficult to repair the high pressure fuel pump of a diesel engine with your own hands.
In automotive technology, almost everything is repaired, except, perhaps, individual oil seals and cuffs, the repair of which is impossible without special materials. The complexity of setting up, diagnosing and repairing high-pressure fuel pumps requires the employee to have skills in working with precision mechanics.
It is simply impossible to set up according to factory parameters, without a special diagnostic stand for repairing high-pressure fuel pumps.During the diagnostic study of the injection pump, it is necessary to check:
- cyclic supply of the high-pressure pump, in the entire range of revolutions of the high-pressure fuel pump shaft, at start-up, and after cutting off the fuel supply;
- stability of the developed pressure;
- Uniform supply of injected high pressure fuel pump to the fuel injector.
Even having access to a diagnostic stand, and having studied the issue of repairing a high-pressure fuel pump using numerous videos, it is very difficult to qualitatively check and evaluate its work.
In heavy diesel engines, plunger, in-line injection pumps are used. Such devices are more difficult to maintain and repair, since they require special equipment for disassembling it, so we will not consider such high-pressure fuel pumps and their repair.
In a passenger diesel engine, a distribution-type injection pump is almost always used. Unlike in-line, in a distribution pump, the force on the plunger is transmitted using a profiled cam. The design of the injection pump turned out to be more compact, but it is hardly easier to expect to repair it on the knee.
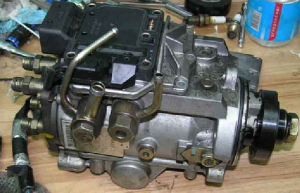
The Bosh VP44 injection pump is considered the most famous and affordable. Often, the need to repair the insides of the pump arises when:
- poor traction and incomplete combustion of fuel even under ideal conditions - in the absence of load and a thoroughly warmed-up engine;
- sudden failure and stop of the diesel engine under load, as they say, "death on takeoff." Usually the scanner in such cases diagnoses the code P1630 and P1651.
- the appearance of a leakage of diesel fuel in the area of \u200b\u200bthe gland of the seal of the central shaft of the high-pressure fuel pump.
Therefore, we will limit ourselves to the issue of repairing high-pressure fuel pumps with our own hands by replacing seals and eliminating scuffing of the working surfaces of parts.
Before disassembling the injection pump drive shaft seal, try to move it in the radial direction. If play is felt by hand, the cause of fuel leakage may be the wear of the working surface of the shaft or the bearing needs to be repaired.
A large number of split planes and mating surfaces of parts required the use of a large number of seals and seals. As a rule, they are made of high-quality material and serve for a long time until they are damaged during repair or maintenance. In this case, do-it-yourself Bosch injection pump repairs use standard repair kits.
It is enough to simply replace the seal on the shaft position sensor and on the injection advance control during repair. For a better fit on new rings and rubber bands, you can drop a couple of drops of spindle or engine oil.
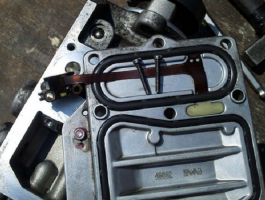


For preventive repair of the Bosch injection pump with your own hands, you will need to disassemble the pump in approximately the following order:
- remove the metering valve from the end part of the injection pump. To do this, unscrew the four screws of the pressure plate, carefully release the injection advance valve cable. After removing the three screws securing the metering valve, you can carefully remove it from the socket;
- by unscrewing the mount on the top cover, you can remove the control board and gain access to the electronics;
- set the position of the shaft, as shown in the photo, remove the camera and get access to the insides of the injection pump;
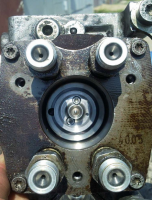
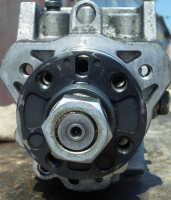

- after dismantling the bearing with the help of a special puller, we get the opportunity to study the potential culprit for the poor performance of the injection pump - the piston of the injection advance unit. Often there is surface wear and tearing on the edges on the part. You can try to repair the surface by polishing, replacing the entire part is much more expensive.
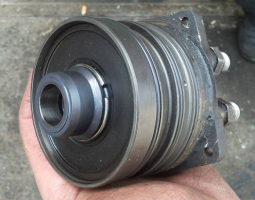
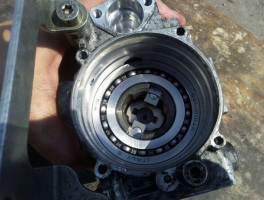

After repair, the assembly is carried out in the reverse order with washing the parts with diesel fuel.
Often, in addition to scuffing, there is another reason on the surface of the pistons why the injection pump does not develop the necessary pressure. This cause may be debris, films or paraffin deposits deposited on the filter screen inside the pump. There is a mesh on the side of the inlet pipe. Flushing the channels is troublesome and inefficient, it is easier to remove the mesh and blow it with compressed air.
Broken pieces of debris can jam the plunger piston or even cause the pump drive shaft to break or break. Therefore, cleaning should be carried out very carefully to avoid contamination of the internal cavities of the pump.
Among the many reasons for the failure of the electronic "liver" of the high-pressure fuel pump, the breakage or burnout of the contacts of the control board and the failure of power transistors are more common than others. If the knowledge and skills of working with electronic devices allow you to “diagnose” the performance of transistors and repair, you should try to identify the cause and replace the culprit with a serviceable element.
To check the condition of the “culprit”, you need to carefully open the black cover, tightly seated on the rubber seal with screws. It should be removed carefully so as not to damage the seal itself.

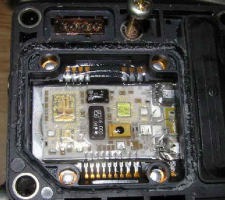


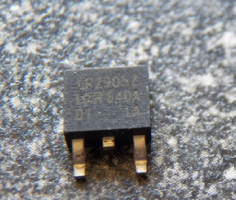


The reason for the failure of not only the transistor, but the entire board could be air that got into the cavity due to poor performance of the drainage system or a check valve. Often they try to eliminate airing by spinning the starter, hoping to pump diesel fuel into the high-pressure fuel pump in this way. At this moment, the transistor is open and loaded to the maximum, which leads to intense heating. In an air environment with poor heat dissipation, it will inevitably burn out. In some German cars, there is protection that prevents an attempt to start the engine in the absence of fuel in the line. To do this, use the fuel sensor in the tank.
The failure of the transistor can be established by a "dialing" tester or by appearance. The best option for repairing such a malfunction would be to replace the entire control board. Perhaps this is more expensive than soldering, but it will give guaranteed quality and stable operation of the high-pressure fuel pump after repair. As a last resort, give the board and transistor for soldering to specialists - electronics engineers.
When installing and reassembling after repair, check the tightness of all fasteners.
If during the revision process you did not make rash and unreasonable replacements of parts, the assembled pump should work with approximately the same parameters as before. As a standard, for testing and adjusting the injection pump after a major overhaul, use the Bosch EPS-815 stand.
On the video you can learn how to increase the plunger pressure in the Bosch VE injection pump:
High pressure fuel pump in the diesel power supply system. Violations in the operation of the device, their external manifestations. How can I repair the pump on my own, the sequence of actions. Tips for resorting to the help of specialized services.
Any diesel engine may need repair of the high pressure fuel pump sooner or later. Just as the human heart begins to “jump” with age, so this apparatus is subject to age-related changes. Along with the natural wear of parts, refueling with low-quality fuel also affects. Diesel units in this regard are more sensitive than gasoline engines.
The proposed article will help owners of diesel cars in case of problems with the fuel pump. It also provides tips on how to repair this node with your own hands.
The high pressure fuel pump (TNVD) is an independent unit of the power supply system for internal combustion engines (ICEs), primarily diesel ones. Although this device is also used on injection gasoline engines, it was first used on a diesel engine.
Its main function is to create a pressure difference between the pressure line and the compression chamber in order to ensure reliable injection of fuel into the cylinder cavity. But this is not enough.
The pump also sets the sequence of fuel supply to the working nozzles, that is, it performs a distributive function. In addition, it regulates the amount of supply depending on the driving mode (crankshaft speed) and on some other factors: engine temperature, turning on and off the air conditioner.
Finally, just as the ignition timing is adjusted in carburetor engines, on a diesel engine, the injection pump automatically adjusts the timing of the injection.
There are three main types of pumps: in-line, port injection and mainline. Their device is considered in a separate article. Here it is worth mentioning only that in-line pumps were used until recently on diesel trucks, tractors and specialized road transport equipment.
Distribution devices are installed on all passenger diesel cars and on some trucks. Trunk are used in modern Common Rail fuel systems. Such pumps do not have the function of distributing fuel, this task is performed by the electronic engine control unit (ECU), which, according to the program, commands the working nozzles.
What are the symptoms of a fuel pump failure? As it was said at the beginning of the article, the main reasons for the loss of efficiency of high-pressure fuel pumps are the wear of rubbing surfaces and poor fuel quality. Here it can be clarified that the low quality of diesel fuel should also mean the ingress of water into the fuel. The following are external symptoms of a malfunctioning fuel pump:
- It is difficult to start the engine - most likely, the plunger pair (or steam) has worn out, and the pump does not develop the required pressure. Checked in a simple way. It is necessary to put a rag on the injection pump, pour cold water on it and wait a few minutes. Then try again. If the engine starts, then the cause is indeed wear and tear. When cooled, the gaps in the interface decrease and the viscosity of the fuel increases, as a result of which the pump provides the necessary pressure.
- Loss of power. Due to the increased gaps, the injection pressure decreases, the operation of the all-mode speed controller deteriorates.
- Engine overheating. The reasons may be the incorrect operation of the injection advance automatic. In this case, it is impossible to postpone the repair of the injection pump "for later."
- The growing "appetite" of the power unit. Caused by fuel leaks, wear of plunger interfaces, incorrect injection timing.
- Rigid operation of the engine, which may be the result of too early injection time and uneven supply of diesel fuel to different cylinders. True, the latter is practically impossible on distribution injection pumps, so, most likely, the matter is in the injectors.
- Black exhaust from the exhaust pipe. The reason may be too late fuel injection angle.

If the symptoms listed above are present, it is necessary to think about repairing the fuel supercharger. Below we consider how to fix some malfunctions of the axial injection pump of the distribution type with your own hands.
It should be noted that before undertaking this work, you should study the device of the unit being repaired, find out what tools you may need, because in some cases you cannot do without special equipment, a puller, for example.
You should also prepare a camera to record each stage of disassembly. Otherwise, you can forget where these or those details were located. For disassembly, it is necessary to prepare a suitable table and cover it with a clean cloth or at least a sheet of white paper. There should be no debris on the floor, otherwise an accidentally dropped part may not be found.
So, what can a motorist who does not have special qualifications do on their own?
- eliminate fuel leakage from the pump housing;
- check the operation of the solenoid valve;
- check the plunger fuel supply mechanism;
- check the automatic speed controller;
- clean the filter meshes;
- check the pressure developed by the device;
- adjust injection advance.
The following describes the sequence of actions for self-repair of high pressure fuel pumps.With the engine running, disconnect the rod connecting the gas pedal to the lever that regulates the fuel supply. Then manually shake the lever in the radial direction, trying to stretch the return spring.
If there is no seepage of diesel fuel through the annular gap, then the seal is not worn out. Otherwise, a refurbishment of the pairing is required.
While the pump has not yet been removed from the engine, make sure that the fuel shut-off solenoid valve is working. If the engine starts and stops when the key is turned, the valve is good. What to do in a situation where this component fails while driving will be described below.
Now it remains to move on to disassembling the pump. Before disconnecting the fuel lines and electrical supply from the unit, it is necessary to wipe its body and connections with a rag soaked in diesel fuel, and then wipe it dry to prevent dirt from entering the fuel system. Rinse the removed pump again, then remove the cover and drain the fuel from it.
First of all, you need to disassemble the fuel supply adjustment drive and inspect the seals, as well as assess the degree of wear of the mating parts. O-rings must be changed. For this purpose, it is necessary to buy a repair kit for the repaired device.
As for worn parts, there are two ways to restore them: restore the worn axle with chrome plating, or turn and fit a repair bronze bushing into the body. The body will have to be bored before this.
Next, proceed to disassembly and revision of the plunger supercharger. The distribution head of the pump is disconnected from the housing, after which it is placed with the pulley down so that the insides do not spill out. Before removing the cams, the drive gear and the centrifugal governor clutch, you need to check if these parts are sticking during movement, and then, carefully supporting them with your fingers, remove them from the housing.
It is advisable to mark the rollers, washers, axles of the cam clutch with a marker, because all mating surfaces have already got used to each other, and it would be better if they remain after assembly. After disassembly, you need to carefully inspect the parts for chips or wear. Heavily worn parts should be replaced with new ones.
The degree of wear of the plunger pair can only be estimated approximately. The performance of the precision interface is checked after the pump is assembled by measuring its working pressure. Finally, you need to blow out all the filter elements (grids) with compressed air, after which you can assemble the pump in the reverse order.
When the unit is assembled, you need to fill it with diesel fuel by manually turning the drive shaft, after which you can install it in place and connect the fuel lines, hoses and electrical wiring of the control system.
After the engine is started, you should make sure that the fuel injection advance automatic machine works correctly, depending on the pressure in the cavity of the low-pressure vane pump. This unit has its own idle speed controller. If necessary, adjust this parameter by screwing or unscrewing the adjusting screw.
Before performing this procedure, it is recommended to remember the position of the screw by counting the number of threads protruding from the locknut in order, in extreme cases, to return to the original setting. The manual for the engine indicates the required number of revolutions at idle. Usually they drop from 1100 rpm after starting to 750 after warming up the diesel with a manual gearbox, and up to 850 on an engine with a gun.
Finally, the pressure in the pressure line is checked, which is an indirect check of the condition of the plunger pair. For this purpose, you will need a pressure gauge up to 350 bar, a connecting hose to connect to the pump and an adapter that includes a bleed valve.
As a measuring device, a TAD-01A pressure gauge or an older one, KI-4802, is suitable. If the adapter is not on sale, you will have to make it yourself.
Of course, it is necessary to take into account the dimensions of the connecting thread, and where it is planned to screw the connecting hose. For measurement, the device is connected to the central hole of the distribution block or to one of the pressure fittings.
After attaching the pressure gauge to the injection pump, turn the pump shaft using the starter and record the reading of the dial indicator. If the device shows more than 250 atmospheres, this is normal (when the engine is running, the pressure will be higher).
As promised above, a few words about what to do if the fuel cutoff solenoid valve fails. In this case, the engine will suddenly stop. True, there may be several reasons for this. To discard the solenoid valve failure version, it must be excluded from operation, since in normal mode it is always open.
To do this, you need to remove the supply wire, isolate it from the ground, then unscrew the valve, remove the tip with the spring from it and put the device back. If the engine still won't start, it's obviously something else. If the engine starts, you need to look for a malfunction in the valve.
To do this off the road, you must first get home. True, then you will have to turn off the engine rudely, but simply: put the car on the handbrake, turn on the increased gear and release the clutch pedal.
And then start repairing. First you should check if the electromagnet winding has burned out. To do this, connect the valve to the plus of the battery using a piece of serviceable wire, after which they try to start the engine. If it starts, then the winding burned out. Otherwise, look for a place of voltage leakage from the supply wire.
Those who do not have the desire or ability to repair the injection pump on their own should contact a specialized fuel equipment repair station. Although there are dealerships that service and repair cars of a certain brand, they usually do not deal with fuel equipment, since this requires expensive diagnostic equipment.
The main stand for diagnostics and adjustment of high pressure fuel pumps is Bosch EPS-815. It checks various parameters set for this pump by the manufacturer. For example: starting fuel supply, volumetric supply in various modes, outlet pressure and some others.
When choosing a service, you should consider its reliability. To do this, you must first come to the interview, where you can ask the opinion of the clients you serve. In such cases, pay attention to the history of the selected service. As a rule, unscrupulous firms exist in the service sector for no more than one year.
The weak link of the high pressure fuel pump of diesel engines is their sensitivity to water ingress into the fuel system. Foreign cars are especially susceptible to this, for which water is the main enemy. To reduce this danger in winter, keep the fuel level in the tank as high as possible in order to minimize the formation of condensate.
The high pressure fuel pump is one of the most complex components of the diesel engine fuel supply system.
The principle of operation of the injection pump is to supply to the cylinders of a diesel engine at a certain moment and under a certain pressure precisely measured portions of the fuel mixture that correspond to a given load.
In direct-acting fuel pumps, the plunger is mechanically driven, and the process of injection and injection occurs simultaneously. The injection pump section supplies the required portion of the fuel mixture to all cylinders. The necessary pressure for injection and spraying is provided by a plunger pump.In the article presented by us, we will talk in more detail about this part of the manufacturer bosch, namely, we will consider such fairly common questions:
- Where to buy injection pump and accessories?
- What is a high pressure fuel pump?
- High pressure fuel pump device;
- What is the principle of operation of the Bosch injection pump?
- Bosh in-line injection pump device;
- How to properly disassemble the Bosch injection pump?
- Bosch plunger injection pump, its device and principle of operation;
- The principle of operation of the moment of injection of the high-pressure fuel pump of the company bosch;
- Bosch injection pump installation.
So, what is the principle of operation of the injection pump? The principle of operation of the Bosch injection pump, as well as the injection time, is no different from injection pumps from other manufacturers. The main element of the Bosch injection pump is a plunger pump. The fuel pump is designed to transfer a certain portion of fuel to the engine under high pressure and avoid two extremes, such as its deficiency and excess. Therefore, breakdowns that the car owner may not pay attention to or consider them insignificant can lead to the repair of a diesel engine or its complete replacement. The main criterion by which fuel pumps are divided into types is their design. So, based on the design of fuel pumps, they are divided into the following types:
- Distribution. They are equipped with nozzles and mechanical type regulators. Modern engines are equipped with in-line injection pumps (high pressure fuel pump) with electrical control. The presented type of pumps is considered the simplest, although it differs in significant dimensions and weight characteristics;
- Inline. It is equipped with one or more plunger pairs that pump the fuel mixture and distribute it over the cylinders. This type is much smaller and lighter than in-line ones. Although this advantage leads to some disadvantages, for example, the rapid wear of parts of the distribution type;
- Trunk. As a rule, they are used in the common rail injection system. Their main and only function is to pump the fuel mixture into the rail. The number of plungers ranges from one to three. This type of injection pump also uses parts such as a washer or camshaft that actuate the plungers.
A fairly obvious fact is that without the use of high pressure fuel pumps, it would be difficult to supply fuel to the engine. That is why it is quite logical that so much attention is paid to this type of fuel pump by motorists who are engaged in the repair of engines of this type.
The most common causes of failures are:
- The use of low-quality fuel, and this can lead to damage to the fuel pump. Diesel fuel is used for high pressure fuel pumps as a lubricant for moving parts and plunger pairs. If the fuel is contaminated with various impurities, the lubricating property is lost, and this can lead to a malfunction of the fuel pump in the future;
- Deterioration of the fuel pump;
- Problems with electrical equipment. Improper functioning of the vehicle's electronics can affect the normal functioning of other systems.
In order to qualitatively repair a high-pressure fuel pump, you need to know how disassembly and installation are carried out, when the restoration of the high-pressure fuel pump is impossible and what parts need to be replaced to troubleshoot. So, how is the disassembly and installation of the high pressure fuel pump carried out correctly?
- Unscrew 4 screws on the end side;
- Release the injection advance valve cable from under the pressure plate;
- Unscrew the 3 screws that secure the pressure plates of the dosing valve;
- Remove the dosing valve;
- Unscrew the 2 screws that secure the injection advance angle valve;
- Remove the injection advance valve;
- Unscrew the screws securing the so-called brains;
- Move the brains and unscrew the screws that secure the fuel pump roller position sensor;
- Remove the brains along with the liver;
- Set the pulley on the mark and remember the location of the roller along with the dosing needle;
- With the help of two flat screwdrivers, laying them in pairs-diametrically behind the ears, carefully the camera along with the fittings;
- Take out the bearing and plates;
- Unscrew the cover of the advance machine;
- Take out the injection advance machine;
- Install the advance piston so that the cam washer can be removed from it during rotation;
- Remove the injection advance piston;
- The fuel pump has been disassembled and reassembled in reverse order.
Website for cars and repairs.
There is no more complex and responsible unit in a diesel engine than the fuel injection system, more precisely, its main part - the high pressure fuel pump. Many mating parts, highly loaded units, the presence of a precision dosing system make the repair of high-pressure fuel pumps a difficult task even in service conditions. It is all the more difficult to repair the high pressure fuel pump of a diesel engine with your own hands.
In automotive technology, almost everything is repaired, except, perhaps, individual oil seals and cuffs, the repair of which is impossible without special materials. The complexity of setting up, diagnosing and repairing high-pressure fuel pumps requires the employee to have skills in working with precision mechanics.
It is simply impossible to set up according to factory parameters, without a special diagnostic stand for repairing high-pressure fuel pumps. During the diagnostic study of the injection pump, it is necessary to check:
- cyclic supply of the high-pressure pump, in the entire range of revolutions of the high-pressure fuel pump shaft, at start-up, and after cutting off the fuel supply;
- stability of the developed pressure;
- Uniform supply of injected high pressure fuel pump to the fuel injector.
Even having access to a diagnostic stand, and having studied the issue of repairing a high-pressure fuel pump using numerous videos, it is very difficult to qualitatively check and evaluate its work.
In heavy diesel engines, plunger, in-line injection pumps are used. Such devices are more difficult to maintain and repair, since they require special equipment for disassembling it, so we will not consider such high-pressure fuel pumps and their repair.
In a passenger diesel engine, a distribution-type injection pump is almost always used. Unlike in-line, in a distribution pump, the force on the plunger is transmitted using a profiled cam. The design of the injection pump turned out to be more compact, but it is hardly easier to expect to repair it on the knee.
The Bosh VP44 injection pump is considered the most famous and affordable. Often, the need to repair the insides of the pump arises when:
Therefore, we will limit ourselves to the issue of repairing high-pressure fuel pumps with our own hands by replacing seals and eliminating scuffing of the working surfaces of parts.
Before disassembling the injection pump drive shaft seal, try to move it in the radial direction. If play is felt by hand, the cause of fuel leakage may be the wear of the working surface of the shaft or the bearing needs to be repaired.
A large number of split planes and mating surfaces of parts required the use of a large number of seals and seals. As a rule, they are made of high-quality material and serve for a long time until they are damaged during repair or maintenance. In this case, do-it-yourself Bosch injection pump repairs use standard repair kits.
It is enough to simply replace the seal on the shaft position sensor and on the injection advance control during repair. For a better fit on new rings and rubber bands, you can drop a couple of drops of spindle or engine oil.
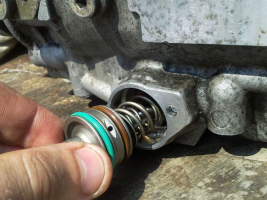


For preventive repair of the Bosch injection pump with your own hands, you will need to disassemble the pump in approximately the following order:
- remove the metering valve from the end part of the injection pump. To do this, unscrew the four screws of the pressure plate, carefully release the injection advance valve cable. After removing the three screws securing the metering valve, you can carefully remove it from the socket;
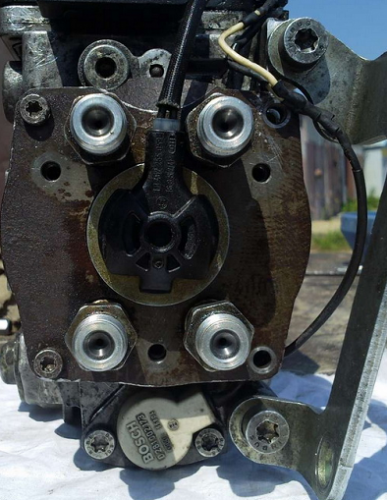
- by unscrewing the mount on the top cover, you can remove the control board and gain access to the electronics;
- set the position of the shaft, as shown in the photo, remove the camera and get access to the insides of the injection pump;


- after dismantling the bearing with the help of a special puller, we get the opportunity to study the potential culprit for the poor performance of the injection pump - the piston of the injection advance unit. Often there is surface wear and tearing on the edges on the part. You can try to repair the surface by polishing, replacing the entire part is much more expensive.


After repair, the assembly is carried out in the reverse order with washing the parts with diesel fuel.
Often, in addition to scuffing, there is another reason on the surface of the pistons why the injection pump does not develop the necessary pressure. This cause may be debris, films or paraffin deposits deposited on the filter screen inside the pump. There is a mesh on the side of the inlet pipe. Flushing the channels is troublesome and inefficient, it is easier to remove the mesh and blow it with compressed air.
Broken pieces of debris can jam the plunger piston or even cause the pump drive shaft to break or break. Therefore, cleaning should be carried out very carefully to avoid contamination of the internal cavities of the pump.
Among the many reasons for the failure of the electronic "liver" of the high-pressure fuel pump, the breakage or burnout of the contacts of the control board and the failure of power transistors are more common than others. If the knowledge and skills of working with electronic devices allow you to “diagnose” the performance of transistors and repair, you should try to identify the cause and replace the culprit with a serviceable element.
Often the reason for the failure of the injection pump metering valve is not the valve itself, but the control electronics. More precisely, a power transistor responsible for supplying a control pulse to the valve.
To check the condition of the “culprit”, you need to carefully open the black cover, tightly seated on the rubber seal with screws. It should be removed carefully so as not to damage the seal itself.


The reason for the failure of not only the transistor, but the entire board could be air that got into the cavity due to poor performance of the drainage system or a check valve. Often they try to eliminate airing by spinning the starter, hoping to pump diesel fuel into the high-pressure fuel pump in this way. At this moment, the transistor is open and loaded to the maximum, which leads to intense heating. In an air environment with poor heat dissipation, it will inevitably burn out. In some German cars, there is protection that prevents an attempt to start the engine in the absence of fuel in the line. To do this, use the fuel sensor in the tank.
The failure of the transistor can be established by a "dialing" tester or by appearance. The best option for repairing such a malfunction would be to replace the entire control board. Perhaps this is more expensive than soldering, but it will give guaranteed quality and stable operation of the high-pressure fuel pump after repair. As a last resort, give the board and transistor for soldering to specialists - electronics engineers.
When installing and reassembling after repair, check the tightness of all fasteners.
| Video (click to play). |
If during the revision process you did not make rash and unreasonable replacements of parts, the assembled pump should work with approximately the same parameters as before. As a standard, for testing and adjusting the injection pump after a major overhaul, use the Bosch EPS-815 stand.


