In detail: do-it-yourself repair of a touch screen on a tablet from a real wizard for the site my.housecope.com.
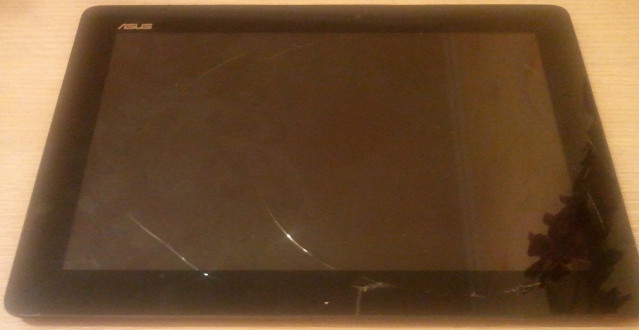
Recently, one trouble happened to me, accidentally crushed the touchscreen (touchscreen) on my ASUS TF300T tablet (the tablet was lying on the bed and I pressed it with my knee, the cover did not save me from such pressure).
As a result, the tablet works, but the touch sensor is buggy to the point of impossible. Repair needed.
I turned to the service center - they announced the amount of 5000 rubles. for repairs and an indefinite period of repair (1 month minimum, but maybe 2-3). Neither the amount nor the terms suited me, so I decided to repair it myself.
On the Internet, I read that there are several options (revisions) of the touchscreen for this tablet. The touchscreen revision can be recognized by partially disassembling the tablet.
Total revisions 5: G01, G02, G03, Only white Label, 5158N FPC-1 06WW (NEW).
1) Preliminary analysis of the tablet.
He took off the back cover (you can see how to remove the cover in the video clip that will be below).
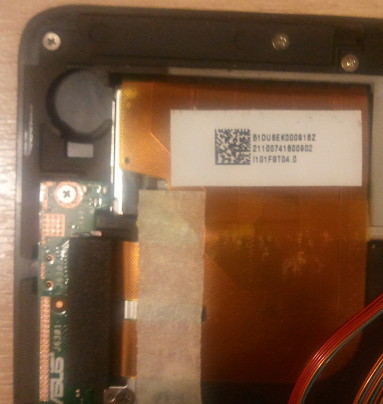
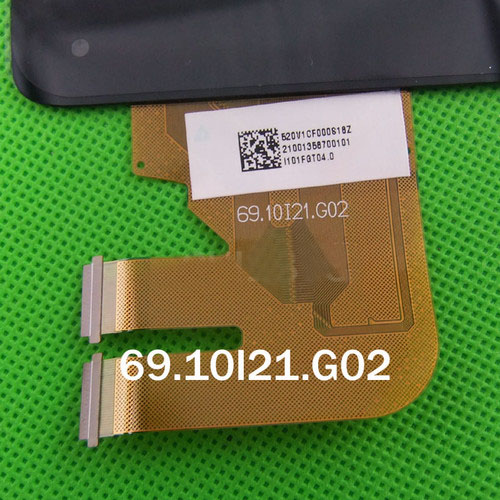
We look at the revision on the touchscreen cable
It turned out that the revision is Only white Label, there is very little information about this revision on the Internet, perhaps that's why I decided to write about my repair.
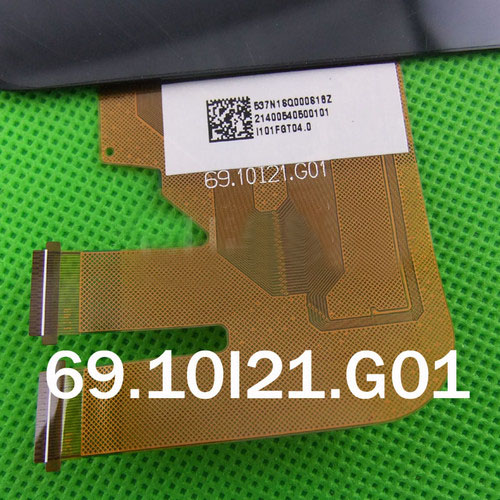
Examples of other revisions:
2) Ordering a touchscreen
Ideally, you need to order a touchscreen with the same revision as yours, but I didn't find that, so I ordered what it was.
I ordered it on the website> for 2145 rubles + 300 rubles. for delivery through the Russian Post in the first class.
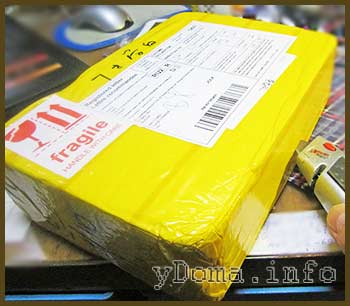
I paid for the order with a bank card, after 6 days I received the parcel in the mail. The box was large and very light.
They sent me a touchscreen with revision G01.
When parsing, I thought several times that I shouldn't have started this venture, but there was no turning back.
I'll add the following on my own:
The touchscreen is glued with something like double-sided tape to a plastic frame, the display itself is glued in the same way, but to the touchscreen glass itself.
Before separating the display from the touchscreen, heat up the touchscreen (I used an industrial hair dryer, but you can also use a simple hairdryer, or heat it up in the sun, etc.). Begin to peel off the display gently, do not damage the display. Do not feel sorry for the touchscreen (it is already broken) and do not feel sorry for the sticky substance with which the elements are glued.
Next, you need to separate the plastic frame from the touch glass, also heat it up and do not feel sorry for the glass itself (as a result, almost everything broke for me), only the plastic frame is important here.
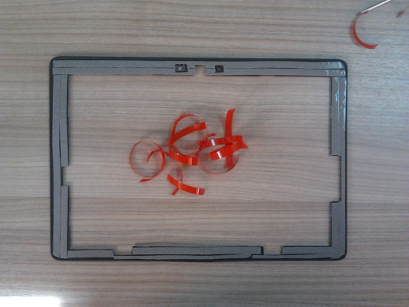
I removed all the adhesive from the plastic frame and display.
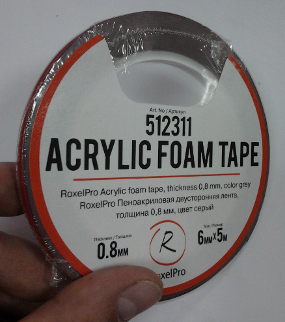
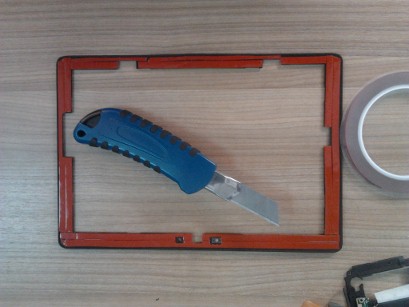
I bought double-sided tape "Foam-acrylic double-sided tape" 0.8 mm thick, 6 mm wide. (0.8 mm turned out to be thick, it is better to buy two times thinner than 0.4 mm)
| Video (click to play). |
I put this tape on the frame
Removed the red film
And neatly glued the touch glass. Be careful not to stick upside down or stand sides.
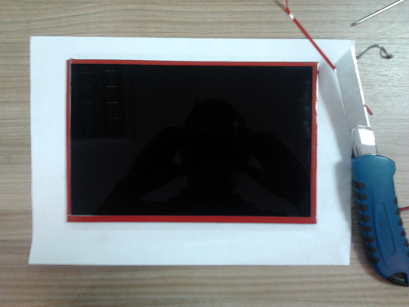
Pasted scotch tape on the display
I removed the red film and glued the display to the touch glass, also be careful not to confuse anything.
After that, you can assemble the tablet as shown in the video. I lost 1 bolt, but it seems not scary.
Turned on the tablet - the touchscreen does not work. Doesn't react at all.
The difference in revisions is to blame for this. If there was such a revision, then I think everything worked right away.
Let's start setting up the tablet.
I will warn you right away that my tablet was rooted before I broke the glass, so the setup went very easily and quickly.
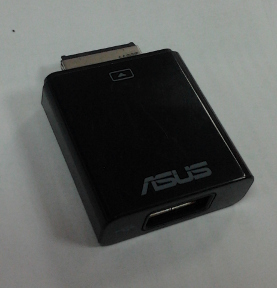
I also had a USB-OTG adapter, which also simplified the task (or use a docking station if you have one).
Hello everyone. Today we will consider replacing a broken touchscreen on a 10.1 inch tablet with our own hands.In fact, there is nothing complicated in this, and all that is required from you is accuracy, attentiveness and a few tools.
Before buying a new touchscreen, we need to find out the model of the original sensor that was installed on the tablet. Often, the exact model is written on the touchscreen connection cable, next to the connector. To get to this loop, the tablet must be disassembled.
Each tablet is disassembled differently, so before the disassembly procedure, you must inspect the tablet case for screws, and if there are any, they must be unscrewed. In my case, the tablet cover is held only by snaps. For disassembly, I took a plastic card, inserted it into the gap between the touchscreen frame and the back cover, after which I began to snap the latches one by one. The lid came off easily.
After disassembling, you can safely get to the motherboard.
Motherboard. 1. - display connector.
2. - Touchscreen connector
How do you know which train is from what? Everything is very simple. We recognize it by the same inscriptions on the trains. When I typed the marking of one loop into the search engine, I got displays in the results, when I drove in another marking - touchscreens.
Marking my touchscreen XC-PG1010-031-A0 FPC
I buy touchscreens and other spare parts on Aliexpress. In this case, I use the cashback, which I talked about in this article. If the client is in a hurry, I try to find it from local sellers.
Before installing a new touchscreen, it is imperative to check its serviceability. A prerequisite for a guarantee for a touchscreen is the presence of all factory stickers on it.
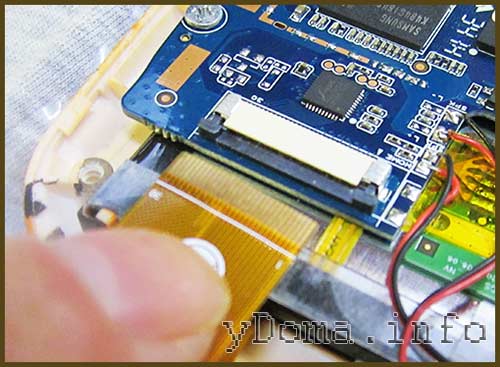
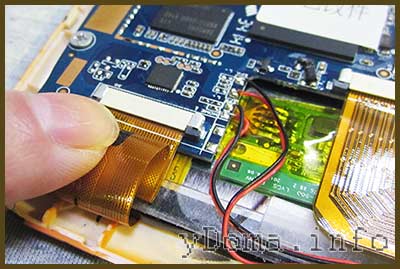
To check, I connected a new touchscreen with a canopy instead of the old one. To do this, I clicked the clip on the connector, pulled out the old cable, and connected a new one.
Since the cable is short, I had to set the touchscreen in such a way that I could see the display and move my finger across the touchscreen, checking its performance. Be very careful not to damage the ribbon cable.
Thus, I set up a touchscreen to check the functionality
The new touchscreen responds well to touch, so you can install.
Before any manipulations with the tablet, it must be de-energized, namely, the battery must be unsoldered.
Battery contacts. Signed as BAT - and BAT +
When unsoldering the battery, you must be very careful not to accidentally short-circuit the leads between themselves, and not to cause a short circuit.
Further, the contacts must be isolated and secured in such a way that they do not interfere with working with the tablet.
Isolating Tablet Leads
I figured out the batteries, now you can start removing the touchscreen.
It just so happened that first of all, in the gap between the touchscreen and the frame, along the perimeter of the tablet, I drip a drop of gasoline from a galosh, but since I ran out of it, I used alcohol instead. This procedure helps to soften the glue and makes it easier to peel off the touchscreen.
I started pouring alcohol into the gap between the frame and the touchscreen
After that, I wait about 10 minutes for the alcohol to soften the glue.
After this time, I start to peel off the touchscreen. To do this, we warm up the touchscreen with a soldering hairdryer (you can also use a regular one for hair). I pry the corner of the touchscreen with something thin, usually for these purposes I have a thin screwdriver, after which I insert a plastic card into the gap between the touchscreen and the frame.
The card must not be inserted very deeply to avoid damaging or scratching the display. I warm up the place where the card is, and slowly lead it down the frame, warming up its current location with a hairdryer. Thus, the display is peeled off.
The process of peeling off the touchscreen. The hair dryer is set to a temperature of about 110 degrees.
The card must not be inserted very deeply to avoid damaging or scratching the display. I warm up the place where the card is, and slowly lead it down the frame, peeling off the display.
Tablet without touchscreen. The frame contains remnants of glue and glass from a broken touchscreen
Now it remains to clean the remnants of glue from the frame, glass from the old sensor and blow off the dust on the display with a medical pear, and prepare a new touchscreen for installation.
Since I already have a new touchscreen with double-sided tape, installing it in place will be a little easier than usual.
nevertheless, knowing the quality of such an adhesive tape, I will apply a little glue to the frame to be sure of the exact result.
New task screen. Double-sided tape is glued along the frame
A little about the glue. For gluing touchscreens, I use E8000 glue. This glue adheres very well to touchscreens, backlight lenses and much more. I buy here and always get good quality and fast delivery.
Thanks to the metal dispenser, the adhesive can be applied in a thin layer, and exactly where it is needed.
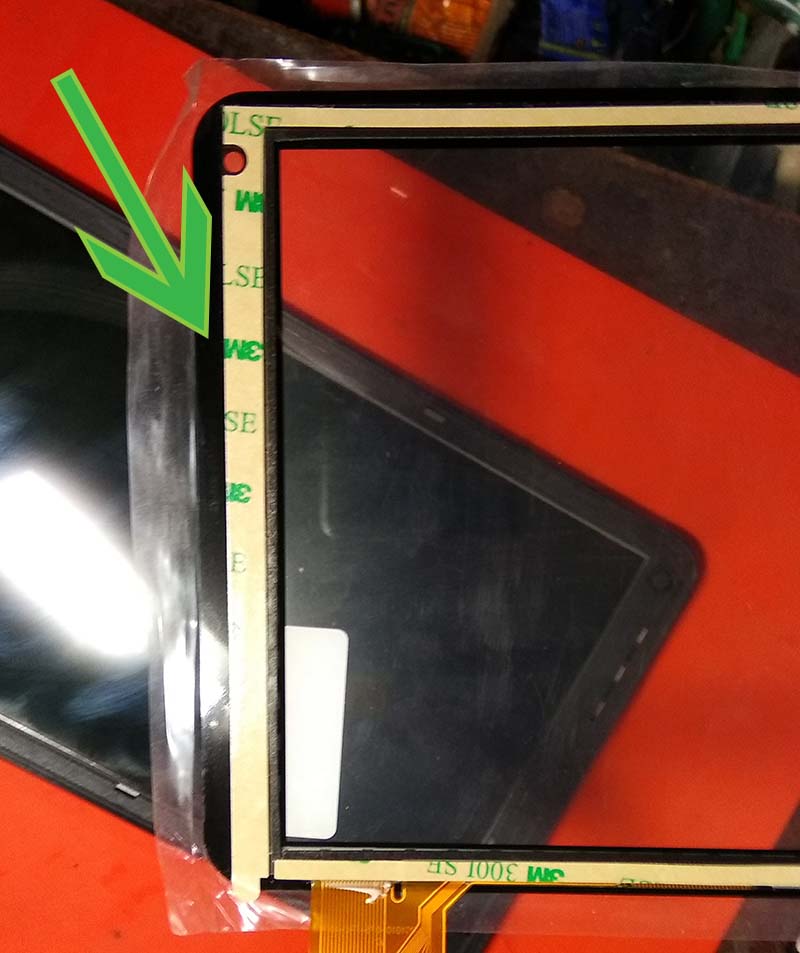
The glue was applied on the outside in a thin layer, near the double-sided tape, in a thin layer. In the photo marked with a green arrow.
Before installing, once again blew all possible dust off the display, removed the tape from the double-sided tape, and installed the display.
After installation, I installed 4 clothespins on the sides, and gave the glue to harden for 20 minutes.
Tablet with a new touchscreen.
After this period, I connected all the cables, soldered the battery, and checked the performance.
This is how you can change the touchscreen of the tablet with your own hands. Thank you all for watching and good luck with the repairs.
The touchscreen of the tablet is damaged most often due to careless and neglectful handling of the device. If your gadget cracked screen, do not despair, panic and give up.
In order to fix the tablet, you just need to take it to the nearest service center that specializes in the repair of such devices. Experienced staff will replace the damaged part in a short time.
However, the budget does not always allow you to use the services of specialists or it is difficult to find a workshop near your home. Then you can repair the tablet sensor yourself. In this case, a number of simple but mandatory rules should be observed.
It is important to remember that during repairs it is strictly forbidden to use metal aids that can cause mechanical damage to the body.
In order to change the sensor, the touchscreen on the tablet, you need to prepare the tools necessary for minor repairs.
You can buy tools for disassembling phones and tablets at specialty or hardware stores. Or you can order it together with a touchscreen on our Terabyte Market website.
Required tools:
- stationery knife
- any flat plastic object: a guitar pick, a plastic card, a drawing template
- regular hair dryer
- tweezers
- screwdriver (most often Phillips)
- soft lint-free cloth
We disassemble the tablet and change the touchscreen
- First, use a screwdriver to unscrew the bolts (if any) located in the end parts of the gadget.
- To detach the cover from the rest of the case, use a plastic card or similar plastic object. We pry the case with them a little, lead with plastic along the perimeter.
- The cover of the device and the case are connected to each other using a ribbon cable. It must not be pulled out, otherwise it will disrupt the entire operation of the device. The ribbon cable is pulled out after you open the connector:
find a latch on the side of the cable and gently pry it off;
Let's find out the touchscreen model on the tablet:
- We write it down on a separate piece of paper number of pins and markings on the cable.
- Finding the right touch glass model for your device
How to choose and where to buy a touchscreen, touch glass, sensor for a tablet?
You can choose and buy a touchscreen, touchscreen, glass on our website Terabyte Market in the category TABLET SCREENS
You have disassembled the tablet, now you should select the glass for your gadget. It is not always possible to find a touchscreen for the tablet display in the shops of the city. Therefore, the best option is to search in an online store.This way of buying is also much more convenient: there is no need to go somewhere to buy, the purchased goods will be delivered home by courier.
In the browser, through a search engine, we are looking for a suitable online store and communicate with a sales consultant or manager. The staff will help you choose a touchscreen for a specific gadget model. After purchase, the sensor should be checked for damage.
Found and bought a tablet task screen?
You can continue to repair and replace the touch screen with your own hands.
We disassemble the tablet screen completely
1) Remove the cracked screen, for this we warm up the case with a hair dryer.
2) Now we detach the screen from the case. To do this, we insert a clerical knife into the double-sided tape or take our old credit card, moving carefully along the perimeter of the device, peel off the glass.
3) The touchscreen has been successfully removed, now we get rid of the small remaining particles of adhesive tape with a clerical knife or plastic tweezers.
4) Remove the remaining small glass crumbs from the screen with a napkin or soft lint-free cloth.
IMPORTANT . : Before peeling off the protective films from the new touchscreen, check it for operability by connecting the cable of the new touchscreen instead of the old one! Turn on your tablet and check how the new touchscreen works. If it does not work, then feel free to change the touchscreen in the purchased store. If you remove films, stickers, then they will not change it!
5) Prepare the purchased sensor for installation: remove protective films and paper stickers.
If you bought a touchscreen, touch glass without self-adhesive tape, then we recommend this product to you:
Adhesive tape 3M 300LSE double-sided transparent original for repairing tablets and phones.
6) Trying on the touch screen for the gadget, placing the touch screen on the frame.
7) Carefully iron the frame with the installed sensor with your fingers.
We assemble and set up a refurbished tablet with our own hands.
- We assemble the device in the reverse order.
- To prevent the appearance of scratches on the screen of the gadget, we will glue a protective film on it. Some touchscreens are sold with a factory film.
How much will it cost to replace a touchscreen on a tablet?
Parts for new models are much more expensive than for old gadgets. The average price of a touchscreen is 800 - 2,000 rubles. In addition, many large manufacturers sell sensors in a set with a matrix, called a module (touchscreen + matrix). The cost of a matrix for a tablet varies from 1,500 rubles. Therefore, the price of such a kit is from 2,500 (touchscreen price + matrix price). In service centers, for replacing a matrix or a touchscreen, they take from 500 rubles to 2,000, depending on the complexity of the work.
Useful tips and tricks for tablet owners
- The touch screen of the tablet consists of two parts: the touchscreen and the matrix. In most cases, the screen breaks, but the matrix remains intact. Therefore, even if the glass is cracked and the sensor is working, you should replace the screen as soon as possible. Do not delay repairing your gadget. Otherwise, you will have to spend not on one part, but on two. This, of course, will cost more.
- All repair work with the gadget must be carried out very carefully so as not to permanently damage the device.
- Bonding the sensor takes a lot of time and effort. Before you start gluing the screen, you should make sure that it is working properly.
How can I prevent damage to my tablet's touchscreen?
- Protect the gadget from a sharp temperature drop at which the glass can crack.
- Purchase and stick a special protective film on the screen.
- Do not leave the device on a sofa or chair, as you may accidentally sit on it.
- Buy a hard case for your gadget.
These simple guidelines will help you protect your tablet, and especially its touchscreen, from damage.At the same time, the gadget will serve you much longer.
In contrast to stationary computers, the functions and programs in tablets are controlled by lightly pressing the pad of your finger on the screen at the desired point. The tablet responds to touch thanks to a thin transparent glass plate superimposed on the display screen. When you press on the glass (touchscreen), depending on the type of sensors, the resistance, inductance or capacitance of the grid applied to the glass changes, and thus the tablet receives an indication of a specific action.
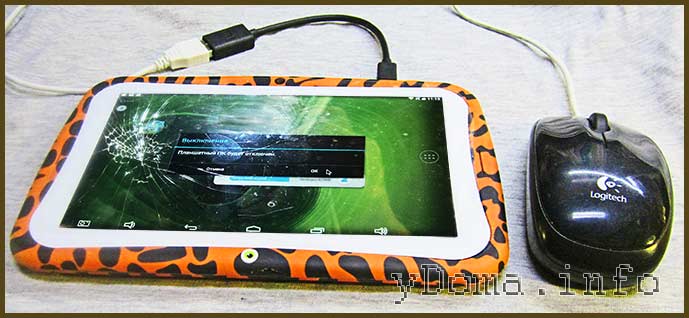
The touch glass is very thin but strong enough to break with your finger. But if the tablet is dropped on a hard surface or hit with a sharp object, the touchscreen will crack, which is what happened to the glass of the MonsterPad children's tablet shown in the photo.
The image on the screen was uniform without defects or distortion. The tablet remained operational, since when the Power button was pressed, a window with a menu to turn off the tablet appeared, but it became impossible to control its operation by touching the screen with a finger.
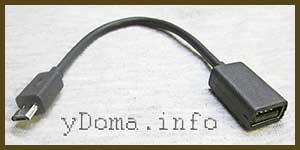
For a complete check of the tablet's functionality, and the ability to turn it off before repairing, it was necessary to connect a mouse to the Micro USB connector located on the side of the tablet. Mice usually have a USB connector. So I had to buy a USB-Micro-USB adapter.
When the mouse was connected, the tablet system automatically detected it, and the mouse cursor in the form of an arrow appeared on the screen. Diagnostics showed that the electronics of the tablet is in good working order. Therefore, to repair the tablet, it is enough to replace the touchscreen with your own hands. After diagnostics, the tablet was turned off with the mouse.
While waiting for the purchase of a touchscreen, it is necessary to keep the tablet battery in a charged state, since a deep discharge of it dramatically reduces the battery life of the tablet.
The search for a store to buy a touchscreen for a children's tablet MonsterPad at the lowest cost led me to the site of the time-tested Chinese online store AliExpress. The site featured a wide range of MonsterPad touchscreen sellers.
A seller with a lot of positive reviews and a high rating with an average price and free shipping was selected. When choosing a touchscreen, pay attention to the presence of double-sided tape on it. If the screen is without scotch tape, then replacing it will be complicated by the need to purchase such an adhesive tape, cutting and securing it.
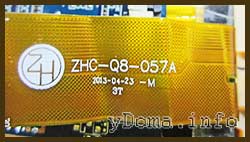
If you couldn't find the touchscreen by the name of the tablet, then you can try looking for its markings, which are usually applied to the flat cable coming from the touchscreen.
The touch glasses of many tablet models are interchangeable. The main thing when choosing to pay attention to the type of sensor and its diagonal size, expressed in inches. For example, a MonsterPad requires a 7 ”touchscreen.
The resulting parcel was a large, in comparison with the size of a touchscreen, a box of polystyrene completely wrapped with adhesive film. It is convenient to open such a package by cutting the film with a knife along the line of joining the halves of the box.
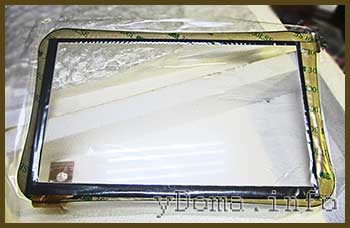
The touchscreen has been removed from the packaging and carefully examined for defects. Everything was in perfect condition. Fitting the glass on the tablet confirmed the coincidence of the sizes. To check the functionality, it remains only to disassemble the tablet and connect the touchscreen to the motherboard.
Before starting to repair the tablet, to prevent scratching and dust getting between the display and the touch glass, you need to wipe the table with a damp cloth and cover its surface with a soft, lint-free cloth. All you need from the tool is a knife and a couple of small cross-head and flat-blade screwdrivers. After preparing the workplace, you can start repairing.
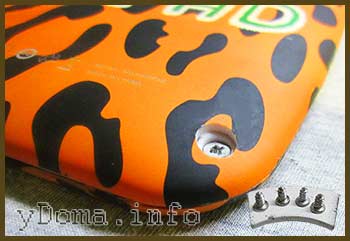
It is easy to disassemble the children's MonsterPad tablet, thanks to the screw fastening of the back cover. Using a sufficiently sharp object, remove the four cover feet, glued with a sticky mass, and unscrew the four screws with a Phillips screwdriver.
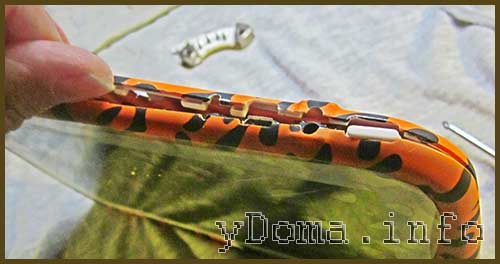
Further, even without the help of a plastic card, grabbing the halves of the case with your nails in the area of installing the tablet power button and connectors, carefully spread its halves to the sides. The buttons for turning on and adjusting the volume of the sound must be immediately removed and put aside so that they do not get lost and do not scratch the tablet screen if they fall under it.
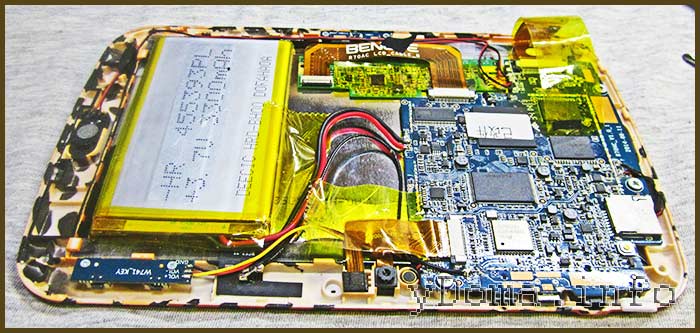
The tablet has been disassembled enough to begin replacing the touch glass. It remains only to remove the cable coming from the touchscreen from the connector. In the photo, the connector is in the far right corner.
If the tablet was disassembled to replace the battery, then its type is clearly visible in the photo. To replace the battery, you first need to unsolder the red and black wires coming from the motherboard and carefully remove it, overcoming the adhesive force of the double-sided tape.
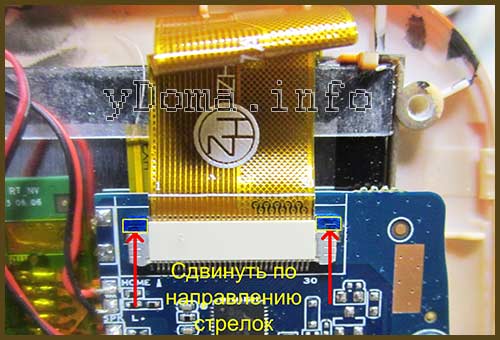
To release the touchscreen loop, you need to move the clamps with a screwdriver blade a couple of millimeters to the side indicated in the photo with red arrows. After that, the cable can be removed from the connector without effort.
After removing the back cover from the tablet, it became possible to test the new touchscreen for performance. To do this, without removing the protective film, put a new touch screen on the broken one, carefully turn the tablet over, and observing the loop numbering, insert it into the connector on the motherboard and return the latches to their place. Then turn the tablet upside down and turn it on with the power button.
After downloading the software, you need to tap on any icon or just do a little work on the tablet. If there is a reaction on the display when you touch and scroll through pages, then everything is in order and you can start replacing the broken glass. Before starting the repair, you must turn off the tablet with the power button and disconnect the new touchscreen cable from the connector.
To remove a cracked touchscreen, you need to pry it at any of the corners with the end of a knife and try to lift it.
In the MonsterPad, the glass was weakly glued, it was not even necessary to warm up the gluing place with a hairdryer. Finger force was enough to peel it off. The main thing is not to rush and perform this operation very slowly and smoothly.
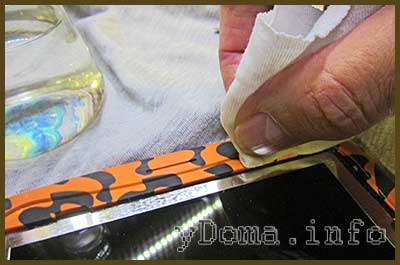
After removing the cracked touchscreen, it is necessary to degrease with a rag soaked in alcohol and remove the remnants of glue from the frame.
Fortunately, the cracked glass did not fall into pieces and did not need to be blown off small fragments with a vacuum cleaner or hair dryer. For the same reason, it is not recommended to scrape off glue residues with a tool.
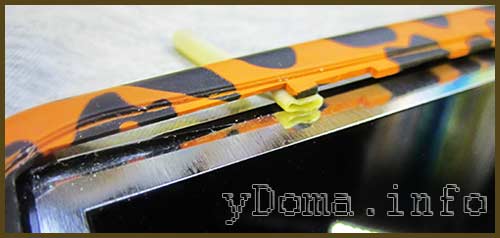
In order for the cable not to interfere with the positioning of the touchscreen when gluing, a piece of PVC tube was inserted next to its outlet, as in the photo.
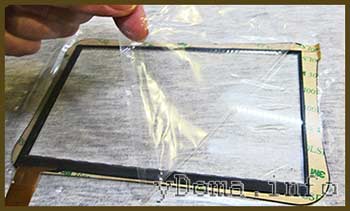
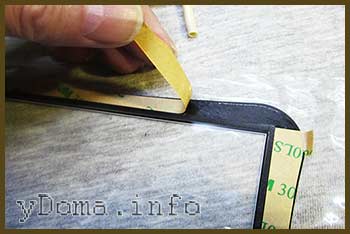
In the next step, the protective film was removed from the touchscreen from the side of the applied adhesive layer on the edges.
Next, the protective paper was removed from the sticky layer. The glass maker made the repair easy and provided space in the paper for grabbing it with your fingers without a tool.
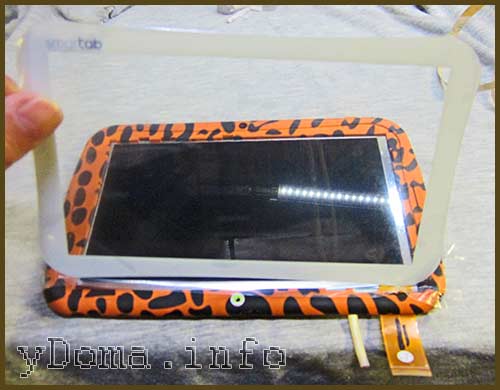
It remains to tuck the cable into the hole of the tablet frame, rest the corner of the touchscreen near the cable against the recess of the frame and slowly attach it to the frame, controlling the accuracy of laying along the opposite corner along the diagonal.
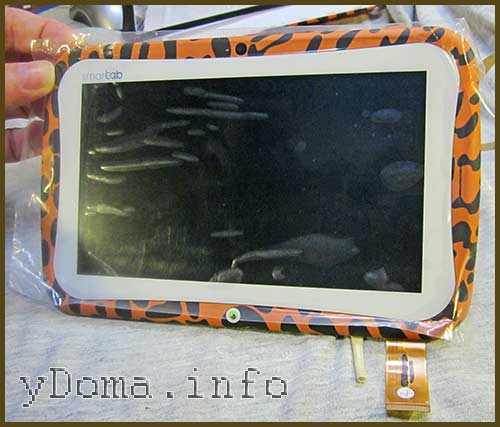
The touchscreen fell into the recess of the frame exactly, without gaps and displacement on the first try. There is no need to firmly press the glass at this stage of repair. It is advisable to do this after complete assembly and testing of tablet operation.
Next, you need to put the tablet on the table with the screen down, insert the touchscreen cable into the connector on the motherboard and fix it by sliding the latches into the connector.
The cable is long enough, which is convenient for installation.However, so that the cable does not break if it gets between the covers when they are closed, it must be folded in half and pressed a little, avoiding sharp bends.
It remains to install the pushers of the buttons for turning on the tablet, adjusting the volume of the sound, and snapping the back cover to the base of the tablet. Screw in four self-tapping screws and install the removed plugs on them.
The self-repair of the tablet was successfully completed, it began to work and look like new, and the child can play his favorite games again. Now, I suppose, he will be more careful with the tablet and other gadgets. I did not remove the protective outer film from the touch screen, let the owner of the tablet remove it himself and be the first to tap (touch) the surface of the screen.
I hope that the given step-by-step instructions will help any home craftsman to cope with the repair of a tablet, smartphone, even one who does not have experience in repairing such devices.
The cost of replacing the touch glass of the tablet with your own hands was less than 10% of the original cost of the tablet.
Today, almost everyone has tablets at home. They are bought for children as a gaming gadget, and not every adult will refuse such a toy. However, tablets are quite fragile. Their large screen is very vulnerable, and since the device is mobile, it experiences shaking and crushing of various degrees in buses, shopping centers and other places where people gather. What does not happen to them. If you forget your tablet on a couch or armchair, you run the risk of someone landing on top. The delicate microcircuits inside can be shocked if dropped to the floor or spilled on if your child accidentally tosses tea on it. In general, there are many questions, so everyone wants to know how to fix a tablet.
In fact, home repair is only possible in some cases. An ordinary user can replace the battery if it has worn out. In this case, there is only one snag: you need to know for sure that the problem is in the battery. For example, if the tablet charges as much as possible and discharges the same amount quickly, and also heats the wall in the place where the battery is located, the problem may not be in it at all, but in the circuit. Since it is quite difficult to fix the tablet on your own, you can already carry it to the workshop at this stage. Of course, a specialist will take money for diagnostics, but as a result, you will get a quick and reliable result.
And we will continue to consider various breakdowns and tell you how to fix your tablet. The second case when you can try to cope on your own is replacing the touch screen or cracked case. To do this, you only need to disassemble your tablet, which can be somewhat difficult for a simple user who has no experience with electronic devices.
Since you need to repair the tablet carefully, without harming its microcircuits, it is recommended to find a disassembly diagram for your model. Usually they are on the manufacturer's specialized sites. In addition, there are videos on the network, following which, you can easily cope with the task at hand. This may require a rounded flathead screwdriver or a plastic card. Gently slide any of these items into the gap between the case and the lid, and slide it gently along the side of the case. Now you have all his insides in front of you. Arm yourself with a Phillips screwdriver and remove a few bolts. This must be done very carefully so as not to disrupt the thread. When you reach the touchscreen, disconnect all cables and carefully remove the damaged assembly. After that, you need to assemble the device in reverse order.
There are many cases when there are no visible causes of breakdown (shock, water ingress), and the device does not show signs of life. Let's talk about how to fix a tablet if it won't turn on.There can be many reasons, these are problems with the "hardware", the network with the internal stuffing of the device, or malfunctions of the operating system. However, let's take it in order. First, remember how long ago you last charged it. When fully discharged, even if the power is connected, it may take at least 10 minutes. So wait a little and try turning it on again. If charging did not help, then carefully inspect the case for external damage. The device may have been dropped, but you do not know about it yet.
Can the tablet be repaired if the problem is an OS crash? Depends on how well you understand the software. In this case, a backlight appears first, and then a picture of an idle robot. Very often this happens if the application was terminated incorrectly, for example, there was a forced termination of system processes. As a result, the firmware suffers.
You can fix the tablet at home using a special program. It is easy to download on specialized sites, and it is called "Hard Reset". True, if there is a lot of important information on the tablet, this may be fraught with its loss. If, apart from music, there is nothing valuable there, then you can get down to business. Since you can fix a tablet at home only in certain cases, and even then, if you do everything right, look at the address of a good repair center in advance.
Turn off the device and remove the sim and micro card. Now hold down the volume up button for at least 10 seconds. Now, additionally using the power button, select setting and format system from the menu. After that select Reset and reboot the device.
This procedure will completely reset the system to factory defaults. That is, you will receive the tablet in the same form as you opened it the first time. However, the procedure may not work. In this case, you can repeat the manipulations again or think about the complete firmware of the device. This procedure is somewhat more complicated, so it would be better to consult a specialist. Programmers know that a poorly delivered operating system is fraught with many complications in work, so it's best not to risk it.
This happens, and not to say that it is very rare. Therefore, you need to know how to act in this situation. It is recommended to connect the charger and simultaneously press the volume down and power button. The volume button will access the menu system where you can select the bootloader and the powder off device section. The power button selects this option. Now turn off your tablet and unplug the charger. Finally, the charging is reconnected, and you see a growing indicator on the screen.
Then you need to look for where you can fix the tablet. Most often, the choice is the address of the service center indicated on the warranty card, even if the term has already expired. Or use the recommendations of your friends. If your tablet won't turn on or receive a charge, the problem might be with the charger or power supply. In rare cases, the power button itself may be damaged. Mechanical damage is eliminated by disassembling the device and one of the following actions: replacing the button, restoring the path, eliminating the broken contacts.
This is one of the most common troubles. A large display does not tolerate neglect, and therefore service centers are always overflowing with tablets that require replacement. Speaking about how to fix a broken tablet, I would like to say that it is not recommended to do this on your own. You need to find a suitable screen, which will cost you more than a service center. It is very likely that the ordered model will not suit you, and it will be revealed only at the time of installation. Finally, the procedure itself is quite complicated and the likelihood of harming your device is very high.For example, peeling off the glass will damage the matrix, and the cost of repairs will increase in accordance with the saying "the cheapskate pays twice."
It may vary depending on the model. It's almost impossible to open original Apple tablets yourself. The fact is that their screen is held on special latches, which are very difficult to open without special devices. But even if you are not faced with such a problem, the main thing is yet to come. Separating the touchscreen and display is not easy. They are connected by durable optical glue, which needs to be heated up to 250 degrees. How to achieve this at home is difficult even to imagine.
However, the difficulties do not end there. After removing the protective glass, a new one is installed in its place, on the same base. No, you do not need to heat it, however, to fix the result, the tablet is placed under the press for an hour. The error can be costly. A badly glued new touchscreen will peel off, and too tight will lead to new damage. Therefore, it is much wiser not to try to do everything yourself and turn to professionals who have the necessary equipment and experience.
We have not described even half of the cases when your tablet may need help. Not everything, even from this list, can be corrected by yourself. Therefore, conduct an initial inspection, check the battery and charging, reboot the system, and if all else fails, contact an experienced technician. In most cases, it will be much faster, more efficient and cheaper.
How to reanimate a touchscreen in 1 minute! In this video, I showed how you can restore in just 1 minute.
The video is a demolition of farts of schoolchildren. Objectively speaking, the only solution is to change the sensor.
Like))) you are free, I am pleased) WE CLEAR THE DEAD ZONES OF THE TOUCH SCREEN visit the channel about.
if your touch screen is cracked and it does not respond to touches, then in this video I will teach you how to restore.
The touchscreen does not work! Piezo will help! Include subtitlings, there are a few explanations. YOU DO EVERYTHING AT YOUR OWN RISK. And nobody.
A small area of the phone's touchscreen stopped responding to touch. I looked on the Internet.
Cashback service: Browser extension: Group in VK:
Donate to the repairman: Tools and consumables in the video (expand the description): - tweezers: 1.
How to fix a touchscreen on a mobile phone with your own hands will not waste money and a lot of time.
What to do if the smartphone sensor is broken. I found a way out. and I have been using it for 2 weeks already. Sony Xperia Z Ultra _ The most.
Why the screen sensor stops working and how to fix it - says the master of the China service center.
In this video, I am testing the myth that I attach the back of the foil to the sensor and rub it over it with a rag.
An original application of toothpaste that you did not expect from her! +++ Subscription to CSO FACTS:
The touchscreen (touch glass) crashed what to do if there is no money. ZikValera When the touchscreen or the screen itself crashed.
I think it will be useful to everyone, I already have) ✓ Screwdriver with bearing https: //ali.pu.
Welcome to my channel here a lot of interesting things on cell phones and homemade products, subscribe to updates.
Various troubles can happen with tablet PCs: the camera does not work, Wi-Fi is turned off, the device freezes.
| Video (click to play). |
A month and a half after buying a radio tape recorder on Ali Express, the sensor stopped working.

