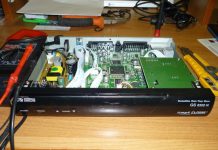
In detail: DIY repair of a sensor mixer from a real master for the site my.housecope.com.
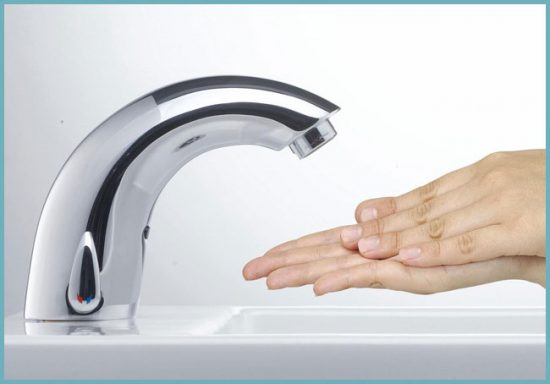
Automatic faucets (taps) are often called faucets, to which, to supply water, it is enough to bring your hand (or substitute your body).
They are also called sensorybut this is not entirely accurate. A sensor is a sensor in general, and it would be more accurate to call them optoelectronic (although this is not entirely true).
Another variation: infrared mixers, since they have infrared sensor (as, for example, on a TV), where the signal from the emitter is received (as from the remote control). Such a scheme is not often used, usually for urinals: one emitter and several taps with sensors are installed.
More often used in automatic taps induction sensor.
It creates an induction field that changes when hands (or the whole body) hit it.
The sensor records the field change and transmits a signal to the electronic control unit, which sets the operation algorithm, for example: open the solenoid valve when the field changes and close when it normalizes.
The water flow is opened by a solenoid valve. Consider its device:
Schematic diagram of a large valve, options may be different
As you can see from the figure, there is a membrane at the end of the core that blocks the flow of water. As soon as the core with the membrane rises, water flows out.
How does the core rise?
An electrical voltage is applied to the coil of the electromagnet, it is triggered and draws the metal core into the solenoid. If the voltage is disconnected, the core with the membrane will drop back and the water will turn off. Thus, in the event of a breakdown or when the batteries are discharged, the valve closes automatically.
| Video (click to play). |
Cranes, as a rule, are powered by conventional batteries or from the network through a transformer (or a combination of both). Since the consumption of electricity is low, it is easier to use batteries - they are safer. Usually, even in a busy public place, one "bookmark" is enough for several months, unless, of course, you buy completely bad batteries.
Since hot and cold water is mixed up to the solenoid valve, a check valve is installed at the inlet to prevent backflow of water.
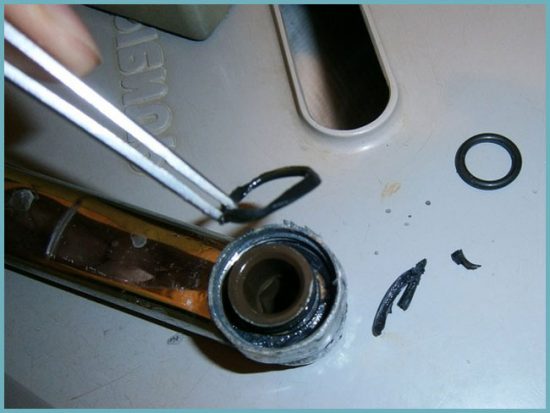
Most often, the sensor faucets are clogged with dirt: particles fall on the rubber membrane, and the water does not block off. In this case, it is enough to disassemble and clean the membrane, as well as install / check a coarse filter (sump).
If the mixer begins to behave strangely, it is worth checking if the sensor is stained.
Under certain conditions, automatic taps can "glitch": for example, if a sink is similar in shape to a lens and with a certain location of light sources, sinks and faucets, the reflected beam hits the sensor directly, then it will not work correctly. To correct the situation, it is necessary to slightly change the relative position of the faucet, sink and light bulbs. In "Varion" mixers the set includes a chrome-plated brass O-ring with a thickness of about 5 mm - just put it under the tap during installation, and the "glitch" disappears.
The rarest category of automatic faucets. Instead of an induction sensor, there is a piezoelectric element. Looks like a smooth chrome finish.
By pressing on the body, a person displaces the crystals underneath; from their friction against each other, a weak electrical signal arises, as when rubbing amber against wool. Further - everything is like in an induction tap.Such products are used wherever increased vandal resistance is required: in prisons, psychiatric hospitals, in aggressive environments.
Better to set it, as is the case with any decent mixer.
In what cases is a sensor faucet not suitable?
In ordinary at home touch-sensitive faucets are not so practical: you have to wait a split second for the water to turn on, and sometimes it is even required that the water does not turn off when you remove your hands, which directly contradicts the principle of operation of such a mixer.
What is the flow rate of the sensor mixer?
1. Touch mixer for sinks 9340890 (monoblock) and 9346890 (with swivel U-shaped spout):
Consumption - 6 l / min at a pressure of 3 atm.
2. Sensory taps for urinal:
The water supply cycle begins 2 seconds after a person enters the sensor response zone, the water supply cycle continues for 4 seconds, during which time approximately 0.5 liter... After a person leaves the sensor triggering zone, after 1 second, a water supply cycle begins, which lasts 7 seconds, during which time approximately 0.8 liter... A sanitary flush of water takes place every 24 hours.
The water supply cycle begins 3 seconds after a person enters the sensor response zone (50 cm), the water supply continues for 3 seconds, during which time approximately 0.5 liter... After a person leaves the sensor response zone, after 3 seconds, a water supply cycle begins, which lasts 3 seconds, during which time approximately 0.5 liter... There is a sanitary flush every 24 hours.
The water supply cycle begins 5 seconds after the person leaves the sensor triggering zone, the water supply continues for 15 seconds, during which time approximately 2.25 liters... There is a sanitary flush every 24 hours.
The usual 4 AA cells of 1.5 Volt will do
Apparently, the main reason for the mixer breakdown is the dubious quality of the product itself. The market is overflowing with low-quality Chinese-made sanitary ware, such a product by itself cannot last long. When shopping for a new faucet, the drive to save money can be frustrating in the future. It is better to spend money right away and buy high-quality plumbing, and not change the mixer or its components every six months in the event of an emergency.
There are two-valve, contactless and single-lever mixers. The most common malfunctions of mixers:
- weak stream of water;
- tap water leaks;
- water enters the gander and shower at the same time or the switch does not work at all;
- the switch has broken;
- the push-button mechanism does not work.
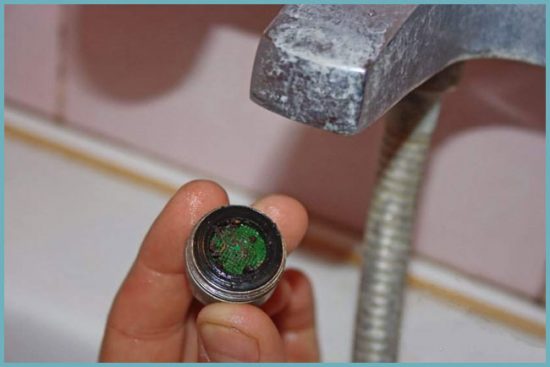
This is perhaps the most harmless and easily removable flaw in the bathroom faucet. The decrease in the volume of the stream of water, most likely, was provoked by a clogged aerator - a special nozzle at the end of the spout. The aerator saturates the flow of water with oxygen and contributes to its less splashing in different directions. Made of metal or plastic.
To return the stream of water to its former power, it is necessary to unscrew the aerator and clean it from the blockage: rust, pieces of small debris and salt deposits. After the cleaning procedure, the aerator is screwed into place. It is better to replace the rusty mesh of the aerator with a new one. Plaque can be easily removed with special chemicals.
A sign of a faulty shower switch is the impossibility or tightness of switching the mechanism, as well as if, in any position of the switch, water continues to flow simultaneously from the gander and the shower.The repair of the switch mechanism will depend on the switch type:
- ball;
- box-type;
- eccentric;
- cartridge;
- a block separate from the shower.
Ball mechanisms are the most reliable, but they cannot be repaired, so if a breakdown occurs, you will have to replace the entire mixer. All other switches are repaired as follows:
-
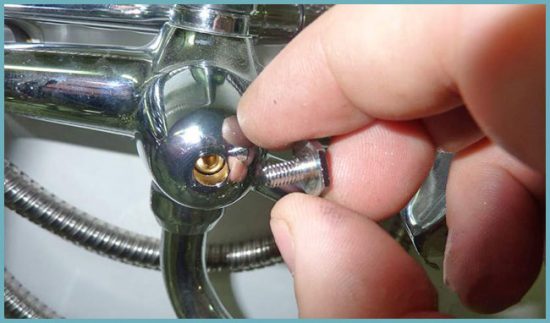
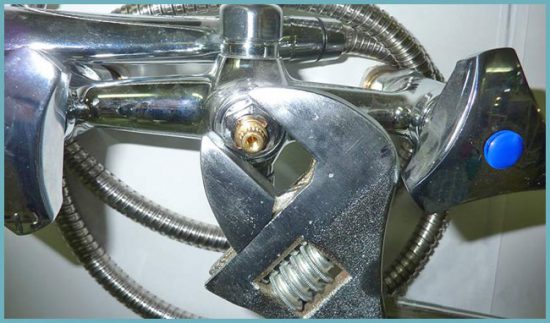
Remove the plug on the mixer switch knob. It can be easily removed by picking it up with a fingernail or a stationery knife. We unscrew the fastening screw. On many models, the plug can be a bolt.
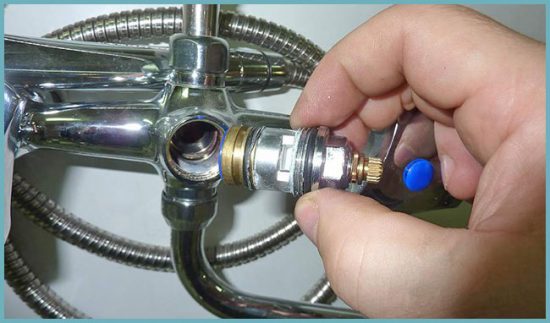
We check the removed cartridge for operability. We replace the faulty mechanism with a new one and assemble it in reverse order.
The switch in the form of a separate block changes completely:
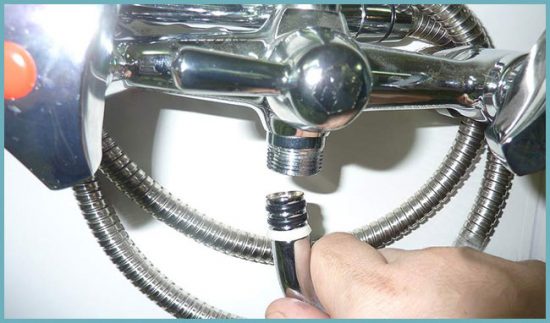
- unscrew the shower hose;
- unscrew the nut connecting the switching unit with the mixer;
- we remove the spare part together with the gander;
- turn off the spout;
- we install a new switching mechanism.
Advice. If, after removing the mixer switch, water seeps out from under the nut, then, most likely, the cartridge is in order, the nut is loose, which must be carefully tightened.
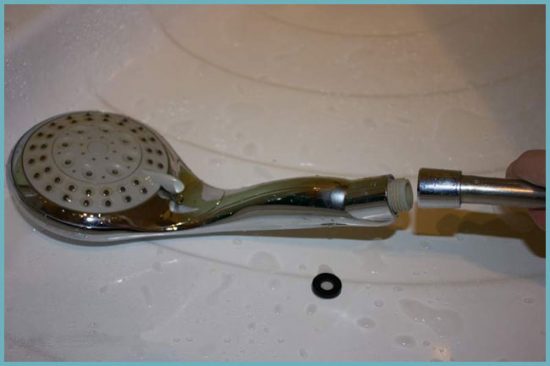
When the gaskets are worn or destroyed, leaks occur at the joints between the mixer and the hose, or between the shower head and the hose. The gasket can be rubber or paronite. If the hose itself is leaking, then it must be completely replaced with a new one. To repair the damage, you will need pliers, a piece of cloth, a FUM sealing tape, and a new gasket.
- Using the pliers, unscrew the clamping nut of the shower hose. Place a cloth under the pliers so as not to damage the decorative coating of the nut.
- Remove the old gasket and install a new one.
- A little sealing tape is wound on the clean thread and the clamping nut is tightened.
The cause of the leak can be caused by a foreign particle trapped in the core of the mixer - the cartridge. Any mixer core has two fixing rods and three openings: two for the inlet of cold and hot water and one for the outlet of mixed water. The only difference is where the water will be mixed - in the cartridge itself or in the body of the mixer.
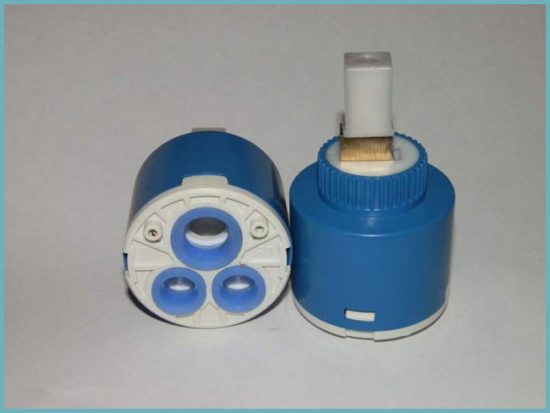
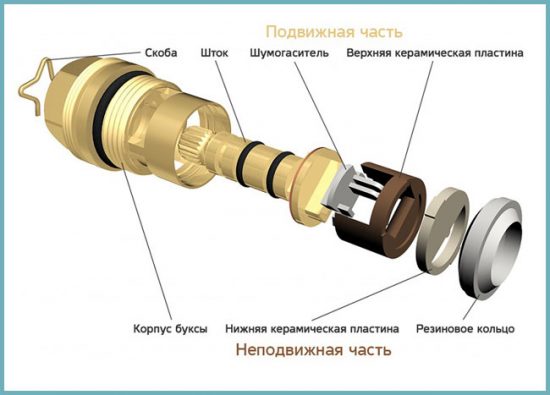
Any single-lever mixer has a certain type of cartridge that cannot be replaced with another. The cartridge can be ball or ceramic. The ceramic one must be completely replaced, and the ball one can be repaired by yourself. After dismantling, inspect the seal and other parts of the ball cartridge, remove blockages and replace unusable parts with new ones. The following signs indicate that the time has come to replace the cartridge:
- hot or cold water does not come in;
- the temperature of the water changes itself;
- the lever does not open fully or does not close completely;
- the lever switches tightly, with additional effort;
- there is a leak under the mixer lever.
To replace the cartridge, you need to do the following:
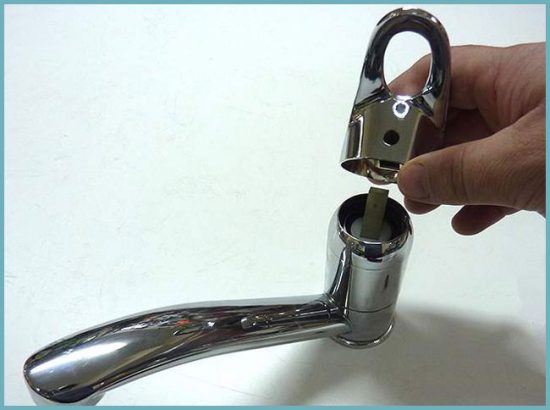
- Remove the decorative cap - plug.
- There will be a screw under the cap that holds the lever. Remove the screw with an Allen key or screwdriver.
- Unscrew the decorative strip.
- Unscrew the washer that presses the core.
- The core can now be removed for inspection.
- The new cartridge is installed in the reverse order.
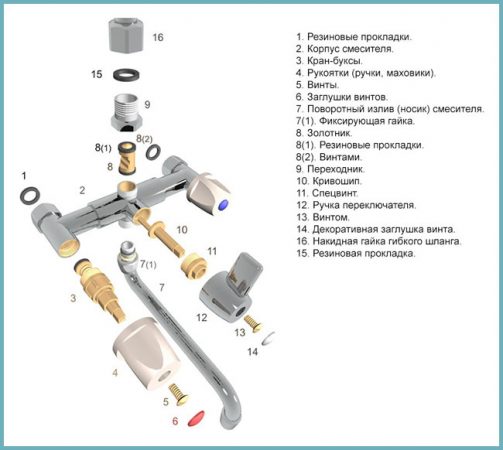
Classic mixers have two working units in their body - a core with a ceramic or rubber gasket. The core is also called the crane-axle box. Failure of this assembly will result in leakage. It is best to replace the entire core with a ceramic spacer as it is very difficult to find a suitable spacer. You can cut the rubber pad yourself from a suitable piece of rubber or buy it from a store.
- Unscrew the plug on the valve.
- Carefully unscrew the screw from the valve.
- Remove the valve handle.
- We dismantle the decorative strip.
- We unscrew the core with a key.
- We replace the core or rubber gasket.
- Putting the structure together.
Advice.Rubber and ceramic backed cores are often interchangeable, so you can choose one of your choice.
Classic two-valve bathroom taps often have a flat or round movable spout. Due to the hardness of the water and the wear of the rubber gasket under the clamping nut, a leak occurs over time in this place.
To replace the gasket an adjustable wrench and FUM tape are required.
- Unscrew the spout jam nut.
- Inspect the spout, remove the old gasket and insert a new one.
- Wrap some sealing tape around the threads of the spout.
- Secure the gander with the clamping nut.
- In a flat spout, after unscrewing the clamping nut, the spout inner sleeve must be unscrewed to reach the gasket. You will need a hex wrench. After unscrewing the sleeve, it is removed together with the nut. Now you can replace the gaskets and install the gander in its original place.
Touchless bath and shower faucets are considered more reliable in comparison with other types of faucets - single-lever and valve. This is not surprising, because they simply do not have mechanisms that the user mechanically affects. After all, it's not for nothing that manufacturers give a guarantee for contactless models for at least 5 years. But there is also a downside: if such a mixer fails, it will not be easy to find a good master, because not every plumber is able to understand the device of a contactless mechanism and find the cause of the breakdown.
During operation, over time, the sensors that are responsible for turning on and off the water when hands approach the tap may become unusable. In this case, it is better to resort to the services of a specialist, but it is easy to break the aerator with your own hands, relying on the instructions for repairing other types of mixers.
The dismantling and assembly of the mixer parts is almost entirely done by hand. Twisted connections are slightly tightened with keys. Excessive tightening forces can destroy parts. Understanding the principle of operation of the mixer, it is not so difficult to troubleshoot on your own.
Installing a sensor faucet is an excellent solution to improve the design of a bathroom. This device meets all sanitary and hygienic standards, because it does not require tactile contact. It is enough just to bring your hand to the tap, and water will flow from it. We will talk about the features of the choice of this device and the installation of the sensor mixer further.
A touch-sensitive faucet is a faucet that does not have levers or valves to regulate the flow of water. Its work is carried out through the presence of photocells, ultrasonic or infrared sensors, which pick up the presence of foreign objects. These components are installed on the crane and look like a sensor.
The mixer is characterized by the presence of a sensitivity zone for which individual parameters are selected. Average sensitivity is 20-25 cm.
Faucets have the function of adjusting the temperature of the water, for this there is a valve or levers.
If soap or shampoo is accidentally tipped onto the washbasin, water will not flow out, since the photocell can only react to movement.
The inside of the touchscreen washbasin faucet contains a 9V lithium battery that lasts about 20-24 months, then needs to be replaced. It is able to cycle the water on and off about 4000 times.
The mixer kit contains a battery, an electric unit, twists and other components, depending on the cost and functionality of the device.
Some models have a remote control that allows you to turn the water on and off from a distance.
The mixer consists of an induction sensor and a control unit.The sensor, depending on the settings, creates a certain magnetic field, if a foreign object enters it, it transmits a signal to the control unit. The control unit opens the water, after the end of the signal, the water will automatically stop flowing.
The water is opened using a solenoid valve. This valve is characterized by the presence of:
- solenoid coil,
- shielding coil,
- core tubes,
- membranes,
- saddles,
- seals,
- housing,
- housing covers,
- core,
- springs,
- retainer,
- tip.
As the core and membrane are lifted, water opens. This process is explained by the application of an electric voltage to an electromagnetic field, which affects the core. If the batteries run out, the water supply is shut off.
The crane is powered through the mains or by installing conventional batteries. The second option is safer.
To prevent the reverse flow of water, a check valve is installed at the inlet.
The main advantages of using sensor mixers:
1. Convenience, comfort - such devices are more convenient, for example, a tap, does not require opening, if your hands are dirty, you just need to bring your hands to the device.
2. Sensor faucets are the most hygienic and meet the requirements of all sanitary standards. In public places, where there are a large number of people every day, a lot of bacteria and microorganisms collect on ordinary taps, in the case of contactless faucets, this problem can be easily eliminated.
3. Such devices allow you to save water, because when your hands are not under the tap, water does not flow.
4. No need to worry about a family member forgetting to turn off the tap.
5. The ability to automatically set a certain temperature, allows you to use such a tap, even for small children, without fear of hypothermia or burns.
6. The touch-sensitive faucet will add comfort and modern look to the interior.
Disadvantages of sensor faucets:
1. Inconvenience of installation in the kitchen: touch faucets allow you to adjust one mode of water, in the kitchen you need either cold or hot water, so it is inconvenient to change the temperature every time.
2. Inconvenience with regular filling of the sink or bath. It is required to constantly hold hands until the sink or other vessel is full.
- restaurants, cafes,
- shops, supermarkets,
- cinemas,
- hospitals,
- bathroom sinks,
- kitchen sinks.
In relation to the purpose, sensor mixers are divided into:
- touch-sensitive kitchen faucet is available with a swivel or U-shaped spout;
- taps for urinals are divided into: external, built-in;
- toilet faucets - start to dispense water after 5 seconds, for 10-15 seconds.
Depending on the appearance of the device, there are:
- mixer with a push-button touch sensor - controlled using a touch display, have many functions and settings;
- touchless touch-sensitive faucets, some models provide the ability to install additional lighting, in the form of a one-color LED lamp.
In relation to the length of the stream, mixers are distinguished:
- long, jet length exceeds 35 cm;
- medium from 20 cm;
- fixed,
- shortened,
- swivel,
- design.
Depending on the principle of operation, sensor mixers are divided into devices:
- with the presence of separate taps,
- single lever type,
- electronic type,
- with a double spout.
The simplest is the first option, which consists of several cranes. They are adjusted using a valve or a handwheel. These mixers are the most reliable and low cost.
Mixers with only one lever are designed for temperature control. There are two types of such devices:
- ball type,
- ceramic type.
Devices with a double spout look like a single-lever mixer, they are distinguished by a special valve that helps in obtaining filtered water.
Electronic mixers are distinguished by such advantages as:
- automatic water supply,
- temperature control,
- aesthetic appearance.
Disadvantages of electronic faucets:
- power supply is required,
- low reliability,
- high price.
Depending on the type of program, there are:
- mixers with a constant water supply, such devices supply water from the moment the palms are raised and until there is no movement;
- batch mixers - only respond to palms, but work for a few seconds and then turn off.
In relation to the type of sensor, mixers are distinguished:
- with the presence of an infrared sensor,
- with the presence of an ultrasonic sensor,
- with the presence of a photocell.
The first and second options are distinguished by higher reliability, since the mixer with a photocell has a large number of false alarms due to light hitting the surface.
1. To select individual settings, choose mixers with adjustable sensitivity.
2. Pay attention to the presence of additional functions, such as operating time, water supply time, switching on and off the mixer.
3. Choose models with adjustable water temperature.
4. Touch mixer price depends on the following factors:
- number of additional functions,
- availability of remote control,
- the material from which the mixer is made,
- jet length,
- device size,
- appearance,
- company manufacturer.
5. Pay attention to the tap system, it can be one-pipe and two-pipe, if there is both cold and hot water, select the second option.
6. Choose a faucet from high quality materials, ask for a certificate of compliance with health and safety standards.
7. When choosing a mixer for a room that already has another mixer, pay attention to their complementarities.
To install the sensor mixer, two stages of work should be carried out:
- installation of the body,
- connection to the water supply system.
Shut off the water supply before installing the mixer.
The housing is installed in a specially prepared hole on the sink. When replacing an old mixer, it should be dismantled. An obligatory element is the installation of a mounting gasket, which is placed between the sink and the new faucet.
The lower part of the device is mounted on a gasket, plate, and fixed with a nut. The kit must contain additional fasteners on which the control box is installed.
The minimum distance between the box and the floor is 55 cm. The mixer is connected to the control box using a flexible hose.
For the faucet connector to the plumbing system, connect the nipples to the plumbing pipes. Install a gasket at the junction of the mixer and control box.
For proper operation of the solenoid valve, connect the sensor wire to the control control using a nut. To do this, unscrew the four bolts, remove the upper part of the case. Install the batteries or lithium and replace the cover.
Turn on the water supply and check that the tap is working.
If the water does not overlap, disassemble the device and clean the membrane from dirt and small scale particles. Install a new sump after cleaning.
If the mixer malfunctions, check the sensor.
If the light from the sink accidentally hits the mixer, it is triggered, the light source should be eliminated.

