In detail: do-it-yourself generator brush repair from a real master for the site my.housecope.com.
Hello dear car enthusiasts! Today I will tell you how to repair the generator with your own hands. You may have already encountered such a problem when the battery discharge indicator suddenly turned on on the dashboard, which means that charging has disappeared on your car, and you have not long to go, the battery will last for a maximum of 1-2 hours.
Do not rush to throw away the generator. Try to fix it first. The most common alternator failure is brush wear.
To check the brush assembly, you need to remove the rear plastic cover by bending three plastic clips arranged in a circle.
Remove the cover, unscrew the two screws and remove the voltage regulator.
Check the wear of the brushes, if the residual length of the brushes is less than five millimeters, feel free to buy a new voltage regulator in the store. Sometimes it happens that the generator does not charge or recharge the battery, this is also a malfunction of the voltage regulator. The normal voltage of the generator is from 13.5 to 14.5 volts, depending on the engine speed and the load on the generator.
The next generator malfunction is a breakdown of the diode bridge. To test the diodes, you need to remove the diode bridge. We unscrew the bolts that hold the diode bridge.
Bend the wires to the side.
Remove the diode bridge. How to test a diode bridge. Read here: How to test a diode bridge?
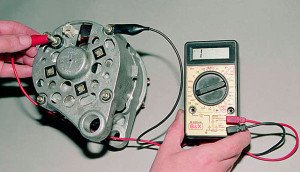
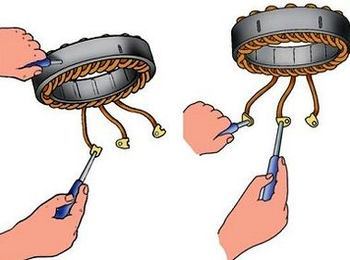
After removing the diode bridge, be sure to check the stator windings. We do this, turn on the multimeter in the dialing mode and check all three stator windings for an open circuit. All windings must ring among themselves.
| Video (click to play). |
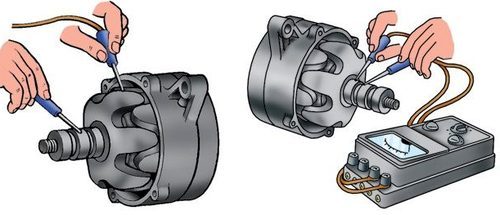
Next, we check the short to ground. We connect one probe of the multimeter to ground, and connect the second one in turn to the terminals of the windings. There should be no short to ground.
Similarly, we check the armature winding.
We check the anchor, there is no short to ground.
Now I will show how to disassemble the generator to replace the bearings. We unscrew the four screws connecting the two halves of the generator together.
Loosen the nut and remove the pulley.
Using a screwdriver, carefully split the generator into two parts so as not to damage the aluminum covers.
Replace defective bearings with new ones. Assemble the generator in reverse order.
Friends, I wish you good luck! See you in new articles!
As the title of the post makes clear, I tried to extend the life of the genadium by replacing the bearings and brushes. Mileage genes 95 thousand miles across the states and 53 thousand miles in the harsh conditions of Russia - mother. Which is not much. And for such a solid service life, the bearings began to squeal and the brushes were worn out so that they barely touched the rotor.
We removed the gene from under the hood and unscrewed the pulley, we begin to disassemble. 4 bolts are unscrewed with a head of 8, they hold the body and 4 bolts for a curly screwdriver around the pulley. They hold the bearing, and, as usual, unscrew their dick and unscrew it with a chisel.
Gently hit the body with a hammer, because it sticks to the stator, be healthy. Our goal is to remove the front cover and draw out the rotor. If we could, then well done. No, let's move on)))
To remove the back cover, you need to unscrew the nut behind the genes with a head for 12 and 3 bolts with a curly screwdriver inside. 2 bolts can be easily obtained, and one stsuka will be under the stator winding. So the people here then have to be careful, because you need to slightly pull the stator out of the back cover and bend it a little to the side, because the cross-eyed soldered the diode bridge to the winding. Bent back, climbed up and turned away. The cover after all this, the back itself will fall off.
After these manipulations, we see such a picture.
Mon 19 Oct 2015
 Category: Auto electrics
Hello! Today I'm going to show you how I repaired my generator, which maybe someone else would have thrown in a landfill. When I was driving home yesterday, it was all inclusive - light, stove and music. At some point, the on-board computer squeaked and the battery light on the panel lit up. I immediately brought the voltage of the on-board network to the BC and was surprised - it was 11.4 volts. I immediately turned everything off and slowly drove home.
After turning off the engine, the computer showed 8 volts. Having removed and disassembled the generator, it was revealed that one of the copper-graphite brushes of the relay-regulator simply fell off the wire. This one costs 510 rubles, but I thought it would be better to fix it myself.
This is how it looks.
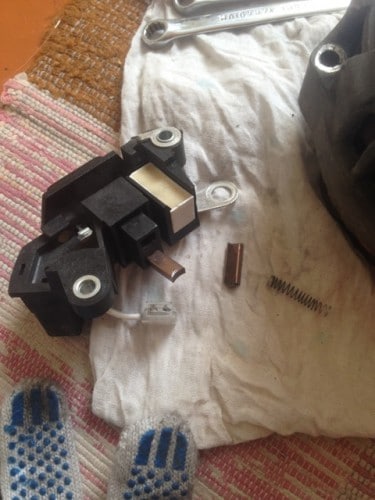
Rummaging through the warehouse, new brushes from the drill were found.
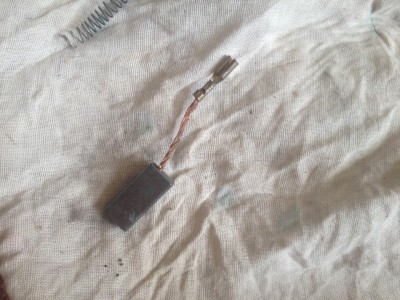
They differed in width and thickness, but the length was the same. Compare:
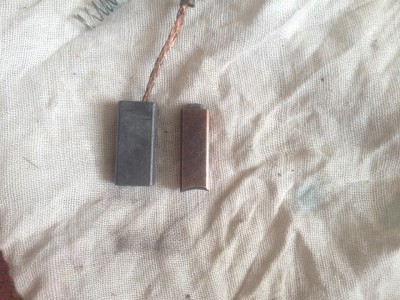
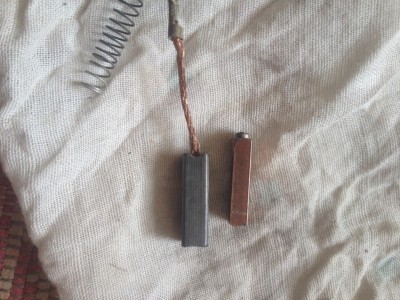
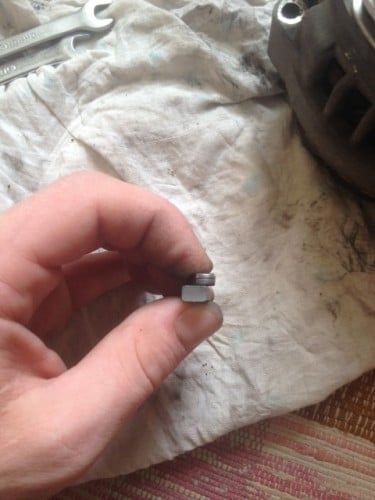
After a little grinding on the grinder, they became almost identical, only the color was different.
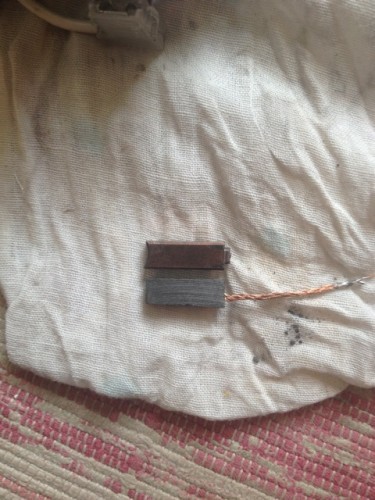
Then I soldered a thin copper wire to the brush pigtail, so that with its help in the future I would not have any problems with how to tighten this very pigtail into the brush contact hole.
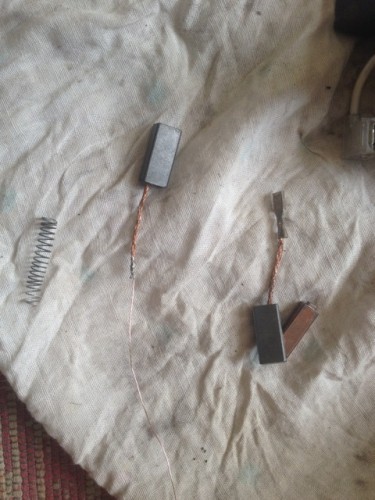
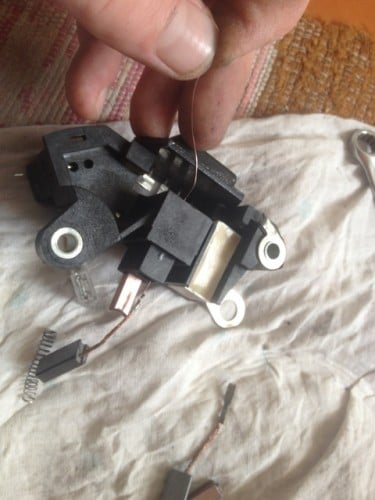
After the brush contact of the relay-regulator was cleaned, there were still remnants of the old braid.
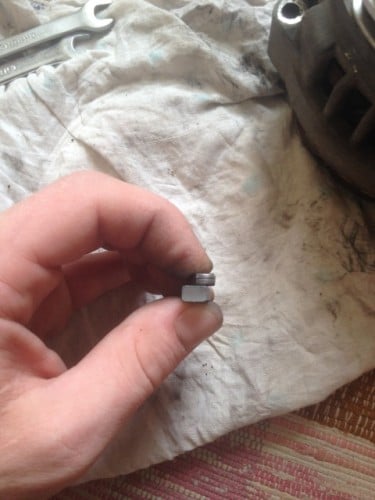
And he tinned the whole thing using tin and soldering acid.
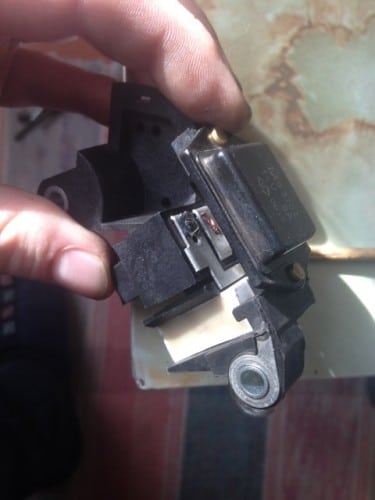
Then I put a spring on that same wire.
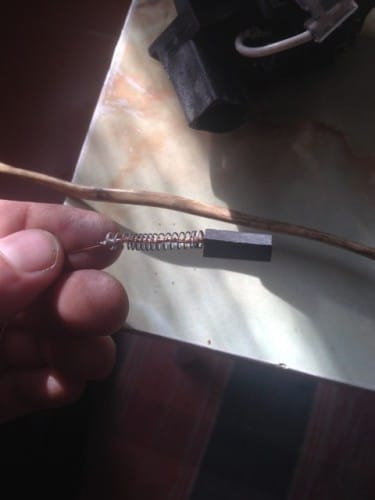
And I put it in the contact hole of the relay-regulator brush.
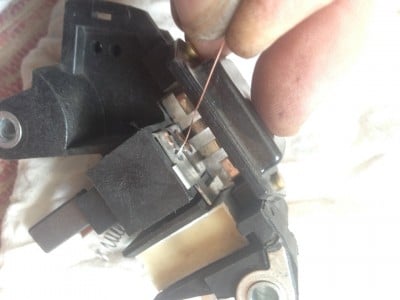
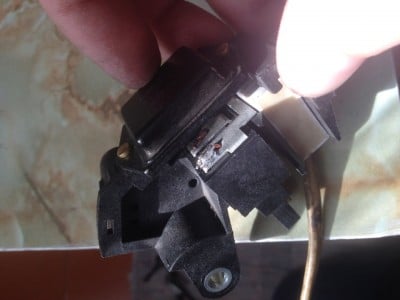
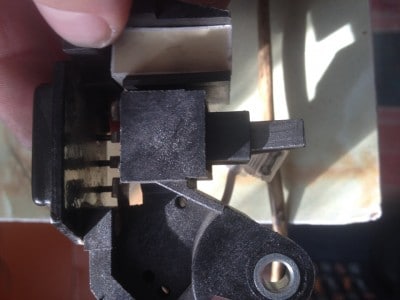
Then I saw that the contact bushings of the generator rotor were rubbed with brushes, so much so that plastic was already visible in the grooves, that is, either the contact bushings or the rotor needed to be changed.
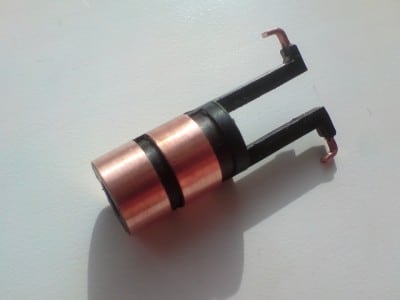
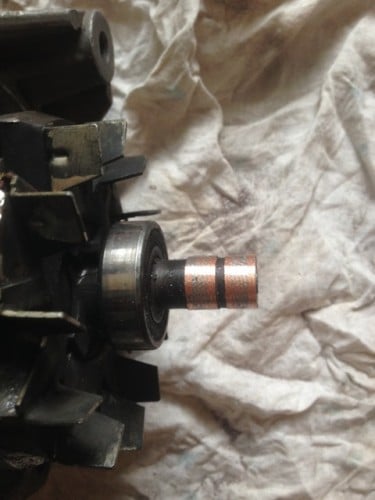
Well, it looks like a repaired generator.
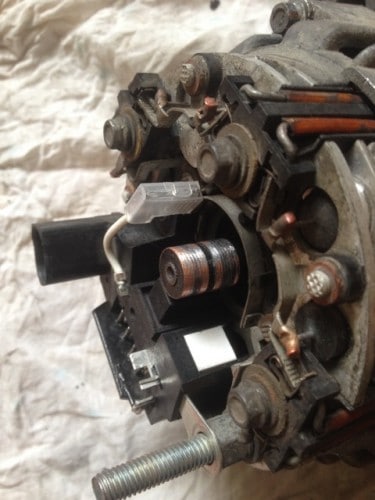

I installed it back in the car, started it and see 14.1 volts. Of course, I could not take a steam bath and buy all this, incl. and a new generator. But why? Repairs were spent 0 rubles and a minimum of effort. I hope this is useful to someone. Good luck!
Alternator brushes are an important element of the automotive system for supplying and discharging electric current. Without their participation, the car's generator will not be able to generate voltage.
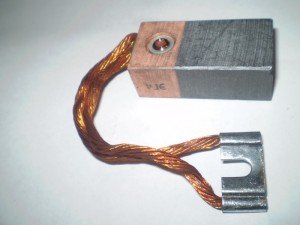
The brushes we are interested in are made of graphite, which is why they are often called carbon brushes. They are used not only on cars with an internal combustion engine, but also on a wide variety of mechanisms and machines equipped with an electric motor (machine tools, lifting equipment, urban public transport, and so on). Brushes are the most common EG-4.
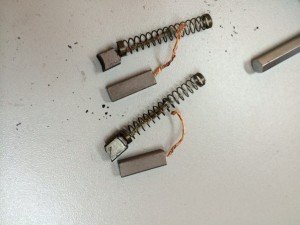
This brand is suitable for installation on many cars of different years of production, as it has standard operating parameters. Rarely used other products (for example, EG-61), which are characterized by a high margin of safety due to their impregnation with special compositions.
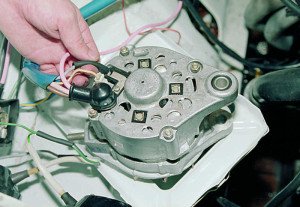
The generator and brushes for it on domestic cars are located under the right front headlight of your "iron horse". Finding them is easy. It is enough to open the hood to see the generator - its winding and two lids that look like tin cans come to the surface.
With planned maintenance, of course, no one pays attention to the small elements of the generator. It is for this reason that the failure of its brushes always comes as a surprise to the driver. Experts advise after 50 thousand kilometers (or once every four years) to check their serviceability and functionality, and then there will be no problems with the operation of the generator.
It is noteworthy that you can check the brushes (and change them if necessary) without dismantling a rather bulky generator. In addition, the following symptoms may signal the need to look under the hood of a car and check the graphite brushes:
- unpredictable shutdown of electronic devices in the vehicle, occurring for unknown reasons;
- reduced illumination of the car interior and external light sources;
- voltage reduction;
- a car battery that discharges unreasonably quickly, which, moreover, is then very difficult (and sometimes impossible) to charge.
Any of these symptoms tells the motorist that he most likely needs to remove the old brushes and install new ones in their place. You can check old products for functionality very simply. It is necessary to fold the "minus" from the battery, remove the voltage regulator and visually assess to what height the graphite parts of interest to us protrude from their "shelter". Brushes need to be changed urgently when their height is less than five millimeters.
We must say right away that this operation is very simple and does not require special skills from the driver. First, as already mentioned, you need to discard the "minus" from the battery, then dismantle the regulator (it is located on the opposite side of the generator), and then perform the following steps:
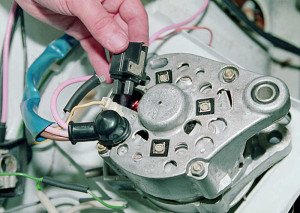
- Thoroughly clean soot and dust from the holder seat, as well as the clamping springs and slip ring. This operation is performed with a soft bristled brush. Sometimes it may be necessary to grind the graphite brushes to the commutator with glass fine sandpaper (its grain size should be about 100).
- Install new products and check that they move freely in the brush holder.
- Assemble the assembly in reverse order, and then connect the previously wrapped wire to the battery.
If you bought a prefabricated structure (regulator plus brushes), its installation also does not cause any problems.
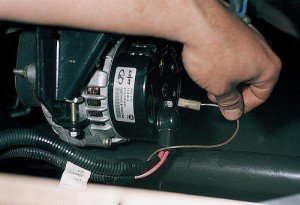
Disconnect the “minus”, remove the cap made of rubber from the “positive” wire, and then dismantle the block by unscrewing the fastener nut. Then you will need to remove the plastic casing and remove the three spring clips located around the perimeter of the block. Using a Phillips screwdriver, unscrew the brushes along with the voltage regulator, and disconnect all the wires leading to it. Mount the purchased prefabricated structure in the vacant space. Operation completed!
The alternator is the main unit in the vehicle's power supply system. Sometimes it fails, but you should not throw it away and rush to buy a new one. Often the problem is that the generator brushes have worn out and it is enough to replace them for the further uninterrupted operation of this unit. Replacing the alternator brushes is a fairly simple procedure, but first you need to find out what signs may indicate brush wear.
Often, when carrying out a preventive inspection of a car, they do not pay attention to various trifles. Generator brushes are one of those little things, if they wear out, the generator will stop charging the battery. Experts recommend inspecting the brush assembly every 45-55 thousand kilometers. The brushes can be diagnosed without removing the generator, and in some cases it may even be possible to replace them without removing the main assembly.
- Electrical appliances of the car suddenly turn off (even while driving);
- Headlights, dimensions and even interior lighting dims and flashes;
- A sharp decrease in the voltage of the car's on-board network;
- A sharp discharge of the battery, which in the future will be very difficult to recharge.
Each of these items may indicate wear on the generator brushes that are located inside this assembly. Many people wonder how to check the brushes. In order to check the remaining length of the generator brushes, it is enough to disconnect the generator from the battery and remove the voltage regulator. After this procedure, you can determine by eye how worn out any of the brushes of the generator. If the length is less than 0.5 centimeters, you need to change the brushes unambiguously. Checking the brushes should be carried out during a routine inspection of the generator.
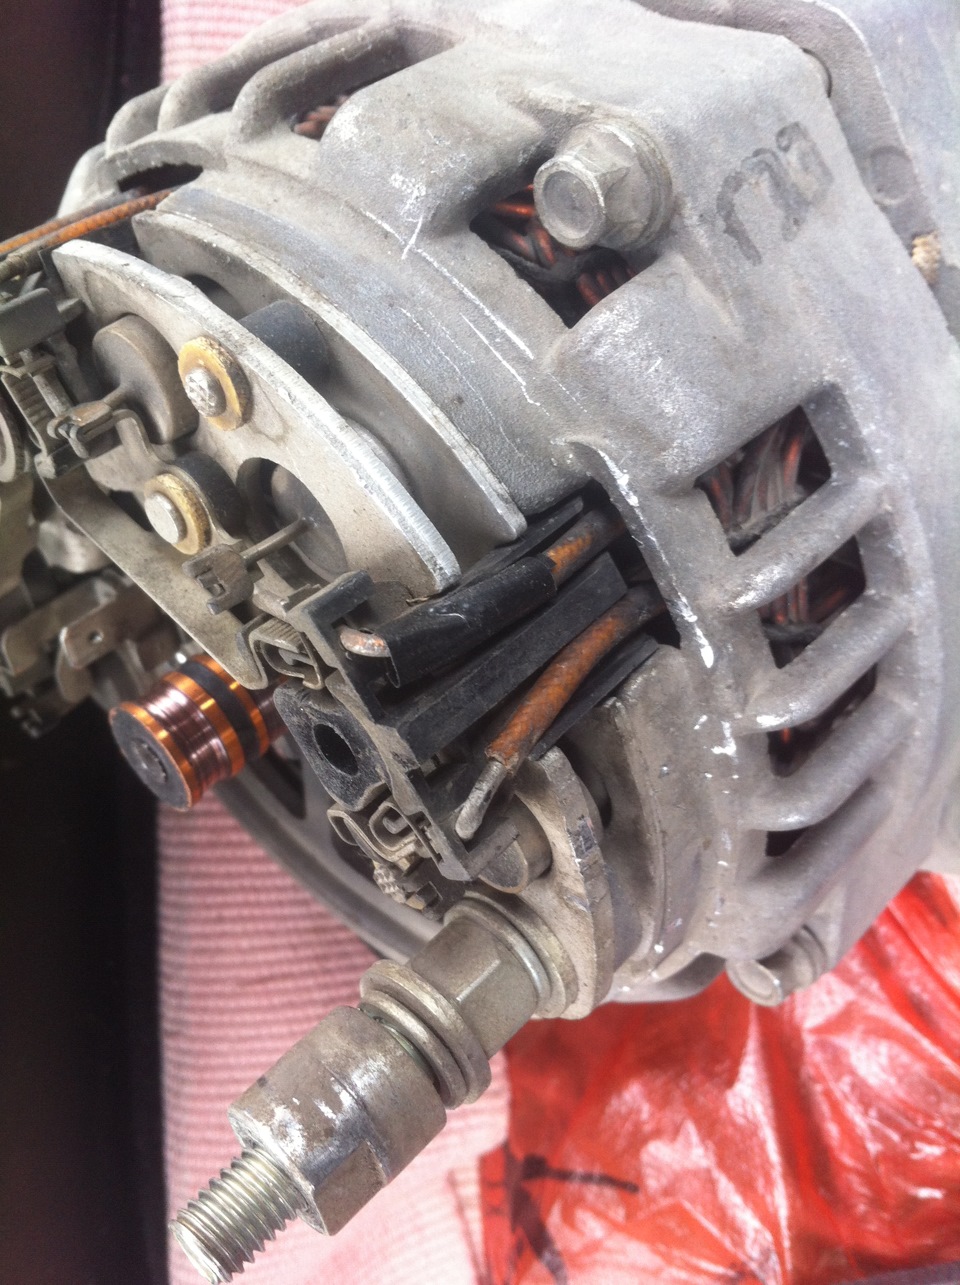
Changing alternator brushes is not difficult. They are located in the rear half of the device and are held by one bolt.The brush assembly itself is located next to the slip rings and is connected to the voltage regulator. Next to the rings, the brushes are held by springs. Knowing the scheme of the generator device, it is easy to find brushes. To replace, you will need a standard set of tools:
- Several wrenches;
- A pair of screwdrivers;
- New brushes;
- WD-40 fluid (in order not to strip the threads of the bolts).
The brushes can be replaced in two ways, by removing the alternator or without removing it. Which way is better to use will be prompted by the design of the car, or rather the place in the engine compartment. If there is free space, it is not difficult to repair the generator brushes without removing the assembly, and if the engine occupies the entire engine compartment, you cannot do without removing the generator.
With the generator removed, the work on replacing the brushes will be much easier. With access from all sides, it is easy to see the wear of the brushes and replace them. The main problem in this option will be the removal of the generator from the car. It is necessary to unscrew the fixing bolt of the generator, loosening the belt tension, remove it and unscrew the fixing bolts connecting the generator to the engine housing. If you manage to get the generator from above, consider yourself lucky. There are frequent cases when, to remove the generator, you have to remove not only the air filter and pipes, but even remove the radiator.
First of all, you need to clean the mounting place of the brush holder from dirt and dust. You can wipe it with a solvent and then blow it with compressed air. After that, you need to remove the brushes, for this they need to be soldered. Leaving the generator without brushes, be sure to clean all the contacts and check the springs for elasticity. It is advisable to polish the contact ring afterwards.
The replacement itself consists in soldering the old wires from the worn out brushes and soldering them to a new set. When carrying out this operation, care must be taken, as the material of the brushes is very fragile. After installing the brushes in the seat, make sure that they move freely.
Installation of new brushes should be done in the reverse order, after which the generator is assembled and installed on the car. It is recommended to change the bearings of the generator when replacing the brushes. When installing a generator on a car, the main thing is to correctly adjust the belt tension. With insufficient tension, the belt will slip on the rollers.
It happens that the computer in the car starts showing a generator malfunction immediately after replacing the brushes. This is due to insufficient grinding of new parts. During operation, they will rub in, and the error will disappear. If the error persists, the case is stuck due to excess dirt. This problem is easily eliminated by blowing the parts with compressed air. Before checking the operation of the generator, be sure to inspect the brushes for chips and cracks. Often there are manufacturing defects on new parts.
It happens that the brushes are changed as an assembly with the relay regulator of the generator. In this case, the replacement process is as follows:
- The negative terminal is disconnected from the battery;
- Remove the rubber tip from the positive wire;
- The generator is being dismantled (if necessary, the air filter housing must be removed);
- Get a block of brushes with a relay regulator;
- The fixing springs are removed;
- The brushes are unscrewed;
- All associated wiring is disconnected;
- The new block is installed.
The generator is connected only after checking the absence of defects on the new brushes. After assembly, we put the generator in place, tighten the belt, connect the battery and start the car.
If the previous owner put a block of brushes with a regulator relay into the generator, then the question of how to change the brushes on the generator without removing it from the car is much easier to solve than replacing individual brushes.With enough space in the engine compartment, it is also possible to replace the brushes separately without resorting to removing the generator.
All work on the vehicle's electrical equipment should begin by disconnecting the battery.
- The voltage regulator is removed;
- The production of brushes is measured;
- Soldered old brushes;
- Contacts are cleaned;
- New brushes are soldered;
- The free movement of the generator brushes is checked;
- The regulator is installed in place;
- We connect the battery and start the car.
If everything went without errors, you will not have to suffer for a long time with the question of how to check the generator brushes. Now, knowing perfectly the device of the generator after its disassembly, it will not be difficult for you to fix another malfunction of the generator with your own hands.
A car generator is a device that takes the mechanical energy of the engine and converts it into electric current, thus providing the rest of the car with electricity. The generator provides battery charging and power supply to the car engine. Therefore, the “engine-generator” connection should not be interrupted, because an idle generator is a battery that does not receive a charge and, accordingly, the main organ of the car is not working.
Replacing the generator will entail significant financial costs. Therefore, if you have at hand all the necessary tools and knowledge of the devices of the engine compartment of the car, then you can fix the breakdown yourself (read about what to do if the car does not start - the starter turns, read in our other article).
So the generator is broken. What malfunctions can cause the failure of this device? Consider them:
- The generator produces current at a very low voltage.
- The generator does not produce electricity at all.
- The failure of the device is displayed on the dashboard in the form of a flashing light bulb.
- The generator is charging in excess of the optimum rate.
- The operation of the generator is accompanied by extraneous noise.
Before you start repairing the generator with your own hands, it is necessary to check its technical condition and disassemble the unit into parts. Before disassembling the generator, check the condition of the belt and its tension, and make sure that the alternator belt is not expected to be replaced in the near future (read more about how the timing belt is replaced on the VAZ 2109). The check consists in pressing a finger on the middle of this part of the generator. If the belt is in good condition, then it should not fall more than half a centimeter when pressed. It is worth noting that the new belt should not sag by more than 2 mm. If the belt is not worn out, but the tension is weak, then the deficiency can be corrected by tightening the alternator belt. Also scroll the tension roller of the generator, if it scrolls with difficulty and creaks, then it will need to be lubricated with oil, or a new roller should be put in its place.
The technical condition of the generator can be checked using the following measuring instruments:
The rotor speed is measured using a tachometer (usually located next to the speedometer on the instrument panel). During normal operation of the generator, the indicators of this device should not be less than 2000 rpm., The norm is 5000 rpm.
Consider the reasons that can cause a generator to break down. So, if the generator does not generate a charge, then the following phenomena may be the reasons for this:
- Blown fuse or contacts.
- Broken or worn alternator brushes.
- The regulator relay has failed.
- Due to the short circuit of the winding, an open occurred in the stator or rotor circuit.
In order to fix the first three malfunctions from the list, you just need to replace the worn parts of the generator, having previously, of course, disassembled it.
- First of all, remove the brush holder together with the voltage regulator, carefully unscrewing all the fasteners.
- Remove the tension bolts and then the cover with the stator.
- Remove the cover from the stator, having previously disconnected the phase windings from the output wires on the rectifier unit.
- Next, remove the pulley from the shaft and the front cover of the generator using a special puller.
The assembly of the generator is carried out in the reverse order.
In the event of a winding short circuit, you will need more serious action than a simple replacement of the part. So, a broken winding can either be repaired or replaced with new wires. Often the winding breaks near the slip rings. In addition, a breakdown can occur due to the desoldering of any of the ends of the winding. Such a malfunction can be repaired by unwinding the turn in the gap area back from the rotor winding. Next, the broken end of the winding must be removed (soldered) from the slip ring and the previously unwound wire is soldered there. Desoldering is very easy to fix by resoldering the wiring.
A damaged relay indicates a weak or too strong charge of the generator, which must be replaced when repairing the generator.
If checking the generator voltage showed that the device is working, but at the same time the indicator flashes on the instrument panel, then most likely one of the diodes that are responsible for powering the light bulb in the indicator has failed. These diodes are located in the generator itself, and the replacement is carried out after disassembling the device.
Noises unusual for the generator may indicate wear on the rotor bearing. If during inspection it is found that the alternator bearing is worn, it will need to be replaced. If the incomprehensible sounds of the generator are associated with the lack of play in the bearing, then it can simply be filled with oil, after washing it in gasoline. Extraneous sounds will then disappear.
Thus, you can even repair the generator on your own in your garage (as well as overhaul the engine, in fact). When checking and replacing parts of the device, follow safety precautions and be careful, because the electrical system should not be damaged.
I have already talked about the design of electric current generators, which are similar to synchronous motors, only differ from them in a collector, so the process of troubleshooting and repairing electric current generators is in many ways similar to them.
In this article I will tell you in detail using the example of do-it-yourself repair of a car generator, because it is the repair that most people most often face. The principle of repairing a generator with your own hands as part of a power plant will be similar. Only a voltage rectifier will not be built into its case and the output voltage adjustment will work differently.
Cars use a three-phase alternator alternating current, but as is known in the on-board network, a constant voltage of 12 volts. To obtain direct current, a rectifier consisting of 6 diodes is used, and a voltage regulator is provided to keep the voltage of 12 volts within acceptable limits.
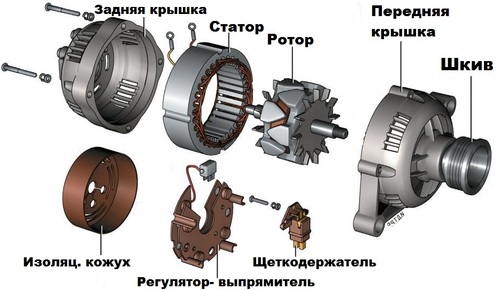
The generator is quite simple. Voltage is applied to the rotor through graphite brushes and slip rings to excite it. It is driven by a pulley through a belt drive. The rotor rotates in bearings. The electrical voltage is generated in the stator windings and converted to DC using six power semiconductor diodes, three of which are connected to the positive terminal of the generator, and the other three are connected to the negative terminal and "vehicle ground".
- If on the dashboard of the car after cranking does not go out indicator lamp, this indicates that the generator is not working and does not give current. But sometimes the cause of the alarm may be a bad contact of the connector, wires, or a malfunction of the relay.
- Discharging the battery. But keep in mind that sometimes the battery is discharged and does not have time to be charged by a working generator when moving over short distances and with the car's lights and electrical appliances turned on as much as possible.
- Generator at engine speed 2000-2500 produces a voltage below the allowable limit of 13.2 Volts.
- If the generator generates voltage above the allowable limit in 14-14.8 Volt (depending on the model), then this indicates a faulty voltage regulator, which leads to disastrous overcharging for the battery.
Before removing the alternator for repair, check:
- Tensioning the drive belt and rotating the pulley, tightening its nut.
- Connecting the battery and alternator to the car body.
- The integrity of the fuses.
- Bearing play. It is checked in the same way as for electric motors according to this instruction.
- Before removal and disassembly power unit, if there is generator noise during operation, try disconnecting the wires. If the noise has disappeared, then this indicates a short circuit or an interturn circuit of the stator windings, or a short circuit to ground. Repair is not advisable, it will be cheaper to replace the generator with a new one. If the noise remains, then this indicates wear on the bearings. They need to be replaced.
- Most often Worn brushes are the cause of the failure.. Check and replace them.
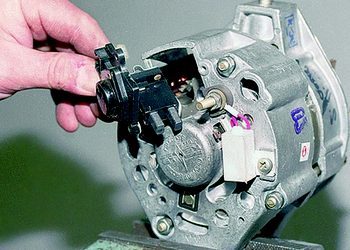
- Poor contact between brushes and slip rings. Check for a bad spring pressure. It can be stretched or replaced if necessary. Inspect the slip rings for signs of burning or dirt. For cleaning, use the finest sandpaper, and for dirt, use a rag. In case of severe wear of the slip ring, the rotor must be replaced.
- Rotor winding damage can be checked with a multimeter. The windings should ring between each other for a short circuit or show a resistance of a small value. If the windings are intact, then it is necessary to ring for the absence of an electrical connection between them and the case. A defective rotor cannot be repaired and must be replaced.
- Stator winding damage checked in a similar way. Between the terminals, the multimeter should show a short circuit or resistance of a very small value. And there should be no electrical contact between the winding and the generator housing. A defective stator must be replaced.
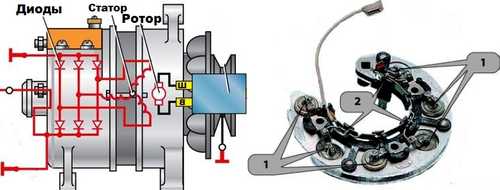
- Check all diodes in the rectifier. They should conduct electric current only in one direction, in the opposite direction (the positive and negative probes are interchangeable) - the resistance is quite high. In the example in the picture, it is necessary to check each diode between points numbered 1 and numbered 2.
Recommend additionally get acquainted with the instructions for repairing synchronous electric motors with their own hands, because they have troubleshooting carried out in almost the same way as for generators.
The generator set refers to a rather complex automotive electrical equipment, however, the maintenance of the generator and do-it-yourself generator repair for most car enthusiasts.
From theory. A working generator must supply a voltage of about 13.7 - 14.5 V to the car's electrical circuit, sufficient for its normal operation.
There is a separate article about the possible causes of generator failure, where the causes of generator failure are described in detail.
Reminder. Do not attempt to test the alternator by disconnecting it from the battery while the engine is running. The voltage surge that occurs when the terminal is removed can damage the diode bridge of the generator.
If after checking the integrity of the fuse, tensioning the alternator belt, checking the tightening of the pulley, the generator malfunction remains, then we go further, namely:
- the brush assembly is removed and the generator brushes are checked, the ease of movement of the brushes in the brush holder and the height of their protrusion
- a faulty relay regulator is replaced with a serviceable one or regulated (VAZ, ZAZ, GAZ, etc.)
If the generator malfunction remains, then it is necessary to disassemble the generator, except for generators, where the diode bridge (if, say, the problem is in it) is taken out, and it can be replaced without disassembling the generator.
Generator disassembly
before disassembling the generator, you need to mark the relative position of the covers so as not to get confused during assembly
• The alternator pulley is removed
• the terminal is removed at the output of the brush assembly (generators of cars VAZ output -67) and the brush holder with the voltage regulator is removed (if it is a combined assembly). Be careful not to damage the alternator brushes.
• the ground wire is given (-)
• the power wire is given and removed, as well as the wire from the capacitor going to the same contact (on the VAZ this is output - 30), if you perform do-it-yourself vaz generator repair.
• the nut of fastening of the voltage output is released (contact bolt, where the (+) thick power wire was screwed). This must be done as this power lead is attached to a diode bridge inside the alternator and it will not be possible to remove the rear cover.
• Check again to make sure there are no loose wires going either to the generator terminals or inside it.
Next, the bolts are given, tightening the covers and the stator winding. Then the back cover is carefully removed along with the stator winding (the stator winding can “stick” to the front cover and the terminals of its windings connected to the diode bridge fixed on the back cover can be damaged). First, the stator winding must be separated from the front cover, for which you carefully walk with the tip of a screwdriver.
along the contour between the cover and the stator. Actual for - VAZ car generators.
It remains in the dismantling of the generator that the front cover and rotor are not removed. If the generator cover cannot be removed from the rotor by hand,
then you need to pick up two bars, put a cover with a rotor between them and lightly hit the rotor shaft (through soft metal or a wooden block) to knock it out of the front cover. In order not to damage the generator rotor, place a piece of rag between the bars.
Disconnect the ends of the windings from the diode block and remove the stator and the diode bridge of the generator.
The generator has been disassembled and all components must be checked. The test can be performed both with the instrument and with a test lamp.
- break test
With the help of a test lamp and a battery, the terminals of the stator windings are checked. The lamp is alternately connected between the terminals of all windings. In this case, the lamp should burn in all three cases. When the lamp does not light in one of the connections, it means that there is a break in the stator winding and it is necessary to replace the winding or stator.
When checking with the device, all ends of the windings should “ring” among themselves.
If in this case we take into account the cost of replacing the stator winding by a professional electrician, and the cost of the stator itself, then it is more profitable to purchase a new stator, since it is beyond the power of an ordinary motorist to replace the stator winding on their own.
- Checking the stator for short windings to the housing.
To do this, connect one end of the test lamp to the stator winding terminal, and the wire from the battery to the stator housing. If the winding does not short to the body, then the lamp will not burn. When the lamp is on, this indicates that there is a short circuit and the stator needs to be replaced.
If the test showed that the stator winding is in good condition, it must be carefully examined for overheating (usually during breakdown of diodes) and if there are signs of overheating on the winding, then the stator must also be replaced.
Three diodes of the rectifier block (bridge) are “positive”, they have a “plus” on the body and are pressed into one bridge plate, and three diodes are “negative”, they have a “minus” on the body and are pressed into another plate of the block or into the generator case. Between them is a non-conductive plate that separates them.
A good diode only allows current to flow in one direction.When there is a break in the diode, then it does not pass current at all, but when it passes current in both directions, then it has a short circuit. In both cases, the replacement of the diode bridge is required.
- For a short circuit, the diodes in the rectifier unit (horseshoe) can be checked directly on the car without removing the generator. Before checking, disconnect the wires from the generator and battery. The diode bridge can be checked again using a test lamp ((1 - 5 W, 12 V) and a battery, as seen in the figure.
where: a - checking "positive" and "negative" diodes at once - the burning of the lamp will mean that there is a short circuit in one of the diodes and it is required alternator diode bridge replacement
b-checking the "negative" diodes - the burning of the lamp indicates a short circuit in the negative diodes / diode; c - checking the "positive" diodes - the burning of the lamp indicates a short circuit of the positive diodes / diode.
1-generator; 2–control lamp; 3-battery
If, after checking, it turns out that the generator windings are in working condition, and there is no short circuit in the diode bridge, then the cause of the malfunction (reduction of the charging current) is an open in one of the diodes.
* Rotor check
- checking the resistance of the excitation winding of the generator is carried out between the two rings and it should be - 4.3 ± 0.2 Ohm.
- checking the winding for a short circuit to the rotor housing. The control lamp is connected to the body, and the wire from the battery in turn to each ring. The lamp should not burn in both cases, otherwise the rotor must be replaced, since the winding is closed in it.
| Video (click to play). |
As can be seen from the article, servicing a generator and repairing a generator with your own hands does not seem very complicated and is quite within your power.


