In detail: do-it-yourself school board repair from a real master for the site my.housecope.com.
At a certain age - not very respectable, but already almost reasonable, everyone was shkodniks and schoolchildren. Even inveterate excellent students dreamed of conducting a smelly chemical experiment under the window of a sportsman - so that he would not force the scientist to dangle on a horizontal bar like a sausage. Having their own ingenious spinognaws, one already has to ask the exact opposite question: How to eliminate the consequences of the actions of a domestic demon? Today, specifics are on the agenda: Do-it-yourself school board, made or restored.
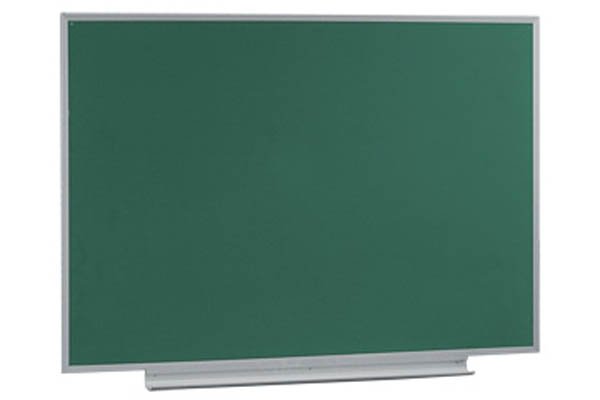
Today we will be making a modern school board
First you need to find out what the modern blackboard is made of? We will need:
- Chipboard for a rigid base. Sanded, 16 mm thick.
- Frosted glass for the front surface. You can take a thin one, but not less than 3 millimeters.
- U-shaped aluminum profile 25 mm wide (including 3 mm glass). The internal distance in such a profile is 20 mm - just right for our purposes.
- Dark green or black matt enamel. If you can buy paint with fine porcelain abrasive (used in machine tools and for painting outboard motors) - it will be just perfect. It will last ten years longer.
- High-quality insulation tape for the seal - so as not to reinvent the wheel.
- Wall awnings.
- Silicone sealant or glass adhesive.
- Self-tapping screws.
If you intend to make a swing board, in the image of a trellis, you will need butterfly loops. But today, the school will cost with a regular textbook measuring 2000x1350x25 mm.
| Video (click to play). |
In any case, you will have to order glass cutting in the workshop. We recommend paying for handling and shipping right away - to avoid injuries and accidents.
- Glass 1997x1347 mm.
- Chipboard 1999x1349 mm.
- 2002 mm - 2 pcs., Upper and lower profile.
- 1347 mm - 2 pcs., Side profiles.
All aluminum profiles are sawn at an angle of 45 degrees and the saw cut is processed with a small file or file.
Before making a chalkboard, you need to glue the main surfaces and process them. We used a table that was smaller than the board and occupied it for three days.
Place chipboard on the table and carefully remove crumbs, sawdust, etc. from the surface with a damp cloth. Apply adhesive in strips parallel to the long side of the board, approximately 50mm apart. Ask someone to help you, because it is almost impossible to neatly position the glass in a horizontal position on top of the adhesive base alone.
You need to "wiggle" the glass a little, pressing it over the entire surface. It is smaller than the base, so distribute the tolerances evenly and immediately grab around the perimeter with electrical tape. The tape should not be wider than the grips of the aluminum profile.
The glue will dry for about a day, but after three hours you can start painting the glass. Enamel will lay on frosted glass well if you don’t decide to apply it with a brush. For a spray gun, the paint must be thinned with a suitable solvent in a ratio of 5: 1. Two approaches with a break a day were enough for us to achieve a uniform color and an acceptable surface.
We snap the aluminum profile only after the coating and glue have completely dried. You can fix it to the ends of the chipboard with 4x16 self-tapping screws along the perimeter of the board. Since it does not carry any load, but only serves as a frame, this will be enough.
We figured out how to make a blackboard ourselves, or rather, so far only a blackboard module.It can be simply hung on the wall by screwing elementary fasteners to the base, or it can be combined with mechanisms or fixtures.
So, taking a wider profile and gluing glass on both sides of the chipboard, we get a ready-made module for a swing or swing school board. Using a sheet of metal instead of glass (of course, not three millimeter thick, body 0.4 mm of tin is quite enough), we get a magnetic board and so on.

Almost all young children are very fond of drawing, often using the floor, walls and pieces of furniture as a "canvas". Taking into account the needs of their child, resourceful parents make certain adjustments to the home interior, using a special paint, on which chalk is easily applied and just as easily removed. In this case, it is not at all necessary to paint an entire wall or cabinet. A small chalk board is quite capable of satisfying a child's creativity, which can be useful for adult family members, if you use it, for example, for notes and reminders of important things.
The paint, which has a slate effect, is very often used to restore furniture, making the finish matte, velvety and pleasant to the touch. British designer Annie Stone is considered to be its creator. In 1990, she developed a special finishing material, which she began marketing under the ChalkPaint brand.
Making a chalk board opens up ample opportunities for creativity
For your information! Given the name and consistency of "ChalkPaint", it is logical to assume that one of its components should be chalk (calcium carbonate). However, the problem is that for more than 20 years the original recipe has not been revealed by its creator. Therefore, many clones have appeared on the market, created on the basis of a variety of materials.
In addition to an interesting visual effect, chalk paint has a number of operational advantages:
- fits well on almost any material (wood, wood substitutes, metal, drywall, plaster, brick, tile and glass);
- has excellent adhesion to the surface;
- has good hiding power, hiding most of the defects of the old coating;
- dries quickly;
- does not have a pungent odor;
- not toxic.
The disadvantages of this finish include its price and deficit. "ChalkPaint" is not supplied to Russia at all, and its analogues from the companies "Tikkurila" and "Siberia" are much more expensive than conventional paints and varnishes. Therefore, in order to save money, many are trying to make a slate coating on their own, using more affordable and inexpensive components for this.
Factory slate paint is available in several color options
To make your own chalk paint, you can use several recipes. The essence of each method consists in adding a finely dispersed free-flowing substance to the usual glossy paint, which gives the coating the necessary roughness.
Acrylic or latex wall paint is suitable as the main component. The second is also made on an acrylic basis, however, due to the addition of rubber to the composition, it has increased strength characteristics. Therefore, if we are talking about making a board for chalk, the coating of which will be constantly subjected to certain loads, it is better to stop at the latex version.
You can choose sodium bicarbonate (regular baking soda), calcium carbonate, gypsum, tile grout, and even cornstarch as an adjunct. All options have the right to life, and their success primarily depends on the correct consistency.
Preparing such a composition is one of the most affordable options, since soda can be purchased at any grocery store. The process of creating paint itself is quite simple: you need to mix the two components until a homogeneous mass is obtained.If the mixture turns out to be very thick, adding a small amount of water will help to bring it to the desired consistency.
Advice! To avoid lumps, soda or any other bulk material should be added gradually.
When using such a composition, full coverage of the treated surface occurs when 3 layers of paint are applied. After drying, the finish has a fairly massive grainy texture. If it is necessary to get rid of such an effect, for example, for a chalk board, too large a grain size is unnecessary, it is enough to perform a fine grinding of the surface.
Application of corn starch
Just like soda, cornstarch is sold in almost any supermarket and has a very affordable price. The technology for obtaining the desired mixture does not differ from the previous version, the only thing is that a little more water may be needed to get the mass that is optimal for application to the surface.
To completely paint the surface, 2 layers of coating are enough. At the same time, the need for finishing sanding is also present, since after drying, strokes will be clearly visible, which can negatively affect the texture of the finish.
Application of calcium carbonate
The price of 1 kg of fine calcium carbonate powder exceeds 200 rubles, so this chalk paint recipe is not the cheapest. But from the point of view of the result, the addition of chalk makes it possible to obtain, perhaps, the best composition, which, after drying, has a uniform texture and does not require sanding. Full coverage of the part occurs after the application of 2 layers of paint. With such a finish, you can safely open not only the chalk board, but also furniture.
The use of plaster of paris (alabaster) is one of the most optimal options, taking into account the price / quality ratio. This material is an order of magnitude cheaper than chalk powder, while the coating after 2-layer processing has a homogeneous matte texture and, while maintaining the correct consistency of the paint composition, does not require additional sanding.
Note! Gypsum dries very quickly, therefore, after making the mixture, it should be immediately applied to the surface.
Tile grout is in the middle price range between calcium carbonate and stucco. The quality of the chalk paint obtained with this material is quite high, so you can safely decorate furniture with it. As a rule, it is enough to apply 2 coats of such a composition so that the coating is uniform and has no visible defects. In this case, fine grinding is not required and after the surface has dried, you can immediately draw or write on it with chalk.
It is very easy to make a chalk board with your own hands if you have the necessary components, especially if the master has detailed instructions with easy-to-understand illustrations.
For work, you will need the following materials:
- glossy acrylic latex paint;
- finely dispersed free-flowing component (one of those mentioned in the previous section);
- container and stick for making a mixture;
- medium-hard brush or roller;
- paper tape, if you need to protect the edges;
- base for painting.
If the work will be carried out in a residential area, it is advisable to protect the work area from accidental ingress of paint and varnish material. To do this, you can use oilcloth or old fabric.
Note! The color of the paint for the chalk board is selected individually. The selection does not have to be limited to the black option. Chalk will be clearly visible on brown, burgundy, blue, green and any other dark surface.
A standard paint tool kit is used to make a slate board.
- Any material can be used as a base for the board: plywood, chipboard, fiberboard, MDF, natural wood or drywall. It is desirable that the base is smooth, without visible defects.Otherwise, sand the surface with sandpaper. The same procedure (grinding) should be performed if the workpiece has a glossy finish. In order for the paint to have good adhesion to the surface, the gloss must be removed.
For this master class, an ordinary cutting board was chosen as the basis, which is available from any housewife.
- Chalkboard paint can be prepared using any of the methods listed above. Most often, a combination of latex paint with plaster or tile grout is used for such purposes.
If the surface to be treated has an insignificant area, you can prepare the finish in any available container.
- The resulting mixture should be applied immediately after preparation as it dries quickly. To get an even coating, brush movements should be smooth enough.
To completely paint the workpiece, a 2-layer treatment is usually enough.
- Drying time for chalk paint ranges from 30 to 60 minutes. If done correctly, the surface will soon become matte and velvety.
If there are visible irregularities, sand it lightly with fine-grained emery cloth.
- Once dry, the slate board can be tested for functionality by taking a short note or sketching a fun drawing.
The colors of the chalk and blackboard should be contrasting for the lettering to be legible
Despite the excellent performance of chalkboards, they can easily be scratched with hard objects. Therefore, you should not paint with cheap chalk, since it often contains admixtures of sand and small pebbles. For home use, it is better to buy special drawing crayons, which are characterized by a careful attitude to the surface.
For your information! The composition of the drawing crayons, in addition to calcium carbonate, includes a coloring pigment and a binder designed to reduce dust formation during operation.
Do not use abrasive materials or aggressive cleaning agents to wipe off the inscriptions from the board. To wipe off the chalk, just use a damp, soft cloth or sponge.
The use of a soft material to clean the board from chalk will significantly extend its service life
A DIY chalk board for drawing or writing will allow you to solve several problems at once. Such an accessory will decorate almost any interior, and all important matters will be recorded and, therefore, completed. But most importantly, the results of children's creativity will move from the walls, floor and furniture to the surface intended for this.
Drywall is a fashionable and modern building material. With it, you can bring to life the most daring architectural solutions. For example, various types of arches,.
Floor lamps, sconces, chandeliers, table lamps and bedside lamps make our life brighter and more joyful. Correctly directed light will favorably emphasize the dignity of the interior. ...
As practice shows, even in a small family, over time, there is not enough space for things. You can solve the problem with a lack of space by purchasing a new rack,.
Chalk board is increasingly finding its use outside the walls of educational institutions. The strict rules for the design of a classic blackboard have become blurred, replaced by interesting shapes and decorative appearance. Chalk board has become a part of the interior, allowing not only to decorate the room, but also to add a useful component to it. Taking up the newfangled trends, designers began to widely use slate surfaces in their projects, photographers included chalk boards in the list of necessary props for photo shoots, calligraphers began to paint slate photo zones at weddings and presentations. This creative boom was due to a new look at the good old chalk board.
So I, imbued with this idea, decided to make a chalk board with my own hands.Only I could not find a special paint with a slate effect. As often happens, if you catch fire with some idea, you need to start implementing it on the same day. I don't have enough patience, my hands itch to get to work. I started looking for an alternative, as it turned out, there is a simple and budget option, which I will talk about in today's master class.
In order to make a slate board with our own hands, we need:
- Acrylic paint for wood;
- Matte black (or whatever you like) acrylic paint for the working surface of the board;
- White Spirit;
- Fugue for tiles (grout for filling tile joints);
- Drill;
- Jigsaw or hacksaw;
- Construction primer;
- Brush and foam roller for decorative paint;
- Sandpaper;
- Ring screw, screws;
- Baguette frame;
- Twine (rope or lace).
Tip: To decorate your whiteboard with chalk, you need to find a base with a large flat surface to paint on. The base can be a wall in a room, a kitchen cabinet door, a baguette frame with a back wall (backdrop), a sheet of plywood or fiberboard.
An old frame was found in the attic. The back wall (48x38 cm, thickness 0.5 cm) is cut from fiberboard according to the dimensions of the frame. Since the baguette frame has lost its pompous look from time to time, and the stucco molding has partially fallen off, it was decided to remove it and clean the frame of paint.
Gypsum stucco molding can be removed well with a spatula, and old paintwork with sandpaper. We clean the plaster and paint, apply a primer to the cleaned surface. After the primer has dried, cover the frame with two coats of paint at intervals of 24 hours. It remains to decorate the frame itself. We take paint and a brush. With light strokes, without completely painting over, we apply paint to the surface of the frame.
After forty minutes, we moisten the cotton wool with white spirit and erase with it those places that came out unsuccessfully when staining. You can also walk on the surface to be painted so that the unpainted places acquire the shade of the decorated paint.
Leave the decorated frame to dry completely. Now is the time to tackle the back wall, which will be the base for the slate board. For reliable adhesion of paint and fiberboard sheet, we clean its smooth surface with emery paper. Then cover with a primer, after about an hour, apply a base coat of matte acrylic paint.
Apply homemade slate paint on top of the base coat. In order to make the paint with the slate effect, we need the acrylic matte paint itself and the fugue (tile grout). We take 3 parts of paint and one part of fugue (3: 1) and mix with each other until smooth.
Tip: In order to minimize the formation of lumps, add the fugu gradually while stirring the paint at the same time. You can choose the color of the paint to your taste. If the paint is not light, then the chalk on it will also be clearly visible.
After the mixture of paint and fugue is ready, roll it out with a foam roller over the surface of the future board. It is necessary to roll out the paint with a roller evenly and in one direction. The roller needs to be slightly pressed when rolling on fiberboard in order to roll out small lumps and press the fugue particles into the paint. If you want your chalkboard to last for a long time, then cover the base of the board with at least 3 coats.
After the paint on the frame and on the base of the slate board has dried, we align the frame and the back wall together and fix them with clamps. On the reverse side, we mark the markings with a pencil, along which we will fasten the frame to the back wall with screws. We take a drill with a drill with a smaller screw thread diameter, drill holes and wrap the screws in them.
Tip: By screwing the frame to the fiberboard, we get a gap between the frame and the fiberboard sheet. Chalk dust will crumble into the gap (where glass is usually inserted), which will not allow everything around to be stained with chalk.
Having decided in what position the board will hang (horizontally or vertically), we drill holes for fastening the screw-ring. A ring screw is a screw that has a ring instead of a head. You can thread a rope through this ring and hang the board on the wall. We measure the length of the screw-ring according to the thickness of the frame and fiberboard so that it does not crawl out onto the front side of the baguette frame when screwing in.
Along the measured length, we clamp the screw-ring in a vice and bend it. Then we wrap a screw with a ring into the holes to the bend. Insert the rope into the rings and tie it - the chalk board is ready! With proper decoration of the baguette frame, the made coated board will be able to fit into any interior.
Tip: Use soft crayons or a chalk marker to prolong the life of your chalkboard.
Using the method considered in today's article, if necessary, you can paint any objects and surfaces. With the help of crayons, you can create unique props for photo zones, wedding photo shoots and plates for messages to your loved one. If you paint a metal surface with homemade blackboard paint, you can attach magnets to the chalkboard. Such a slate-magnetic board will be an excellent alternative to the refrigerator door. Housewives will appreciate the slate surface in their kitchen.
Chalk board is perfect for a child's room. On it you can study the alphabet, practice writing letters with chalk, draw and develop the child's creativity.
Such a useful recording tool will become an indispensable assistant in the workshop. It does not matter whether it is sewing or locksmith's, there is always a need to make a drawing that will always be in sight when performing work. The most important thing is that at any time you can make changes, erase everything and paint again.
The chalk board fits well into our interior and has become a good helper for organizing time and business. In addition, the home organizer from time to time becomes a message board.
The other day I took out a large baguette frame from the attic, which I plan to redo and hang in the room as well. What will come of this, you will find out in the next article. Subscribe to site updates, join groups on social networks, and you will be aware of new publications!
Slate board in the interior is an extraordinary solution. If you want to follow individuality to the end and make a slate board with your own hands, and not buy it in a store, then you will most likely have a question: what about the paint? Save money and make your own chalkboard paint. Whether it is applied on furniture or on a special board, the blackboard paint is completely different, green or black, that is used in schools. Our paint can be used to cover completely different surfaces: a kitchen cabinet door or a headboard, turning an ordinary piece of furniture practically into an art object.
Materials: primer for latex paint
latex paint of any color
mixing container
brush or roller
drill mixer attachment
1. Mix latex paint and primer in a container. The ideal proportion of chalkboard paint mixture is 1 part primer to 8 parts latex paint.
Stir well, otherwise the primer granules will be visible on the surface of the board. Therefore, it is better to mix with a mixer.
In order to get the blackboard paint in a beautiful slate, not mourning color, black paint can be mixed with white paint in a ratio of 2.2 liters: 0.2 liters (2.2 liters of black paint and 200 ml of white paint). Then add a primer to the mixture.
2. Paint the surface with slate paint. The surface must be prepared in the same way as is usually done before painting. Apply the paint in two layers.
The color range of chalkboard paints is endless. You can choose any bright contrasting color.
3. Bringing the board to mind.In order for the board to become completely suitable for drawing, it must be sanded with chalk, then erase its traces with a dry rag in a circular motion.
Thus, it is possible to make paint for the slate board and the board itself, which can successfully become an ornament not only for children, but also for adults.
We all once went to school and, as children, never thought about the amenities that were provided to us. But years passed, and my daughter went to school. And our parents had to renovate the classroom. We wanted to create good conditions for the comfortable learning of our children. Unfortunately, the state stopped thinking about it, leaving it on the shoulders of teachers and parents. We easily coped with wallpapering, painting windows, desks and chairs.
But the condition of the board confused us. She was no longer able to serve the children or teachers. Even sitting on the first desk, it was only with difficulty to make out what was written there. The top painted layer of the wood plank has rubbed off, exposing the wood structure.
We wondered how to cover the board so that we could still work productively on it. Enamel paints were clearly not suitable for us, since chalk does not normally write on them. We decided to use an anti-corrosion primer “Zebra” GF-021, red-brown color.
True, many of the parents were skeptical about such a proposal, but we took full responsibility for ourselves and decided to take a chance by testing such a coating for a school board. First, we washed the board well, let it dry. They began to cover with a brush, but the brush left stripes, but the foam roller coped with the work at 5+. The Zebra primer does not have a pronounced unpleasant odor like paints. The surface is matte and not glossy like from enamel paints. The primer lay flat and covered the board well, even one layer was enough for the board to take on the look we needed. The board was ready for use the next day. But it had to be used in business.
Our joy knew no bounds when we ourselves tried how chalk now writes on our new board.
New because that was exactly the impression that everyone who saw and wrote on it had. During the year, children used a new beautiful, and most importantly, easy-to-read whiteboard. Now, at the school where my daughter is studying, all the boards are brought into proper shape with the help of an anti-corrosion primer.
Quite often, when creating the interior of a children's room, you want to decorate it in a special way, creating an appropriate atmosphere so that the child can not only play, but also develop.
At the same time, certain elements are used that are directly related to education, teaching children the appropriate skills.

Amateur photo of the interior of the room, where a blackboard is used as a wall
To begin with, it is necessary to say that it is possible to use various kinds of enamels for these purposes, which create a strong film on the surface and at the same time give it a matte appearance. Recently, however, completely different materials have begun to appear, and although the price for them is quite high, the result obtained fully justifies all the costs. A good example is the well-known blackboards.

Wondering how to paint your blackboard? There are various types of specialized materials to create coatings of this type.
- First of all, you need to prepare the surface itself.... To do this, clean it with fine sandpaper to get rid of the lint.

Decorating a children's room with chalk-drawable walls
- In the next step, the installation instructions recommend using a special impregnation to increase the level of surface adhesion.... It also protects the material from decay, mold and harmful insects.
- Next, you need to choose the right primer.... To do this, you can use a neutral dye or a special compound that creates a film on the surface. However, professional craftsmen recommend using a primer that has been specially designed so that the paint for the blackboard lies on it.

Special magnetic primer designed to create a layer to hold small metal objects on the board
- This type of material quite often has inclusions of magnetic particles.... This is necessary so that under the paint layer there is a layer capable of attracting metals, which will serve to fix various elements on the board surface.
Advice!
You should not skimp on a primer with magnetic particles, since this ability is sorely lacking in the learning process.
It will pay off quite well and can be an additional element of play and education.

The use of similar design solutions for decorating kitchen walls and even furniture

Layer appearance that should be obtained with the correct components
- Professional craftsmen recommend using store formulations that have been specially developed for these purposes. They provide a uniform matte layer with high wear resistance. At the same time, he will receive a good slate color, characteristic of these products.
- A paint roller is used to apply the material to the surface. At the same time, professional masters recommend using a minimum amount of dye so as not to create smudges.

Some specialty paints are also magnetic, but using a primer is more efficient and economical.
- If you need to make your own paint, then for these purposes it is better to use a primer and latex paint. They are mixed in a one-to-one ratio to create a firming effect. It should be noted that you only need to use black paint and a primer of the same solvent composition.
- To obtain a slate color, it is recommended to add a little white pigment to the composition. Then the board will not be too gloomy, and its surface will not change its structure.
- It is important to remember that it is necessary to achieve the effect of a strong film on the surface, which will have high wear resistance. Color characteristics in this case do not play a special role.
- It is also desirable to obtain a matte finish when painting, since the gloss will reflect light, and it will be inconvenient to work on such a board. This must be taken into account immediately and when choosing an enamel, focus on this property.

Using this material for decorating the walls of a children's room, it allows not only to develop the child, but also gives him the opportunity to independently create a comfortable and beautiful interior


