In detail: do-it-yourself repair of gazelle pins from a real master for the site my.housecope.com.
The front suspension of Gazelle cars is spring, a massive cast beam is installed on the front axle.
The pivot joint has been used in mobile equipment for a very long time - it was used even in carts and horse-drawn carriages. The pivot suspension is installed on Volga and UAZ vehicles, on GAZ 53/3307, KAMAZ, ZIL trucks.
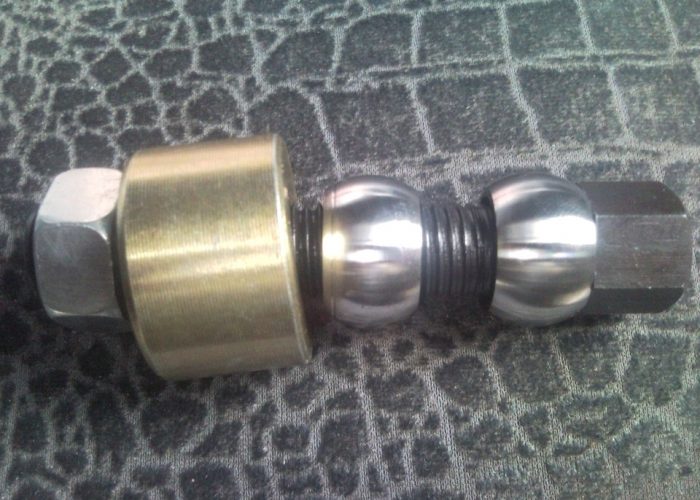
For Gazelle cars for repairing the suspension, repair kits are sold; the standard set includes four bronze bushings and two pivots. The industry also produces repair kits of a new type, in which the bushings are replaced with needle bearings. The price of a repair kit with bronze bushings is in the region of 900-1700 rubles, there are no problems with the spare parts themselves - they can be bought at almost any specialized auto shop.
Complete sets are also sold in car dealerships, which include:
- wedges (2 pcs.);
- spherical bushings (2 pcs.);
- pivots (2 pcs.);
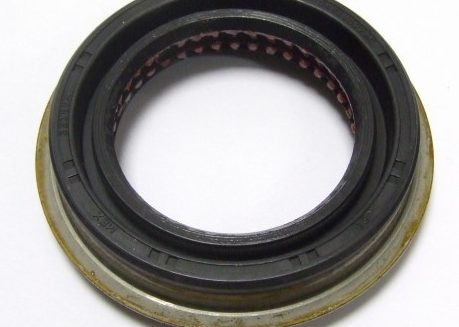
- rubber seals (2 pcs.);
- plug gaskets (2 pcs.);
- bronze bushings (4 pcs.);
- washers;
- nuts.
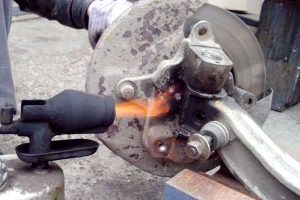
Often, car owners of GAZ commercial vehicles are interested in how much it costs to repair the pivots on a Gazelle. It should be noted that the work of replacing the pivots itself is quite laborious and requires considerable physical effort and time. The prices for work on ash-slabs in car services are different, the price depends on the level of the service station, the region (location), the degree of complexity of the replacement. Here the fact is that in neglected cases (when the suspension has not been lubricated for a long time), the pivots practically do not knock out of their seats, and then you have to completely remove the front beam assembly, use a gas burner during disassembly. The cost of spare parts for a Gazelle car on average starts from 2-2.5 thousand rubles for one side, the replacement price can go up to 10-12 thousand rubles.
| Video (click to play). |
Due to the fact that ZSh is not cheap, many car owners of commercial vehicles do this kind of work with their own hands. Here we will look at how to change the pivots on our own with and without removing the suspension itself. Let's first look at how to get the job done without removing the beam.
We disassemble, we carry out it in the following sequence:
- we put the car on a level surface, it is not necessary to use a pit or a car lift, but it is very desirable that there is a concrete floor. In any case, the base must be rigid, otherwise the car will simply fall through, press into the ground;
- we loosen the bolts of the front wheels, we jack up each side, we substitute supports (tragus) on both sides. In a word, we hang out the "front end" of the Gazelle;
- unscrew the two caliper bolts, which is located on the inside of the brake disc, use a screwdriver to squeeze the brake cylinder to release the pads;
- we fold the caliper on the brake hose to the side;
- detach the caliper bracket;
- we unscrew the bolts securing the plugs of the pivot joint (top and bottom);
- we knock out a wedge;
- take a piece of iron rod, suitable in thickness, and knock out the king pin with a sledgehammer from top to bottom. Very often, the kingpin boils tightly in the body of the front beam, so it is sometimes simply impossible to knock it out in place. When the front suspension is not removed, the wheel arch interferes with swinging the sledgehammer normally, the distance for swing is not enough.
If there is a gas burner, you can properly warm up the connection, and the king pin may move from its place. Having removed the steering knuckle on one side, we do the exact same operation with the other fist.
The pivot pin (fist) can be disassembled after dismantling, but this is not at all necessary.
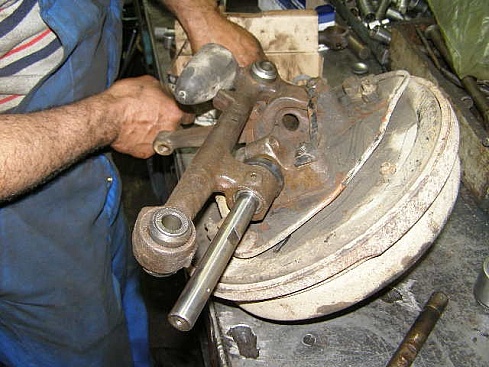
We clamp the removed trunnion in a vice, in turn knock out the upper and lower bronze bushings from the body. Since the bushings are not needed, they can be knocked out as you like, the main thing is not to damage the seat under them. You can take an iron flat screwdriver or a barb, flatten the sleeve from one edge, and then it will fall out of the fist by itself.
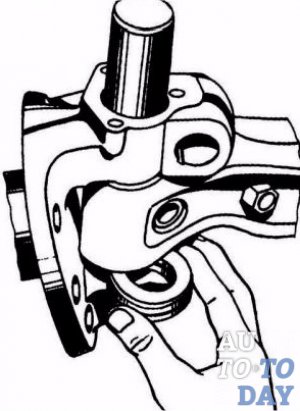
After knocking out both old bushings, we install new parts in place, drive them into the pivot pivot seats using a sledgehammer. It is not recommended to beat, as in the figure below, it is better to push the bushings into place through a spacer.
Having installed the bushings in place, we use a round file to approach them from above,
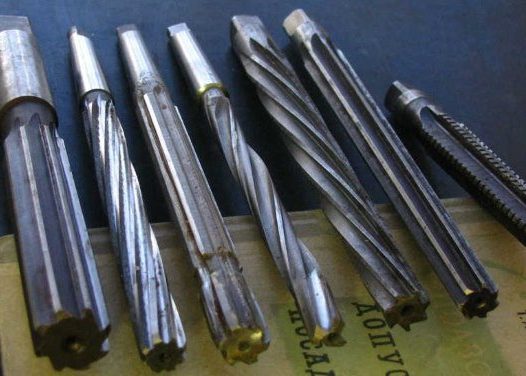
then we unfold them with a 25 mm sweep.
It is very important here not to loosen the bushing - having passed the sweep once from top to bottom, you need to try on the king pin in place. Ideally, the king pin should go into its seat very tightly, with a hammer (light tapping). The fact that the pivot pin sits tightly is normal; during the operation of the car, it will develop very quickly. But loosening is unacceptable here, in this case a backlash will quickly appear, and soon the suspension will need to be repaired again.
Instead of a simple sweep, you can use an adjustable sweep or a ball, it should be borne in mind that the diameter of the ball should be 24.7 mm, not more. If the bushing is punched with a ball with a diameter of exactly 25 mm, play will appear in the pivot joint almost immediately.
Before turning the hole with a reamer or a ball, the bushing must be lubricated (with engine oil, lithol can also be used). Having installed the bushings, we put the steering knuckles in their places. Usually, there are no problems with assembly, the most important thing in the ZSH is to disconnect the steering knuckles from the beam.
If you can't knock out the pivots in place, you have to remove the entire beam. We do it as follows:
- in the same way as in the option considered above, we remove the wheels, hang the front axle of the car;
- disconnect the brake hoses from the calipers on both sides;
- remove the brake calipers;
- dismantle the front shock absorbers;
- we disconnect the steering rod together with the lever from the long beam;
- on each of the two sides, disconnect four nuts securing the beam to the springs;
- we roll out the beam, remove the steering knuckles from it.
Then we make the ash-slag. With the suspension removed, it is very convenient to knock out the pivots even with a heavy hammer, and with a very sharp strong impact and a large sledgehammer, almost any "dead" kingpin can be moved from the spot.
There are certain signs by which one can understand that a backlash has appeared in the pivots on the Gazelle:
- uneven premature wear of the tire tread occurs;
- a knock appeared in the suspension;
- the car does not obey the steering wheel well.
Checking the suspension for backlash is quite simple, for this you need to hang the car on a jack and swing each wheel from top to bottom. If the backlash is felt (more than 2-3 mm), it is necessary to get up without repair.
Gazelle is a very tenacious car, and even with backlash in the suspension it can drive for quite a long time. But with broken bushings, it is extremely undesirable to operate a car, there may be bad consequences:
- the seat for the bushings in the front beam will break, then the beam itself will have to be changed, and it is not cheap;
- the rubber will wear out quickly, you will have to change the wheels;
- driving a Gazelle with large backlashes is dangerous, you can get into an accident.
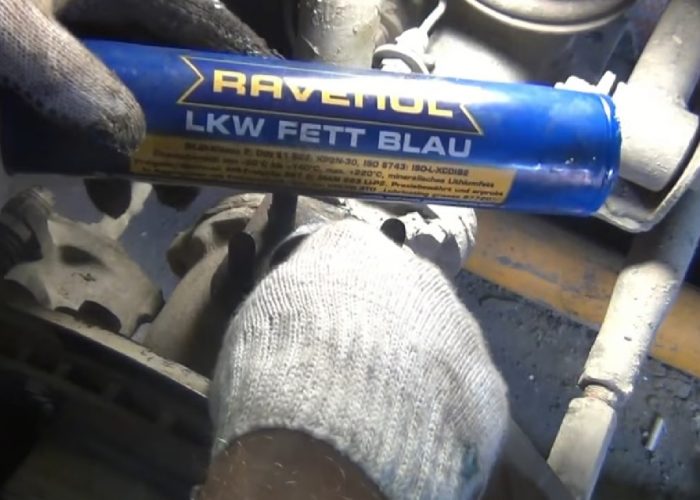
In the factory instructions, the regulations for the lubrication frequency of the suspension on the Gazelle are spelled out - after 15 thousand km of run, but experienced drivers advise to fill the grease into the pivot joints approximately every 5-8 thousand km. Lubrication significantly extends the service life of the pivots; with regular injection, parts can pass up to 150 thousand kilometers without repair.It is not difficult to lubricate the joints, the main thing is not to be lazy to do it.
We make sprinkling as follows:
- we install the car on a pit or a lift;
- we prepare the syringe - we fill it with lithol;
- we find the upper grease nipple, and we finish the lubrication with a syringe into it;
- then we stuff the grease into the lower grease nipple, first the oilers should be cleaned from dirt with an iron brush;
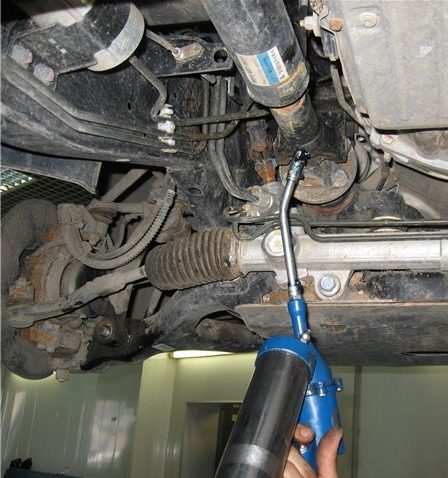
These nipples are located on each side of the front axle of the vehicle. But there is one nuance here - even new grease fittings with lithol sometimes do not break through. It is safer to make injection using a flexible hose. We proceed as follows:
- we unscrew the oiler from the plug, instead of it we twist the flexible hose;
- install the other end of the hose on the syringe;
- pump the lithol into the pivot with a syringe.
It is necessary to pump in the grease until it begins to protrude from the connections. First, there will be dirt, but you need to wait until pure lithol begins to appear from the connections. Having missed the kingpin, we unscrew the hose, put the grease nipple in place. So we lubricate all four points on the suspension.
Syringe hoses are sold at auto dealerships, they are standard and must match the thread.
Car owners disagree about lubrication, some Gazelle owners believe that such pivot connections must be coated with thick transmission oil, for example, TAD-17. Still, it is more reliable to inject the Gazelle with lithol or other grease - the "transmission" is too liquid, it quickly flows out of the pins. But on the "Volga" they inject mainly with nigrol (TAD-17), for this you can even use not too dirty working off.
- Do-it-yourself replacement of pivots on a Gazelle
- What is a king pin?
- When to change the pivots to the Gazelle
- What is required for work
- Sequence of work
In those days, when carriages and carts, which were pulled by horses, were made as vehicles, the axle of the front wheels was fixed on the front of the carriage with a special bolt or rod. He was called the kingpin.
The reason to change the rod may be large backlash of the steering knuckle. You can check the degree of its deviation by hanging the front wheel and pulling it up and down with your hands. If there is a backlash, it feels good.
Another question is how to check the kingpin on the Gazelle if there is no possibility for a special inspection of the car? You can turn the wheel out during parking and also loosen it, checking for unnecessary movements.
It is recommended to do such inspections at the end of each trip during difficult weather and on fluffy trails. A knock on the front suspension may indicate an urgent inspection and possible replacement.
It is difficult to say when exactly the inspection of the part will be needed. It depends on a number of factors that do not always depend on one another. For instance:
- timely stuffing;
- front wheel bearings tightening time;
- condition of wheels and steering tips;
- car roads;
- driving style.
First of all, the part fails when the truck travels a lot around the city, when the car is actively used in the spring on leaky roads. The previous bad repair at the service station will also render a "bear" service.
It is convenient to replace this part as a procedure accompanying other repair work. For example, wheel alignment and balancing checks, steering tip repairs and more. But if your Gazelle is in a deplorable state and the replacement of pivots is extremely necessary, you can do it yourself.
For this procedure, you will need the following tools:
- set of heads;
- rolling board;
- gas-burner;
- reamer and holder;
- devices for replacing silent blocks and wheel bearings;
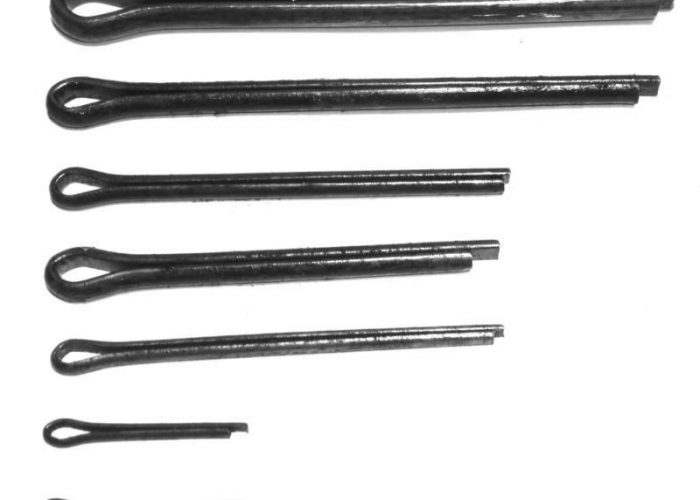
- cotter pins;
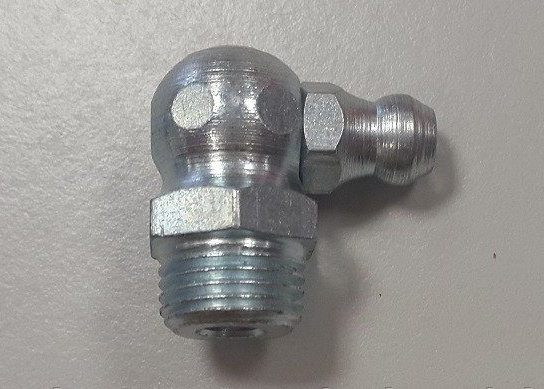
- corner grease nipple;
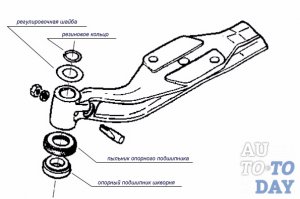
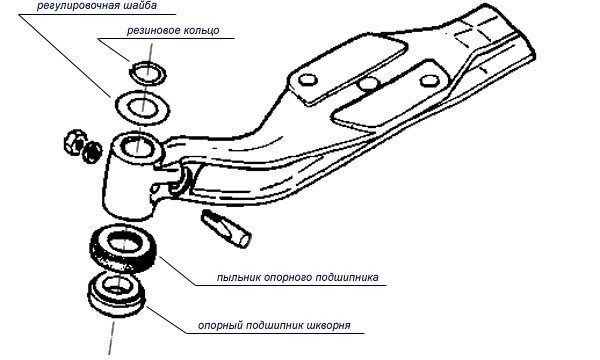
- adjusting washer;
- pivot bushings and pivots;
- thrust bearing and king pin wedge;
- locksmith's tool;
- semi-axle oil seals;
- spacers for the left knuckle pivot and for the pivot cover;
- sealing rings.
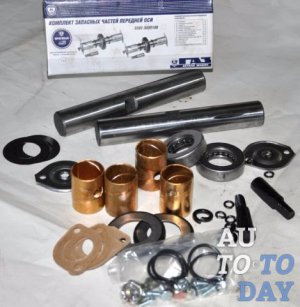
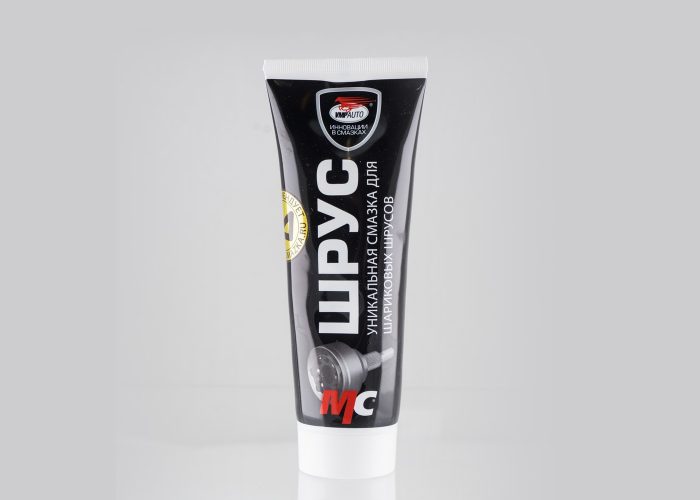
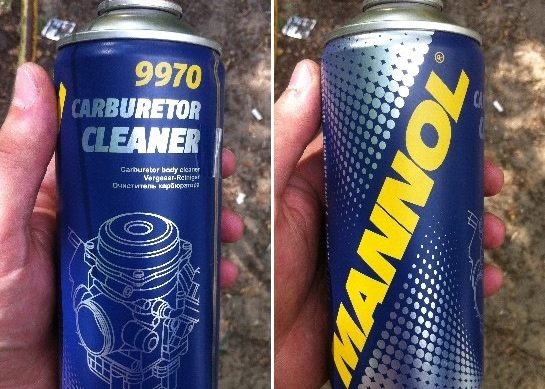
When purchasing a kit, keep in mind that you also need to have on hand a carburetor cleaner, VD-40, CV joint grease, thread sealant, pivot pins lubricant.
The kingpin on the Gazelle is a simple part, so everyone can figure out how to change it. The most important thing is to stock up on tools, time and patience. So, the change of the part is carried out in the following sequence of actions:
- we drain the oil from the bridge, hang the bridge itself, put stops, remove the wheels;
- unscrew the brake disc and caliper;
- then we unscrew the brake shield, remove the drive assembly with the bearing housing;
- remove the steering tip, turn out the lower oiler;
- then remove the pivot cover, after which - the lubrication valve;
- the cork is unscrewed from the lower kingpin.
The same sequence of work must be repeated on the other side. All removed pivots must be soaked, all adhering dirt must be removed from the rest of the assembly and inspected from all sides for integrity.
Inspect and clean oil seals, grease coils. Everything should be left clean, free from defects and oiled. The last step of the check is to make sure that the pivots are securely in the trunnion. Check the axial movement of the knuckle.
Then you can install the oiler, the kingpin cover, lubricate its valve. After all these checks are complete, it is necessary to lubricate the drive journal with oil and insert it. After these works are completed, you can assemble the nodes in the reverse order to that given above.
Keep in mind that it is quite difficult to disassemble the nodes with the help of one person. In addition, this part often sticks to the knot and sometimes you have to knock it out with a sledgehammer, for which you also need an assistant. If knocking out does not work, experts recommend soaking the part in kerosene or warming it up with a gas burner.
The check is carried out with the adjusted bearings of the front wheel hubs.
1. Raise the front wheel with a jack. Rock the wheel vertically.
If play is felt (the upper outer edge of the brake caliper moves more than 0.5 mm - this distance can be measured, for example, using an indicator), then the king pin and bushings are worn out and must be replaced.
2. Place the car on the wheels and measure with a feeler gauge the gap between the upper lug of the steering knuckle and the front suspension beam boss.
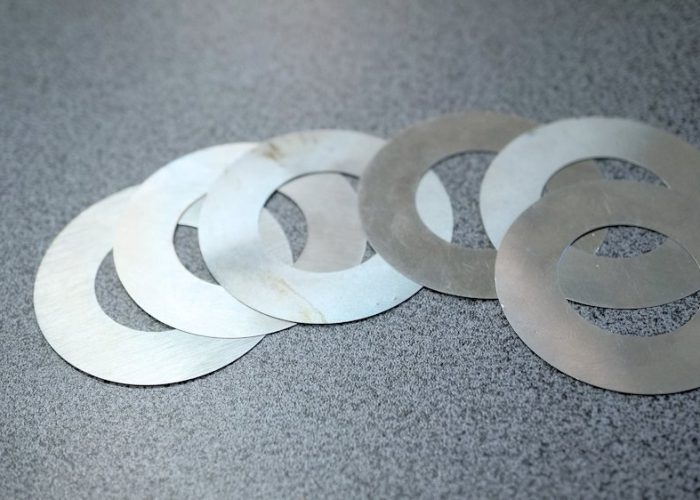
The maximum allowable gap is 0.15 mm. Eliminate the gap from 0.15 to 1 mm by selecting an appropriate set of shims installed between the upper lug of the steering knuckle and the boss of the front suspension beam. If the clearance is over 1 mm, replace the thrust bearing.
1. We jack up the front of the car.
2. Remove the front wheels and install stops under the beam.
3.Using the "10" key, unscrew the two bolts securing the upper bearing cover of the king pin
6.
7. For convenience, remove the shock absorber (see Replacing the shock absorber).
9.
11. Striking the lever with a hammer, press out the finger.
12. After unscrewing the nut, remove the pin from the hole in the transverse link.
The Gazelle car of the AvtoGAZ plant belongs to this class of machines that are used, as a rule, with maximum intensity. Its technical characteristics, in particular, the pivot suspension, provide the Gazelle with a wide range of applications, both for production needs and for personal purposes.
The king pin, as the elements of the chassis, initially have a limited resource, and when operating under loads, it naturally decreases. Replacing the pivots with gazelles with your own hands will significantly reduce the cost of repairing, and also allow the owner to restore the performance of his car as soon as possible.
The rod, which provides the turning properties of the wheel in the car, is usually called the kingpin, and the suspension using axial rods is called the kingpin.
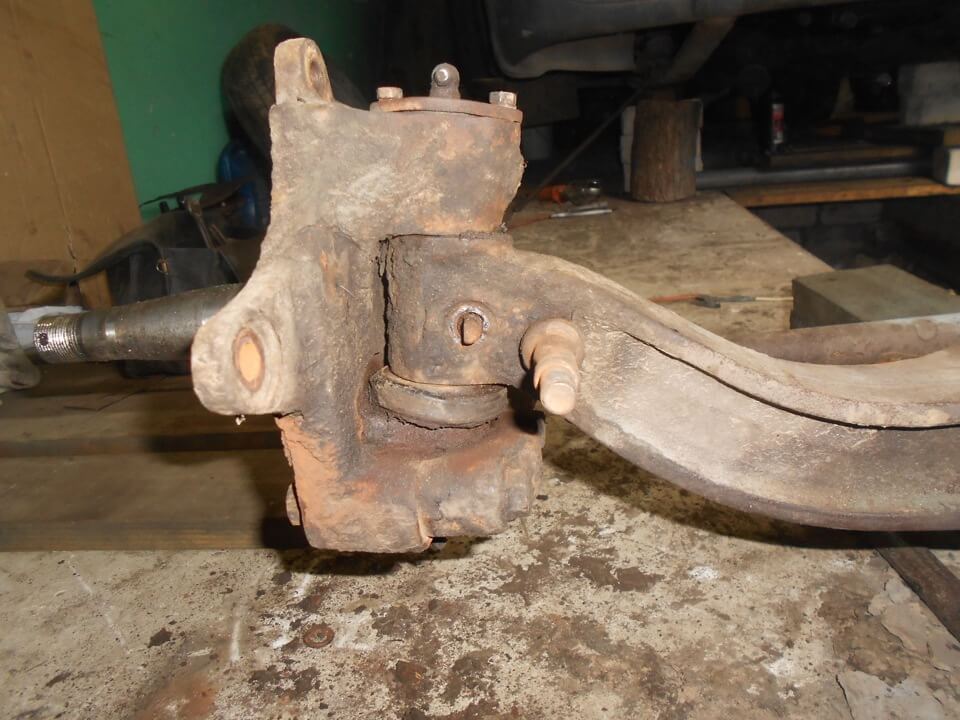
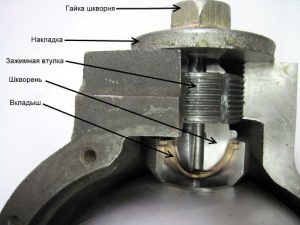
It looks like a kingpin in disassembly
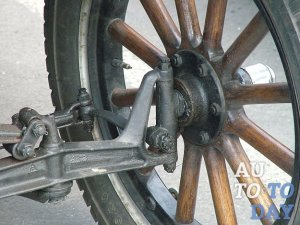
The prototype for the suspension of a car using pivots was the device of a conventional wheeled cart, which were used in the 19th century and used an axial hinge mechanism.
The principle of operation of the pivot suspension is also based on the properties of the spherical joint, which allows free wheel travel and fastening of the hub, thereby allowing the car to perform turns within the steering limits.
Components of the front suspension Gazelle
The main indicator of the stability of the machine during maneuvers is the set lateral and longitudinal angles of inclination of each kingpin, which ensure comfortable movement.
The material for the manufacture of pivots is strong hardened steel, and all cavities that come into contact with it are filled with grease.
See in the video: replacing the pivots with the Gazelle.
The scope of application of pivots in the suspension extends mainly to trucks and medium-duty vehicles, such as the Gazelle, as well as off-road vehicles designed for off-road driving. This is due to the combination of simplicity, reliability and maintainability in this design.
Correct operation and timely maintenance will guarantee a long and reliable operation of the pins in the car.
Before starting to repair the suspension, you need to make sure that replacing the pivots with Gazelles is really necessary.
The following symptoms may be the first signs of a faulty king pin:
- A metallic sound is produced when a wheel is struck.
- Beat on the steering wheel at speed.
- Difficulty turning the steering wheel.
- Pronounced wear on the outer or inner part of the tire.
We recommend that you see: how to check the malfunction of the pivots on the Gazelle.
However, the presence of these manifestations can be caused by other malfunctions of the chassis, therefore, it is necessary to carry out further diagnostics to localize and clarify the degree of wear of the suspension parts.
To be completely sure that the kingpin in the Gazelle requires replacement, you need:
- raise the car with a jack, ensuring the suspended state of the wheel;
- fix the hub mechanism with the brake pedal;
- shake the wheel in a vertical plane.
This is what a worn kingpin looks like.
The presence of play in the wheel during swing indicates a malfunction of the king pin, which must be replaced.
To repair the pivot suspension on the Gazelle, you must prepare the following parts and tools:
- A repair kit that contains all the necessary parts, including a new king pin.
- Reamer for Gazelle 25 mm, as well as a holder.
- A set of heads, keys.
- Wheel bearing puller.
- CV joint lubrication, carburetor cleaner and VD-40 fluid.
- Pivot grease and thread lock.
See in the video: replacing the pivot with a Gazelle.
It is recommended that both pivots on the axle be replaced as part of the same repair to ensure that the steering is identical while driving.
The front of the car must be hung out by means of a jack and dummy stops, which are placed under the beam, and the wheels must be removed, thereby ensuring the possibility of repair work.
The appearance of the pivot suspension
The replacement technology is as follows.
- Initially, it is necessary to remove the oil from the bridge.
- Remove the brake caliper and disc.
- Having unscrewed the brake shield, the entire drive must be removed as an assembly together with the bearing in the housing.
- Further, the steering tip and the oil can located below are dismantled.
- Then the pivot cover, lubricant valve and plug are uninstalled.
Removing the pivot suspension
When disassembling the assembly, it is advisable to process the VD-40 parts, as well as use the appropriate tool. Parts that are difficult to remove are recommended to be heated with a burner or soaked in kerosene. The kingpin itself, as a rule, is knocked out with a hammer from the bottom up. The dismantling of the second part on the other wheel is carried out in the same way.
- The dismantled parts must be cleaned of dust and dirt by pretreating them with cleaning fluids, and also to visually inspect their condition. All cracked and severely worn parts must be replaced.
- The installation process is carried out in reverse order using new components.
Parts of the pivot suspension disassembled
In this case, you need to take into account some features:
- pressing of the steering knuckle bushings is carried out using a mandrel, the parts to be installed are lubricated with grease for the CV joint;
- when unrolling new bushings, the technological tolerance is from 0.02 to 0.053 mm, while it is necessary to strictly observe the alignment;
- reaming is recommended to be performed through the old bushing, which is not dismantled, but is left in the steering knuckle;
- when installing a support bearing with an anther, it is important to observe the assembly directions, while it is installed so that the boot buh is on top;
See in the video: how to replace the king pin and install the bushings in the trunnions.
Upon assembly, it is necessary to make a complete lubrication and check the assembly. After that, all the parts are installed on the machine in the reverse order, oil is poured into the axle and the wheels are installed.
Subject to the rules and using this technology, repair work can be performed on our own.
Thus, replacing the pivots with the Gazelle is a periodic procedure that ensures the controllability and maneuverability of the car on the road. The presence of a special tool and knowledge of technology will allow each owner to repair their car on their own.
Gazelle, like any other vehicle, consists of many different parts. All together, they ensure its smooth operation and movement. One example of such parts is king pins. The kingpin on the Gazelle plays an important role, but over time it loses its properties and wears out. In such cases, its repair is required.You can replace the pivots with a Gazelle with your own hands.
The detail was known back in the days when carts and carriages drove along the roads. The axle for the front wheels was attached to their front with a special bolt or rod. He also bore the name of the kingpin.
The main purpose of the element is to connect the ball joints to the wishbones. It follows from this that the kingpin on the Gazelle is a steel rod that fixes the pivot joint located on the steered wheel.
King pins are of two types:
- swivel - are installed on the Gazelle;
- trailed - are most often used in the construction of trucks.
The fastening of the pivots directly depends on their appearance (shape) and location. This is usually a cylinder or cone.
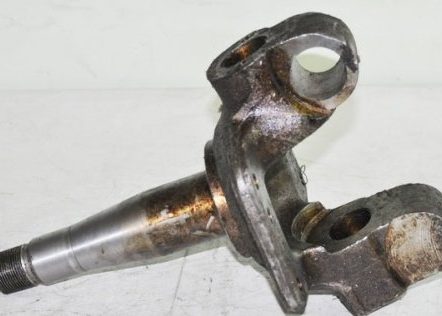
Replacement of these elements is necessary in several cases:
- If you hit the wheel, a metallic sound will be produced.
- At high speed, there is a beating in the steering wheel.
- The steering wheel is difficult to turn.
- There are clearly visible signs of wear on the inside or outside of the tire.
The listed conditions of the car do not prove the need to replace the pivots with Gazelles. They can also be caused by other breakdowns. Therefore, it is necessary to carry out a number of clarifying procedures:
- Using a jack, raise the car so that its wheels are in a suspended position.
- Secure the hub mechanism using the brake pedal.
- Shake the wheel a little vertically.
The detection of swing play is a signal that these parts still need to be replaced.
In the process of work, you may need:
- reamer and special holder;
- bushings for pins and pins themselves;
- sealing rings;
- gaskets;
- semiaxis oil seal;
- bearing and wedge;
- adjusting washer;
- corner oiler;
- cotter pins;
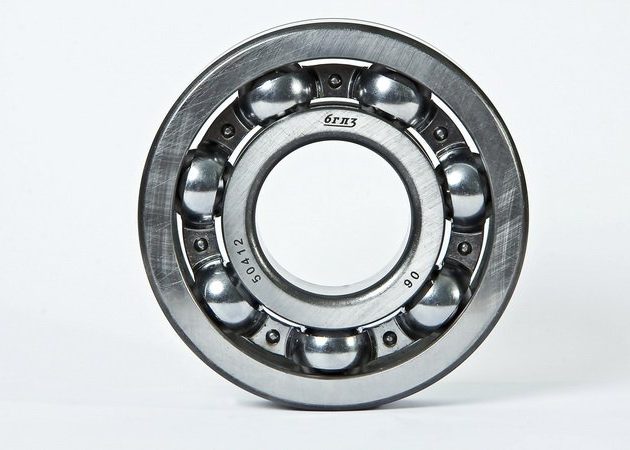
- devices to help replace silent blocks and bearings;
- locksmith tools;
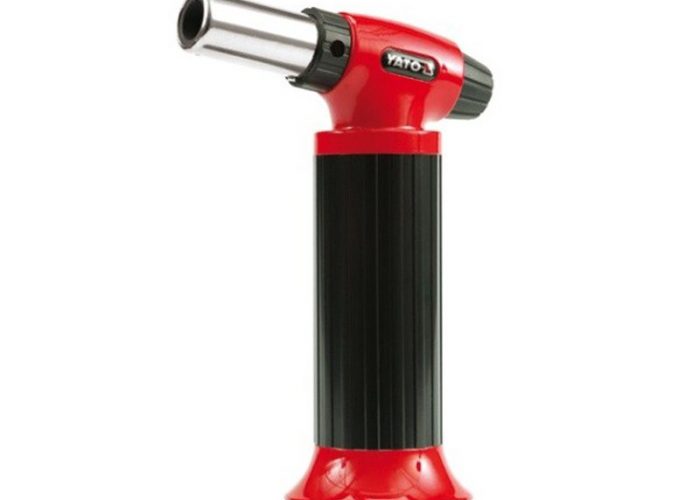
- gas stove;
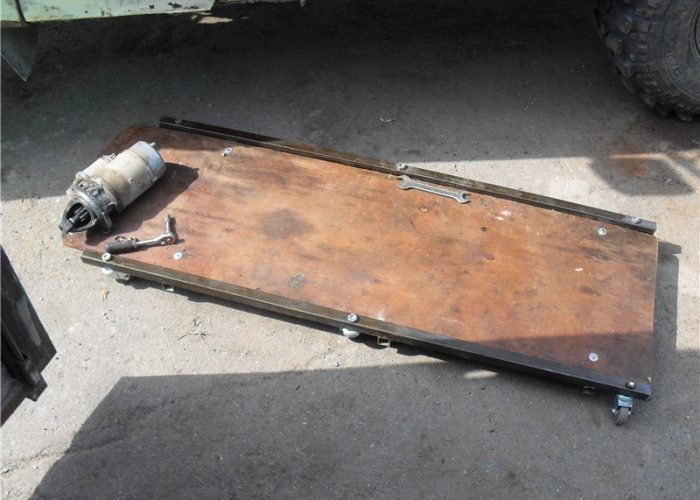
- rolling board;
- several heads;
- grease;
- sealant;
- CV joint grease;
- VD-40 (corrosion protection);
- carburetor cleaner.
After the preparatory work, you can start replacing the pins on the Gazelle with your own hands.

Replacing the pivots on the Gazelle is carried out in several stages:
- First, you need to carefully drain all the oil, otherwise you will then have to wash the objects around and wash your clothes.
- Hang up the bridge, put metal or wooden stops and remove the chassis.
- Remove the brake disc and caliper. Remove the brake shield and bearing.
- Remove the tip, unscrew the bottom oiler, remove the steering tip and open the part. It is also necessary to remove the valve.
- The pins have a plug at the bottom. Unscrew it.
- Using a bolt or metal bar and hammer, knock out the part. If it does not give in, warm up the attachment point with a burner.
- Soak all removed elements first, and then thoroughly clean from dirt and oil. And also it is necessary to check if there is damage and deformation on them.
- Lubricate the bushings and install so that they are flush with the body. As soon as the pressing is completed, it is necessary to check whether the hole in the lubrication channel is visible. If not, clean it. Apply oil to the bushings on top.
- Now the replacement of the pivots begins directly. If done correctly, it will be easily installed. It is important that the backlash disappears. Experts do not recommend installing the part with great force. This will accelerate wear and tear. In addition, the system will have to be developed over a long period of time.
- Check the condition of the oil seals. Replace heavily worn ones if necessary.
- Assemble the structure in reverse order: plug, valve, steering tips, grease nipple, brake disc and caliper, chassis.
All elements must be thoroughly lubricated with grease. If necessary, replace parts on the other side.
The work process has several nuances:
- When buying new parts, you need to pay special attention to their section. It is often much less than needed. This is why it is recommended that you bring a micrometer with you.
- Bearings must not be forgotten. They should turn without effort or extraneous sounds. It is important that there is sufficient lubrication on them.
In order for the pivots to last as long as possible, it is necessary to lubricate the bushings more often (inside and out).
So, replacing the king pins is not that difficult. It is enough to prepare all the necessary tools and materials in advance. And in order to avoid replacement and repair, it is necessary to regularly carry out a preventive technical inspection of the car.
I really want the car to work reliably and not surprise the owner with unexpected breakdowns. Your car will respond to tight bends if the steering wheel swivel is secured with a pivot pin.
It is this rod that is called the king pin. Our great-grandfathers used a metal rod or bolt through which the axle of the front wheels was securely attached to the front of the crew. Such an attachment was called "kingpin" or "kingpin".
The first cars also attached the wheel to the suspension with a hardened steel axle that rotated on bearings. In our everyday life, the concept of "kingpin" remains, denoting the constructive axis of rotation of the wheel. On double wishbone suspension, an axle connects the centers of both ball joints.
Along with the pivot pivot, which stands on the car's beam, there are also trailed pivots. That is, such a metal finger serves to connect rotating parts independently of each other. Most often, such a part is installed on trucks. This part can be conical or cylindrical in shape, it can be fastened in different ways in different nodes.
Reasons for replacing the pivots with a Gazelle
Regularly checking the steering knuckle play in a simple way allows you to replace the assembly in a timely manner. I check it very simply: I hang up the front wheel and at the 12 o'clock position I jerk it up and down with both hands. If you feel a backlash - it's time to pay attention to the wheel bearing or kingpin. On the road, at short stops or gas stations, I just turn the wheel out and loosen it. This way you can see how far the fist moves in relation to the front beam.
Replacing the pivot bushings in a timely manner depends on factors that need to be addressed. After a long drive on rough highways in the spring, I examine the front wheels of the car. The easiest way to do the replacement is to repair the steering tips and check the wheels for balancing and toe-in. You can take a closer look at the assembly when tightening the front wheel bearings. Given the possibility of a recent poor-quality repair at someone else's service station, I inspect the car more often. If the inner diameter of the bushing is slightly squashed, the unit will hold out in working order, at best, at a crossing of 200 km. Although it all depends on the quality of the road surface and weather conditions on a business trip.
Everyone is wondering if it is possible to repair the pivots on their own? If you have a lot of free time and the right tool you will succeed. The main thing is patience and scrupulousness. Because I had to roll out the front beam. And this is not easy. It is necessary to spend a lot of energy and time on unscrewing the step-ladder of the springs. Then it is necessary to remove the mounting bolts from the steering knuckles and front link arms. The question is, why so much movement? And the scope of the sledgehammer, with the help of which it is necessary to knock out the kingpin! It is an indispensable tool for replacing gazelle pins. Sometimes it is possible to knock out the king pin in place.
First, remove the wheel. Now disconnect the caliper and unscrew the king pin cover. Unscrew the nut and knock the retaining wedge out of the beam. Now knock over the appropriate bolt, the king pin should slide down. Most often, this method is quite realistic.Having taken out the kingpin, the steering knuckle is easily removed. But if the part is stuck and does not want to come out, I roll out the front beam and take a reliable tool - a sledgehammer.
It is necessary to complete the repairs. You can't do without the help of a friend. Now you need to put the beam on a metal support with the lower part of the fist and knock out the stuck kingpin. In order for things to move forward, you need to have a drift. I am using an old kingpin, to which I welded a handle for convenience. Take turns with my friend pounding from all over the place on the drift. There were cases when this method did not help either. I had to soak the kingpin in kerosene. Sometimes it helps to warm up the finger clamped in the beam with a gas burner. The main thing is that the matter is going well.
To repair a gazelle with your own hands at home, you must have a whole arsenal of tools. To replace the pins, you need to purchase o-rings, a reamer and a holder. Of course, you will need kingpin bushings and new kingpins. A set of heads and a rolling board should be in your garage workshop. When calculating the cost of replacing gazelle pivots, do not forget to take into account the starting materials: various lubricants and thread sealant, a good carburetor cleaner.
When I hear a knock in the front suspension, I call in to the masters at the service station to make sure that the pivots are malfunctioning. The guys make repairs quickly and efficiently. The very next day, you can go to the Gazelle on a business trip at any distance.
| Video (click to play). |

