In detail: DIY repair of chips on a car body from a real master for the site my.housecope.com.
Welcome to blog my.housecope.com/wp-content/uploads/ext/2102!
In this article, we will look at how to remove chips on a car with your own hands.
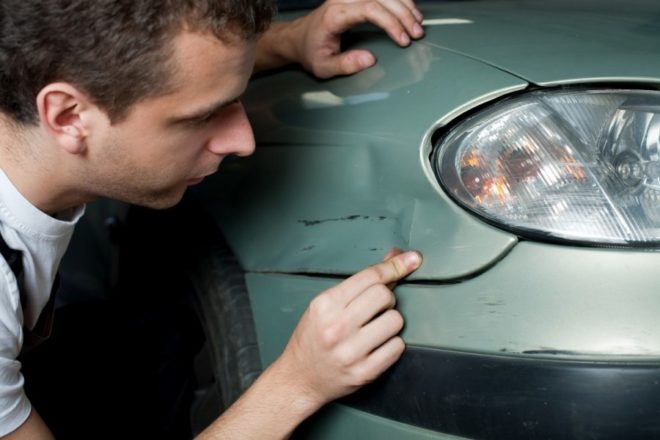
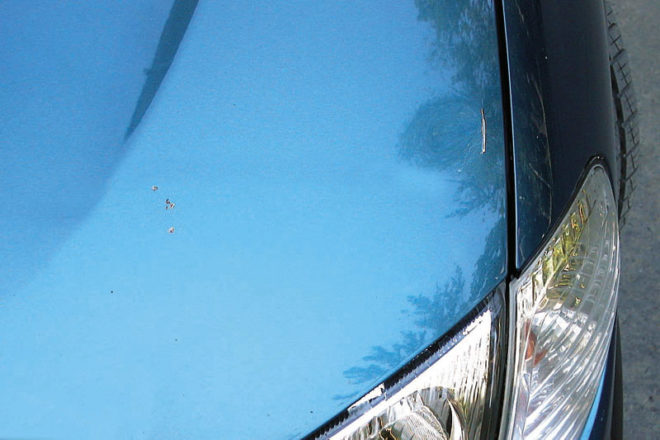
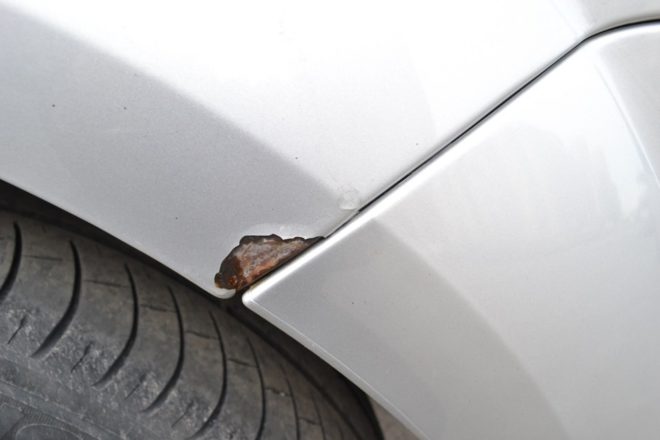
Lots of stone chips look terrible, especially on dark cars. Worse, the chips break the protective paintwork and contribute to the appearance of rust in these areas. After a while, rust can grow in depth and in diameter and it will be difficult to remove it (see the article on removing corrosion), so it is best to repair chips as soon as possible from the moment they appear.
Chips appear due to stones flying during the movement, which fly out from under the wheels of other cars. The more distance you keep from other vehicles, the less chips will occur.
The stones do not fly out from under the wheels of other cars like bullets, they just go up a little and do not have much acceleration. The full force of the impact, due to which the chip occurs, is given by the speed of your car. Thus, the faster you drive and the shorter the distance, the more likely you are to chip paint.
In modern cars, the paint can be an independent protective coating (acrylic paint without varnish) or paint coated with varnish (base + varnish). To be more precise, first the primer is applied to the metal, and then the base (a thin layer that gives color) and varnish (the thickest layer that gives protection).
Chips can be of three types - damage only to the varnish (if the paint is varnished), damage to varnish and paint to the ground and damage to all layers to the metal.
| Video (click to play). |
- Depending on the type of chips and the type of paint, different materials and components may be required. This can be either a scratch / chip corrector (for very small chips), or a bottle with paint selected by the code, a primer for metal and varnish in the same bottle (for varnished paints). Paint from an aerosol can can also be used, which has certain features, which we will discuss below.
- The brushes supplied with the tinting paint bottle are usually made of plastic. They do not absorb and hold the paint normally and "capture" a large area when applying paint, therefore they are inconvenient when repairing small chips. Better to buy a small brush for painting with natural bristles and a fine tip. This will make it easier to paint over the chips as it gives you better control. The tip of the brush should be V-shaped to hold the drop of paint. Brushes can be purchased in different sizes from the smallest to 5 mm. They are useful for filling in paint chips of different sizes.
- To prepare medium to large chips for repair and to smooth out the paint with which the chip is filled, you need to prepare sanding paper P600 / P800, P2000. On the eraser at the end of the pencil, you can super glue P600 or P800 sanding paper (can be cut or made with a hole punch). With this mini sanding block, it will be convenient to smooth the edges of medium and large chips and, if necessary, clean off the rust inside the chip.P2000 sandpaper wrapped around a school eraser can be used to smooth out dried paint after filling in the chip.
- Abrasive polishing paste to restore gloss, in case you decide to smooth out excess paint by sanding.
- Examine the body of the car carefully and look for places where there are chips. Most of the chips are usually found on the front of the car, next to the headlights and grille. Also, chips can be on the mirrors and the bottom of the doors.
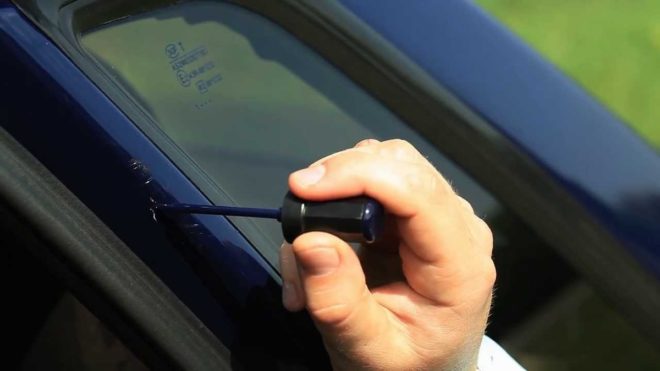
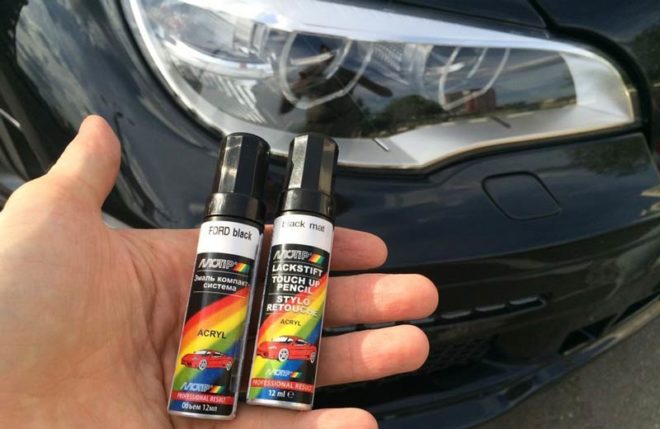
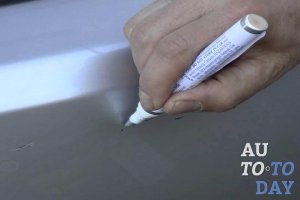
- If the chips are very small, then you can use a special pencil (corrector) of a similar color. Medium to large chips cannot be repaired with a proofreader; this requires paint.
- Before repairing chips, wash and dry the body surface.
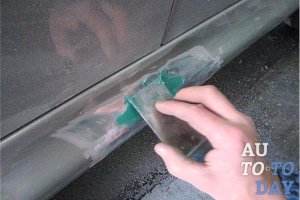
- For large chips, use a P600 or P800 sanding paper to smooth the edges and clean out the cavity (for convenience, use a pencil eraser with sandpaper glued on). The beveled edges of the chip will allow the paint to flow more smoothly and reliably. You will get a smooth transition from the old paint to the new one and the chip border will be less noticeable after the paint dries. You can "capture" the area around the chip a little. If soil remains inside, you need to try not to clean it off.
- If there are several chips on the car, and there is no experience in repairing them, then to start the repair it is better to choose the chip in the least noticeable place.
- If the chip passes through all layers of coatings to the metal, then a primer must be applied before the paint and allowed to dry. It will help to increase adhesion, and the paint will hold more securely.
- Stir the paint well before use, as this can affect its color. Place a small amount of paint in a container, from where it will be more convenient to take it with a brush or toothpick / match.
- If the ambient temperature is low, a hair dryer should be used to heat the surface. The paint should flow easily inside the chip. The cleavage cavity can be filled in stages, over and over again. Also use a hair dryer to speed up the drying time between coats.
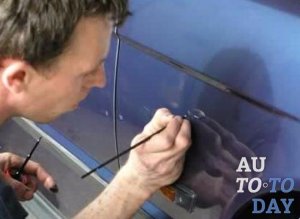
- The paint inside the chip must be applied from the center to the edges. Dip the very tip of the brush or toothpick into the paint so that a small drop forms at the tip. Place this drop in the center of the cleavage. Large chips must be filled in stages. First apply one coat, wait at least 30 minutes, then apply a second coat. Thus, it is necessary to fill the entire cleavage cavity and so that it is above the level of the entire adjacent plane. The paint will settle a little after drying, so it needs to be applied more than necessary.
- Excess paint after drying must be sanded with P2000 sandpaper with water, always with a hard block (you can use an eraser for this). It is simply impossible to smooth out the paint to the level of the entire surface with sanding paper.
- When grinding, it will be clear whether the repaired chip is at the same level. This requires the water to dry after sanding. The surface should be evenly matt. If there is a depression left, paint or varnish can be added and sanded after complete drying.
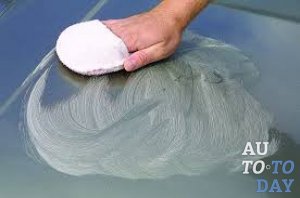
- If you have smoothed out chips by grinding, then to restore the gloss of the paint, you need to use a polishing paste with a special polishing wheel, or a polishing cloth. You can read the detailed article “do-it-yourself body polishing”.
- Some colors are more visible after chipping repairs than others.On a car in red, black, white, blue, green, it is quite easy to make the chips invisible. Light "metallics" and "mother-of-pearl" are much more noticeable after renovation.
- Varnish is used when a chip is repaired on a machine covered with paint and varnish. Varnish provides basic surface protection.
- If you plan to apply varnish, then, filling the chip with paint, you need to leave space for the varnish.
- Each coat of varnish should dry for at least 30 minutes before applying the next one.
- Some paints that are sold for repairing chips can be mixed with varnish without the need to apply varnish over the top.
If using spray paint, shake it thoroughly and spray into a small container. Next, soak a toothpick or paintbrush in the paint and spread the paint inside the chip, starting in the middle. Repeat paint application at intervals to dry. As a result, the paint should be slightly higher than the general surface, as it will settle after complete drying. You can finish at this stage, or continue leveling the applied paint by sanding. This is best done after 1–2 days, depending on paint thickness and temperature conditions.
One method of protection against chipping is to use a protective film (such as 3M VentureShield) on areas that are most prone to chipping. It is translucent and thick and soft enough to resist the impact of stones, but turns yellow over time.
Another way to protect the hood from chipping is with a special plastic trim. Its disadvantage is that some stones that fall on it can, like on a springboard, rise and fall on the roof.
When driving a car, small scratches and chips appear on the surface of the body. They spoil the appearance of the vehicle and are a hotbed of corrosion. Well, rust destroys the bodywork of the car. To solve problems, you need to know how to touch up chips on the car yourself.
Small chips and scratches, it is quite easy to fix it yourself. However, before carrying out the restoration of the paintwork in small areas, you need to prepare:
- Drive the vehicle into a heated and well-lit area.
- Wash and degrease the surface to be treated. At the same time, gasoline cannot be used as a degreaser, as it can damage the paintwork of the body. Use a lint-free cloth for application.
- After degreasing, coloring compounds are applied to small defects (they are used to paint chips) or a special pencil is used to remove scratches, well, around large damages, they are sanded, the place is treated with a primer. In some cases, a putty is used to smooth out small dents.
Upon completion of the preparatory work, proceed directly to the restoration of paint on the car.
Small damages are easy enough to remove with your own hands at home.
When painting chips on a car, you need to determine the nature of the damage. If these are shallow defects, then you can use a polishing agent or a pencil. After surface treatment, the damage is almost invisible. If the chips have a deepening, then the restoration process is carried out as follows:
- A primer is applied to the prepared surface.
- On the dried primer, paint is applied, identical to that with which the body of the vehicle is painted.
- After staining, a small layer of varnish is applied, it hides artistic defects and makes the tinted area almost invisible. Well, the treatment of the area with a layer of wax will give it a glossy shine.
To choose the right shade of paint, they turn to the services of a colorist.However, the shade code can be found in the technical documentation for the vehicle.
If there are a lot of chips on one part, spot painting will not help solve the problem. The dye applied with a brush will be quite noticeable. For more efficient repairs, local body painting is performed.
The part is dismantled, washed and worn out. After drying, it is completely sanded with a polishing machine (first, coarse-grained discs are used, after which they are changed to fine grain). Some areas are treated with sandpaper. An acidic primer is applied to the surface. After it dries, an acrylic primer is applied. If the part has been damaged, an epoxy primer must be applied over the acrylic, it gives the surface mechanical strength.
After the primer has dried, the part can be painted over. The painted part of the body, after the paint has dried, is applied with varnish. At the end of the work on the restoration of the paintwork, the place of repair is polished.
If the body part cannot be dismantled, entire sections of the car body are pasted over with newspaper and masking tape.
If a part of the car is covered with a small number of small chips, and there are no signs of corrosion, then you can touch up the chips on the car's paintwork with your own hands. It doesn't take much time and effort.
Chips are tinted with a soft artistic brush, then varnish or enamel is applied. This is how they get rid of shallow damage. If the chips have depressions, then the recovery algorithm is as follows:
- Prepare the surface for work.
- Apply a primer to the chip and let it dry. Grinding.
- The restored place is painted, varnish is applied.
Only wet sanding can perfectly level the surface to be treated. For this, the area is sprayed with water.
If you do not pay attention to damage to the paintwork for a long time, metal corrosion occurs. It is impossible to remove rust from the body with a pencil. If corrosion appears, you will need to remove it, and only after that, proceed to eliminate chips. The algorithm of the work performed is as follows:
- The damaged area is cleaned to metal. This applies to both large and small damage.
- The area affected by rust is treated with a corrosion neutralizer and degreased.
- A primer is applied to the surface, polished, painted and polished.
If there are dents, they must be repaired. To do this, use special pulling devices and automobile putty.
To make the painted area invisible, you need to choose the right color. To do this, you need to know how to determine the shade:
- The first way is to study the vehicle's documentation. In the technical passport of the vehicle, the painting code is indicated, according to it you can find the coloring material of the desired shade.
- If the documentation for the car is not available, you need to dismantle the gas tank cap and go to the store. There, the desired paint is selected according to the color.
- An alternative option would be to use the services of a colorist. A specialist in custom templates will select the exact shade of color.
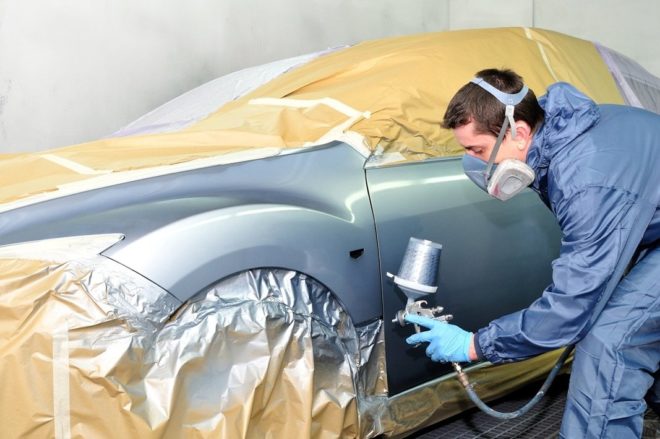
The surface of the car is painted from a spray gun or a spray can. The paint is applied to a dried, degreased surface in a dry, enclosed area. If dust or moisture gets on the treated area during painting, the painting will be damaged. After tinting the bodies, with a type of metallic or mother-of-pearl color, they carry out polishing, which almost completely masks the restored area.
After drying, tinted areas are visible to the naked eye. To fix this defect, they need to be polished. This operation is performed using a grinder and special milk.
Methods for polishing a car body after painting have a number of nuances:
- Sanding is carried out with P1000 grit sandpaper soaked in water.
- The next step is to use a sandpaper with a finer grit P2000.
- A matt and smooth surface is formed at the polishing site. To give shine, polish with a grinding machine with a coarse abrasive paste.
- The result is fixed with a medium abrasive polish.
- At the end of the work, the surface is treated with polishing milk and a soft grinder.
Small damage to the paintwork of the car body does not cause concern for many motorists, but they cause more serious problems. To avoid costly repairs, small chips and scratches must be removed promptly. Large damages can be repaired at home, so you can save a lot.
- Repair of chips and scratches on the car body: which method to give preference
- DIY repair of scratches, chips on the car body
- Work on paint chips
- Stages of repairing a scratch or chip on the body
- Materials for the repair of scratches and chips on the car body
- Budget calculation
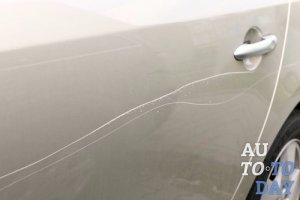
This moment is quite unpleasant for the car owner, not only because the car loses its aesthetic appearance, but also because it is in the places of scratches and chips that corrosion and rust begins to develop.
Therefore, it is very important to get rid of such small damage as soon as possible, since delaying the repair will lead to even greater monetary costs. You will learn how to independently remove scratches and small chips on the car body from this article.
One of them is polishing the body surface. This work can only be done when the scratch has not reached the ground level. For polishing, you need special pastes that will help remove a thin layer of paint in the place of the scratch and level it down to one level.
In this case, it must be remembered that the car is not painted, but on the contrary, a layer of paint is removed. This will require accuracy and care, because you can overdo it and polish to a layer of soil. Then you will have to paint not only the scratch, but the entire polishing place. And this will lead to additional costs of money and time.
It should be remembered that before using a wax pencil, the car must be thoroughly washed, and the place of the scratch must be cleaned with gasoline or white spirit. Removing a scratch with a wax crayon is fairly straightforward. If the scratch has not touched the layer of soil, but itself is very wide, here you will not get off with polishing and a wax pencil.
In any case, you have to paint. Only a scratch will be enough to paint. To do this work, you can glue the scratch on both sides with adhesive tape or masking tape. To apply paint, you can use a brush with which girls paint their nails. The main thing is to thoroughly rinse it in acetone and thin it out a little.
If the scratch has touched a layer of soil, there are also two possible solutions to this problem. The first is only suitable for very thin and small scratches. It consists, as in the previous case, in covering up scratches with a wax pencil. Again, do not forget about the preliminary treatment of scratches and washing the car. But don't flatter yourself. This method has one big drawback.
Over time, the wax layer will begin to fade, and the scratch will become more visible. Therefore, this treatment will have to be performed over and over again at some intervals and, in order to avoid this, it is best to touch up the scratch site. In this case, two layers of paint are applied after preliminary preparation.
If you notice a wide scratch that has reached the ground - forget about the wax pencil, it will not help in this matter. Here, only painting the damage site will help out.
For this, the place of the scratch must be washed and treated, as mentioned above, with gasoline or white spirit. Then it does not hurt to glue the problem area with adhesive tape around the perimeter and apply two layers of paint. This method is much more reliable and effective than a wax pencil, and it is done only once, unlike the first.
What if the scratch went through the top coat of paint, the primer coat and got to the metal? Although this damage is one of the most unpleasant, there are also ways to repair it. Here you will not get off with ordinary painting, and even more so with a wax pencil. First of all, as in all cases, the car should be thoroughly washed with foam and dried.
Then the standard process is processing with white spirit or gasoline.... After that, wipe the car again in the place of damage, first with a damp and then with a dry cloth. If elements of corrosion are already visible in the place of the scratch, the next step will be the application of an anti-corrosion primer.
This element should never be omitted, as painting a deep scratch without anti-corrosion primer can lead to unexpected results.
Corrosion and rust will continue to develop under the paint layer, and will soon nullify all your efforts.
Sometimes car owners have problems with parking, in which bumpers very often suffer. Therefore, scratches on bumpers are a fairly common problem that cannot be ignored.
The plastic bumper is not susceptible to corrosion and rust, so everything is simple here - cleaning from dirt, processing with gasoline and touching up with acrylic varnish from a repair can or paint.
If your car has metallic paint - everything is the same with one small peculiarity. It consists in the fact that such a painted layer has a slightly higher gloss, which sometimes becomes very noticeable. To eliminate this problem, the painted area is covered with a thin layer of varnish.
We figured out the scratches, but there is another common problem with the car body - paint chips.Chips of paint, even at a shallow depth, have a fairly large area, so a wax pencil is not used here.
If the depth of the chip is small, treatment of the problem area with a color-enriching polish can help, after which a layer of protective polish is applied.
Before processing, the surface should be cleaned and degreased. In the case when the chip has reached a layer of soil or metal, the polish is useless, and tint of the chip cannot be avoided. Some car owners are faced with the problem of bloated paint.
The damage is quite unpleasant, since under these swellings, foci of rust and corrosion appear. Therefore, this problem must be dealt with immediately. To do this, carefully open the bottle and remove any remaining paint.
You should remove so much that the remaining paint adheres securely to the car body. If, after opening the bubble, you find traces of corrosion or rust under it, it is imperative to remove it and treat the place with anti-corrosion primer.
Then you can start painting. The paint is applied in several layers so that it is equal in level with the old layer.
We thoroughly clean the place of the defect from dirt, traces of rust, if any. We make stripping to the ground. Degrease.
During troubleshooting, you decided what kind of primer you need: for paint or for metal. Apply a primer with a rubber spatula and let it dry. Then we clean up the area again.
That is, all procedures are performed in accordance with the body painting technology, only on a small area.
Before applying paint to the repair site, cover the surrounding surface of the body part with film or paper and masking tape. Apply paint from a spray can in accordance with the instructions.
If you use a "pencil" to repair a scratch or chip, then apply the paint in two or three layers. Do not immediately remove the resulting influx... Let the paint dry.
After repairing a chip or scratch in the body and complete drying of the paint, polish the body at the place of repair. Given that the damage area is small, the body can be polished without the use of equipment, i.e. manually.
If you have too large a scratch area on the car body, the repair, most likely, will have to be done to the entire body part. Here already one "pencil" is indispensable.
In the same way, the repair of plastic parts is carried out with the only difference that the means for plastic surfaces are used.
On the shelves of the store, you can find a repair kit to restore the surface of the car. In its simplest form, these are several cans of paint, supplemented with consumables.
Kits are more expensive and include brushes, sandpaper, varnish, masking tape and other accessories. Stores often offer paint tinting to match the desired tone. Repair kits for severe chips contain primer, putty and tools to work with them.
Corrosion treatment compounds can sometimes be found in kits. Anti-corrosion mastic is ideal for car repairs with significant paintwork damage. The last finishing can be carried out not only with varnish, but also with special means that increase the reflectivity of the paint.
The main reasons for the formation of defects are small stones and road sand. They leave multiple but slight scratches. When diagnosing a car, it is necessary to assess their size and penetration depth.
A matte surface means that only the varnish has been damaged. White body - damage to paint or even soil. The budget will be affected not only by the "depth" of the work, but also by the speed of reaction.
Scratches that have reached the metal require immediate repair. The ideal driver should keep wax crayons close at hand and repair any dangerous damage as it is found. Timely cosmetic work will save money in the future. Approximate guidelines for determining costs:
- Fix it PRO and New Fix - sets of several pencils, from $ 0.15 to $ 2 excluding shipping.
- Single pencil Fix it PRO (Car Repair Pen) - $ 0.1.
- 5X and 5Pcs - Multiple scratches, price up to $ 7.
- 3M Scratch Remove - deep damage, up to $ 15.
If you decide to carry out a full cycle of priming and painting, then mindfulness will be the main source of savings. Do not skimp on materials, do not thin the varnish too much - it may leak.
Paint smudges are formed due to the high humidity in the room. For the same reason, do not use the car until it is completely dry.
Over time, during operation, in almost any conditions, small defects of the body or bumpers in the form of scratches and chips appear on the car. This paint damage is not only an aesthetic disadvantage, but also a practical danger to the car body. Therefore, it is advisable to eliminate the chips that have appeared as soon as possible. This will protect the car body from the harmful effects of corrosion. Sometimes, even a small chip, which is practically invisible to others, but knowing about it, it constantly "cuts" your eye, causing constant discomfort. Is it possible to remove chips on the car yourself? Yes, it is possible, and this does not require high qualifications or large financial costs.
Of course, there is the simplest option - to contact a specialist. However, such a seemingly simple operation can be quite expensive, or the quality will be, as they say, even worse than it was, that is, even more noticeable. This also often happens and then you have to pay again and more to correct what you have done. The choice is yours - if there is money and there is no desire to mess around, then it is better not to save, but immediately contact a decent company. Below is an article for those who want and can make minor repairs to their car on their own.
With a large amount of damage, it makes no sense to make a spot body repair. Indeed, in this case, your hood or bumper will be covered with spots or dots with a slightly different color, and the process of spot repair itself will be quite long and laborious. In this case, it is better to paint the entire body part completely. The painting process is quite complicated, but you can also do it yourself. However, whether it will be of better quality and cheaper is up to you. Since this will already require special tools, materials and skills.
If the chips are small and there are not very many of them and there is no metal corrosion, this is exactly what you can quite simply eliminate yourself.
To protect the car body from environmental influences, manufacturers use multi-layer protection, which is a combination of several different materials. The hardened structure of such a coating is shown in the figure. In modern cars, the iron is preliminarily subjected to additional protection - galvanized. Thickness and quality may vary.
Therefore, starting the repair, at least two types of minor damage to the paintwork of a car can be distinguished:
- affected by iron;
- not reaching iron.
The fact is that in each of these cases, the restoration of the paintwork is correct in different ways. If the damage only affects the varnish and paint, for example a shallow scratch, it is enough to treat the area with polish to fix it. In the event that the violation of the paintwork turned out to be deeper, damaged iron, the repair will be a little more difficult.
There are several different approaches as to how to correctly paint over the chips on the car, and each of them has its own supporters and opponents. But in any case, paint is applied to the place of damage, which forms a kind of dome above it, and it must be treated with polish to bring the existing paintwork to the general level. This will make the repaired area less visible. Visibility is most influenced by the accuracy of paint selection.
They are able to remove scratches and chips on the car, which only touch the lacquer surface of the car and do not reach the paint. These products often have abrasive substances in their composition, due to which the top layer of varnish is rubbed off and the surface, leveling out, again becomes supposedly smooth and shiny.
The polishes are selected depending on the size of the scratch. But you should not get carried away with these funds, since you can completely remove the varnish layer.
They allow you to remove scratches from a car, which touch not only the varnish, but also the paint layer. These products fill the damaged surface, thereby protecting it from corrosion.
In addition to the advantages, these funds have a significant drawback: after prolonged exposure to water, they are washed off, and also if you do not have a standard car color (black, white or red), but, for example, light green with a metallic effect, then the scratch will still be visible ...
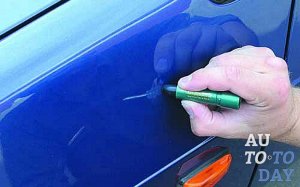
Eliminates the most serious scratches and chips on the car that have reached metal or ground. The restoration pencil is a tube with automotive paint and a brush.
The colors are usually matched by the color code of the vehicle. A scratch remover is the safest we have reviewed because the paint won't wash off and protects your car from corrosion. The only caveat is that in some specific cases it is difficult to find a tool, since not all coded car paints are in pencils. In such cases, the colors are selected visually from the catalog with real colors.
If the chip is very small, take a match or toothpick and apply a drop of paint to the washed and dry area of the chip. When the paint has hardened a little, you can smooth it out with a small brush. The paint is selected according to the number of the car from the colorists or according to the car part (for example, the fuel filler flap). Over time, the paint burns out a little, therefore, the method of selection for a car part is more preferable.
You also need a little varnish and a hardener to it, In the right proportions, mix the paint with varnish and hardener. Tint with a small margin. After drying, for at least a day, it is polished with a professional polish 3M, You can trim it with two thousandth sandpaper before polishing.
In this case, the repair of the chip will be more difficult and time-consuming, since it is necessary to remove the processes of corrosion and rust propagation that have begun. To do this, you need to use traditional body repair, which removes rust and allows you to locally paint over the part without visible differences from the rest of the body.
To repair such a chip, you will need sandpaper with a grit of 600, 800 and 1000, possibly putty, primer and paint, as well as tools for applying them, and a solvent for degreasing. The process of work in this case is as follows:
- First, it is necessary to clean up the local chip on the car, taking into account the possible spread of corrosion under the paint.
- Rust must be removed to metal, then the surface must be rinsed and degreased. It is advisable to treat the places where the removal of corrosion has been carried out with a primer. You can use an acrylic two-component spray primer. It will be required for these works a few drops. Apply a thin brush or a sharpened match to the metal. After 10-15 minutes, apply a second layer. After that, they wait about 2 hours until the soil is completely dry or accelerate it by heating.
- If necessary, apply a filler, let it dry and use 600 and 800 grit sandpaper to adjust the surface to specifications.
- Degrease the surface again and, if necessary, apply a primer, which must then be washed off with 1000 sandpaper and water.
- After that, the final degreasing and painting of the body part or the chip site takes place.
The paint is applied using a marker or brush - this operation requires some care. It is not advisable to apply the paint in a thick layer, preferably several times, but thinly and accurately. It is best to work in a garage or in the shade rather than "in direct sunlight." If the area is large enough, a spray or spray can be used. When painting in this way, be careful not to hit other parts of your vehicle with the spray. For this you can use masking tape and old newspapers. After the paint is completely dry, you can polish it.
Many also apply car varnish, believing that doing so will improve the visual quality of the car's paint job. However, under varnish, any difference in paint becomes more noticeable, therefore it is advisable to use varnish only with a perfectly matched paint, or not use it for small local repairs.
According to the Dr.ColorChip technology, paints used for local repair differ in their composition from traditional repair kits, selected by the color code of the car. The formula of Dr. ColorChip provides the ability to quickly dry paint without the use of cameras or other dryers. To remove excess paint, Dr. Colorchip Sealac, which is applied to a napkin and polished by hand until all excess paint is removed, then stains from the SealAct solution are wiped off with a microfiber towel.
Everything you need is included. Quite quickly and simply - the price of the issue - find out on the Internet. Reviews are different, often do not match the color. If you choose this option, read more on the forums.
| Video (click to play). |
Naturally, from all of the above methods and means for removing chips and scratches, one should not expect a completely perfect result. But if you compare the price-quality ratio and labor costs, then these are quite effective methods and are suitable in most cases.


