Repairing an old speedometer can be much more expensive than replacing an old instrument cluster with a new one.
// Tidy here I will call “instrument cluster”, “instrument cluster”.
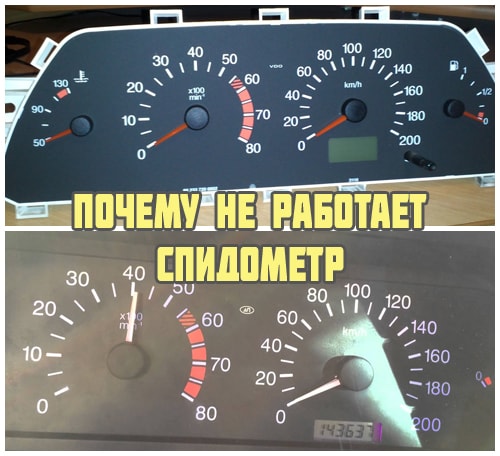
The car was purchased with a non-working odometer / tripometer. At the same time, the speedometer worked correctly, i.e. the sensor is ok. To measure the mileage, it was necessary to measure the distance with a ruler on the map after the fact, which is not very convenient 😉
A mechanical odometer is a relative rarity in the 900s, most had a digital one. Whether digital is suitable in my case - opinions are divided. On the Internet at that time, I found only one option from the disassembly in Karsity:
The manager told me that it was for the turbo, but I didn’t have a turbo. Google suggested that there were gadgets without a turbo arrow on low-priced turbo, so I did not specify it again. I decided to take it apart to see if the gears might have jumped off or broke (in services they don't take this, they only offer the replacement of the entire tidy). There is a good instruction on how to remove the device here:
I did not see any instructions for further analysis, so I decided to post this report. The back white panel attaches to the front black one with latches without screws.
All odometer mechanics turned out to be in good order. The problem is either in the electronics or in the motor. I did not find new components by marking, which ones are suitable for replacement are also not known, so I just greased the motor and put everything back together.
VIDEO
Also, when disassembling / assembling, you need to especially carefully monitor the four thin wires of the speedometer drive. I had to solder 2 of them after parsing. And after the collection, the speedometer stopped working, I had to disassemble everything again and solder these wires again - it is better to check them before assembling, they should ring crosswise, it is better to call from the back (green) side of the board.
Everything is also assembled in reverse order, with one addition - fold down the bottom cover and the fuse box in order to connect the connectors on the left from the inside.
The odometer did not work, and later a similar tidy was found from the disassembly. Now the odometer is working, but the SRS error is on and the indicator of the burned out bulb is on when the dipped beam is on, although all the bulbs seem to be on.
Price tag: 1 500 ₽ Mileage: 176581 km
Saab 900 1996, petrol engine 2.0 l., 131 hp sec., front-wheel drive, manual transmission - DIY repair
The manager prompted you to shit, the 900 does not have a low press, all turbo gadgets with an arrow, and this gadget from the usual atmosphere only with a seed in the complete set (which is the majority) and not a semblance of the last kind of clock.
With the manager, another option is that they posted a photo of the wrong tidy that is available.
Without dancing with a tambourine, only a mechanical one will do, for another you need a seed and you will have to farm with wires. Throw off the photo of the connector from the seed, something tells me that there are no half of the wires there. For our LED is connected to the tidy by a bus, the indication of burnt out bulbs and washers goes to it, you have it all tied directly to the tidy.
According to the Ouna manual, this seed, in addition to the temperature, also works with the audio system and even displays 4 types of errors (how it will display them on this screen is not very clear).
Well, yes, there is a bus in the wiring, tomorrow I’ll look at my contacts, at the same time I’ll open the vis, maybe it will turn out with a little blood to stick your usual tidy.
Thanks in advance, this is more for “general development” interesting, I’ll hardly get into the tidy again, unless it breaks or turns up complete with a full-fledged seed
Without dancing with a tambourine, only a mechanical one will do, for another you need a seed and you will have to farm with wires. Throw off the photo of the connector from the seed, something tells me that there are no half of the wires there. For our LED is connected to the tidy by a bus, the indication of burnt out bulbs and washers goes to it, you have it all tied directly to the tidy.
It is no secret that accurate speedometer readings are extremely important to the driver. It is by this device that the driver knows at what speed a light vehicle is moving and how many kilometers the car has traveled in total.
A breakdown of a speedometer is fraught with dangerous consequences - from a fine for speeding to incorrect gear shifting, or not getting into a corner due to an overspeed.
The following manifestations can indicate a malfunction of the speedometer to the driver:
Full stop of the digits counting the total mileage
The device indicates an inaccurate speed (you can check it using the navigator turned on on an independent device).
Dashboard sensors fail.
The order of preparatory actions to start repairing the speedometer:
First you need to remove the front panel and de-energize the car's light signal switches (dimensions, turn signals, low beam).
Then take out the radio tape recorder and turn off the cigarette lighter, unscrew the screws that fix the panel and the speedometer cable.
After that, remove 3 pads and the panel itself. The speedometer mounting bolts are now accessible and need to be removed.
If the device shows a speed higher than the real one, it is recommended to do the following:
we throw the arrow over the limiter;
under the data of the device we strengthen a small piece of construction tape;
using a pencil, we put risks on the scotch tape. The distance between the two risks should be equal to 7 millimeters, which is equal to the speed of 10 km per hour;
we take out the arrow and put it in such a way that its bottom overlaps the second risk.
If everything was done correctly, the arrow must be returned to its original position.
With an inaccurate reading of the total mileage of the car, the numbers can be easily corrected manually. Speed sensors that have become unusable for one reason or another are simply replaced with new ones.
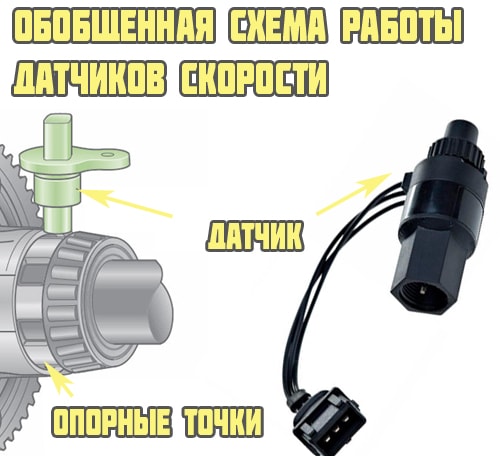
If the speedometer shows no signs of life, or shows false readings, it is quite possible that you can limit yourself to replacing the drive. The drive itself in VAZ cars is made in the form of a flexible shaft, with a total length of no more than 355 cm, or an electric drive. During the repair of the Ninety-nine drive gears, O-rings and the speedometer drive must be removed without fail. Luckily, they can be removed without touching the gearbox.
The car repair manual recommends motorists to do the following:
The car is being driven to the inspection pit.
Using a socket wrench, it is necessary to unscrew the bolt from the body that secures the speedometer drive housing to the gearbox.
Using a screwdriver, gently pry and remove the housing.
It is also necessary to remove the driven gear.
Be careful when visually inspecting the receptacle where the tool's flex rod end is installed. The gear should not be licked and have any defects.In their presence, it must be changed.
The case of the box where the drive will be installed is carefully examined. If there is a trace of engine oil, then the O-ring must be replaced. To do this, pull out the driven gear and push out the O-ring. Parts are washed cleanly and cleanly in kerosene. After they dry out, you need to install them in the same order as you took them out.
When deciding to do all the work on his own, the car owner saves an impressive amount of money, which he would have to pay to the masters in the car service.
Many car enthusiasts resort to the rolling mileage method on cars. This is due to the desire to sell your iron horse as expensive as possible or to simplify the procedure for passing a technical inspection.
Amateurs have long come up with a way to twist the readings on the speedometer. Correct installation of the device in its place becomes the main headache.
Accurate operation of the speedometer is a guarantee of safety on the roads!
A breakdown of the speedometer, and, consequently, the inability to read the speed and mileage of the car is not a critical problem. In most cases, the repair consists in replacing the cable or speedometer drive.
Much less often, you can encounter a malfunction of the control device itself, or a breakdown of the drive gear of the speedometer drive located on the secondary shaft of the gearbox. In the first case, you will have to spend money on a new speedometer, and in the second, you will need to disassemble the gearbox and replace the gear.
The following are possible causes and malfunctions that may cause do not work speedometer , as well as methods of their elimination.
The nuts for fastening the tips of the flexible shaft of the speedometer have been loosened.
Breakage of the flexible shaft of the speedometer.
The tips of the flexible shaft of the speedometer, mating sockets in the speedometer and in the speed sensor roller are worn out. Loose fit of the thrust ring on the speedometer shaft (at the top nut).
As a rule, noise occurs in a certain range of speeds.
The flexible shaft is mounted with small bending radii.
Re-route the flex shaft, lubricate it with engine oil.
The shell of the flexible shaft is deformed.
Model - 2107 23.3802
Speedometer VAZ 2107 23.3802
Range of indications (0-180) km / h.
Measurement range (over 20-140) km / h.
Gear ratio 1: 1000. Without housing.
Included in instrument cluster 151.3801. 153.3801. 155.380
Model - 2104,05 17.3802
Speedometer VAZ 2104, 2105 17.3802
Range of indications (0-160) km / h.
Measurement range (over 20-140) km / h.
Gear ratio 1000: 1.
Landing diameter of the case is 98 mm.
Model - 2106.21 SP193
Speedometer VAZ 2106, 2121 (Niva) SP193
Range of indications (0-180) km / h.
Measurement range (over 20-140) km / h.
Gear ratio 1000: 1.
Landing diameter of the case is 100 mm.
The capacity of the total mileage counter is 99999 km.
Prices in different car dealerships may differ depending on the region of residence and extra charges. The approximate range is 600-800 rubles. for a new “standard” control device.
"Seven" (VAZ 2107) speedometer is slightly cheaper than the instrument models for VAZ 2104, 2105 and VAZ 2106, 2121, as it is slightly different in size (does not have its own case).
The speedometer is an important element of the car, which shows the speed of movement and calculates the distance that the car travels. This information is displayed by a special pointer, which is located on the dashboard. Many drivers face a problem when the speedometer does not work or its arrow jerks, showing incorrect values. In this case, repair is necessary, but first you need to find out the cause of the breakdown.
There are two main reasons why the speed sensor may not work:
the shaft-rope dried up;
the part is worn out and burst.
In the first case, it is necessary to lubricate the semi-collapsible shaft, which is the main element of the device.It is housed in a special shell placed in a PVC tube. It prevents moisture and grease leakage, which the flexible shaft needs for accurate and continuous operation. Long-term use of the machine assumes gradual drying of the liquid. When this happens, the driver can hear characteristic rustling sounds, and the instrument needle twitches. In the second case, the device simply stops working, because over time the part is erased and torn.
On the video - what to do if the speedometer is lying:
VIDEO
In order to lubricate an element, you will need:
First you need to disconnect the device itself - for this, unscrew the union nuts on both sides. Pull the flex shaft towards the drive, spread the ends of the lock washer, then remove it. Pull the part out of the shell gradually.
Now remove the remnants of the old grease with kerosene and dry the parts. The element must be lubricated two thirds of its length on the drive end. After completing the procedure, insert it back into the shell, closing it with the lock washer, and reinstall it. Finally, tighten the pressure nuts well.
The video shows the replacement of the speedometer cable:
VIDEO VIDEO
If the flexible shaft breaks, it must be replaced with a new one. Replacing the cable begins with dismantling the old part. Everything is done according to the same principle as for the first case, only a new one is installed instead of the damaged element. In order to make it easier to insert the lock washer, we recommend to lubricate it with lithol.
Video about replacing the speedometer with your own hands:
VIDEO
Now you know how to change the cable of the instrument and lubricate it if necessary. The procedure is quite simple, the only difficulty is to remember how the element was installed in order to correctly replace it. Before doing the work, read the manual for your car - each model may have its own peculiarities of dismantling the device. Following our instructions, you will quickly fix the breakdown of the device without contacting a service center.
Share your opinion on what you read below!
Nowadays, the car is a comfortable and affordable means of transportation. With the help of a car, we can quickly get there, not be late, but for this we pay money that goes to repair various breakdowns that often happen with cars. The speedometer fails quite often. This article will help you fix it yourself.
Experienced drivers can accurately determine driving speed by eye. It is more difficult for beginners to do this. Better to fix the speedometer right away to avoid accidents and troubles.
To do this, you will need the following things: a car manual, a sealant, a set of tools, an ordinary plastic plug.
Before starting the repair, carefully read the required section of the manual. Here are some tips to help you fix the breakage.
A malfunction can manifest itself like this:
The arrow is constantly jumping.
The arrow does not change its position.
Test the speedometer. There is a button next to it to test it (most cars). If the testing mode did not help, disassemble the control panel and get to the mechanism that rotates the arrows, inspect it.
Remove the overlays.
Unscrew the steering wheel.
Remove the switches located under the steering wheel.
Then remove the self-tapping bolts that secure the torpedo. And only then dismantle it. Take the torpedo by the edges, pull it towards you without effort, then disconnect the wires. Mark them in advance, this will be useful when reassembling. Now pull out the torpedo.
Examine the instrument panel. To disconnect from the torpedo, you need to unscrew the bolts. Remove the glass that is attached with plastic. This is done by heating the junction with a hairdryer. Then the glass is easy to detach.Remove all residues from the old sealant with a cloth.
VIDEO
On the back of the dashboard there are gears that rotate the speedometer. Inspect them and replace them if required. This should be done if there are not enough teeth or if there are other reasons for doubting their work.
If you are not sure that you can do everything yourself, it is better to contact the professionals.
Contacting us at the center, you will be helped to repair the speedometer, as well as to set it up:
Regardless of the complexity and type of work.
The type of speedometer is unimportant (mechanical or electronic).
The year of production of a car, motor vehicles and special equipment can be any.
The country of manufacture and the brand of the car and motorcycle are also not important.
Correct damaged speedometer mileage data.
We restore the odometer values after an unsuccessful mileage roll.
Real mileage data is programmed.
The operation of the arrows of the instrument cluster is being corrected.
It is necessary to repair the speedometer if the arrows do not work, the display does not show information about the mileage, the backlight on the instrument panel does not work.
As an add-on, we offer the following services:
- Replacement of instrument illumination bulbs;
- Repair of motor control switches;
Our many years of experience, combined with high-quality equipment, will help to achieve a positive result even in difficult cases of speedometer malfunctions of the latest models of cars, motorcycles and special equipment.
We suggest that you entrust your car to our reliable hands, only this gives a guarantee of a positive result.
Speedometer (odometer) programming - from 1500 rubles.
“Not so long ago in the morning I had to go on business, I started the car, put my foot on the gas and noticed that the speedometer simply did not respond. Since that day I had to drive a lot around the city, a fear arose as to how I would be without him. DPS is common, cameras hang around and measure speed, and of course I didn't want to get an unwanted fine. I decided to set aside some time and went to the center for repairing and adjusting the speedometer (my friends constantly recommended it to me, and since the case turned up, I decided to check everything myself). I came to the center, told the master everything, he listened to me very carefully, then proceeded to the examination. Before I even had time to smoke, he came out and said that everything was ready and I could accept work. To be honest, I was very surprised. Oddly enough, they charged me quite a bit of money for the work. I left the center in a good mood, it was nice to know that such good and qualified employees work for us ”- Ivan.
“In order to feel safe and comfortable on the road, you need to follow many rules. I like to go somewhere far away and, being behind the wheel, I get real pleasure. But not so long ago I had to face such an unpleasant problem as the breakdown of the speedometer. My friends advised me to go to the ProbegOFF center, they said that they were such good specialists, they do everything quickly and at the same time inexpensively. I went there and was able to be convinced of everything in practice. Really good staff, everything was shown, explained and repaired, everything works. Nice attitude towards clients. They took a little money for the work.Thank you very much, if something happens, I will only apply here ”- Kirill.
Surely you think that everyone knows what a speedometer is and what it is intended for. However, there are also those people who simply do not understand what is at stake. So, a speedometer is a measuring device that allows you to control and monitor the speed while the car is moving.
We can express our deep gratitude to Nikola Tesla, who was able to create such a useful and necessary invention for machines. The speedometer first appeared in 1901. But to this day, the device has practically not changed in appearance, and it is still used in order to build it into a car.
Installing a speedometer on a VAZ 2109 car
The purpose of the speedometer is to inform the driver about the distance traveled and the speed. This also determines the composition of its units - the counting, indicating the mileage of the car, which is sometimes called the odometer, and the high-speed one, the speedometer itself.
Signs of a malfunction of the speedometer:
On the counter, the numbers do not exactly become, and over time they stop working altogether. The speedometer starts to give the wrong vehicle speed. Sensors burn out. To repair the VAZ 2109 speedometer, you must remove the front panel:
The "beard" is unscrewed. To do this, unscrew two screws on the bottom panel. Three clamps on the top panel are removed and switches for dimensions, emergency gang and low beam are turned off.
The radio tape recorder is pulled out, the cigarette lighter is turned off.
Two screws are unscrewed that fix the panel, the speedometer cable. Three pads are removed, the panel is removed.
The screws holding the speedometer block are unscrewed.
When you overestimate the speed on the speedometer, you need to do the following:
Throw the directional arrow over the stop.
Glue a piece of construction tape at the bottom of the scale.
At the lowest point of the instrument arrow, a mark is put down with a pencil.
Using a ruler, the distance on the device is measured from zero to ten kilometers per hour. Its value is 0.7 millimeters.
The required distance is measured on the scotch tape from the previously set mark and the mark is again put.
The speedometer needle is removed and installed in such a way that its lower position falls on the second mark.
If the VAZ 2109 car was repaired correctly, the arrow flips back over the limiter.
If the mileage counter breaks down, the numbers are simply corrected by hand.
Burnt-out panel sensors are replaced with new elements.
If the speedometer does not work, or its readings are erroneous, it is necessary to replace the drive. The speedometer is driven by a flexible shaft when the length of the drive cable is not more than 3.55 meters or by an electric synchronous drive.
The car is installed on an overpass or inspection pit. The bolt fixing the speedometer drive housing to the gearbox is unscrewed with a socket wrench.
With a flat screwdriver, gently pry off and remove the case, as shown in the photo.
Removing the speedometer housing
Tip: The material for making the gear is plastic.The part must be carefully examined and, if a development is found, replaced with a new one.
Attention is drawn to the socket where the tip of the odometer's flexible rod is placed; it should not have a working out and there should be no licked corners, otherwise the defect will serve as a reason for replacing the gear.
The case of the box where the drive is installed is carefully inspected. If traces of oil spills are found, the O-ring, which is located on the drive housing, changes.
VIDEO
The driven gear is pulled out
All parts are washed in pure kerosene.
The device is then reassembled and reinstalled.
If the car owner decided to independently repair the VAZ 21099 speedometer, the video will tell you how to do it correctly, then the price of work will be much lower.
Sometimes, when a car is being repaired on a VAZ 2109, a mileage adjustment is made to artificially rejuvenate it ... Some drivers want to speed up the process of passing MOT, while others adjust the data for insurance companies or reduce mileage in order to sell a car at a higher price.
In the first case, the indicators are mechanically twisted with the help of an improvised tool. The problem in this case can be the correct dismantling and subsequent installation of the device.
There are some subtleties when twisting electronic odometers. For this, special equipment is connected to the diagnostic connector.
The reliable performance of the speedometer ensures safer driving on the roads.
The need to twist the odometer readings can occur for various reasons, in particular, when it comes to Gazelle cars. The principle of operation, malfunctions, as well as the question of how the speedometer is rewound on a Gazelle car, will be discussed in the article.
Before telling how to twist or wind up the odometer readings, let's figure out what the principle of operation of the speedometer on the Gazelle is. The principle of operation of the mechanism is to measure the speed of the vehicle by means of the mechanical connection of its arrow with the output pulley of the gearbox. The latter gets the drive from the wheels.
The shaft can give a true measure of the driving speed, more accurate indicators will give the wheels of the car. This is because the gear pulley is located farther from the gearbox and closer to the wheels, and the speed at which it rotates is set in accordance with the final speed after the gearbox. The speed of the pulley can be identical in either first or fourth gear, but the difference in machine speed can be enormous.
In a gearbox, the output pulley contains a gear that rotates with a pulley. The gear is connected to the speedometer drive cable. In the circuit, the cable is a strong wire located inside a protective rubberized casing. One end of the cable is installed in a special hole and fixed on the drive gear. When the gear rotates, the cable rotates with it.
The other end of the cable is connected to the device on the control panel. At the end is a shaft-shaped magnet that is positioned close to the steel drum without touching it.The drum is attached to a needle and transmits the readings to the appropriate scale. When the vehicle is at a standstill, the cable needle is held at zero level by a small coil spring.
Why is the speedometer not working?
There are many reasons, consider the main ones:
So how to twist the speedometer on the Gazelle yourself? You can wind up and finish the readings according to several schemes, we will consider each of them separately.
If you do not know how to wind the speedometer, then you can use a simple method, which consists in interfering with the operation of the odometer. Prepare an awl with tweezers before winding up the odometer. It is necessary to dismantle the dashboard and partially disassemble it by opening the glass and dismantling the odometer. With the help of an awl and tweezers, the run is twisted in the car. The twisted odometer is installed in place in the control panel and the tidy is connected to the on-board network.
There is also a method that is referred to as "collective farm". How to rewind the readings using this method? Very easy - the winding scheme involves disconnecting the cable from the device and connecting a construction drill with a reverse function through it. The drill turns on and the readings are unwound, everything is simple here.
If you are the owner of a new model, then a ready-made speedometer for the Gazelle Business speedometer, equipped with an electronic odometer, can be used for reeling. How to wind a speedometer with such a device? This is not difficult.
Video (click to play).
Before winding up the indicators, you need to find the OBD-2 connector on the car, to which you need to connect the twist:
First, connect the device to the socket, the ignition must be turned off.
After activating the required mode, turn on the ignition, the indicator light on the spinner should light up, thanks to which you can adjust the speed of winding up the readings. If the speed is low or absent, you need to use the sub-modes.
After the unwinding work is completed, the made speedometer can be left, for this, turn off the ignition and disconnect the spinner. The nuances of using the device may differ depending on the manufacturer and device, so follow the instructions when using it.

