In detail: do-it-yourself repair of gorenje washing machines from a real master for the site my.housecope.com.
Master's consultation
by phone: 915-85-73
- difficulty category from 700 to 1200 rubles:
- Replacing the hatch lock 1100 rubles
- Replacement of heating element 1200 rub
- Replacing the drain pump 1200 rubles
- Replacing the hose 700 rubles
- Replacing the engine brushes 1200 rubles
- Replacing the control board 900 rubles
- difficulty category from 1200 rubles:
- Repair of electrical wiring 1200 rubles
- Replacement of tank bearings from 1900 rubles
- Repair of electronic boards from 900 rubles
- other:
- Disassembly, assembly - 300-500 rubles
- In case of refusal - diagnostics 390 rubles
- Prices are shown without spare parts!
- Normal wear and tear:
- Drain pump
- Motor brushes
- Heating element (ten)
- Sunroof locking device (UBL)
- Water inlet valve
- Engine drive belt
- Tank bearings
- Tank suspension shock absorbers
- External factors:
- Control board (power surge)
- Manhole cuff (punctures)
- Shorting the wiring (moisture ingress)
- Leaking tank, nozzles (foreign matter)
- Drainage tract blockages
In the early 2000s, many GORENJE washing machines appeared in Russia, based on PG1-PG5 hardware platforms. It is necessary to distinguish between budget cars and premium: CLASSIC (PG-1), EXCLUSIVE (PG-2, PG-3), and PREMIUM (PG-4, PG-5).
The type of hardware platform is identified by the alphanumeric model designation (second number after letters). For example, the WA 63121 model is made on the PG-3 electronic module, and the CM WA 62081 - PG-2.
- Launching the service test CM Gorenje:
- the program selector to position "0"
- simultaneously press the two extreme keys (hold them) as shown in the figure.
- turn the program knob one division to the right
- after 5 seconds, release two keys
- all indicators should flash and then go out.
| Video (click to play). |
Checking nodes:
1.Ubl door
- open the hatch door (10 sec), close
- if the operation is performed correctly, all indicators will light up. If wrong - error F2
2.NTC sensor
- for 2 sec. the electronic controller measures the resistance of the sensor
- if the test is successful, all indicators will go out. Otherwise - F1
3.Pouring water into the following compartments of the dispenser:
- hot water (5 sec.), Prewash (10 sec.), Main wash - (10 sec.)
- pre and main wash until the water in the tub reaches level 1.
- flash of all bulbs, in case of various defects - error F3
4.Rotation of the drum and turning on the heating element
- the drive motor turns on (as in the normal wash mode): for 15 seconds, it rotates in one direction, a pause for 5 seconds, then in the other, the heating element turns on for a short time
- all indicators will go out. If not, defect F4 or F5
5.Spin mode
- within 30 seconds, the drum rotation speed changes from 500 rpm to the maximum
- the display remains unchanged
6.Water drain
- within 10 seconds the drain pump turns on. After performing a test drain, the water level in the tank should drop.
- all indicators will light up, otherwise - F7
7. Final spinning and draining of water
- the drain pump remains on. At the same time, the drum starts to rotate in the spinning mode, its rotation speed smoothly changes from 100 rpm. to the maximum.
- the indicators go out, or (if the rotation speed has not reached the maximum) error F8.
8. Completion of the service test
- Turn the selector knob to "0"
- Error codes:
F1 - Short circuit of the heating element or power cut;
F2 - No water intake;
F31 - Problems with the engine tachogenerator;
F32 - No communication between the board and the motor;
F4 - No water heating; F41, F43 - Water temperature is higher than permissible F5 - No drain;
F61 - Low engine speed;
F7 - the water in the tank does not fall below the first level during the process of switching the drain mode; F63 - Control module
F9 - Water has accumulated in the pan of the washing machine.
Order without intermediaries the repair of the washing machine Burning in St. Petersburg with us.
Calling a master and diagnostics at home - IS FREE
Many breakdowns in washing machines can be repaired by yourself.If an error code appears on the display, then some can be easily removed yourself. Stopping in the middle of washing, no draining water from the tank, when the washing machine does not heat up or rattles and rumbles at high speeds or does not rotate the drum at all - all these malfunctions during self-repair do not seem so difficult for those who know how to use a tool
Be patient and courageous, watch video tutorials on how you can fix Gorene washing machines yourself at home in case of various malfunctions.
A great incentive for you will be that when you, after watching the video, do any repairs with your own hands, not necessarily washing machines, but in general in everyday life, you save money. The savings in money are significant. For the work of a master, on average, you have to pay from 500 to 2000 rubles, depending on the complexity of the work. And here you buy only the necessary spare parts and do all the work yourself. But if something does not work out, call us, we will help you. Successful repairs!
All modern washing machines are built on the principle that a drum rotates inside the tub. In such a system, the main bearing element is the bearing, which is mounted on the drum axis. Statistics show that the proportion of SM malfunctions associated with defects in this element is quite high.
The most common cause of bearing damage is packing seal wear, which causes water to enter the bearing and quickly corrode.
If a bearing defect occurs, it must be replaced as it cannot be repaired. The bearing always changes with the oil seal, regardless of the condition of the removed oil seal. When installing a new gland seal, its groove must be filled with a specialized grease, in extreme cases, you can use lithol-24. Replacing a bearing with an oil seal is one of the most difficult and critical operations performed during the repair of lubricants.
Bearing defects can manifest themselves in the form of increased noise, as well as knocking when the drum rotates (especially during spinning), up to a noticeable beating of the drum. Consider the procedure for replacing the drum axle bearing in the CM "Gorenje WA 101/121/132/162 (P) / 982 / -1182 / 1384".
When replacing a bearing, perform the following operations:
- remove the back cover of the CM;
- remove the belt from the drum pulley;
- unscrew the pulley fastening screw, remove the pulley, and then the bushing;
- unscrew three nuts in the center of the cross support (Fig. 1.);
Rice. one.
- knock the drum axis out of the cross support. To do this, a wooden block is applied to it and the axis is sunk by 20 mm with light blows on it with a hammer (Fig. 2.);
Rice. 2
- using two ring wrenches, unscrew three nuts along the edges of the support (Fig. 3.) and remove the screws to which they were screwed;
- remove the cross support (Figure 4.);
Rice. 4
- using a flat screwdriver, remove the gland seal (Fig. 5.)
Rice. 5
- when doing this, pay attention not to damage the plastic ring underneath (fig. 6);
Rice. 6
- using a hammer or a puller, remove the bearing (Fig. 7.);
Rice. 7
- a new bearing is pressed in, using the support of the old one as a mandrel (Fig. 8);
Rice. eight
- clean the surface of the Simmer ring from contamination (Fig. 9);
• install in reverse order: cross support, pulley, belt, CM back cover.
When installing the cross support, it should be noted that first, the screws located along its edges are screwed in, and then in the center.
The article was prepared based on the materials of the "Repair and Service" magazine
The owners of the Gorenje brand have always known how to make their equipment more attractive to consumers. Even today, when almost every manufacturer produces "super-sophisticated" automatic washing machines, under the Gorenje brand you can purchase unique equipment. Just what are their automatic washing machines with a water tank that do not depend on running water! Well, yes, not about the technical characteristics of Gorenie machines today will be discussed, but about how to repair these machines.
To begin with, we will deal with the vulnerabilities of these washing machines, we will give a list of the most frequent breakdowns that occur with various models of Gorenie brand machines. This list was compiled using statistical data provided by the leading service centers of the Russian Federation. Here is the list.
- According to statistics, most often the drain pump of such machines breaks down. Almost ¼ of calls to service centers are associated with a breakdown of the washing machine pumpG
- In second place is the heating element.
- On the third - problems with the drain pipe.
- And finally, on the fourth - the engine brushes.
In fifth place, with a very small margin, was the breakage of the hatch door handle. But it is quite easy to fix such a breakdown with our own hands and we will not describe it, the main thing here is to find and buy an original part, which can be a difficult task.
The drain pumps of the Gorene washing machines do break down very often. Most likely, this is due to the operating conditions of the washing machines. The fact is that the original pumps of the Gorene washing machines are sensitive to water containing impurities of heavy metal salts. Moving elements are so closely matched to each other that plaque formed on them due to water blocks their work, accelerating wear. As a result, the pump breaks down and needs to be replaced. How to fix such malfunctions with your own hands without inviting a master?
Be careful! Malfunctions of this kind are easy to fix with your own hands, the main thing is to carefully work with the measuring device, do not confuse anything. Otherwise, you can throw out a serviceable pump and the problem, accordingly, will not be solved.
A rather specific problem of the Gorene washing machine is a breakdown of the drain pipe. The specificity lies in the fact that seemingly rather strong pipes are damaged in the knee (in the double bend of the pipe). Why is this happening? There are three main reasons:
- Poor quality material from which the branch pipe is made. A factory defect, which then leads to the formation of a crack in the pipe, and as a result, to a leak.
- The hit of a sharp foreign object, which, unable to overcome the knee, sticks into it, creating damage.
- Use of very aggressive cleaning agents. There are many users who, after reading articles and watching videos about cleaning the washing machine, start pouring any aggressive chemistry into their “home assistant” in the hope of getting rid of dirt and water stone. It may be possible to get rid of the dirt and it is possible, but along with the dirt, some of the parts of the car dissolve as well (just kidding).
In this case, the repair of Gorenje washing machines should start with checking the hoses and connections. Immediately you will not understand that it was the drain pipe that leaked, so first inspect the drain hose for damage, and only then disassemble the washing machine. The drain connection can also be reached through the bottom of the washing machine. There is a branch pipe next to the drain pump.
Next, we just have to get the original pipe, unscrew the clamps holding the leaky part and put a new one in its place.
Important! When installing a new branch pipe, be careful, it should "sit" well in its place and each connection should be securely tightened with a clamp. In this case, the clamp does not need to be overtightened - this will damage the branch pipe.
Teng is a weak point not only in Gorenje washing machines, most brands of automatic washing machines suffer from such a sore and there are many objective reasons for this.
- Impurities in the water that settle in the form of limescale on the heater, causing it to fail.
- Electrical problems (voltage drops, etc.).
- Operating conditions (frequent incorrect shutdowns of the washing machine by the user or washing at 90 ° C).
One way or another, if the Gorenie washing machine has stopped heating the water, it means that we are talking about a malfunction and, therefore, it is necessary, at least, to check the heating element and, if necessary, replace it. What is the order of the work?
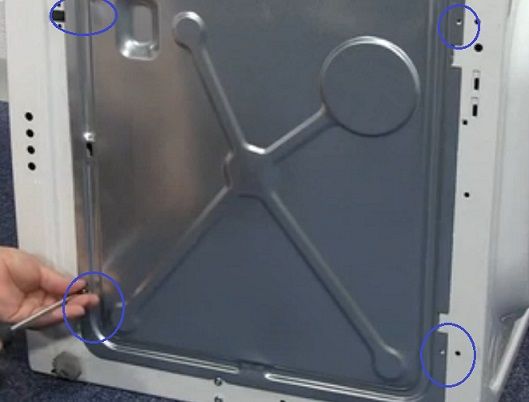
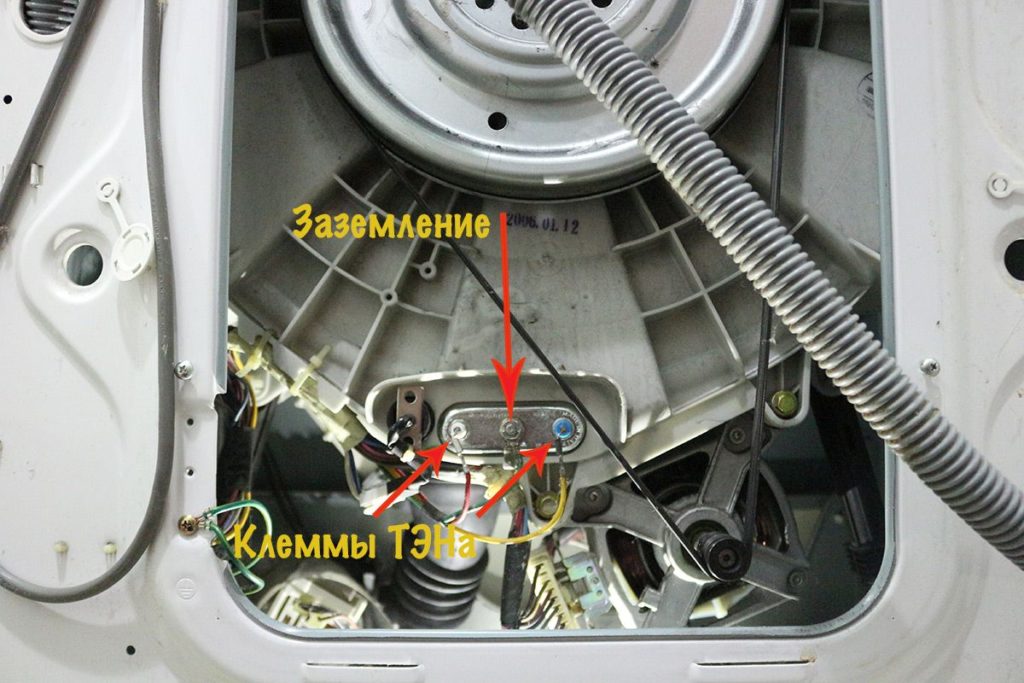
To change the heating element with your own hands, you must first prepare the washing machine for work, namely, disconnect it from electricity, water and sewage. After that, pull the machine out of the niche or cabinet and turn the back wall towards you. Before your eyes you will have a service hatch that you need to open by unscrewing a few screws.
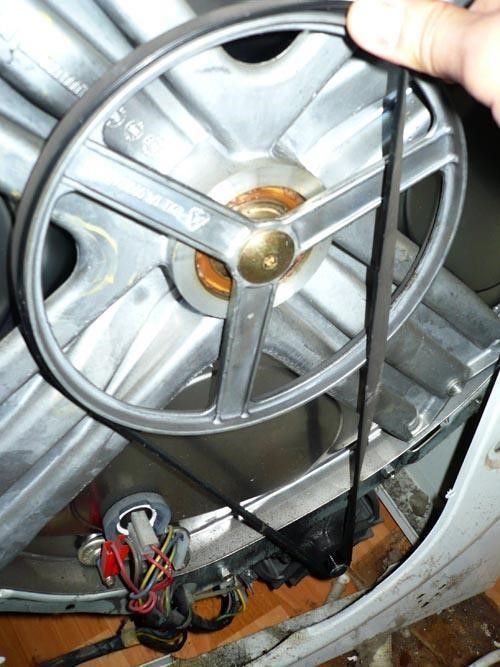
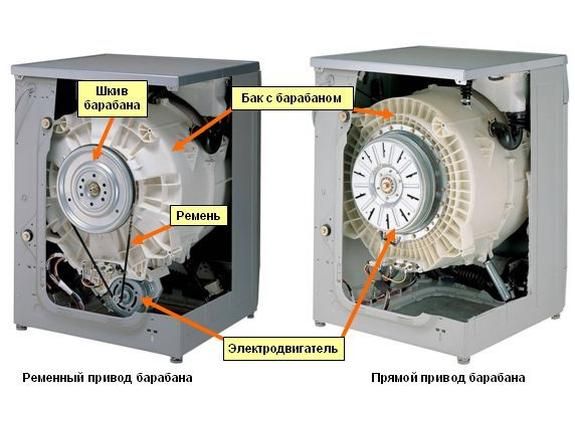
We can already see the heating element, but it is inconvenient to work with it, since the drive belt interferes. Remove the belt from the drum pulley.
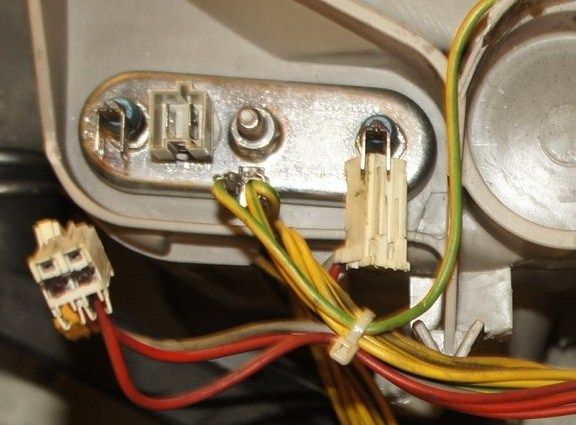
Next, we remove the wires from the contacts of the heating element. In order not to confuse the wires later, it is better to immediately hang tags with marks on them or take a photo.
Now we take an ohmmeter and check the resistance of the heating element. We set the minimum resistance value on the device. We install the probes on the two extreme contacts. The working heating element has a resistance of 10-30 ohms or more, depending on the power of the heater. If the device showed 0 or 1, then the heating element must be replaced.
Important! If the heating element is working properly, but the water does not heat up, also check the thermistor and the wires coming from the thermistor and the heating element.
What needs to be done to remove the old heating element from the washing machine tank?
- We unscrew the fastening nut holding the heating element in the groove. There is a nut between the contacts of the heating element exactly in the middle.
- We press pliers on the mounting bolt to rip the heating element from the seat, but do not overdo it so as not to break anything.
- Next, we take with our own hands the contacts of the heating element and shake it from side to side, pulling the heater towards ourselves. If you cannot pull it out, you can spray the edges with grease.WD-40 and rock again.
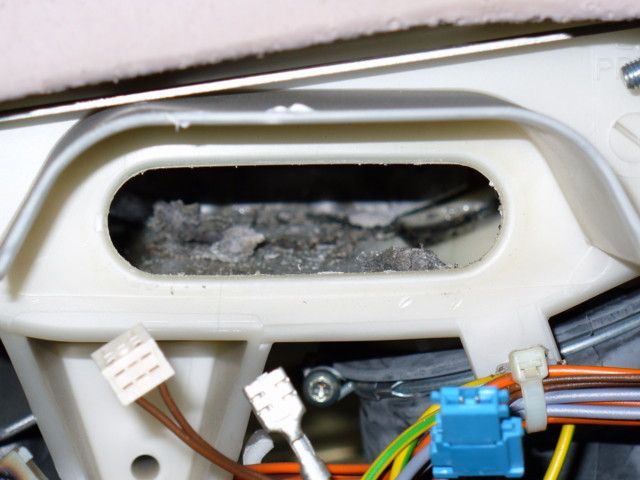
- As soon as you managed to take out the old heater, do not rush to put a new one in its place. First, carefully stick your fingers into the hole and try to scoop out the debris from the bottom of the tank, if the machine is not new, then there is plenty of debris.
- The new heating element can now be installed. We put it in the groove and make sure that the heating element “sat down” tightly.
- We fasten the fastening nut with our own hands, but it is not necessary to tighten it strongly so as not to rip it off.
- We cling to the wires, put on the drive belt.
- All that remains is to close the service hatch, put the Gorene machine in place, connect it and test it.
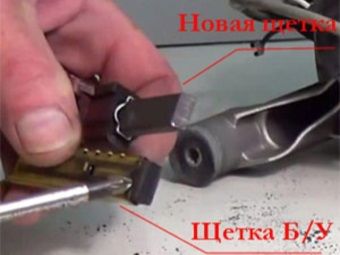
The wear of the motor brushes is also a common malfunction that occurs with Gorenie washing machines. What are the signs of such a malfunction, how to understand that it is necessary to change the motor brushes? First, the engine power will drop dramatically and the drum will rotate much more slowly. Secondly, the car will start to smell like burning, and when the engine is running, most likely, there will be a crackling sound. Third, the wear of the brushes can be recognized by the machine's self-diagnosis system. Gorenje, giving an error on the display F4.
When this kind of symptoms appears, it is necessary to check the engine - 80% chance it is he who is the cause of the error. How to do it?
When installing the engine in its seat, make sure that it “sits down” all the way, otherwise it may cause malfunction in the future.
- We put the washing machine on its feet, go around it from behind and fasten the engine with bolts.
- We put in place the drive belt, and then close the service hatch.
- We connect the washing machine and check the operation of the engine - the work is over.
In conclusion, we note that almost all common breakdowns of Gorene washing machines can be eliminated with your own hands without involving masters and without paying them a lot of money.But be extremely careful and careful, before you do something, read the instructions contained in our publication. Happy renovation!
Automatic washing machines Combustion are widespread not only in the Russian market, but also in the CIS countries and the European Union. A lot of innovative solutions in these washers is good, but there are many breakdowns from this. Therefore, the repair of washing machines Gorenje (Gorenje) is a daily concern of almost any workshop.
How to make repairs at home, and what breakdowns are most common for this brand, read on.
Manufacturers of Gorenje washing machines know exactly how to make appliances desirable and attractive for every customer. Today, these AGRs are so advanced that there are even models whose tank works autonomously and does not depend on the presence of water in the water supply system.
Only now we will not talk about technical innovations and the merits of SM Gorenie, but about what are the most frequent malfunctions of the Gorenie washing machine, and how to fix them with our own hands.
The first thing you need to pay attention to is the most vulnerable spots of various models of this brand. Using statistical data freely distributed by the leading service centers of the Russian Federation, we have compiled a list of typical breakdowns that are characteristic of almost any Gorenje model:
- The drain pump is the most vulnerable part. It breaks down in a quarter of all cars of this brand. Replacing the pump is the optimal solution to the problem.
- The second place went to the thermoelectric heater. The heating element breaks down in at least a third of the washing machines that have expired the warranty period.
- The third on the list is the water drain pipe.
- The fourth place is the engine brushes, which from frequent use become unusable and require replacement.
We give an additional fifth place to the hatch door handle - it breaks down in every 5th typewriter. The most important thing with such a breakdown is to find an original replacement part.
Important! Error codes often help to determine the breakdown: F1, F2, F3, F4 and others.
The drain pumps in the washer Gorene really break down too often and wear out faster than other components.
Cars of this brand are distinguished by their increased sensitivity to water, in which there are many different impurities. Moving elements are located almost side by side, so water stone settling on them interferes with work. Parts wear out faster, in the end, the pump breaks down and requires replacement.
Replacement or self-repair of the drain pump takes place in this way:
- Disconnect the appliance from the mains.
- Remove the detergent drawer. Pour the remaining water out of it, insert into place.
- Place the washer in a comfortable position.
- It is easier to get to the pump from the bottom, so it is better to put the machine on its side.
- SM brand Gorene are closed with lids on either side, and the bottom is no exception. Therefore, you will have to unscrew a few screws to gain access to the "insides" of the machine from the bottom.
- Now you need to inspect the pump, checking its serviceability. You will need a tester to measure the resistance. Disconnect the wiring and start measuring. If the tester displays about 160 ohms, then the pump is in order. If there are no indicators, then the pump is broken.
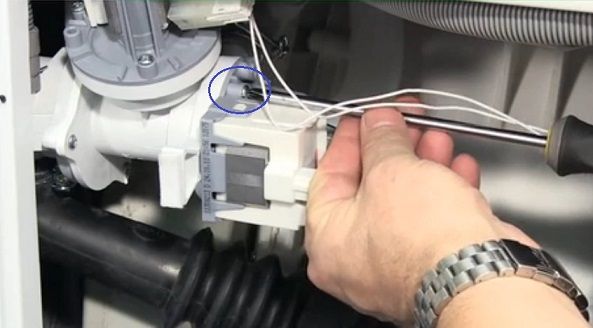
- Remove the pump by unscrewing the fasteners.
- Buy a new original part and install it in place of the old pump, reconnecting all the wiring.
- Attach the lid on the bottom side, restore the machine to the vertical position and run a dry wash in test mode.
For your information! If you decide to do the repair yourself, be careful when working with the tester so as not to throw out the serviceable pump - then the problem will remain unresolved.
If you are wondering how to clean the pump filter for the Gorenje washing machine, watch the video:
This problem can be attributed to specific breakdowns of the Gorenje brand. The specificity is that the pipes, despite their strength, often wear out in the knee area.
This usually happens for one of three reasons:
- Poor quality materials. Cracks that cause leaks are due to a factory defect.
- Sharp objects hitting the knee.
- Too aggressive chemicals for washing.
Important! Do not fall prey to advertisements that say that magic will remove limescale and blockages from machine parts. This chemistry is so aggressive that parts can suffer from it.
In a similar situation, do-it-yourself repair of a Gorenje washing machine should begin by checking both the hoses and the pipes. Start with the drain hose - it's easier to reach.
To check the pipe, you need to know how to disassemble a Gorenje washing machine. Access to the nozzle is also provided from the bottom, it is located next to the pump.
Proceed as follows:
- Buy a new original part.
- Unscrew the clamps holding the damaged old nipple.
- Remove the nipple.
- Put on a new one, fasten the clamps, assemble and turn the washer.
Attention! When installing a new branch pipe, ensure that all connections are tight. But also do not overtighten the clamps too much, so as not to damage the part.
TEN is a vulnerable unit of any machine, including the Gorenie brand. The heater breaks down for a number of reasons:
- Hard water with heavy impurities that settle in the form of water stone on a thermoelectric heater. A thick layer of limescale does not allow the heat generated by the heater to pass through, so it burns out.
- Voltage drops in the network.
- Features of use - improper shutdown of the machine, washing at high temperatures, etc.
In general, if your CM has stopped heating water, and you want to repair the automatic machine with your own hands, you need to start by checking the heater - you may even have to replace it.
The work is carried out in the following order:
- Disconnect the AGR from the mains, sewerage and water supply.
- Turn the back wall towards you - the work is going to be difficult, you should be comfortable.
- It is necessary to open the service hatch, covered by a panel fastened with several bolts.
- You will see a heating element.
- Remove the drive belt from the pulley so it does not interfere with your operations.
- Remove the wiring from the heater contacts. In order not to look for a diagram of the Gorenje washing machine later, mark the wires or photograph their location.
- Arm yourself with a tester to check the resistance. Set the min value by turning the selector wheel. Place the test leads against the outer contacts on the heater shank. The working element will have a resistance of 10-30 ohms or more. And if the display shows the numbers 0 or 1, then the heating element will have to be changed.
Attention! If the heating element is not broken, but the water does not heat up, check the temperature sensor (it is located on the heater) and the wires coming from it.
Consider how to remove the old heating element from under the drum:
- Take it off. You will find a nut between the two heater contacts - right in the middle.
- Press the pliers on the mount to remove the heating element. But do not overdo it so as not to break other parts.
- Grasp the contacts and loosen the heating element, pull the part towards you. If everything is really bad, and the heating element sits very tightly, use a universal grease, such as WD-40, and swing the heater again - it should give in.
- After taking out the old heating element, do not rush to install a new one. Use your fingers (preferably with gloves) to clean the hole in which the heating element was - at the bottom of the tank you will find a whole mountain of rubbish, especially if your machine is not the first year.
- Now put in a new part. Insert the heating element into the groove and check if it is firmly seated.
Important! Together with the heater, the craftsmen advise to change the rubber gasket as well.
- Tighten the nut, but not tightly so as not to break the threads.
- Replace the wires, put the drive belt on the pulley.
- Close the hatch, put the washer back in place, provide connection to all systems and run a test wash.
The wear of the engine brushes is an equally rare breakdown for Gorenie brand washers. You can define it by the following features:
- The engine power is significantly reduced, so the drum starts to rotate slowly.
- The machine may give off an unpleasant smell of burnt rubber.During washing, when the engine is turned on, a crackling sound can be heard.
- The wear of the brushes is often recognized by a self-diagnosis system. In this case, the display shows the error code F4.
Repair of washing machines Combustion in this case consists in checking the engine. In 8 out of 10 cases, the problem is with him. The check should be carried out as follows:
- Open the hatch at the rear of the machine.
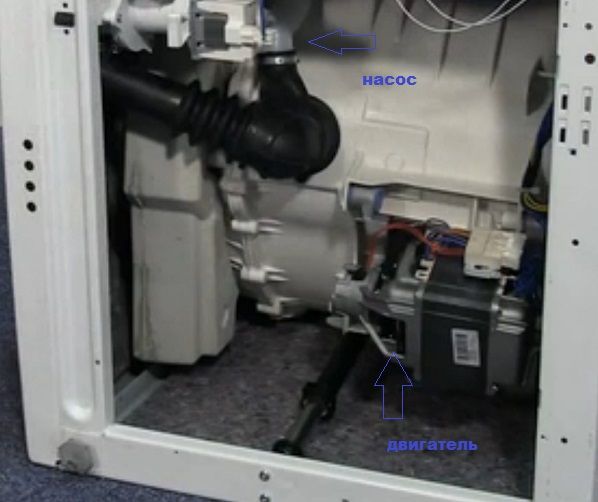
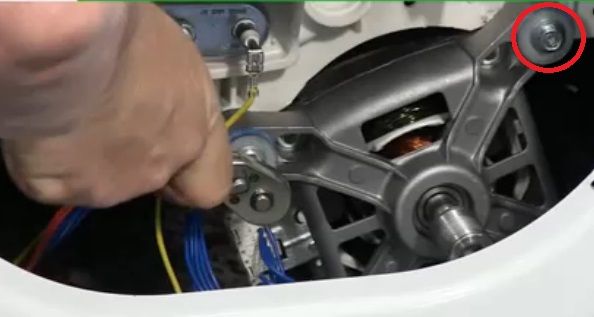
- You will find a motor under the drum.
- Remove the drive belt so that it does not interfere with the test.
- Remove the bolts that hold the engine.
- Walk around the CMA and remove the powder receptacle, drain the waste water and replace the cuvette.
- Lay the washer on its side, remove the bottom.
- Remove the wiring from the engine.
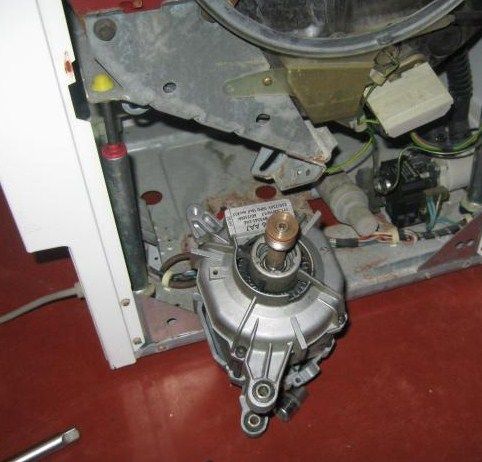
- Pull the engine away from its seat with a strong and precise movement.
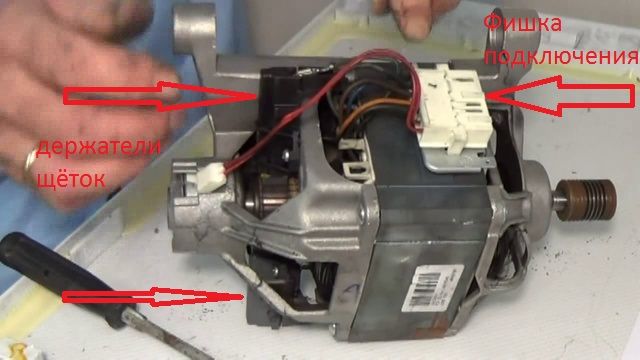
- Now your task is to remove the brushes and inspect them. If the brushes are worn out, you will definitely not mistake them for new ones. Old brushes are too frayed, worn and give off a burning smell.
- After making sure that the brushes are unusable, install new ones.
- Land the engine and run the wiring.
- Cover the bottom with a panel.
Important! The engine must be installed all the way to avoid future breakdowns.
- Place the clipper in working position.
- Tighten the engine bolts at the back.
- Replace the drive belt by sliding it over the pulley.
- Replace and screw on the service hatch.
- Connect the automatic machine to the communications and start a test wash. You did it!
If you are interested in other breakdowns, for example, how to disassemble a washing machine door, read more about this in our other materials.
Also, the video will help you with the repair:
Repair of Gorenje washing machines is distinguished by its specificity, thanks to the peculiarities of the assembly of equipment. Despite the high quality of components and compliance with many standards, Slovenian CMAs fail. Consider how to determine the problem, what breaks down more often and how to do it yourself yourself.
When starting a wash, the user rarely monitors the stages of the program - he threw in the laundry, filled in the powder, turned on the cycle and left. This is how things usually happen, so it's hard to spot problems in time. The SM self-diagnosis system comes to the aid of the user. Electronics “notices” the failure in time and notifies the owner of the washing machine by displaying error codes on the screen.
Consider the most common SM fault codes from the Goreniya trademark:
- F1 (F1) indicates a short circuit in the heater or an open circuit in the power supply of the part.
- F2 (F2) lights up when there is no water intake into the system.
- F31 (F31) indicates a malfunction in the operation of the tachogenerator of the electric motor (EM).
- F21 (F32) means the loss of communication between the electronic board and the ED.
- F4 (Ф4) lights up when the water is not heated.
- F41, F43 - errors confirming water overheating.
- F5 (F5) - water is not drained from the tank.
Read more about other alphanumeric combinations in a separate article dedicated to decoding CMA codes from the Gorenje brand.
You can reboot the system to confirm the error or rule out a one-time system failure. But don't get carried away with this method if the code reappears.
- Disconnect the power by removing the plug from the outlet.
- Leave the technician idle for 15-25 minutes.
- Turn on, run test mode.
If the code disappeared, it may have appeared by mistake. If it lights up again, then there is a problem. If there are no codes, but the operation of the equipment is broken, the manufacturer offers to conduct a simple service test at home.
To make the machine go into testing mode, follow the scheme:
- Turn the mode selector to the zero position.
- Press together the two outer buttons, holding them for a while.
- Rotate the selector one click in a clockwise direction.
- After 5 seconds, release the pressed keys.
The result of the operation should be flashing and extinguishing of all lamps on the user panel.
After the system has entered the test mode, check the serviceability of the components one by one, according to the instructions.
UBL (electronic door lock):
- Open the hatch for 10 seconds.
- Close the door.
- If the operation is successful, all the lamps on the panel will light up. If wrong - code F2.
- The controller will measure the resistance of the sensor for 2 seconds.
- A successful test will result in the extinguishing of the lamps. Otherwise, F2 will be displayed.
Water intake into the compartments of the powder dispenser:
- 5 seconds to test hot water.
- 10 seconds for pre-wash (soak).
- 10 seconds for the main wash.
- Pre and main cycle until the tank is filled with water to the first level.
- All is well - the lamps will flash. If defects are found, the display will light up F3.
Drum - Spin and Run:
- The motor starts and turns in one direction for 15 seconds. After a 5-second pause, it rotates back, the heater turns on for a while.
- Everything is OK - the indication will go out. Failure will be indicated by code F4 or F5.
- The drum will rotate for half a minute in the range from 500 rpm to the maximum threshold (1200-1400 depending on the model).
- If the spin is ok, the bulbs will remain as they were.
- The pump will start for 10 seconds. After performing a test drain, the machine will lower the water level in the tank.
- If all is well, all LEDs will light up. In case of breakdown - code F7.
Last spin with drain:
- The pump is on, the drum rotates as during spinning, in the range from 100 revolutions to maximum.
- The lamps go out if everything is OK. If the RPM has not reached the maximum mark, the F8 code will light up.
To end the service test, turn the program selector back to zero position again.
Knowing how to detect a malfunction, you can proceed to self-repair of the Gorene washing machine.
The unique Gorenje cars are distinguished by a variety of shapes and modifications. Units even with a water tank are produced under this brand! But despite the manufacturability, the technology also has weak points. Based on the statistical data obtained from service centers, the most common problems with the AGR of this brand can be identified:
- A quarter of calls to the masters are associated with a breakdown of the drain pump.
- This is followed by the heating element. Either it is not made well enough, or it does not withstand voltage surges, or poor quality water affects, but burnout of heaters is the scourge of all automatic washing machines, not only the Gorenie brand.
- "Bronze" goes to the drain pipe - leaks, drying out, blockages, all this blocks the normal operation of the drain system.
- Another problem of any machine equipped with a collector ED is brushes.
- Another problem specific to these automatic machines is the breakage of the handle on the door. We will not go deep into solving this problem, because disassembling the door, buying a new handle for the Gorenje machine and replacing it with our own hands will not be difficult even for an inexperienced user. An example of work:
The next part of the review we will devote to instructions for eliminating the listed malfunctions.
Pumps most often fail, most likely not due to a factory defect, but due to unfavorable operating conditions. The water in domestic water supply systems is far from the European quality standards for which imported household appliances are created. The admixtures of salts and heavy metals slowly but surely cause barely fixable damage to many SMA systems. And the compactness of the case, due to which all the parts are located close to each other, completes the bad deed: the parts wear out ahead of time. As a result, the pump needs to be replaced.
Have you decided to carry out the repair yourself in order to save money on the services of a master? You will need a clear scheme of work:
- Disconnect the device from all communications - electricity, water supply and sewerage.
- Take out the powder cuvette, drain the water and replace it.
- Move the equipment so that there is more free space around.
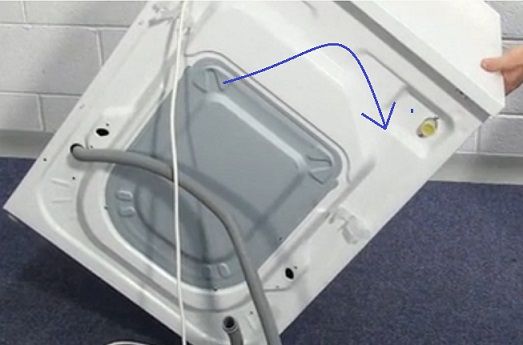
- Tilt the casing to one side, because you will have to get to the pump through the bottom.
- If the cars of other brands are distinguished by an open bottom, then in our case the bottom is tightly screwed with a lid. It is easy to dismantle by unscrewing several fasteners.
- There is a pump under the cover - next to it there is a large black drain pipe, so it is unrealistic to confuse the pump with another unit.
- Checking the functionality of an element is easy: you need a tester. Disconnect the wires from the pump, put the device in resistance measurement mode and measure the values. If they are in the region of 160 ohms or more, the pump is working properly. If the screen is blank, the pump is broken.
- Remove the part by unscrewing the bolts holding it.
- Go to the store with the old part to purchase a similar one.
- Replace the old node, connect the wiring.
- Screw on the bottom.
On a note! If you have already started checking the pump, at the same time inspect the pump filter. We wrote earlier about how to clean the filter in detail.
- Start a test wash.
The Gorenje washing machine has another specific nozzle problem. The most vulnerable part of a seemingly durable part is in the double bend (knee). What causes deformations?
- Poor quality material.
- Factory defect resulting in cracking.
- A puncture by a foreign body that has entered the drain system - a sharp object forgotten in a pocket of clothing.
- The use of overly aggressive agents in the hope of cleaning systems from scale, blockages, etc. Sometimes the use of such compositions is advisable, but you need to remember that vinegar, citric acid and other reagents not only remove scale and mold, but also accelerate the wear of "delicate" parts ...
It is difficult to understand the first time that the problem lies in the pipe. If a leak has formed, it does not hurt to first check the drain hose and the rubber cuff, and only then proceed to disassemble the case. How to disassemble the case is written a little higher - they make their way to the nozzle in the same way as to the pump.
All that remains to be done is to remove the original and install the analogue. To pry off the nipple, release it from the clamps. Do not try to patch up the part - this is a temporary measure and the leakage will resume as soon as the result of your efforts wears off.
Important! Ensure a secure fit when installing a new part. Tighten the clamps tightly, but do not overdo it so as not to damage the new tube.
Heater breakdowns are typical for any car - from budget Ariston and Indesit to premium CMA Miele or AEG. The Gorenje brand is no exception. But the reasons for the combustion of an element do not lie in the brand, but lie on the surface:
- Plaque from impurities in tap water is deposited on the tubular element, leading to overheating and burnout of the unit.
- Frequent interruptions of the wash cycle and system reboots.
- Permanent high temperature wash.
- Power surges.
If the water stops heating, you need to check the heating element and, if necessary, replace it with a new one. Before work, prepare the equipment - disconnect it from communications and put it in a place convenient for repair, with its back facing you. You will see a service hatch - remove its cover by unscrewing the screws.
The heating element is already visible, but it is inconvenient to get to it - the drive belt interferes. Remove it by removing the strap from the pulley.
Now the work is carried out according to the scheme:
- Remove the wires from the heater contacts.
- Take pictures or tag the wiring to avoid mistakes when reassembling.
- Use a tester to measure the resistance by setting the minimum values on the device. The probes must touch the two extreme contacts. The work item will display numbers in the 10-30 ohm range. A faulty heating element will display a unit on the ohmmeter display.
On a note! If the check shows that the heater is working, check the wiring and temperature sensor.
- Unscrew the large nut from the bolt holding the TEN in the hole.
- Press the fastener inward and forcefully (but gently) pull the part, loosening it to the sides. Can't? Use WD-40 fluid or equivalent.
- After taking out the assembly, remove the debris (scale) from the mounting hole with your hands.
- It's time to install a new part - install it in the groove, making sure it fits tightly.
- Screw on the mount.
- Replace the wiring, drive belt.
- Close the service hatch, screw in the screws.
- Run test mode with hot water.
Another "popular" breakdown is the erasure of graphite brushes. You can identify the problem by noticing a drop in motor power - this slows down the rotation of the drum. In addition, the technique may smell, and a crackling sound is additionally heard. An F4 error will also indicate brushes.
- Open the hatch behind the car - the engine is located directly under the tank.
- Remove the belt.
- Unscrew the ED fasteners.
- Now take out the powder receptacle, drain the water and reinstall it.
- Lay the equipment on its side, twist the bottom.
- Disconnect the wires from the motor.
- Remove ED.
- Find the brushes and inspect for wear. Old brushes are substantially worn out and give off an unpleasant odor.
- Install new brushes, put the motor back in place, reconnect the wiring. Screw on the bottom cover.
Important! Seat the motor firmly - incorrect installation will cause other problems.
- Place the SMA in a vertical position, bypassing the body, from the back, through the hatch, screw the motor.
- Install the belt, close the hatch.
- Connect the CM to the water supply and other communications, check the operation of the machine.
Other repair work is clearly demonstrated in the video:


