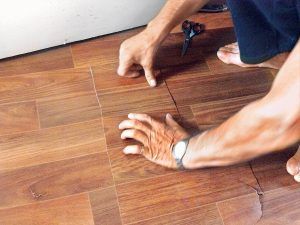
If the coating has gone in waves over the entire area, you need to cut off the excess distance along the perimeter of the walls so that a temperature gap of 1 cm remains.
How to repair the coating if waves have formed in the center of the room is discussed in the table:
The best option to lay linoleum without a single joint is to find a suitable material width.Unfortunately, the drawing you like is not always applied to the material of a suitable size.
The most difficult way to properly fit the material with the carpet pattern is to connect the corridor to the kitchen or hallway. You cannot do without floor joints in large rooms. Of course, modern materials for decorative flooring are presented in stores in a wide range. But it was linoleum that users fell in love with:
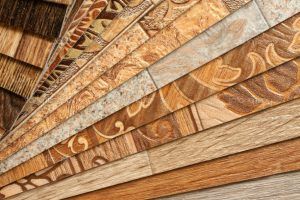
Even 30 years ago, there was no big difference between the materials for linoleum. Now, even to a non-professional, with a cursory glance at the assortment of materials in the store, it becomes clear that the samples presented differ not only in the absence or presence of insulation on the reverse side, but also in the materials themselves differ in thickness, have smooth glossy and rough textured upper layers.
Based on the difference in materials, a suitable joining method should be selected. In general, there are only 2 options that the craftsmen use - soldering with filler material and the use of glue.
Hot soldering is not used for thin linoleum, the top layer of which looks more like rubber, because at the place of heating the pattern will be melted, which may look even worse than a barely noticeable joint. The hot splicing method is not at all suitable for foam backing flooring. Textured carpets may not lend themselves to this type of joining due to their weak melting ability. Strong heat can ignite the lower insulating layer of the coating. So only a small part of the linoleum is suitable for hot docking.
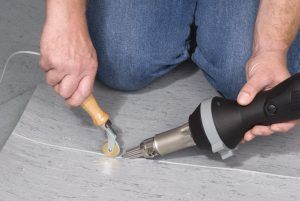
When laying linoleum, a special soldering iron is used. Its principle of operation is to heat a thin cord cut from linoleum. When working with linoleum, a professional building hairdryer can be used instead of a special soldering iron, which is equipped with a special nozzle. Outwardly, it resembles a hook. A thin tape of linoleum is threaded into the cavity of this hook. It should slide easily inside this folded tube.
The bottom of the hook is inserted into the groove. Its movement along the joint gives the distribution of the heated plastic cord inside the cut cavity. The heated cord will reliably fill the groove, but not all of the material will be inside, some of it will come out. When hot soldering linoleum, you need to have a lot of specialized tools on hand, which is quite expensive to repair just one apartment.
Professionals use more tools for laying linoleum, but even a minimal list will make you abandon the idea of making a hot joint of materials. In addition, working with a hairdryer requires skill. With prolonged use, very plastic linoleum coarsens, the joints diverge. In the end, you have to resort to the gluing method.
The simplicity of the cold method is that the special glue is sold in tubes, which are a container and an applicator. The long nose of the tube is inserted into the gap separating the linoleum sheets. A little pressure - and the glue fills the groove, melting the edges, joining them at the molecular level. This action gives the adhesive marked "A". Its use is advisable when laying new linoleum.
There is no need to completely change the floor covering if the aesthetics are spoiled only by the edges of the joints, which over time have become somewhat farther from each other than they were immediately after installation. Adhesive for repairing joints differs in its action from that used in cold welding of linoleum. It is thicker.Due to the fact that the coating has become coarse and has lost several millimeters, molecular contact of the material at the junction is practically impossible. Glue marked "C" is used to fill the groove. After fast curing, it becomes part of the coating itself. With a large groove width, its presence cannot be hidden, but there will no longer be any twisting inward or bulging ends of the linoleum, and dirt will not accumulate at the joint. The fact that if the water leaks, there will be less opportunity to get under the covering, it is possible not to say.
VIDEO
Linoleum is one of the most popular finishing materials. The scope of its application is not limited to residential premises, apartments, houses, cottages. Linoleum has good performance characteristics, therefore it is widely used for flooring in public buildings with high operational load. There are several ways to hide the joints between linoleum canvases. We will talk further about how to create a beautiful, invisible sealed seam with our own hands.
There are several methods for joining linoleum. The choice of one or another is based on the individual characteristics of the room, the type of linoleum coating and the method of installation.
Let's get acquainted with the methods of connecting linoleum in more detail:
1. Double-sided tape. Prepare the surface for work, clean it from dirt and dust. Prime if necessary. Check the connection of the joints, it should be as accurate as possible. Correct them if necessary with a utility knife or scissors. Stick the tape on the floor, gradually remove the protective film and glue the linoleum. This method is quite easy and low-cost, however, during operation there is a possibility of joint divergence. In addition, this method is unreliable, when washing the floor with water and moisture ingress between the joints, they diverge over time.
2. Thresholds. This method is relevant when moving from one room to another. It is based on the use of a special threshold that hides the joint between two sheets of linoleum. To fix the threshold, use special screws or plugs made of plastic. In this case, you can get a reliable connection at an affordable cost. Among the shortcomings, we note:
difficulties in choosing the color of the nut;
threshold projections above the floor.
When connecting linoleum based on felt, only this method is used, since the thresholds reliably fix the coating, unlike glue or scotch tape. The use of glue is a more expensive process, in addition, it often contains toxic substances that are released during operation. Thresholds, in comparison with the glue method, are safer and do not require periodic ventilation of the room when connecting the joints of linoleum.
3. Hot welding method. This method is highly labor-intensive, requires the use of special tools and skills to work with them. However, the result is a seamless seamless coating that performs well during operation.
In the process of connecting linoleum by hot welding, you will need:
high-power hair dryer;
special bundle on PVC basis;
knife and attachment.
Linoleum is installed with a slight overlap, then a groove is cut along the length of the joint. Using a construction hair dryer, the surface is heated to a temperature of 450 degrees, and then a tourniquet is installed in the groove with a special nozzle and heated until a perfectly even joint is obtained. After the seam has cooled, cut it off with a knife.
As a result, it is possible to obtain a seam that practically does not differ from the linoleum itself, the connection is tight and reliable. Among the shortcomings, we note:
the cost of performing work;
a long process and the need to ventilate the room;
the use of this method to connect the household version of linoleum is excluded, since it melts under the influence of high temperature.
4. Cold welding method. One of the simplest and most reliable options for joining linoleum joints. To complete, you will need:
masking tape;
a knife with a measuring ruler;
adhesive composition for welding.
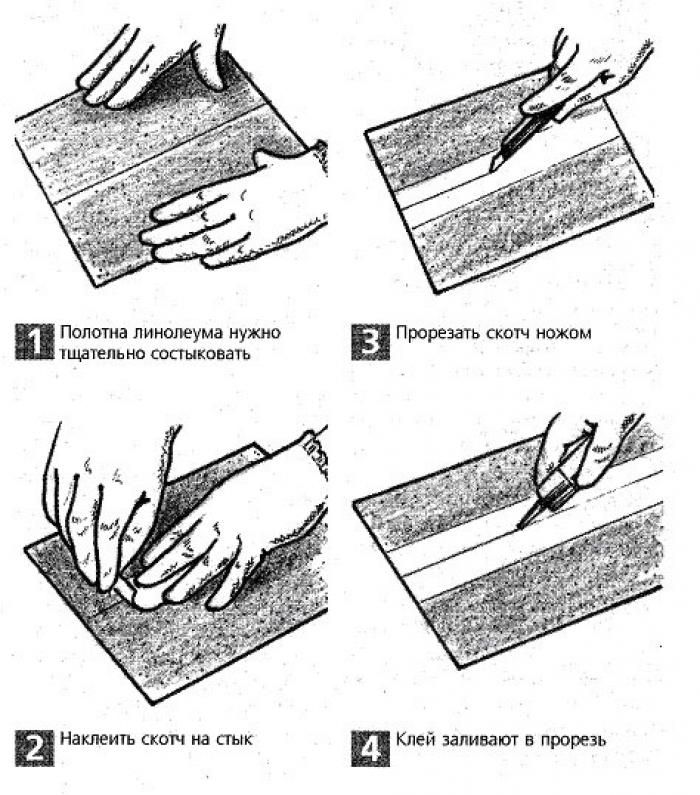
Linoleum sheets are adjusted to obtain a perfectly even seam. The edges are leveled and trimmed, if necessary. The edge of the linoleum is pasted over with tape. The coating is cut and filled with a special compound in the form of cold welding. After the weld is completely dry, the masking tape is removed.
Please note that contact with cold welding on linoleum leads to its destruction and the appearance of traces that cannot be removed. Therefore, special care must be taken when working with this material. If the cold welding still gets on the linoleum, wait until it dries completely, and then use a knife to remove it from the surface.
Among the advantages of this method, we note:
ease of independent use;
no need to call a home-based master;
the possibility of repairing linoleum coverings.
If you want to get a reliable and airtight connection of linoleum joints, we still recommend staying on the last two connection options - cold or hot welding.
One of the most common methods for gluing linoleum is the cold welding method. It is based on the use of a special adhesive that forms a colorless coating that perfectly seals the joint. Among the advantages of using cold welding to join the joints of linoleum with our own hands, we note:
obtaining a monolithic, neat and reliable connection, which is outwardly invisible, felt only with tactile contact;
does not require special equipment, a standard set of tools is sufficient for the operation, thus reducing the cost of laying linoleum covering.
There are three options for an adhesive composition for cold welding of linoleum:
type A adhesive composition;
type C adhesive;
adhesive composition T type.
We suggest that you familiarize yourself with each type separately. When choosing this or that glue, take into account the peculiarities of the linoleum coating, the accuracy of the joints.
Adhesive composition for cold welding type A is liquid in consistency, since it contains a large amount of solvent-based substances. Thanks to this structure, the edges are effectively delaminated for joining. However, it will not be possible to connect joints with large joints to each other, since the adhesive composition is too liquid in consistency.
Therefore, type A adhesive is used to join seams with minimal discrepancies. The adhesive composition is an ideal solution for newly purchased linoleum, which was cut at the factory.
The adhesive composition of type C is distinguished by the presence of a large number of PVC-based substances in the composition. The adhesive composition has a thick and rich consistency, therefore it easily fills wide gaps between the sheets. An excellent solution for the repair of linoleum covering, which was previously used. The adhesive composition does not require an ideal sheet for fitting, it easily fills large gaps. After drying, a neat, almost invisible bond is formed.
The T type adhesive composition for linoleum is used very rarely and only by professionals, it allows you to connect sheets of multicomponent linoleum options.
Instructions for joining linoleum joints by cold welding:
High-quality welding of linoleum joints allows you to get an ideal seam in terms of density, which is not exposed to mechanical stress, as well as moisture and chemicals for cleaning floors.
On site, the joining of the two canvases is installed with double-sided adhesive tape, so the cold welding does not get onto the linoleum.
A strip of tape is allowed strictly along the seam, while trying not to touch the coating itself.
A special needle-shaped nozzle is put on the adhesive, which makes the seam less noticeable.
Place the needle inside the incision, fill in the gaps with glue. When glue appears on the tape, move further in the direction. Fill in the entire seam this way.
Drying time for cold welding is indicated in the manufacturer's instructions and is usually about fifteen minutes.
After that, remove the adhesive tape from the linoleum and check the condition and smoothness of the joint.
For the fastest and easiest gluing, check out the recommendations for soldering linoleum with your own hands with cold welding:
when buying linoleum, take into account the fact that it is necessary to connect the sheets with an overlap of at least 5 cm, thus, it will be possible to achieve the most even joint between the canvases;
use rubber gloves for work, contact of cold welding with skin is undesirable;
be sure to use a needle glue nozzle, with its help, the joints between the canvases will be filled as quickly and accurately as possible;
if the glue comes in contact with the linoleum coating, wait until it dries completely, and then remove with a clerical knife.
To perform hot welding, equipment for welding linoleum is required. A special hair dryer with a nozzle heats the cloth to the required temperature. Linoleum is pre-glued to the base.
The hot welding method is especially often used for natural linoleum. Additionally, you need to purchase a harness for connecting the joints of linoleum. The joints between the canvases are sealed during the solidification of polymer substances, which are preheated with a hair dryer.
The connection of linoleum at home using the hot welding method is quite difficult to produce, especially without experience with this equipment. Therefore, we recommend that you entrust this process to specialists in order to avoid damage to the canvases.
If you still decide to do it yourself, follow the instructions below:
Prepare all the tools necessary for work in the form of:
special knife;
construction hair dryer;
harness.
Treat the end areas on linoleum with a knife. As a result, a grooved surface is obtained that reaches the main part of the linoleum.
Remove debris and dust from the floor where the covering is located. Turn on the hair dryer and warm up the linoleum to 350-380 degrees. Install a special nozzle in which the harness will be installed.
After installing the harness, heat the linoleum with a hairdryer, gradually reaching the joint line. The tourniquet should melt gradually and evenly.
After completion of welding, remove unnecessary sections of the bundle; for this purpose, use a sickle-shaped knife or special equipment.
Make sure the connections are neat, the knife is installed parallel to the floor to avoid damage.
Hot welding of linoleum is divided into two stages. Work should start from opposite sides, and end at the overlap of the canvases.
Do not forget, in addition to the hair dryer for welding, prepare a special attachment that improves the quality of the work performed and heats up only the necessary areas.
Choose a high-quality hair dryer, the maximum heating temperature of which is 500-600 degrees. To maintain a constant temperature, the device has special sensors. Also, pay attention to the number of modes of operation of the device.
If the volume of work is large, then the welding will be long, the hair dryer, in this case, must have sufficient power to carry out this process, in order to avoid overheating.
Before starting work, the strips of the coating are chamfered, thus a wedge-shaped depression is obtained. It is in it that the tourniquet will subsequently be located, which, when heated, will turn into a polymer liquid substance. A special nozzle for a hair dryer heats this particular area. The groove on the nozzle should be firmly pressed against the seam for the most uniform heating. Please note that the polymer substance must fill the ditch evenly without protruding beyond the floor surface. Only in this case, it is possible to achieve an aesthetically pleasing docking. When we hide the joints of linoleum with a hot method, you should be especially careful when working with a hairdryer. Since excessive heating of the polymer substance leads to the appearance of sloppy butt joints.
VIDEO
PVC flooring or natural roll coverings look presentable and are characterized by good resistance to compression and abrasion loads. But if the conditions of installation and operation are violated, it is not difficult to make a hole in the linoleum or a cut, burn through or even “decorate” it with stubborn stains. You can deal with any defects at home with your own hands.
For home, most often buyers choose inexpensive household or semi-commercial series 21-23 and 31 classes of wear resistance. Although linoleum belongs to elastic flooring materials, the surface of natural and PVC products is quite resistant to abrasion, and some collections even withstand furniture casters, sharp heels of women's shoes and animal claws.
But, unfortunately, buyers do not always heed the recommendations of manufacturers, or do not have the financial capacity. Therefore, a covering that does not correspond to the load class of the room is chosen. For example, for a corridor or a kitchen in a house with small children and pets, an economy series of 21 classes is purchased. Or even worse - due to a limited budget, in schools and kindergartens, material of 21-22 categories from the household series is laid on the floor with the minimum possible protective layer. And do not be surprised that the linoleum tore so quickly, gathered like an "accordion" or lost its gloss. For such rather harsh conditions, completely different coatings are intended - from class 31 and above.
Blaming the manufacturers for the manufacture of low-quality floor products, buyers forget about another important factor - the correct installation. Plants Tarkett, DWL, Juteks, Grabo, Forbo and others strongly recommend that you carefully read the instructions before installing the coating. It states in black and white that:
The base must be perfectly flat , without pits, potholes, bumps and other irregularities. Alas, there are still masters who are simply too lazy to level the surface. They convince customers that linoleum will perfectly hide all the flaws. Yes, indeed, the material lies flat on the base, but at the same time it is elastic and not a rigid product. Therefore, it is enough to put the chair leg in the area of the fossa or to step with your heel to make a hole in the linoleum.
It is possible to correct installation errors, but you will have to work hard - dismantle the flooring, level the surface, etc.DO NOT lay on the basis of no backing materials for insulation, sound insulation, creating a soft layer, etc. To effectively reduce the level of impact noise between the coating and the sound-scattering layer, there must be a massive layer - a wet screed with a thickness of at least 4 cm or a dry prefabricated made of durable sheets of gypsum fiber board, chipboard (according to the technical album of Knauf or Rockwool solutions).
Video (click to play).
For thermal insulation of a concrete base, you can arrange floor heating or lay any sheet material with a low coefficient of thermal conductivity (edged board, plywood, chipboard, OSB). The formation of a soft floor covering is an irrational decision.If only because a kind of backlash is formed, due to which, when installing furniture or walking, the finishing material is pressed through, a cut or torn area easily appears. Remember the simple rules: the base must be firm, even and solid.
Covering both natural and PVC is required glue to the base ... This process is carried out using water-dispersion adhesives or using universal mastics. As a last resort, you can carefully smooth the canvas and fix it with double tape.
Seams between canvases it is necessary anchor ... Can be glued using cold welding compounds or pressed with metal joints, PVC thresholds. Read more here.
Means for fixing seams.
If mistakes are made, and the surface of the linoleum is damaged, then you should not despair. With a little skill and desire, almost any defect can be corrected.
One of the characteristics of rolled marmoleum and PVC coating is partial maintainability. This means that, for example, a small incision or swelling is easy to repair - it is enough to carefully glue the torn linoleum with the help of special compounds. But the burned-out area and other types of holes are more difficult to eliminate. We will tell you about everything in order below.
Such contaminants are classified as complex, therefore, special household chemicals are used to remove them. Forbo and Wicanders, for example, have a whole series of products for the care, cleaning and protection of natural surfaces (marmoleum, cork, parquet). And Dr. Schutz, InterChem and Tarkett produce professional cleaning and care chemicals for vinyl flooring. Including:
universal cleaners for daily cleaning and deep cleaning (concentrates and ready-made);
special cleansing pastes for stubborn dirt;
protective polishes on polymer and oil base;
restoration dispersions based on polyurethane or methyl polyacrylate resins (to restore transparency or protective varnish);
various mastics and emulsions renewing with anti-slip effect, giving a glossy shine, etc .;
concentrates for intensive cleaning from traces of pencils, ink, permanent markers, iodine and brilliant green solutions, paints and varnishes, rubber, oil products, etc.
Professional series of linoleum care products.
Advice! It is not recommended to use chlorine-containing products, abrasive powder cleaners, solvents and petroleum products for cleaning roll PVC coatings, marmoleum and cork.
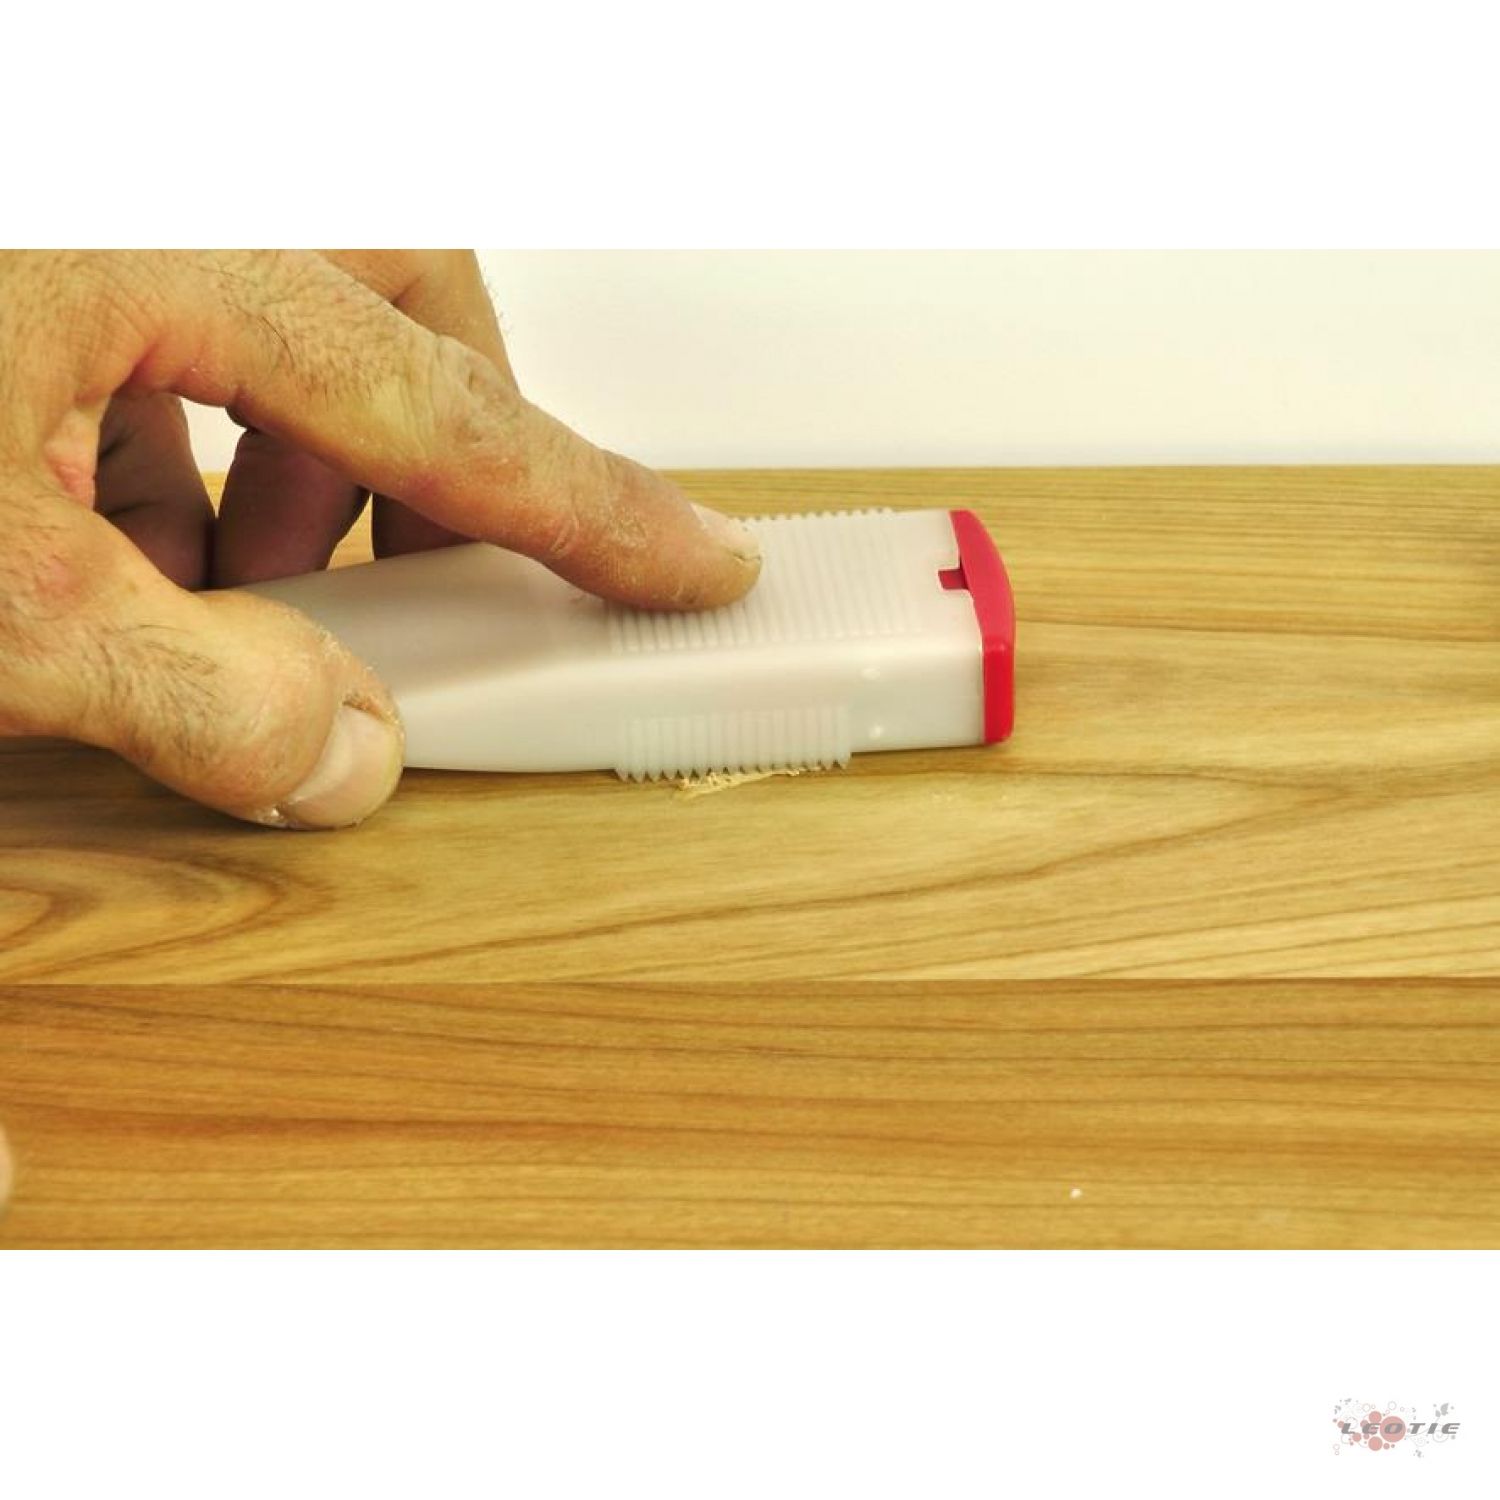
Of course, this list is far from complete. The assortment is huge, so choosing the right one is not difficult. But it is not worth listening to the advice of would-be masters and deteriorating the condition of the coating by means of sandpaper, abrasive powders. It will not repair a burned or contaminated area. On the contrary, the wear-resistant top layer will be removed, and the defective area will be irretrievably damaged.
What to do if linoleum is cut or torn by negligence? Everything is very simple - fix it by gluing using PVA or "cold welding". The latter is a series of adhesive polymer compositions that do not just connect, but fuse parts of the web, forming a strong, almost invisible seam. Available in three variations:
Type A - repair compound for homogeneous and heterogeneous PVC coatings, connected without gaps.
Type T - pasty mass used for felt-based products.
Type C is a thick glue that allows you to glue the canvases close together, and with a gap of up to 4 mm wide.
Varieties of cold welding glue.
In order to glue the parts as accurately as possible, special tips in the form of a needle with a standard or C-, T-shaped nozzle are included in the kit with the adhesive tube.
"Cold welding" refers to low-toxic and flammable building materials, so you need to work with it carefully, preferably using personal protective equipment (glasses, gloves)
Before work, the linoleum elements to be glued must be cleaned of dirt, mastic residues, torn felt or pieces of a foamed base, dust. If there are recesses in the base, they must be filled with quick-drying cement, vacuumed. Protect the cut or torn cloth from excess glue protruding onto the surface with a piece of masking tape, insert a needle into the joint or puncture and squeeze out a little adhesive mass and leave to dry. After a few hours (the exact period is indicated in the instructions), you can load the coating as usual.
Wavy bulges on the surface almost always appear due to improper, glueless styling. Less often - due to high moisture content of the substrate (dampness, etc.). In the first case, you need to remove the furniture from the room, remove the baseboards, warm up the linoleum with a construction hairdryer and carefully smooth it out. It is advisable to load the surface for several days in order to fix the coating in the desired position.
But dampness and its consequences will have to be fought seriously. First you need to eliminate the source of high humidity, dry the base, waterproof it if possible. Only then can linoleum be laid using adhesives.
Locally swollen areas can be eliminated with PVA glue or "cold welding": pierce the bubble or make a cross-shaped incision, introduce the composition under the canvas and glue the linoleum to the base.
"Raised" edges of linoleum can be easily repaired with the same adhesives - welding or polyvinyl acetate. But you need to strictly follow the instructions.
If the joints in doorways or in the middle of the room are more than 4 mm apart, the edges frayed, then it is better to use metal or PVC thresholds to join them. The range of products is wide: with open or hidden fasteners, painted with polymer powder or laminated to match the color and texture of linoleum. We believe it will not be difficult to find the right one.
In this case, a local replacement of the damaged piece is carried out. For this, a cut of the coating is selected, if possible, of the same color and design. The defective area is removed, the remnants of old glue or mastic are removed from the base, if necessary, leveling is carried out, cleaning from dust and dirt. Next, a fresh adhesive is applied to the base floor with a brush, a patch is inserted, and carefully smoothed. You can place a load on the surface for several days.
Replacing the damaged area of linoleum.
VIDEO
VIDEO
In conclusion, I would like to note that any repair of linoleum must be carried out immediately upon detection of defects. Otherwise, the damaged area will increase day by day, and the possibilities for fixing it will decrease.
Advice! If you need repairmen, there is a very convenient service for their selection. Just send in the form below a detailed description of the work that needs to be performed and you will receive offers with prices from construction teams and firms by mail. You can see reviews of each of them and photos with examples of work. It is FREE and non-binding.
With cosmetic repairs, old floors are rarely opened, only in the case of large defects that cannot be eliminated in other ways. And here linoleum is widely used to refresh the atmosphere. This floor covering has a number of advantages, which determine the wide demand for it.
low cost;
big choice;
wide selection of the width of linoleum, which is important for high-quality styling;
simple and quick installation;
no need to attract professionals, which saves money.
This problem will not affect only the owners of small apartments, where the rooms are not too large. For such premises, you can easily pick up linoleum, the width of which is greater than the size of the room, therefore you will not have to take care of the beauty and strength of the seams - they simply will not be there.
Seam design with a nut. The method is simple, but somehow you don't want to watch the sill in the middle of the room. Plus, it's not flat enough to be overlooked. Therefore, this option is most suitable for decorating linoleum seams at the junction of two rooms. Here, the narrow nut looks quite natural.
Fastening adjacent canvases with double-sided tape, which is glued to the base of the floor on one side, and to the other side of the linoleum canvases in the seam area. The method is simple and cheap, but does not guarantee reliability, aesthetics of the seam and its tightness.
Joining of canvases by hot welding. This option requires the use of special equipment and professional skills. Most often, hot welding is used for joints of hard commercial linoleum, which is extremely rare in residential premises. And soft linoleum of a household class is easily damaged when exposed to high temperatures.
Cold welding of linoleum. A special glue is used for it. In this case, no equipment is required - the can is made in such a way that it allows you to apply the glue strictly to the right place.
Thus, the most accessible way for an ordinary consumer to neatly and reliably join the edges of linoleum is precisely cold welding.
VIDEO
In fact, this is not welding in its pure form, but simply high-quality gluing of linoleum seams. Moreover, you need to use only special glue - it is he who guarantees a high-quality seam.
Type A glue. It has a liquid consistency and therefore perfectly penetrates even the narrowest seams and crevices. This option is ideal for gluing soft linoleum, and the seam after drying is almost impossible to see. This glue is indispensable when joining panels with a pattern or a complex pattern.
Type C glue. It is much thicker than the previous one, and therefore is able to reliably close seams and cracks up to 4 m wide. This glue fills a wide joint, reliably connecting the panels to each other. It is often used for joining coatings already in use, the panels of which have "dispersed" or have shrunk, as well as for repairing tears and cracks in linoleum.
Type T glue. It is not recommended to use it on your own, as it requires professional skills. In addition, this adhesive is highly toxic. It is mainly used for welding polyester linoleum.
construction knife;
metal ruler (preferably long);
double sided tape;
masking tape;
a can of glue.
It is very important to thoroughly clean and level the base before laying the linoleum. If there are irregularities and cracks, they need to be eliminated, especially if the use of soft linoleum is supposed.
Before gluing, linoleum must be laid out indoors and kept for two to three days.
A very important step is trimming the edges of the linoleum of two adjacent panels. To do this, they are laid with an overlap and the cutting line is marked with a ruler. Then, along the ruler, both layers of linoleum are cut simultaneously. In this case, the resulting edges are ideally adjacent to each other.
The sheets are laid on the installation site and fixed to the base with double-sided tape or mastic.
Before gluing, you need to protect the edges of the linoleum from possible ingress of glue, since it dissolves the linoleum and can damage the front side of the coating. To do this, masking tape is glued to the edges of the panels, leaving only the joint gap free.
The tip of the tube is made in the form of a thin cone, from which glue flows out. You need to work slowly, carrying out a uniform supply of glue into the seam. The whole work is to slowly and carefully pass the tip of the spray can along the seam. The glue bead should be approximately 3-4 mm wide. This will ensure that the glue will get into the seam and securely join the linoleum cuts.
The result is a durable and almost invisible seam that does not deform and matches the color of linoleum.
If it is necessary to repair an old cracked coating, then it is better to use type C glue, it will perfectly close even fairly wide gaps.
The use of high-quality glue and proper preparation for laying linoleum for many years guarantees the durability and tightness of the coating.
VIDEO

