In detail: DIY repair of a Hyundai accent generator from a real master for the site my.housecope.com.
You will need: a socket head "for 8", a Torx E6 head, an extension cord, a knob, a barb, a soldering iron, a tester, a puller for the rotor bearing.
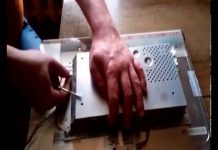
2. Remove the two screws securing the generator casing ...
3. ... and unscrew the "B +" terminal nut.
4. Press the casing holders away from the stator housing ...
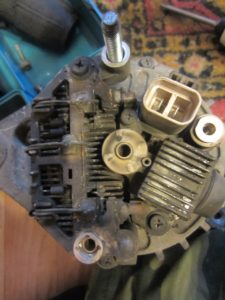
6. Unsolder the two leads of the electronic voltage regulator from the rectifier unit using a solder remover.
This is what a special device for removing molten solder looks like.
7. Remove the two screws securing the electronic voltage regulator to the stator housing ...
8. ... and remove the voltage regulator.
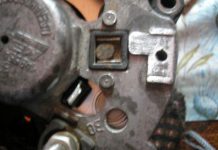
It looks like a technological hole in the brushes of the generator, designed to fix them when installing an electronic voltage regulator.
9. Unsolder the three leads of the stator winding from the rectifier unit ...
10. ... remove the two screws securing the rectifier unit to the stator cover ...
11. ... and remove the rectifier unit.
12. Remove the four clamping screws of the stator housing and generator front cover.
13. Mark the relative position of the stator relative to the generator front cover and stator housing.
14. Hook up the stator housing with a screwdriver ...
16. Hook up the stator with a screwdriver ...
17. ... and remove it from the front cover.
18. In order not to damage or jam the pulley when unscrewing, put a larger belt over the pulley.
19. Clamp the pulley with the belt in a vice, unscrew the nut ...
21. ... and a spacer sleeve.
22. Remove the rotor from the front cover.
Inspect the rotor slip rings. If there are scuff marks, risks, scratches, traces of wear from brushes on them, grind the rings.
| Video (click to play). |
23. Inspect the generator front cover. If, during the rotation of the bearing, play between the rings is felt, rolling or jamming of the rolling elements, damaged protective rings or grease drips, replace the bearing. If cracks are found in the cover, especially in the places where the generator is attached, it is necessary to replace the cover with a new one.
24. To replace the front bearing ...
25. ... remove the four screws securing its cover ...
27. Press the front bearing out of the cover.
28. Press a new bearing into the cover using a mandrel of a suitable diameter, applying force to the outer ring.
29. Check the ease of rotation of the bearing from the side of the slip rings of the rotor. If during the rotation of the bearing you feel play between the rings, rolling or jamming of the rolling elements, damaged protective rings, or there are grease drips, the bearing should be replaced. To do this, press the bearing off the rotor shaft with a puller and install a new one, applying force to the inner ring.
30. Check the resistance of the rotor winding with a tester by connecting it to the slip rings. The resistance should be approximately 3 ohms. If the tester shows infinity, then there is an open circuit in the windings and the rotor needs to be replaced.
31. Check the short circuit of the rotor winding to ground. To do this, connect the tester probes to the rotor pole and alternately to the slip rings. The measured resistance must be infinitely large, otherwise replace the rotor.
32. Check the stator windings for an open circuit, alternately measuring the resistance between all winding leads with a tester. If the measured resistance tends to infinity, the stator must be replaced.
33. Check the stator windings for a short circuit to the frame. For this…
34. ... connect the tester probes to the stator housing and alternately to each winding lead.The measured resistance should be very high (should tend to infinity). Otherwise, replace the stator.
35. Check the rectifier unit. To do this, connect the tester probes to the output of the stator phase winding and the air heatsink of the diodes ...
36.… and, swapping the tester probes, measure the resistance. If the tester readings are the same in both cases, the rectifier unit is defective and needs to be replaced.
37. Check the other two diode circuits of the generator in the same way.
38. Reassemble the generator in the reverse order of removal, taking into account the following:
- before installing the generator rotor, sink the brushes of the electronic voltage regulator and fix them in this position by inserting a pin into the hole in the cover (for example, a paper clip). After assembly, remove the pin;
- orient the front cover of the generator and the stator housing according to the previously made marks.
One of the important components of any car is the generator. It helps to convert the mechanical energy of the crankshaft into electric current. From this current, the battery and all electrical appliances in the car are fed. If it breaks down, then the lighting stops working, the on-board devices are turned off, and the car itself becomes. In the event of a generator breakdown, powered only by the reserve battery, the car will be able to drive quite a bit. And after it is discharged, the car will become completely. And you have to send the car to the service station. However, if you know at least a little about the repair of equipment, you have certain skills and, most importantly, the desire to try to fix something, then you can try to figure out some breakdowns yourself. For example, almost everyone can adjust the belt tension, replace it, or change the bearings. Consider how to repair a Hyundai Accent generator with your own hands.
All problems with the generator can be roughly divided into two parts: mechanical and electrical. The electrical part includes problems with the stator, rotor, rectifier unit. In most cases, if a unit fails, its repair is no longer possible, it just needs to be replaced, and this requires at least minimal repair skills and knowledge of electronics.
Mechanical problems include bearing wear, belt wear. Their repair is quite simple. As a rule, they fail due to banal corrosion or wear of parts, prolonged operation or untimely maintenance of the car.
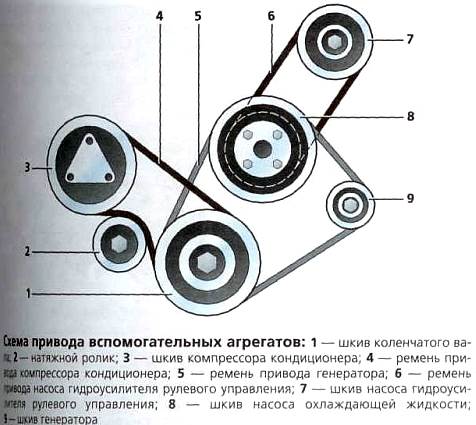
Quite often, problems with the alternator belt are the cause of the poor supply of electricity to the vehicle's on-board instruments. Weak tension or strong wear can lead to the fact that in the car the on-board electrical appliances do not work well or turn off altogether, or the battery is discharged. The first thing to check in this case is the belt tension. To do this, it is enough to check its tension with your hands in the middle between the pulleys. With light pressure, the deflection of the belt should not exceed 1 cm.If you have more, then it should be tightened more. To do this, first loosen the nuts of the fastening bolts on both sides (from the adjusting plate and the oil pump). After that, use the same 12 key to adjust the tension. To do this, turn the adjusting bolt to the right. Then tighten the mounting bolts and see the tension. Do not forget that both poor tension and strong tension have a bad effect on the operation of the car. Excessive tension can damage the bearings.
If, when examining the belt, defects were noticed or it is badly worn, then it is better to replace it immediately. To do this, the first step is to remove the plastic motor mudguard (right). After that, loosen the fastening, tension and, moving the generator itself towards the cylinders, dismantle the belt from the pulleys.The new one is installed in the reverse order, its adjustment is carried out.
The generator on the car is an important component. Without its correct operation, starting the car will be difficult or simply impossible. The generator converts the electrical current into mechanical energy from the crankshaft.
The battery is fed from the generator, and there will be no constant need to charge the battery with chargers. When the generator is not working, most electrical appliances stop working, and the car itself ceases to be operational. When the generator is not running, the vehicle absorbs energy directly from the battery, but this phenomenon is short-lived. As soon as the energy in the battery runs out, the car will stall and will not start.
If you know at least a little about technology, or just have a desire to repair something with your own hands, for example, replace the alternator belt, or change bearings or alternator brushes, then this article is for you. Let's take a look at how to make a DIY generator repair. Using an example, we will analyze the repair of a generator on a Hyundai Accent.
A generator breakdown can be divided into two parts: electrical and mechanical.
Mechanical problems include wear on the bearings and alternator tension belt. This is by right the easiest generator repair. As a rule, the wear of these parts occurs due to wear of parts or untimely maintenance of the car.
Electrical breakdowns are breakdowns of the rotor or stator, rectifier unit and wear of the generator brushes. Repairing such breakdowns requires at least basic knowledge of electronics repair. If such knowledge is not available, it would be better to entrust the car to specialists (auto electricians).
Poor electrical supply to the vehicle, often a weak alternator belt tension. With a weak tension or strong wear of the belt, the on-board electrical appliances do not work well in the car or completely turn off. Check belt tension. To do this, it is enough to check the tension between the pulleys with your own hands. If you do not press hard on the alternator belt, then at normal tension, the belt deflection should not be more than 1 cm.
If the deflection is greater, then it is worth tightening the belt. If you tighten the belt, first unscrew slightly the nuts of the fastening bolts on both sides (from the oil pump and the adjusting plate). After that, adjust the tension with a 12 key. When tensioning the belt, turn the adjusting bolt to the right. Then tighten the mounting bolts and check the tension. At the same time, do not forget that a weak belt tension is certainly bad, but you should not overtighten the belt either. Strong belt tension leads to rapid bearing wear.
If during the initial inspection of the belt you notice cracks or other defects, such a belt should be replaced so that in the future its rupture does not lead to more expensive repairs.
If you need to remove the belt altogether, first remove the plastic protection of the alternator belt. Then loosen the tension fastener. Then slide the alternator towards the cylinders and remove the belt from the pulleys. Install the new belt in reverse order and tension it.
Tensioning the alternator belt or removing it can be done without removing the alternator, while replacing the bearings requires completely removing the alternator and disassembling it.
Before removing the alternator, be sure to disconnect the battery terminals, remove the belt and disconnect all wires from the alternator. When disconnecting the wires, remember where which one was, sign them or just take a picture with a smartphone.
This will be needed in order not to confuse the wires when installing the generator back in place. Next, open the protective cover of the generator output, use a 12 key to unscrew the fastening of the wires and disconnect them from the output. Then remove the oil filter and unscrew the bottom mounting nut on the generator. Everything is unscrewed and removed.Now just gently lift the generator up and remove it.
After removing the generator from the engine, place it on a workbench with bearings on both sides. To remove the rear bearing, it is recommended to heat the generator housing to 60 - 70 degrees, after which it can be easily removed.
Remove the front bearing with a puller. After these procedures, replace the old, new bearings. Under no circumstances, when installing bearings in place, do not hit them with metal objects. When installing, use a mallet or wooden block.
After installing the bearings in place, reassemble the generator and install it on the engine. When installing the generator, insert the mounting bolt, then move the generator along the central mounting bolt, measure the distance between the support and the bracket, select the washers in accordance with the dimensions, insert into the gap formed and screw the nut onto the central mounting bolt of the generator.
After all this, reinstall everything in the reverse order. First, the oil filter, then connect the wires to the generator terminal, connect the wiring box, and install the generator belt, while clearly adjusting its tension.
Having understood the article, we can say that tensioning the belt or replacing the bearings of the generator is not a difficult task. If, after the repair work carried out, the operation of the generator is still unstable, then you should watch its electrical breakdowns. As a rule, this is a rather complicated process, and it is not easy to do it at home. Therefore, contact a specialized center.
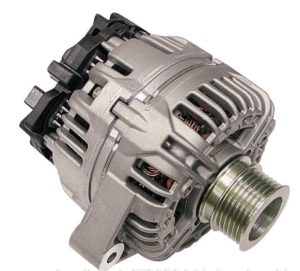
The generator on the Hyundai Accent is not much different from similar units used on other cars. It has a stator winding that generates an electric current (and three phases at once), rotary (it is often called exciting). A stable voltage is applied to the latter, as a result of which a current is generated. And also in the design there are brushes, a rectifier, a capacitor, housing elements - front and back covers with bearings. The difference from the units of other machines is only in size and shape. In our article we will try to consider how to properly remove the generator on the Accent.
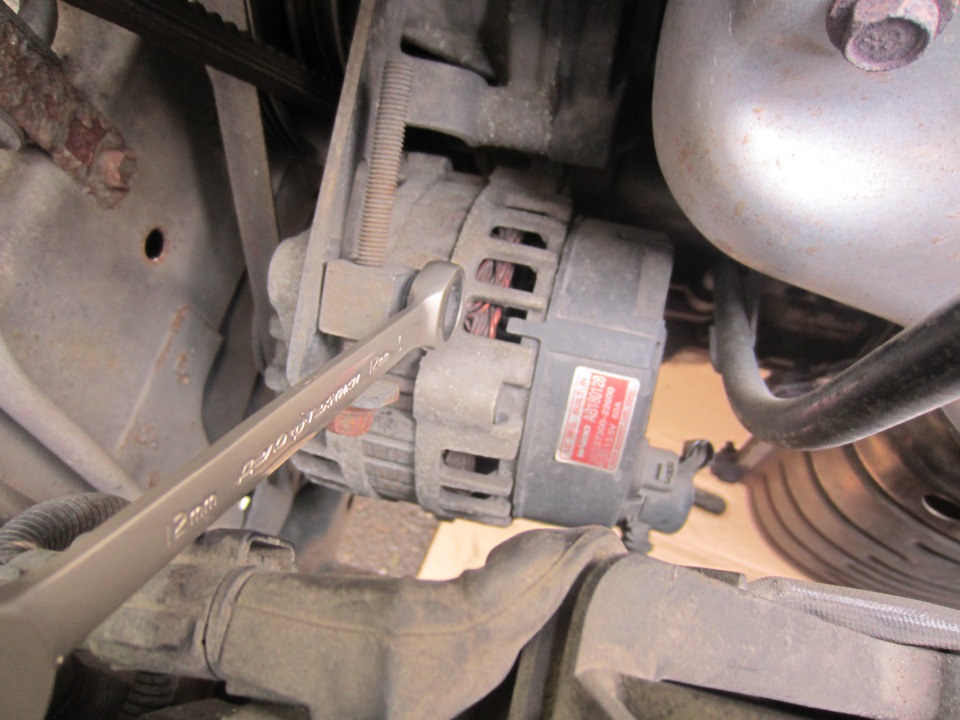
It is recommended to install the car on a viewing pit or overpass. If you have an air conditioner on your car, then it is most convenient to remove the generator from the bottom, and not from the top. You will need to perform the following manipulations:
The negative terminal must be disconnected when carrying out work related to electrical equipment. It is also recommended to disconnect the plug that connects the electric fan to the power supply system.
- Remove the bolts that secure the radiator.
- Next, you need to loosen the adjusting bolt, which adjusts the tension of the drive belt.
- If the work is not carried out on an inspection pit or overpass, then you need to slightly raise the machine.
- The output of the generator B + must be opened, and also disconnect all the wires going to it.
- Remove the nuts and bolts that secure the generator. Then you need to raise the radiator and completely remove the generator from the Hyundai Accent.
In fact, the disassembly process is not much different, so we will consider it using the example of a 75A generator. In the process of work, a vice will be used. It is imperative to install linings made of soft material on their sponges so that during repairs they do not damage the generator elements. You need to perform the following manipulations:
Install the unit in a vice and unscrew the three bolts that tighten its halves.
- Place two flat screwdrivers between the magnetic core (stator core) and the front cover. This will allow you to remove the cover. Please note that the screwdrivers must be inserted shallowly, otherwise the stator winding could be destroyed.
- Remove the back cover in the same way. But this is a complicated matter, since the design contains a ring that fixes the outer ring of the bearing.To facilitate the work, you need to warm up the lid with a soldering iron. A hair dryer cannot be used, as the diode unit may be damaged.
- Now you need to fix the rotor from the side of the pulley in a vice.
- Unscrew the nut that secures the pulley, remove the engraving washer, the pulley itself and the bushing.
- Then you can remove the front cover.
- Next, remove the rotor from the vice and unscrew the bolts that secure the brush holder, rectifier and terminal B.
- Remove the stator with the winding.
- Remove the oil deflector from the brush holder.
- Unsolder the wires going to the diodes, remove the stator. Try not to hold the soldering iron for more than 5 seconds, as damage to the semiconductors may occur.
- There are two plates soldered on the rectifier, they need to be unsoldered.
To check the rotor, you need to follow a few simple steps:
Using an ohmmeter, measure the resistance between the rings. If it is below the normal value, then there is a short circuit in the winding. If there is no resistance, then most likely there is a break. In this case, it is most reasonable to install a new rotor. The resistance of a good one should be 3.1 ohms.
- It is necessary to measure the resistance between the armature and the rings using an ohmmeter. If there is conductivity, then you need to change the rotor.
Diagnostics of the stator Hyundai Accent is performed according to the following algorithm:
- Using an ohmmeter, you need to check for conductivity between the start and end wires of the windings. If there is no conductivity, then the stator must be replaced or repaired. In fact, the cost of repairs is about the same as purchasing a new unit.
- Now check if there is a short circuit in the wires of the different coils. If so, the stator needs to be repaired or replaced.
Rectifier unit diagnostics is performed according to the following algorithm:
- Check for conductivity between the positive terminals of the rectifier unit and the stator coil. It is necessary that the conductivity is in one direction only. Otherwise, there is a breakdown in the semiconductor.
- Then you need to perform the same manipulations, but with negative conclusions. Similarly, there should be conductivity, but only in one direction.
- And the last step is to check the conductivity between the terminals of the 3 semiconductor diodes. The ohmmeter should only show resistance in one direction.
If the brushes are excessively worn, follow these steps:
- Unsolder the braided wiring and dismantle the brush with the spring.
- Install the spring and a new brush into the holder.
- It must be inserted in such a way that there is about 3 mm between the end of the holder and the wear limit line.
- And the last step is to solder the wire to the holder.
Then you need to assemble the entire generator and install it on the car:
Insert the central bolt that secures the device body. You do not need to tighten the nut yet.
- Now you need to move the body to one side along the bolt and measure the distance between the bracket and the generator support.
- You need to pick up a set of several spacer washers. Their total thickness should be the same as the measured distance.
- Install all spacer washers and screw the nuts onto the bolt.
The installation procedure is carried out in the reverse order of removal. There are no special features.
When the test lamp does not go out during normal engine operation, the malfunction is most likely in the generator itself. True, a short circuit in the section of the circuit between the test lamp and the generator gives the same result.
Also check with the indicator for the presence of voltage on the large connector on the generator. It should always be here - if not, then check the connection of the generator to the battery. If your vehicle's voltage regulator is separate from the alternator, then it may also be faulty. In this case, it is better to remove the generator and voltage regulator and contact an auto electrician.
The simplest way to check the generator load current is to turn on the side lights of the car and start the engine. If the lights do not start to burn brighter when the engine is running, then this is the best proof that the generator is not delivering current. If you have a voltmeter, connect it to the battery terminals and start the engine. At high idle speed, the generator should generate current, and the voltmeter should show about 14 V. Do the readings differ by more than 1 V? Either the generator or the voltage regulator is faulty.
In many cases, the constant burning of the control lamp signals a malfunction of the generator, but malfunctions are possible in another place, and the generator, paradoxically, at this time may be serviceable.
And yet, for most car owners, the control light is the only indicator of the generator's health. The most common causes of abnormal functioning of the charge warning lamp and typical situations are shown in the table. For example, the line “The control lamp does not light up” implies that the ignition should already be on, and at the same time it does not mean that the engine should be started. Generator faults are listed in ascending order of likelihood of occurrence. Faults in italics are not directly related to the generator. Below is a table that explains what some of the above problems can cause.
Typical malfunctions reflected by the charge indicator lamp
replacement of generator bearings (Hyundai accent)
Hyundai Getz Generator Bearing Replacement
Alternator bearing replacement
DIY generator repair. Charging is not in progress. Hyundai Accent.
replacement of generator bearings without special tools
Video repair of the Hyundai Elantra generator
How to remove and disassemble and replace bearings on a Mitsubishi Karisma generator.
Generator repair. Hyundai Solaris. The battery has lost its charge.
Gentra Cobalt Generator Bearing Replacement
Hyundai getz 1.3 alternator bearings
Hyundai Accent 2 - Replacing the Alternator Belt and Power Steering
Hyundai ACCENT. HOW TO REPLACE THE ALTERNATOR BELT?
Hyundai Accent alternator belt Hyundai Accent Tagaz
Hyundai Accent 2 - Replacing the timing belt and pump
DIY generator repair. Charging is not in progress. Hyundai Accent.
Tensioner and drive belt for Hyundai Solaris. IT'S IMPORTANT TO KNOW!
Hyundai i30 alternator belt replacement
2012 Hyundai Solaris Hyundai Solaris 1.4 Drive Belt Tensioner Repair
replacement alternator belt for Hyundai Solaris
replacing the alternator belt and gura for a Hyundai accent
1. If the brushes are worn out to the maximum permissible length, replace them.
2. Unsolder the braided wire and remove the spring and brush.
3. Install the brush spring and new brush into the brush holder.
4. Insert the brush so that there is a distance of 2–3 mm between the wear limit line and the end of the brush holder.
5. Solder the braided wire to the brush holder.
1. Remove the nuts securing the “B” terminal to the rear cover.
2. If it is necessary to remove the stator, unsolder the four stator wires from the rectifier diodes.
Unsolder for no more than 5 s, otherwise the rectifier diodes may be damaged.
3. Remove the stator from the back cover.
4. Remove the brush holder and straightener.
5. Remove the four tie bolts.
6. Insert the blade of two flat-blade screwdrivers between the front cover and the stator core and remove the cover.
Do not insert the screwdrivers too deep, as this could damage the stator winding.
The rear cover can be difficult to remove, as a ring is used to secure the outer ring of the rear bearing. Heat the back cover with a 200 W soldering iron to make it easier to remove. Do not use a hair dryer to heat, as this could damage the diode unit.
7. Fasten the rotor in a vise at the pulley side.
Install soft protective pads on the jaws of the vise to prevent damage to the generator parts.
eight.Unscrew the pulley retaining nut, then remove the spring washer, pulley and spacer sleeve.
9. Remove the front cover and washers.
10. Remove the rotor from the vise.
11. When separating the rectifier from the brush holder, unsolder the two plates from the rectifier.
1. Use an ohmmeter to measure the resistance between the slip rings. If the resistance is extremely low, then there is a short circuit in the rotor winding. If there is no conductivity, then there is an open circuit in the rotor winding, and the rotor must be replaced.
Resistance: 3.1ohm
2. Use an ohmmeter to check the conductivity between the slip ring and the rotor armature. If there is conductivity, replace the rotor.
1. Use an ohmmeter to check the conductivity between the stator coil wires. If there is no conductivity, replace the stator.
2. Use an ohmmeter to check the conductivity between the stator coils. Replace the stator if conductive.
Rectifier unit check
1. Check the conductivity between the positive poles of the rectifier and the terminal of the stator coil. The ohmmeter should only show conductivity in one direction. If there is conductivity in both directions, then the diode is broken and the rectifier must be replaced.
2. Check the conductivity between the negative poles of the rectifier and the terminal of the stator coil. The ohmmeter should only show conductivity in one direction. If there is conductivity in both directions, then the diode is broken and the rectifier must be replaced.
3. Use an ohmmeter to check the conductivity between the terminals of each of the three diodes. The ohmmeter should only show conductivity in one direction. If there is conductivity in both directions, then the diode is broken and the rectifier must be replaced.
Videos uploaded by AUTO HOBBY
Search AUTO HOBBY 2 years ago
At idle, the generator stopped charging the battery, but when the speed rises, everything returns to normal. A malfunction with such symptoms was corrected by replacing the voltage regulator.

nothing complicated in my case.
A detailed article on how to check a generator on a car WITHOUT REMOVING! We will use a multimeter, as well as the proven old-fashioned method. Permanent link to the article - https://my.housecope.com/wp-content/uploads/ext/178/elav/kak-proverit-generator-na-mashine-ne-snimaya.html
BAD CONTACT IN TERMINAL CAUSE OF DISCHARGED BATTERY. WE CUT THE WIRE FROM THE TERMINAL AND TURN THE CABLE ON THE BOLT AND THE MIRACLE HAPPENED TO CHARGE THE BATTERY BATTERY.
After installing this "little thing", the drawdowns have disappeared. The headlights began to shine better, the sub began to play better. The battery will last longer at this voltage than undercharged.
GENERATOR REPAIR | HYUNDAI and more. This video shows a method for checking the generator of a Hyundai car. Check the malfunction of generator parts yourself.
Forgot to mention the size of the bearing (303 closed) and the difference in price of the original costs 720r. and in the store 240 rubles, the difference is 500 rubles. no matter how significant.
1 - adjusting bolt; 2 - 90 A generator; 3 - bolt, 20–25 N • m; 4 - bolt, 20–28 N • m; 5 - bracket; 6 - bolt, 12-15 N • m; 7 - bolt; 8 - generator 75 A; 9 - an adjusting bolt; 10 - bolt, 20-25 N • m.
Disconnect the negative battery cable and the radiator fan and condenser fan connectors
Remove the radiator mounting bolts
Loosen the belt tension adjusting bolt and remove the alternator mounting bolt. Lift the car onto a lift
Disconnect the connector from the generator and the wire from the B + terminal of the generator
Remove the bolt and nuts securing the generator. Raise the radiator and remove the alternator from the vehicle. Removal of the Hyundai Accent generator is completed, the generators are installed as 75 A and 90 A, depending on the vehicle modification.
Fasten the generator in a vise and remove the three tie bolts
Insert the blade of two flat-blade screwdrivers between the front cover and the stator core and remove the cover
Heat the back cover with a 200 W soldering iron to make it easier to remove. Do not use a hair dryer for heating, as this may damage the diode unit.
Fasten the rotor in a vise from the pulley side and unscrew the pulley retaining nut, then remove the spring washer, pulley and spacer sleeve. Remove the front cover and two washers, then remove the rotor from the vise. Unscrew the screws securing the brush holder, the rectifier and the nuts securing the terminal B and remove the stator from the back cover. Separate the oil deflector from the brush holder and unsolder the three wires from the diodes and remove the stator
When detaching the rectifier from the brush holder, unsolder the two plates soldered to the rectifier. Hyundai Generator Disassembly Detail Focus Completed
Measure the resistance between the slip rings with an ohmmeter. If the resistance is extremely low, then there is a short circuit in the rotor winding. If there is no conductivity, then there is an open circuit in the rotor winding, and the rotor must be replaced. Resistance should be 3.1 ohm
Use an ohmmeter to check the conductivity between the slip ring and the rotor armature. If there is conductivity, replace the rotor.
Use an ohmmeter to check the conductivity between the stator coil wires. If there is no conductivity, replace the stator
Use an ohmmeter to check the conductivity between the stator coils. If there is conductivity, replace the stator.
Check the conductivity between the positive poles of the rectifier and the terminal of the stator coil. The ohmmeter should only show conductivity in one direction. If there is conductivity in both directions, then the diode is broken and the rectifier must be replaced.
Check the conductivity between the negative poles of the rectifier and the terminal of the stator coil. The ohmmeter should only show conductivity in one direction. If there is conductivity in both directions, then the diode is broken and the rectifier must be replaced.
Use an ohmmeter to check the conductivity between the terminals of each of the three diodes. The ohmmeter should only show conductivity in one direction. If there is conductivity in both directions, then the diode is broken and the Hyundai Accent generator rectifier must be replaced.
If the generator brushes are worn out to the maximum permissible length, replace them
Unsolder the braided wire and remove the spring and brush, then install the brush spring and new brush into the brush holder. Insert the brush so that there is a distance of 2–3 mm between the wear limit line and the end of the brush holder.
Solder the braided wire to the brush holder. Replacement of brushes Hyundai Accent 75A generator completed.
Unscrew the nuts securing the "B" terminal to the back cover, if it is necessary to remove the stator, unsolder the four stator wires from the rectifier diodes
Unsolder for no more than 5 s, otherwise the rectifier diodes may be damaged. Remove the stator from the back cover, remove the brush holder and rectifier, remove the four tensioning bolts of the generator
Insert the blade of two flat-blade screwdrivers between the front cover and the stator core and remove the cover
The rear cover can be difficult to remove, as a ring is used to secure the outer ring of the rear bearing. Heat the back cover with a 200 W soldering iron to make it easier to remove. Do not use a hair dryer to heat, as this may damage the diode block, then clamp the rotor in a vise from the pulley side
Unscrew the pulley retaining nut, then remove the spring washer, pulley and spacer sleeve, remove the front cover and washers
When separating the rectifier from the brush holder, unsolder the two plates from the rectifier, this completes the disassembly of the generator.
Measure the resistance between the slip rings with an ohmmeter. If the resistance is extremely low, then there is a short circuit in the rotor winding. If there is no conductivity, then there is an open circuit in the rotor winding, and the rotor must be replaced.Resistance should be 3.1 ohm
Use an ohmmeter to check the conductivity between the slip ring and the rotor armature. If there is conductivity, replace the rotor.
Use an ohmmeter to check the conductivity between the stator coil wires. If there is no conductivity, replace the stator
Use an ohmmeter to check the conductivity between the stator coils. If there is conductivity, replace the Hyundai Accent stator.
Check the conductivity between the positive poles of the rectifier and the terminal of the stator coil. The ohmmeter should only show conductivity in one direction. If there is conductivity in both directions, then the diode is broken and the rectifier must be replaced.
Check the conductivity between the negative poles of the rectifier and the terminal of the stator coil. The ohmmeter should only show conductivity in one direction. If there is conductivity in both directions, then the diode is broken and the rectifier must be replaced.
Use an ohmmeter to check the conductivity between the terminals of each of the three diodes. The ohmmeter should only show conductivity in one direction. If there is conductivity in both directions, then the diode is broken and the rectifier must be replaced.
The assembly is carried out in the reverse order to disassembly, taking into account the following.
Before attaching the rotor to the rear cover, insert the wire through the small hole in the rear cover to secure the brushes in the retracted position. After installing the rotor, remove the wire.
Install the generator to the engine. Insert the center bolt of the generator, but do not screw the nut onto it
Move the generator to one side over the center bolt of the generator mounting and measure the distance between the generator support and the bracket. Select a set of spacer washers that match the measured distance, then insert the spacer washers and screw a nut onto the center bolt of the generator mounting. Further installation is carried out in the reverse order of removal.
At idle, the generator stopped charging the battery, but when the speed rises, everything comes.
GENERATOR REPAIR | HYUNDAI and more. This video shows a method for checking the generator of a Hyundai car.
charging lamp does not light up Hyundai Getz no charging.
nothing complicated in my case.
repair of the Hyundai generator how to disassemble the generator repair diagnostics restoration sale.
An attempt to remove the generator pulley with homemade pullers.
We remove or how to remove a generator on a Hyundai accent in 10 minutes 80A.
Repair of the Hyundai Elantra generator year of manufacture - 2009 engine displacement - 1.6 liters. fuel type - gasoline Voltazh Service-.
What to do if the generator does not charge. Generator check and repair. VK group.
Repair of the Hyundai generator Soldering how to solder the winding leads to the diode bridge on the Valeo generator.
Troubleshooting the generator.
In the process of repairing the Korean Mando generator, it turned out that the stator windings are shorted to ground, and with this.
This problem appeared unexpectedly. The car just started shaking and stalled in traffic. I had to push it away.
repair of the Hyundai generator assembly of the generator repair diagnostics restoration sale.
| Video (click to play). |

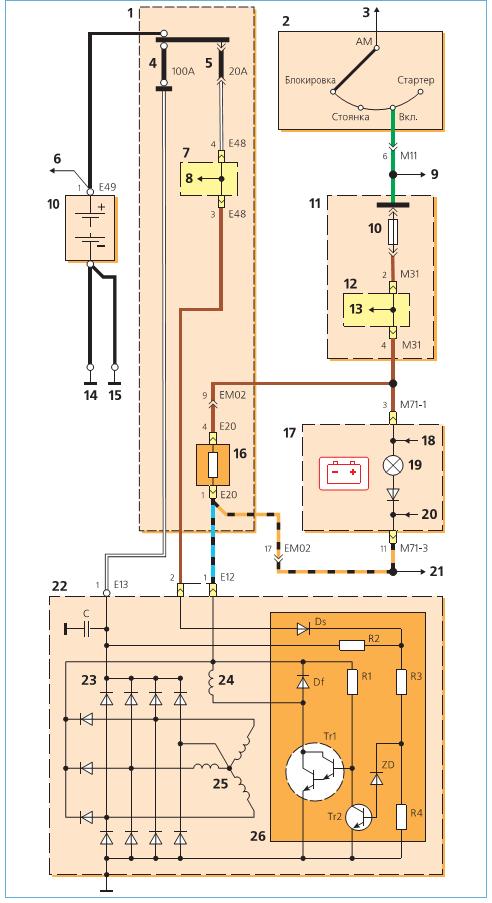


 The negative terminal must be disconnected when carrying out work related to electrical equipment. It is also recommended to disconnect the plug that connects the electric fan to the power supply system.
 Install the unit in a vice and unscrew the three bolts that tighten its halves.
 Using an ohmmeter, measure the resistance between the rings. If it is below the normal value, then there is a short circuit in the winding. If there is no resistance, then most likely there is a break. In this case, it is most reasonable to install a new rotor. The resistance of a good one should be 3.1 ohms.
 Insert the central bolt that secures the device body. You do not need to tighten the nut yet.


