In detail: do-it-yourself rotband repair from a real master for the site my.housecope.com.
Plastering the walls is required in almost every case of capital repairs or construction. Often, plaster acts as a finishing decorative layer, but most often it serves as a base for wallpaper or tiles. But in any case, its main task is to level the walls and without certain skills it is quite difficult for a beginner to cope with this. The article will discuss the nuances of choosing a high-quality mixture, as well as the sequence of all stages of work.
Rotband is a brand of universal gypsum-based dry plaster mix from the world famous manufacturer Knauf, which produces top quality products. All products are certified and comply with Russian GOST and DIN (German Institute for Standardization) standards, they also have all the necessary sanitary and epidemiological conclusions and fire safety certificates. This is especially important for those who care about the health of their families and do not want the building materials to have any negative impact in the future.
Knauf Rotband gypsum-based dry plaster with additives that provide increased adhesion. It is recommended for use in rooms with normal humidity, as well as for kitchens and bathrooms. Due to its properties, it can be used for almost any surface of walls and ceilings with a conventional solid base: brick, concrete, cement plaster, expanded polystyrene and cement bonded particle board. The manufacturer especially recommends the use of Rotband for smooth concrete surfaces of the ceiling and walls.
| Video (click to play). |

- Layer thickness: for walls 5-50 mm, for ceilings 5-15 mm.
- Consumption: about 8.5 kg / m2 (with a layer of 10 mm)
- Amount of water for 30 kg: 18-20 l
- Time of using ready-made mortar mixture: 20-25 minutes
- Drying: from 7 days (depending on indoor conditions)
- The maximum size of the fraction is not more than 1.2 mm. Strength: in compression> 2.5 MPa, and in bending> 1.0 MPa. Solid density approx. 950 kg / m3.
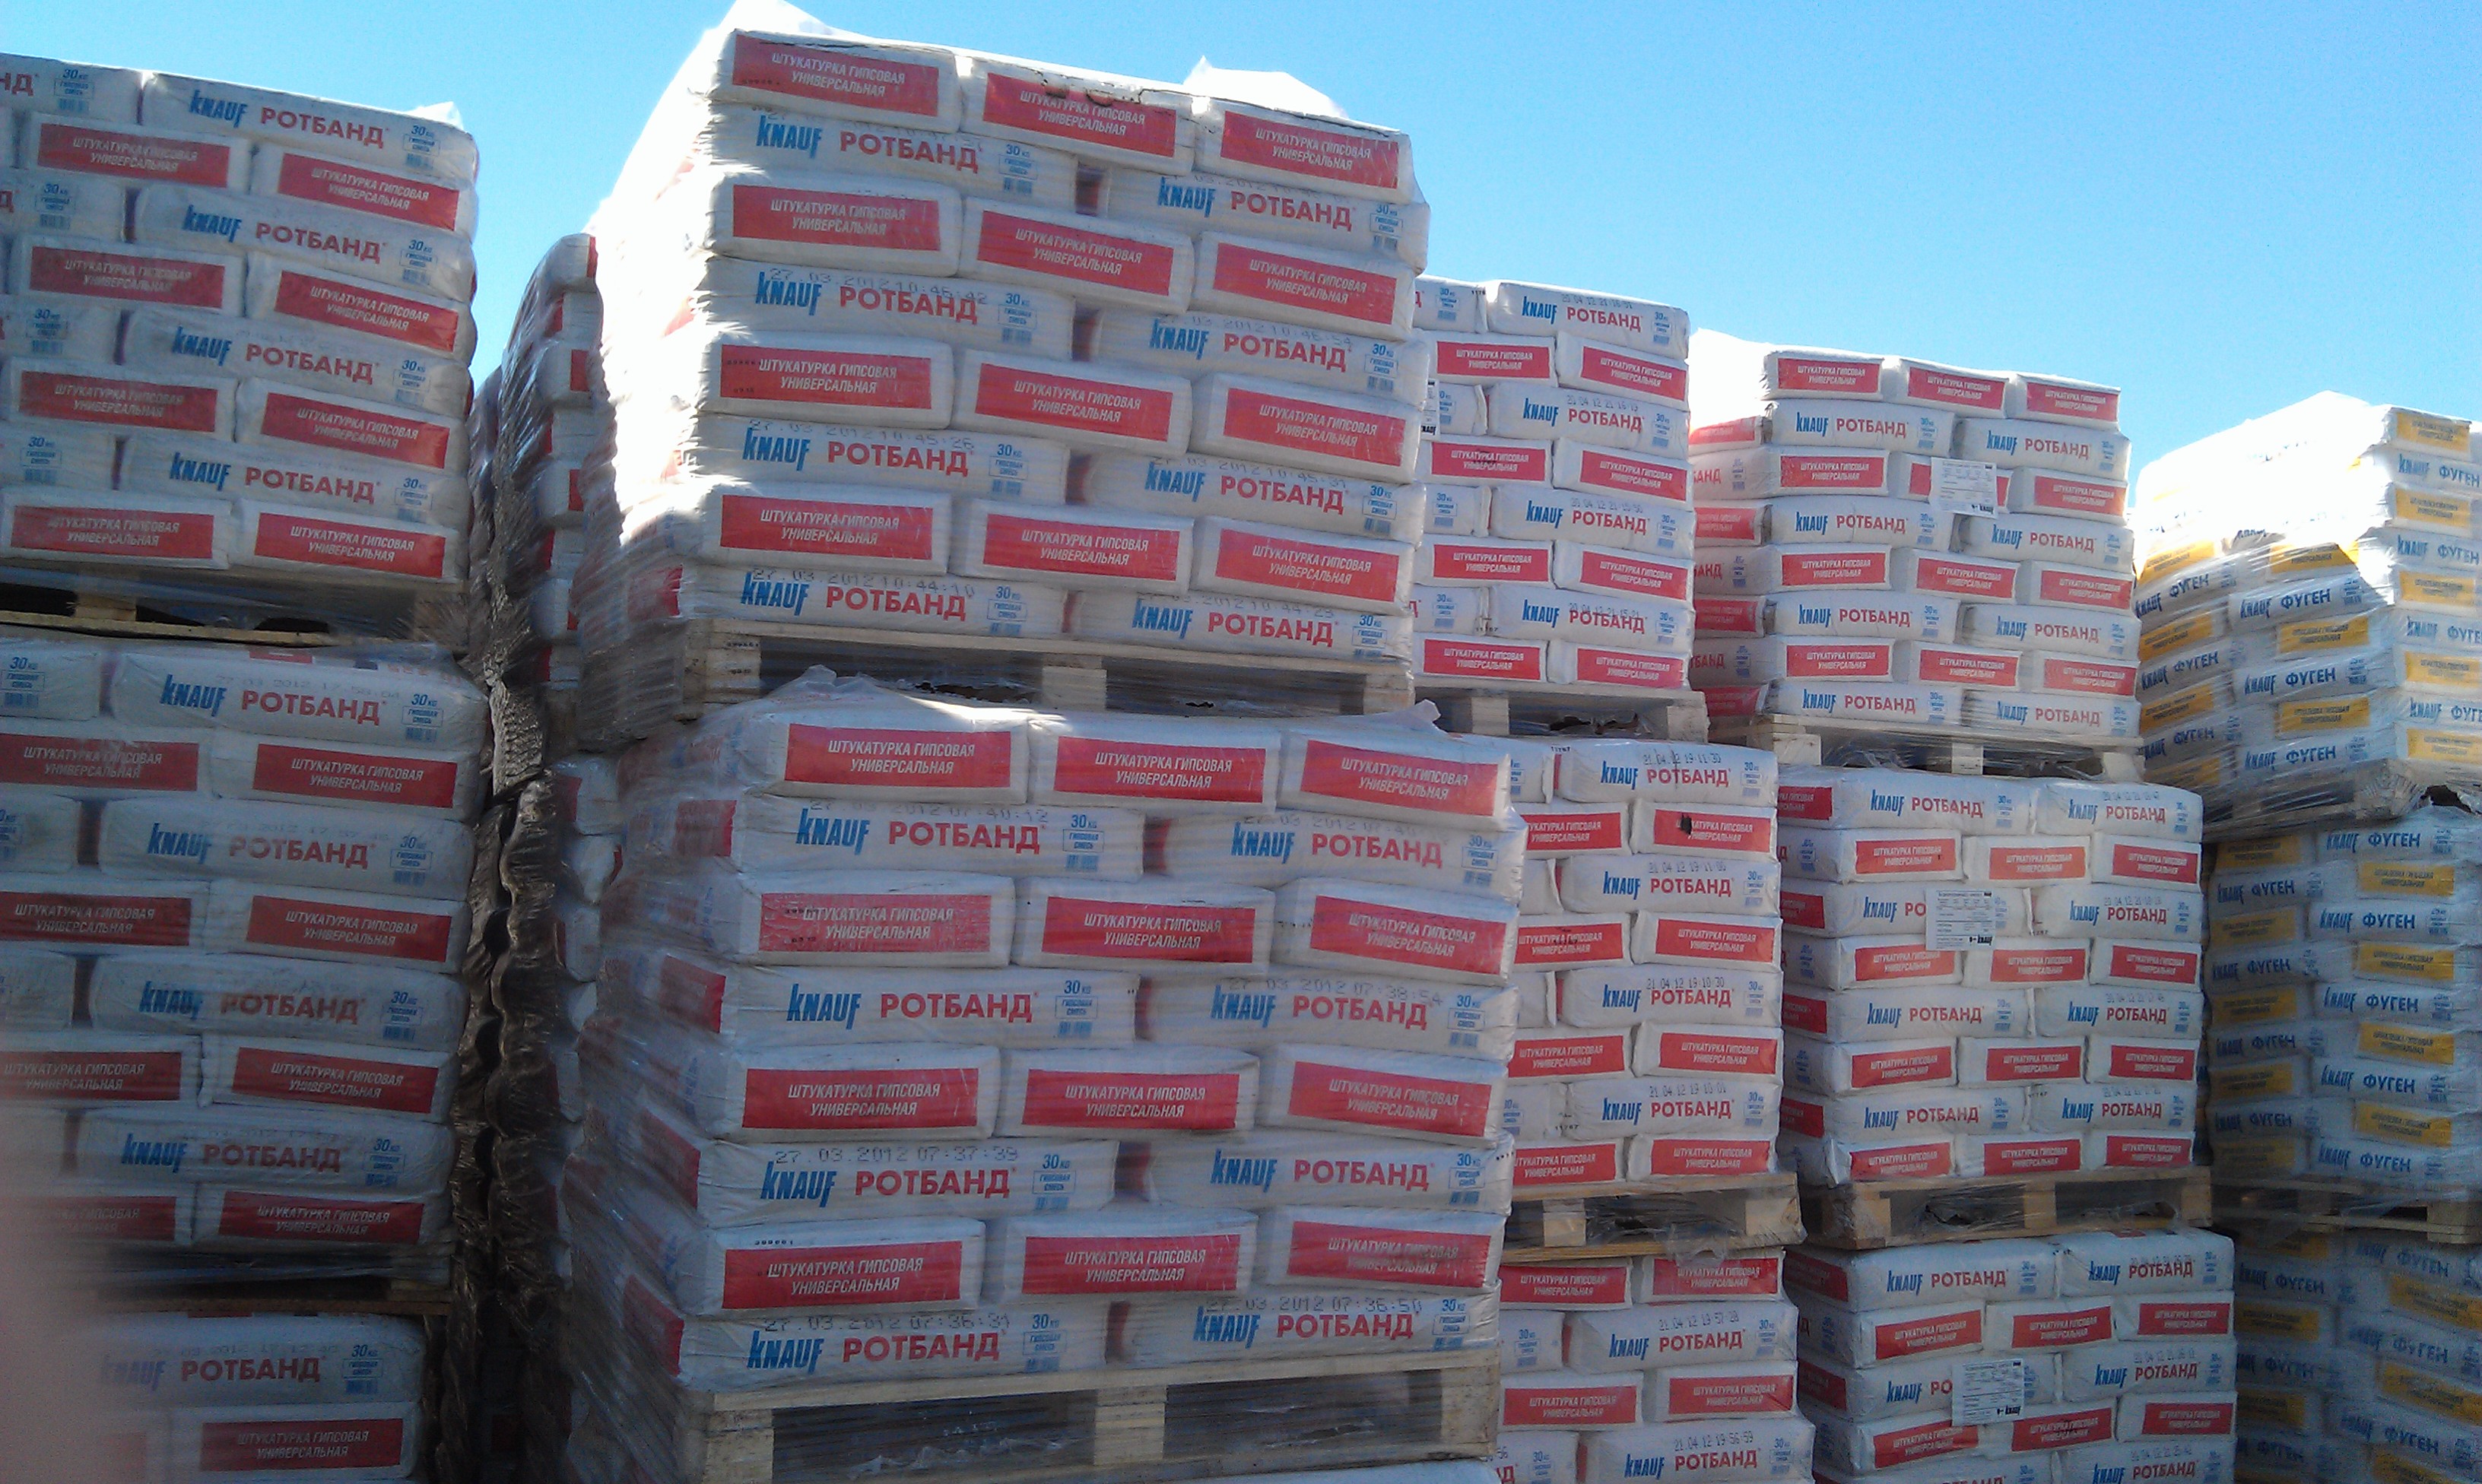
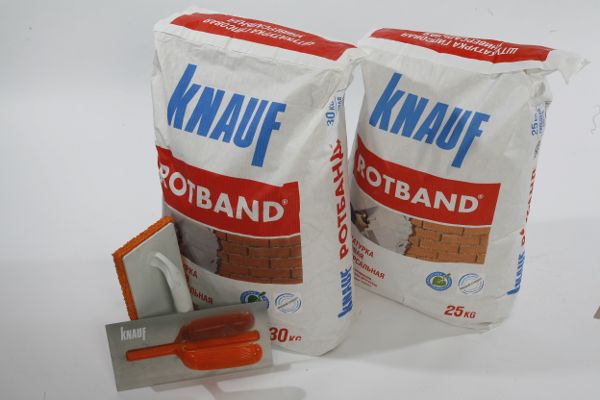
- Packaging - paper bag with packing of 30, 25, 10 and 5 kg. Shelf life 6 months (with undamaged packaging).
When choosing a plaster, the manufacturer is undoubtedly important, as a guarantee of quality, Knauf has already been mentioned, it is known to everyone, even people who are far enough from construction and repair.
- Rotband has undoubted positive qualities that distinguish it from other gypsum plasters:
- Produced from an environmentally friendly natural mineral - gypsum, does not contain impurities harmful to health.
- Easy to manufacture and use. Detailed instructions on the packaging of Rotband dry mix will help you prepare and apply plaster yourself. Suitable for both experienced craftsmen and beginners.
- Versatility. It does not require subsequent filling, as it creates a smooth, even surface, suitable for high-quality staining.
- Fast in application. Rotband dries quickly enough (cement plaster dries for about 30 days, gypsum plaster - 7).
- Due to its hygroscopicity, the material "breathes", providing a favorable climate in the room.
- Possesses good water retention ability, does not delaminate or crack, even when applied to porous, moisture-absorbing substrates.
- It gives freedom of creativity, allows you to create decorative elements, textured surfaces, as well as carry out restoration work.
Rotband is very popular with contractors performing renovation and finishing work due to its practicality and ease of use. However, one cannot fail to mention the shortcomings identified by buyers when working with the mixture.
- Price.This plaster is in the middle price range. Its opponents claim that there are plasters on the market with similar qualities, but at a significantly lower price.
- Possible shrinkage of the material. This is controversial, though, as material shrinkage or cracking can occur due to improper mixing or application techniques. The manufacturer claims that its plaster does not crack, even when applied in thick layers.
Before starting the repair, it is worth calculating the cost of leveling the wall with Rotband plaster. The average price of a 30 kg package in Russia is 360 rubles. This amount is sufficient to plaster 3.5 m2 of surface. Take, for example, a room with a total area of 16 m2. Ceiling height 2.5 m, length 6 m, width 2.7 m. The area of all walls in the room is 43.5 m2. Thus, for plastering a room with a layer of 1 cm, with an average packaging consumption of 3.5 m2, slightly more than 12 Rotband packages are needed. It is very convenient that the manufacturer packs the mixture not only in large bags, so if a little was not enough, you can buy a package weighing 5 or 10 kg. In total, the cost for a room of 16 m2 will be 4,320 rubles for 12 packages of 30 kg, plus 200-250 rubles for an additional package. In this case, only the plaster mixture is calculated, not including tools, primer and additional materials.
So, having decided on the choice of the plaster mixture, there is little left to do - to buy and start directly to work. But unfortunately, it's not that simple. Like all popular goods, there were a lot of Rotband counterfeits. Kanuf has worked hard to identify and eliminate them. To protect its own quality, the manufacturer places a holographic sticker on each package. In addition, you should pay attention to the date of manufacture, which indicates not only the day / month / year, but also the hours, minutes and, most importantly, the seconds of production. A new package appears on the line every 4-6 seconds, so the time on each package is unique, if there are two identical ones next to it, you are in front of a fake.
To plaster walls you will need:
- brush or roller for applying the primer;
- level or plumb line;
- metal profiles 6 or 10 mm;
- rule;
- spatula (wide);
- construction mixer;
- metal rail;
- hard sponge or metal float.
First of all, the wall is cleaned of large particles of old plaster, paint, dust and dirt. If concrete bases are plastered, then it is necessary to remove the formwork grease from them (in other words, greasy stains, if any). There should be no large irregularities on the surface. Metal elements are pre-treated with anti-corrosion coatings.
In order for the plaster to lay down well, dry evenly and not deform, the surface must be primed.
The primer is selected based on the type of substrate. For surfaces that slightly absorb moisture (concrete, cement, expanded polystyrene), a primer such as Knauf Betonkontakt is selected. For surfaces with high absorbency (brick, aerated concrete), a primer such as Knauf Grundirmittel or Knauf Rotband Grund is required. After application, the primer must be allowed to dry completely and only then proceed to the main work.
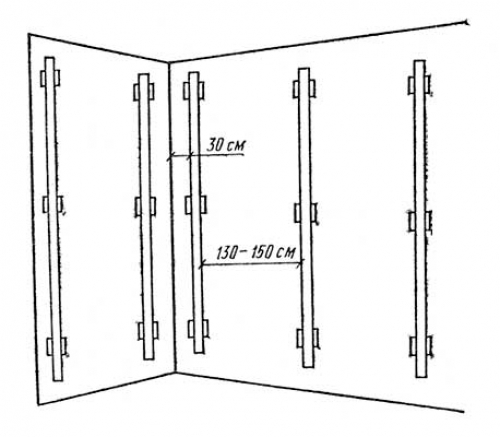
One of the most important things in the preparation process is the installation of beacon profiles, on which the plaster will then be applied. Now there are two types on the market: 6 and 10 mm, it is easier for beginners to work with the latter, since they are tougher. When buying, you need to make sure that there are no deformations and ensure accurate transportation.
Lighthouses are prepared in advance, they are cut to the required height. For installation, the Rotband mortar mixture is vertically applied to the surface at a distance of every 30 cm, then beacon profiles are pressed into it and aligned in one plane strictly vertically using a level.
It is best to use the longest tool possible.The remains of the mixture remaining when the lighthouse is pressed in must be evenly distributed along its entire length, filling the gaps formed between the lighthouse and the wall.
The distance at which beacons are installed depends on the length of the rule. Ideally, with a rule length of 2 m, the beacons are located 130-180 cm apart.
Plastering of surfaces can be carried out in rooms with temperatures from +5 to +30 and at a relative humidity of no more than 60%.
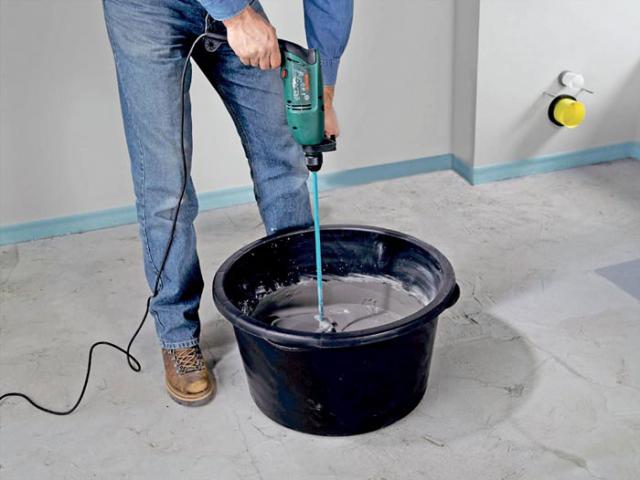
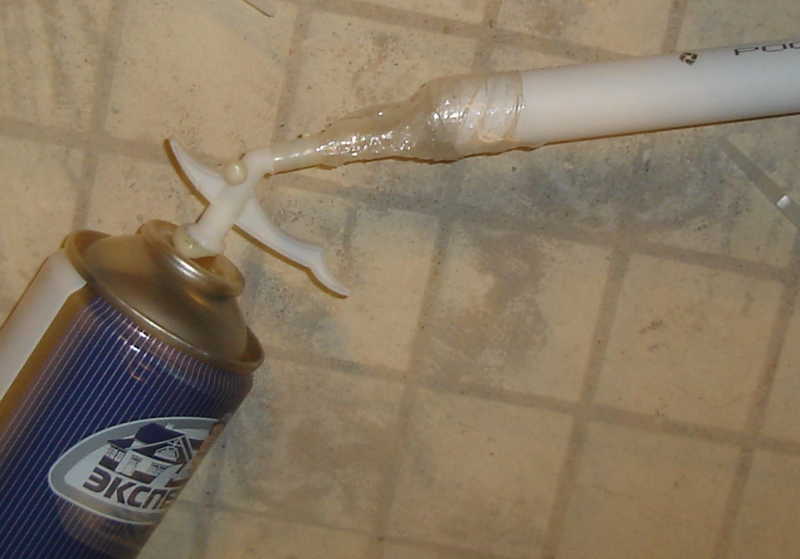
One package weighing 30 kg is diluted with 18 liters of cold water. The water should not be hot, this can lead to the mixture setting too quickly. However, if the plastering work is carried out alone, then it is better to prepare a smaller volume, since the composition is applied within 25-30 minutes after its preparation. In this case, a bucket with a volume of 10-15 liters will be enough. It needs to be filled with water by 1/3 and the dry mixture is gradually introduced. A construction mixer or drill is used for mixing. In terms of density, the mass should resemble sour cream. To improve the elasticity of the plaster, it is recommended to leave it on for 10 minutes and then stir again.
Advice: during the application process, it is not allowed to add water or dry mixture to the solution, as well as any other components.
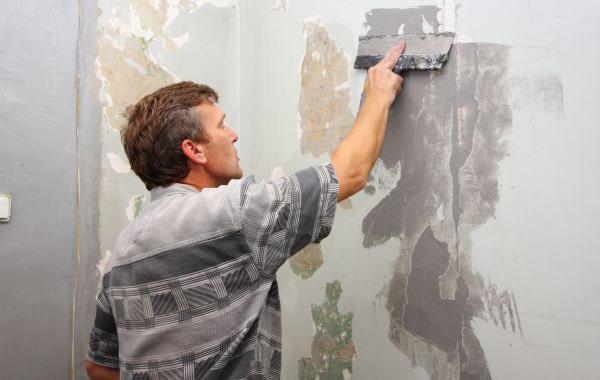
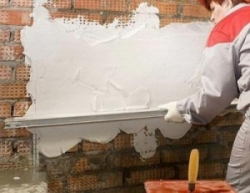
Professionals throw on the mixture with light and relaxed movements, from the bottom up. Beginners are advised to apply the mixture with a wide spatula.
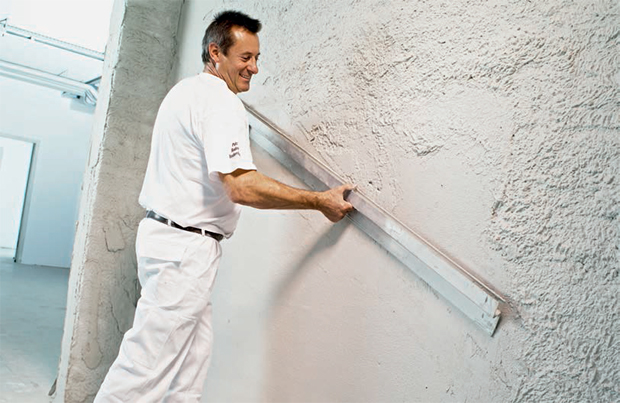
At one time it should be possible to apply plaster in width from one lighthouse to another and in height by about one meter. Then the layer needs to be aligned with the rule. To do this, the tool is tightly pressed against the beacons and with zigzag movements, the mixture seems to be pulled upward. Excess plaster formed on the rule is removed either onto the wall or into a bucket for later use.
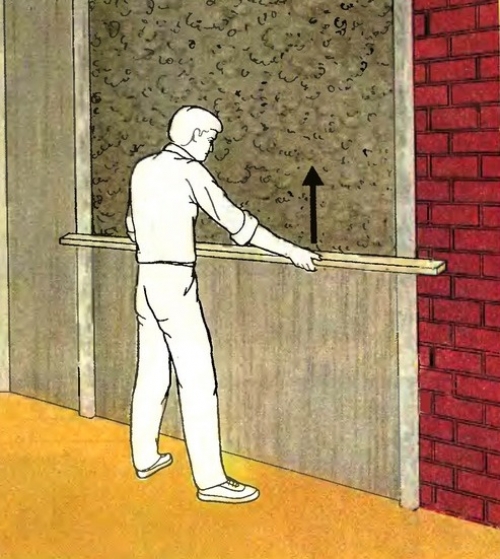
It is also important to know that since plaster is very flexible, it can settle under its own weight. Therefore, do not be lazy, go over the rule a couple of times from the very bottom in the process of applying plaster to the wall.
If a thicker layer of plaster is required
It so happened that the walls are very uneven and one layer of 10mm is absolutely not enough. In this case, it is necessary, before the first layer has time to harden, to walk along it with a plaster comb, which will create a relief.
Let the layer dry. Then prime the surface again using Knauf Grundirmittel or Knauf Rotband-Grund, and only after the primer has dried, apply a second coat.
If expanded polystyrene or cement surfaces are plastered, then on them the second layer is applied only to the reinforced mesh.
There are two ways of laying the mesh: on a thin layer of plaster or on PVA glue. In both cases, the mesh is pressed down and smoothed with a spatula until the irregularities or bubbles completely disappear. Then it is sanded a little, excess dust is removed, then it is primed, dried and a second layer of plaster is applied.
The ceiling is plastered exclusively in one layer, no more than 15 mm thick.
After about 40-50 minutes, the plaster mixture will begin to set, now it needs to be leveled. The excess is cut off with a metal strip, the recesses are filled. In the corners, they can be removed with a plastering plane.
The resulting surface is suitable for laying ceramic tiles. The minimum layer of plaster under it is 10 mm.
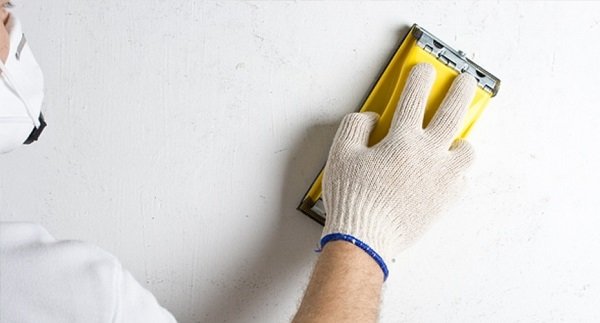
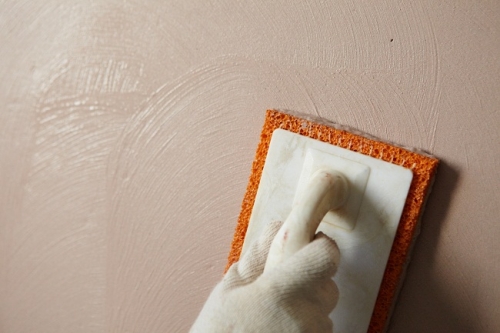
Surfaces intended for wallpapering or painting are trowelled with a hard sponge or float 15 minutes after leveling. To do this, they are abundantly moistened with water and grout is performed in a circular motion. This erases possible unevenness and trowel marks after leveling.
On the wall prepared in this way, wallpaper can be glued. However, if you have a thin light wallpaper, then Rotband may show through due to its rather dark shade. In this case, it is better to pre-apply a layer of finishing putty.
Smoothing
For high-quality painting, a glossy surface must be achieved.To do this, after waiting until the wall begins to dry out, it becomes a matte shade (about 3-4 hours after mixing the solution), the wall is again abundantly moistened and smoothed with a metal float. Such a surface does not require putty, it can be safely painted. Below is a video about aligning the walls with a rotband.
Gypsum plaster seems to be created for creativity. It is perfect for the embodiment of all your design ideas. In particular, to create an unusual texture on the wall. Relief is given to the plaster using a relief roller or other forming tool.
Posted by anpspb on Aug 14, 2016 in Plastering, glueing, painting
You must be a registered user to post a comment.
Register in our community. It's very easy!
Or sign in with one of these services
| Video (click to play). |
-
Emerald posted a topic in Tools and Equipment, September 25, 2008, Topic
-
KGB has published an article in Tools and Equipment, October 3, article
Sano posted a blog entry in Slab Furniture, September 27th, blog post
So I lived to see my workshop, which needs to be equipped and supplemented with various instruments for a long time and persistently.
But the main thing is there is a warm room, although not your own, there is where to work until they are kicked out.
This warehouse is quite spacious, if you remove everything you don't need, so you have to do a lot to get to work at least somehow. And the first thing I did was take out too much and started assembling a large desktop.
-
Sano posted a blog post in Slab Furniture, Oct 6, blog post
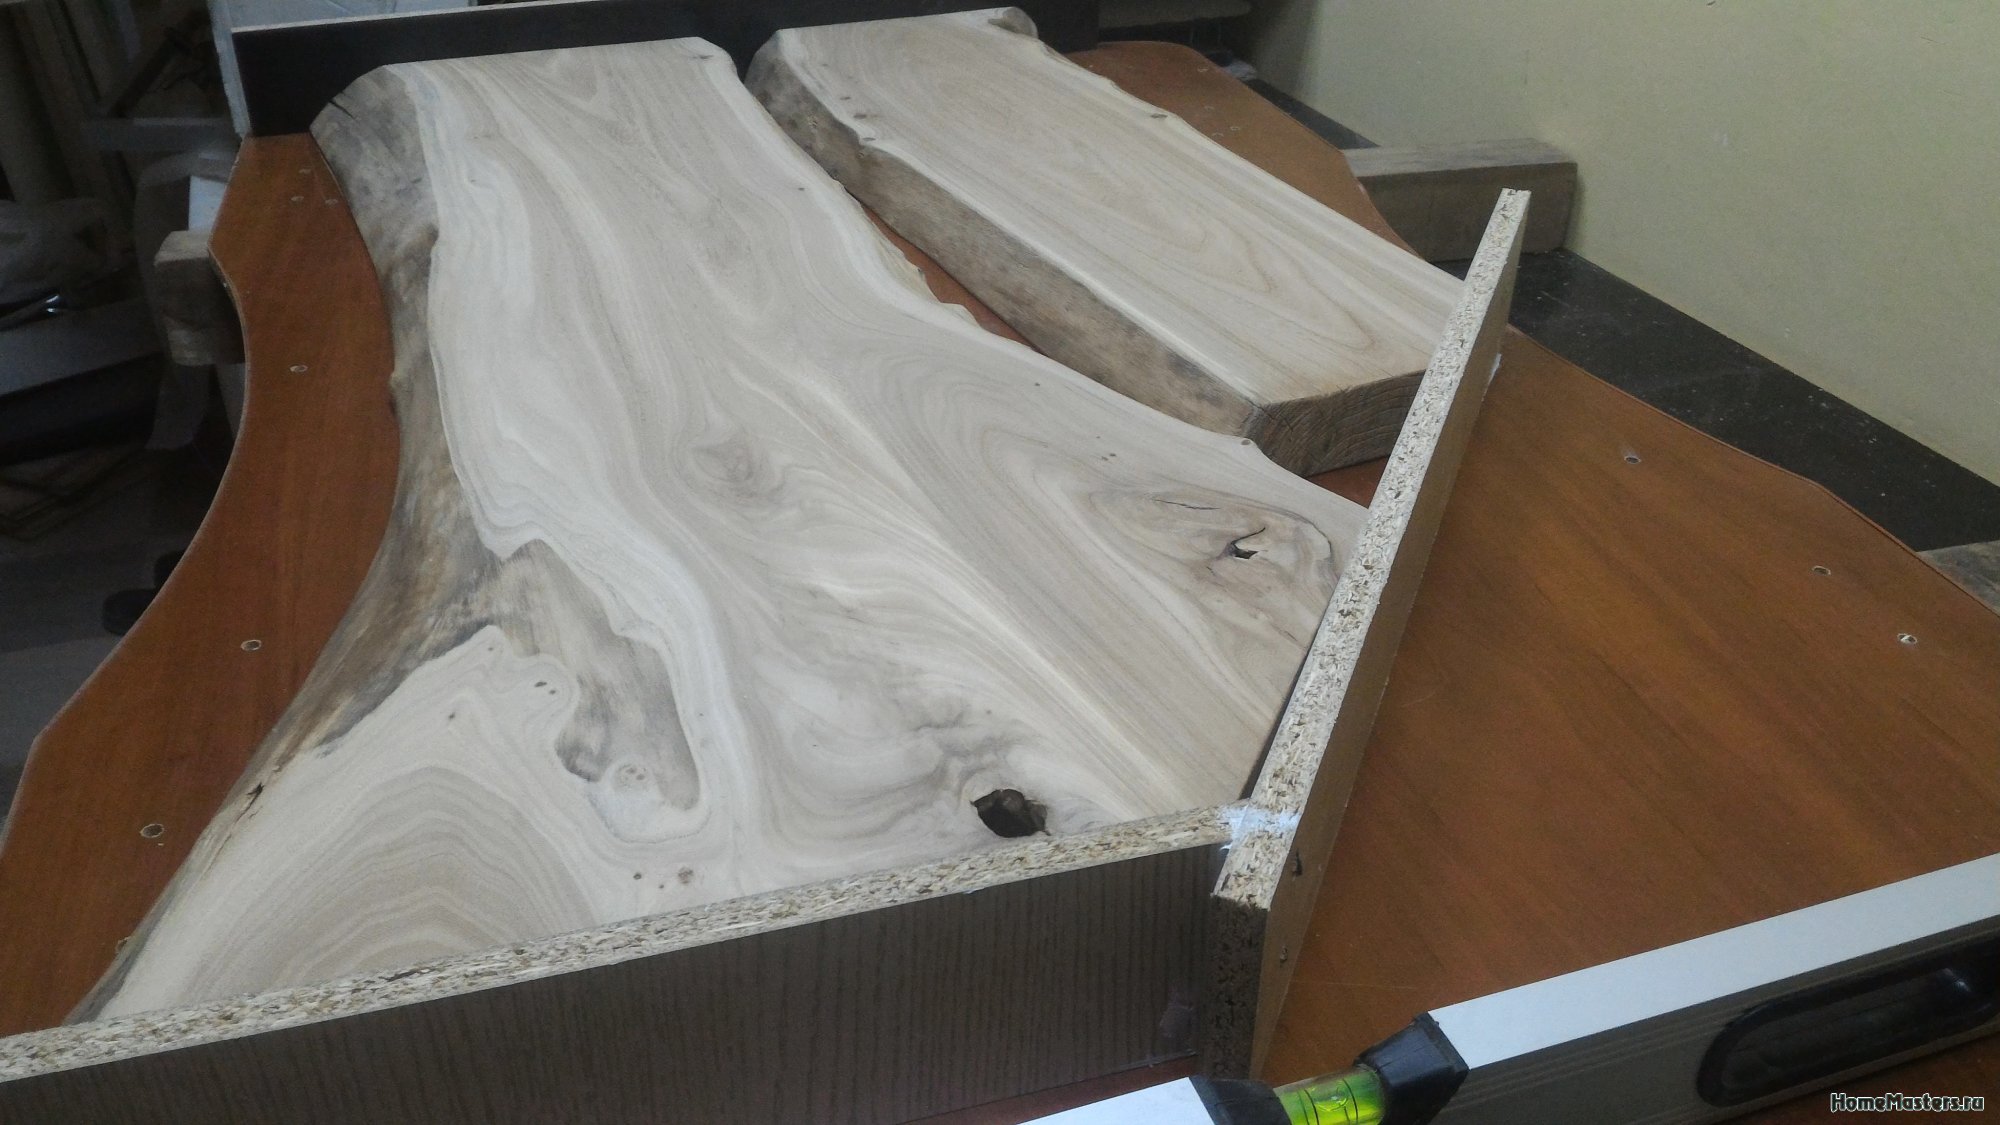
The first attempts to make something out of the brought slabs. Although there may be attempts, the material costs money and the margin for error is as much as there is money in your pocket. Train at your own expense, as they say.
Therefore, each board is carefully examined and measured, the proverb about seven times measure in action.
The work itself is not tricky, creative, there are several boards and you need to pick them up so that it looks beautiful and there is no overrun. All adjustments to the size and trimming are done with the minimum possible removal of material, just sawed off a bit here, cut a little there with a chisel.
-
Sano posted a blog entry in Slab Furniture, Wednesday at 9:16 pm, blog entry
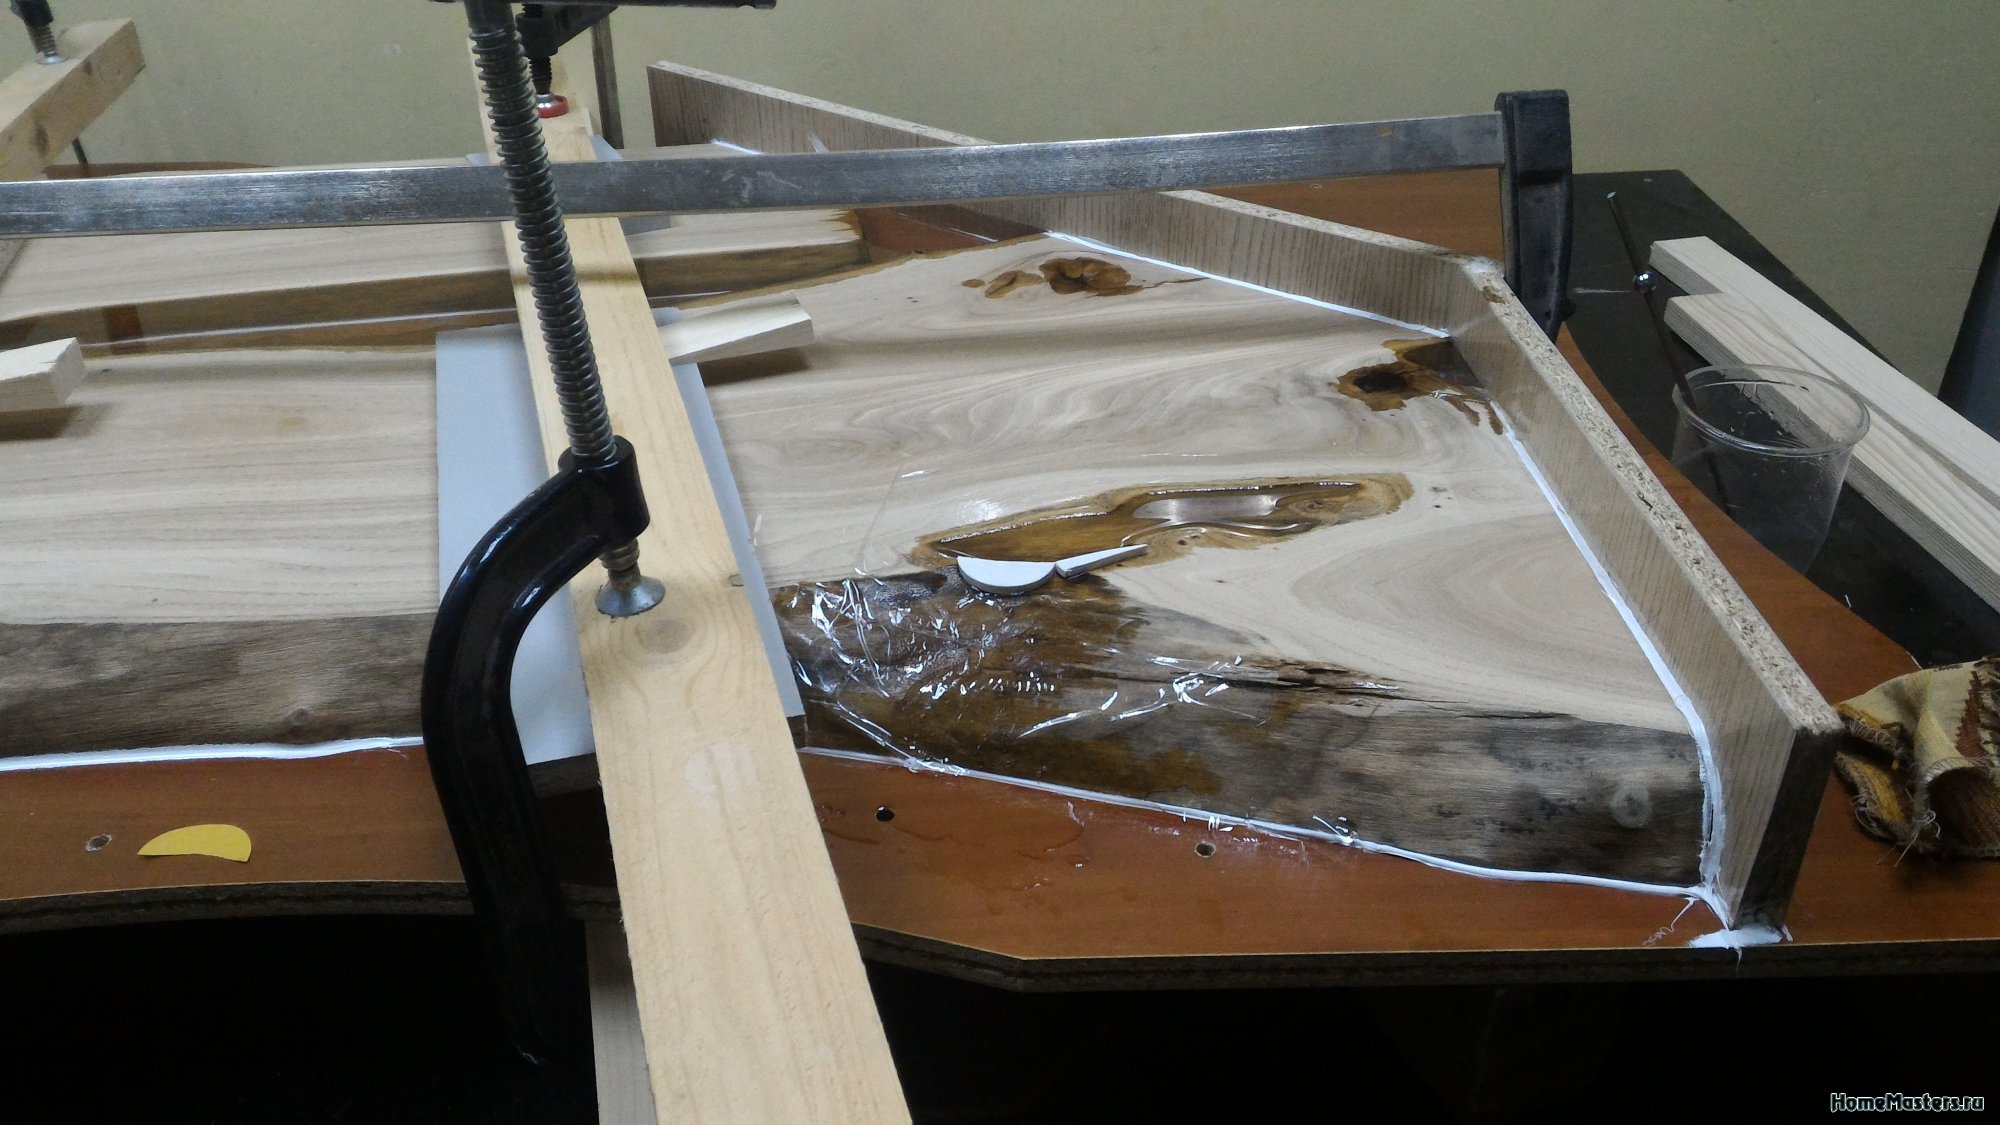
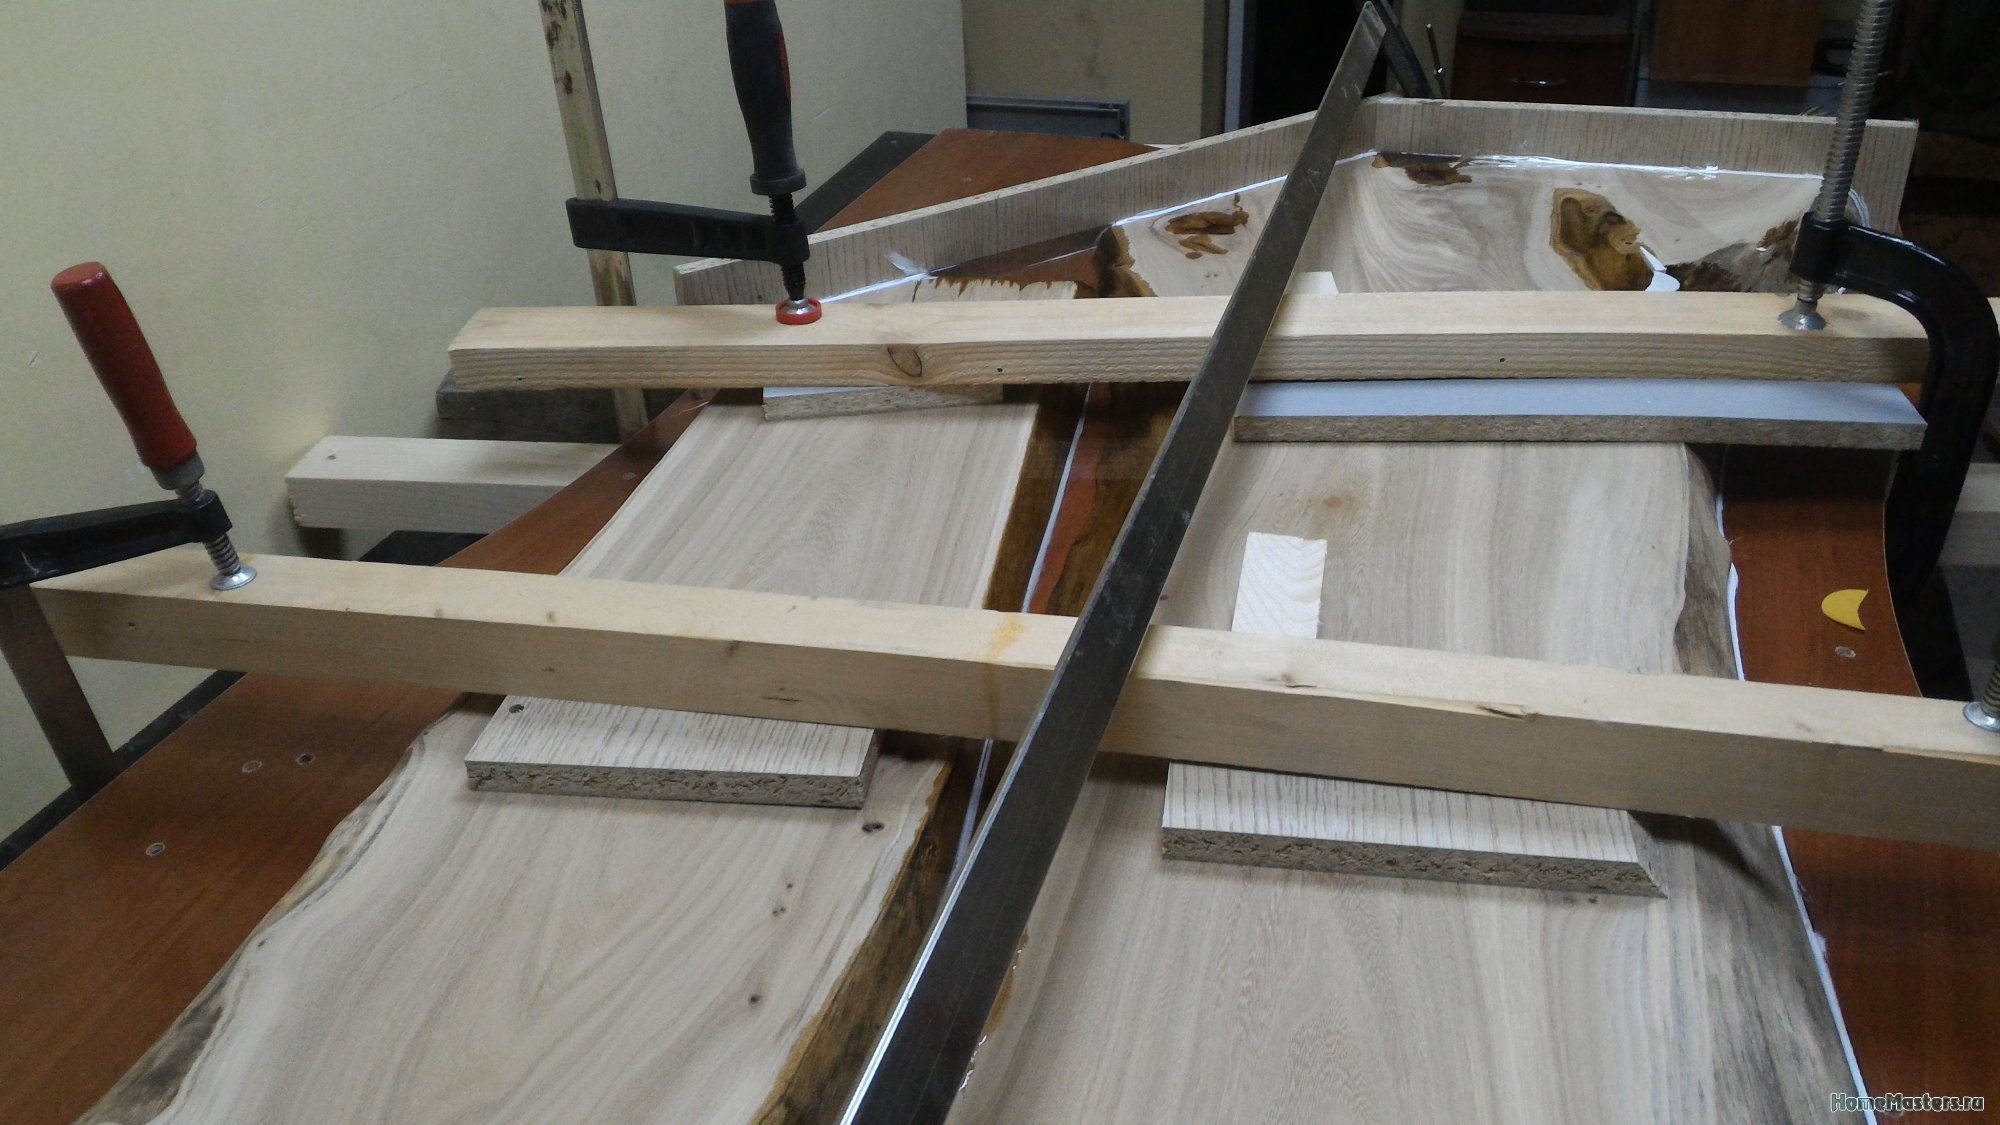
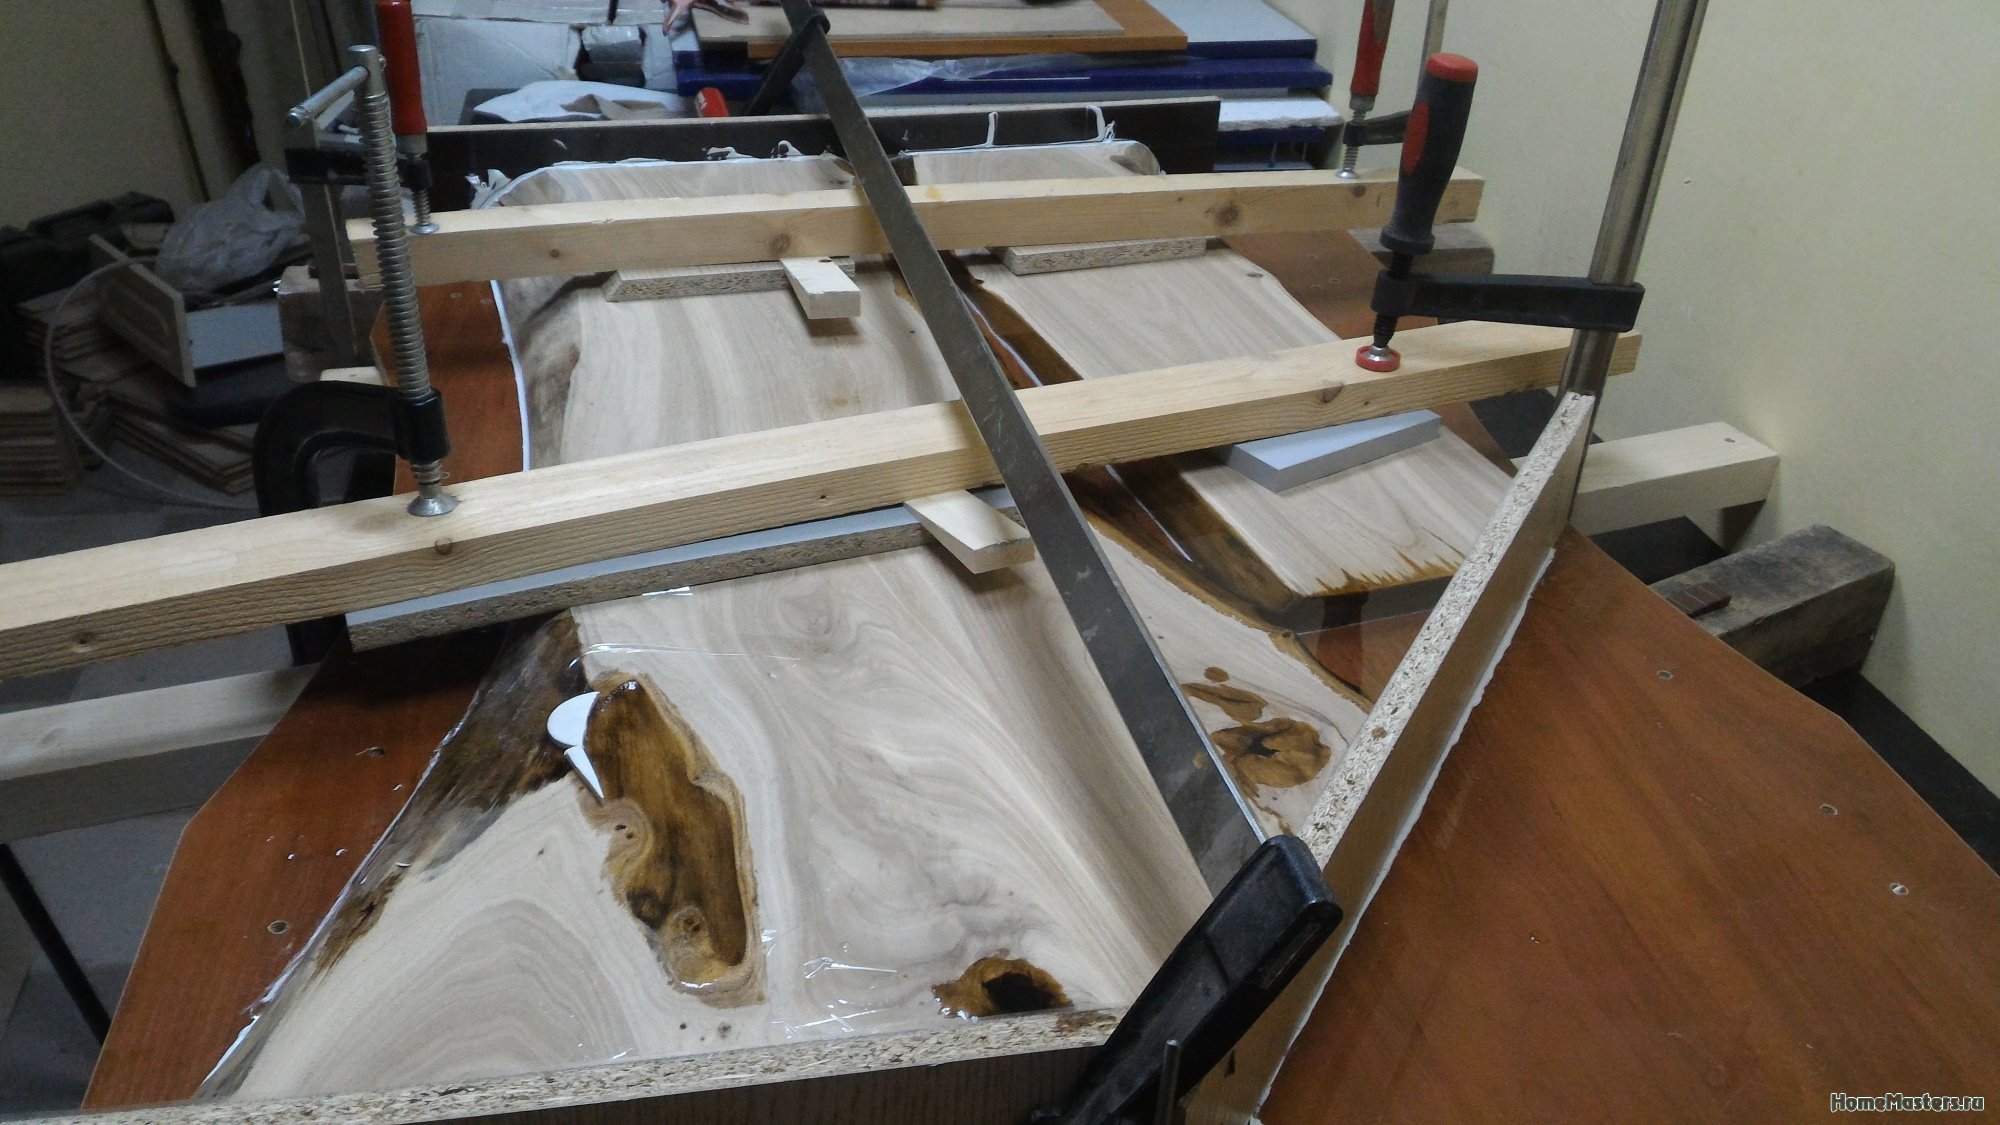
Filling the slab with epoxy resin. First pouring resin onto the slab.
It is necessary to put the slabs on a flat base, for me it is a chipboard sheet, while the base sheet itself should lie strictly horizontally.
-
windsor posted a topic in Our works, August 8, 2017, topic
-
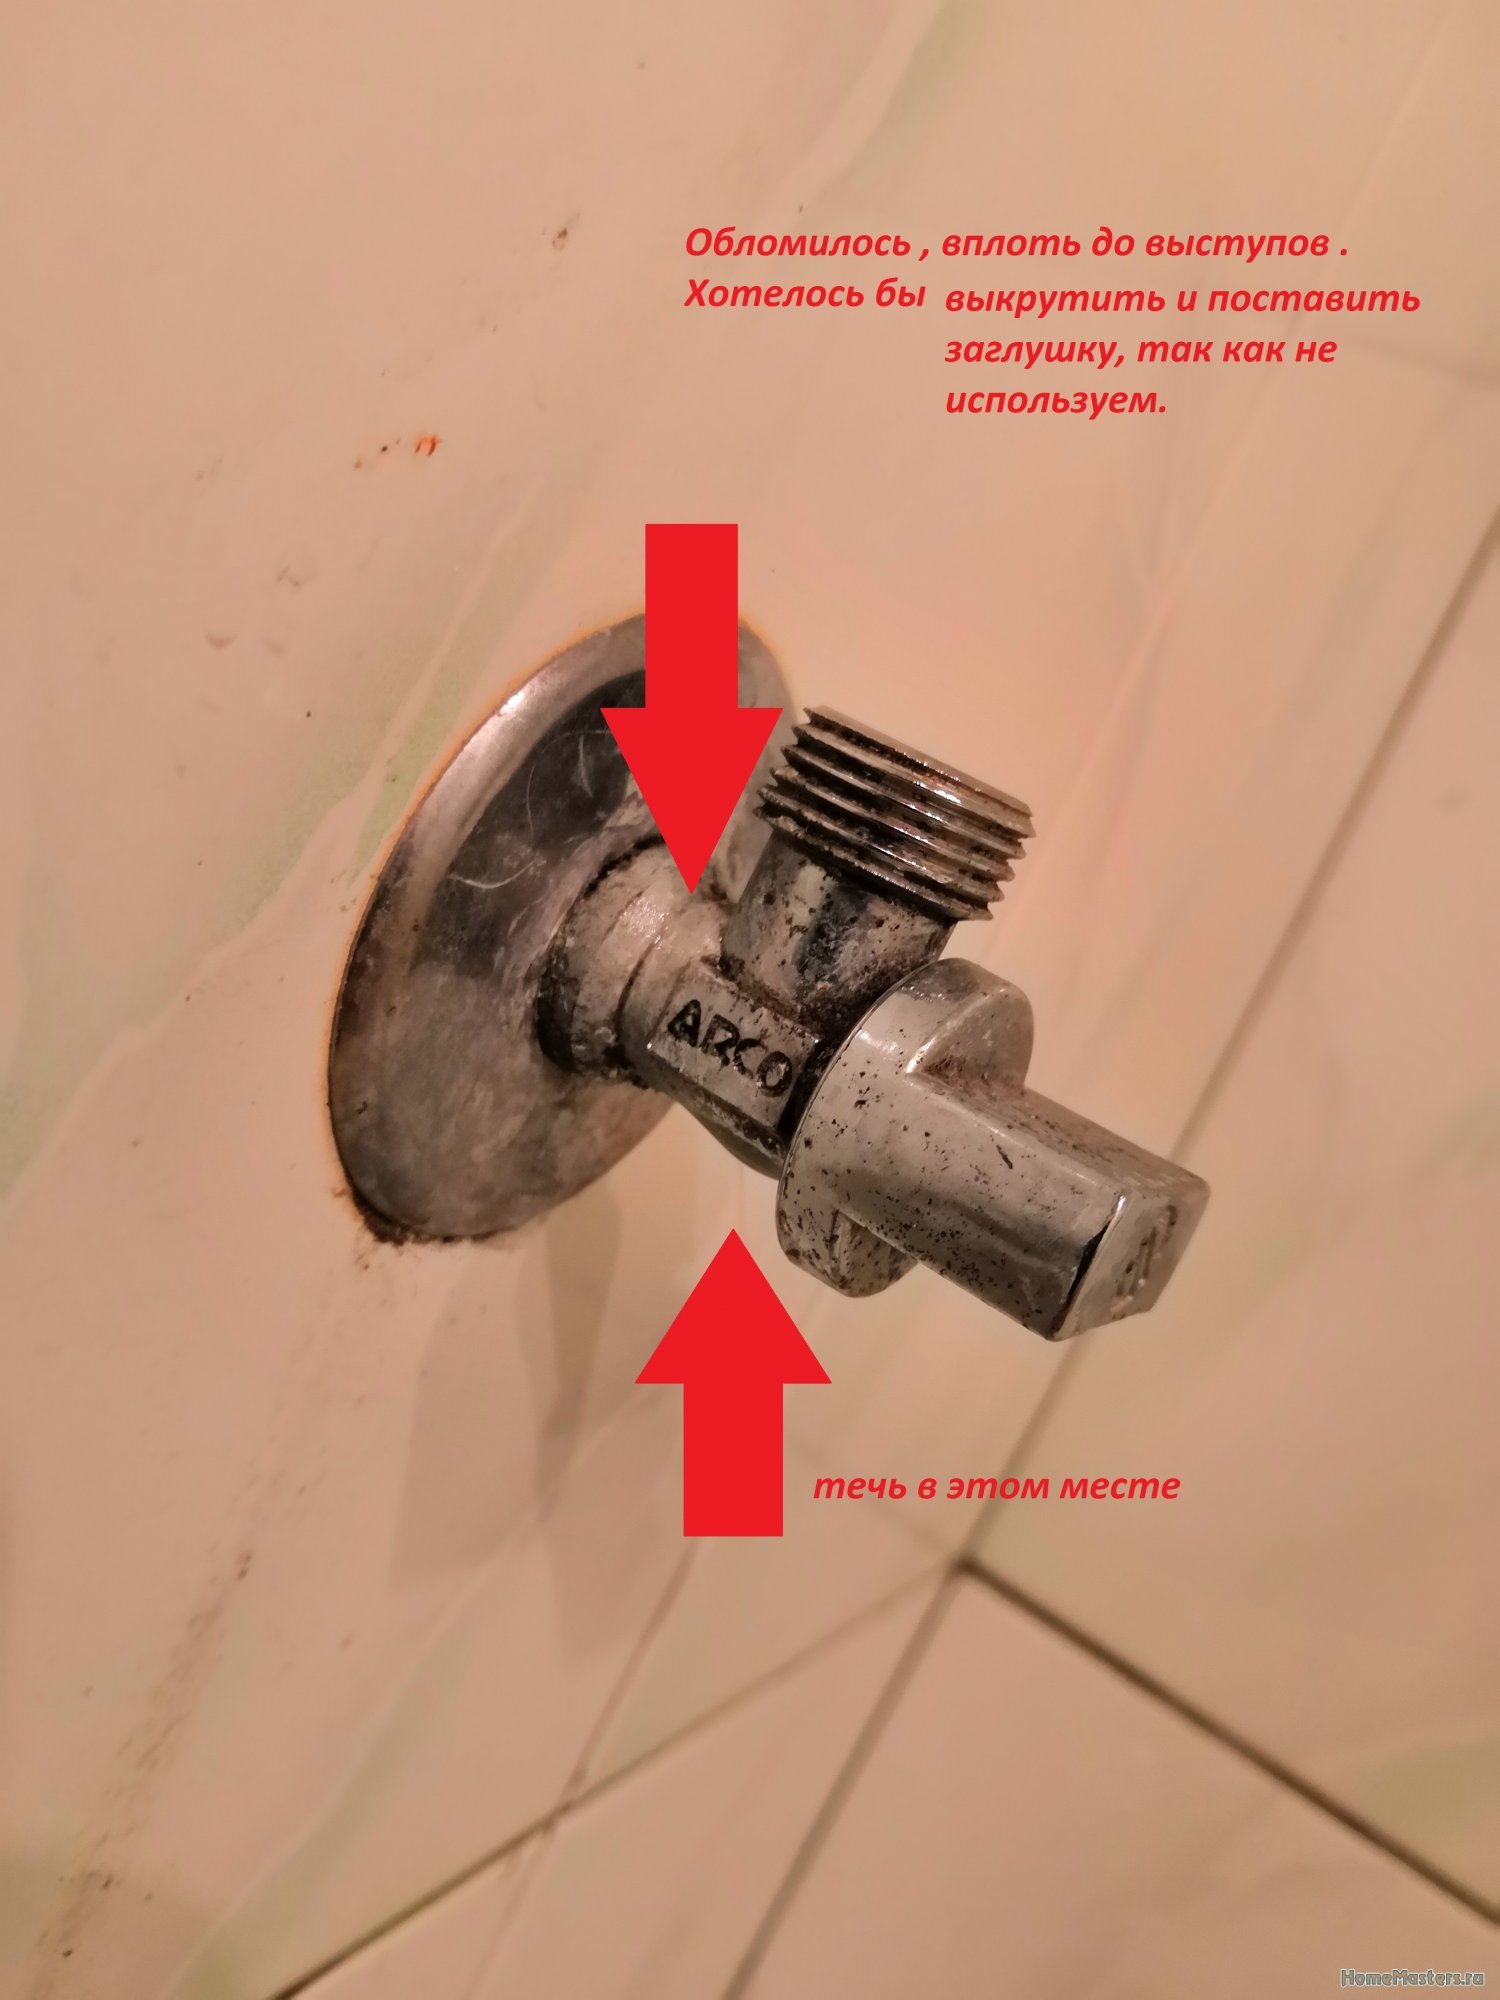
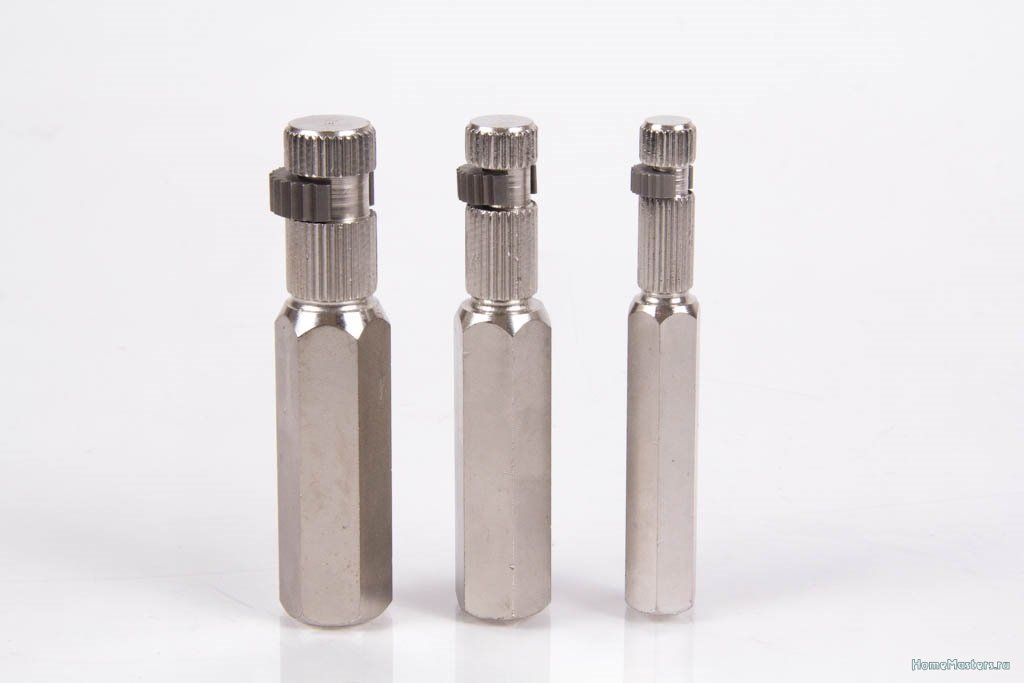
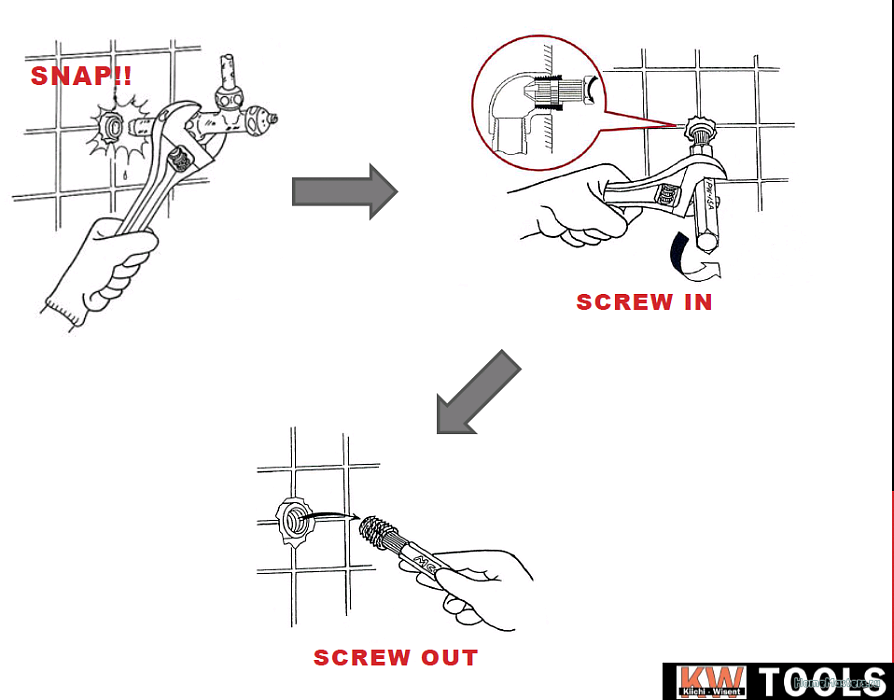
Nikolay911 posted a topic in Plumbing, plumbing, heating, sewerage, October 1, topic
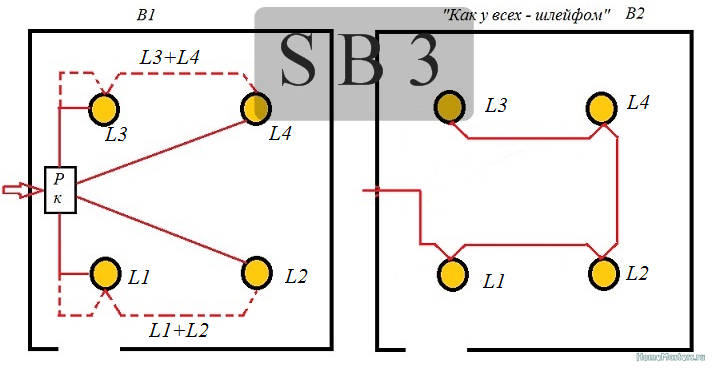
SB3 posted a blog post to Interesting by SB3, Oct 7, blog post
Greetings, I will continue what I started in the entry “Electrician. How things really are. ”.
The record will be gradually updated). "Pictures" will be
The wrong choice of material for wall renovation can discourage the desire to continue working and lead to unsatisfactory results. To prevent this from happening, you should pay attention to a special gypsum plaster for interior decoration.
Should you be afraid of uneven walls and how to deal with them? The answer is obvious - of course not. In this article, I will tell you how to align the walls with a rotband with your own hands and get the result no worse than that of the pros.
Aligning walls has always been a scary and difficult process for beginners. Indeed, without sufficient experience, it is rather difficult to work with various solutions, especially cement ones, because of their properties. But can this be the reason not to take up the alignment at all? Especially to solve this problem, there is a special plaster called rotband. It is produced using the technologies of the German company Knauf, so you will always see this word on the packaging.
What is the peculiarity of this gypsum plaster? The fact is that it has all the physical properties that make its use as simple as possible. It is a flexible plaster, easy to apply with a short drying time. Therefore, even beginners can align the walls with a rotband without much effort and even with pleasure. Rotband is applied with a layer of 5 to 10 mm, however, it is recommended to maintain a layer with a thickness of about 10 mm, which dries up in 45-60 minutes. Although practice shows that even 1 mm of plaster is held tightly enough.
The color of the plaster can be white, gray and pink. This plays a role not only aesthetically, but also functionally. White and gray plaster is less grainy, no more than 0.5 mm, therefore, when applied, it forms small waves horizontally. This feature can be easily removed by subsequent grouting. The pink color is characterized by a coarser grain size - up to 1.2 mm and the appearance of waves in this case is not observed.
The color can be determined by the manufacturer or check with the seller, since it is not indicated on the package. White mixes are produced by CJSC KNAUF GIPS Baskunchak and Baskunchak LLC KNAUF GIPS KUBAN, gray - LLC KNAUF GIPS, and pink - LLC KNAUF GIPS KOLPINO and LLC KNAUF GIPS CHELYABINSK. All this is made in Russia. However, there are, of course, exceptions. Therefore, with the importance of color, it is better to clarify it before buying. Packing is available in bags of 5, 10 and 30 kg.
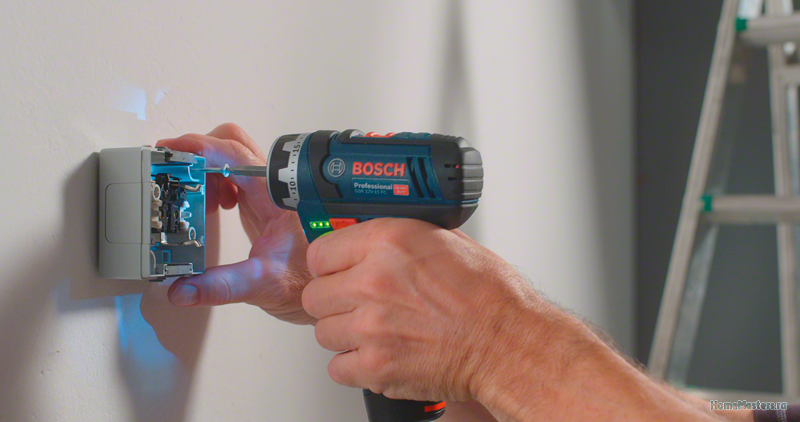
The alignment of walls with a rotband invariably begins with their preparation. To do this, it is necessary to remove all previous finishing from the walls. Tear off the wallpaper, wash out the paint, chop off the old plaster, and also pull out all the old nails and screws. It is better to cut off the protruding bumps, otherwise you will have to use a large amount of plaster and this will significantly complicate the work. Then all the dust must be swept off the wall. Such work is rather laborious and not always safe, so I advise you to be extremely careful and careful. This is especially true for the use of tools such as a hammer, chisel, spatula. It is also best to use a respirator and a hat.
After completely cleaning the walls, they must be thoroughly primed. This significantly increases adhesion, strengthens the surface and protects it from external influences. When the wall is cleaned and primed, you can proceed to leveling.
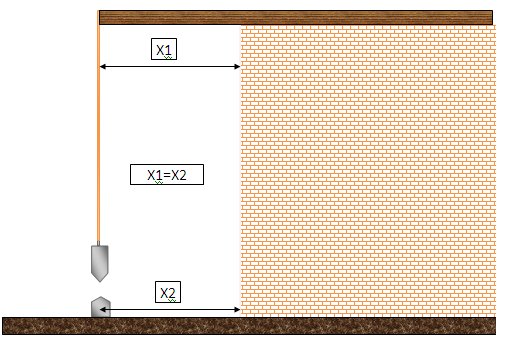
To do this, evaluate all its irregularities. Check the vertical and horizontal lines. For the first, you need a plumb line, and for the second, a building level.
Using a plumb line, you can easily install beacons that are attached to a small amount of plaster or mounted using self-tapping screws. It is better to install lighthouses every 30-40 cm. A cord or thread is stretched horizontally, which should go right through all the lighthouses, pressing against them as much as possible. To secure the cord, you need to drive a nail into the corner of the room and tie a thread on it. Sometimes screws are used, but I do not advise you to do this, as in this case it will be very difficult for you to move the cord, setting it to the desired thickness.
I also want to remind you about the evaluation of the diagonals. This is a point that is often ignored, and then the result is not quite the desired one. If necessary, pull the mesh onto the wall. It is important to do this in cracked areas or under a large layer of applied plaster.
So everything is ready to get started. It remains to prepare the mixture and arm yourself with tools.
I would like to remind you about the quick adhesion of the rotband, and therefore the life of the solution usually does not exceed 25 minutes. Therefore, it is necessary to knead the mixture a little in order to have time to develop it.
I advise you to immediately determine the areas on which you can apply the leftovers. It is more convenient to knead the mixture in containers with rounded corners. A plastic bucket is ideal for this. Pure water is poured into it and then the dry mixture is added in a ratio of 2: 3.
But it is better to use a deliberately smaller amount of dry plaster and, if necessary, add it at the end. And there is a nuance here. Your solution will live longer if you use colder water. The consistency of the mixture should be such that it does not fall from an inverted trowel. You can quickly and easily mix the plaster with water using an electric drill and a mixer attachment. After that, the solution matures for 5 minutes and is mixed again. Now neither water nor dry mixture can be added to it. After finishing the preparation, it is necessary to very quickly wash the mixer or other used tool with water, as the rotband instantly grasps and hardens. Otherwise, it will be problematic to clean the tool.
So that nothing distracts from the work, which should take place quickly due to the high speed of solidification of the solution, it is better to prepare all the necessary tools in advance. You will need a spatula, trowel, corner levelers, a rule, and a trowel. A damp cloth and a wide brush will come in handy from auxiliary tools so that dirt can be removed in time.
First you need to close up all the depressions. To do this, apply a small amount of the solution to these areas and then run the spatula from one end of the cavity to the other. This will make it easier and faster to deal with further alignment. In order for the wall and the rotband to adhere more successfully, it is best to first apply it in a thin layer over the entire surface. This can be done with a trowel. After the first auxiliary layer has dried, you can start applying the main one, if it should not be too thick. Otherwise, this process is split into two stages. The technique of applying rotband is shown in many videos. I recommend that you familiarize yourself with them in advance.
To level the wall, you will need to throw the mortar on the wall in the area between the beacons, and then, setting the rule on two adjacent beacons, sweep them along the wall at an angle of 45 degrees in a sweeping motion. This angle of inclination will allow excess plaster to lie flat on the maximum area. As a rule, you can use special construction or any rigid rail 0.5-2 meters long, depending on the width of the lighthouses. After several such postings, the rule must be wiped with a damp cloth. If this is not done in time, then the excess plaster remaining on it will dry out and very much interfere with further leveling.
If waves appear in the process of work, this indicates that the surface is even and they can simply be eliminated with the help of a trowel. Unlike cement mortars, in the case of a rotband, the rule can be moved in all directions, not being limited to the option from the bottom up. It is better to level the wall in small areas, keeping in mind the short life of the solution.
How to putty the walls with a rotband, see the video below