In detail: do-it-yourself repair of a cement floor screed from a real master for the site my.housecope.com.
The content of the article:
- Condition assessment
- Preparation of the mixture
- Repair technology
- Minor defects
- Deep cracks
- Delamination
- Potholes
- Dusty screed
Cement screed is the outer layer of the sub floor. Over time, for many reasons, it wears out, but the floor covering laid on top does not give timely identification of the defects that have arisen. In the process of replacing it, when the base is exposed, the hidden problems of the floor become apparent, and it becomes necessary to repair the cement screed. You will learn how it works in this article.
The floor screed is subjected to tremendous stress from the weight of the flooring, furniture and equipment, as well as dynamic effects from falling objects and walking by people. Therefore, the service life of an expensive floor repair largely depends on its condition. The money invested in this event can be wasted if a neglected screed makes itself felt.
Reliable information about the condition of its surface can be obtained only after complete cleaning of the floor from the old coating, debris and dust. To determine the degree of damage to the screed, there are the following criteria:
-
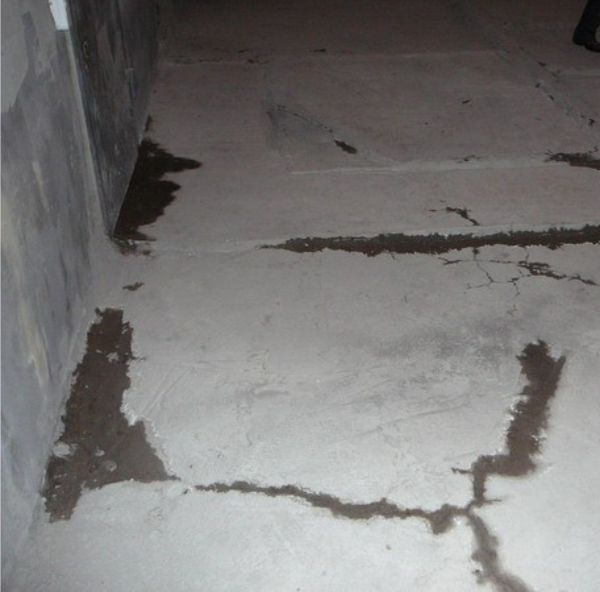
The screed is even, but has small indentations, a network of small cracks and is constantly dusty. To eliminate such damage, an investment of significant funds is not required, since such work can be done independently.
The surface of the base has delamination and in some places is covered with deep transverse or longitudinal cracks, but their average size does not exceed? the length of the short wall of the room. Such a screed can also be repaired independently, but this will require building mixtures with a special composition.
| Video (click to play). |
The screed has significant curvature, expressed in numerous depressions and humps. To level such a surface, a milling machine will be needed, which creates a lot of noise and dust during operation. Therefore, the repair of such a foundation is recommended only in non-residential premises or private households. In city apartments, neighbors may not stand the discomfort from the work of technology, complain or go in person.
Redecoration of a cement floor screed is performed if no more than 30% of its area is damaged. In other cases, it is better to replace it completely.
Today the construction market has a huge selection of mixtures designed for the restoration of cement screeds. These formulations can be based on a variety of bases, including polyurethane and synthetic resins. Many of them are used to renovate industrial floors. But in an ordinary apartment, the use of such mixtures is not always rational, given their cost.
For a simple repair of the screed at home, a mixture that can be made independently from affordable and inexpensive materials is quite suitable. It contains PVA glue, water, sand and cement. To prepare a repair solution, you first need to dilute the PVA glue in water in proportion to 1: 3, and then add a dry mixture of cement and sand 3: 1 to the resulting emulsion.
The composition should be mixed at minimum speed for 5 minutes using an electric drill with a mixer attachment.After the end of the process, it is recommended to immediately immerse the mixer in the water poured into the bucket and rinse well with the operating mode of the tool.
If the cracks in the screed are deep, such a composition will not work. To repair it, in this case, you will have to buy a special thixotropic liquid for concrete. Store-bought ready-made mixtures are mainly mixed with water, and home-made compositions are mixed with an adhesive suspension. Ready mixes can be replaced with tile adhesive.
All screed defects, such as shallow and deep cracks, delamination and dust formation, potholes and depressions, are eliminated in various ways, which we will consider below. In the meantime, the following tools and materials must be prepared for work: a perforator, a trowel and, as a rule, a brush, a trowel and a paint roller, cement, a primer for concrete and a repair mixture.
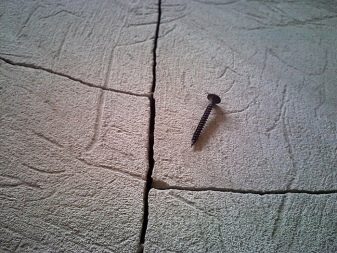
These include small cracks, gouges and chips on the surface of the cement screed. The reasons for these defects are mistakes made during its installation: the absence of expansion joints, poor-quality grout or insufficient reinforcement of the base.
To repair a cement-sand screed with small defects, you first need to mark all problem areas with chalk, and then cut each crack and recess with a hammer and chisel a few millimeters in depth and 1-2 cm in width at the edges. After that, you need to remove construction waste from the surface of the screed with a broom, and from the cracks with a vacuum cleaner.
Cracks and gaps should be treated with a penetrating primer several times until it is no longer absorbed into the concrete. This procedure is necessary to increase the adhesion of the base with the repair mortar.
While the primer is drying, you can prepare the mixture according to the recipe described above. The resulting solution should be used to fill the cut damage of the screed just above the general level of the rest of the surface, and after the mixture hardens, grind the repaired areas.
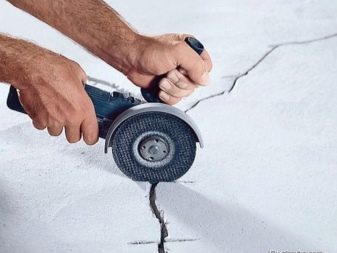
Such damage to the screed must be cut to the full depth. For this purpose, it is recommended to use a circular saw and a hammer drill, it will be unproductive to work with a hammer and chisel.
After the crack is cut, several strobes must be made across it, the ends of which will extend beyond the resulting cavity by 5-6 cm on each of its sides. Then, at the two ends of each groove, holes should be drilled 2-3 cm deep, and then remove the debris and clean the cut cracks with a vacuum cleaner. Prepared grooves must be primed and left to dry.
Now you need to prepare a mortar of sand and cement in a ratio of 3: 1. Filling the crack should be done gradually in several stages. In the first of them, a liquid mixture is used, which must be filled in part of the cavity in depth so that it penetrates into the most inaccessible places of the excavation.
Then you need to prepare a solution of medium density and fill the crack with it flush with the bottom of the transverse grooves. When it hardens, it is necessary to make staples from thick wire or reinforcement to tighten the crack and mount them in the grooves so that the bent ends of the rods go into the drilled holes.
After that, a little plasticizer must be added to the solution and filled to the end of the cavity along with the staples. Then the surface in the area of the former crack must be leveled, and after the solution has dried, it must be sanded. Now the repair of the crack in the cement screed can be considered complete.
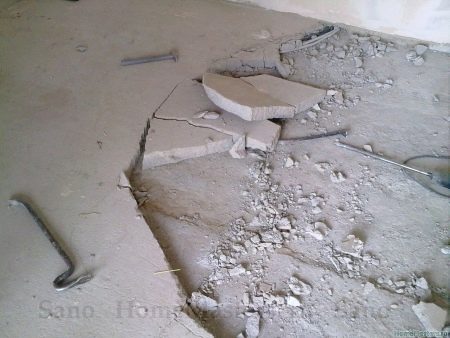
Delamination and even swelling of the screed occurs when it is laid on a dirty and not primed floor. Such defects can be detected using a light hammer or piece of reinforcement. To do this, it is enough to tap the surface of the screed with this tool and determine the place of the defect by the dull sound of the impact. When the screed peels off, gaps may appear through which, with this diagnostic method, clouds of dust will fly into the air.
Detachment repair can be done in two ways. In the first case, the entire damaged area must be cut out, and a new screed must be laid in its place. In the second, the exfoliated area is injected, during which a special binder based on an epoxy or adhesive base is introduced under it. The second method is less laborious and faster. It makes sense to use it if the problem area is flat and does not have through cracks.
After determining the places of screed delamination, they need to be outlined with a marker or chalk, then take a punch or drill and install a drill or a concrete drill with a diameter of 16 mm in any of these tools. Drilling in places of delamination should be carried out for the entire thickness of the screed, observing the distance between them 0.2-0.3 m.
When this work is completed, you need to pour a primer into the holes obtained. He must wet the entire internal cavity between the base and the screed layer. To make the process of drying concrete faster, you can use a construction hairdryer.
It is important to correctly identify the material for the injection screed. It must have good fluidity, because the repair mixture will have to be pumped under the screed using a plunger pump or a construction syringe. A cement-glue mixture will cost less, a low-viscosity epoxy resin is more expensive, but more reliable.
Injections through the holes in the screed must be carried out gradually, giving time for the repair compound to fill the entire space of the cavity. This procedure should be continued until the mixture appears on the surface of all drilled holes and its level stops dropping.
The screed must dry for 24 hours. After that, you can work with it further: priming, gluing linoleum, laying tiles and so on.
This damage occurs due to a violation of the technology of the screed device and significant loads on the base. In the presence of such factors, during the operation of the floor, voids appear in the screed. They are more dangerous for the floor covering than cracks. In areas of potholes, the floor suffers a subsidence and deforms, which leads to its further complete destruction.
In this case, for repair, it is first necessary to cut through the pothole with a "grinder" equipped with a diamond disc, along the perimeter of the damage to the entire thickness of the screed. Then, using a hammer drill or chisel and hammer, remove the concrete from the pothole. After that, the cavity must be cleaned of screed residues and dust, and then treated with a penetrating primer.
After the primer has dried, it is necessary to prepare a repair mixture and fill the pothole with it using a spatula. Without waiting for the mixture to dry, use a wide spatula and lath to level it to the floor and leave until the final polymerization. Grinding the problem area should be done so that the pothole filled with the mixture does not stand out against the background of the floor.
Over time, cement-sand dust begins to appear on the screed. This is especially evident in those rooms on the floors of which the screeds serve as a topcoat, for example, in the basement, garage or any other utility room.
Gradually, the amount of dust increases, and it becomes impossible to simply sweep it away. It is often the result of significant mechanical stress on the surface of such a floor and its "old age". In other cases, dust appears immediately after a month or two after starting to use a new screed. The reason for this is the low quality of the cement mixture and violations in the technology of its laying. If it is not possible to replace the tie, it can be repaired in the following way.
First, you must thoroughly clean its entire surface with a vacuum cleaner. If at the same time potholes and cracks are found, they must be repaired using the above technology. After that, the screed must be sanded and cleaned again in the same way. The floor surface should then be treated with a penetrating primer and allowed to dry.At the final stage of work, the entire screed must be covered in two layers with a polymer composition. If the room has high humidity, special water emulsifiers must be used for this purpose.
There is another way to eliminate screed dust - painting it. In this case, the coating must be sufficiently wear-resistant; according to this parameter, the finishing material should be chosen.
The cardinal method of such a screed defect is its reinforcement with the help of fiberglass and subsequent pouring with a special self-leveling building mixture. To implement this method, the floor surface must first be cleaned with a vacuum cleaner, primed and allowed to dry.
After that, glue should be applied to the surface of the screed and the fiberglass fabric should be overlapped. When the first layer of glue is dry, the second layer must be applied to the resulting coating and allowed to completely cure. The floor can then be sanded or poured over the fiberglass with a self-leveling compound.
How to make a cement screed - watch the video:
An even floor is a prerequisite for renovating an apartment. It is important to keep it in good condition after renovation. If the floor has undergone deformation, it is necessary to find out and eliminate its cause, to repair the floor screed.
The floor screed, even if it was made exactly in accordance with the competent instructions, eventually deteriorates. This is not surprising, because it experiences enormous loads from the weight of the flooring, furniture, movement of people and other dynamic influences. Therefore, to prevent a complete loss of its operational properties, it is periodically necessary to repair the floor screed.
To get an idea of the degree of surface deformation, you must first completely remove the old coating, clean the floor from debris, dust and dirt. Next, you should decide on the type of deformation and repair that will need to be done.
One of the following may occur:
- The flat surface has small pits and some cracks, the level of dust formation is increased. These damages are not scary, they are easily repaired with minimal loss of time and money.
- The screed is peeling off, the surface is cracked deep enough in some places. This type of deformation must be repaired, but it will be necessary to use special building mixtures.
- The surface is significantly curved, the floor is covered with deep cracks. Repairing damage of this magnitude is available only to professionals with the appropriate skills and techniques.
Before proceeding with the repair, you should pay attention to some procedures that will tell you which way to eliminate flaws is suitable in each case. Necessary:
- identify the cause of the deformation;
- identify the presence or absence of expansion joints (if they are not there, then it is necessary to take care of the gasket);
- determine the method of pouring the cement mixture and the type of base on which the floor was laid;
- find out if the concrete is flaking by tapping the surface with a hammer.
These recommendations must be followed in order to avoid the reappearance of flaws in a month or two after the repair. If the work is done poorly, there is a risk of cracks, potholes and "coiling" concrete returning.
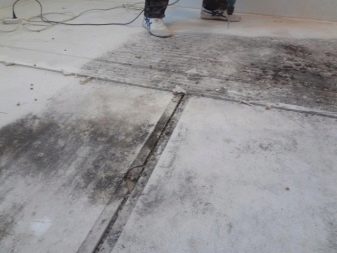
Before starting the repair of the floor screed, it is necessary to determine the type of damage itself. This can be done by removing the floor covering. Visual assessment of defects will help to identify the specific type of damage, which will allow you to quickly select the right tools and start repairs.
The main types of damage include:
- detachment of the screed (in whole or in part) from the base of the floor;
- irregularities, potholes, cracks and pits on the surface;
- excessive dust formation, which means weakening of the screed material.
The reasons for the appearance of defects can be very diverse.It is necessary to pay special attention to them in order to avoid similar mistakes and further destruction of the screed in the future.
The most common reasons are:
- Violation of the mixing technology. Most often this happens when using a ready-made mixture. It is recommended to strictly follow the manufacturer's instructions, as incorrect proportions lead to a deterioration in the quality of the mixture. Also, do not knead the solution manually - for this purpose it is better to use a special attachment for an electric drill or a construction mixer so that the existing substances are mixed evenly.
- Fast drying. When working with concrete, you should always remember that its durability and strength directly depend on contact with water. The cement floor should not dry too quickly, periodically it should be sprayed with a small amount of water and covered with polyethylene so that the top layer does not become dry before the concrete is completely cured.
- Excessive amount of water in the solution. Excessive water in the concrete mix, firstly, deforms the concrete itself and reduces the strength of the screed. Too much water ultimately causes the screed to crack and the surface becomes loose. To avoid this, after the concrete dries, the screed must be covered with deep penetration soil, which will entail new costs and increase the repair time.
Most often, defects appear precisely in the cement screed; when using semi-dry mixtures and gypsum compositions, the likelihood of cracking is significantly reduced.
- No expansion joints. Incorrectly laid expansion joints or their complete absence most often cause the surface to crack. It is recommended to fill the wall joint with an elastic material such as polypropylene foam. It is located along the thickness of the screed, and this reduces the effect of wall loading on it. Intermediate seams divide the screed into equal parts, passing through half of its thickness.
- Lack of damper tape. The presence of an edge tape is especially important when pouring a screed for a warm floor. When heated, concrete tends to expand, thereby creating additional pressure on the walls. Thus, the absence of a pressure compensating tape can cause the destruction of not only the screed, but also the walls themselves.
- Poor quality reinforcement. The main rule when installing reinforcement is its location in the concrete, and not under the screed.
There are many other factors that lead to the destruction of the screed. Most often it is the poor quality of the mortar, poor-quality cement mixture used in construction, violation of the pouring stages. Delamination of the screed can be caused by local shock loads, improper surface preparation for pouring with concrete.
Whatever the error, do not ignore the revealed deformation of the screed. Small repairs at the initial stage of destruction will keep the floor intact and save a significant amount on its subsequent restoration.
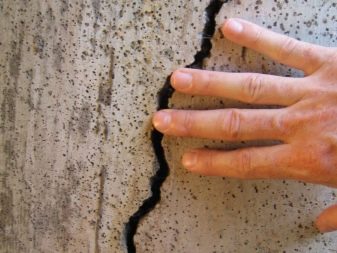
The above types of deformation lead to the fact that the screed begins to crack. This is bad because over time, even the smallest depressions expand, because of them you will have to make major repairs to the floor. Cracks are one of the most severe types of destruction, requiring urgent removal, therefore, they must be eliminated in a timely manner. Cracks are small and deep.
Small-diameter cracks are considered to be damage up to 2 mm wide.
You can repair the screed with your own hands as follows:
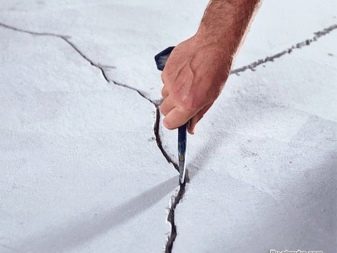
- Use a grinder to widen and deepen the crack. Particular attention should be paid to the fact that after expansion, the edges of the cracks should not crumble, but should be absolutely hard. If it is not possible to use a grinder, you need to stock up on a hammer and chisel.
- After expansion, the cracks must be cleaned. For this purpose, only a construction vacuum cleaner is used.
- The abraded areas are coated with an epoxy primer. This must be done several times until the mixture is completely absorbed into the concrete.
- After the primer has completely dried, the damaged areas are filled with a mixture of Rizopox 3500 and quartz sand. The mixture should fill the crack just above the surface.
- After the mixture has hardened, the repaired areas are sanded and cleaned.
To close up very small cracks, you can refuse to buy ready-made mixtures and use ordinary tile glue or a mixture for a self-leveling floor. However, it must be borne in mind that this method is unacceptable when repairing a screed in rooms with high humidity.
Repairing minor damage takes little time and requires no special tools.
If large cracks have formed in the screed - more than 2 mm in width - the repair process will proceed as follows:
- As in the first case, the cracks must be cut to the full depth.
- After expanding the crack across it, it is necessary to make several strobes.
- Small repair seams (1.5 cm long) are made along the grooves with an interval of 2 cm.
- Prepared grooves should be cleaned with a construction vacuum cleaner, primed and left to dry.
- After the primer has dried, the repair joints will need to be filled with pieces of reinforcement, metal staples or wire.
- Further, the cavities are filled with a liquid mortar from a mixture of sand and cement. The surface is leveled with a strip and sanded after drying.
One day there comes a time when the screed, which was once done according to all the rules, becomes unusable. This is not surprising, because a lot of loads fall on her, which she has to withstand. The consequences of an uneven and crumbling screed can be quite unpleasant, so repairs are necessary, which you can easily do yourself.
DIY floor screed repair
After the floor covering is removed, it does not matter if it is linoleum or something else, several types of damage are found under it at once:
- too much dust. This indicates that the old screed was made from poor quality material or the mortar was mixed by eye and not very professionally;
- irregularities in the form of large and small pits, as well as holes of various shapes;
- pieces of the screed are peeling off the base, or all of it has come off.
These are alarming signals that it is time to come to grips with repairing the screed, or, depending on its condition, completely change it.
DIY floor screed repair
There are several types of screed repair:
- removal of defects, which include cracks, pits, formwork seams, bulges and bumps;
- overhaul for finishing;
- elimination of gaping cracks;
- dust-free surfaces.
The most time consuming and costly is the second type of repair.
If you decide to fix all the defects yourself, first of all you need to take care of the tool and the necessary materials.
- perforator with a drill having a small angle of inclination;
- grater;
- rule;
- Master OK;
- rollers, brushes;
- level;
- Bulgarian.
- water;
- cement;
- primer;
- special mixture for screed;
- short defatted reinforcement rods (diameter 12 mm).
To successfully cope with this type of repair, the perforator mentioned above is taken. Cup-shaped holes (20 mm) are drilled, the top is 2 times wider than its bottom to the base, every 25 cm. The depth is 0.5 of the thickness.
Cracks are cleaned from dust as much as possible. Bars of length equal to the depth are placed in the drilled holes, previously filled with epoxy for concrete, and filled with it completely. It is good to add quartz sand to this mixture as a filler. After this procedure, a surface reinforced with epoxy pins is obtained.
Minor repair of pits and cracks
In order to successfully get rid of pits, first of all, you should take care of your equipment. Glasses and headphones, and even more so a respirator will be useful. Clothing should be of dense fabric and completely cover the body from dust.
You will need a grinder, with which potholes are cut off. The cut is made in the form of a rectangle + 20 mm on the sides. Deepens into the entire pothole + 20 mm. Depending on the density of the floor, +10 mm if the floor is dense, and + 20 mm if it is loose with a lot of dust.
The protrusions must be knocked down with a perforator until a fossa is formed, which is converted into a depression-rectangle.
The protrusions must be knocked down with a puncher
If the defect is small, it is advisable to use a hammer and chisel, while trying to avoid cracks. Then the recess is dedusted with a vacuum cleaner.
Then the recess is dedusted with a vacuum cleaner.
After that, it is treated with any concrete primer. As soon as the primer dries, the recess is filled with a thixotropic compound and, using a rule, is leveled and left to dry.
Cracks are dealt with in much the same way. Cuts are made along the length to a depth of 20-50 mm and a width of 10-20 mm. Sawing parameters are selected depending on the condition of the floor. All dust is removed. The crack can be repaired with a homemade mixture if there is no dust and the floor is solid. For a loose dusty coating, it is better to take a high-quality primer and thixotrope.
Very small cracks are simply treated with a primer and filled with thixotrope.
Tikkurila Enamel MIRANOL thixotrope
First, you need to establish where the delamination takes place. To do this, the surface is tapped and thus by ear you can understand where the voids are in the floor. Tap gently with a hammer.
- muffled sound;
- dust fountains along cracks and along the edges.
In the course of the survey, the places that have come under suspicion are graphically indicated. If there is a detachment on more than 1/3 of the entire area, it is better to completely renew the screed.
Holes (20 mm) are drilled along the peeling area at a distance of 25 cm from each other. With the help of a construction syringe, the liquid diluted Rhizopox is injected into the hole.
Do this injection until it is completely filled. After some time, you should take a closer look, it is possible that the liquid will partially go away, so several more such injections may be required. After drying, usually every other day, the topcoat should be tackled.
With the help of a construction syringe, the liquid diluted Rhizopox is injected into the hole
As it was said, there is also a major overhaul of the screed. It is practically tantamount to a completely new screed, so it should be discussed separately.
It often happens that the floor is completely flat and does not have any obvious defects in the form of holes and cracks. However, there is too much dust from it, which is, of course, very unpleasant. Dust is the result of surface wear, which in this case is not difficult to tidy up.
For this purpose, special formulations are used. There are a lot of them and the choice largely depends on where. In which room is the problem floor. Neomer-LP (Russia), Elakor-PU (Russia) or Ashford-formula and others are suitable for subfloors or for non-residential buildings, thanks to which the layer increases by 150 microns.
For premises where people live and work most of their time, GruntElast-PU, Retroplate, Elakor-ED are suitable. They give a layer of 250 microns. After dedusting with a vacuum cleaner, one of the listed compositions is applied to the surface. A roller is suitable for these purposes. In terms of their performance and cost, the compositions are all approximately the same.
It is quite possible to repair the screed with your own hands. In some cases, this can be done quickly and inexpensively. In others, it can be time consuming and expensive.Almost always, you can correctly determine what kind of repairs the floor needs and do it yourself.
Often, construction technology provides for the presence of concrete floors. This is due to the high technical characteristics of the components of the mixture. The finished coating is affordable, durable and practical. It perfectly acts on its own, and serves as the basis for subsequent finishing with any floor materials. However, for a number of reasons, the base is deformed and becomes unusable - cracks appear, dust formation increases. The formed defects reduce the strength and reliability of the screed. In this connection, during the repairs carried out, it will help prevent further destruction. The article will consider the technology of repairing concrete floors.
Before starting surface restoration work, you must:
- conduct a visual inspection to assess the condition;
- identify the reasons that led to the result.
Based on the data obtained, the elimination technology is selected. In case of minor damage (potholes, lonely cracks), it will be enough to carry out local repairs. If the area of the site to be repaired is more than 30-35% of the area of the entire premises, then here we will talk about capital work.
There are several known main reasons that negatively affect the concrete pavement. They are conventionally classified into 3 groups: soil impact; external influence; internal factors.
- To the first point includes poor-quality soil compaction, winter swelling of the earth and the proximity of groundwater. Such factors lead to formation shifts, and as a consequence - the destruction of the concrete floor.
- Second point suggests a negative impact on the base due to the use of a poor-quality solution, as well as pouring, carried out in violation of technology. Here it is necessary to note such a common reason as the shrinkage of the house, which creates some movement.
- In the third paragraph there are such factors as: natural wear of the coating, mechanical stress (falling of heavy objects) and prolonged exposure to moisture, for example, during flooding.
After analyzing this information, you can proceed to eliminate the causes. Only after this can we talk about the benefits of repair work, otherwise all the restorations carried out will be useless.
- Work begins with freeing the room from furniture and other interior items. If there is a floor covering on the screed, then it is dismantled. All debris and dust is removed. Much attention is paid to damaged areas. It is there that a large number of exfoliating elements accumulate.
- Old primer deposits, rust and other contaminants are removed with a wire brush. Then it is necessary to make incisions on the repaired area, which will increase the adhesion between the material and the new concrete.
- Chips and dust generated in the process are swept away with a broom. A construction vacuum cleaner will show a good result in cleaning. The surface must be treated with a degreasing impregnation or primer.
The degree of damage to the coating determines the complexity and type of subsequent work. If the financial means allow, then it is possible to carry out a major overhaul of the concrete surface in order to significantly extend the operational life of the floor.
- To eliminate shallow potholes and crevices, you can use a solution with the addition of PVA, prepared at home. First, dilute 1 part of glue with 4 parts of water. Then, diluted PVA is added to the prepared dry cement-sand mixture (1: 3) until the optimum consistency is achieved.
- More serious problems are solved by using building mixtures. In such concrete floor repair compositions, specially selected components guarantee ultimate strength and high resistance to mechanical damage.
- The locked powder composition is thoroughly mixed with a mixer. The use of such equipment will allow you to perform the process more efficiently. The ready-made mortar penetrates deeply into the concrete structure and forms a single monolith with the original surface.
For damaged areas of small areas, local work can be dispensed with. The following are subject to cosmetic repairs:
- indentations;
- cracks of various depths and widths;
- hair slits (cobweb);
- minor irregularities.
Despite minor defects, work should be started immediately. The smaller their size, the easier it is to tidy the surface. An increase in existing cracks will lead to their growth, and as a result to deformation of the floor covering.
They usually appear as a result of long-term presence of furniture or bulky equipment in one place. Often the reasons for the appearance are mechanical impact, for example, falling of an object from a height.
Elimination technology
- With the help of the tool, the defect expands and deepens. This is done in order to exclude the possibility of leaving loose pieces of concrete on the site. The depression is cleaned and primed. Filling is done with epoxy or adhesive.
- The solution is pierced several times with a metal pin. It is important to remove any air voids and distribute the mixture evenly in the resulting groove. Horizontal alignment is performed with a wide trowel or a building rule. After drying, the area is sanded.
- If the depth of the pothole is more than 5 cm, the technology of filling the mortar is somewhat different. Here the mixture should be poured in several stages in order to avoid the formation of cavities.
Flaws of this kind appear due to the shrinkage of the structure or foundation. Temperature extremes, incorrect proportions of the concrete composition, and the absence of reinforcing elements can lead to deformation.
Elimination technology
- Using a hammer drill or a hammer with a chisel, the gap is widened both in width and depth. Carefully inspect the surrounding area for hidden defects that, after a while, will lead to repeated surface repair.
- The groove clears concrete debris and dust. A polyurethane primer is used for processing. A mixture is laid in the crack, and then leveled with a spatula or level.
- If there are cracks of large width, auxiliary grooves are made on both sides with a grinder. They will serve for laying metal grips, the distance between which should be 25-30 cm. All recesses are filled with mortar.
This kind of deformation cracks can appear when the mortar dries out too quickly. They are not fraught with danger, but they are quite capable of expanding over time. The cobweb is almost invisible. Its identification is possible by wetting the surface.
Elimination technology
- It is enough to treat the so-called hair gaps with a primer and seal with an elastic sealant. If weakened areas are observed along the edges of the crack, it is recommended to clean the delamination.
- The resulting groove is cleaned of foreign inclusions and treated with primer solutions. For embedding, you can use your own composition or purchase ready-made mixtures of various grain sizes.
As a result of pouring, it is not always possible to obtain a perfectly flat floor. This is due to non-compliance with the technology of these works. Flaws appear due to neglect to install beacons, improperly mixed cement mass (too liquid or thick). Therefore, after drying, "waves" are formed.
Elimination technology
- The crests of the waves are removed using a grinder with a trowel disc. The work is dusty, therefore personal protective equipment must be used. If the area to be treated is large, it makes sense to contact a specialized company. In their arsenal there is equipment that, together with grinding, sucks in dust.
- The depressions are cleaned out and deepened. They are treated with primers or diluted solvent. The recesses are filled with mortar, you can also use self-leveling mortars.
Thorough work will be needed if:
- there is extensive damage (over a third of the total area);
- the "warm floor" system is being installed;
- there is a desire to completely renovate the old concrete screed.
Such work can be carried out using the following technologies:
- laying a wet screed using a standard cement-sand mortar;
- pouring a self-leveling mixture, which include plasticizers, stabilizers and fiberglass;
- installation of a dry screed, including backfills, followed by laying gypsum fiber sheets (GVL).
Each case requires a different set of materials for repairing a concrete floor.
- Renovation work begins with the removal of debris and dust removal of the surface. It is necessary to remove all flaking areas that can subsequently significantly affect the strength characteristics of the new floor.
- Next, the flooring of waterproofing materials is made. A huge selection will allow you to purchase products with the most suitable properties at an affordable price. The next step is to place the beacons. Their step should be slightly less than the length of the used rule.
- Mixing of concrete mortar is carried out in accordance with the current proportions. The ratio used depends entirely on the grade of cement used and the desired strength of the finished mixture. Water is added until the required viscosity is reached.
- Pouring is carried out in small portions. This will help to distribute the mixture evenly without creating voids. It takes about 30 days to completely dry, during this time it is advisable to avoid any mechanical effects on the surface.
- Special formulations allow for leveling with minimal labor costs. After inspecting the surface, all existing delamination is removed. In the presence of contamination, treatment is carried out with a solution of copper sulfate.
- Seams and cracks are repaired with repair mortar. Waterproofing materials are necessarily spread. If pouring is done on an old coating in good enough condition, then the step with waterproofing can be skipped.
- If you plan to pour a mixture with a thickness of more than 10 mm, then it is recommended to pre-install profile beacons. Work starts from the far corner of the room. The solution is fed in portions and leveled with a needle tool.
- Already after 8 hours, small influences can be exerted on the surface. The floor will be ready for full use after 5 days. Then they already move on to finishing (laying decorative flooring).

