In detail: do-it-yourself digital photo frame repair from a real master for the site my.housecope.com.
Your digital photo frame has been repaired with a declared “won't turn on” defect. In many such cases, this defect is associated with a malfunction of the power adapter (in this case, it is the GP303E-120-150 12V-1.5A AC MAINS ADAPTER), but in this case the adapter turned out to be working properly.
In the course of further verification, on the main board M55-C151-114 For AUO 10.4, on which, in particular, there are chips: Amlogic AML6222D processor, ESMT M12L128168A- 6T RAM, SAMSUNG K9GAG08U0E NAND Flash, linear voltage regulators 1117 and 17-33 (+ 3.3V), UMNCH PT5322, PWM controller ZT1583S (most likely this is an analogue of MP1583, datasheet; it has a “main” switching voltage regulator + 5V), SPI Flash cFeon F80-100HCP, faulty electrolytic capacitors (externally, some or traces of faults, they are not): C1, C131 100uF-16V, C12 22uF-16V, C19, C20 100uF-10V, C112, C145, C160 47uF-16V, C132, C133 220uF-10V, C169 47uF-25V (all - type SY ® + 105 ° C).
Such a massive failure of capacitors is apparently due to the fact that the device operates in a 24 × 7 mode, and the ventilation in the case is “not very good”. When replacing, a problem may arise due to the fact that capacitors with a low height are installed on the board, but if it was not possible to purchase such elements, then you can use "ordinary" ones, placing them horizontally on the board, there is quite enough space for this. In addition, the BT1 CR2032 3V battery was also replaced on the main board.
Thus, after replacing the faulty electrolytic capacitors and the lithium battery, the photo frame's performance was restored.
| Video (click to play). |
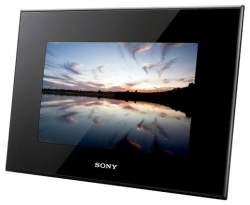
A Sony DPF-E72N digital photo frame has been repaired with a declared malfunction - it does not turn on. The digital frame arrived for repair along with the power supply, which was immediately checked with a multimeter for the presence of an output voltage.
The tension was normal. 5 volts. Even a little more. For those who want to try to repair this device on their own, I want to note that, of course, you can take the faulty digital frame to the nearest computer service, where it will certainly be repaired, but you can try to repair this device yourself, and this is not very difficult. Let's see how I got started with the repair.
First of all, I checked the output voltage of the power supply. As I wrote above, it was normal, even a little higher. Then I decided to disassemble the frame and see how it works from the inside. We turn the frame upside down with the display:
We take out the SD card and unscrew the 4 screws at the corners of the photo frame:
Then, carefully, with a pick, we open the photo frame along its entire length:
So we almost got to the insides:
Carefully disconnect the matrix cables and backlight lamps:
Putting aside the display:
Disconnect the cable going to the control buttons and unscrew the 4 screws that hold the board (we also don’t forget to remove the hardware):
We take out the board, connect it to the power supply unit and try to measure the voltage at the connector:
Oops! Here it is, Mikhalych! The voltage jumps from 1 to 2.5 volts. We solder the wiring and carry our board to the stationary power supply:
On the stationary power supply, the frame started up and even brought out a picture (since for a more complete check, I connected a display cable and a backlight lamp). Well, then it's all about the power supply. Putting the frame in reverse order:
And go to the power supply:
By lightly tapping a hammer on the sides of the power supply, we open it along its entire length:
We see two swollen capacitors of 680 uF at 10V. We put 470 uF at 16V. Of course, it would be better to find the same, or 1000 by 10 volts. But only such were at hand. We change:
We assemble the power supply unit, glue the case with super glue. We include:
All photos were taken with a Kodak EasyShare C1530 camera.
There is a Diframe DF-F8X photo frame.
Which worked great. Then her screen turned pink.And the device stopped turning on altogether and showed anything on the screen.
Repairing it in a service center is economically unprofitable.
So I decided myself
An autopsy revealed such a fee.
and
How can this be replaced, and what else can you pay attention to?
I do not see any visible damage in the last picture. If we are talking about L21, then this is inductance. Core coil, type. It can only be done with a hammer.
This is a CCFL backlight lamp power inverter. If the ballast inductance is covered, then, most likely, the MOSFET U23 assembly also died. You can check with a multimeter, usually almost a short circuit in the transitions. You can replace it with a similar one, or with better parameters. Their nomenclature is large.
FastCat: Then her screen turned pink
Splav56: This is CCFL backlight lamp power inverter
The photo frame consists of 2 parts, a screen and a computer, or rather a controller.
If the screen glows pink, the backlight seems to have nothing to do with it, even without the backlight if you bring the screen close to a table lamp
you can see the image.
Check the ribbon cable that connects the controller board and the screen
see the description of microcircuits
The lamp is in the trash, the inverter is for repair.
I support KRAB-а: if “the screen“ covered ”with pink color, then the lamp is to blame.
It only needs to be changed.
I don’t know the principle of powering the backlight lamps in photo frames (I haven’t come across even once), but from the above photo it looks like a step-up converter and powering the lamp with direct current, which is rather strange.
First, check that the converter is working properly by connecting another lamp. You can also use the usual small-sized LDS.
P.S.
If the matrix backlighting is implemented in the same way as in laptops, then replacing the lamp will be fraught with certain difficulties.
Either a backlight (unlikely) or an inverter (more likely). First, check if the inverter is receiving power.
I don't know about photo frames, but in LCD monitors, the inverter power circuit is protected by a fuse. Look for F on the board.
Yuha, if the lamp shines in red or its shades, then 100% is a lamp malfunction.
And if the lamp is shining, it means that there is voltage on the inverter and it is working.
But the operation of such a lamp is dangerous - it gets very hot and there may be melting or fire, therefore, inverters, as a rule, have protection against such a malfunction - they simply do not turn on.
And if there is no backlight on the switched on frame, but the image is visible (in the light or in reflected light), then first we substitute the lamp (to check the inverter). But change the lamp unambiguously.
I don’t remember the fuses in the LCD monitor inverter circuit, although I constantly repair the monitors.
Maybe in some old models.
By the way, recently (the whole last year), even in new and warranty ASUS-ah lamps die after a month or two of use. Or more, but still under warranty. Especially in 193 models.
In more expensive ones too, but a little less often.
Over the past few years, the art of photography has almost completely changed: digital media have replaced film, and instead of the usual frames in homes, you can increasingly see digital photo frames that can reproduce not only photos, but also video, as well as audio files. And it is not surprising that after the sale there was also a repair of photo frames.
Agree, when you come to a house where photographs of smiling children, relatives and pets are everywhere, your soul somehow immediately becomes warmer, and you can easily learn something new about the house and the family living in it.
Today, conventional paper photographs have receded into the background, giving way to digital photographs, usually stored on computers or on memory cards. However, the invention of the digital photo frame made it possible to show photographs (one or more) to guests, framing the show with a melody or video.
Active sales of such a wonderful device as a digital photo frame gave impetus to the development of another necessary area of human activity, and digital photo frame repair became available to ordinary people, like any other service in a repair shop.
The digital photo frame, although it appeared on the domestic digital electronics market relatively recently, quickly gained popularity among consumers. A simple, but at the same time functional little thing, has become not only an excellent accessory, but also an additional technical gadget. But the repair of electronic photo frames required a professional approach.
The most common photo frame malfunctions:
- - Non-working display;
- - Inability to play formats;
- - Difficulty uploading files.
Only a professional technician can fix this kind of problem, since repair of photo frames Sony, Texet, Digma, Viewsonic and other brands is a relatively new and not yet very widespread service.
Service center "MasterPulse" is pleased to announce that repair of photo frames is now available with us! Professional craftsmen will quickly and efficiently eliminate faults, regardless of their complexity, and give new life to your digital devices.
To prevent an unexpected breakdown from causing you unnecessary trouble, contact the MasterPulse service center, where the repair of photo frames, home theaters and other equipment will be done efficiently, quickly and on time. You can continue to enjoy viewing your favorite photos!
Once I gave my elderly parents a 7 ”digital photo frame. For half a year of continuous work, it showed shortcomings.
- From continuous work, the backlight has noticeably sat down.
- 7 inches is clearly not enough for viewing fine details, especially in group shots.
- In the event of a power outage, it was necessary to start and adjust the frame again, which is not easy for untrained people.
Only 8 '' frames were sold on the market at that time. It was decided, with limited budgetary funds, to solve the problem of altering a laptop for these purposes.
The network has provided several links to successful conversions of a laptop into a photo frame.
Network interface card
So, further, I will try to explain in detail the essence of the process. A broken, but with a whole matrix, Fujitsu lifebook laptop, and most importantly alive, was taken as a basis. The cost for me of this unit was 228r. The acquisition also had drawbacks - the lack of any ports and communication devices with the outside world, except for a keyboard and mouse. To communicate with the beech, I had to buy a PCMI card for 380 rubles. to install 100M network interface. To write the drivers, the hard drive had to be removed from the laptop and installed in another laptop with live peripherals. The appearance of the laptop is shown in the photographs, so its reincarnation into a photo frame is quite justified. We disassemble the laptop and remove unnecessary parts.
The purpose of disassembly is to remove the matrix, the backlight power supply and the matrix cable.
In order to reduce the width of the future frame, it was necessary to redo the power supply plug for the laptop. We assemble the case and bring out the backlight lamp power supply cable and the matrix cable. The length of the loop and cable must be sufficient to connect to the matrix and the lamp power supply. The matrix switch got into unnecessary details when the laptop was closed, speakers, indication LEDs, a dead (full zero) battery, the internal connector and the flop and CD themselves were gone.
As the basis of the frame, as in the original, I used a wooden corner bought in a hardware store, costing 80 rubles. Unlike the prototype, I was very limited in tools. Using a plastic miter box and a fine-toothed hacksaw, I sawed a wooden corner into blanks. In terms of the size of the blanks, the main thing is that the inner window of the frame coincides in size with the showing dimensions of the matrix.There was no specific solution for fixing the equipment in the frame, so I thought of everything during the manufacturing process.
We glue the bosses into the blanks of the photo frame
Photo frame blanks are glued in pairs
I want to say right away that having cut the entire workpiece, I never managed to cut it exactly. It was decided to eliminate these defects during gluing and installation. The workpieces were first glued in pairs using PVA glue, the main thing is to observe the angle of 90 °. Then the angle was reinforced by gluing the boss. Then the paired blanks were glued together in a frame.
Control of 90 ° angles is mandatory (for example, by measuring the lengths of the diagonals - they must be equal). We dry the glue joints well. At this stage, you can fill in glue leaks formed from uneven sawing of workpieces. It is important to dry the frame well for future work. At this stage, you can varnish the frame. I worked in the winter, so I used a water-based parquet varnish, it doesn't smell so much when working.
To secure the main part of the laptop, cut out grooves in the bosses. I used an analogue of a dremel for this. Next, we try on the matrix. We mark the mounting holes. The matrix will be screwed to the frame. In my case, I glued in with epoxy resin metal strips from the trash stock, in which there were holes with M3 threads. After the resin has solidified, we assemble the frame. We fasten the matrix with screws. Installing a loop. We attach the lamp power supply to double-sided tape. We connect the loop, power supply of the matrix.
Photo frame complete and in action
Good evening, it turned out well, and I was brought to your site by the following question; I have an idea to make photo frames and decorate them in a nautical style, and then not only photo frames, but plates, hot coasters, mini bedside tables, etc. I wanted to consult with you about this, write, my name is Elena.
Photo frame from scrap materials
Author - Aheir;
Published on November 02, 2010.
Today, perhaps, we will arrange a visiting festival of the "Crazy Hands" club. The situation is, in principle, standard: some time ago I bought an electronic photo frame as a gift, of course, I indulged myself for a couple of days, and, you know, I liked it. But buying ready-made toys for ourselves, let alone admiring our own photographic masterpieces on a 7-10 inch screen, is not our method, whatever one may say.
Therefore, we make an audit of stocks, and according to the results of the inventory we find, firstly, the Samsung SyncMaster 152S monitor, like this:
I got it once on the occasion, free of charge, without a leg and not in working order. It was repaired and since then has been lying on the mezzanine.
Secondly, we find the motherboard from the Asus Eee 900 netbook, like this:
Further, we thoughtfully look from one piece of iron to another (3-4 times), scratch the turnip (to taste) and proceed.
To begin with, let's think: what can a laptop do and which of this would I like to use? From a software point of view, he can do almost everything that a regular computer can. With the hardware, in this case, on the motherboard, we have: a pair of SSD drives (i.e. we don't need a hard drive), an audio output (which means you can screw on the speakers), Ethernet (it would be nice to keep the ability to connect to it), several USB connectors (similarly - it would be useful to use), a Wi-Fi card (great, you just need to get antennas), and a VGA output - where can we go without it. Quite a decent set, it should be noted.
In light of all this, we disassemble the monitor (we put the plastic and the board with buttons aside for now, look at the two lonely boards behind the matrix (the monitor power supply unit and the controller), make sure that there is still quite a lot of space and fix a couple of speakers from the monitor on the sides (now I don’t even remember which one, they were taken from the same place, from the mezzanine), and on top of the power supply, without fail taking care of additional insulation, the second (he is the duty officer, he is also for the laptop) 12V power supply with an output current up to 3A (the place of origin of this BP is still the same.) We get the following picture:
Now we take on the laptop motherboard. Cooling in this Eee-shka is handled by a dead cooler-turbine, which provides air circulation in the case. From the main heat sources (processor and bridges), this heat is transferred to the metal plate located under the keyboard and which is a part of the case. I do not have this plate. And she is not needed in this case. We take a radiator of a suitable size (the base area is comparable to the size of the motherboard and is not very high), mark on it the locations of the heating chips and mounting holes in the motherboard (of which there are quite a few, by the way), drill holes, cut threads in them, at the locations of the chips we strengthen the copper gaskets (in order to slightly raise the radiator above the board) and put the whole thing into a sandwich (where necessary - do not forget about the thermal paste). This is how uninteresting it looks from above:
If you look under the radiator, you can see these same copper gaskets. I used copper plates about 4mm thick:
It was decided to locate the controls and indicators in the lower part of the structure, there are 4 threaded holes for fixing the standard monitor leg, it is quite convenient to fix a printed circuit board with connectors and LEDs on them (for definiteness, we will call it a control board). In addition to the main function (to show photos), I personally only need one thing from a photo frame - work on a schedule. Those. turned on at 10 am, turned off at 12 at night. Everything. I did not find adequate ways to arrange this with the available means, therefore, on the control board, in addition to the 220V power input connector, the motherboard power button, the power and activity indicator of the hard disk, a 3.5 mm stereo audio jack, 4 USB connectors, an RJ-45 connector, an optical Tos -Link SP-DIF, reset buttons and monitor control buttons, there is also an Atmega 8515 microcontroller with a real-time clock and a small 7-segment LED indicator for 5 characters. More or less assembled, it all looks like this:
Everything was collected in place, on screeds and hot melt glue, with isolon gaskets, etc. Everything is fixed securely, nothing dangles or falls off. In the upper left corner of the photo you can see two Wi-Fi antennas (here they were not found on the farm, I had to throw a cry on the ad website and after a couple of days and 50 rubles of money I had them). I did install my own turbine next to the radiator, but I never connected it: experiments have shown that there is absolutely no need for this, everything is sufficiently cooled in a passive way.
Now for the details. All the necessary interfaces were extended with wires to connect to the board. Partly, we used the standard connectors on the motherboard (audio, network), partly - the wires were soldered directly to the motherboard (USB). In addition, the power and reset buttons are duplicated, removed on the motherboard and transferred to the control board, the disk activity and power LEDs. The sound chip supports SP-DIF, so an optical signal transmitter has been added for it. In time, the idea arose to add a remote control, so the board also houses the USB IR receiver module from the GoTView tuner kit (again, from the mezzanine):
Naturally, the body of the receiver was removed and only the board was left (I must say, it was completely ugly and made on disgusting material - well, this is not about that).
The scheme of all this disgrace looks like this:
A little about the design. The side walls are made of foil-clad textolite, holes are drilled opposite the speakers, the control board panel is factory-made:
In general, of course, it was assumed that it would stand on top of the metal cover and cover it, but it turned out differently).The lid itself was taken from some kind of industrial 15 ″ monitor (in principle, you could use your own one, but this one was attracted by its “all-metal” and the presence of a stable leg on the VESA mount - it is quite rare). The necessary cutouts are made in it, mainly for the radiator. The left and right sidewalls are screwed directly to the matrix block, there are standard blind holes with threads, 4 on each side. This attachment is sufficient to ensure the rigidity of the entire structure.
Externally, the frame is framed in a wooden molding (in fact, of course, MDF: I bought a platband for the door, sawed it down on a machine, assembled it with glue). The internal dimensions of the frame are made exactly according to the native plastic edging - that's why we put it aside and did not throw it away right away.
Next, we combine the resulting frame and the assembled matrix block, glue small blocks to the frame around the perimeter of the latter, and pull the electronics unit to them through the corners. In principle, everything can be seen in the photographs. This is how it looked during the gluing process:
And this is the finally assembled and painted version on a stand:
In the upper part of the body, I added a pair of corners with holes for possible hanging on the wall.
Finally, it all looks like this:
A little about the software. Ubuntu 10.04 for netbooks was chosen as the OS for this piece of hardware, there are no problems with installation and configuration, everything works, as they say, “out of the box”. A weighty plus: the remote, which pretends to be a HID keyboard and mouse, worked by itself, without additional settings. As a shell (media center), I put XBMC (X-box Media Center). Very nice softphone, right word. As far as I understand, there are ports for Windows and some other OSes, so if someone is thinking about HTPC - take a closer look, the thing is quite flexible. Since the processor on the motherboard is not the weakest, there is enough memory, we slightly improved the sound subsystem, nothing prevents this frame from not only playing MP3s from a home local network, but even happily playing DivX avi-files from a file storage - there is enough performance without questions. In addition, the piece of iron shows the weather forecast, if you close the XBMC, you can play with toys using the remote control (Sudoku, for example), and when you connect a USB keyboard and mouse (better, of course, wireless), you can comfortably rummage around the Internet. Well, and with its main task - a slideshow - the frame also copes quite well.
A handmade photo frame can be both a home decoration and an excellent gift for loved ones. Making an original "frame" is not so difficult, you just need to show a little imagination.
collected for you some interesting ideas that will help you create a beautiful and unique photo frame for your favorite images.

A regular frame can be transformed with a few fake flowers. Read more here.
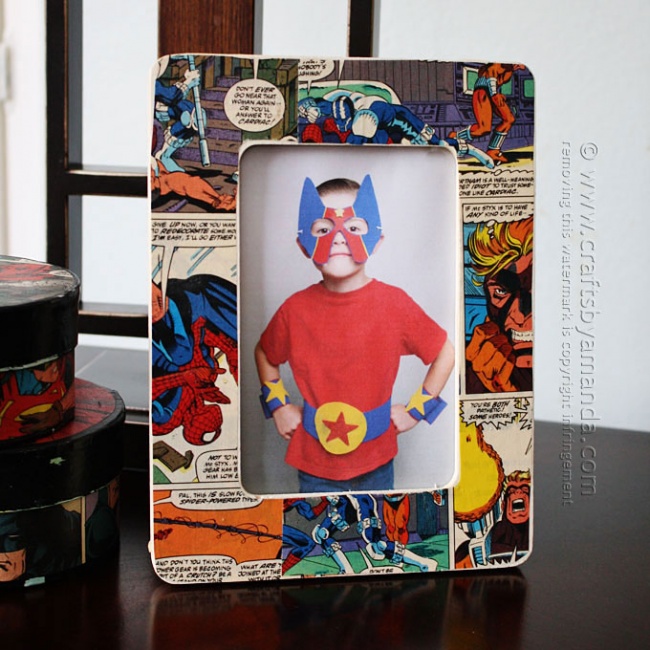
Decorate the frame with your child with bright clippings from his favorite comics. Step-by-step instructions can be found here.
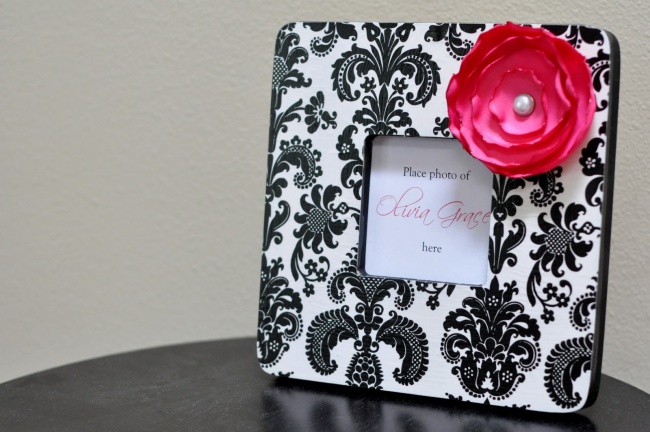
And how to make such a lovely frame using brown paper and scrap materials, see here.

Read how to turn an old window frame into a cool photo frame here.
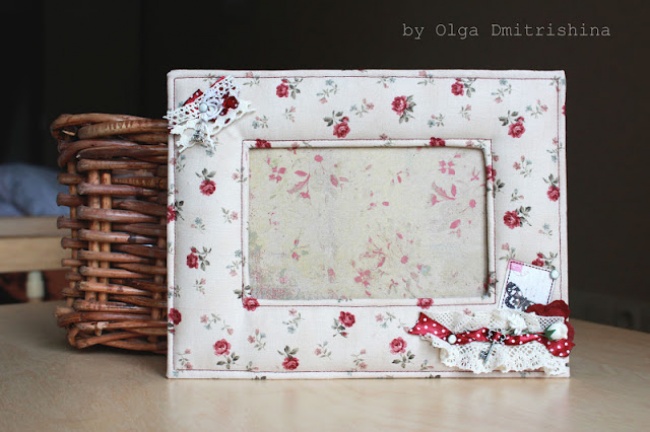
A detailed master class on how to sew a soft and cozy frame with your own hands is here.
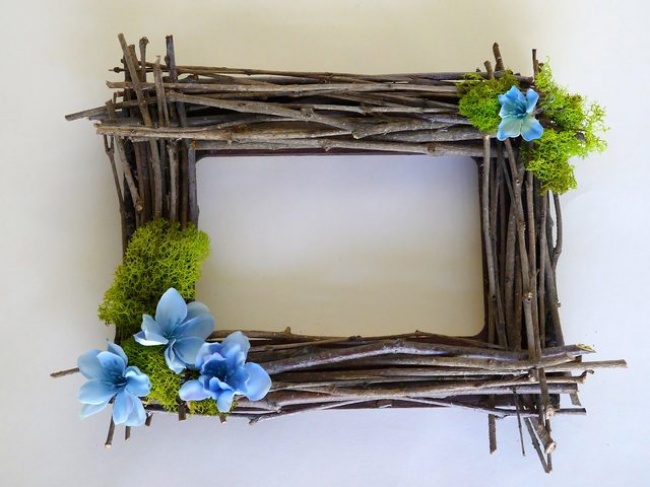
A photo frame made of twigs and moss will not only remind you of memorable events, but also become a decoration of your home. Detailed instructions for creating this beauty are here.
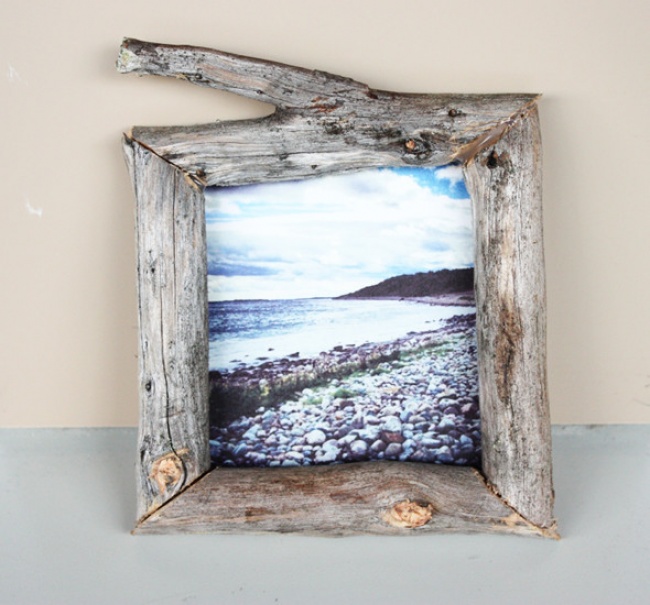
The frame of thick and coarse branches looks great too. Step by step photos here.
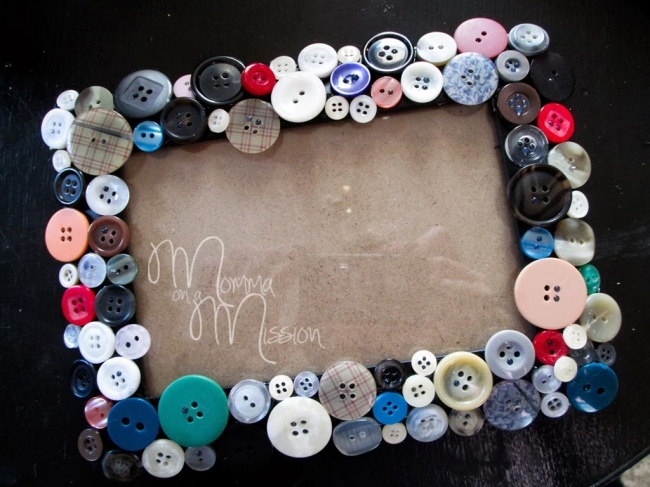
Unnecessary buttons, which are found in almost every home, can be a wonderful decor element. Lots of other interesting ideas here.

With the help of decorative tape or washi tape, you can make a bright frame that will liven up your interior in just a few minutes. You can see step-by-step instructions here.

The frame, decorated with seashells and pebbles, will be a great reminder of a pleasant vacation. More ideas for using seashells here.

You can find out what you need to create this original frame here.
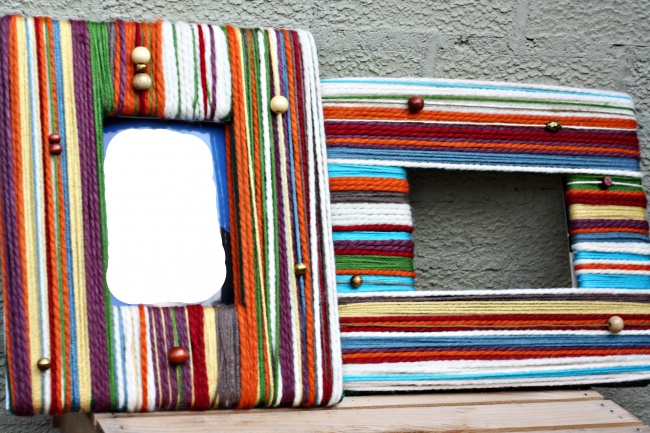
You will learn how to create a voluminous soft frame out of yarn or thread here.

Original, affordable and easy to perform. Detailed step-by-step instructions are here.

You can decorate the frame with several wine corks, as was done here.

Your frame can be decorated with lentils and other grains or bones. You can see how to do this here. You can also make a fragrant frame from coffee beans and cinnamon sticks.

You can even make a frame from a couple of unnecessary magazines or newspapers. More details here.
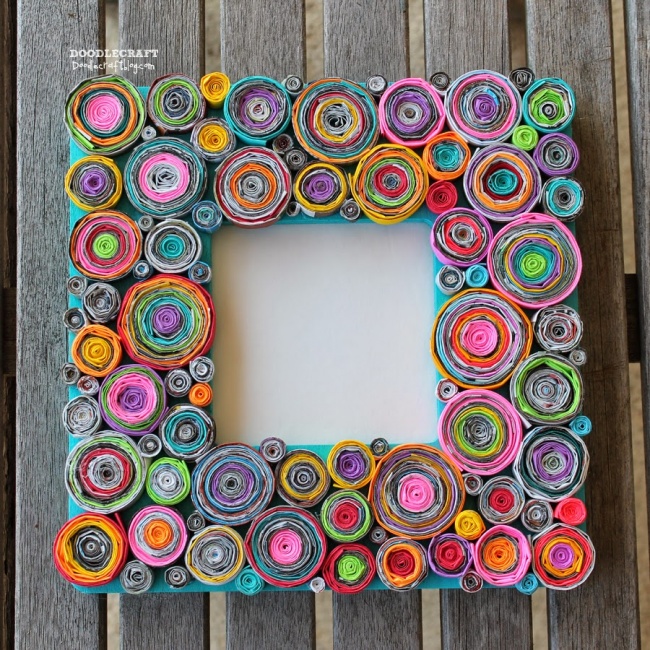
You can also decorate the frame beautifully using the quilling technique. How to do this is shown here.
Location: the smallest room in a 4-room Khrushchev building / 7.6 sq. M Location: 1st floor, sunny side Population: 5-year-old son Objective: to make it spacious and functional, as positive as its inhabitant :) Budget: medium Ideas: invented from the bowels of his head :) Hands: yours and your husband's —————————————–
Thank you all very much for your ideas and valuable advice! I couldn't even imagine that such a small space could be planned in more than 10 variants. Was: Will: Everything in order. Today we went and took accurate measurements of the entire apartment. The BTI plan blatantly lies and stole some precious sentiments from us. Now I will only tell you about the redevelopment. And one of these days I will post options for finishing and furniture arrangement. They decided not to reduce the corridor, since then there was too little space there. And I also wanted to keep it small.
Girls, help someone with what they can, I want to make photo frames with my own hands, maybe someone has any thoughts? Maybe someone has already done something, or just ideas, at least something, I will be grateful. And what else can I replace the glass with? Any ideas? I took out old postcards, buttons, shreds and all sorts of little things, but then I don’t know what to do, what glue to glue on, what base to choose? We are doing repairs for the birth of the baby and it turns out we have a corridor, so I want to make a "walk of fame."
Hello my dear diary and those who are still reading it 🙂 My beloved Bun is 1 year and 8 months old today. Every new month I ask myself the question - until what age will my daughter be taking notes in monthly posts? And I understand that while it is important for me, while it is interesting, while there is something to tell and there is something to remember - I will write it down. After all, today it would be very interesting for me to compare my childhood successes and achievements with the successes already.

Use LxPic as a photo viewer. It is significantly more compact than the classic PV, SEA and QPEG. In addition, it is free, fast, and also supports almost all video adapters, from CGA to SVGA, and processors starting from 8086. However, for high-quality viewing of photos, a processor of at least 80386 and a video card not worse than VGA are recommended. Download this program from the page below. Place the lxpic.com file from the archive in the same folder as the photos. And add the following lines to the end of the autoexec.bat file:
Here folder is the name of the folder with photos and the executable file of the LxPic program.
Paid repairs are not available.
Order repairs on the website and get 10% discount from the cost of work and spare parts!
All work performed and replaced spare parts are provided 30 days warranty.
1. The cost of spare parts is not included in the cost of services and is paid separately.
2. Diagnostics is free of charge if you agree to repair, if you refuse to repair, the cost of diagnostics is paid in the amount of 250–400 rubles.
3.The time frame for each repair operation is approximate and depends on the availability of spare parts in stock.
GOOD AFTERNOON. Good service and excellent quality of renovation, polite staff. Satisfied with the repair of my SONY smart. Keep it up. I recommend to my friends, but I have a lot of them
Good afternoon, I handed over my LG mobile phone to the service on Komendantsky 17 under warranty. They did it for a week, relatively not for long, even during the repair they gave me the service. They said they were ready, I recommend this service - it's good.
Good afternoon. I contacted the service at Komendatskiy 17. Alcatel's mobile phone broke, the image disappeared, I was pleasantly surprised that they did it quickly in one day, they called and said that they were ready. The service is good - the staff are polite, friendly, I recommend it. Thanks for the service. Fedor
The mobile phone TEXET was brought under warranty to the service at Komendantsky 17. The office is stylish, the managers are polite. Quickly repaired in 1 day and called. I recommend, contact this service.
Photo frame Texet (I don't remember exactly the model) suddenly stopped turning on. The warranty period has already expired, I was afraid that repairs at my own expense would be too expensive. I contacted the service on Osenny Boulevard. The next day they contacted me and offered a repair for 400 rubles (program update). I agreed to repair it, by the evening I already received an SMS that I can pick up the frame. Thank you for such efficiency and quality service!
Friends presented the TEXET TF810 photo frame. Stopped working after 2-3 weeks of use. I was afraid that they would not accept it without a check (there was only a warranty card). Accepted without any problems. Repaired well, there are no comments on the quality. In terms of time, the repair took about two weeks.
I repaired the Samsung photo frame on a warranty basis at Marat 12. They immediately diagnosed it, said that the breakdown was not serious, and I can go for the repaired frame in 40 minutes. Thanks to the service and craftsmen for such a prompt repair and good service!
Photo frames are an amazing accessory in which new digital technologies are used to serve our love of photography in home and business interiors. External storage media are also connected to inexpensive electronic devices. Many frames function as media players, play files of various types. Each is supplied with a rechargeable battery or power adapter.
Malfunctions happen with touchscreen frames. The device is vulnerable to shock and damage from falls from a height. If the frame screen suddenly went out, changed color, brightness, there is no sound during playback, contact MT Service authorized centers. Digital photo frames from various manufacturers are repaired here.
Engineers will replace defective parts of the electronic device, including the touch screen, speakers, battery. Sometimes breakdowns are associated with loose contacts, and the installation of new parts is not required.
Digital frames for photographs are increasingly appearing in our apartments and offices. They are happy to give them on various occasions. The variety of models is growing, manufacturers are trying to attract buyers with additional functions of electronic devices. Photo frame repair has become a very popular service in recent years.
Frame screens for viewing photographs are currently available in widescreen format. The size of the display varies from miniature - 1 "diagonal, to large - 19". Frames with such a screen diagonal can be used as an additional computer monitor. Many models are equipped with:
- codecs for watching videos;
- speakers and microphones for scoring;
- players;
- Bluetooth wireless communication module;
- Wi-Fi router;
- remote control;
- functions of an alarm clock, clock, timer.
Any of the modules providing such versatility can break or wear out.Repair of photo frames is carried out in service centers with qualified specialists who have mastered the subtleties of restoring phones, monitors, routers before, since complex knowledge is required to repair a digital frame.
The main part of the photo frame - the LCD-display - is one of the most vulnerable spots. Regardless of the cost, in expensive and budget models, if it falls from the wall or refrigerator door, the screen may crack or simply go out and not turn on. Shocks are especially dangerous for touch screens, which are equipped with some frames.
Replacement of the display is necessary in case of chips, cracks and other serious external and internal damage. The plastic casing around the screen often deteriorates, which can also be replaced with a new one.
In addition to the screen and the case, the following may fail:
- power unit;
- commutation connectors;
- control schemes;
- speakers and other elements.
MT Service centers are authorized to service electronics of most well-known brands. Digital photo frames are accepted for repair: Sony, TeXet, Digma, Espada and other firms.
Accurate professional diagnostics allow you to quickly find the cause of a malfunction. Each model has technical documentation and spare parts from the manufacturer.
In the centers "MT Service" make adjustments and restoration of photo frames after getting wet while saving the data of the internal memory (if available).
You can find out the approximate cost of the repair on the page dedicated to a specific model.
| Video (click to play). |
Federal company "MT Service" is a network of authorized service centers for the repair of phones, smartphones, tablets and other digital equipment.


