In detail: do-it-yourself repair of car bumper ears from a real master for the site my.housecope.com.
Every car owner can face the problem of a torn bumper mount. This can happen not only as a result of an accident, but also during aggressive use of the car, frequent driving on bad roads, etc.
You should not rush to buy a new bumper immediately after detecting a malfunction of the fastening, just as you should not go to a service center if you know at least a little about the hardware. Do your best and save a decent amount of money by doing your DIY repairs.
 Materials and tools required for work
ATTENTION! Found a completely simple way to reduce fuel consumption! Don't believe me? An auto mechanic with 15 years of experience also did not believe until he tried it. And now he saves 35,000 rubles a year on gasoline! Read more"
Before starting work, you should prepare everything that may be needed to remove the bumper and carry out repair work on its fasteners.
Make sure you have at hand:
- new mount (be sure to be sold with a complete set of mounts: 2 rear / front and 2 side);
- long hex key for "6" (different car models may require the use of a key of a different size);
- crosshead screwdriver;
- 1-2 keys for "13";
- lanterns;
- electric drill and drills (3 and 5/6/7 mm) (if you decide to make the mount yourself).
To start repairs, you need to remove the bumper.
- remove the radiator grill (for some car models - assess the need for this action on your own);
- where the holes for the towing cable are made in the bumper, find the heads of the mounting bolts with a hexagon and unscrew them;
- make sure that the protection of the arches is not bolted to the bumper (if so, unscrew them too);
- carefully "lift" the part from the latches on the fenders and remove it.
- carefully dismantle the rear light (assess the relevance of this action on your own);
- some car owners will have to remove the rear wheels (do not forget to put the car in a stable position on jacks or stands);
- under the lantern, as a rule, there are two bumper latches that must be released;
- those fasteners that remain intact should be removed by unscrewing the plastic screws;
- only after releasing all the fasteners can the bumper be removed (in some car models this is not required at all, since the clearance obtained when removing the wheels and taillights is quite enough to do the work with your own hands).
| Video (click to play). |
 To remove the rear bumper:
Sometimes, instead of bolts, fasteners are held on by rivets. They must be carefully drilled out and removed by hand.
Prepare new bumper mounts or make them yourself.
To do this, cut out a rectangle of the required size from a metal sheet, mark and drill holes on it for fastening bolts. Experts advise using this method only in extreme cases, when it is impossible to purchase a suitable set of mounts in the nearest auto parts stores.
Attention: it is not necessary to buy mounts designed for your car brand. You can pick up any suitable options from other models (today, many foreign cars have identical, interchangeable options).
Begin installing the new mounting tab. Secure it with self-tapping screws and check its reliability (DIY repair will be much more effective if you control every important step). Next, install the rivets in place. That's it, the repair of the bumper attachment can be considered complete.
Now the most tedious process of the whole repair begins: installing the bumper back.
Any repair requires competent completion. If you got down to business with your own hands, try to complete it 100%.
In order not to break off the bumper to the wing again (which is very easy), it is better to ask a friend for help. Tighten the bolts lightly by hand and try on the bumper. If everything is in order and the repair was successful enough for the bumper to immediately fall into place, just gently push on it. After all the clips have clicked into place, start screwing on all the parts that you had to remove for the repair (headlights, radiator grill, taillights, wheels).
Don't forget to replace the plastic screws!
At this stage, do-it-yourself bumper repair can be considered complete. Be attentive and follow our recommendations to get a high result of your work.
Forget about fines from cameras! An absolutely legal novelty - NANOFLENKA, which hides your numbers from IR cameras (which are located in all cities). Read more about this at the link.
- Absolutely legal (Article 12.2.4).
- Hides from photo and video recording.
- Installs independently in 2 minutes.
- Not visible to the human eye, does not deteriorate due to the weather.
- 2 year warranty,
Yes, solder Mona's four-thread! was a shareholder with hands!
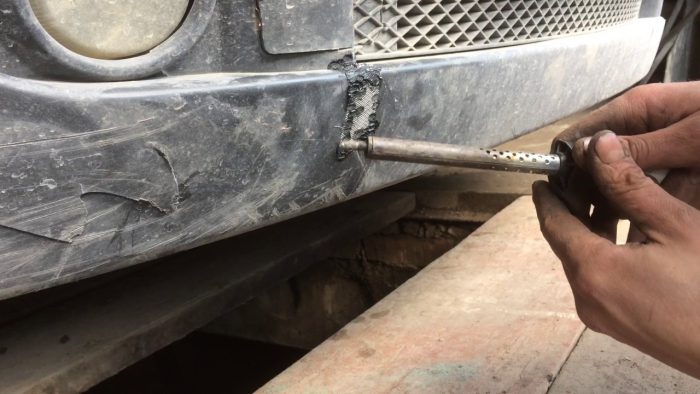
I remember how a painting preparatory work was being restored when I was with me. He got only two things - a soldering iron and a mesh, maybe you know the mesh from the car speakers. So he turned on the soldering iron, it got hot, cut out a small piece of mesh, melted it and soldered it. Moreover, this whole collective farm really holds. It was about 2 years ago and everything is still going on
An “eyelet” is cut out of a credit card and glued (there is even a photo report). The second option is to glue the eyelet with two-component glue with glass wool (glue costs 200r). I wanted to make a bumper for sale, I bought glue. but did not have time. and so a typewriter
I have an ear that is closer to the wheel broke. I unscrewed the bolt under the locker, soldered a paper clip into it and assembled it. 2500 km flight is normal. And then when the bumper was painted for me, other fish soup was already restored
I spilled a little bit of Poxipol and sealant on my ears (just to be sure, if Poxipol can't stand it))))))) - I've been driving for a long time and I'm not worried. Who does not have both - screw the self-tapping screw into the bracket, and you will be happy. Both options are budgetary.
You can still restore the ears, you can solder a paper clip or make a blank from a plastic card. Damn, yes options - darkness.
I cut myself out of tin exactly the same shape as the ears themselves, then put the blank on the inside, drilled holes for rivets and pressed everything with them! Held on with a bang!
He did not degrease anything, took off the bumper, cut out an eyelet from a plastic card around the office and put it on the paxipol on the back of the old eyelet. Keeps tight, even he could not tear it off. (checked) let's see what happens next. Paxipol 119 rub for 14 g. This is enough for all ears and cars for 10. )))))
I can offer an option on how to fix it) just do not kick for the collective farm, and so on, the main thing is it works! in a place that is closer to the wheel, I drilled a small hole right in place and twisted the self-tapping screw slightly bending the fender liner in a place near the headlight, it is still more interesting and collective farm. I have a broken mount not on the bumper itself, but on a detail where it clings to this, all the variks with a card and the like did not fit, but I went differently took a piece of copper wire 4kv.mm exposed it so that it would be easier to tie and hooked on the ear bumper and stuck it into the engine compartment and brought it to the TV and oh my God, hold on and not fall out)
__________________
Lega ExclusiveF! there is
__________________
Forum rules and regulations VERY SHORT:
Anything that is not prohibited is allowed.
Prohibited:
-Personalization, insults, assaults.
- Swearing, warmongering, negativity in any form.
-Unnecessary_fucking *.
* the moderator (administration) reserves the right to declare any topic and post unnecessary_hrenoviny.
cfg, Ilyukh, I have it on my desk in the office for a year already. Are you on Serpukhovskaya? Let's cross, I'm on Novokuznetskaya.
Added after 3 minutes
Michman, good idea. the only thing, from the inside, you probably need to put it in.
THE MAN SAID - THE MAN DID! Don't keep your word - don't respect yourself!
__________________
Looking for arguments in an argument with a dull person is like playing chess with a dove. It doesn't matter how well you play chess: he will knock over all the pieces, beat the whole board and proudly think that he has won.
________________________________
Any rebel who decides to rock the boat during a storm should, in accordance with the law of the sea, be hung on a yard. It is a pity that this law does not apply to city squares.
No, the same.
PP with PP, PPe with PPe, ABS with ABS.
Added after 14 seconds
__________________
Looking for arguments in an argument with a dull person is like playing chess with a dove. It doesn't matter how well you play chess: he will knock over all the pieces, beat the whole board and proudly think that he has won.
________________________________
Any rebel who decides to rock the boat during a storm should, in accordance with the law of the sea, be hung on a yard. It is a pity that this law does not apply to city squares.
Temperature is important there, very much.
And they do it not just with a hairdryer, but with a soldering station, apparently it is.
Soldering with a mesh in the same place, it is important not to overdo it, otherwise the hat will come out.
Many people have 100-120W soldering irons with degree adjustment?
Added after 4 minutes
I tried many options, and soldering, and soldering with a mesh, and riveting reinforcement. I repeat, I chose 3M glue for myself the best. Yes, it's expensive, yes, you can't buy it everywhere. But, this is the best, and much easier if you do everything right.
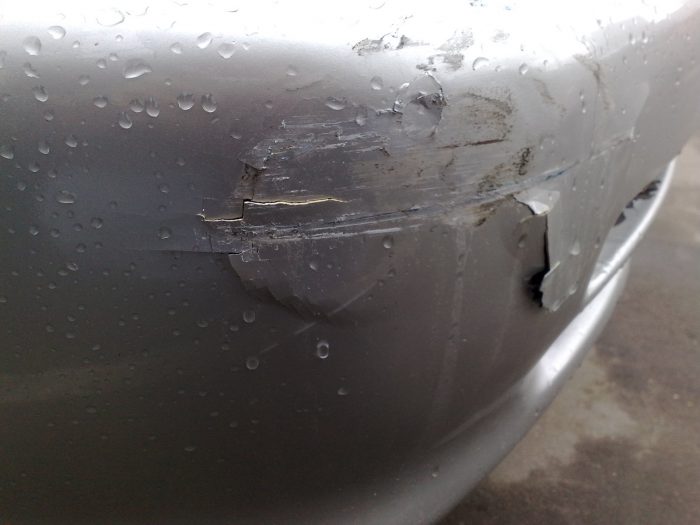
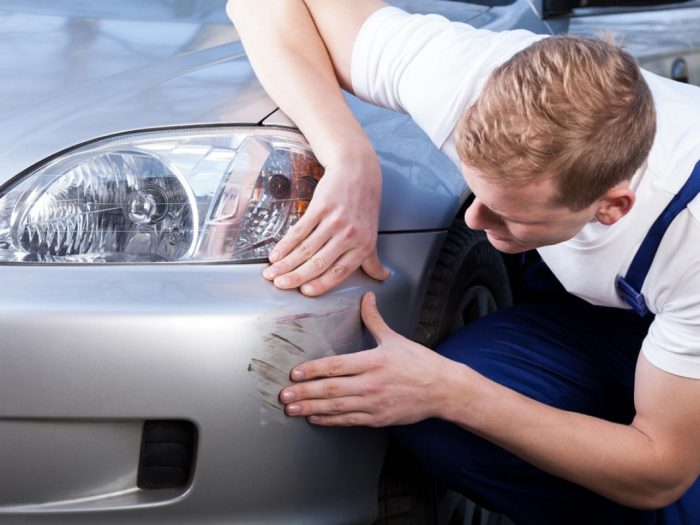
Often in the traffic flow you can find a car with a cracked or deformed buffer. What can you do, no one is safe from unsuccessful parking or a minor accident. However, this is not a reason to continue driving a car that has lost its "shiny" appearance - there is a practical experience of restoring the original state of this element.
The external plastic components are mainly made of thermoplastic plastics. The technology for restoring such products is based on welding, it is this technology that allows you to get rid of through cracks and even recreate broken fasteners. Actually, the procedure is not much more complicated than preparing and spray paint damaged area of the car body.
Some car enthusiasts assure us that we repair the bumper with our own hands using metal brackets. But the experienced car owner knows that like is treated like this, that is, repair plastic rods are used for soldering. Their composition, color and profile are different; the required core is selected according to the marking on the buffer.
Making the right choice means guaranteeing a high-quality repair, because the mismatch of materials will significantly reduce the life of the automotive element. To find out what the cracked bumper is made of, it is enough to carefully examine the inside of the part. Depending on the marking, appropriate conclusions are drawn:
- PP - polypropylene base.
- ABS (GF, PAG 6) are hard plastics.
- PUR - polyurethane.
Plastic welding requires high temperatures, for example, 400-450 ° C is suitable for propylene, and 500 ° C is necessary to restore an ABS structure. Many car owners will learn how to repair a bumper with their own hands in a video where craftsmen use an ordinary 100 W soldering iron.
You can also restore a damaged part using pieces from a bumper with a similar marking. They are cut into strips 8 mm wide for PUR, and 4-5 mm for polypropylene.
Almost any breakdowns are treated by welding, even broken parts are reanimated.However, no one canceled the economic feasibility of such work, because the restoration of numerous defects can hardly be called justified. The cost of a complete restoration and staining will be more expensive than a new buffer.
Certain tools are required to complete the repair. These can be both ordinary household appliances and professional tools. The ideal kit includes the following items:
- Orbital sander or sanding block.
- Grinding wheels of various grain sizes.
- Mini drill like Dremel or drill.
- Clamps and rubber spatula.
- Soldering iron and hair dryer.
- Metallic tape.
Of the materials for restoring a cracked buffer, you may need:
- Putty and primer.
- Brass mesh for crack reinforcement.
- A can of paint or a can of paint.
- Plastic repair rods of the required configuration and composition.
The damaged part must be dismantled in order to eliminate, firstly, excessive stress in the crack area. Those who have already done such work will say that now we clean the bumper and only then repair it with our own hands.
The cracked parts fit together. For reliability, they are fixed with metal tape from the outside of the part. If the breaks are quite significant, then clamps will be needed to clamp the edges of the cracks. Their number depends on the complexity of the repair.
When restoring PP-based parts, the reinforcing mesh is not used. The process begins with the fact that a nozzle with a nozzle with a diameter of 5-7 mm is installed on the hair dryer. In the future, work is carried out according to the following points:
- On the inside of the buffer along the crack joint, use a Dremel mini-drill to make a groove for the plastic rod.
- Using a hair dryer, melt and place the repair rod into the prepared groove.
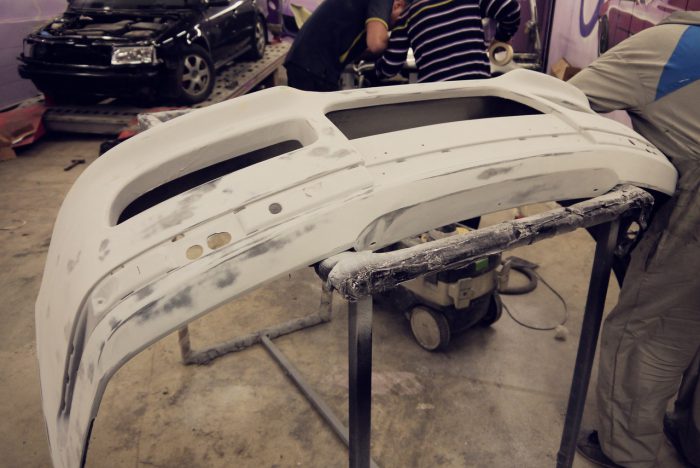
- Clean the front part of the bumper with an orbital sander with P240 attachment and repeat the welding procedure similarly to the operation on the inside.
- Grind the cooled seam from the outside with a nozzle with the same grit P240, then remove dust from the surface.
- Even out irregularities with a special putty for plastic, try to keep the layer as small as possible.
- Dilute the primer with solvent 3: 1 and apply two coats to the degreased surface. Drying time for the first layer is 15 minutes.
- Apply a developing layer in a contrasting color, followed by sanding with a disc or sandpaper with grit P800 and P1000.
- Eliminate the detected defects with a nitro putty followed by sanding with P1000 sandpaper.
- Remove dust with a damp cloth and degrease the part, then paint plastic decorative paint with overlapping borders 50-100 mm. Apply the paint in 3-4 coats with intermediate drying cycles.
Anyone who is interested in how to properly repair a bumper in a video with their own hands should take into account an important detail. 30-40 minutes after applying the last layer of paint, the part should be varnished. Thus, we get a flawless appearance of the repaired part. Do not forget to follow a few simple rules:
- You should try to apply a minimum layer of putty.
- Take a temporary pause for complete hardening of the putty layer.
- To process the putty area with a grinding wheel or sandpaper with grit P800, and then - P1000.
- It is desirable to apply a developing layer of primer.
In the case of a polyurethane buffer, the preparatory stage in the form of grooving work is excluded. A brass reinforcing mesh is applied to the crack; steel is not recommended for use, because it is prone to corrosion. Alternatively, stapling staples can be used every 10-20 mm. They are recessed into the body of the part across the seam, it is imperative to make sure that the bracket does not go through the part.
Further, the repair technology does not differ from the restoration of a polypropylene part.Wire mesh or staplers should be sunk into the plastic. Only after that, the seam is filled with repair plastic and soldered from the opposite side. Some important points of technology should be taken into account:
- It is necessary to solder the mesh or staples carefully so as not to overheat the plastic, otherwise it may deform from the opposite side.
- For a complete DIY repair of a polyurethane bumper, the width of the reinforcing mesh should be 15-20 mm.
- It is better to press in the mesh or staples with a flat object.
- If the legs of the staples pierce the plastic through and through, then they should be shortened using side cutters.
- For the convenience of working with metal elements, you can use tweezers.
- To prevent the new enamel from peeling off, it is necessary to grind the paint over the entire plane of the part.
Puttying and painting are performed in the same way as described above - according to the traditional scheme. Repair work on the restoration of the buffer can be combined with painting the car , so the consumption of materials will be more rational. It is important to determine in advance the feasibility of carrying out restoration work. If there are significant costs in the future, then it is better to buy a new part.
Yes, solder Mona's four-thread! was a shareholder with hands!
I remember how I was restoring a painting preparatory worker. He got only two things - a soldering iron and a mesh, maybe you know the mesh from the car speakers. So he turned on the soldering iron, he got hot, cut out a small piece of mesh, melted it and soldered. Moreover, this whole collective farm really holds. It was about 2 years ago and everything is still holding
. The "eyelet" is cut out of the credit card and glued (there is even a photo report). The second option is to glue the eyelet with two-component glue with glass wool (glue costs 200r). I wanted to make a bumper for sale, I bought glue. but did not have time. and so the car was taken)))
I have an ear that is closer to the wheel broke. I unscrewed the bolt under the locker, soldered a paper clip into it and assembled it. 2500 km flight is normal. And then when the bumper was painted for me, other fish soup was already restored
I spilled a little bit of Poxipol and sealant on my ears (just to be sure, if Poxipol can't stand it))))))) - I've been driving for a long time and I'm not worried. Who does not have both - screw the self-tapping screw into the bracket, and you will be happy. Both options are budgetary. You can still restore the ears, you can solder a paper clip or make a blank from a plastic card. Damn, yes options - darkness.
I cut myself out of tin exactly the same shape as the ears themselves, then put the blank on the inside, drilled holes for rivets and pressed everything with them! Held on with a bang!
How to solder a bumper at home? Do-it-yourself bumper repair?
Repair of a plastic bumper.
1. The soldering material must be thinner than the thickness of the bumper.
2. The bumper and tire must be of similar material.
3. The bumper soldering point and the bar must be cleaned from dirt with a sharp knife before soldering.
4.Cracked bumper and tire must be preheated with a soldering iron.
5. In the process of welding the bumper, a small wave of loose plastic should form between the tire and the bumper.
6.If the plastic of the bumper is poorly warmed up, the tire will not weld.
7. It is not recommended to overheat the bumper too much.
Plastic deforms from overheating. When overheated, the plastic loses its properties and, as a result, strength
Now you know how to make a durable bumper solder
Repairing a bumper with electrodes made from a car fender liner is worth trying and taking note. And undoubtedly the locker is a life hack in bumper repair
INSTAGRAM
V.K
Vk group
—————————————————————————————————————-
Collaboration and Advertising
—————————————————————————————————————-
Video Do-it-yourself bumper repair RELIABLE Soldering a plastic auto bumper FIXING RESTORATION. channel VlaKoz Car
Hello dear guests and regulars of our site! We continue to talk about sore subject for car owners.Today I will tell you about repairing a plastic bumper with my own hands, a video about which will allow you to more clearly study the whole process in stages.
I understand perfectly well that situations are different, like the bumpers themselves. In some cases, at home, it is impossible to return the body kit to its previous state. Rather than collecting a whole set of tools and auxiliary materials, it is sometimes easier to buy yourself a new one. This applies to both the rear and front bumpers.
But sometimes repair is the best way out of the situation. The cost of such work will largely depend on the high cost of your car. This is if you look for the addresses of car services and contact them. But at home it is quite possible to do local body repair, that is, restore the integrity of the bumper without investing a lot of money. Think about how much a new bumper for your car costs and compare to the cost of a few new mounts, i.e. lugs, putty, glue and possibly fiberglass mesh. At this point, act according to the situation when choosing materials.
If buying all these consumables is cheaper than buying a new bumper, then feel free to start repairing cracks or chips.
Depending on the nature and complexity of the damage, different recovery methods are used. Some people prefer to use epoxy resin and reinforce it all with fiberglass mesh. Resin and mesh hold the damaged structure together well and provide a fairly long-term operation of the body element after repair.
In the presence of chips and dents, I prefer to use the soldering method with additional priming and puttying of the damaged areas. In principle, this way you can restore damage of any complexity, if you make an effort.
An approximate work plan for repairing a damaged bumper is as follows:
- assessment of the current state;
- work from the inside of the bumper;
- outside processing;
- alignment;
- padding;
- applying putty;
- finishing and painting.
If you have a simple crack without dents or chips in the paintwork, you may be able to do without painting. But soldering the cracked element will come in handy anyway. The technology is not the most complicated. But if you want to get a high-quality result, do not forget to buy the appropriate soldering electrode and learn how to handle the soldering iron itself.
To choose an electrode, do not just read reviews, but be guided by the composition of the plastic from which the bumper is made. For plastic body kits, polyurethane or propylene is used in most cases. Depending on this, you will need the appropriate flat plastic electrodes. The price for them is not that high. Choosing the wrong electrode will simply not hold and you will have to re-do all the work. But now with a suitable electrode.
Let's not postpone, but get down to work.
It will be easier for you to navigate by photo and video instructions. This technique is personally tested by me. But there are other ways to repair a damaged bumper. The simplest of them is to contact a service station in St. Petersburg, Neftekamsk or any other city. Moscow alone has hundreds of car services.

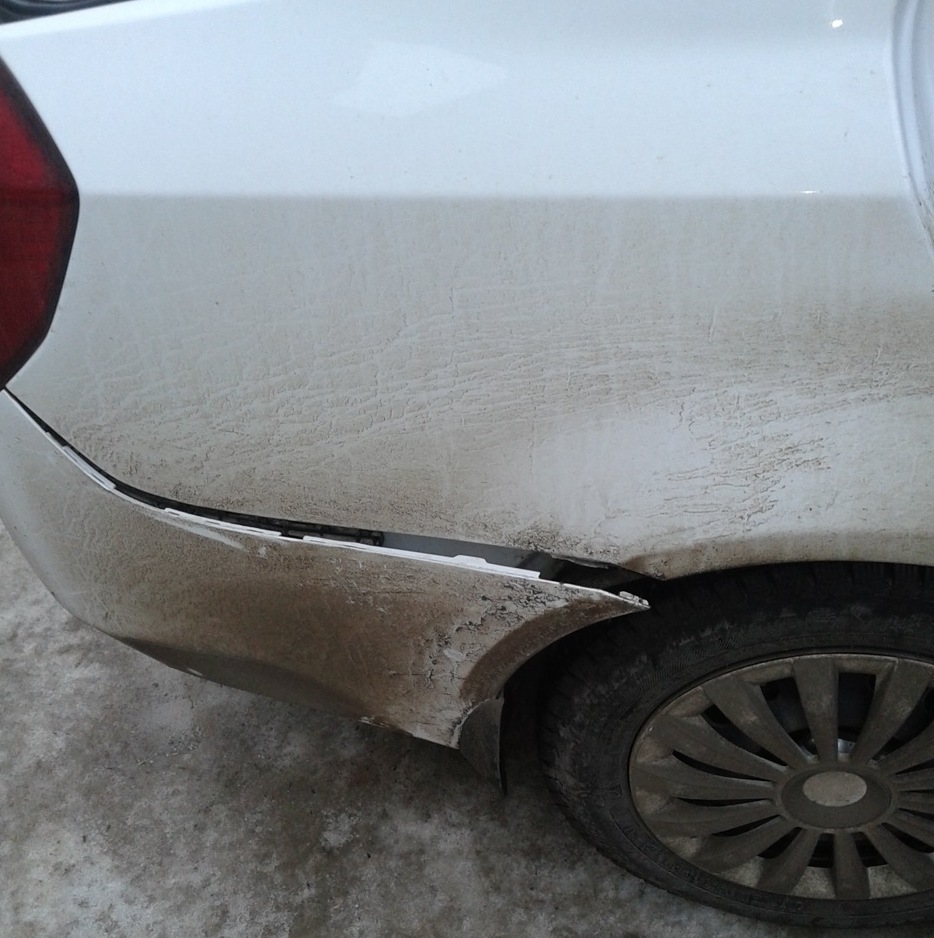 Materials and tools required for work
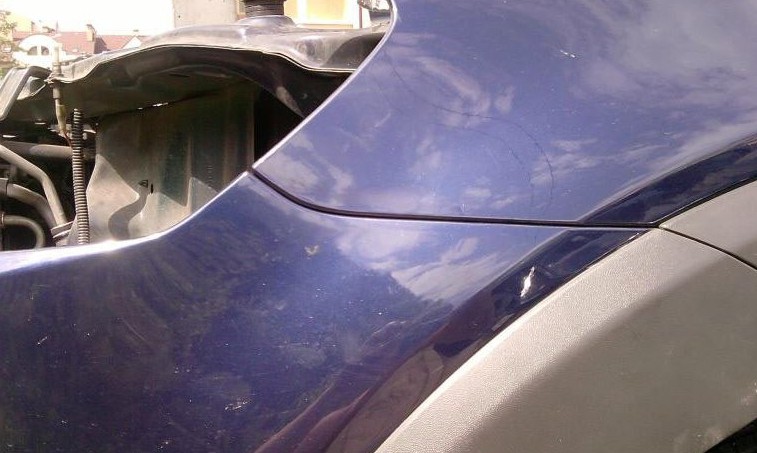 To remove the rear bumper:

