
In detail: DIY repairs in a Stalinist house from a real master for the site my.housecope.com.
- Where to begin
- Wall finishing
- Floor finishing
- Ceiling decoration
- Kitchen renovation
- Finally
The houses of the Stalinist type, built in the 50s of the last century, by their own durability will give odds to any of the newly erected buildings. But this applies only to the brick walls of such houses, because the internal "filling" leaves the desire for the best.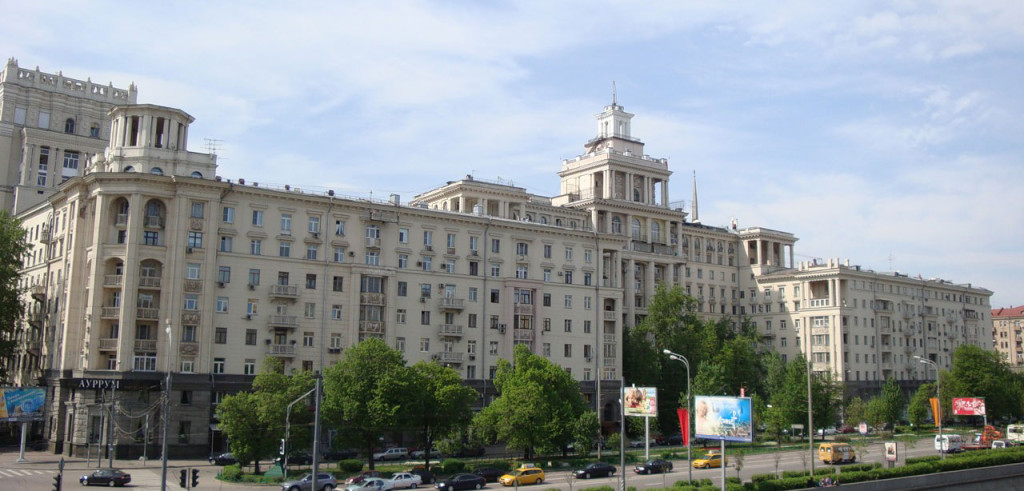
Repair in stalinka is perhaps the most difficult of the various apartment renovations. But this is not a reason to panic, because even such a complex issue can be completely resolved.
- You should start by finding out all the details about what you are dealing with. Stalinism and Stalinism are different, in almost all houses of this type, during their service life, restoration was carried out with the replacement of wood floors with concrete ones. In addition, you need to find out in what condition the wood logs are (the beams on which the floorboards are laid in the woody field), which are definitely available in the construction of the stalinka floor.
 Partitions in such apartments are usually woody and crooked, so you should think about their possible dismantling and building new ones.
- You also need to realize which type of finish for each surface (walls, ceiling, floor) will be more applicable both in terms of price and practicality.
- It is necessary to start repairs by replacing old windows with modern plastic ones. Due to the fact that the walls of the stalinkas are thick and with a low overall thermal conductivity, PVC windows will be a good addition to the design, which keeps cool in summer and does not let the cold through in winter.
- The next step is to replace the wiring. Due to the fact that the house was built with the entry of wood parts, the fire safety requirements in the stalinka are increased.
 Partitions in such apartments are usually woody and crooked, so you should think about their possible dismantling and building new ones.
| Video (click to play). |
When making repairs to the walls in the stalinka, it is necessary to install their wiring inside, additionally placing it in a corrugated insulating pipe.
The "native" type of stalinka plaster is clay, under which the so-called "shingle" is placed - a wooden board that serves as the basis for partitions both inside the apartment and often partitions between apartments.
Here, the following options are provided for your choice:
- removing old plaster and installing the newest - an expensive and labor-intensive method, suitable in cases where ancient plaster is, well, completely crooked and inapplicable either for restoration or for cosmetic repairs;
- leveling the walls with plasterboard on top of the old finish is a cheaper and least labor-intensive method, but a side effect is a small decrease in the area of the apartment, because the profile and drywall together have a thickness of at least 3 cm;
- wallpapering on old plaster - applicable only in this case, if the walls are smooth and reliable; of course, the cheapest, but at the same time a rare option.
 removing old plaster and installing the newest - an expensive and labor-intensive method, suitable in cases where ancient plaster is, well, completely crooked and inapplicable either for restoration or for cosmetic repairs;
Dismantling the old clay plaster is carried out using a perforator with a chisel inserted into it. After removing the old one, apply an even layer of the latest plaster, and then putty.
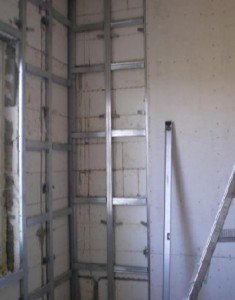
For finishing with plasterboard with your own hands, a special duralumin profile is screwed vertically to the walls with a step of 60 cm along the central axes, which is set strictly according to the level.
Then they expose the sheets of drywall so that their joint falls strictly on the central axis of the profile (the width of a standard sheet of drywall is 1.2 m), and fasten them with screws.
When repairing a bathroom in a stalinka, with the help of such a design, you can hide in a wall, for example, a sewer riser.
Advice! To give the walls the best sound insulation from neighbors, mineral wool can be hermetically laid in the niches of the profile lathing.
The walls are now ready for wallpapering.
Interior partitions deserve special attention. As needed, before finishing the walls, they should be disassembled, and in their place new ones should be erected from a light, non-thick cinder block.
Probably the most difficult process in the restoration of a Stalin-type apartment. Repair of the floor in the stalinka, as already mentioned, depends on the state of the previous: integrity, evenness, reliability of lags, etc.
If the floor is flat, does not creak and does not cause concern, then feel free to lay the flooring. Otherwise, it is necessary to open the floor and diagnose the problem. Under the floorboard, you can usually find, albeit slightly curved over 10 years of operation, but still not putrefactive logs spilled with slag.
They should be leveled using substrates and planing. And then, depending on your financial abilities, you can throw everything as it is and lay the final coating on an old floorboard (newly reinforced and not creaky), or you can construct a new construction from a dry screed.
The process looks like this:
- A layer of old slag is removed
- In its place, lighter expanded clay sand, which has the best sound and thermal insulation characteristics, is poured.
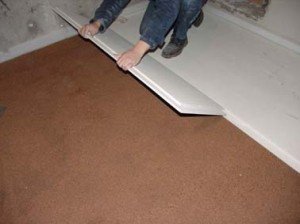
- Dry screed plates, which are also called gypsum fiber boards (gypsum fiber sheets), are installed and fixed with glue and screws.
- The front cover spreads on them.
Such a screed has a number of advantages over the wet method: it is quite easy to install, lighter, and in terms of reliability is in no way inferior to the standard one.
It should be noted that when repairing a bathroom in a stalinka, it is required to use GVLV (waterproof slabs).
Advice! To give the screed additional solidity, the joints of the plates must be excellently treated with a water-repellent sealant.
The procedure for finishing the ceiling with your own hands is complicated only by the need to remove old plaster, also consisting of clay.
For the rest, the repair of the ceiling in the stalinka is no different from the traditional one.
It is recommended to install a profile-plasterboard structure or stretch ceiling.
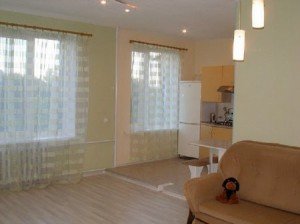
If you do not want to do redevelopment, kitchen renovation in Stalinka has no peculiarities. In case you are not satisfied with the small kitchen (often its dimensions are 2 by 3 m), you can demolish the walls between the kitchen being finished with your own hands and the room.
Usually, the layout of the stalinkas allows you to make one huge living room-studio, combined with a kitchen. This solution will visually enhance the multifunctional zones of both rooms.
Summing up the article, I would like to note that when making the reconstruction of the stalinka, it is necessary to be prepared for a large amount of construction waste, both because of their multi-room nature (often at least 3-4 rooms), and as a result 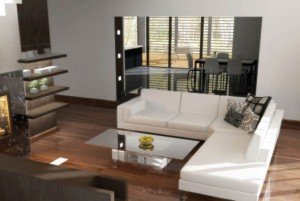
a large layer of "ancient" clay plaster, wood, curves requiring dismantling of partitions, etc. aspects.
You should also be careful with the dismantling and installation of new ceiling and floor wood floors in order to avoid collapses.
Hello!
I am starting the renovation of a 1 room apartment in a Stalinist house built in 1953. The renovation is planned to be not very large-scale and low-budget.
To implement the project, help me find answers to some questions:
- I plan to combine a bathtub with a toilet + lay tiles. The walls in the bathroom are very uneven. Is it possible to completely demolish the bathroom and lay out the walls again. What material should be used. Foam block or tongue-and-groove plates ?? How to find out whether the walls of the bathroom are load-bearing or not? The structure of the crossbars, apparently, consists of columns and rails on them not wide slabs are laid!
- What is the construction of the floors in such houses.The floor in the kitchen will be very strong, what to do with it? I don't want to break, what can I do to lay the tiles ?? Two layers of moisture resistant drywall possible ??
- Where is the wiring usually located in such houses? I plan to replace it completely, it is necessary to coordinate it somewhere ??
- you can combine. better lightweight construction - impregnated and primed drywall from moisture. The bathroom is usually made of planks and sheathed with shingles with plaster - not load-bearing, bearing in stalinka - brick walls. The floors are mainly wooden beams.
- Wooden beams in most cases, if there was no reconstruction in the 70-80s. You can make sure - the air vents for the floor should be on the floor - ventilation holes, if the blunt-headed scoops have not laid the linoleum and closed them. Before doing anything with the floor, you need to make sure that the beams are not rotten. And make air vents under them so that they are ventilated. It is better not to put heavy loads on the floors. Drywall on the floor DO NOT STEEL.
- In the plaster layer, permission is not required - replacement of the wiring and that's it. The main thing is not to hang electric stoves, boilers and other things, even a washing machine needs approval to increase power - hemorrhagic.
I found out the situation on the floors - they are made of slabs. I don't want drywall for the plumbing. What would you advise to make from? Criteria for quality, speed of construction, convenience of subsequent finishing, cost?
2mdog
then the brick is ordinary, but it is more expensive, but of higher quality and without hemorrhoids in further operation
I made from GVL (gypsum fiber sheets) ”>).
In two layers. Inside a slab of basalt wool. Three-meter GVL is difficult to buy and it is more difficult to work with them than with gypsum plasterboard. But the wall turns out to be much more like a capital one than a plaster wall. There is something to compare with - the gypsum is located a meter from the gypsum fiber.
Wooden floors in post-war Stalinist houses are rather rare. Alternatively, they may turn out to be like this: ">
If the kitchen, it is highly likely that some of the boards have turned into dust.
Enlighten the guru: if foam blocks or tongue-and-groove plates are used instead of bricks and drywall. Is it worse or on a level ?? What to choose a foam block or a groove comb? What material thickness is required at a height of 3.20? Thanks!
There are so many topics about tongue-and-groove slabs and foam concrete.
Do not forget that the latter must be plastered without fail, and you will also have to putty under the wallpaper. And the pipes cannot be hidden in them.
Slowly he began to pick the apartment!
What came up:
- All partitions in the apartment are wooden. Covered with shingles and plastered.
- The floor in the kitchen is wooden along the logs. The logs lie on compacted slag. Up to the bottom slab from the field level approx. 30 cm.
- The wiring is hidden in rubber hoses.
- The ceiling is lined with an incomprehensible material, something like chipboard.
- The floor tiles in the bathroom are laid on a stitch that is poured directly over the slag without waterproofing.
- A burst sewer riser was found.
- What to change partitions for? If initially they were wooden, then will the floors (concrete) withstand the weight of the new partitions.
- Is it worth taking out all the slag? For 50 years, it was heavily caked.
- Whether to tear off the ceiling and make a new one out of kipboard or what would you advise.
mdog wrote:
Will the ceilings (concrete) withstand the weight of the new partitions
this requires a construction expertise, *********.
mdog wrote:
Is it worth taking out all the slag? For 50 years, it was heavily caked.
If it is heavily caked, why scoop it up?
mdog wrote:
Whether to tear off the ceiling and make a new one out of kipboard or what would you advise
I would not rip anything off, unless, of course, it falls on my head. Make a new one from gypsum board or tension.
Dear Gennady!
As a guru, tell me what to do with the slag.
Are you 100% sure that there are concrete floors? Most likely a screed over logs and boards.
2mdog remove the slag and fill everything with mineral basalt (not glass!) Wool, tightly without air.
the slag is filled in for sound insulation, so that it is not audible what is going on up and down there.
So there is a real chance to lighten the construction of the floor. And if you make a floating floor (from boards, screeds), then you can generally get very good acoustics characteristics.
2VladM
Yes, in stalinkas, a common thing is load-bearing wooden beams.
Overlapping 100% concrete slabs by region.
Gennady And if the foam is on top of the slag, and then the screed according to your technology.
Just 30 cm of basalt wool is too expensive.
mdog wrote:
Overlapping 100% concrete slabs by region
I have a wooden floor on the crossbars.
cross-section transom 300x100, length 6m, across the beam 150x150 4m
columns, regilas are laid on them, and floor slabs on them.
No photo yet.
IMHO, our houses are not adapted to such repairs. Disproportionate costs. Inability to apply normal technologies. On good, they need to be broken. these stalinkas. equally and percent. 70 Moscow buildings. I myself faced this directly, dismantling 4 garbage containers from a kopeck piece. True, there was still no 30 cm of slag. I believe that all houses of those years (and subsequent years too) are 100 percent construction defects that cannot be fixed. If, according to the snip, a wall that has a deviation from the vertical of more than 10 mm along its entire height is not subject to plastering (TR 137-03 Moscow). and so on and so forth. like this. on ceilings ... 30-50 bags per 20 sq.m. rooms. well, where does that fit. when slabs in an elite house with a price per square meter under 10 thousand lie with a drop of 5 cm, and this is not the worst option. the Germans correctly arranged a continuous demolition. and the quality of their houses (GDR) cannot be compared with ours.
2mdog
it is better to somehow lighten the structure even so, because you will load new materials.
if exactly concrete floor slabs, then put foam 30 cm
the price will also be rather big. maybe it is possible to lower the floor level? Maybe nothing is in the way? Put 10 cm of styrofoam and screed over the mesh?
I opened the floor. Floor slabs are P slabs laid with the plane down. the space between the slabs is covered with slag, see 15. The thickness of the slab is 7-8 cm. Will these slabs withstand a screed with a thickness of 5-7 cm?
What I observed. Repairs in the stalinka. And so on almost the entire ceiling in the apartment. Support on cap. Walls. Partitions were demolished. In the area of window openings, reinforcement was everywhere. According to the customer, when replacing windows, the lintel began to sag and, in an emergency, had to be jacked up with subsequent strengthening. It was done according to the project. In the process of repair, constant complaints from neighbors to various authorities, not even related to alterations.


Hello residents of Stalinki)
Please tell me who has at least some experience with the renovation of this series of apartments.
I want to start repairs, I don’t know where to start.
But I know what's in the kitchen. I changed the window to plastic. the floors are creaky and uneven, the ceiling is also bad.
What is the best thing to do with the ceiling? Gypsum? Stretch? or just whitewash?
With floors? to pull out old boards and lay new ones? or on top? I want tiles in the kitchen, is it possible to do this? will there be problems in the future? all the same, the floors are wooden.
Are the walls also better with plaster?
Better to start with the bathroom. The curvature of the partitions can prompt you to think about replacing them with new ones, which will simplify the task of leveling the walls for further decoration, replacing doors, plumbing and electrical equipment.


I'm sorry. The bath is already ready. I mean the rooms
step221565 wrote:
Hello residents of Stalinkas) Please tell me who has at least some experience with the renovation of this series of apartments. I want to start repairs, I don’t know where to start.
I started by scrutinizing this forum two years ago. 
There was enough free time, and the hands were more or less from the right place.
The main problem with all these houses is curvature in everything. Blocked walls, corners, ceilings, openings. But that's okay.You just have to break everything down to brick and do it normally. Partitions foam block 100mm, screed on the floor, plaster the walls along the lighthouses. The materials are not very expensive. It's hard at work !! Buy the tool yourself, but look for people for the day. I paid 1500r / person / day (Moscow), two guys from Kazakhstan. For a day (10-12 hours) they rubbed the lighthouses on a room of 20m2 for me, for another two they covered the whole with plaster. Look for young people, they perfectly grasp the whole experience of this forum under your sensitive control. Well, not the first time, yeah
But they are also happy to do it in a couple of hours - the same money. Do not mess with local “craftsmen” at an age, most likely you will get a bagpipe, constant bickering about how to do it, whether it is necessary to redo, etc.
Now, looking back, I can say that there is nothing complicated there, and the cherished 2mm by 2m is quite achievable. Only the amount of work is considerable.
finish while in progress
[
nerochen wrote:
plaster walls on lighthouses
I'm not sure. There is experience in repairing the stalinka on Velozavodskaya in Moscow. The plaster didn't work. Only plasterboard on the frame on the walls and ceiling. New subfloor in floorboard and parquet flooring.
Are there stalinks in Norilsk too?
Of course have. I have a house in 1951.
Who has experience with renovation? Everything is just beginning for me now, I'm looking for advice from knowledgeable people
"Native" view stalinka plaster - clay, under which the so-called "shingles"- a wooden board, which serves as the basis for partitions both inside the apartment and often inter-apartment partitions... In the 30s for leveling walls and ceilings only clay was used. Until our time the walls in the stalinka survivedbut the strength of the wall surface is poor. Redecoration in apartments with shingles is contraindicated.
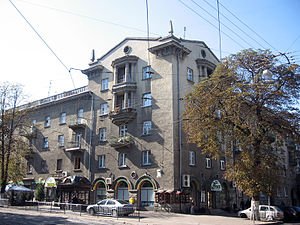
The late Stalinists of the 50s used plastering of walls and ceilings in conjunction with reinforced concrete floors. Interior partitions such stalinka made of red bricks, cinder blocks (from asbestos, sawdust and other debris with cement, but very light) or durable slag concrete (for example, in the bathroom). This the best option when buying an apartment of the Stalinist project.
At repair of walls and redevelopment in stalinka there are the following options:
- removing old plaster and installing a new one is a rather expensive and time-consuming method, in cases where the old plaster is coiled or crooked and unsuitable for restoration or cosmetic repair
- alignment walls plasterboard on top of the old finish - the method is a little cheaper and less laborious, but the negative effect is a decrease in living space stalinka
- plaster available wallsstalinka a thick layer of starting putty on the lighthouses with preliminary removal of especially coiled areas and sealing cracks, an inexpensive option, but also not always reliable
- dismantling of non-bearing walls in case shingles - the only correct and most expensive option. need to arrange new partitions
- combined option for walls in different condition is a flexible approach and inexpensive repair interior partitions and load-bearing walls in stalinka
- other options wall restoration in a satisfactory condition due to design solutions (stone decor, exposed brick, wallpaper, etc.) - the cheapest option
Determine what the internal ones are made of interior partitions you can talk to your neighbors or contact the housing office, the architectural department or look at the data sheet apartments... The most popular solution is the demolition of non-load bearing interior partitions in stalinka and the device is new. There are several reasons for this:
- bad condition wall plasters in the apartment where repair was done once a year of construction
- disgusting installation interior partitions stalinka in half a brick by builders of the 30-50s
- 99% need for replacement electricians in stalinka due to the low bandwidth of the cable
- content of asbestos and other slags in materials and old construction waste walls and floors
- the need to build in heating pipes, batteries, sewerage as well as design solutions
- bad sound insulation of interior partitions in stalinka and cracks in load-bearing walls
Sound insulation of walls in stalinka bad, neighbour's audibility is excellent. The source of penetration of sounds from neighboring apartments is poor fixation of the upper and lower parts partitions, cracks v walls. Partitions between apartments have thickness 15-20cm a load-bearing walls of stalinka (by the way, the "weighty" advantage Stalinproviding good heat and sound insulation from the outside) can have thickness 0.5-1.0 m and more. Bottom part partitions usually stands on a crossbar (if the floors are reinforced concrete) or a log (in the case of wooden floors), the upper one supports the floor in the gap between the crossbars (but not always). Old age cracks between bricks, cinder blocks or in shingles also allow sound and odors to pass through (in the case of ventilation ducts). Recommended to sew walls soundproofing (or basalt mats / rolls in rolls) for soundproofing partitions (the floor and ceiling will be soundproofed, and the vibration of the ceiling, if there are neighbors from above, cannot be avoided in stalinka with wooden floors).
Dismantling of interior partitions in stalinka will not be difficult, but you need to be EXTREMELY! careful, - first of all, release the upper and lower parts of the partition, remove the stucco molding. Assess the condition before starting demolition. Perhaps the ceiling is in an emergency condition and is interior partition... It needs to be repaired first. As a rule, you need to obtain permission to redevelopment in the architectural department before producing dismantling, and find builders for this with good experience repairs in stalinka.
CONCLUSIONS for repairing walls in stalinka:
- drew attention to the different types of interior partitions in the stalinka and what they are made of
- it is necessary to carefully dismantle the interior partitions in order to avoid the collapse of the ceiling
- the choice of 6 options for repairing walls in stalinka depends on the condition of the walls when buying an apartment and the cost of repairing each of the options is different
- repair of walls, shingle-type ceilings in combination with wooden ceilings is the most expensive. Buying a stalinka with wooden beams and shingles is the most unprofitable investment, because repairs will cost much more than in a new building. The only financial benefit in this case is the location in the city center and the “elitism” of the house.
- Back
- Forward
Residential buildings that were erected in the USSR until the beginning of the 60s of the last century are called "Stalinkas". Distinctive features of "Stalinist" housing:
- high ceilings;
- big windows;
- spacious rooms;
- wooden interfloor floors (in most buildings);
- wood floors.
The topic of our article is floor repair. But first about what types of floors exist.
Actually, there are only three types of floor coverings that can be found in "stalinkas":
- floors covered with artificial materials. Linoleum, laminate and the like can be used;
- parquet, piece, type-setting, panel board;
Block parquet in the interior of the stalinka
The most common type of floor in Stalinist buildings is a plank floor. Below we will talk about this particular species.
Excerpt from SNiP 3.04.01-87 "INSULATING AND FINISHING COATINGS"
In Russia, only coniferous wood is used in the construction of housing. For the device of floors you will need:
-
planed edged board, at least 40 mm thick;
Calculating the number of floorboards
The lag is adjustable. Set
Artificial materials such as, for example, linoleum are not used as waterproofing. If you cover a wooden floor with such insulation, then it will quickly rot.Expanded clay and similar materials, up to well-dried earth, can be used as waterproofing, insulation, and sealant.
Expanded clay for wooden floor
The plinth in the flooring has a decorative function. In addition, it hides the gap between the floor and walls. Skirting boards can be made of wood or plastic. Wooden plinth is capricious, quickly deteriorates, breaks easily. Therefore, it is of little use for installation and use. Plastic skirting board, on the other hand, is durable, easy to handle, strong, quick to install and easy to remove. Does not require painting.
Wooden skirting board
All wood materials that we need for repairs must be well dried and treated with fire-fighting and anti-rotting agents, mold and mildew. If you buy lumber in specialized stores, then in this case they will already be dried and processed. Otherwise, you will have to process the material yourself. When installing floors, and in any other structures, it is impossible to use non-antiseptic, that is, untreated with the above means, lumber. Dry wood at a temperature of at least 10 degrees Celsius. Treatments are available at retail. By the way, it is not difficult to cook them yourself. Recipes can be found either on the Internet or in specialized literature.
Universal wood antiseptic
Wooden floors are usually installed as follows: logs are laid across the room, perpendicular to long blank walls. On them, along a blank wall from the entrance to the window, a board is laid and fastened to the logs.
Diagram of the device of a wooden floor
This is the most common and simplest wood flooring arrangement. There is another type of flooring using an intermediate, the so-called sub-floor. In this case, the lags are laid both along and across the walls, forming cells aligned by the edges. A board or plywood is laid on top. It will serve as a backing for the base flooring. Such a device is mainly used when laying parquet or artificial materials, laminate, linoleum, etc. Artificial insulation is not used in Stalinist apartments. Expanded clay or similar material is poured between the logs and compacted tightly.
Floor repair can be divided into three types:
- small, sealing cracks, cracks, chips. Possible replacement of the skirting board;
- medium, replacement of worn-out floor parts, floorboards, rotted logs;
- major, replacement of a significant part of the floor or complete replacement of the entire flooring.
Whatever repairs we face, it always consists of three main parts: preparation, basic, repair work, cleaning after repair.
DIY floor repair
Preparation is, in our case:
- inspection of floors, identification of defects;
- calculation of the scope of work,
- procurement of materials. preparation of cost estimates;
Basic work - actions to eliminate identified defects, performed in a specific sequence.
Cleaning includes cleaning the floors from the debris remaining after the work performed, washing the floors.
Such a floor requires at least minor repairs.
This type of repair is carried out when the floors are still strong, do not bend, do not creak, do not walk underfoot, but cracks, scratches, chips have already appeared. The wood shrinks and longitudinal gaps appear between the floorboards. This is the fault of any apartment, including the Stalinist type, where the floors have not been renewed for many years.
What do we need to do in this case? First of all, let's take a look at the entire floor. Note where there is visible damage. Then you need to remove the paint in the places where they appeared. Let me give you one piece of advice at this point. Remove all paint from the floor. Under the old paint, you will most likely find more damage to the boards. In addition, gaps between the floorboards are likely to be found. And one more consideration.It is very difficult to paint then the repaired places so that the new layer coincides with the old one.
Removing old paint with a spatula and a construction hairdryer
The paint can be removed with a sharpened trowel or squeegee. You just need to bury nails or screws into the boards. Otherwise, the machine could be damaged.
Removing paint using metal brushes


