In detail: do-it-yourself treshka repair from a real master for the site my.housecope.com.
This is what the corridor looks like after renovation.
We've made built-in wardrobes along the corridor that leads to the kitchen. Wallpaper - Aura Vintage Rose was glued to the walls. The floor in the corridor is paved with porcelain stoneware. Its color matches the wallpaper.
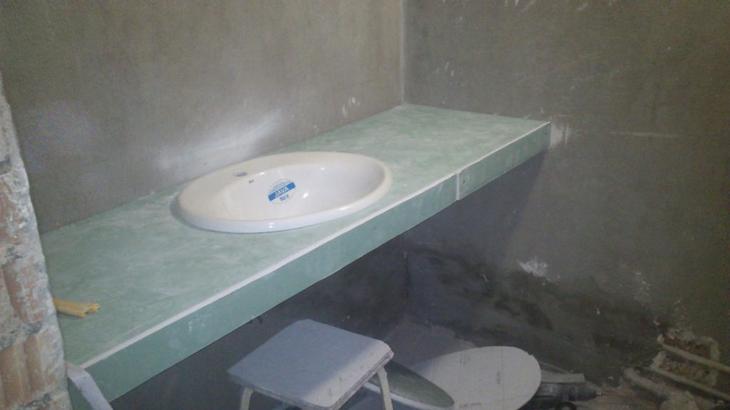
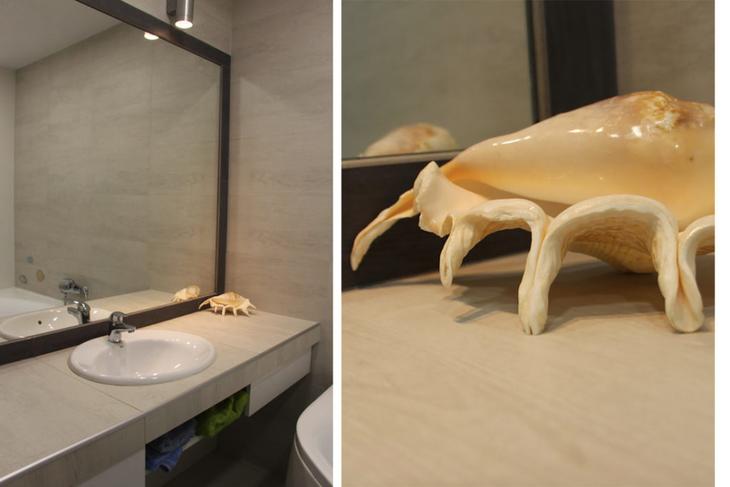
Considering the small size of the bathroom, we installed a shower cubicle. The bedside table against the wall was made by ourselves, thank God the hands are growing correctly. Marble top. The walls in the bathroom and toilet are tiled, made in Italy. On the floor is our Russian porcelain stoneware. Nothing worse than imported. I can compare with what lies in our corridor.
Shower column - Hansgrohe Croma 220.
Toilet and cistern - Jacob Delafton, Bidet shower - Hansgrohe Talis. Directly in front of you is the door behind which all the plumbing wiring is hidden.
This is how she looks when the doors are open. Now we think - it was in vain that we did not clean everything as it should be inside. They hoped for the workers. We'll have to somehow get it ourselves. By the way, there is an opportunity to make at least one shelf.
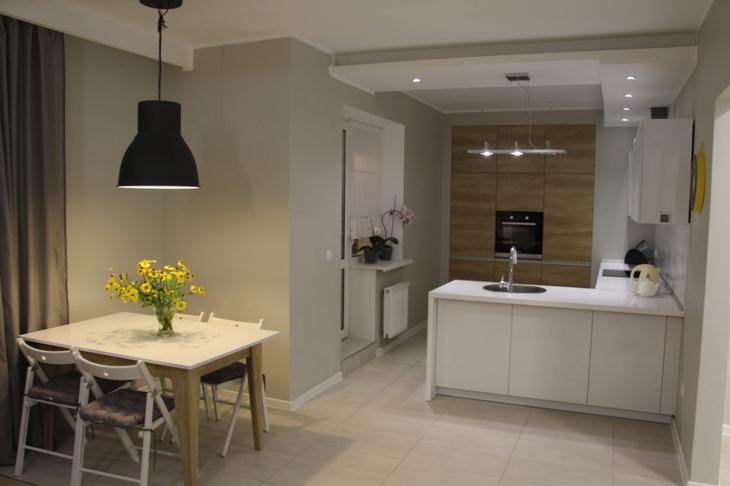
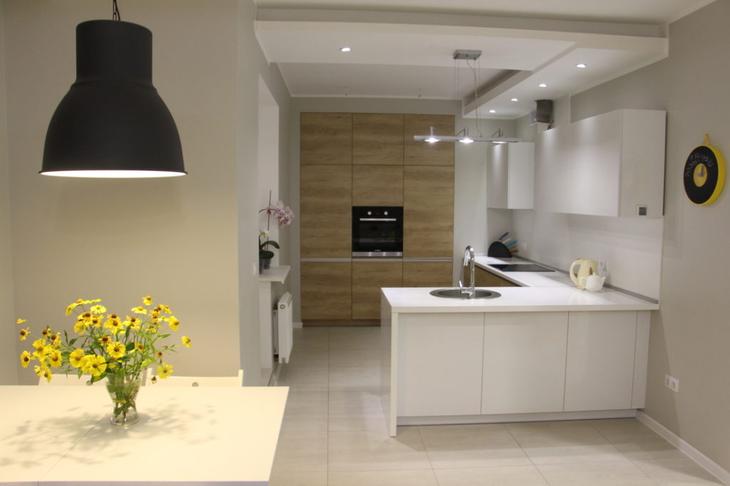
This is how our kitchen began to look. Please note that the walls, floor, ceiling and furniture are in light, warm colors.
The sink itself was purchased from IKEA. In size, everything fits fine. Naturally, the stove and oven were immediately installed. At the last moment we decided to install a dishwasher as well.
As you can see, there are other wallpapers here: GranDeco Hidden Richness. We laid a parquet board on the floor. Imported. The quality is excellent.
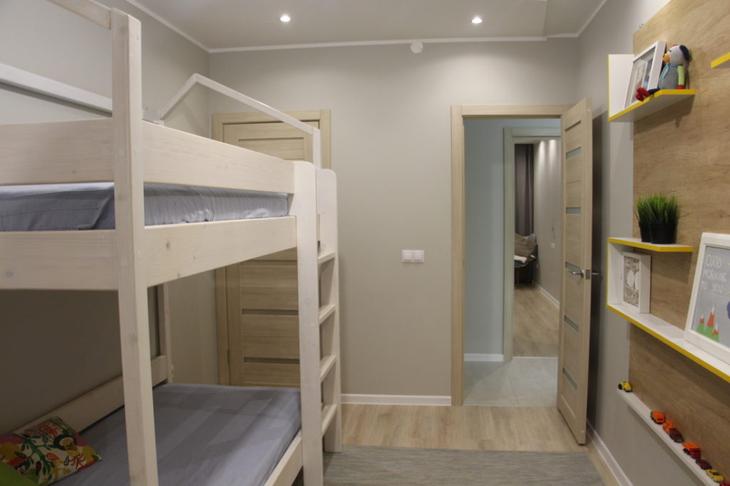
The next room is for children. The wallpaper is slightly different, but it is still warm beige color.
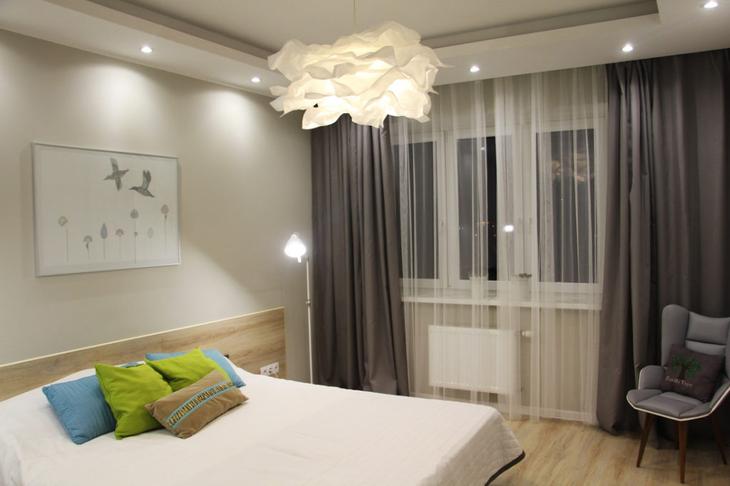
I'm showing our bedroom. The renovation has been completed here, but it still looks uncomfortable. I need furniture. We ordered, we are waiting.
| Video (click to play). |
The next two photos are of the balcony. Note that there is a different tile here. On the advice of friends, tiles with a rough surface were laid. In vain. Very inconvenient to wash.
That's all. Made according to our own design calculations. We like. It remains to acquire furniture.
Andrey spoke about his experience in arranging his own apartment. Further from his words.
My story began with the purchase of a three-room apartment. Before that, we lived in an ordinary kopeck piece, but the birth of a child prompted us to "expand" - we wanted to provide him with a separate full-fledged children's room.
After buying an apartment, there was not much money for repairs. But things were going well at work, so I was thinking of moving into the already equipped housing in a year. Soon, problems began at the firm, and salary delays became the norm. But he did not want to give up his promise to visit a new house.
So I decided to save some money that might have gone to pay the workers and did it myself. So, armed with the knowledge gained from the previous renovation and videos on YouTube, I began to equip the apartment.
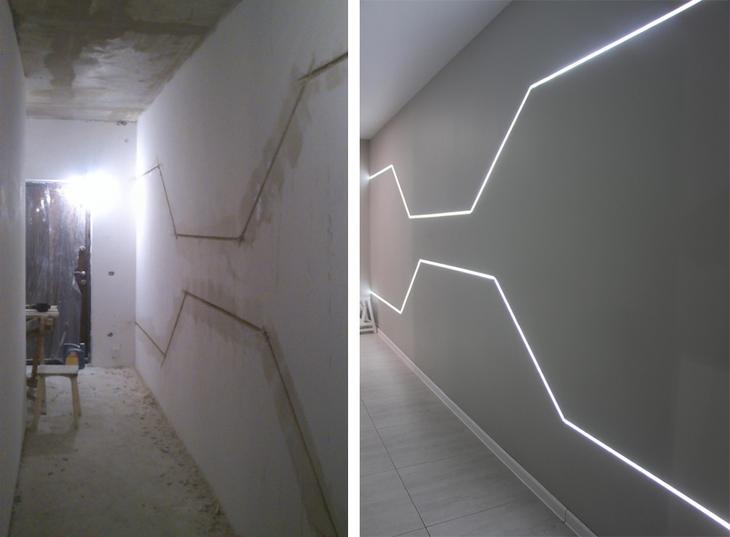
I started with an electrician. This case turned out to be a fairly simple stage. But the plumbing was a little more difficult, so I had to resort to consulting a familiar master.
The most time-consuming process was the design of the ceiling - I decided to make it with built-in lighting. To avoid the appearance of cracks on the ceiling, fiberglass was glued. Working with him brought a lot of unpleasant moments - the material was very brittle and after it my hands were itching terribly.
I still had to entrust the tiling work to a specialist, did not dare to cut porcelain stoneware without special tools. The sum for the tiles and the work of the master turned out to be considerable, but the laying area was also impressive.
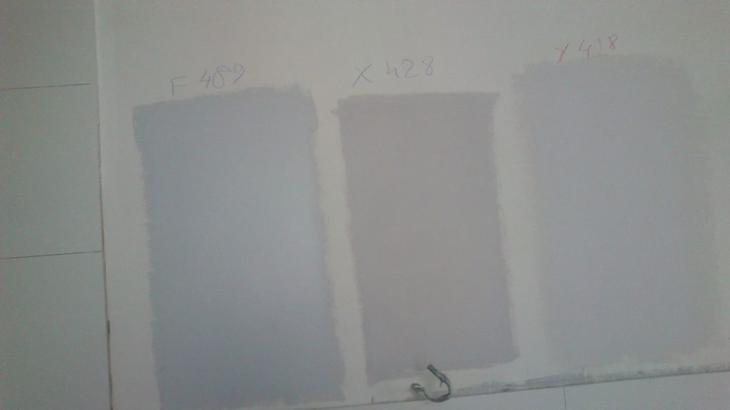
Then the walls were putty and ready for painting. After that there was a long choice of a suitable color. And having already lost hope, my wife and I still found a light gray-beige-blue satin that they both liked with a completely unpoetic name "x 486".
The painting brought many surprises, and unpleasant ones.Expensive Finnish paint behaved very capriciously, so it was not possible to avoid divorces. True, the domestic paint with which I covered the ceiling behaved even worse.
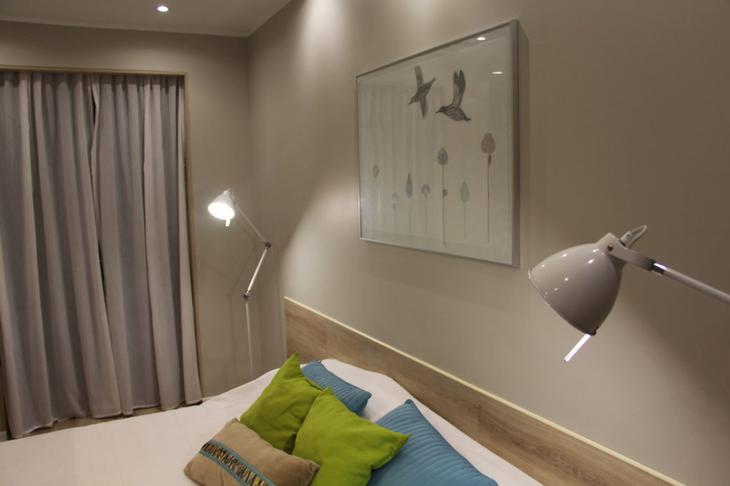
A domestic laminate was laid on the floor, which cost several times cheaper in comparison with foreign counterparts. I liked the color and texture very much, and the styling went like clockwork. I decided to lay out the headboard with the rest of the boards.
Initially, it was planned to install compartment doors in the dressing room, but they were simply draped with curtains as a temporary entrance. Moreover, this decision seemed to us so successful that we decided not to change it.

A housewarming took place in the period appointed by me. Then the apartment did not yet have sofas, doors, dressing rooms, but still there was a minimum for living.
In the next six months, we acquired all the attributes of a comfortable life. I bought furniture, made dressing rooms myself, which allowed me to save a lot.
My separate pride is children. I made the bed and the highchair myself.
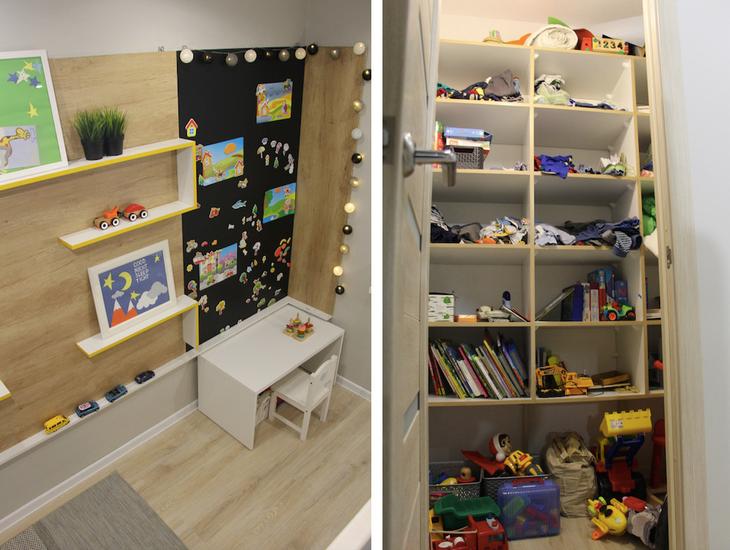
Recently I added a magnetic slate board of my own production to the room.
I bought the rest of the furniture in the nursery in Ikea.
This renovation was a great experiment for my family, but we were very pleased with the results.
There are a lot of photos, so I will add as much as possible.
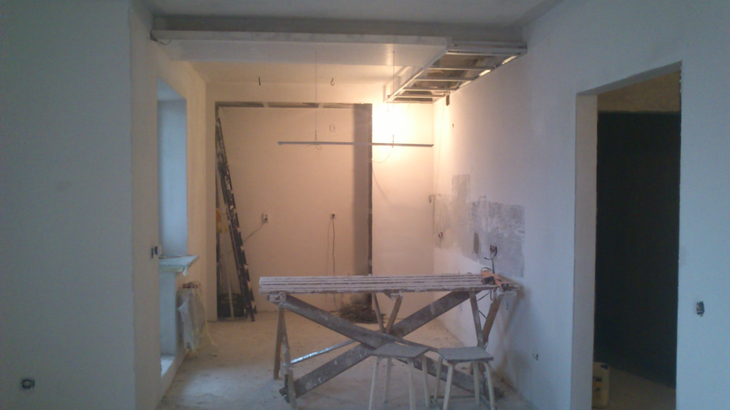
So, three rubles on Veterans Ave., we started on February 20, at the same time finished the previous object. Everything looked as usual: a concrete box
Before plastering work, we remove all crumbling plaster from the developer
Since the apartment is very cold, the plaster dried for a very long time, about 1 month, even despite the periodic operation of a 30 kW gas cannon and two 27 liters of gas that were completely used up.
While the plaster dries, we collect the frames for the gypsum plasterboard
To reduce heat loss, we insulate the loggia. Cold glazing was replaced with double-glazed windows, and extruded polystyrene foam was glued to the floor, walls and ceiling. On the floor and outside wall 5cm, the rest 3cm
We do waterproofing in the bathrooms
The fact is that the standard odor trap in ladders of this type dries out quickly, and odors begin to flow from the drain pipe through the ladder. The ladder must be filled with a self-leveling solution so that there are no voids and air under it, otherwise it will not be able to withstand the load of a person who has stepped on it, and they will often step on it, because it is located in the center of the shower
Then we align the ladder to the level
We mark the position of the water sockets and the fan pipe using a laser level
Another node on the kitchen riser. Since the space here is very limited by the future box, everything is done more compactly.
Much attention has been paid to waterproofing the apartment. Waterproofing of floors was done throughout the apartment, as many as three neptune systems and 7 leakage sensors were installed, and at the very beginning of work we went up to the neighbors from above and filled the space between the risers and riser sleeves with sealant, so when the neighbor on top had a flood, we were relatively dry , since the water did not flow, but oozed through the concrete
We begin work in the shower room with the formation of a slope from the walls to the center, for this we put beacons around the perimeter and around the ladder
Simultaneously with them, work with drywall and painting went on, so we go back a few weeks ago
Dear readers, for a long time we have not had such extensive posts-tutorials on apartment renovation. I am pleased to offer one of the manuals for reading.
This summer we did a phased decoration of a two-room apartment. First, all the furniture and things were dragged into one room, locked and sealed. After the renovation of the adjacent room and kitchen, everything was moved to the finished premises and the remaining room, corridor, bathroom and toilet were completed. In general, it is not the most convenient repair option. Task: to make good-quality inexpensive repairs from budget materials. Terms: June 10-July 24 - the first stage, August 4-September 10 - the second stage.Estimate: 295800r (only work + stretch ceilings) All work, except for the installation of interior doors and the installation of two of the three windows, was done on our own. There are a lot of photos, so I will post as much as I can and free time appears. So, this is how the “object” appeared before us


the parquet fell off by itself, dismantling consisted of collecting it from the floor and folding it into bags.


This pipe leads to the coil in the bathroom.


Here is such a horror object, we dismantle everything that is possible


First of all, the windows are installed, this window was installed by another company with which the customer agreed earlier

a cold cupboard can be seen under the window, and a radiator hangs behind a door leaning against the wall. The logical solution was to insulate the cabinet and install a new radiator in its place.

on the Perlfix assembly glue we glue the extruded polystyrene foam, then the gypsum board on the same glue

Getting started plastering

first of all, we put our branded beacons


in some places we use the combined technology of leveling the walls, from above the gypsum board is glued to Perlfix, and from below the layer is plastered to a lesser extent

Waste plasterboard can be embedded in a thick layer of plaster

we change the hot water and cold water pipes, the piping to the coil, fill the grooves with plaster

When plastering corners, do not forget about 90 degrees, and of course, verticality


we form the entrance opening using a plank box

We install the window sill and slopes


We bought a special grinder for sanding the walls, it connects to a vacuum cleaner, a great thing


before leveling the floors, we fill in all large defects of the DSP floor


We level large differences without beacons with a semi-dry screed


In the corridor we break part of the old screed with a large crusher

vacuuming, priming, making a rough leveling, vacuuming priming.

we divide the corridor into parts using scrap materials.


slippers for “walking on water” are made of OSB, self-tapping screws and a glamorous strap with rhinestones


And this happened due to the fact that a thick layer of soft seal was laid between the gypsum wall and the ceiling


the cracks were repaired with pearlfix, putty and the ceiling was put on. That is why it is better to stretch ceilings before wallpapering. Another reason why you should stretch the ceilings before finishing the walls is a possible hit during the installation of the baguette into the electrical wiring (for example, as in this video) And finally, even with the most careful installation of the ceiling, there is a risk of damage to the wallpaper, therefore, we glue the wallpaper only after the stretch ceiling, and we lay the floor coverings after them too.
This miracle of technology is called construction stilts, with their help, all work at a height, including stretch ceilings, is done many times faster. In Russia, these are practically not sold, and if they are sold, they are expensive. We bought it via e-bay. We want to buy something else later, but more on that later.


a mandatory attribute for finishing, this is a vacuum cleaner. As they say, cleanliness is a guarantee of quality


At this stage, stage 1 ends, we open the sealed room, we give the customer time to transfer things. Since the customer has little time and can only do this on weekends, we leave for another facility for 10 days. The object is a kitchen in the old fund, where we made cosmetic repairs, later I will also post a photo report.
So, we are back, the middle room is empty, again dismantling (((
The best way to change the premises beyond recognition is to redevelop. Overhaul of a 3-room apartment in Khrushchev must be carried out in accordance with building codes and with the permission of the BTI.
Khrushchev is a house with the most common layout. Such buildings were built back in the 60s. All of them are distinguished by small kitchens with forced ventilation and an adjoining bathroom. A large number of built-in closets and mezzanines were installed in the apartments. These objects greatly reduced the already not high ceilings (2.5 meters). The experience was complemented by cramped corridors and poor soundproofing.On the landing, there were usually 4 apartments, and starting from the second floor there was also a balcony.


In the video: example of a finished apartment after renovation
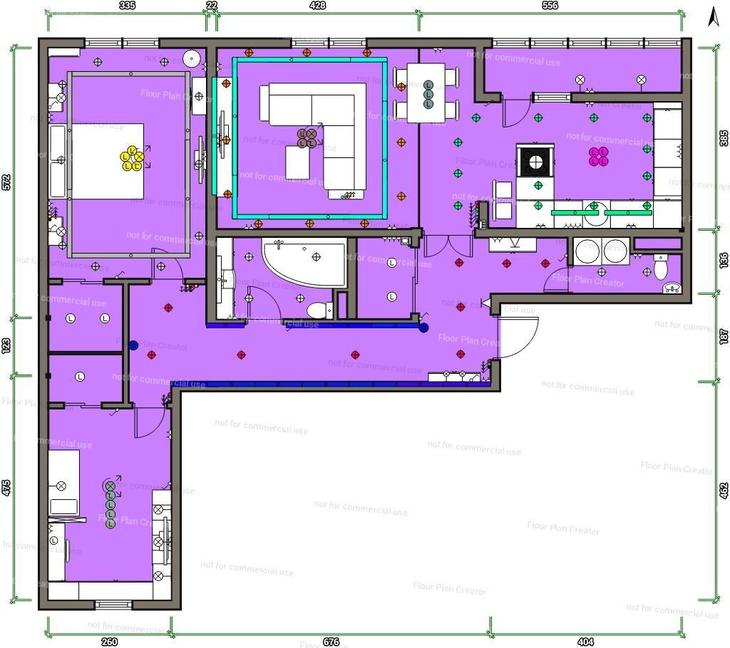
The treshki were distinguished by a large spread in area: from 45 to 59 sq.m. The most common layout: two small rooms in the form of a book. It seems as if one room was divided in half. A more acceptable option: 2 large adjoining rooms and a small third. There is also a third option - scattering rooms on different sides of the house. This layout is also called L-shaped. Some apartments have isolated rooms.


Despite the described features, the repair of the Khrushchev does not create many problems. In apartments with a standard layout, you need to level the walls, floor and ceiling. But small rooms can be enlarged by the kitchen. How exactly to do this, read on. The opening that leads into the corridor should be attached to the room. You can increase the amount of space in the kitchen by taking the refrigerator out into the corridor. The balcony in such apartments is usually insulated. That is, there are a lot of design solutions for improving the premises. You just need to choose the right one.


There are several types of Khrushchev layouts, differing in size and location of premises. Usually a 3-room Khrushchev house contains one room adjacent to the kitchen. When redeveloping an apartment, this wall is demolished, creating a kitchen-living room. Old entrance close up. In a single space, the work area can be visually separated from the kitchen. For example, install a bar counter, make flooring of different levels, paint walls in different colors.


The wall can also be "moved". Then the kitchen will expand, but the area of the room will decrease. You can also make an entrance to the kitchen from it. This option is not suitable for a family with a large number of people.
Due to the corridor of the apartment, you can expand the bathroom. BTI will not allow him to take him to the living quarters. The work is more complicated if the bathroom is connected to the bathroom. When repairs are made, the latter is dismantled, a shower cabin is installed instead, and the free space is filled, for example, with a washing machine. When redeveloping the bathroom, the other two rooms of the apartment are left unchanged. To create the illusion of a high ceiling, you can widen the doorways.


A Soviet-era Khrushchev building consists of consecutive rooms. In such an apartment, you can demolish the wall between 2 and 3 rooms, as well as between the kitchen and the third room. After such a redevelopment, a large space is obtained. Renovation of the premises will allow it to be divided into hotel zones: living-dining room and, for example, a nursery or an office.
If you remove the partition between the living quarters, you get a large studio. In it, the zones will differ in flooring. You can also make repairs to the ceiling and paint the walls in different colors. This will not only visually expand the space, but also divide the functional areas.
Khrushchev can be increased by a fourth room. From it you can make, for example, a dressing room. If there is little light in the room, there is no point in creating another living space. And things can be stored in dark rooms.
There are usually many doors in a 3-room apartment. If instead of them, beautiful arches are built, the space will become even wider. If you have permission from the BTI, you can increase the area of the apartment by combining a balcony with one of the rooms. This will break the facade. But the most important thing is that the structure withstands the glazing of the profile.


It is worth paying special attention to the flooring. It is usually made from wooden planks. However, the service life of such material does not exceed 20-30 years. During the renovation of the apartment, you need to remove all the old boards and make the floor screed. In the rooms where the tiles will be laid out, it is not necessary to level the coating. But in places for laminate or linoleum, you will have to try.


Renovation of a 3-room apartment is an opportunity to radically change the appearance of the premises. From any of the described redevelopment options, you can make a beautiful, comfortable and original space.
You may also be interested in: