Everything in the bathroom is constantly exposed to moisture, so building materials are threatened, if not by direct contact with water, then at least in the form of fumes. It is for this reason that the choice of finishing materials should be treated very carefully and understand that not all of them can be used in this room - you cannot just use what you like. In this article, together with my.housecope.com/wp-content/uploads/ext/1616, we will examine one of the possible materials for use in the bathroom and deal with the issue of using decorative plasters. We will study the advantages and disadvantages of their use in this room, the conditions under which decorative plaster can be used in the bathroom, and also we will analyze the issue of applying them on their own.
The properties of most modern decorative plasters not only allow them to be in contact with moisture contained in the air, but also to withstand direct exposure to water. Their acrylic base and special additives determine the main advantage of this type of finish - resistance to water. They do not fade and do not lose their original properties at all, regardless of humidity drops and large fluctuations in temperature. In addition, decorative plaster for bathrooms provides other benefits as well.
In addition, finishing a bathroom with decorative plaster is an original solution, a beautiful appearance and a rich interior. True, in order to get this interior, it is necessary to withstand some conditions, which will be discussed further.
If you think that such a coating can be applied to any walls, you are deeply mistaken. The surface for applying decorative plaster in the bathroom must be carefully prepared. And this must be done with the help of a certain material, on which its ability to withstand moisture fully depends. This is nothing more than a sanitizing plaster, with the help of which the walls are leveled. What it is? In principle, this is a type of cement-sand mortar, in which ingredients are added that give the surface the following properties.
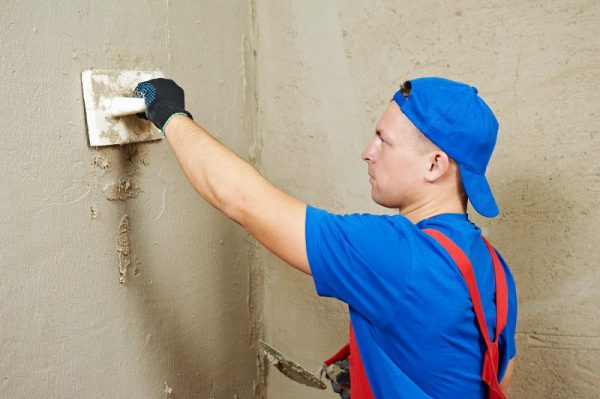
Despite all the seeming difficulties of such a solution, this type of plaster is quite easily applied to the walls. In principle, this can even be done independently without resorting to the help of appropriate specialists. By the way, this plaster is not suitable for a decorative layer - please note that we are talking about a rough mixture, the task of which is to level the surface and give it the properties described above.
The moment the walls are prepared for the application of decorative plaster is important not only because it allows the decorative surface to resist moisture, but also because it allows the use of almost any type of decorative plaster. There are no restrictions in this regard, but, nevertheless, one should understand the difference between existing types of such surfaces.
Now with regard to the direct choice of a mixture for decorative plaster. What should you pay attention to when choosing this material for finishing your bathroom?
How to properly apply decorative plaster in the bathroom, see the video clip.
VIDEO
There are not so many features of applying decorative plaster in the bathroom. In principle, there are enough of them, but as far as the bathroom is concerned, the process itself is not much different from its implementation in any other premises. In particular, the following points can be highlighted.
Primer. It is necessary to prime the bathroom surfaces especially carefully and more than once - in this room the primer is not only a means of bonding and strengthening the surface, but also a kind of waterproofing. The first layer of soil is applied abundantly (it must dry completely), and the second is intended to completely eliminate dust (it is applied directly in front of the plaster itself). The type of primer is also important - in most cases it is a primer with the addition of quartz sand, whose tasks include a multiple increase in the adhesion of the decorated surfaces.
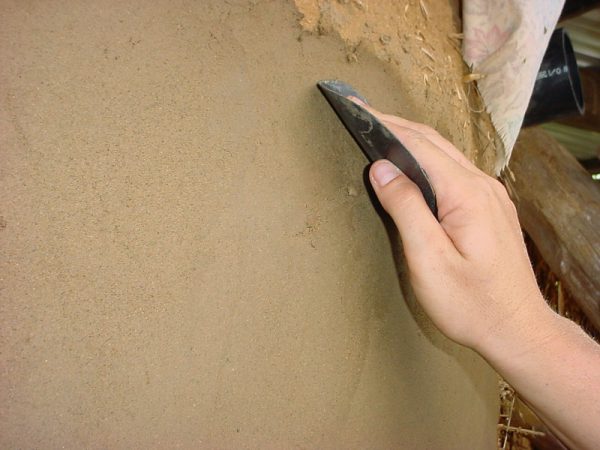
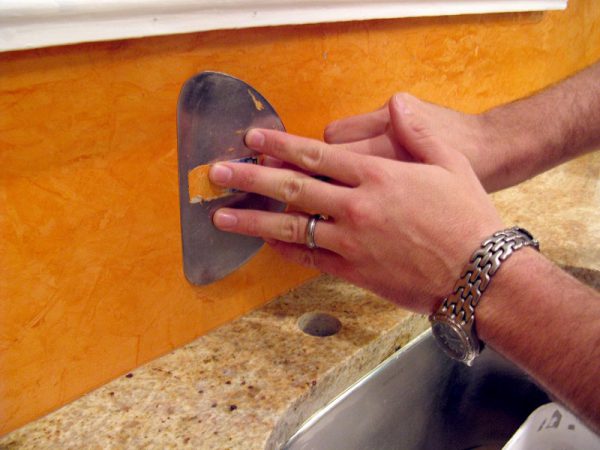
The application technique itself also has some differences - the composition applied to the wall must be carefully compacted by grouting. This is done at the stage of drying the solution with the help of a stainless steel falcon - this process is popularly called ironing.
Decorating a bathroom with decorative plaster photo
As you can see, the statement that decorative plaster in the bathroom is unacceptable is quite misleading. In some ways, it is great for these types of environments. If everything is done correctly, in full compliance with the technological process of application, then its service life can be compared even with the service life of the tile.
Only materials with good moisture resistance are suitable for finishing rooms with high levels of humidity. Certain types of plaster will fit perfectly into the bathroom, as they tolerate high humidity, temperature changes and exposure to household chemicals. Such compositions can be used as a base coat for further finishing, as well as a decorative topcoat.
For bathroom furnishings, special requirements are imposed on the materials. Not the most favorable operating conditions have been created in the room. High humidity, frequent temperature changes negatively affect the finish and contribute to the appearance of dampness, mildew and mold. Plaster is not a suitable material for bathrooms.
The plaster mixture must be moisture resistant and antiseptic. Such compositions can be used as a decorative layer, as well as for the purpose of leveling the surface of the walls and protecting against moisture penetration.
There are several types of plaster for the bathroom. The performance characteristics of a particular mixture primarily depend on its composition.
However, all bath plasters have a number of common advantages.
Good vapor permeability.
The coating does not allow moisture to pass through and does not absorb it.
Resistance to the spread of microorganisms. Such a coating will not develop fungus or mold, even in conditions of constant humidity and poor ventilation.
Like any plaster mixtures, bathroom compounds mask well defects on the surface of walls and ceilings, and also level the base.
On the construction market, you can find many decorative moisture-resistant compounds that will perform not only a protective function, but also play the role of a beautiful finish.
The plaster is suitable for application to almost any material.
The starting layer of moisture-resistant plaster can be painted, tiled, covered with decorative mixtures or any other finishing materials.
Low consumption per square meter. An exception may be decorative compositions. Certain application techniques require more topcoat consumption.
Good adhesion.
Ease of application.
High drying speed.
Resistant to cracking.
Disadvantages of bathroom plasters mainly depend on the specific type of material used.
Let's consider the main disadvantages of most mixtures.
Decorative plaster is a rather expensive material.In addition, certain application techniques require a high mix rate.
Gypsum mixes do not tolerate direct contact with water and too high humidity levels in the room.
Most decorative compounds require certain skills and craftsmanship to apply them. It is not so easy to do the finishing work with your own hands. If the material is handled incorrectly, it will not be possible to create a reliable and beautiful coating.
Decorative mixtures are difficult not only to apply to walls, but also to dismantle.
Cement-based plasters can crack if applied incorrectly or too thick.
On the construction market, you can find a large variety of plaster mixes for wet rooms. For bathrooms, both base and finishing compounds are available. The type of plaster will determine its technical characteristics and decorative properties. Most of the formulations are made on a cement or gypsum base. According to their composition, decorative plasters for the bathroom can be divided into several types.
Mineral. Such mixtures are made on the basis of various minerals (most often marble or granite chips) with the addition of high-quality Portland cement and lime. This type of plaster is often used for finishing the facades of buildings, which indicates the good resistance of the material to external negative factors.Acrylic based. This plaster contains acrylic resins, which play the role of the main binder. This coating is highly durable and crack-resistant. When applied correctly, the material can last more than 25 years without loss of appearance and performance.For an uninformed person, the option using decorative plaster in the bathroom looks quite problematic. Firstly, very often decorative plastering of a room is confused with liquid wallpaper, and secondly, it is widely believed that decorative plaster in a bathroom will cost a lot of money, and is usually used in rooms with an ideal microclimate.
In reality, liquid wallpaper and decorative plaster differ in characteristics, although they have much in common. In addition, such decor is successfully used for finishing facades and external walls of a building for relatively little money.
Decorating a bathroom with decorative plaster has long ceased to be something unusual. It is used as often as tiles or plastic. Another thing is what kind of plaster decor to use in the design of this room. Among the existing varieties of design projects that are affordable and affordable, amateurs most often opt for the following options:
Decorative plaster with imitation of polished natural stone;
Finish with an ordered material structure;
Venetian plaster options;
Plaster with individual painting and relief drawings.
Usually it is not recommended to use facade plastering options, certain types of structural, such as "bark beetle", "pebble", with fillers based on granite, basalt, gabbro. These types of decorative cladding work great on outside walls of a home, but are not very useful for bathroom walls. Some of the façade plastering materials that are excellent at withstanding low temperature and rain will lose their qualities in the warm and humid atmosphere of the bathroom.
The main disadvantage of this decor is the ability to absorb and retain a significant amount of condensation.
Any of the types of plaster decor listed above perfectly allows water vapor to pass through and thereby regulates the humidity in the room.But the conditions in the bathroom are fundamentally different from the microclimate in other rooms, so the most "breathable" plaster is not able to deal with extremely high levels of humidity. Therefore, the best option would be to use waterproofing varnishes and mastics. In this sense, finishing with an imitation of natural polished stone can be considered the most suitable option.
Certain types of Venetian plaster, imitation of finishing stone species are the best suited for use in the bathroom. Such decorative plaster in the bathroom with your own hands can be laid within a few days, while most of the work will be devoted to preparation and final finishing.
The polished surface of imitation of marble or calcite is perfect for the bathroom interior. In some cases, a combination of marble walls and semi-antique furnishings can result in a very beautiful and organic bathroom design, as in the photo.
If you try to recreate such a decorative wall decoration using tiles, plastic, washable wallpaper, it will be much more difficult and costly to achieve such an effect, it is quite likely that it is impossible.
Decorative decoration in marble will require a very high-quality leveling of the walls, since all flaws will be clearly visible on the polished surface: bumps, humps, irregularities, curved corners. Therefore, with the help of a finishing putty and a building level, the surface is brought to the desired quality. In addition, before applying the decor, the walls are twice treated with a deep penetration primer. After 4-5 hours, you can start applying the base coat.
The most crucial stage will not be the formation of a marbled structure with a spatula and plaster, but the correct selection of varnish with toner and wax mastic, which will subsequently be used to polish the finish. The fine-tuning process of reconstituted marble is relatively straightforward, but requires experience and practical skills.
Such decorative plaster can be cleaned from dirt with a soft sponge and brush. The lacquer coating is significantly inferior in hardness to tiles, therefore, when carrying out any work on the repair of a bathroom, the surface of the walls must be covered with a thick plastic wrap or cloth.
Imitation of natural stone is not the only option suitable for decorating a bathroom. Very interesting design options can be used on the basis of Venetian plaster with elements of artistic drawing. Most often, such a painting is performed in its own style, corresponding to the general design of the room. Such decoration of the bathroom with decorative plaster allows you to implement your design project, taking into account the individual characteristics of the room.
When choosing a color scheme, it is not necessary to focus only on imitation stone or artistic design projects. There are many varieties of decorative stucco cladding with a pronounced structure that can be successfully used in the bathroom. These can be options with fillers from rolled sand, ground marble, metal powders, microfibers of natural or synthetic materials. In addition to the standard method of applying such plaster, you will need to add one more operation - applying a decorative protective coating.
When it comes to using decorative plaster for the bathroom, the most difficult thing is not the choice of material and the method of its application, but the harmonious combination of the texture of the walls and the general design of the room. This kind of finish is applied to the walls based on the use of such decor for a long time, this must be taken into account when planning changes to the interior, for example, when changing plumbing or adding new decor items.
VIDEO
Decorating a bathroom is rarely complete without plastering the walls, because this is the most practical way to prepare a base for painting or tiles. In addition, bathroom plaster can be decorative as an alternative to traditional materials. And in fact, and in another case, the composition for plaster must be chosen taking into account the specifics of the room.
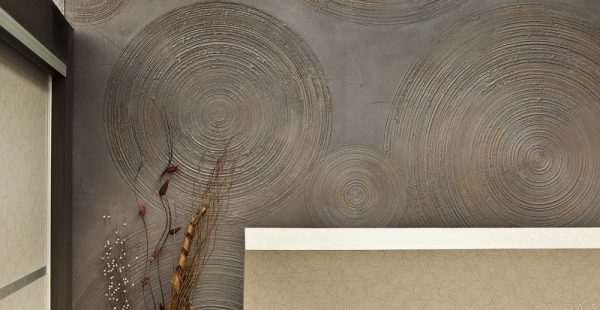
Textured plaster in the decoration of the walls for the bathroom
All materials used in the bathroom must be highly resistant to moisture. For plaster mortars, this is especially true, since they are the basis for finishing. If the plaster is saturated with moisture and swells, the tiles will begin to fall off and the paint will peel off and crack. To eliminate such defects, new repairs will be required, and this is an additional cost, and very significant. The same applies to decorative plaster: low water resistance will lead to swelling and peeling of the finishing layer.
Decorative plaster in the bathroom
The second condition is resistance to microorganisms. Moisture and heat contribute to the appearance of fungi that penetrate into the smallest cracks and crevices. Fungi not only spoil the aesthetic appearance, they are also very harmful to humans. That is why the plaster composition must have strength, resistance to shrinkage and cracking, as well as antiseptic properties. Ready mixes for bathroom plaster fully comply with these requirements.
Decorative plaster must additionally have good density and abrasion resistance. Dirty plaque, dust, and soap suds easily penetrate porous surfaces, and in order to clean everything, you have to often wash and wipe the walls. Incorrectly selected plaster in such conditions will quickly lose its attractiveness, begin to wash out and crumble.
Plaster mixes are made on a gypsum and cement basis. In addition to the binder and filler, various additives are additionally introduced into the composition, designed to improve the quality characteristics. But still, the main properties of the plaster depend on the type of binder.
Gypsum solutions are rarely used in bathroom decoration, since gypsum is hygroscopic. Thanks to modifying additives, these properties can be significantly reduced, but nevertheless, they must be used with caution in the bathroom. For example, they are quite suitable for a spacious room with good ventilation, but if the bathroom is small, and when bathing, a lot of steam is formed, which settles on the walls, gypsum plaster cannot be used.
Gypsum plaster mix
Cement plasters are resistant to temperature and humidity changes, do not deteriorate in contact with water, and therefore are the best option for wet rooms. In addition to cement and sand, hydrophobic additives and plasticizers are added to the solutions, which facilitate the process of applying plaster. When making a mortar on your own, it should be borne in mind that its quality depends on three factors - the brand of cement, the granularity of the sand and the correct ratio of components. It is easy for a beginner to make a mistake here, and therefore it is better to choose ready-made factory mixes with optimal proportions.
Decorative plasters are divided into the following types:
mineral - cement, lime or gypsum acts as a binder, finely ground granite or marble serves as a filler;
acrylic - the basis is polymeric acrylic resin, the filler is glass chips, marble flour and other minerals;
silicone - made on the basis of silicone resins, the filler is the same as that of acrylic compounds;
silicate - the basis is potassium and sodium water glass, and the filler is finely ground mineral components.
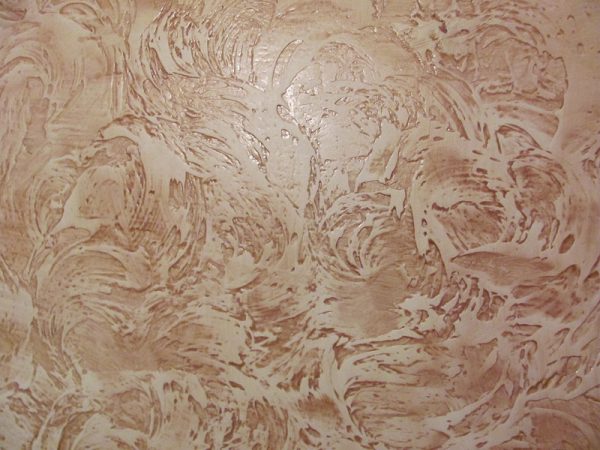
The texture of decorative plaster
Relief of decorative plaster
With the exception of lime and plaster compounds, they are all great for bathrooms. Such plasters are easy to apply, have good adhesion to any surfaces, do not deform or deteriorate when moistened, and can be cleaned.
Comparative characteristics of waterproof plasters
There is an opinion that the choice of finishing materials for the bathroom is limited to plastic panels, painting and tiles. New developments annually bring new moisture resistant coatings to the market, which have become an excellent alternative to traditional tiles. Sanitizing decorative plaster in the bathroom is one of the finishing methods that "breathes" and normalizes the microclimate of humid rooms. Some varieties require additional protection against moisture destruction, but this does not exclude plaster from the list of recommended cladding for bathrooms or toilets.
Bathroom interior with decorative plaster and decorative bricks
Decorating the walls of the bathroom with green decorative plaster
Combination of mosaic tiles in the bathroom
Toilets and bathrooms, even with good insulation, create specific conditions due to excess moisture. If there is no waterproofing or it is not done in good faith, steam and salt deposits will eat into the finishing materials and gradually destroy them.
The main condition is that decorative plaster in the bathroom must effectively resist dampness. Otherwise, mold can easily start in such an environment, microorganisms develop, and a fungus progresses. Modern plaster mixes for cladding rooms with high humidity contain fungicides - antifungal mixes that block the development of harmful microflora. This is important for allergy sufferers and people sensitive to mycotoxins and fungal spores.
Decorative plaster for concrete in the interior of the bathroom
Wall decoration in the bathroom can be done with decorative plaster
There is one more undeniable benefit for air quality sensitive people. Textured plaster imperceptibly absorbs excess moisture and gradually releases it when the indicators stabilize. For asthmatics and heart patients who find it difficult to be in a humid environment, this may seem like a preferable solution.
Condensation does not form on a cold plastered wall, as on plastic panels and tile materials. Decorating the bathroom with decorative plaster will provide an aesthetic surface with flawless use.
It is possible that decorative plaster will become dirty over time or lose its original appearance during cleaning. This is normal for any textured surface. It can be coated with paint from a spray gun, extending the operating time. So it will be possible to postpone major repairs and update the color scheme of the bathroom or toilet.
When the plastered wall is adjacent to a bathtub or jacuzzi, there may be doubts about the practicality of cladding without a protective coating. All doubters can be advised one solution - cover the part of the wall adjacent to the container with rows of porcelain stoneware, tiles or artificial marble, the rest - plaster.
In cases where the bathroom is equipped with a shower box, an oval "font" in the center of the room or a mini-pool with a podium, finishing the bathroom with decorative plaster will be an ideal option.
Decorative plaster is perfect for the bathroom
Wall decor made of decorative plaster
The walls in the bathroom are finished with decorative plaster
A surface with a beautiful texture will become the basis for an exclusive bathroom design in a city apartment and a private house. If desired, any color can be added to the dry or prepared mixture to obtain the preferred shade.
If in the future it is planned to repaint the textured surface, it is better to choose a light initial tone, then change it to a more saturated shade. For example, the light lilac color of the walls can be easily repainted in the future into pink (fuchsia), blue, purple, red or burgundy. The milky background can be easily converted to beige, golden, brown or apple green.
Remember that part of the texture may not be completely painted over, so the base will not fall out of the general palette. If you use a roller, not a spray gun, on the plaster "bark beetle", you will get a two-color wall of volumetric texture.
Decorative plaster comes in any color
Flexible stone is perfect for decorating bathroom walls
In order to further protect the plaster based on an aqueous emulsion, it is recommended that the dried surface be treated with a wax composition or opened with a special moisture-resistant varnish upon completion of work. If you use non-water-based plaster, it is less susceptible to moisture destruction.
The composition of most dry mixes for decorative plaster in the bathroom refers to environmentally friendly materials. They contain a minimum amount of chemical additives and stabilizers, which after work will be present in a bound form.
An important advantage - decorative plaster for the bathroom goes well with other surfaces. It is in perfect harmony with any tile cladding, decorative moisture-resistant panels and paintable glass wallpaper. In addition, surfaces with different textures can be coated with the same paint - within the framework of a single design concept.
It can also be noted that, with careful use, decorative plaster in a room with high humidity is not susceptible to dirt. It is also easy to clean, just brush with soapy water and blot with a damp sponge. However, abrasive cleaning compounds are not recommended.
Rust effect decorative plaster
Wall decoration in the bathroom is made with decorative plaster
Those who decide to abandon the traditional tiled surface with its condensation and drips should remember the advantages of decorative plaster in the bathroom:
Sufficient vapor permeability - excess moisture is absorbed and evaporated from the surface of the walls, preventing small puddles from accumulating on the floor.
Additional protection against pathogenic and fungal microflora developing in a humid environment.
Minimal accumulation of condensation on mirrors, metal and polymer surfaces.
Long-lasting flawless finish will last a dozen years or more, later it is easy to repaint.
Magnificent texture - a unique design of the room for hygiene procedures, relaxation and secluded relaxation.
There is an opportunity not only to choose textures that are traditional for decorative plaster, but also to "sculpt" something exclusive that cannot be repeated.
The coating is so strong that it is difficult to remove it from the wall.
The base is not subject to destruction under the influence of ultraviolet radiation, does not support combustion and has excellent contact with heating systems.
The plastered surface is warm enough to the touch, it maintains the set temperature for a long time even after the heating is turned off.
Very unusual bathroom design
Bathroom design is made in chocolate color
Finishing mixtures are applied to prepared and well prepared surfaces. If the wall does not have serious flaws, decorative plaster will hide minor defects without preliminary preparation, which will significantly reduce the cost of repairs. This is another indisputable advantage, however, for better adhesion, you still should not refuse to work with primers on a concrete or other fairly flat wall.
There are few disadvantages, but they are worth pointing out.If you need to contact professionals, this work will not be cheap. If you don't like something, the decorative plaster layer in the bathroom is difficult to restructure or remove. And to work out the walls with your own hands, you need to gain some experience, since the base quickly sets, after which it is difficult to change something. It is recommended to practice on the balcony or loggia, in the toilet or pantry.
Using decorative plaster for wall decoration will be an excellent solution.
Video (click to play).
The plaster can be applied in several layers of different colors.

