
In detail: do-it-yourself repair of vanos m62 from a real master for the site my.housecope.com.
Honorary Citizen
User
Posts: 323
Registration: 3.10.2006
From: Irkutsk
Master 
Messages: 4173
Registration: 7.12.2004
From: Moscow, Maryino
Permanent resident
User
Posts: 134
Registration: 4.9.2008
From: Moscow
there was an analogous divorce - they also ordered the vanos to change along with the camshafts - they were sent
Honorary Citizen
User
Posts: 323
Registration: 3.10.2006
From: Irkutsk
The shafts, judging by the cams, are in order (I did not remove the cover, but I think there are no miracles there)
Pride of the Club
User
Posts: 2564
Registration: 2.4.2008
From: Moscow
it is the phase shifter that hurts.
Honorary Citizen
User
Posts: 323
Registration: 3.10.2006
From: Irkutsk
Pride of the Club
User
Posts: 2564
Registration: 2.4.2008
From: Moscow
Honorary Citizen
User
Posts: 323
Registration: 3.10.2006
From: Irkutsk
Permanent resident
User
Posts: 134
Registration: 4.9.2008
From: Moscow
The shafts, judging by the cams, are in order (I did not remove the cover, but I think there are no miracles there)
Well, did he change vanos or not, if so, what is the result (IMG: https: //forum.my.housecope.com/wp-content/uploads/ext/828/style_emoticons/default/rolleyes.gif)
I hope to change in a couple of weeks (vanos on the road) - got diesel rattling. And as for the impressions - an acquaintance at 7-40 E38 changed these same vanos and was satisfied with the result - to shove from the bottom is better than the beginning, to eat less. Only spare parts (couplings and adapters) are quite expensive.
Assembling the M62TU44 motor (replacing the main circuit and its neighbors) - logbook 1998 BMW 5 series 4.4 on DRIVE2
| Video (click to play). |
Finally, it came to the bottom of the motor, did not start for a long time since there was no shaft knee lock on the torsional vibration damper hub, and did not find the original, I had to do it at the turner.
The price for the old course is 825 gr to wait two weeks, plus an indefinite amount for delivery. Found an office in Lugansk.
And this is what the turner bungled me for 100 grams
It looks not impressive, it sucks at all
Installing this retainer on the pulley hub, I began to loosen the bolt.
I rested against the spar was dumb, did not want to damage the pillow, and decided to change the angle.
I did not want to put pressure on the spar and rested against the corner of the pit.
And he began to spin the pipe, the handle from the orbitrek. And he wrapped his retainer in a German cross, like a plasticine bent in three places. So it did not help me ...
The next day I went to another turner, showed the emu this product and demanded to create the best miracle, and that's what happened.
Solid metal showed its superiority, especially since it made the handle longer, which made it possible to unload almost completely the engine mount
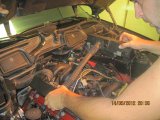
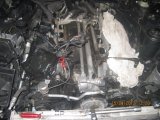
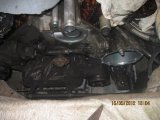
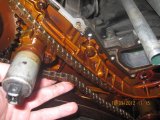
And the bolt was unscrewed, but with great effort))) Hurray. Having removed the cover, a lot of interesting things were noticed, the oil separator was in a lame condition, he wanted to retire ...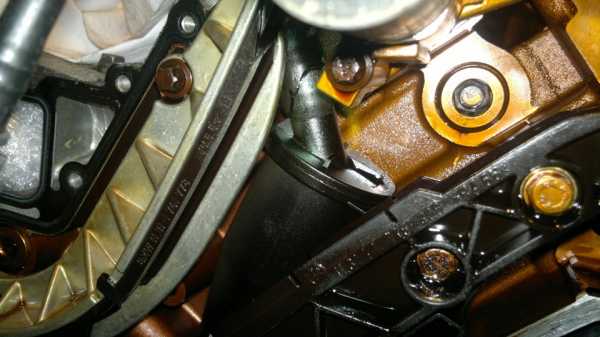
It did not affect the operation of the engine)))
With him, under the sly, the shaft knee oil seal went, the oil seal was oak)
An ear on the oil separator broke off where the tube is attached, and the oil seal can be seen in the photo, tired.
Replacing these cases, things went further ...
When replacing, it is necessary to remove the guide chain and loosen the bypass bar; for convenience, it is necessary to remove the oil drain pipe.
Then the chain was replaced, the bypass bar, the tensioner bar and the chain guide were changed earlier
Now everything is in a safe state And there is another nuance that I got caught on, this is the chain, if the vanos are removed, then it must be fixed on the sprocket in a taut state with a clamp, in order for the chain to sit on the sprocket, it turned out the other way around, and had to be removed cover and tear off new gaskets
Let's start telling how to regulate the whole thing or how I did it))
Look for half an hour, disassemble or not, then take it and twist it (Eyes are on the watch and hands twist)
When disassembling, I advise you to tighten the bolts and nuts, as far as possible, into their places. So then do not oh ... how many of them are there and where.
Since I have vanos and chains, the procedure took a little longer.
Remove covers, oil lines, chain tensioner
Remove the left cover Be sure to change the sealing rubber after installing a new gasket.
We change the O-rings on the tensioners, and the plastic shoes.
Not expensive, but the chain tension will already be better, and pleases the eye
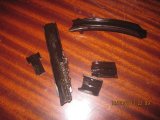
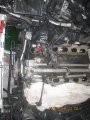
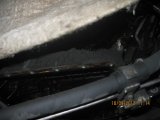
We change small chains, the photo shows the difference
A new chain, a piston outlet, it is visually visible that it is shorter, of course, and the shoes are not idle here
The chain is almost identical in length, but in the bend you can see in the photo whether it is bad or normal, I did not find out
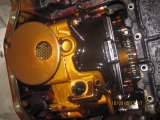
Changed the adapter gaskets, and the check valve O-rings inside the adapters
It was possible not to pick and not change
Believe me, when I removed the adapter, I did not see anything that could skip the oil very much, especially since the sound of vanos is due to it. That may be a meeting of the rings, but I think cases with bad oil, otherwise I see no reason to remove it I removed and installed the old one back. Removing and installing it is very problematic for me))
When we have everything installed, we begin to regulate
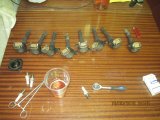
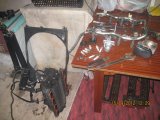
It is better not to start without this miracle of a suitcase))
In this position, the locking pin should fit into the hole without problems.
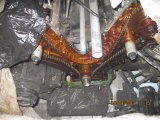
Camshaft clamps, the photo shows that the angle is different, therefore, do not start without them.
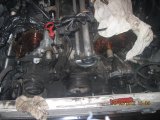
They are installed in such a way that on the right side where the tensioner was wine 1-4
To install, the intake camshaft must be rotated slightly counterclockwise
front cams should be facing each other as in the photo
Correct locking position
On the left side is the same, at the end of the camshaft there should be an inscription 5-8
Embossed on the camshaft 5-8 The inscription must be visible when fixing
This is how the cams look when locked
You may need to turn the intake camshaft a little too
Then we pull the chain so that it does not sag
I pulled with my fingers all the way so that the chain was free of play, there was no need to pull too much.
Then we put on the cover, since I didn't pull the chain right away and it sagged, I installed the front cover, and fixed everything, after assembly I realized that everything had to be disassembled since the chain did not sit down, not the sprocket of the shaft knees, I had to change the gaskets again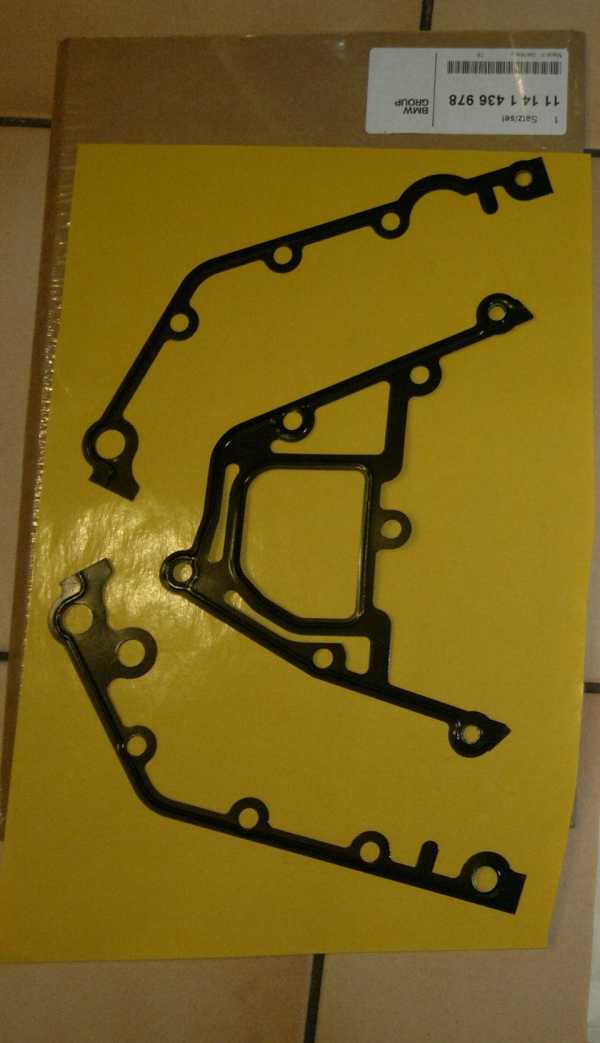
They are disposable, according to the old rate of 160 g, in a new way, when I was 10 g, then I already took it for 230 g
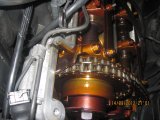
then use a special head to scroll the vanos all the way to the left extreme
position for removing the oil cushion and its original position
all the way to the left left and right vanos
Then we take the tester, set it to dial and check the housing seal
left and right vanos should ring
Then we tighten the bolts of the right vanos 110 Nm inlet and 125 Nm outlet And also on the left side. When I unrolled it, it was 175 Nm, I tried to tighten the bolt burst, since the wedge worked on one side and the thread is left, I do not advise tightening with a constriction, you can break the bolt. I had to change the camshaft, a friend had a motor, he gave it, and then I tightened Nm with a dynamometric Savdepovsky
After tightening, install the clamps and vanos discs, tighten with 30Nm
and Voila))) Continued in a new magazine
Price tag: 3 800 UAH Mileage: 345,500 km
So it's time for me to share some experience in ICE repair.
P.S.: camshaft locks were ordered from turners - (1500 for everything). You need 4 pieces. Two per head.
Andryukha! Thank you very much!
Finally, the ordered parts came and I began to slowly assemble the motor. With the guys in the lathe, we also made strips for installing the camshafts, the design is really a little different, but all the angles of deflection of the shafts are set correctly, inlet at - 0, outlet ahead (relative to the inlet) 3.5 degrees, then maybe salt pictures of the tools.
As it should be, the motor is stuck at TDC, the shafts are fixed with slats.Changed the oil seal of the oil line to the tensioner (mandatory procedure) Installed Vanoses, stars with chains, just screwed on, do not tighten (reverse thread) Installed a flushed separator, it was excellent, did not change (well, what is there in this piece of shit for 4000 rupees?) Installed the tensioner bar Threw on the chain Install the chain damper Stretched the chain, just removed the tensioner bar with a tie, quite tight We unscrew the vanos to the extreme left position and tighten (moment 110 and 125 Nm) We put on the phase sensor rings and screw on the nut , do not tighten (reverse thread) Well, we actually put the lower front cover of the motor Press in the crankshaft oil seal We tighten the crankshaft hub, again what I did came in handy Install the Vanos valves and remove the chain loosening We tighten the upper covers, they must be pressed onto the lower cover Install the chain tensioner Install the sensors F and tighten them h. On the lids there are such special bolts for Torx, so we unscrew them and insert a drill or a nail of a boring diameter there, and there is a hole on the DF rings, we push it there (well, if anyone is especially interested I can tell you)
We fasten the sealing flanges of the Vanos valves
Well, for now, everything is about the motor for this post, I will only tell you a secret that the motor has already been assembled and is already running, but this is a completely different story ...
For one thing, I decided to check the operation of the automatic transmission heat exchanger, I didn't like how it works, it seems to me that the box was overheating, and I will say that it was NOT in vain. It was simply jammed in the closed position, something flew into the valve (I assume that this is a fragment of a part of the hose from the radiator to the heat exchanger). In short, I disassembled it, washed it, checked the operation of the heating element (such a thing that pushes the stem and opens the valve), it works very well. Checked in hot water, opens. Well, I collected everything and already installed it ...
Good day to all. I will repair Vanos on the M62TU engine. Not a replacement of rubber rings and seals, namely a full-fledged repair with flaring and subsequent modernization under a collapsible one. Replacing the ring itself (PISTON), which is responsible for the tightness of the chamber into which oil is supplied under pressure. And a cap is machined, which tightens the whole mechanism with screws. Price tag $ 300 for vanos.

yoma these vanos have been modified and have several advantages over new ones.
1. The rings that I install in vanos have a slightly longer resource than new ones. Since they are piston-type and made of better cast iron than their own. Plus, depending on the degree of vitality of the vanos being repaired, a chrome-plated (fire-resistant) piston ring can be installed; it has improved friction properties and wears out longer.
2. Secondly, it is a duralumin clip that is clamped on bolts. Unlike rolling (IT DOES NOT ROLL, THAT IS A VERY COMMON REASON FOR LEAVING THE VANOS) and a plastic clip (WHICH SITS AND LIKES STARTS TO VERSE OIL AS A CONSEQUENCE OF WHAT THIS IS).
3. The collapsible design allows later, without the help of machines and turners, to disassemble the vanos and replace the ring directly to the owner himself and thereby carry out the repair himself.
It is up to the owner to decide. buy new vanos for $ 1000 every 150 thousand or repair it once and then forget about this problem.
In our workshop, you can bring back to life the thumping, "diesel-rumbling" and twitching engine M62TU c Vanos (except for 4.6 liters). With the help of repair kits, the tightness of the Vanos-gears of BMW 11361438694 is restored and the knock of the diesel engine is eliminated during operation. M62TU engines were installed on BMW E38, E39, E53 X5 and Range Rover, Land Rover. There are various repair options for Vanos M62TU, click on the option you are interested in below:
>>> Repair of the VANOS "Basic" system
This type of repair for M62TU Vanos includes a minimum list of work on the engine:
- Vanos gears (Vanos) are dismantled from your engine
- Repair and restoration of Vanos is carried out with the help of our repair kits
- The engine is assembled and the timing phases are set with a special tool
- Computer diagnostics of the Vanos system is carried out based on the repair results.
The warranty period is 1 year.
The warranty for this type of repair applies only to Vanos gears, and not to the entire Vanos system.
Repair cost - 18 000 rub (including Vanos repair kit).
Required consumables (about 7 000 rub):
11 12 0 034 104 - valve cover gasket 1-4
11 12 0 034 105 - valve cover gasket 5-8
11 12 1 437 395 - rings for valve cover nuts (16 PIECES)
11 12 1 721 879 - rings for valve cover bolts (6 PIECES)
11 14 1 741 532 - front cover gasket 1-4
11 14 1 741 533 - front cover gasket 5-8
11 14 1 435 023 - phase change valve flange (2 PIECES)
11 31 1 435 028 - small chain tensioner pad (4 PIECES)
11 36 1 432 438 - Vanos bolt (2 PIECES)
11 31 7 500 349 - sprocket bolt (2 PIECES)
10 liters of antifreeze
>>> Repair of the VANOS "Optimal" system
This type of repair Vanos M62TU includes a complete list of work on the repair of the system:
- Vanos gears (Vanos) are removed from your engine
- Repair and restoration of Vanos is carried out with the help of our repair kits
- Camshaft brackets and oil channel seals in them are being replaced
- Reducing valves of the Vanos system are checked
- The engine is assembled and the timing phases are set with a special tool
- Computer diagnostics of the Vanos system is carried out based on the repair results.
The warranty period is 1 year.
The warranty for this type of repair applies to the entire Vanos system.
Repair cost - 18 000 rub (including Vanos repair kit).
Required consumables (about 15 000 rub):
11 12 0 034 104 - valve cover gasket 1-4
11 12 0 034 105 - valve cover gasket 5-8
11 12 1 437 395 - rings for valve cover nuts (16 PIECES)
11 12 1 721 879 - rings for valve cover bolts (6 PIECES)
11 14 1 741 532 - front cover gasket 1-4
11 14 1 741 533 - front cover gasket 5-8
11 14 1 435 023 - phase change valve flange (2 PIECES)
11 31 1 435 028 - small chain tensioner pad (4 PIECES)
11 12 1 733 969 - decorative cover gasket (2 PIECES)
11 36 1 705 578 - bracket gasket 1-4
11 36 1 705 579 - bracket gasket 5-8
11 31 1 705 512 - camshaft rings (6 PIECES)
11 36 1 433 660 - bracket 1-4
11 36 1 433 664 - bracket 5-8
11 31 7 531 813 - large chain tensioner
07 11 9 963 355 - tensioner ring
11 36 1 432 438 - Vanos bolt (2 PIECES)
11 31 7 500 349 - sprocket bolt (2 PIECES)
10 liters of antifreeze
>>> VANOS system repair with replacement of chains
This type of Vanos M62TU repair includes a complete list of system repair works:
- Vanos gears (Vanos) are removed from your engine
- Repair and restoration of Vanos is carried out with the help of our repair kits
- Camshaft brackets and oil channel seals in them are being replaced
- Reducing valves of the Vanos system are checked
- The engine is assembled and the timing phases are set with a special tool
- Computer diagnostics of the Vanos system is carried out based on the repair results.
- Replacing the large timing chain
- Replacing two small timing chains
- Replacing all large chain tensioners and dampers
- Replacing the front crankshaft oil seal.
The warranty period is 1 year.
The warranty for this type of repair applies to the entire Vanos system, as well as timing chains and tensioners.
Repair cost - 23 000 rub (including Vanos repair kit).
I registered here 
Group: Users
Posts: 1634
Registration: 26.9.2012
From: SPb
User #: 2526
I am new here
Group: Users
Posts: 14
Registration: 12/11/2012
User #: 2668
good friend
Group: Users
Posts: 156
Registration: 10.5.2012
From: As necessary.
User #: 2287
Wanderer 
Group: Clan WoT
Posts: 2304
Registration date: 6.4.2010
From: Saint Petersburg
User #: 933
1. adapters, rings - it's all a dead poultice. I changed it when I put the repair kit a couple of years ago. the sound has not changed. it got better, but not much. and there was no wear in the adapters for 500tkm. By the way, the repair kit helped with the dynamics.
2. the knock MUST take about 300 km, when the rubber bands are soaked in oil, whatever else will come. but at the same time it is necessary to drive actively pedaling in the region of 1500-3000 rpm, that is, urban mode, and not a cruise on the highway. so they say in Beisan - those who make these rubber bands.
3. the gearbox kicks when it stops and the speed drops - one of the valves in the valve body sticks.shit, wear and temperature. an additional radiator - will help, but for yourself - to sort out and rinse the valve body. or - dmrv in the trash. 50/50. at the same time dmrv will show you everything beautifully in inpe. to catch this bitch by the udder - you need to use some kind of self-written scanner, which will draw a graph of air flow readings at intervals of 10 times per second - then you will see dips.
4. in vanos, there may already be a backlash on the gear engagement, which causes this knock, well, simply because the teeth have already been eaten and the adjustment limit has been reached. on the other hand, this person seems to know how to define it and would not make worn-out vanos.
Post has been edited XCommandeRX – 15.5.2016, 13:23
Good evening everyone! Guys, who knows if vanos are thundering on the m62, I heard that the mileage is already over 500 and the repair is not weak money. Is it so?
there vanos cost a lot of money since they are not repairable and change entirely, about 25k apiece 25kX2 = 50k plus the price for the work.
there vanos cost a lot of money since they are not repairable and change entirely, about 25k apiece 25kX2 = 50k plus the price for the work.
so only rings are sold for him, this will not particularly solve the problem.
so only rings are sold for him, this will not particularly solve the problem.
During the and the sekas for the replacement of these stretches for a couple of days
so only rings are sold for him, this will not particularly solve the problem.
And there, something else can fail?
Good evening everyone! Guys, who knows if vanos are thundering on the m62, I heard that the mileage is already over 500 and the repair is not weak money. Is it so?
As long as there is no error in the diagnostics, they are working. The knock is not an indicator of a malfunction.
As long as there is no error in the diagnostics, they are working. The knock is not an indicator of a malfunction.
Yes, but it’s also not good to listen to this rumble. It's okay myself, but tovarischi. like I bought a tractor.
Yes, but it’s also not good to listen to this rumble. It's okay myself, but tovarischi. like I bought a tractor.
The roar of the M62 may not only come from vanos
Yes, but it’s also not good to listen to this rumble. It's okay myself, but tovarischi. like I bought a tractor.
The new vanos are also not silent for long. Structurally, they are executed in such a way that they cannot work silently.
The roar of the M62 may not only come from vanos
Aha! More from what ?? I have 2 M62 bezel-less and have never seen a rumble.
The new vanos are also not silent for long. Structurally, they are executed in such a way that they cannot work silently.
I mean, not for long ?? The resource of vanos is about 150 km. It is not enough?
It is necessary to read carefully. Silently and regularly are two different things. They work correctly for a long time, but silently, almost never.
The roar of the M62 may not only come from vanos
Why else? New chain tensioners are new.
It is necessary to read carefully. Silently and regularly are two different things. They work correctly for a long time, but silently, almost never.
We must stop spreading nonsense to the masses, otherwise it’s not at all funny.
We must stop spreading nonsense to the masses, otherwise it’s not at all funny.
LANART 01 December 2012
 LANART 01 December 2012
 LANART 01 December 2012
The essence of your problem is that your brains do not know at what moment (at what position of the pistons) 1-4 cylinders to ignite the mixture.
Therefore, ignition occurs in an emergency (sparing) mode.
Wait to shoot the intake. Check the camshaft sensor first ... He also participates in the process of determining the ignition timing.
Maybe that's it.
LANART 01 December 2012
akvadak 02 December 2012
 akvadak 02 December 2012
 64p12 02 December 2012
 64p12 02 December 2012
Do not bother, as it should be, the motor either works stably at the bottom or gives out power at the rpm, to eliminate this, vanos was used. If there is no vanos, there are fewer problems with its repair, but then you have to put up with the raskolbas at idle, as an alternative - you can move the camshaft mark, idle will be established, but you will lose power at the speed. It does not bother me, although I was bothering with such a problem.
The fact is that the raskolbas is a problem with the M60. They have not fully thought out the ventilation of the crankcase and more evil shafts, which require more precise adjustment, over time, when the chains are stretched, and give an unevenness of idling. The M62 solved this problem even without vanos.Fixed ventilation and installed less evil shafts. Thanks to this, the engines began to give better torque values from lower revs. But I had to increase the volume so as not to lose power in comparison with the M60 series. That's the whole trick. The M62 should run smoothly.
The topic is interesting. Here, most likely, the point is in the electrics.
Do not bother, as it should be, the motor either works stably at the bottom or gives out power at the rpm, to eliminate this, vanos was used. If there is no vanos, there are fewer problems with its repair, but then you have to put up with the raskolbas at idle, as an alternative - you can move the camshaft mark, idle will be established, but you will lose power at the speed. It does not bother me, although I was bothering with such a problem.
Someone has already said: you can turn on the exhaust camshaft a little and the problem will go away, but still I don't think that this is the problem, because recently the shafts were exhibited as they should be, with adapted, everything would be like in May.
And it's the easiest thing to sell or score.
Someone has already said: you can turn on the exhaust camshaft a little and the problem will go away, but still I don't think that this is the problem, because recently the shafts were exhibited as they should be, with adapted, everything would be like in May.
By the way, were they even correct? Exhaust distributions are set with a slope of 3 degrees and 30 minutes, relative to intake.
M62, due to its venerable age, will defeat you all
Gold words!
Before expecting perfect performance from a 15-20 year old engine, give the engine perfect clearances in ALL mates, perfect operation of every fuel and ignition unit, perfect readings from multiple sensors, and blow out the gas.
I don’t torture my pensioner m62 with pickiness, although with a cold snap I don’t like jumping revolutions and attempts to stall right after launch. I treat him condescendingly, due to the length of service he is supposed to. Moreover, after warming up, it works fine, although not ideal
Group: Users
Posts: 11
Registration: 17.6.2013
User #: 56 976
Machine brand:
RANGE ROVER Series 2002
Do you like the topic? Useful? Share with your friends on social networks:

Group: Club Member (100)
Posts: 341
Registration: 2.3.2011
From: Moscow
User #: 25 597
Number of the car:
E 501 MO
Machine brand:
RANGE ROVER Series 2002
Vanos adjustment ?! There is no such procedure, there is an adjustment of the valve timing, in fact this work is all-encompassing for everything you have listed, it is technically impossible to adjust the chain separately and the vanos separately, this is a single mechanism, you cannot do without adaptation, you can suffer for a long time by poking, but as a rule, errors on the vanos come out afterwards ... And in fact, in connection with what is the question? Why is there a need for adjustments? There is nothing to regulate during operation, it is regulated during assembly or repair and that's it, then there is no need to climb there
Group: Guests
Posts: 4,841
Registration: 5.6.2011
From: Moscow
User #: 29 828
Number of the car:
H240RR77
Machine brand:
RANGE ROVER Series 2002
Group: Users
Posts: 11
Registration: 17.6.2013
User #: 56 976
Machine brand:
RANGE ROVER Series 2002
Group: Club Member (500)
Posts: 910
Registration: 22.12.2010
From: Moscow
User #: 22 642
Machine brand:
RANGE ROVER Series 2002
This must have been preceded by the knocking of the vanos mechanisms themselves, it is the idle vanos that make the chain twitch, leading to destructive consequences.
However, the ABC book here, of all the devices listed, in reality, you can do only with a device for holding the shafts.
Group: Club Member (100)
Posts: 341
Registration: 2.3.2011
From: Moscow
User #: 25 597
Number of the car:
E 501 MO
Machine brand:
RANGE ROVER Series 2002
This must have been preceded by the knocking of the vanos mechanisms themselves, it is the idle vanos that make the chain twitch, leading to destructive consequences.
However, the ABC book here, of all the devices listed, in reality, you can do only with a device for holding the shafts.
No, dead vanos do not affect the main chain in any way, just because of the loss of pressure, the vanos do not turn the shafts to the desired angle, from tired vanos only a knock, a loss of power at the bottom and increased consumption, many drive dead vanos out of poverty for years and nothing with timing chain does not occur. There are cases when the vanos brewed nah, making out of the engine a semblance of the good old gluttonous but reliable M60, but this is already vandalism
But on the merits of the question: the timing chain on the M62 motors is rather weak, with a mileage of more than 150-170 thousand km, it simply stretches out and the hydraulic tensioner no longer chooses its sagging, but of course it does not immediately break the “shoe” and the bypass bar (as a result of which it jumps over teeth) Before this big trouble, she pokes for a very long time, waits for it to be repaired, and even when the pacifiers fall apart (and it is impossible not to notice this terrible knock), there is a chance to avoid jumping just to immediately turn off the engine and to the tow truck.
Soon the time will come and the opportunity to replace the timing belt on my m62
except for the purchase of all hydraulic tensioner chain dampers, I would like to know what can be immediately completed, altered, etc.
I will take off my heads to replace Moscow time, bushings.
Now ordered titanium valve washers
I also want to pierce the valve in the T-shape
Somewhere else I heard about the installation of a knee from c62 
Does anyone have any interesting thoughts? or interesting spare parts
__________________
and give a fuck!

BMW key blanks, internals, etc.
KVKG membranes for valve covers BMW OPEL VAG PORSCHE FORD VOLVO
Loops for dead pixel recovery
VANOS BMW repair kits, repair kits for foreign cars
8 964 251 92 74 Kirovsky
The Vanos system makes life easier for BMW owners in many ways. With correct operation, it increases engine power, and at the same time significantly saves fuel, provides a smooth idle. If preventive repairs are made on time, BMW vanos will regularly perform these tasks. But the O-rings of the joints dub over time, and the system begins to "play". Diesel-sever will carry out a quality repair of the vanos.
If problems are found, it is very important to repair the vanos m62 and other modifications on time. A defective Vanos does not tighten the camshafts to the required angle, thereby preventing optimal engine performance. You should repair your vanos if you notice:
knocking on the front of the motor cover;
unreasonably high fuel consumption;
hard start at low temperatures;
uneven traction when speed increases;
decrease in torque.
The combination of even several of these indicators is a clear signal that it is time to repair the vanos m54, m52, m62 or any other model.
The original Vanos system is not a cheap pleasure. But the O-rings on the parts of the new system will wear out just as quickly as on the previous one. Therefore, the repair of vanos n52 is so in demand: it will cost significantly less, and in terms of efficiency it can even surpass replacement with a new part. Likewise with other models of the gas distribution system.
Our professionals specialize in the repair and maintenance of diesel engines and carry out all work in accordance with the strictest quality standards. By ordering the repair of vanos n52 from us, you will be sure of the highest quality result. We will not only put the gas distribution unit in order, but also give detailed advice on all issues of interest to you. We carry out repair of vanos m62 and others.
To order, for example, the repair of a vanos m54, you should contact Diesel-sever at the indicated phone number, or simply drive up to the address that you see at the bottom of the page. We have a system of discounts and bonuses for regular customers. If we carry out a refurbishment, the vanos bmw will show you how true German quality feels.
The damper collapsed, after 2 hours the chain slipped. I just brought the contract motor to people a week before, and they did not bother to check and change consumables in the timing.
Listen to the chain rattles or VANOS &
Listen, is the chain rattling or VANOS?
Vanos knocks + most likely the chain is due to a torn pacifier
And so it happened, after that the chain slipped.
yesterday the same garbage started in the left head, but after it was muffled and started again it was gone. I think probably vanos. Write if you figured out what was the matter.
I have the same knock. Dismantled the dvigun and saw that there the central damper (boomerang) shattered into small pieces, and jumped over the chain. in general, an ass.
A tensioner, a damper and a bypass bar (which is a boomerang), this material dries and cracks over time from temperature and they need to be changed, and the chain must be checked from 150 to 200 thousand mileage, which in this case the guys did not do by installing a contract motor (mileage 200 thousand , the car was from England) As a result, the damper began to fall apart, which led to the chain slipping and the rest of the process.
Such engines are made by a guy who is 19 years old, Lev's name is his turn, he made a capital for me for x6 hundred rubles for 70 rubles with spare parts
many who are repairing bmws for 50 years old cannot be compared with the sniper, he has a dumb master
the author is a white-handed idiot infa 100, and then the master you told them to put the internal combustion engine, they put it! no one will climb to open the head covers to visually see something there, but in fact there is nothing you will see!
There was such a knock in the engine in the right head. The engine is without vanos. I blew the air through the line where the oil passes to the tensioner and then goes to the campansators. Compensators knock due to the fact that the oil does not press the tensioner and oil does not come until the last, or maybe even the penultimate one and the noise of the chain may also be present depending on how the line is clogged.
Change the chain tensioner and fill up with good oil.
Vanosy knocking and + most likely broke off the damper bar.
forget about the caps at such a rate. screw the rings or sleeves, open the motor and get ready to replace the block, you can do an endoscopy if there is any and measure the compression, it will at least indirectly show whether the sleeves are alive
if there are better options in terms of price and quality, what do you offer to buy spare parts and bring them, I think it's not a problem. an autopsy will show what is needed as much as needed and what sizes. If people did such things and the result was excellent why not. I just want them to come up with an understanding of the question of what to do and not change everything stupidly.
Dimon today I corresponded with a spare parts store, so I can estimate the prices a little. Well, you understand, yes, I’ll put online correspondence. The name of the store, I don’t distribute it in Kuntsevo on the Moscow Ring Road
Messages pasted: 05 Dec, 2011 16:05 Now the question itself does not know where it is possible for a cheaper price, otherwise it is somehow for a piston 10k and + 2.5 for rings and + inserts it is not yet known how much
In general, a logical continuation of the topic tynts


In general, the other day I will make up a list for replacement, with Vanus, chains and everything that goes with it, I would be grateful if someone throws up their list when replacing Vanus with chains.

I plan to do the same on m62 without vanos. They say after this procedure (if the phases are correctly set) m 62 gains a new life.


Yes, nothing terrible, only a lot of money is needed (vanos, chains, bypass strips, tensioner bar, adapters, gaskets for them, rings for camshafts -6 pcs, preferably a crankshaft star, a set of gaskets. And of course a normal master with a proprietary device for setting the shafts.

An interesting fact is obtained in the diagnostics for ignition, all the buzz and not very much for the iron. The other day we changed two tensioners and oil sprinklers, so this old fighter went differently all the rules. Well done, you can change the caps in one fell swoop all the same disassembled.
What are the camshaft rings?
I think I do it myself, a tool according to the Internet drawings, but only there are no two adaptations for the Vanus, who knows, it is critical without them or the Vanus can be set like that?
Rumors are still straining that new Vanuses are running around 50 thousand, no more. I myself recently observed X5 with grunting Vanus, the owner claimed that 4-5 months ago he replaced them with new ones
Desperate . Good luck with your own setup)))

what are the camshaft rings?
No. 2 in the figure, and in the second figure No. 2 is an adapter in which these rings are located, they say they also have a workout.
No. 2 in the figure, and in the second figure No. 2 is an adapter in which these rings are located, they say they also have a workout.
thank you so much, I'll keep that in mind.
There was a question about the tool for setting vanos, are there any drawings?
tynts on these put 3 cars already.
http: // e38. Ru / node / 22839 3 machines have already been put up for this.
well, this is understandable, this is for the shafts, half a year ago I made myself, I prepared so to speak))) and I speak for the Vanus

You can't find drawings, just buy. They are on m52tu 6000, I don’t know on your capacity.
You can also go to the collective farm - with the help of a ruler and a square.
Nooo this crap will turn out.
Then either buy or look for someone who will give
Found what I was looking for, issue price up to 5000
tynts
one of the options
By the way, this site has the lowest prices and almost everything is available.
I understand its purpose to keep the vanos adapter in position when tightening the vanos bolt?
Now the thought behind the line is clear, please state it
Have you disassembled the engine already? Are the camshafts removed?
I did not understand why the camshafts should be removed.
The last photo is still its current state, then I think to do it, how the spare parts will come
I ask - have they already been removed or not yet)
Here is my number - call me, I will try to explain 8-927-498-oo-o6

vobschem one of these days I will make a list for replacement, with Vanus, chains and all the accompanying, I would be grateful if someone throws up their list when replacing Vanus with chains.
Number, qty, description
11 36 1 438 694 2 star vanos
11 31 1 741 746 1 main circuit
11 21 1 742 435 1 knee star
11 31 1 741 777 1 circulating U-strip
11 31 1 745 406 1 rail (damper)
11 31 1 741 236 1 tensioner rail (damper)
11 31 1 741 115 2 distribution star
11 31 1 435 026 1 tensioner 1-4
11 31 1 435 027 1 tensioner 5-8
11 31 1 747 437 2 distribution circuit shafts
11 36 1 433 660 1 vanos adapter 1-4
11 36 1 433 664 1 vanos 5-8 adapter
11 36 1 705 578 1 steel gasket for adapter 1-4
11 36 1 705 579 1 steel gasket for adapter 5-8
11 12 1 706 921 2 oil check valve in the cylinder head
11 41 7 576 917 1 oil pump chain
11 41 1 733 962 1 oil pump star
11 15 1 705 272 1 oil separator
11 15 1 705 301 1 separator tube
11 61 7 501 563 1 ventilation valve
11 61 1 729 728 1 ventilation valve gasket
11 12 0 034 104 1 valve cover gaskets 1-4
11 12 0 034 105 1 valve cover gaskets 5-8
11 12 1 733 969 2 gasket, plastic cylinder head cover
11 14 1 741 532 1 cylinder head front cover gasket 1-4
11 14 1 741 533 1 cylinder head front cover gasket 5-8
11 14 1 736 758 1 rubber ring in the front cylinder head cover
07 11 9 963 300 1 aluminum ring in the front cover
11 13 1 436 324 1 pallet bottom gasket (steel)
11 13 1 439 736 25 steel pallet bolts
11 51 1 731 372 1 pump gasket
11 14 1 275 466 1 crankshaft oil seal
11 14 1 436 978 1 set of front cover gaskets
11 31 1 705 512 6 O-rings on distributor shafts
11 14 1 435 023 2 gaskets for vanos valves
12 14 1 748 398 2 gaskets for p / shaft sensors
07 11 9 901 511 2 tube gaskets Air pump
Oil pump rubber rings (3 pcs, numbers below):
11 42 1 713 597 1
11 42 1 741 129 1
11 42 1 288 890 1
Along the way, I also needed to buy more, I was too lazy to look for numbers:
A set of rubber rings for the valve cover bolts (6 pcs of one type, plus 16 pcs of another)
Additionally, you need to gasket the aluminum part of the pallet (large, cardboard) 1
Alternator gasket 1
Rubber rings for the pump (for the pipes that are under the intake manifold, one large, one small)
| Video (click to play). |
Crankshaft bolt (MANDATORY) 1
A set of bolts for the aluminum part of the pallet


