The ball began to deflate. It looks like it is poisoning through the nipple. How to repair? An Internet search gave nothing. The advice to buy a new one does not work, because a swimsuit is already sewn for this ball. Please tell me what you can do?
We have the same problem, a sasaki ball, I have already bought two balls, the first one was blown away, I decided not to suffer, we bought another one, after a couple of months it was the same with a new ball.
so it's better not to buy a new one, just to help out someone else, but to work as much as possible.
complained to the store, but they answer that this is the first time they have heard that the balls are of high quality, although I personally heard from many about blowing the ball.
VIDEO
Friends, hello everyone! In this story I will demonstrate a very useful and interesting homemade product - plasma (without a fuel lighter). IN STEAMPUNK STYLE. With her help, you can make a fire and conduct interesting (spectacular) experiments. Such things are also called "impulse lighter", "arc lighter", "shocker lighter".
Advertising and cooperation - Today we will talk about the modern type of fasteners, which will make you shy with its thoughtfulness and manufacturability. We will reveal the secrets that a curly nail is fraught with. After all, a curly nail is not that for you. Dania Craster Instagram - Evil Craster in telegram - Supercrastan - not only a video about how to make all sorts of useful and useless crafts and mechanisms with your own hands. This is a bunch of waste, trash, engineering solutions and a lot of cool stuff. Here you can find DIY guides on how to DIY shit. Playlist - Gamestuff - Playlist
One tire inside the other. One tire inside of another.
Greetings to all members of the forum and "dropped in" visitors to this resource!
In the last few months, there hasn't been much time, and the Internet has been “not very good,” to put it mildly. Now I have a free minute and finally the problem with the Internet has been solved. Looking ahead, I want to say right away - if someone needs to repair the ball, write, I will help. Materials are selected individually.
A standard (adult) soccer ball is size 5 (size 5). This ball size is recommended for ages 12 and older. The circumference of the ball with the Fifa Quality Pro / Fifa Approved logos is 68.5—69.5 cm. The weight of the ball must correspond to 425—445 g. Ball pressure 0.8-1.1 bar
The ball is made from natural leather or synthetics. Mostly these are polyurethane (PU) and polyvinyl chloride (PVC). 85% of all balls are made in Pakistan, so don't be alarmed if you see the country of origin when you buy.
PU coating is much better than PVC coating.The ball, which has a high-quality polyurethane coating, does not harden in the cold and does not lose its shape. The ball is very pleasant to the touch. The thicker the PU layer, the higher its quality! With a good TPU (thermopolyurethane) layer, the ball is better controllable, and it also has better aerodynamics and better circumference. Balls made of PVC are much cheaper and wear out much faster. A ball made from such a coating can lose its shape, and in cold weather it “dubs”.
There is a textile lining under the polyurethane, which is glued crosswise to keep the ball in shape longer. Cheap balls have only a couple of layers, while more expensive models have 3 or more layers.
The ball is sewn by hand or by machine stitching. A hand seam is much safer! Such seams are of higher quality, and balls sewn in this way are more expensive! When the thread breaks, the hand-sewn ball will not “corrode”, since each panel of the ball is fixed with a knot. Make sure your seams stay intact. The hand-sewn ball has a thick thread.
Hand-sewn ball
Machine seam is not very strong. The stitches are small and the seams are always visible. Balls sewn this way will be cheaper than a ball that is hand-sewn.
Machine sewn ball
It is worth watching separately By pressure ball! The pressure of a standard (adult) size 5 ball should be between 0.6 - 1.1 (usually 0.8 - 1.0) bar. There is a special pressure gauge to determine the pressure. Some pressure gauges have a pointer on the scale of the recommended pressure values for balls used in different sports.
Since this is a PRO ball, its recommended pressure is 0.9 - 1.1 bar
Before pumping the ball, you need to drop one or two drops of special oil on the nipple (or on a special needle), but if it is not there, then you can spit on the nipple. If the nipple is lubricated at least periodically, then your chamber will last 40-50% longer and the pressure in the ball will be consistently high. Since the nipple, in contrast to butyl and latex chambers, is made of rubber, it is less elastic and susceptible to environmental influences: earth, grass, pebbles, moisture, etc. It is these factors that lead, in most cases, to the fact that the ball chamber fails.
Oil for nipple Select VALVE OIL
Special needle for inflating the ball
The required pressure is usually indicated on the pentagon where the chamber is glued. It can be different, because depends on the “class” (pro, practice, etc.) of the ball.
After each game, you need to lower (lower the ball) the ball pressure so your ball will last longer! Panels and seams lose their elasticity and stretch, and the ball wears out faster if it is constantly under high pressure. It is for this reason that the ball must be lowered.
The camera is made from butyl or natural latex. The butyl chamber is not as elastic (stiff), but it retains pressure better. Cameras of this kind are sometimes glued together from four parts, while latex chambers can be used!
The latex chamber is more elastic, has a high rebound, and after hitting the ball, it instantly takes the outgoing shape of the ball. Many professional balls are equipped with a latex chamber with a double butyl nipple, which is an ideal solution, since latex makes the ball soft and, accordingly, better sensitivity, and the double butyl nipple reliably retains air for a long time. It is worth knowing that the latex chamber tends to bleed air, this is quite normal. This is due to the fact that the latex structure is porous, and therefore a ball with a chamber of this type will lose pressure before a ball with a butyl chamber.
Balls are divided into several categories, namely: Professional (Pro) - this is a match ball marked Fifa Quality Pro (Fifa Approved - the old marking valid until April 1, 2015), it is usually the most expensive, because complies with all modern FIFA standards, which means that the ball with the mark Fifa Quality Pro (Fifa Approved) passed the following tests:
- Sphericity test - Circumference test - Weight test - Pressure loss test - Rebound test - Moisture absorption test - Shape retention test after 2000 impacts on a concrete slab.
The old ball markings look like this
The new marking valid from January 1, 2016 is as follows
FIFA Quality PRO is Fifa Approved
FIFA Quality is Fifa Inspected
IMS - International Match Standard (remained untouched)
What do these logos mean?
FIFA Quality PRO / Fifa Approved - approved by FIFA (International Football Federation)
FIFA Quality / Fifa Inspected - FIFA Inspected
To receive the FIFA Inspected mark, a soccer ball must pass 6 standard tests. The ball is tested for weight, circumference, roundness, rebound, water absorption, pressure loss, sphericity. Balls marked FIFA Quality / FIFA Inspected correspond to the IMS analogue, i.e. the ball meets FIFA standards, but the ball cannot be played in official matches.
IMS - International Standard for Soccer Balls
All balls bearing the IMS logo comply with FIFA requirements. The only difference between FIFA Quality / Fifa Inspected and IMS is that these balls cannot be played in official matches under the auspices of FIFA. FIFA Quality / FIFA Inspected soccer ball companies have to pay a small fee to FIFA, while there is nothing to pay for the IMS logo! That's the whole difference.
Football (and more) ball care tips
Wipe the ball with a slightly damp cloth after each game. Remember, the ball must dry naturally! If the ball is very wet, wipe it dry with a soft cloth. Dry the ball in a well-ventilated place away from heat sources. Never dry the ball with a hairdryer, etc. and also do not place the ball on the surface of heating appliances. Prolonged exposure to dirt, moisture, high temperatures leads to a deterioration in the physical properties of the ball, and, as a consequence, its playing characteristics, and a reduction in its service life. Remember about the pressure of the ball, after the game, lower it a little, before playing, pump it up to the required pressure, which is often indicated on the pentagon with a nipple. Don't pump the ball!
By following these simple instructions, you can extend the life of your ball.
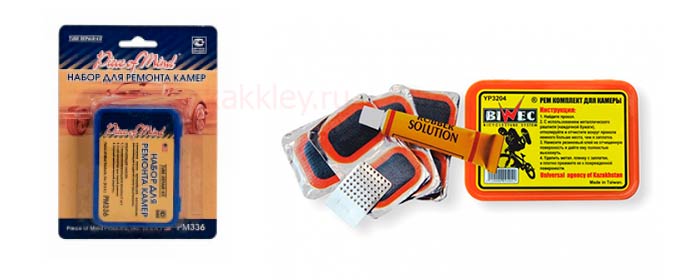
I bought a ball, kicked it and suddenly tore the camera. Problem. But do not rush to throw the ball. In this tutorial, I will show you how to seal the ball chamber if it breaks.
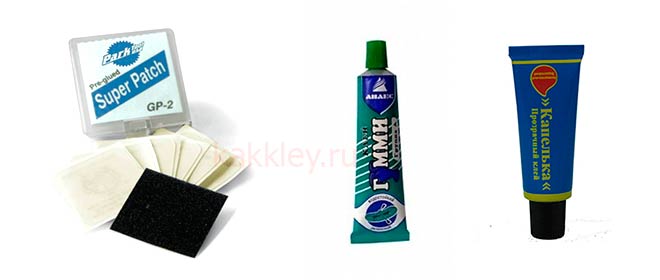
Super glue for 10-20 rubles (from 1 to 3 pieces)
Any knife
PVA glue
A piece of rubber, 10 x 10 cm
Pump for pumping and jumping the ball
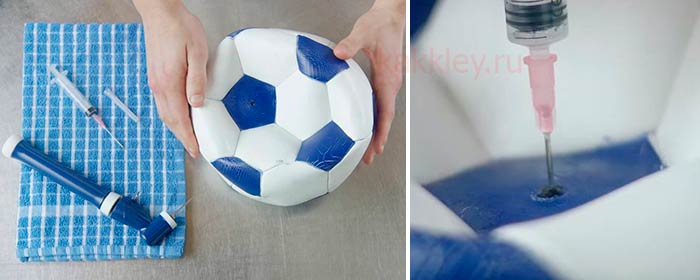
Firstly, if the camera is torn, then the casing of the ball needs to be cut in the place where the hole for inflating the ball is located (the ball will be ironed ugly, but it’s okay not to glue it otherwise, it’s still better than throwing the ball away). To find the place where the camera broke you need to:
Now the most important thing is to take the rubber and cut off a small piece (How much is needed,
You can check if air comes out of the hole using P.V.A. glue.
Finally, if you succeed, deflate the ball and shove the camera back into the hull,
Is registered: 27.11.2006
Is registered: 07.01.
there is a liquid sealant, which is poured into the tubeless, anti-puncture type
Last edited by vadam (Fri May 13, 2011 7:06 pm); edited 1 time in total
Is registered: 04.07.2004
Is registered: 07.12.2004
Is registered: 27.11.2006
Is registered: 07.01.
Is registered: 07.12.2004
Is registered: 27.11.2006
Is registered: 14.03.
Is the ball worth repairing?
A good ball is not a cheap pleasure. Even a primitive amateur "Chinese" is worth at least a thousand. Training grade balls are twice as expensive. The price of a professional equipment - volleyball, football, basketball, handball, or what is used in American football and rugby, such as “Gilbert Virtuo Generic”, can go up to 10 thousand rubles. In this case, even a collectible product fails. And at the most inopportune moment.
New balls usually have problems due to factory defects. For balls that have been in battle, most often due to improper handling: no one reads the operating instructions, which, oddly enough, exist.
With problem balls, our man leaves with ease - he sent his faithful friend to the trash can and all for a short time. Meanwhile, almost any damaged ball is reanimated.
Sewing lobes in case of partial or significant damage to the stitching and replacing the camera in nipple balls. The tire is turned inside out, the broken seams connecting the lobules are ripped above and below at a distance of 1 cm from the beginning and end of the damaged area, the nipple ball chamber is stripped off and removed if it needs to be replaced. Details are cleaned from the ends of the threads. Two pieces of the ball or tires are folded with the front sides inward, clamped in the saddle jaws of the non-glue. The parts to be joined are pierced and stitched with a welded wire in 7-8 additions by hand, using a tight tightening, which gives a strong seam that does not bloom in case of accidental breaks (seam "into a curl" - Fig. 14).
Rice. 14. Manual seam "in a curling", used in the repair of tires of balls.
In the same way, sew all other slices and the washer of the nipple chamber to the corresponding slice of the ball. The seam of the last pair of nipple balls to be joined is not fully sewn up for inversion. The edges of the parts to be sewn together with the lining are overcast with rare stitches.
Attaching patches and replacing the balls of the ball. With minor gaps, patches are applied, with significant gaps and wear, the slices are replaced. The patch is thinned on three sides and applied to the segments of balls and tires so that the fourth side of the patch coincides with the seam of the segment. The patch is sewn by hand with a tight seam.
A new slice is cut out of the black-backed part of the skin. It must fully correspond to the part being replaced in terms of shape, type of leather, thickness and weight. The cut out slice is coated over the entire surface with rubber glue, duplicated with a cotton tent for football, basketball and volleyball balls and a rubberized cloth (for water polo balls) and dried naturally. The prepared slice is sewn into a ball or tire manually, using a tight tightening.
The repaired tires are turned onto the front side through the existing hole on the tire for the camera or the not sewn hole between the lobules in the balls, which, after turning inside out, is sewn up from the front side with a hand seam using a tight tightening.
Pakistan, far from being the most footballing country in the world, produces half of the soccer balls on earth: they are hand-sewn in factories in the city of Sialkot.And although this time the Chinese put the official balls for the championship games, FIFA gave the Pakistanis a consolation prize - the right to fill up souvenir shops with their products.
Problems came from where they did not expect: by the end of the 1990s, human rights defenders led by UNICEF and the International Labor Organization intervened in the established business, they say, child labor is mercilessly exploited in the factories here. Fearing for its reputation, FIFA already in 2006 put forward the slogan "Score a goal with a clear conscience!" and ditched hand-sewn balls in favor of machine-made ones. In 2010, China won the tender for supplies, and the FIFA Approved label is now placed only on balls produced “under appropriate working conditions”.
In order not to destroy the industry created in Pakistan, factories were still allowed to make official "souvenir" balls for the 2010 World Cup. Not so prestigious, but profitable: sales in a year can jump from $ 40 million to $ 60 million. However, the balls from Sialkot will shine on the football field at the 2010/11 UEFA Champions League matches: Pakistani manufacturers have already signed a corresponding agreement.
Published on Feb 23, 2018 To the question of how you can sew a ball at home, and even with an inner seam, you can get an answer from this video in just a couple of minutes of pleasant viewing and good luck.
how to sew a ballhow to sew a soccer ballhow to sew a volleyballhow to sew a ball with a needlehow to sew a ballhow to sew a soccer ballhow to sew a volleyballhow to sew a ball with a needle
Thank you for the video, it's a pity in childhood no one showed how to sew, here it is the beauty of the Internet.
I also have a Barcelona ball but a little different
He is the most. With leather it will be even easier in the old holes for a thread, easily pierced
specially trained person, smiled))
I sewed up the ball with copron threads, and although everything was tight and the threads were invisible, when the ball was pumped, the threads stretched and the ball became a little non-spherical. I wonder how the shoe threads will behave. I managed to hide the knot inside.
I sewed with black shoe threads that were not the strongest, everything was fine, the shape of the pear was not there.
Nick
Is registered: 23.06.
Is registered: 21.09.2004
Is it a nipple? Maybe a wound near the nipple somewhere?
Then there was no money and 1,500, it was terribly sorry for the ball.
Is registered: 10.07.
Repair of volleyballs Mikasa, Gala, Atemi, Torres, Winner. Replacing cameras and repairing damage.
The master repairs volleyball balls, makes repairs of varying complexity. It is possible to repair the damage, replace the punctured chamber or the air-permeable ball nipple.
You can order the item Repair of volleyballs in the "Leather ball" workshop online store through our system. The cost is 380 rubles, and the minimum order is 1 piece. The product is currently in stock status.
Organization Workshop "Leather Ball" is a registered supplier on the BizOrg.su website.
For convenience, on our trading platform, each company is assigned a unique code. Workshop "Leather ball" has ID 43817. Repair of volleyballs has a code on the site - 277943. If you find difficulties in cooperation with the company Workshop "Leather ball" - please provide the identifiers of the company and product / service to our customer service.
The product was added to the site on 08/28/2013, last modified on 11/16/2013. Since the beginning of the listing, the product has been viewed 1406 times.
A physical education teacher is in constant search of ways to improve the effectiveness of the lesson. The decisive condition for a radical improvement in the quality of educational and training sessions in volleyball is the systematic and rational use of various special equipment, which is much talked about, but it is being introduced into practice slowly. This equipment will continue to be called non-standard until its serial production has been established and there is no special methodological literature with descriptions, drawings and recommendations for its use in educational and training work.
Mastering the technical skills of playing volleyball largely depends on the level of physical fitness of students for each technique separately and the technique of the game as a whole.
Hoop block
Four nylon metal gymnastic hoops with a diameter of 80 cm at a distance of 120 cm from each other are attached with a thin nylon cord and an insulating tape to two nylon strings 8 mm thick, located in parallel. On both sides, the strings are attached with hooks to volleyball posts, the height of which can be adjusted.
With this trainer, you can do the following exercises to train and improve the two-handed overhead pass:
1. Passing the ball in pairs: one passes over the hoop, the other into the hoop.
You can also perform other exercises with the help of a block of hoops: somersaults into hoops, climbing through hoops, throwing a ball at a target, etc.
Pole hoop
This simple fixture can be quickly installed and removed. The pole is threaded through the mesh of the net, and the ring serves as a target for practicing ball passes for accuracy.
Exercises to train the accuracy of passing the ball
Volleyball players line up in a column at a distance of first 3 m, and then 6 m from the hoop. After the transfer of the teacher (coach) or partner, they direct the ball into the ring.
The class is divided into three groups. The first numbers perform the serve, the second receive it and pass the ball to the third standing in zone 3, who direct it to the ring suspended from the net in zone 2 or 4.
The class is divided into two groups. The first numbers serve, and the second, having accepted the ball, try to get it into the rings suspended on the net in zones 2, 3, 4. The dosage of exercises is regulated depending on the distance of the ball and the method of its reception and transmission.
The players are divided into pairs and are located in zones 2 and 4. The player from zone 4 passes with two hands from above to his partner, who, in turn, is the attacking blow to the partner who sent him the pass, and he performs the reception back to the player in zone 2, then he, acting as a setter, passes the ball to zone 3 or 4, where the rings are.
The players stand in zone 6, the setter in zone 3.The players alternately pass the ball with two hands from above to the setter, who directs the ball either to zone 4, or with two hands from above - back behind the head to zone 2, where the rings are located.
Lock holder
A leather belt with a lock is attached to the end of the pole with a carabiner, which is put on the lacing of the ball. The lock is made of steel wire. You can use a curtain clip, clothespin, etc. for this purpose. Exercises with this simulator allow you to perform the percussion movement correctly and coordinate the movements of the arms, trunk and legs.
Dumping targets
These simulators are extremely convenient for training a targeted attacking strike. They are located on the volleyball court behind the net in different zones. A player taking a hit over the net seeks to hit a target in a given area. On hit, the target flips over.
Exercises for training the accuracy of the attacking blow
1. Attack hit from zone 4. The target is located in zone 1.
The simulator is made of dense rubber or plywood with a device for attaching it to the hands. Gloves can be sewn to the plates for this purpose.
This simulator is used when performing single or group blocking in various zones. It is possible to perform blocking with fins both in the support position, standing on a dais, and in a jump.
Suspended balls on shock absorbers
The rubber bumper is attached at one end to the ball and at the other end to the bail of a basketball hoop, hinged bar, etc. The rubber cushion can be replaced with twine to help beginners determine the point of contact of the ball with the ball in top pass, bottom pass, and especially on fall and jump pass.
This simulator is used to study and improve the attacking strike: selecting the correct takeoff run and choosing a place for pushing off, and will also help in practicing the technique of hitting the ball on the spot.
The trainer can also be used to train and improve the ball reception in the fall on the hip and back. You can use hanging balls under the net, using its lower cable for this: after moving from the line of attack to the center line in the stance of the volleyball player along a zigzag near the net, perform a ball roll-over, then do the same on the other side of the net.
Ball over the net
The trainer consists of a metal tube into which a metal rod is inserted, which allows you to adjust the height of the ball above the net. A ring is attached to the end of the rod and a ring is installed, the diameter of which is 2 times less than the diameter of a volleyball, parallel to the floor.
This equipment is used to study and improve blocking techniques, discounts and other fraudulent actions.
Exercises to learn and improve blocking techniques
1. The coach holds the ball over the net and the students place their hands on the ball.
2. Students try to put the ball on the ring with one or both hands.
3. Dropping the ball from the ring with one hand in a jump.
4. Knock off the ball with both hands.
5. Imitation of blocking in a jump.
6. Imitation of blocking. Perform 50 times in a row, touching the ball with your hands each time.
7. Movements from zone 4 with an additional step and back to zone 2 with imitation of block setting in each zone.
8. The same in pairs with a double block.
9-10. The same as in exercises 7 and 8, but with crossed steps, the last step before jumping up is a side step.
11. Exercise in threes.The players sit next to the machines in zones 2, 3 and 4. First, all three players perform a single block in their zones. Then the players from zones 2 and 4 move with side steps to zone 3, where they perform a triple block. In this case, only the central blocker touches the ball, the extreme ones are connected to it so that the distance between the blocker's hands does not exceed the diameter of the ball. The players then return to their original position. The exercise is performed 3-5 times with each triplet.
12. The same, but the movement is carried out in cross steps, the last step is added.
13. The same, but after an individual block in zones 2, 3, 4, the player from zone 3 moves to zone 2 - a double block, and the player in zone 4 puts a single block. Then all players return to their seats, where they repeat the single block. Then the player from zone 3 moves to the player in zone 4 - a double block, the player in zone 2 - a single block. After that, everyone returns to their original position, etc. Exercises are performed with moving side steps, then cross steps, the last step - side steps, then running, jump in zone 2 - with half a turn to the right and in zone 4 - half a turn to the left, respectively. The extreme blockers choose the place to push in relation to the ball, and the central one joins them, achieving the necessary clarity and consistency. Blocking in zones 2 and 4 is performed simultaneously.
14. The same, but after a single block in zones 2, 3 and 4 - a triple block in zone 3, then two players move to zone 4 and one to zone 2; respectively, in zone 4 - a double block, and in zone 2 - a single block.
The article was published with the support of the Economist group of companies. Even after graduating from a higher educational institution and getting a high-paying job, one should not forget about the need for constant professional self-improvement. By contacting the Economist group of companies, you can choose courses to improve both your qualifications and your employees. Do you need additional education courses for employees in Perm? Just visit the official website of the company and find what you need.
With the help of the proposed special equipment, it is possible to develop various physical qualities that are necessary not only for a volleyball player.
Jumping expander
2-4 rubber buffers are attached to the player's belt and floor. The degree of effort is regulated by their length. To stimulate the development of maximum efforts, the task is to reach the balls on an inclined frame with your hand or with your head - a suspended ball.
Jumping expander exercises
I. p. - hands on the belt. Jumping on the left leg.
I. p. - too. Jumping on the right leg.
I. p. - too. Jumping on the left and right legs alternately.
I. p. - half-squat, hands on the belt. Jumping with a push of two legs.
The same with the simultaneous extension of the hands up.
I. p. - squat, hands on the belt. Jumping with a push of two legs.
The same with the simultaneous extension of the hands up.
The same with raising the knees to the chest.
The same with the simultaneous extension of the hands up.
The same with raising the legs to an angle position.
The same from a half-squat position, trying to touch your legs with your hands.
Walk and run in place with the shock absorbers tensioned.
Imitation of an attacking blow.
Simulated single blocking.
Rubber ladder
The simulator is made of a simple elastic band in the form of a horizontal rope ladder 40–45 cm wide, the distance between the steps is also 40–45 cm. The height of the simulator in relation to the floor can be adjusted depending on the age and level of physical fitness of the trainees.
Exercises for the development of speed-strength and coordination abilities
Jumping on two legs with forward movement, sequentially jumping into each square.
Jumping on the right (left) leg with forward movement.
Jumping with high hips.
The ladder is located 10 cm from the floor. The student runs with a high hip lift, trying to step consistently in each square.The exercise can be done facing or backwards.
The same with side steps with the right (left) side.
Run "snake", alternately stepping into the stairs from the right, then from the left.
All of these exercises can be performed with weights - cuffs on the arms or legs.
Homemade cuffs
These weights serve to develop the strength of the muscles of the lower leg and thigh. Pockets are sewn to a wide belt, into which the load is put - wet sand, lead, shot, etc. Pockets are made of leatherette, oilcloth or canvas. Weights of a larger size - weighing from 0.5 to 2 kg - are put on the lower leg at the ankle joints, choosing the weight depending on the exercises performed.
For the hands, weights are made of a smaller size and put on the wrists.
This device allows you to determine and regularly monitor the height of the jump from a spot. It consists of a metal clip on the floor, through which a measuring tape passes, and its end is attached to a rope, which is attached to the subject's belt. Before starting the exercise, the beginning of the tape is at knee level. The length of the tape is then measured to the point where it passes through the clamp. Then the student performs a jump upward with the simultaneous extension of the arms forward and upward, after which the length of the tape is measured again to the point of its passage through the clamp. The test result is determined by the difference between the final (after the jump) and the initial (before the jump) measurements.
Exercises to develop muscles in the arms, legs and trunk
Rice. one. Shuttle run on the markings of the volleyball court
Rice. 2. Shuttle run from center to sideline
Rice. 3. Shuttle run "big zigzag"
Rice. 4. Shuttle run "small zigzag"
Video (click to play).
Olga Grosheva,