
In detail: do-it-yourself jacket collar repair from a real master for the site my.housecope.com.
We repair the collar of a light jacket made of fabric with our own hands.
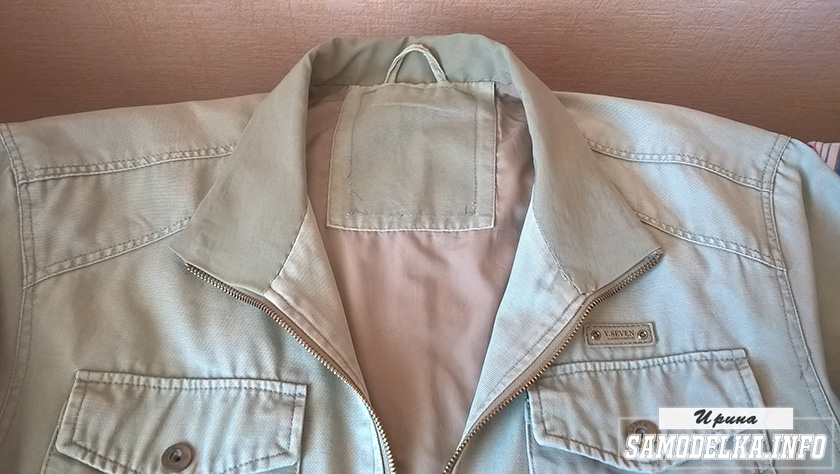
What to do if your favorite jacket still looks so good, but the collar is pretty worn out? Of course, the atelier will undertake to fix it, but the cost will be half the price of the jacket itself. Is it too hard to fix this situation with your own hands and fix the collar on your own? So I tried to do it. How did it happen, judge for yourself.
For the repair I needed a small piece of fabric and thread, matched to the color of the jacket. All work is done by hand.
First, we need to make a collar pattern from a piece of fabric. To do this, I put the collar on the fabric and circled the contour of the collar with a slight allowance for tucking in.
We cut out a pattern, sweep it away, or at least bait it with needles, pins.
We sew a seam by tucking the fabric on the back of the collar.
Near the "zipper" we go to the blind seam.
Then carefully sew the bottom of the fabric right along the seam.
In the process of work, we make sure that the fabric is not pulled together.
Collar view from the back.
All that remains is to iron the collar through a damp cloth.
The author of the article "Do-it-yourself jacket collar repair" Irina
See also interesting articles on a similar topic:
In clothes, the collar stand and the collar edge along the fold-over part (fly away) are most often worn out.
If the collar along the line of the stand and the fly-off is significantly worn out, then it should be completely replaced. To do this, the collar is evaporated, ironed out and a new collar made of the same material is trimmed along it; sometimes a new collar made of a different material (velvet or fur with a low hairline) is put on women's and children's products, which is, as it were, a decoration in the product.
| Video (click to play). |
When there is no material for a complete replacement of the collar, then it is repaired. To do this, chalk lines mark all the worn-out places of the collar (stand and turn-down part), their edges are trimmed, and then grinded with a regular seam. The seam is ironed out and the entire collar is ironed.
In addition, the collar, which is not unbuttoned from the product, is ironed in order to give it the necessary shape, lost during the wear of the product, as well as the ends of the hem along the sewing line of the collar.
After that, the collar is trimmed to clarify the shape or size and the upper collar is connected to the collar in the usual way.
If the collar post is very worn out, then it is cut out along the line a-b-c and replaced with a new one, as shown in Fig. 31, I.
Rice. Collar: I - before repair; II - after repair; a, b, c - the line of tissue damage along the collar; d, f, - seam line of sewing new fabric to the collar.
When the stand is slightly worn out, the collar is stripped from the lining, the worn out places are plastered and hemmed to the lining with hemming hand stitches.
With a strongly worn edge, it is repaired as follows. Along the edge of the collar departure, at a distance of 2-3 cm from it, a marking line is laid, then the edge of the departure is stripped off, and the edge of the collar is trimmed along the departure: in a coat by 8-10 mm, in a jacket and jacket - by 5-7 mm, so so that the worn edge of the collar folds inside out, but the seam connecting the collar to the neckline must be closed.
Fur collar repair... In men's winter coats, fur collars wear out the fastest at the locations of the hook and loop and at the edges of the ends and turn-down parts, as well as along the fold line of the stand.
It is recommended to unpick a badly worn fur collar, carefully select and repair the fur, or replace the worn-out sections of the fur with new ones, and then re-sew it to the product.
If the collar is made of astrakhan or lamb, then it can be repaired without stripping off clothes, by collecting and hemming patches.
It is more difficult to choose patches for a collar made of fur with low hair or from rabbit fur trimmed for a cat, since the hair on the patch in color, height and density should be the same as the hair of the part being repaired, therefore such parts should be stripped from the product.
When repairing an astrakhan collar damaged at the location of the hook and loop, the fur is stripped from the neck at a distance of 10 cm from the ends of the collar on the right and left sides, as well as along each end at a distance of 7-10 cm, starting from the sewing of the collar and the neckline. Examine the ends of the fur for strength and mark the boundaries of wear with chalk lines. The worn fur is cut out with a knife along the lines marked with chalk, patches made of fur are sewn, which in the shape of the hair curl and color corresponds to the collar being repaired. After that, the edges of the collar are sewn to the neckline and ends of the collar in the usual manner.
Before sewing on the fur collar, check the strength of the hook and loop sewing. If they are not strong enough, they are additionally strengthened.
The repair of fur collars, in which the hairline is wiped at the edges, is carried out due to the allowances with which the edges of the collar are decorated.
When the width allowance is sufficient, the fur is stripped from the collar at the ends and along the folded part. Pieces of flesh with wiped hair are cut out with a knife, then the fur is sewn along the line of the cuts. After joining the cuts, the edges of the fur are carefully straightened and sewn to the collar.
If the allowance is not enough for the repair, then the collar is reduced in length and width, starting from the hook and loop in a circle by 8-12 mm, after which it is repaired as described above.
This method should only be used if the appropriate pieces of fur cannot be found to repair a worn collar, or when the collar can be reduced in length and width.
Repair of fur collars and cuffs in women's products. In women's collars, fur rupture most often occurs and, less often, the hairline is wiped off (with the exception of the cuffs).
Collars and cuffs in women's products are always larger than in men's, therefore, when repairing the fur in women's collars, you can reduce the length, width, or slightly change the shape of the collar and cuffs.
When repairing collars, cuffs and other fur trimmings in women's products made of fur with lush and long hair, as well as fur for a cat, first of all, straighten the skin, and then clean the hair with a metal comb, rinse with a slightly moistened linen rag and gently rub it. After washing, the fur parts are dried and combed again.
Thorough brushing of the hairline and rinsing with a damp cloth removes dust from the hair and gives it a good appearance.
Yes, I am again about clothes repair! This jacket was “crippled” by my husband at the end of last winter. I wonder - how do they do it? The youngest of my men has no difficulty in tearing a turtleneck or trousers, and the older one presents such “surprises” with other clothes.
Sometimes, I am very jealous of girls' moms!
In any case, just throwing away the torn thing, my hand does not rise. You have to invent something so that the product can be worn again.
This time I will make an “unusual patch”, rather not even a patch, but an extension made of a different fabric.
If you also have such unforeseen situations, my experience should be useful to you. And don't forget to subscribe to blog updates. HERE, for sure, this is not the last article on repair.
So, the jacket looked like this - the bottom edge is torn, or rather a piece of fabric is torn!

I find more or less a suitable piece of fabric (jacket fabric), cut out a long strip.
Its dimensions are determined taking into account the width of the lower edge of the jacket: the length is equal to the length of the lower cut of the back part, and I took the width so that the strip covers the torn edge on both sides, plus allowances for the width of the seam.
The result is a strip about 50 cm long, about 15 cm wide.I duplicate it with non-woven fabric
Carefully remove all protruding threads, put a glue web under the cut sections and gently iron it, fixing the edges of the gap. You can, of course, do without this technological operation, but it is safer this way.
Immediately I iron the edge of the prepared strip inward on three sides - a long one and two short ones (the layer of the fabric to be sewn is thick, so unnecessary pressing will not hurt, and it is much more convenient to sew along the already fixed edge).
I mark the center of the backrest and the middle of the strip, for precise alignment of parts.
To reduce the thickness and to avoid bias grinded materials, chipping off the fabric along the bottom edge of the jacket.
I apply the prepared strip with the right side to the seamy side of the jacket with a non-ironed cut! and grind.
View with an already sewn strip.
Then I wrap the bottom of the jacket with a strip, first I pin it, and then I line it exactly to the edge.
The result is this new bottom edge of the jacket.
And here is the "updated" jacket itself. I AM stitched the stitched strip along the bottom edge jackets in the middleto better secure and make the edges tighter.
The jacket can now be worn again, and I have to wait for the next "surprise".
This repair method is well applicable when needed. repair torn edges of clothing - bottom, bottom of a sleeve, hem, collar, etc. in other cases, when the product is torn off the edge, it is better to use appliques, various patches or patches... More on this in the next article. Stay tuned!
No matter how many clothes requiring repair fall into my hands, I am convinced that everything is ingenious and simple! 
That's how it turned out this time. A neighbor-client brings an autumn jacket, asks to come up with some kind of patch.
It, of course, only seems (to her!) That there is only a patch, and there is nothing complicated about it.
Here in the photo you can see, a shred was torn out from the side, the collar, by the way, was also in a shabby condition. And the whole jacket seemed to me somehow faded or something.
Well, what kind of "patch" can we talk about ?! And I will probably never learn to say the word “NO”!
I began to think. 
The application cannot be glued, since she is an adult girl, especially somewhere in the kidney area.  The embroidery is the same.
 What remains is what I love the most - to tie everything that I don't like!

I imposed these details to emphasize the texture, let's say, to give some kind of harmony and even zest.
And that's what I got.
The trims accentuate the waist and slim the barrel!
And everything seems to be simple, but there are some nuances: I had to dissolve my daughter's sweater-noodles, and then knit with thin knitting needles.
But the saddest thing is when She, that is, the client, came, and I suddenly began to stutter, mumble, and in the end I could not even pronounce the price!
By the way, I am an unemployed girl, but she is a “worker”, and she looked me in the eye like that, and I halved the price, and, moreover, for 2 months, because she has a loan!
And I have it, the loan, as if I do not!
But I'm an optimistic girl! 
I love my "golden" hands and my ideas! And even though everyone scolded me so much, scolded me so much that I will never earn money, I do not despair!
I will definitely write about a cardigan made of old sweaters!
Greetings to everyone who looked at my master class.
I continue with the topic of clothing repairs.
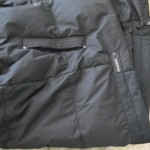
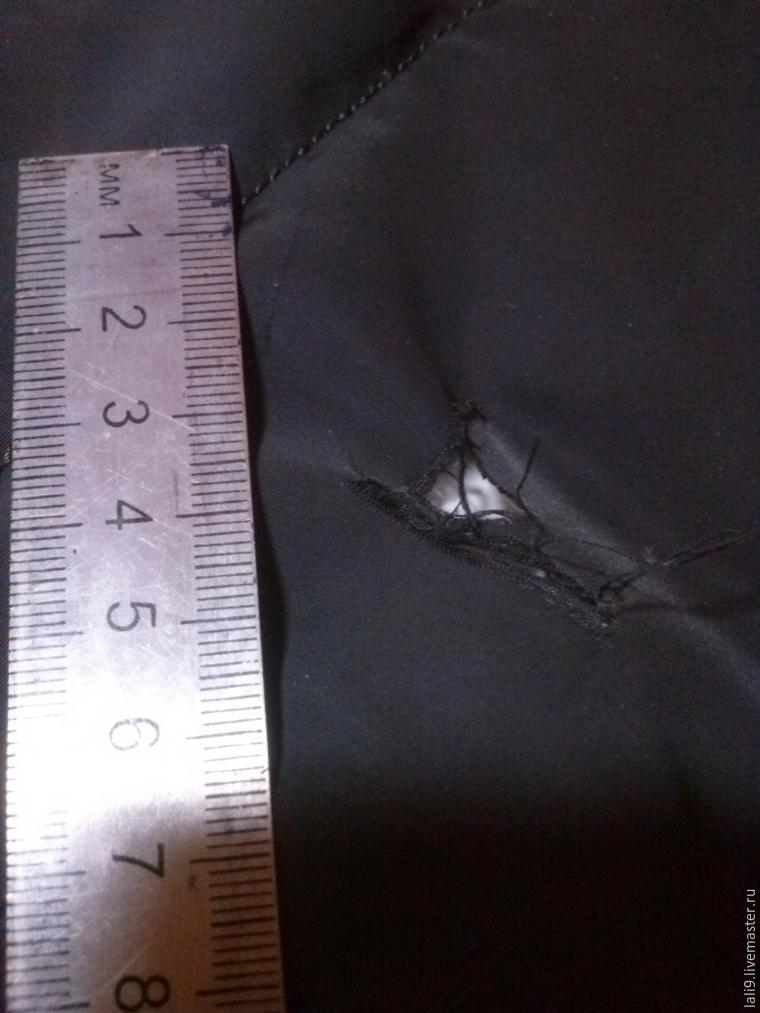
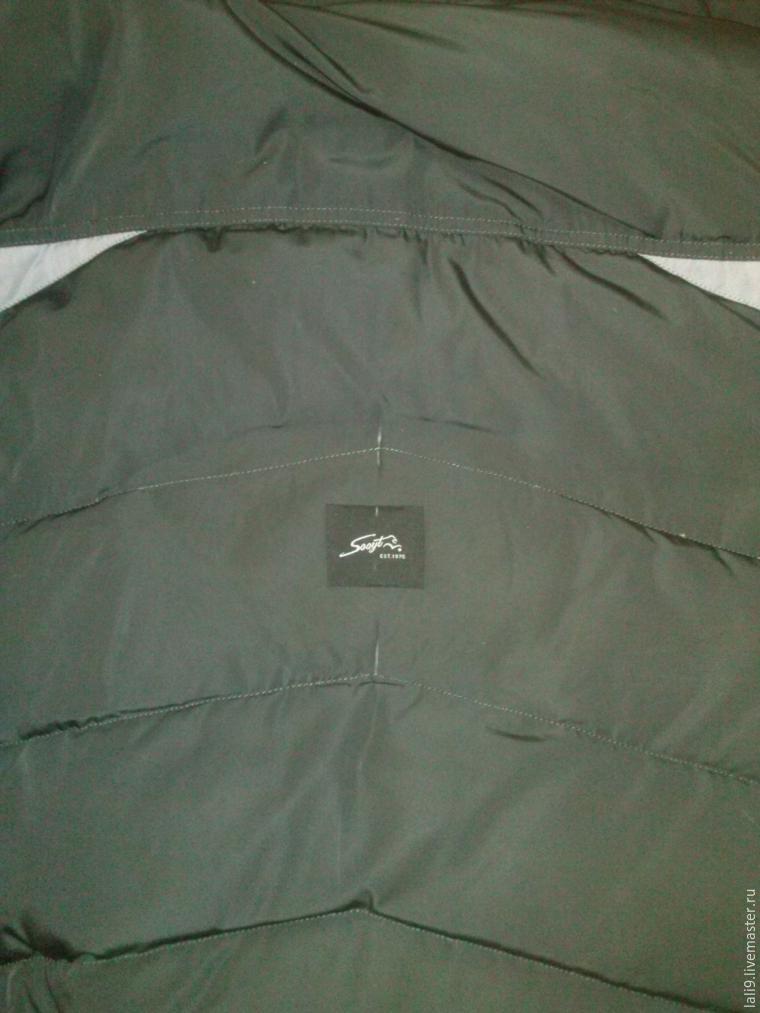
Today we are repairing a down jacket for men.
A gust of raincoat fabric in the most conspicuous place - on the back in the center.
Usually, in such cases, I look for a suitable raincoat fabric in the color of the main fabric or companion fabric (gray in this case, like on the sleeves), and make some kind of curly detail, tweak it from above to the place of the rush, or change part of the back or shelf, depending on the location rush.
In this case, let's go for the least resistance. We consider the inside of the jacket.
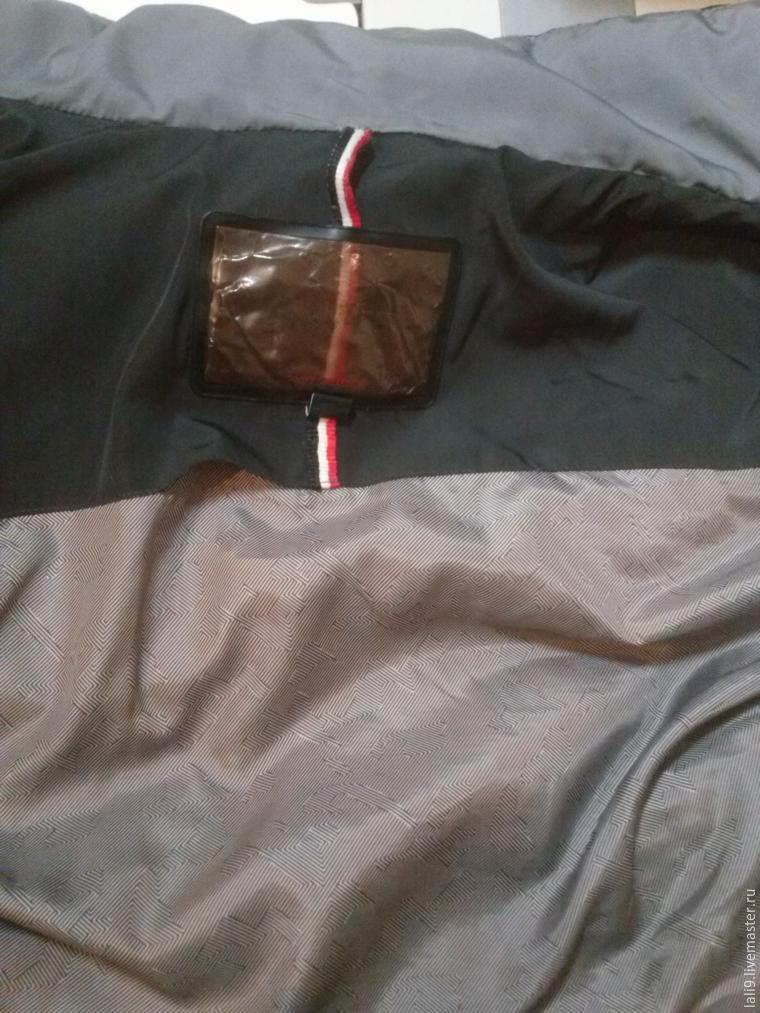
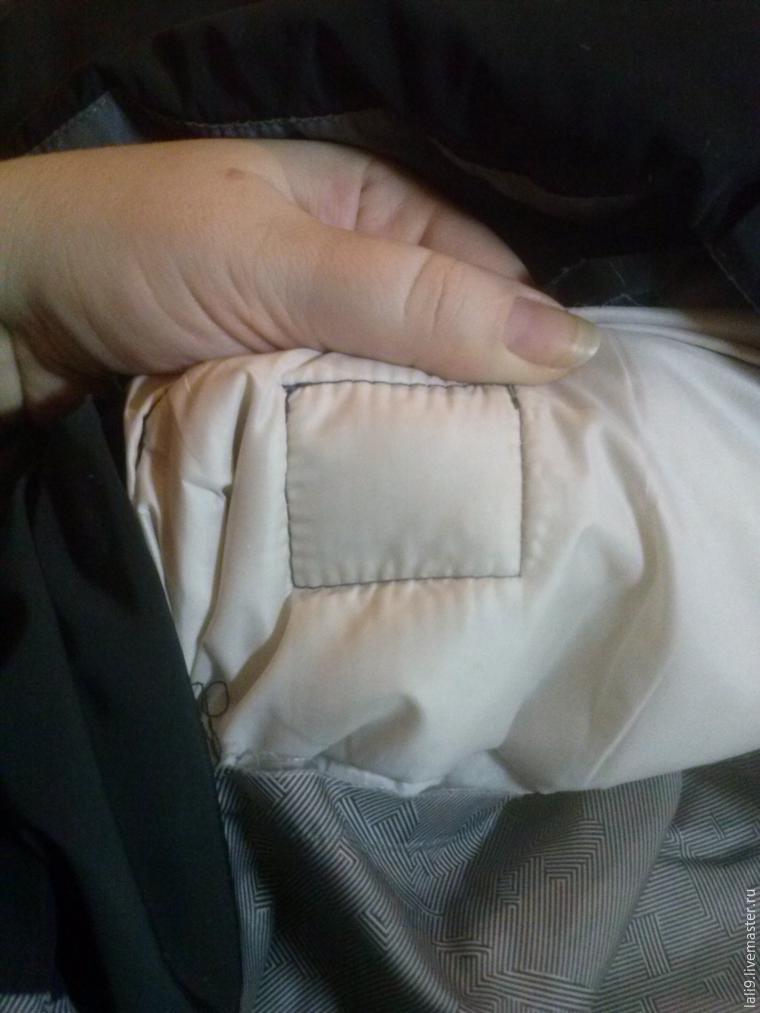
I liked one of the internal labels with the manufacturer's name, without unnecessary information, black. The size is sufficient to close the gust.
Fits in the side seam of the lining next to the inner pocket.
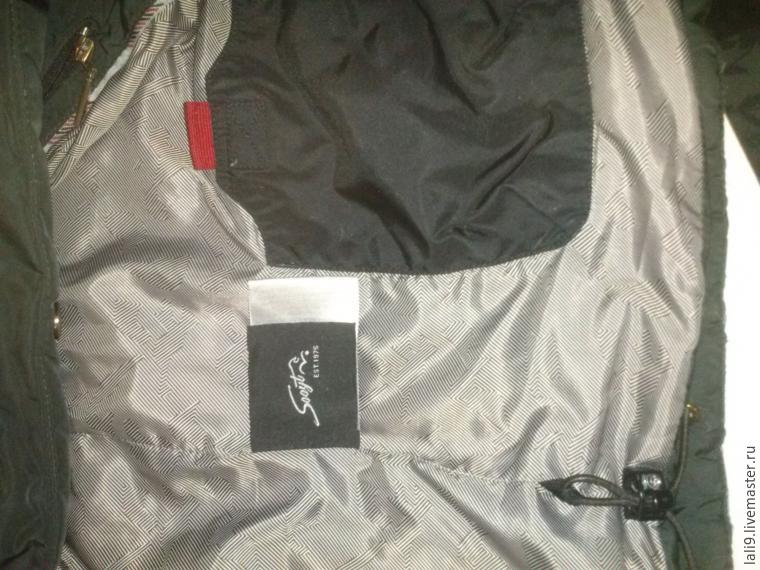
We will tune this label directly to the rush.
We look where to rip the lining so that it is convenient to adjust, as well as whip the label.
In the photo - the inner part of the jacket, the back, on top - the collar, below - the yoke, which is adjusted to the main part of the back lining, we will rip this seam, since it is closest to the center of the back.
We unpick, not reaching the armholes of the sleeves, about 3 cm.
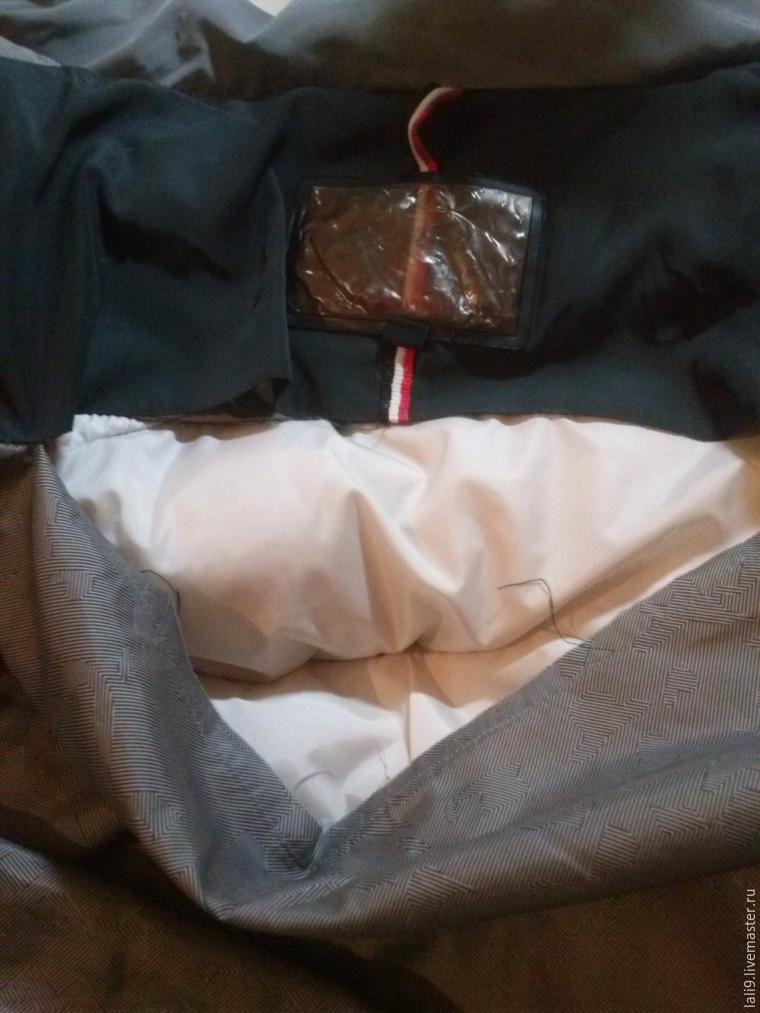
Consider insulation. This is a down pad made of dense fabric on both sides, if you damage it, then down will sprinkle. In the area of the neck, it would be possible to rip off the gasket by disassembling the collar, then unstitch the stitch on the back that connects the raincoat fabric with the gasket, and stitch the label only on the raincoat fabric, then restore the stitch again and collect the collar - but I will not do this, since the work is very laborious and time consuming.
Therefore, we will adjust directly to two layers, the front raincoat fabric and the gasket.
First, we evaporate the desired label.
To save time, we unpick only the seam seam, do not touch the overlock stitch, but simply cut the label close to the overlock seam.
This is what comes out of the face pad.

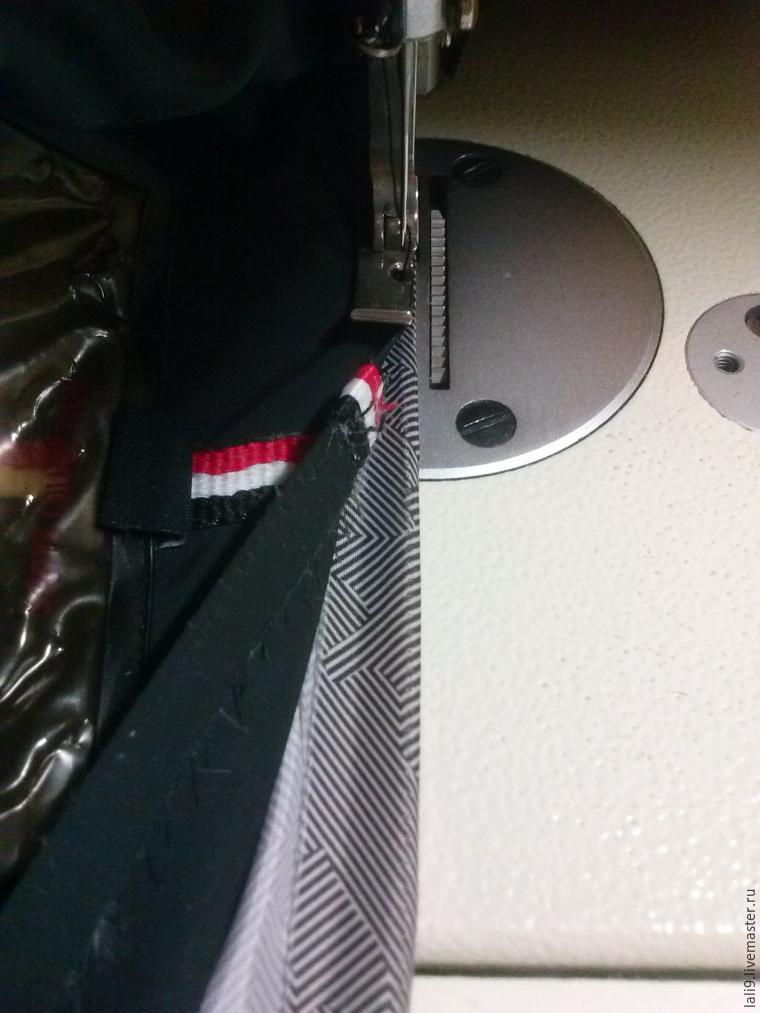
Sew the seam that we ripped open to cut the label.

This is what it will look like from the front of the pad.

Then we glue the glue with a cobweb, glue the raincoat fabric directly onto the gasket.
We align the side edges on the label, ironing them to the wrong side, the upper cuts of the labels are usually sealed, so they can not be folded.
We outline the center on the label and the center on the jacket.
We apply it to the back of the jacket.

We have already glued the gap, now you can glue the label (this is done so that during the sewing process, the details do not move relative to each other).
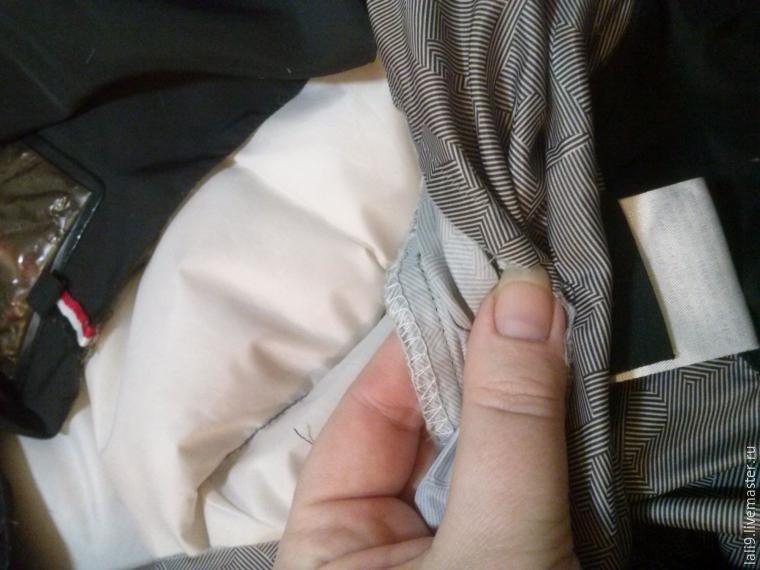
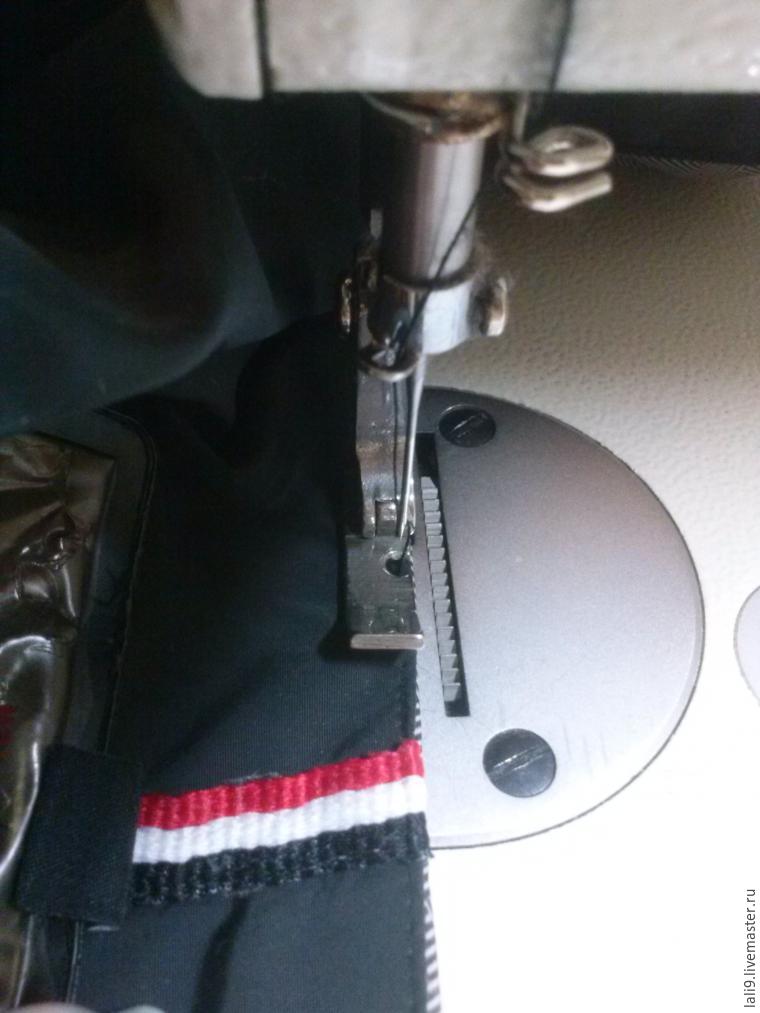
Customize the label by pulling the lining from the inside of the jacket.
Now you need to stitch the lining.
Since we have violated the initial technological sequence for assembling the jacket, it will not be possible to simply stitch the yoke onto the back of the lining, otherwise the seam will be on the front of the jacket on the back.
Therefore, we fold the back yoke and back lining inside out to each other and grind with a seam with closed sections.
As you can see, the entire jacket is left to the left of the seam.
Sew at a distance of 1-2 mm from the edge.
Iron the seam, a slightly damp spot is from the iron.
The main thing is that all wet-heat operations can be carried out only through an iron pad (gauze, thin cotton fabric).
Cracks appeared and now the skin began to crumble. The jacket is good. It's a shame to throw it away. Can you fix it somehow?
Try to sew on fur, for example. Nowadays, beautiful artificial and natural collars are being sold - these are collars, ready-made, and not fur or carcasses. These collars can be easily sewn (or even literally put on) right over an unsightly old collar.
If the style allows, you can simply cut off the old collar and make a new one - knit, for example, some stylish collar-collar that can be used like a scarf.
And to reanimate already crumbling skin, alas, is unrealistic. You can try to paint over, but problems may appear - such a gate will paint everything in turn, and it will not look perfect.
Leather goods look very stylish, but due to the nature of the material, they require constant care. If the inevitable happens, and your favorite thing is ruined, you need to know how to fix a leather jacket and return it to its former appearance..
Of course, you can go to a clothing repair shop, but the services of professionals are usually quite expensive. You can deal with the most common problems and defects on your own. It is enough to allocate some time for the recovery procedure and strictly follow these recommendations. Thus, you "reanimate" the product, giving it a second life.
This is perhaps the most common problem among leather jacket owners. As soon as you catch on a poorly hammered nail, iron fence or other sharp object, an ugly cut will remain on the thing, spoiling its appearance. First, you need to figure out what the gaps can be.
On a note! The most common are two cases: either a piece of skin is torn out completely, or the cut will be in the shape of a corner. Note that recovery procedures in these spirit situations are fundamentally different.
To begin with, we propose to consider step-by-step instructions on how to fix a leather jacket if it has a “corner” gap.
- Turn the garment inside out. Look for a stitched seam on one of the sleeves, and then gently open it. It is most convenient to work on a clean, level, well-lit surface, so think beforehand about where you will perform the procedure. Unfold the jacket, then stick your hand through the ripped hole. You need to find the gap on the wrong side.
- Fold the product flat on the table, and place the load on the patched area. Heavy books or a canned jar will do. Leave the jacket in this position for a day.
- After the required time has passed, treat the gluing line with a special cream paint for leather. This will help mask the seam and give the surface an even color.
- Now you just have to sew up the lining and enjoy the result of the work done.
Every owner of such a thing should know how to fix a hole in a leather jacket.
After all, you need to act in this situation immediately. If restoration measures are not taken in time, then you can damage your favorite thing even more, and its appearance will be forever ruined.
On a note! Note that as soon as you find the torn area, you should secure it with a plaster from the wrong side.
This will prevent further material creep. This is especially true if you are away from home, and time and money does not allow you to start the repair. Consider options for solving the most common problems and situations in which they are best used.
- We sew up. This method is quite radical, but if the hole is quite large, then you simply cannot do without it. It will be problematic to glue the torn skin area, so it is better to prepare threads, a suitable patch and a machine. So, now let's look at how to fix a leather jacket at home. First, you need to open the lining after turning the product inside out. Then carefully trim the edges of the hole to make it easier to pick up the patch and make the damaged area look neat after the repair. It is also very important to choose the material of the desired texture and color for the patch. If you do everything right, the jacket will look like new, and the place where the hole was will be completely invisible. You will need two patches: one can be made of any material, as it is attached from the inside, and the second - exclusively from leather that matches the jacket, because we will sew it on from the outside. By the way, their size should be 1-2 cm larger than the incision on all sides. Attach the selected patches and sew them on. Experts recommend choosing a sturdy needle for this procedure, which is designed for working with leather things.If you neglect this advice, you can not only ruin the jacket, but also damage the sewing machine.
You can eliminate small holes and cuts in this area using one of the above methods. I would like to consider in more detail the instructions on how to repair the collar of a leather jacket if it deteriorates from prolonged use and untimely cleaning. It is no secret that in the process of wearing, the skin is exposed to various contaminants. One of the most common is grease in the collar, which greatly spoils the appearance of the product. Let's see how you can deal with this problem and return the jacket to its former cleanliness. To work, you will need aviation gasoline and special paint for leather.
Spray the affected area with gasoline and then let it dry. The procedure must be repeated 2-3 times. During this time, you will see that the greasy spots disappear, and the thing takes on its usual color. Naturally, such processing will not remain without a trace, therefore it is necessary to apply a paint of a suitable tone.


