In detail: DIY repair of a solenoid relay from a real master for the site my.housecope.com.
It is known that a car cannot drive without a starter. It seems to be a simple electric motor, but without it, nowhere. It is possible to start a piston unit with a failed "starting" unit only from a pusher, but perhaps only for a trip to a car service specialist.
The reasons for the breakdown of such a critical mechanism are quite obvious. Most diseases can be cured if you repair the starter yourself. We list further the main sources of malfunctions:
- natural wear and tear of the elements of the electric motor;
- water ingress during washing the engine of the car;
- improper operation of the unit, for example, prolonged periods of operation of the electric motor after starting the motor;
- short circuits.
Do-it-yourself partial repair of the starter usually saves from all this. That is, it is not at all necessary to buy a whole new unit. Next, we will consider which specific elements are failing, how to make a starter repair with your own hands.
Preliminarily, we note that according to the symptoms when turning the ignition key, it is necessary to separate the types of malfunctions of the starting electric motor. If, for example, a click or crack is heard after turning the key, then the problem is in the retractor cylinder. The latter can be replaced completely.
To begin with, we will analyze how to make a starter repair with our own hands on VAZ cars. First, let's take the very first of the cars in this line.

To repair a VAZ 2101 with our own hands, we will use the tools listed below:
- set of wrenches;
- flat and cross screwdrivers;
- sandpaper;
- heads.
So, we start work by opening the hood.
- Disconnect the terminals from the battery.
- Dismantle the air filter housing with a filter element.
- We unscrew the three nuts securing the electric motor to the motor.
- We disconnect the wires, after taking photographs of the connections.
- We remove the defective device.
- Perhaps the so-called "pants" - the exhaust pipe, will interfere with this, then you will have to unscrew four bolts and "lower the pants".
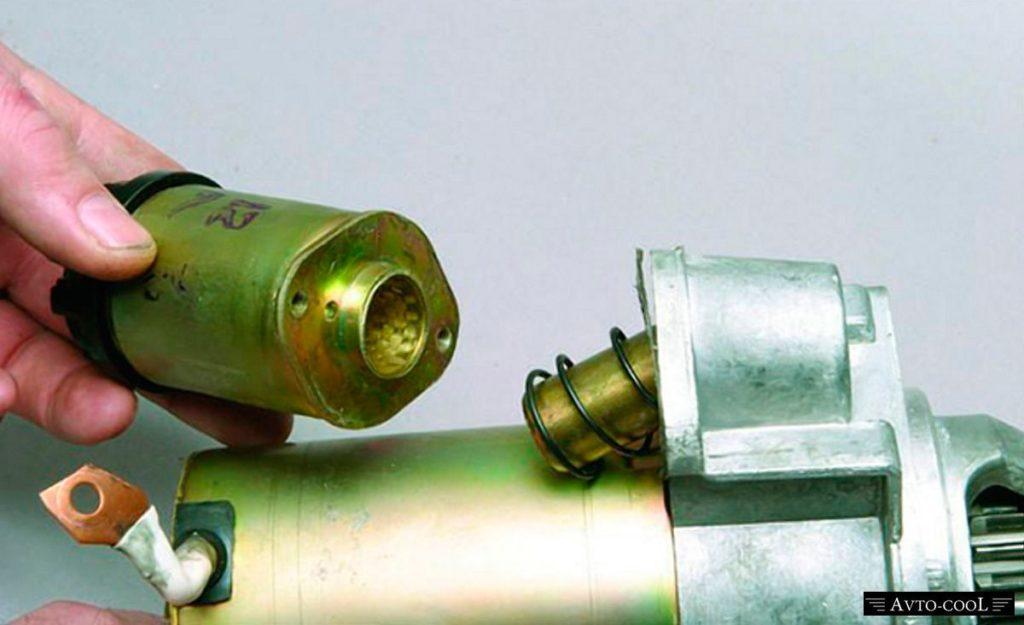
- Separate the retraction cylinder from the dismantled element by disconnecting the wire and unscrewing three screws. We inspect it, if necessary, replace it completely.
- After unscrewing the bolts, remove the motor cover.
- Having unscrewed two bolts, dismantle the cover.
- We separate the windings from the brush holder plates, remove the insulating tube.
- We separate the cover from the side of the collector.
- We take out the brushes of the electric motor with a screwdriver. We measure them, replace them if necessary.
- We disassemble the drive of the defective assembly unit. To do this, remove the cotter pin, then remove the drive lever, disengage the drive from the clutch, and then remove it.
- We inspect the windings of the electric motor.
- If necessary, press out, after which we replace the bushings of the assembly.
- We clean elements with carbon deposits or deposits. We replace the failed parts with new parts.
- We assemble and assemble on the way back.
| Video (click to play). |
Note that do-it-yourself starter repair at the VAZ 2106 is carried out according to similar instructions.
Also find out where the fuel filter on the Hyundai Solaris and the fuel pump device are located.
If we discuss the problem of interest to us regarding the front-wheel drive VAZ, then it is enough just to consider what are the differences from the given instructions. The tools are the same here.
However, for example, for a VAZ 2109 starter, when repairing with your own hands, you do not need to disconnect the exhaust pipe during dismantling from the car. Further manipulations are carried out in the same way as described above.
Naturally, the repair of such a VAZ 2108 starter with your own hands is done according to a similar scenario. When repairing a starter on a VAZ 2110 with your own hands, it is easier to immediately remove the retractor relay when dismantling the unit from the car by unscrewing the corresponding nuts.
However, in the case of repairing the starter at the VAZ 2115 with your own hands, the electric motor can be dismantled immediately along with the retraction cylinder.
By the way, it is not necessary to replace this completely assembled cylinder in the event of a breakdown. You can also repair the starter retractor relay with your own hands. To do this, you need to disassemble it, inspect the retraction winding, the return spring, replace the failed parts. As for domestic cars, UAZ repairs can be performed according to the instructions given by VAZ.
And now let's touch on two more truly popular cars. Let's talk about iterating over the starting element on the Oka, as well as Nexia.

To repair the starter at the Oka with our own hands, we need:
- set of wrenches;
- screwdrivers.
We start by dismantling the unit, it is located under the thermostat of the cooling system.
- In this car, the launcher is attached at only two points; to remove it, you need to unscrew the bolt on one side and the nut on the other. But first we disconnect the wires, both from the battery, from the retractor cylinder and from the connecting block.
- We unscrew two nuts, after which we dismantle the traction relay.
- We unscrew and remove the cover from the collector side.
- We dismantle the springs of the brushes, the locking, and also the adjusting washers.
- We separate the cover from the body, where the collector is.
- We take out the brushes, then measure them; replacement is necessary during production.
- Having unpinned, dismantle the lever axis.
- Remove the cover from the drive side.
- We remove the drive lever, then we take out the anchor.
- We inspect the windings of the electric motor.
- We dismantle the drive clutch, inspect its condition. This clutch is also called bendix. In case of any defects in the clutch, it is easy to repair the bendix of any starter with your own hands. You just need to replace the broken elements.
- We take out the spring of the bendix, replace it if necessary.
These are some simple manipulations.
I must say that in such a small car, such as the Tavria, the fastening of our cherished electric motor is also made at two points, and its design is similar. Therefore, do-it-yourself repairs at Tavria are carried out in the same way.
Well, it is somehow easier with Oka and Tavria, but if the starting unit of another people's car breaks down, will it be more difficult? Let's see. To repair a starter from Daewoo Nexia with your own hands, you need to prepare:
- set of wrenches;
- screwdrivers.
- To dismantle the unit from the car - here, like all big cars, there are three fasteners - unscrew the nuts, disconnect the wires. You need to know that a "ground" wire is attached to the upper bolt of the electric motor fastening to the piston unit.
- We immediately check the drive gear, it should only rotate unidirectionally.
- We carry out disassembly and enumeration of the unit in the same way as in the previous cases.
- We also disconnect the retractor relay.
- Dismantle the cover from the manifold side as well as from the drive side.
- We dismantle and then replace the brushes if necessary.
- We take out the anchor, study the windings.
- If necessary, press out, after which we replace the bushings of the assembly.
- We do the assembly in the reverse order.

Apparently, there are not many difficulties here.
The same can be said about repairing a starter, for example, an Audi 80 with your own hands. There you need to act, practically repeating the above points.
However, not everyone decides to do the repair of the starter with their own hands. Someone may find it much more convenient to contact a car service technician. For such car enthusiasts, we have compiled a table with prices for the described operation.
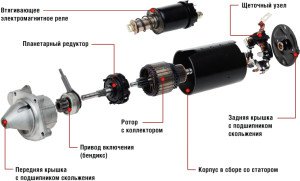
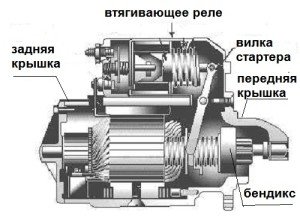
Before proceeding with the diagnosis, it is worth knowing the purpose of the solenoid relay.This part of the starter serves to supply current to the starter motor and drive the bendix to engage it with the flywheel. This article will describe in detail the structure and operation of the starter retractor relay, as well as diagnostics and its repair.
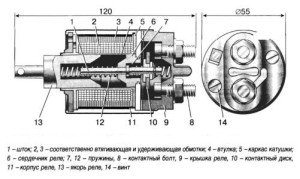
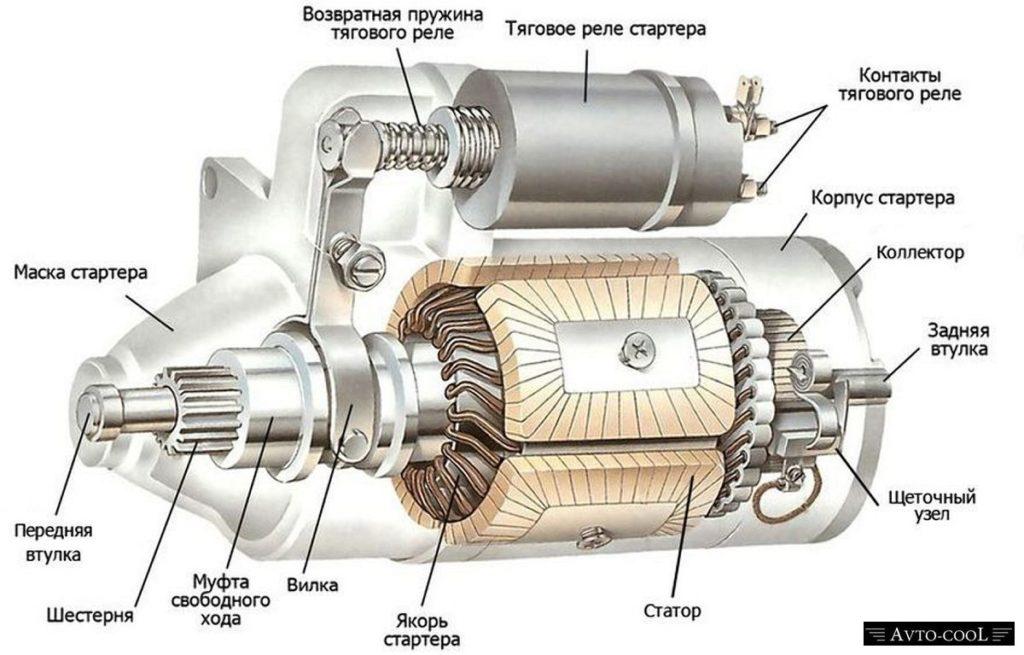
All relay operation is based on the principle of electromagnetism. There is a core, the device of which resembles a hollow tube with an anchor located inside, which, in turn, is equipped with a wire winding. When a current appears in the coil, an electromagnetic field is formed, which forces the armature to enter the core. After turning off the current supply, the armature can move freely, which allows it to automatically disconnect the bendix from the flywheel.
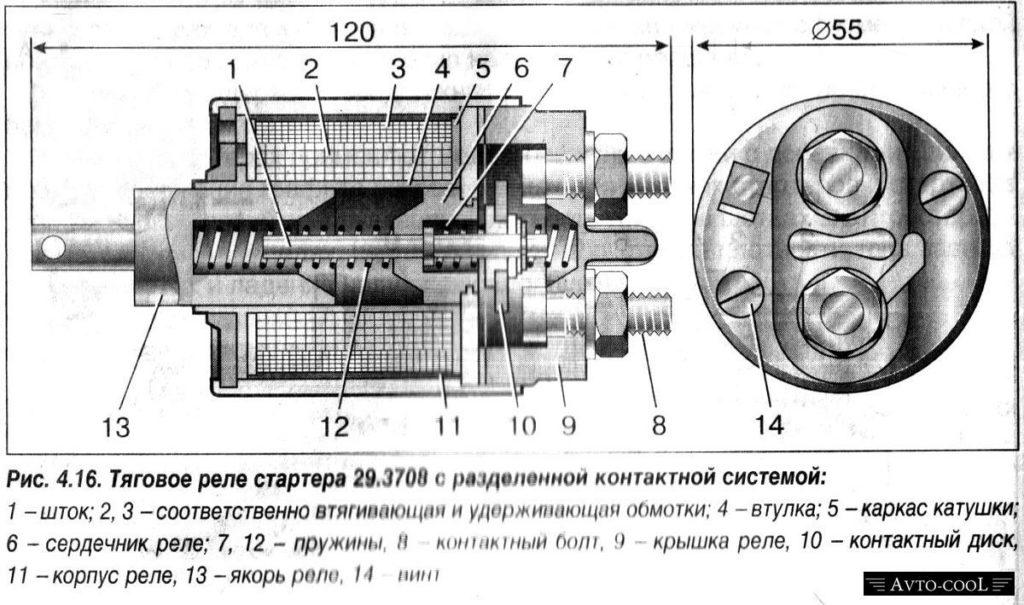
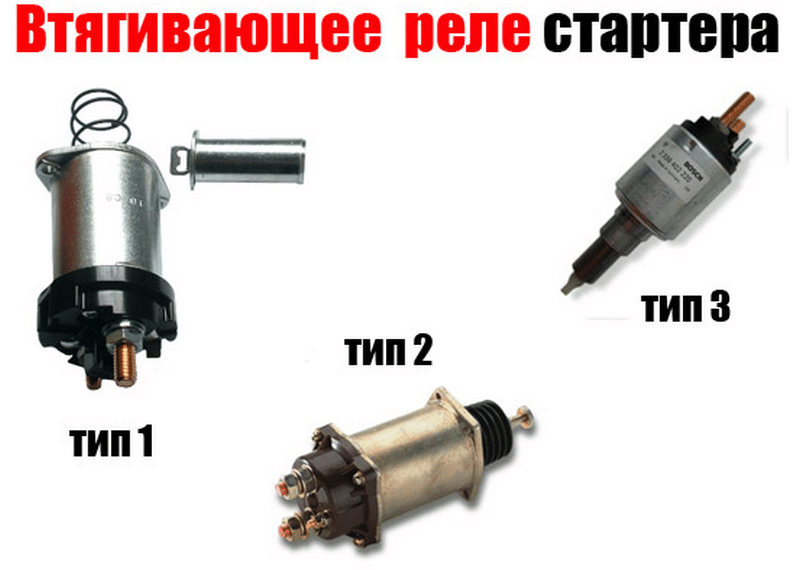
In most cases, the starter retractor relay consists of a housing, a magnet with windings, an armature, a return spring, and contacts. The relay coil is directly connected to the starter motor and to the terminal through which the starter is controlled. In turn, the holding coil is connected to the control terminal, which is in contact with the starter housing.
When an electric current is applied to the control contact, an electromagnetic induction is created in the coil, which, in turn, forms an electromagnetic field that drives the armature. The armature with the bendix engages the flywheel and at the same time closes the contacts through which the current from the battery is supplied to the starter motor, which, in turn, turns the flywheel of the engine.
After starting the engine, when the ignition key is tilted from the “START” position, the power is turned off and the armature returns to its original position, while the power contacts of the electric motor open and it stops.
As a rule, the starter itself and its retractor relay unit are reliable and fail so often. The main cause of breakdown in most cases is the physical wear of the starter parts, burning of the contacts, as well as the destruction of components. Signs of failure of the retractor relay are the impossibility of turning off the starter after starting the engine, while a characteristic buzz is heard. Starter rotation, but the flywheel does not rotate and the engine does not start. When the ignition key is turned to the “START” position, the starter does not turn on, only a click is heard.
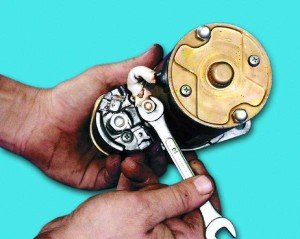
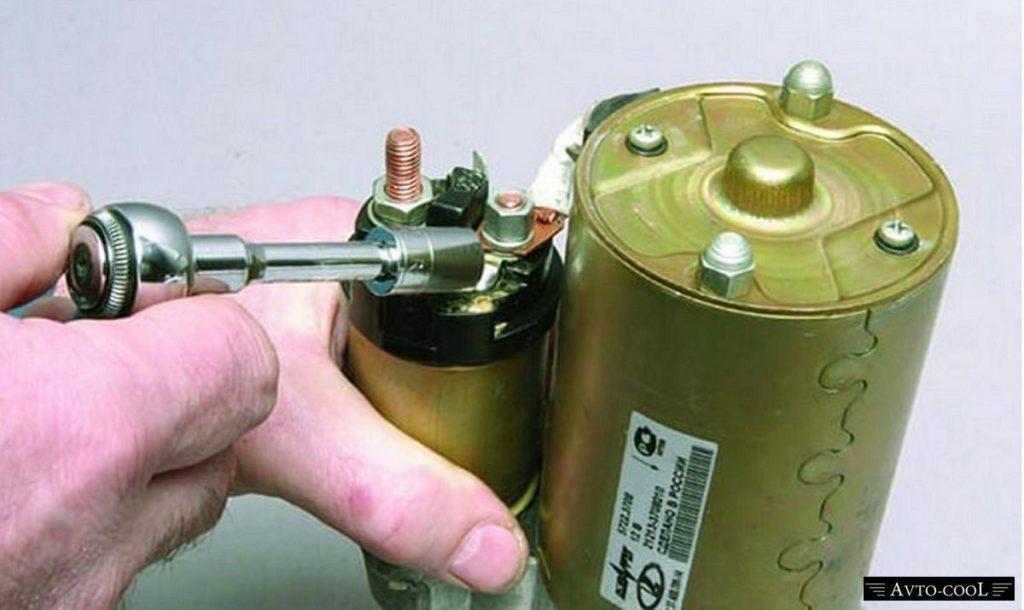
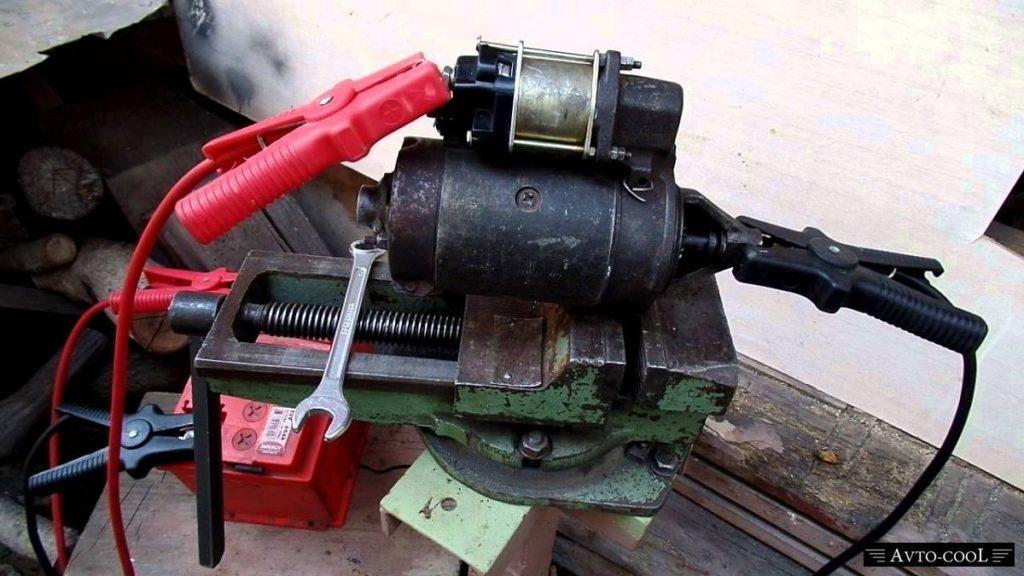
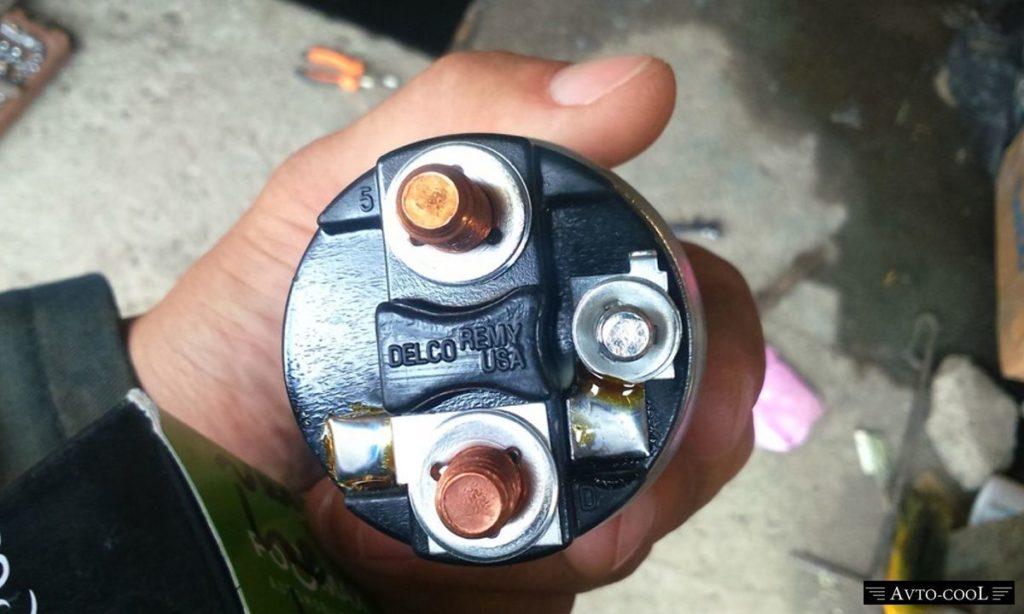
As you know work starter solenoid relay is based on the principle of electromagnetism, during the supply of current to the winding, the armature starts to move, while the position of the bendix changes and it engages with the flywheel, if, although one of the above elements fails, the engine start becomes impossible. To check the starter, it is not necessary to remove it from the car engine; for this, it is enough to close the contact bolts on the back of the relay with a wrench, which will allow the current to be directed to the starter motor. If at the same time the electric motor is running, therefore, the reason is the failure of the solenoid relay. If, during the closing of the contacts, the relay clicks and the starter motor does not turn, then the problem is in the electric motor.
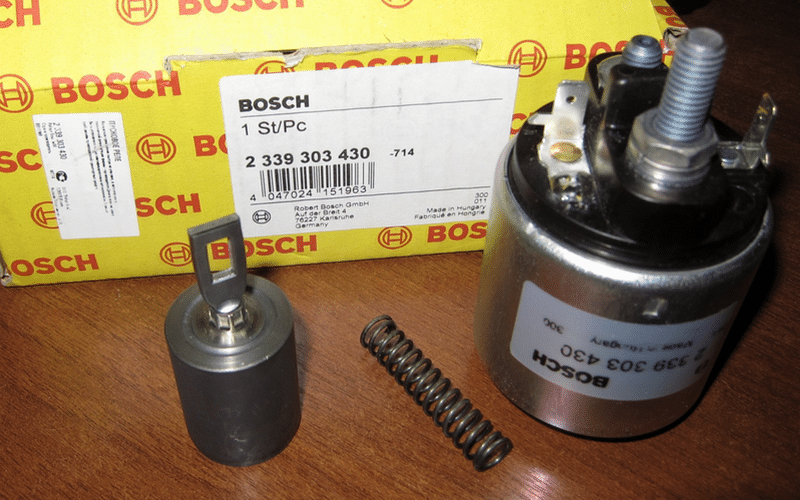
If in the course of diagnostics you come to the conclusion that the starter retractor relay is out of order, then in most cases its repair will consist of replacing it, since it is quite a laborious process to restore its operability, besides, many manufacturers make the starter retractor relay not collapsible. Sometimes, if the relay can be disassembled, you can limit yourself to a simple cleaning of all its elements from contamination.
Finally we got around to the starter ... well, how we got there. If the day before yesterday the car had not refused to start completely, then I would not have thought to touch it. I do everything from under the stick ... oh, it's time to change my life radically ...
To be precise, the problem was with the retractor relay (aka solenoid). It clicks, the bendix jumps out, but the engine does not turn ... And the car had this problem for a long time.
Well, here I am at the garage, doing an autopsy ... which says only one thing - the 3.14-Z-Decl starter ... well, if not right now, then in the near bright future ... in short, he can estimate the result of the "Kazakhstan 2030" program for sure cannot ... Nursultan Abishevich, I'm sorry ...
Well, not to be unfounded, a photo of a stator with badass:
perhaps one core in the winding ... but where is it?
yes, here she is ... lying around inside =)
as I understood, once upon a time, due to the fact that the bearing flew apart, everything inside was blown apart. But the craftsmen did not begin to eliminate the consequences, they simply replaced the bearing and put everything back together, without even checking if there was anything unnecessary inside.
and in general, all the insides are covered in scraps of insulation and dirt ...
I consulted with the specialists, they said there is nothing to catch here, if it is spinning, wait until it gets up at all. Can't be repaired.
Well, let's move on to the hero of the occasion - the retractor relay. It turned out to be non-collapsible (sealed), and, according to the assurances of specialists, it cannot be repaired either ... New under the order from the Emirates to wait 20 days ... from America it is faster, but more expensive. Well, you need to check, maybe someone has been lying around on the market, maybe they brought it by mistake, because the 32nd maxim is almost the same ...
Indeed, it was lying around. Looks like a solid 4
... until you put it back in place. Even does not overpower ... clicks, heats up terribly - insidious endurance =) but the bendix does not jump out. I take off, look - there is a spring inside, removed the spring - the bendix pops up, but not completely ... in short, this Chinese piece of excrement does not overpower the obligations imposed on it ... We do not need such hockey, we will hand it over tomorrow ...
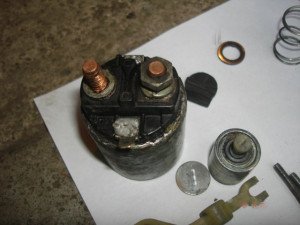
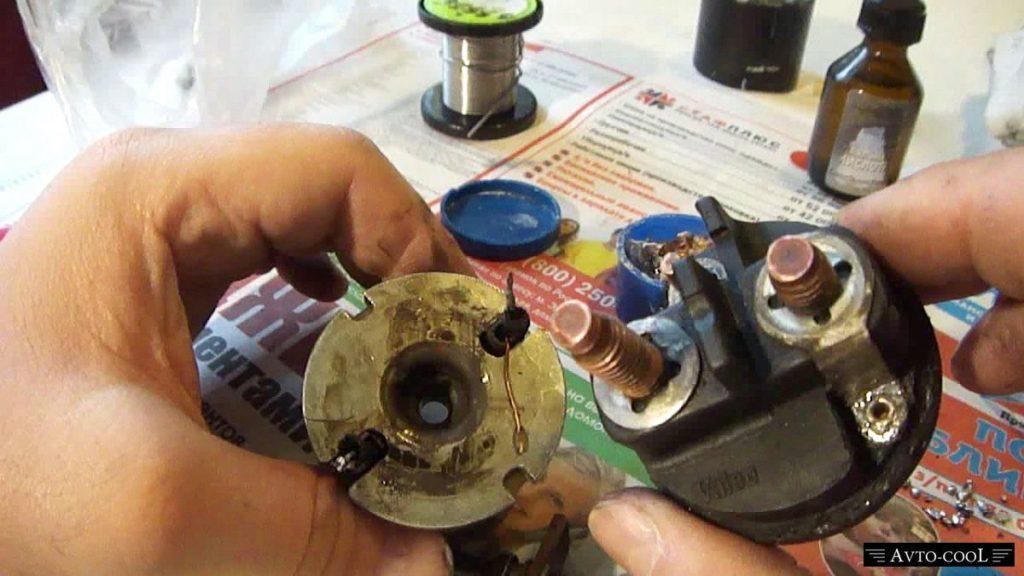
And now what to do, to spend N-th amount of time without a car again? To hell with the assurances of specialists! who said "non-separable" ... there is nothing "non-separable" ... .. a couple of dozen cuts around the perimeter and the object is already ready for opening ... you just need to unsolder the wiring from the terminals, otherwise nothing good will come of it.
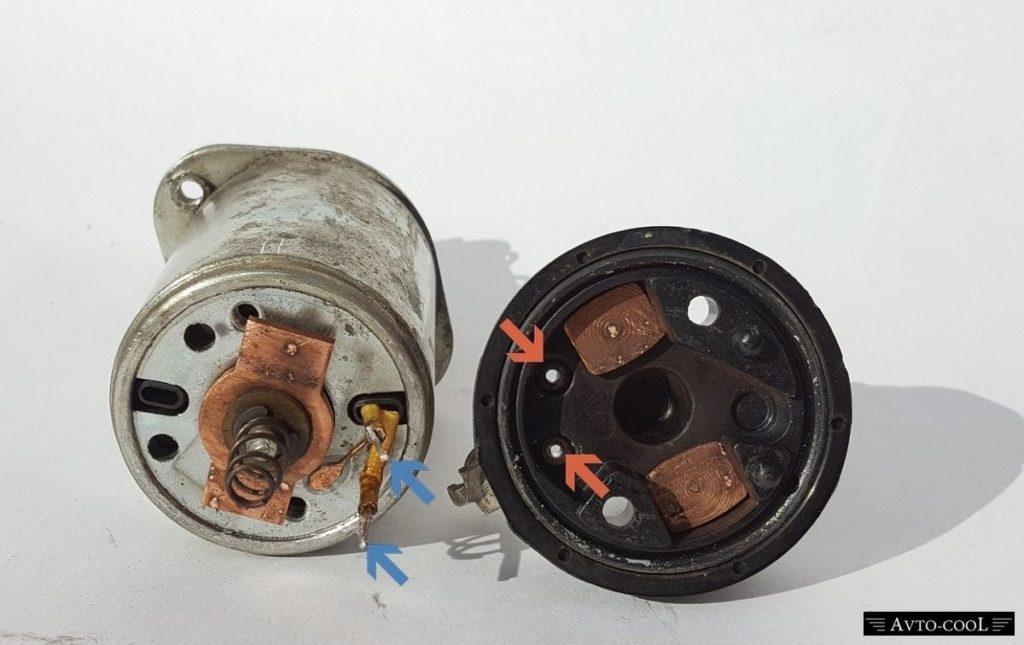
one penny was burnt by half ... But at the same time it was half intact =) so I am doing it simply.
I remove the stopper (I tried to twist it, but then cut it off so as not to smack the thread)
I take out a nickle, I polish it a little
now that's enough for another 20 years =)
replace the removed stopper with a nut.
I also polish the plate ... so that everything is as new.
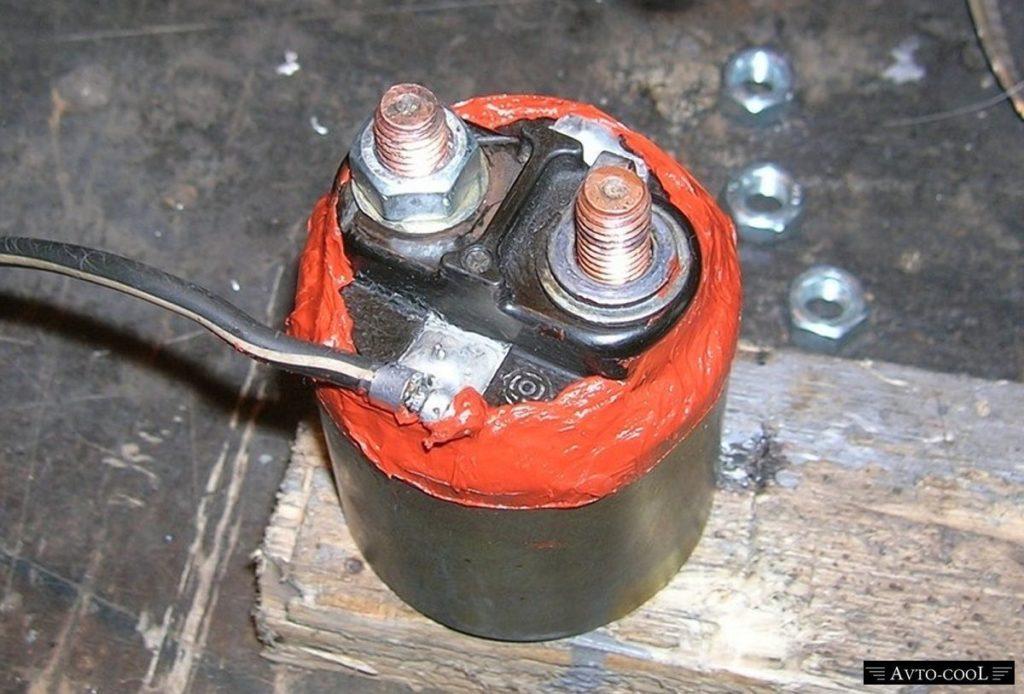
I assemble in the reverse order, I roll up and solder the contacts. It is advisable to walk along the seam with a sealant ... well, so that it is airtight
Thus, it turns out that the starter solenoid is not only "collapsible", but also "assembled", which means that it is even "serviced"))
and… moment of truth… - THE MACHINE STARTS. And this means that I again sent specialists to hell, did it my own way and got what I wanted ...
Well, let me summarize. The starter is in any case for a replacement, but I probably will kill him to the end. The retractor is quite maintainable, and if there is a desire, and most importantly, there is no money to buy a new one, then a hacksaw for metal may be very useful. The quality of spare parts on the market still maintains a clear dependence on the price ... for a penny you can't buy anything worthwhile ... it's good if there is a working one at all.
And I also want to note one point, if you yourself have no time to repair a car, that is, an excellent resource where they will definitely prompt you exactly the company or car service that will do all the work for you.
Service the starter on time. And happy road to you.
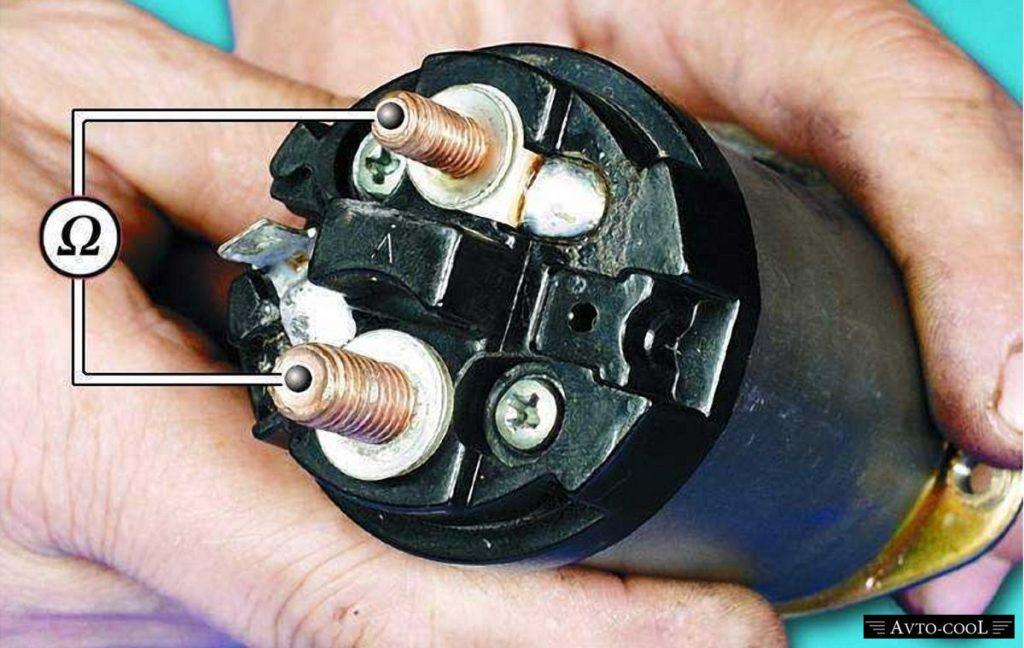
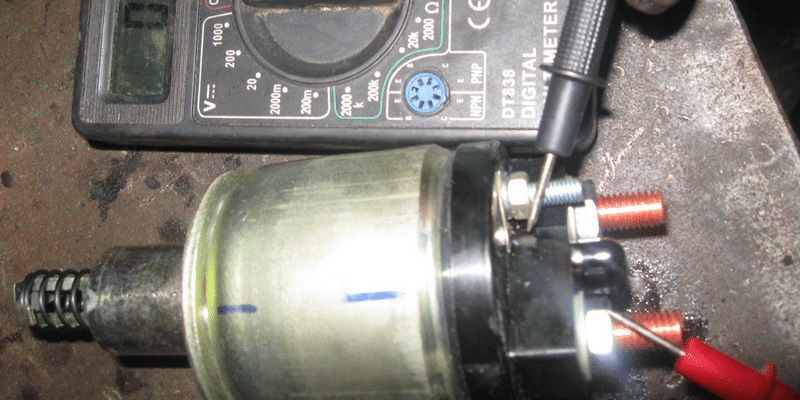
Hello dear motorists! Many have had to experience unpleasant moments when the car refuses to start at the right time. If the power grid is in order and the battery is charged, then the starter and its peripheral devices - the starter relay and the retractor (traction) relay - may be the culprit. If new and new attempts to wait for the engine start end only in silence, then it's just right to get ready for a major repair. The starter itself has a fairly simple device, as a rule, with detailed instructions at hand, even an inexperienced motorist can figure out this issue. The most problematic is to remove and install the starter. First, you need to determine in what place to look for a breakdown. The first on the path of the electric current are the ignition switch and the starter switch, which is located on the mudguard under the hood of the car. One should sin on them if the starter does not make any sounds at all. If you hear clicks or noise of a rotating shaft, then the causes of the malfunction are elsewhere in the electrical circuit. First you need to check the charging of the battery, because it can also cause problems. If replacing the battery or using the starting-charger did not give positive results, you must put on protective clothing and put the car in the pit. Both the starter itself and the solenoid relay use the principle of electromagnetism in their work. When voltage is applied to the windings, the solenoid relay attracts the armature, which pushes the working gear of the bendix until it engages with the flywheel crown. At the same time, the contacts are closed, through which voltage is supplied to the starter windings. All processes occur almost simultaneously and are interdependent. If any one function falls out of the chain, then the car will not start. Breakdowns of the retractor can occur for the following reasons: You can check the starter relay even before the starter is removed from the car. Experts recommend that you close the two contact bolts on the back with a metal object or a piece of wire. In this case, the voltage is applied directly to the starter windings, bypassing the solenoid relay windings. If the starter starts to rotate, then it is serviceable, and the cause of the breakdown really lies in the relay. If, when trying to turn the key in the ignition lock, the retractor clicks the starter does not turn, then the relay may be working properly, and the cause of the malfunction must be looked for in the starter. If all the signs indicate a breakdown of the starter traction relay, it will have to be repaired, although, as a rule, such a repair ends with a replacement. The problem is that some manufacturers, trying to ensure maximum reliability of the unit, make the relay non-separable. In this case, of course, you cannot do without replacing the relay. If the relay is disassembled, then you can try to restore its performance. The reasons why the relay refuses to work may be as follows: Any of the breakdowns is visible during disassembly and only to check the integrity of the windings will help connecting the starter relay to an ohmmeter. When testing the resistance between the body and the ends of the wire, the resistance must be at least 10 kΩ. If this figure is less, then the windings are closed and you will have to buy a new relay. A new relay or a repaired one is installed in the reverse order of removal. In order not to ask questions about how to connect the starter relay, it is necessary to mark the removed terminals. Before installation, the contacts are cleaned and degreased. Have you ever heard a clicking sound under the hood when you turn the ignition key to start the engine. If yes, it means that there is a serious defect in your starter relay. If it was not possible to determine by ear, then to check the performance of the starter relay, you can recommend doing the following: If the engine starts from this, then the cause of all malfunctions is a breakdown of the starter retractor relay. What to do if the car failed to start, then another person should come to the rescue, it is always easier for two of us, and so, in order to revive our car, you need to cock the key to the start position, and the second person, if possible, get close to the retractor relay on the starter and it is corny to knock on it with a hammer, in this case, be extremely careful, exclude all moments when starting the engine hair and clothing getting under the alternator belt and other moving parts of the engine. If this does not help, then all that remains is to start the car from the pusher, unless, of course, your vehicle has an automatic transmission. The first step is to check the fuses in the engine compartment of the car, and only then go into repairs. The next step is to check whether the power comes to the retractor itself. The most common problem with a solenoid relay is the formation of carbon deposits or an open between the contacts and the relay coils. Even a simple carbon deposit makes it difficult for the electric current to flow when the engine is started. The reason for this breakdown is simple: the driver keeps the starter on for too long when starting the engine. As a rule, if the engine does not start within 3-5 seconds, the key must be released. Excessively long starting of the starter greatly harms both the starter itself, and the relay to turn it on, and the battery. With respect, you will significantly extend the service life of the contact group inside the starter relay. First, take your time and remove the entire starter. To begin with, you can try to clean all the wires and contact groups from rust and oxides one by one. If after this simple procedure the problem remains, then you need to remove the starter. After removing the starter, disconnect the starter retractor relay. As a rule, this procedure is individual for each type of starter, so it is not possible to describe a single algorithm. Depending on the manufacturer, the starter relay can have 2,3 or 4 contacts. If, after disassembly, you notice an open circuit or sealed / burnt wires, then their correct location can be found in the technical passport of your starter. Be sure to solder all wires according to the manufacturer's wiring diagram. The performance of the solenoid relay can be checked by connecting the working winding to the battery. If the relay works, then you should hear 1 click, which will reliably close the contacts supplying the starter motor. After fixing the problem, collect the starter and try to emulate its start from the battery or using a charger. Remember that connecting the starter to the battery will consume a lot of energy and do not be alarmed if you see a lot of sparks. Only after all thorough checks can you install the starter in its place. The device of the starter retractor relay - an electric magnet, which is designed to bring the bendix gear to the flywheel rim, is relatively simple. Therefore, the repair of this mechanism, often called traction, can be carried out by any more or less experienced motorist on his own. The retractor was invented by Charles Kettering. It was thanks to him that, in 1912, the first car with such a device and an electric ignition system was produced, which made it possible to refuse to start the engine with a special handle placed in the crankshaft pulley. The device we are describing is designed to perform a number of important functions, in particular the following: The mechanism of interest to us should not be confused with the starter relay, which is located in the engine compartment. The ON relay is also very important for the functioning of the car starter, but it performs completely different tasks. This mechanism consists of the following elements: When voltage is applied to the windings of the retractor mechanism (it occurs when the ignition key is turned), a magnetic field is created that moves the starter armature. This armature, in turn, presses on the return spring and compresses it. The end of the fork, located at the end opposite from the body of the device, begins to move towards the flywheel, which leads to the meshing of the gear with its rim. In this case, the so-called "pyataks" are closed - a pair of contacts built into the structure of the relay we are considering. As a result of all these movements, the holding winding turns on and transfers the required current to the motor winding, which drives the flywheel and the shaft meshed with the gear into rotation. When the ignition key returns to its original position (the engine is started), the "pyataks" open, the mechanism stops receiving electrical energy. As a result, the armature, controlled by the return spring, returns to its initial position, and the flywheel disengages from the bendix. As you can see, the design of the starter traction relay is simple, for this reason, any driver can understand the principle of its operation. Most often, relay repair is required due to: At each cycle of operation, the device we are considering perceives critical loads, which becomes the reason for the relatively rapid failure of its components. Moreover, the breakdown of the plug, contacts, windings leads to the fact that the motor cannot be started in any way. The question of how to disassemble the starter retractor relay is not a problem when it comes to a collapsible device. It is connected to the starter and sits directly above it. To diagnose and repair the mechanism, it is imperative to dismantle the starter, and then disassemble the relay. If a non-separable retractor is installed on your vehicle, it will not be possible to "unfold" it to the shelves. You will have to buy a new relay and install it in place of the old one. The whole operation, given the simple device of the starter retractor relay, will take you about 15 minutes. Probably, all car owners had to find themselves in a situation in which the engine does not want to start. Basically, a similar problem can be solved by recharging the battery or stripping the contact elements. At the same time, it sometimes happens that the problem cannot be solved without repairing the starter retractor relay. We will talk about how to carry out such a procedure now. Before thinking about how to disassemble the starter retractor relay, you need to familiarize yourself with the principle of operation of this system. To begin with, you should understand that the device is powered by a battery. On the other hand, the device is capable of creating a parallel magnetic field, which acts on the armature. Then the return spring is compressed, due to which the bendix is activated. At the end, it connects to the splines on the flywheel. The principle of operation of the element is based on the subsequent closure of the corresponding contacts. At the same time, due to the action of the magnetic field, the coil armature is constantly inside. When the engine is running, access to power is limited.At the same time, the spring begins to return to its original position and the bendix is released. If you are interested in the operation of the starter retractor relay in more detail, the video on our page will help you figure it out. Video advice for repairing a starter retractor relay with your own hands: First of all, diagnostic work should begin with checking the starter. To carry out the check, one turn of the key in the ignition is enough. If the device does not work, you will hear characteristic clicks, which confirms the malfunction of the element. Next, you should bridge the contacts, which are represented by two copper bolts located on the relay cover. If the device starts spinning, then, most likely, the solenoid relay needs to be repaired. At the same time, another option is also possible. In this case, disconnect the starter. It is important to do everything very carefully, because the rotational force of the mechanism is relatively high, so the likelihood of injury is quite high. After completing the dismantling procedure, we put the part on the ground. Using a wire, we connect the contact terminal to the positive, as well as the mass of the starter with the mass of the battery. After such operations are performed, you should see the relay start working, which is accompanied by a characteristic click. If the start of the relay is not detected, we begin to inspect the contacts - most likely, they are slightly burnt. In addition, a system breakdown is also indicated by the situation when the relay does not turn off, even if the power unit has already started. You can understand this by buzzing from the system. Another symptom is the characteristic click of the ignition system, but the starter never starts its work. Finally, idle operation of the mechanism after the key is turned will also be a sign. At the same time, we see that the motor has not started. If you do not know how to check the operation of the starter retractor relay, the video on our website will help you figure it out. In it you will find a detailed description of how exactly to carry out a comprehensive diagnosis of this node. Video recommendation on how to disassemble the starter retractor relay: Basically, repair work involves the analysis of a number of mechanisms. It is important to remember about precautions here - do not rush, do everything very carefully, turn off the power to the car. It is also worth considering carefully whether there is a need to repair the starter retractor relay with your own hands. In the absence of the proper skills, abilities and tools, you should entrust everything to the hands of professionals - otherwise you can not only aggravate the breakdown, but also get injured. At the same time, deciding to carry out repair work yourself, disconnect the power from the battery. This is the initial step for disassembling the starter, otherwise all car wiring may burn out. Do not rush to dismantle the device, first wipe all elements from dirt so that dust does not penetrate into the system. Only after that we begin to unscrew the nut of the brush assembly. Next, we get the contact. Then we proceed to the tie screws, the task of which is reduced to connecting the assembly to the mass. If done correctly, we can completely remove the relay from the mechanism. Now we proceed to unscrew the nut at the end, as a result of which the part is divided into two parts. So we get access to the core, thanks to which we can replace the faulty element, after which we install the mechanism in its place. As final work, it is worth checking the health of the elements. In the event that everything functions as it should, we mount the relay in the vehicle. Having completed the repair work, we once again assess the system's performance. So, as you can see, replacing a faulty solenoid relay is not so difficult.... On the other hand, it is necessary to do everything very carefully and thoroughly here, otherwise there is a high probability of damage to the engine starting system, or serious injury. Thus, if you are worried about whether you can carry out repairs on your own, it is better to seek help from professionals - they will help you quickly restore the operation of this unit. Video review of repairing the starter retractor relay yourself: Every driver wants to drive a car that behaves predictably from the start of turning the key in the ignition lock. But sometimes it is at this moment that troubles happen with the car. One of the culprits of this event may be a relay in the starter. Before checking the starter retractor relay, it is advisable to make sure that the diagnosis is unambiguous. For this, a superficial check of the involved elements in the vehicle starting system is carried out. The driver must ensure that the problem lies solely with a faulty relay. To do this, you can hold visual inspection of electrical wiring, die charge of the battery. If this circuit and all parameters are normal, then with a high degree of probability the breakdown lies in the starter relay. The absence of clicking sounds from the starter indicates that the solenoid relay is not working. If the on / off is audible, then the breakdown is outside the relay. First you need try again with a turn of the key in the ignition lock. Silence of the motor in response to these actions will lead to the disassembly of the starter. But, before disassembling the starter retractor relay, it must be removed from the engine compartment. Knowledge of the device always helps to understand the malfunctions of the mechanism, therefore, we will find out the principle of operation of the starter retractor relay. The coil is supplied with voltage from the car battery. Due to this, a magnetic field is formed, interacting with the armature, which, while rotating, pulls the spring. Due to its interaction with the bendex, the latter meshes with the crankshaft flywheel gear. The closed contact elements block the voltage supply to the winding, but the armature does not come out of engagement due to the magnetic field. It returns only due to the retaining spring after the coil power supply is interrupted. Bendeks at this time disengages from the flywheel. Visual inspection of a faulty relay usually reveals burnt wiring on the contacts. Also, the contacts themselves are recessed (sticking), it is possible to insulate and burn the coil windings. You can often focus on such symptoms, after which you may need to repair the starter retractor relay with your own hands: To repair the relay, you will need to disassemble this element. However, there are models that have a non-separable device, these only need to be replaced. This type of repair is the most common. Any actions, even dismantling, even checking the starter retractor relay, should begin with disconnecting the power supply from the car battery. If this is not done, then the possible consequences will be a short circuit and damage to all wiring. This replacement can be very expensive. Before opening the case, it is necessary to clean the carbon and dirt from the surface so that they do not get inside the electrical device. Then you need to loosen the nut on the brush assembly and disconnect the contact from the bolt. Now you can loosen the tie and its bolts that hold the block against the ground. We take out the relay from the engine compartment. Unscrew the nut at the end and reveal the inner content. We take out a burned out or non-working core, and in its place we mount a new one. We carry out the assembly in the reverse order and mount the part in the engine compartment. If everything was assembled correctly, then the motor should start the first time.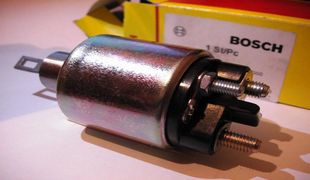
![]()
Video (click to play).


