VIDEO 1. Remove the tie rod end from the tie rod.
2. Clamp the tie rod end in a vise, then remove the ball joint cover.
3. Remove the large tie rod guard retaining clip.
4. Remove the small clamp of the tie rod protective cover.
5. Pull the protective cover from the steering box to the steering rod.
When replacing the protective cover, make sure there is no rust on the steering rack.
6. Disconnect the steering gear tubes from the valve body and steering gear and remove them.
7. Slowly moving the rack, drain the working fluid from the steering gear housing.
8. Using a chisel, chisel out the lock washer that secures the steering rod and steering rack.
9. Remove the steering rod from the steering rack.
Be careful when removing the tie rod from the steering rack, do not bend the rack.
10. Unscrew the rack stop cover locknut.
11. Remove the rail stop covers using a 14 mm tool head.
12. Remove the spring of the rack stop, the rack stop, the rack stop cover and the insert from the steering mechanism housing.
13. Remove the two retaining bolts and remove the valve body assembly.
14. Turn the rack travel stop clockwise until the end of the retaining ring comes out of the groove in the steering gear housing.
15. As soon as the end of the retaining ring comes out of the groove in the steering mechanism housing, turn the rack travel stop counterclockwise and remove the retaining ring.
16. Remove the O-ring from the rail support bushing.
17. Remove the oil seal from the rack support bushing.
eighteen.Tap the pinion gear and valve assembly out of the valve body by lightly tapping with a plastic hammer.
19. Using a special tool, remove the gland and ball bearing from the valve body.
20. Remove the oil seal and O-ring from the steering box.
Be careful not to damage the inner surface of the pinion cylinder in the steering box.
21. Using a special tool, remove the oil seal from the steering box.
Be careful not to damage the inner surface of the rack cylinder in the steering box.
Fuel injectors
Checking the protective covers of the axle shaft
The value of the ignition timing for engines with a working volume of 1.6 and 1.8 liters
So, the weaknesses of Elantra: chassis, rear bearings, front struts. It would be more correct to call the model parquet, as it is intended for megalopolises with an almost ideal coverage. Bumps and potholes contribute to the early failure of the unit and the repair. Given the complexity of the entire system, prevention, restoration or replacement should be carried out only in service centers that specialize in this.
Availability of autonomous premises for repairing several cars at the same time;
Special equipment and non-standard tool kits;
Qualified personnel with a clear delineation of the specifics of implementation;
Quality guarantee for the repair of the Hyundai Elantra rail;
A wide range of spare parts for most car brands, including foreign ones, are always available and on order;
Digital and automated tooling.
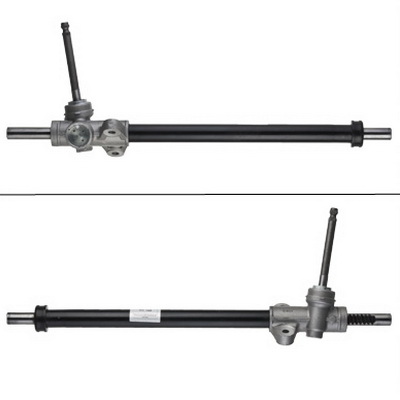
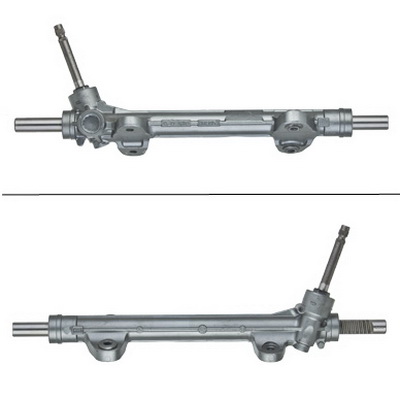
Depending on the model and year of manufacture, the type of steering rack (hereinafter PP) varies. So, the models until 2006 had in their basic equipment only the rack and pinion type PP. The improvement of technologies and their further implementation led to the installation of a power steering. This type is still being established, despite the fact that the electric type of amplifier (EUR) is actively used. It should be noted that ESD is not readily used by all manufacturers. Despite everything, hydraulics are much more robust and durable.
Aluminum body;
Central rack toothed type;
Stock worm;
Plastic bushings;
Seals, anthers, clamps and clamps;
Two shaft ends.
The upgraded version in the form of a power steering has a similar structure, only an auxiliary pusher rod, two pipes for oil supply, a plug for filling and draining should be added.
Car service workers most often encounter the following malfunctions:
Wear of the PP central bushing;
Damage to the teeth on the rack;
Bending of the pusher shaft on the power steering;
Other mechanical damage due to an accident or road accident.
These malfunctions of the steering mechanism often require repair of the Elantra rack without delay.
Indicates a malfunction:
During turns, a slight bite of the steering column is felt;
Squeaking and knocking that occurs intermittently. Many people confuse it with bearing wear. Yes, we are talking about them, but not about the rear ones, as many people think;
Insufficient steering response;
The backlash of the main units, exceeding the permissible limits.
Untimely technical inspection or its conduct in an inappropriate manner;
Insufficient level of lubricant in the power steering, due to which the parts do not receive the required amount of oil, the friction force and wear increase;
Manufacturing defects;
Installation of non-original spare parts or several during previous repairs;
Accident or accident.
With timely contact to the workshop, it will be enough to conduct a visual inspection, replace the anthers, tighten the regulator bolt to reduce the backlash gap, check the degree of clamping of the rod ends. This will be quite enough, if you do not take into account various non-standard situations and other force majeure.
In case of defects in the anthers, contact the workshop for replacement with new ones;
Do not try to carry out the work on your own, since, without the proper experience and skills, you can only do harm;
During the start from a standstill, do not twist the PP to the desired position, even if you have a power steering or power steering. This is the main mistake of drivers. It should be turned out only when the car has moved, and nothing else;
Fill in the lubricating fluid provided by the manufacturer, and do not follow the advice and recommendations;
Observe the replacement intervals for all consumables in the systems;
Use the services of only proven and qualified centers.
Despite the fact that the list is long, there is nothing complicated about it.
Moreover, even if, after a preliminary inspection, the master indicated a price, during a complete repair it may become necessary to replace some parts, which will entail an increase in the cost of repairs.
VIDEO
Otaka oil painting. In the photo, all 4 sides of the upper cardan. This rubbish, apparently, loves my brain in the left turn, as well as on the rails, the last 20-30 thousand. Pay attention to the non-acidic dents on the metal, especially photo 4! Replacement only with a piece of shaft with two cardan joints together 56410. Part code 564002H000.
Look at the price in existential and be horrified yourself.
Huh, why change the whole unit? Change only the crosspiece.
Febest AS-1639 Steering crosspiece 16 × 39 49,00
GreenMile , thanks, but Febestus nooo. There are many complaints about purebred China from the Germans.
I will not change anything there. I took off this knot today. Everything there is alive, but the reason for the dents is not completely clear (see dents in the 3rd photo). Rather, I understood what was hitting there, but did not understand how it turns out that one eyelet meets another. In what cases does the telescopic joint in the middle of the shaft (blue in the 3rd photo) start to fit into each other? It is generally more technological, i.e. only for removing and installing the assembly. When moving, it should not enter into each other.
I checked it myself - there is no backlash. I ordered this plug just in case for 2 bucks.
Registered: Apr 30, 2012 1:11 pmMessages: 2462Images: 53 Name: Paul Automobile: Peugeot3008 1.6e-HDi Napapijri Awards (1):
Author - VADIMZAN .
Now under the car.
The rods were torn off, the nuts were unscrewed, now the stretcher.
RED bolt DO NOT TOUCH ... He holds the rear arm bush, we don't need it.
We unscrew the two bolts securing the engine stop.
Gently pull the subframe down and it goes down while remaining on the ball joints.
THE ENGINE IS NOT NECESSARY TO INCREASE! INSTALLATION WILL BE IN THE REVERSE ORDER.
Reiki analysis!
We find the nut 24 and unscrew the adjusting bolt.
Careful, there is a spring, do not lose it. And you can gently pull out the rack shaft stop with round-nose pliers.
To correctly pull out the shaft, pull the rail to the end to the left, take out the shaft, put it back in the same position during assembly. We take out the rack, clean it of grease, see if there is any rust (if there is, then it is better to change the steering rack assembly). Everything is fine with my rail, no rust. Lubricate the new bushing and put it in place, grease the rail abundantly and start assembling in the reverse order, when installing the steering tips, you need to lubricate the threads with Thread sealant, put the anthers on the sealant.
Attention! Not all models are presented on the site.You can find out the price, check availability, and also make an appointment for repairs by phone: . Come! Steering diagnostics - free!
Narrow-profile specialization
Guarantee for all works for at least six months
Huge accumulated experience and technological base
Repair cost with spare parts (rub.)
Repair of the Hyundai Elantra steering rack is a difficult and often expensive process. The rail is a very complex machine unit, which is directly responsible for the reliability of the ride. Manufacturers claim that this unit is capable of serving 200-250 thousand kilometers. However, the duration of the coordinated work of the steering rack can be reduced due to poor quality roads and aggressive handling.
Leaking oil seals is the most popular breakdown that can be eliminated by repairing the Hyundai Elantra steering rack. Oil seals usually leak as a result of wear. This is influenced by the difference in temperature regimes in winter and summer. The formation of corrosion on the rod stem can also lead to oil leakage. Often, oil leaks when the seal is no longer able to maintain a good seal. Then the repair of the Hyundai Elantra steering rack is reduced to a bulkhead and changing the oil seals and O-rings.
A knock on the steering rack is the main sign of wear and tear on the biscuit. A malfunction of the cracker assumes the formation of a backlash. It is especially evident on low-quality tracks. As some motorists believe, it is possible to resort to the rail adjustment method. This implies a slight tightening of the biscuit. But to be honest, the problem will not be solved. On the contrary, you will need to steer all the time while driving, since the steering wheel will not be able to return to its original position. The problem here is much deeper and its cause is the wear of the crankcase.
Our team will repair the Hyundai Elantra steering rack with proper quality and responsibility. Need to eliminate knock and play in the steering rack Hyundai Elantra? No problem! Please contact us. Carrying out detailed diagnostics of the steering control of Hyundai Elantra, which is compulsorily performed by our technical center, can save you money and time.
Replacing the steering rack with a new Hyundai Elantra HD 2006-2011
VIDEO Hyundai Elantra How to change steering traction
VIDEO
Hyundai i30 steering rack repair part 1.
VIDEO Knock on Hyundai steering rack. Repair!
VIDEO hyundai i30 repair steering rack euro
VIDEO Steering rack bushing replacement. Front suspension knock
VIDEO A knock on the steering rack! Hyundai i30 How to fix it.
VIDEO
Steering rack without power steering Hyundai Elantra, Hyundai I30, Kia Cee’d, Kia Pro Cee’d KI 101R
VIDEO
hyundai i30 steering rack removal
VIDEO
Hyundai Elantra 2014 Knock when turning the steering wheel in place
VIDEO Remove the clips securing the pressure head and return hoses to the steering gear housing. Drain the power steering hydraulic drive. Disconnect the pressure head and return hoses from the steering gear housing.
Remove the bracket, dust cover and cover retaining plate. Raise the car. Remove the front wheels.
When removing the steering gear, be careful not to damage the protective covers.
Checking and pre-adjustment before installation
Secure the steering gear in a vise, the jaws of which are covered with soft material.
When securing the steering gear in a vise, wrap a cloth around the steering gear and be careful not to damage it when the vise is squeezed.
Gear preload
Measure the preload at full stroke of the feed dog.
Tie rod deflection resistance
Perform 10 steering rod deflections.
If the measured value is greater than the rated value, replace the steering link assembly.
If the measured value is lower than the nominal value and the steering rod turns smoothly and without backlash, it can be installed on the vehicle. However, if the measured value is less than 4.3 N, replace the steering rod.
Checking the pleated protective sleeve
Visually inspect the pleated protective cover for damage or deterioration. Make sure the protective cover is installed in the correct position.
Remove the tie rod end from the tie rod.
Move the gaiter to the steering rod.
When replacing the bellows, check the steering gear for rust.
When removing the steering link, be careful not to rotate the rack.
Be careful not to damage the valve cylinder in the steering gear housing.
Be careful not to damage the rack cylinder in the steering gear housing.
Check the rack for tooth damage or wear. Check the oil seal contact surfaces for damage. Check the feed dog for bending or twisting. Check the O-ring for damage or wear.
Checking the gear valve
Check the pinion valve for tooth damage or wear. Check the oil seal contact surfaces for damage. Check the o-ring for damage or wear.
I have developed another option for tightening the rail. My version removes the knock of the rasp and the worm. To detect a knock, it is enough to open the driver's door and crawl to the pedal assembly, then swing your hand with the steering wheel in a near zero position and then you will hear a knock from the rail which you can remove by tightening the nut. TE It is from the passenger compartment that you can control the sound of knocking but not twitching the mustache under the hood.
Have you got an eur author? Yes, you are a risky, not one car service does not undertake this
And why is the camera shaking already my head started to get tired and could not watch it
If the rail knocks, twist it counterclockwise!
The guy confuses the direction of movement of the clockwise
And what about the plastic sleeve did not say a word? Before you pull the rail with that nut, you need to be sure that there is not the slightest backlash in the bushing, otherwise with such a tightening you can turn that end of the rail where it slips in the bushing into the end of the scrap which will knock the pinion rack joint with terrible force
Prompt clockwise, taking into account that the nut is on the opposite side, loosening is obtained. ? Or is there a left-handed thread?
Too much, hourly minutes. If it did not help, then repair, or better replacement. Thank you for the video
It can be made even easier. Unscrew the steering wheel to the right to the limit and through the holes where the steering rods pass, stick your hand through and adjust the rack by touch. At the same time, you can slightly jack up the car from the left front side, so that your hand is freer.
Thank you for the video, let's try to do it
There are a lot of words, it was possible to keep within minutes.
Hyundai Elantra is good for everyone: fuel consumption on the highway is less than seven liters per hundred kilometers, sound insulation in the cabin is excellent. It should have been called not Striving (as Elantra is translated), but Achievement.
But there is one nuisance: after 9-15 thousand kilometers in the parking lot in the area of the steering mechanism, something starts to tap, gnash, creak. This is a signal: it's time to repair the steering rack of the Hyundai Elantra. Otherwise, the crankcase may be damaged, the rack shaft may bend (restoration work will cost more) or other parts of the steering mechanism. When treated at an early stage of the "disease", the problem can be solved by cleaning. A simple repair of the steering rack Hyundai Elantra hd (most often found in the Russian Federation, a representative of the IV generation of 2006-2010) is carried out in just three stages: disassembling the assembly, cleaning and replacing parts (bushings, worm gear). Takes several hours and is inexpensive.This is how they work in the Autopilot service center - the only specialized hyundai car service in Moscow, where a fine will be paid to the client for violating the agreed terms of repairing the steering rack of the Hyundai Elantra. Only here the owner of the Korean "swallow" can undergo diagnostics free of charge and receive extended guarantees of the quality of work.
The Autopilot company employs certified specialists who have been assembling and disassembling models of the Hyundai family for years. They understand the weak points of different versions, they know which parts (original and non-original) should be installed during the repair of the Hyundai Elantra HD steering rack. Here, everyone can personally attend the car service during recovery operations or watch the process of repairing the Hyundai Elantra rail on the big screen. The masters have at their disposal all the necessary equipment for a quick and absolutely safe "treatment" for a car.
In the center "Autopilot" there is a strict rule of constant tariffs. The price for repairing the Hyundai Elantra rail does not change after the agreement of future work. And this applies not only to the repair of the steering unit. Here they restore the operation of the chassis, suspension, brake systems, engine, change body parts and carry out maintenance. Everything that may be required for a normal ride on the Elantra will be done in this center quickly and efficiently.
We have been working since 2008
Every car driver wants his car to serve for a long time and reliably, as well as to be safe for passengers and others. The steering rack is one of those nodes, the condition of which must be carefully monitored in order to avoid trouble.
In the network of our Moscow Hyundai car services, we carry out all types of work on diagnostics of the condition, repair and replacement of the steering rack, steering rods and anthers of the Hyundai Elantra.
The main signs of malfunctions with the steering rack, requiring the intervention of the masters, are: the presence of a knock in the front of the car, the increased severity of the steering wheel revolutions, extraneous noise at the location of the GURA, drips of power steering fluid.
More rare but unpleasant problems are possible. For example, there have been cases where the steering rack body simply split in half when hitting the curb.
The steering rack on the Hyundai Elantra is often restored by the masters of our car services, respectively, the process is well studied. After dismantling, it is completely disassembled, then the condition of the worm gear, side shafts, oil seals, springs and sealing rings is assessed. For a quality repair, it is necessary to replace all these spare parts with new ones. After assembly, the rail is installed on a special test bench that simulates the operation of the steering mechanism.
After confirming the operability and the absence of defects, the rack is installed on the car, the GURA fluid is replaced and the entire steering system is pumped. All parts used for the repair are certified, which makes it possible to carry out restoration work of proper quality.
How quickly can a new car need to replace the steering rack? The manufacturer believes that no earlier than a mileage of 200-300 thousand kilometers. Unfortunately, in Russia's harsh operating conditions, the reality is different. And the need for this service may be required much earlier than we think.
The technology for replacing the steering rack on the Hyundai Elantra:
The air intake is removed
Both clamps are removed, fixing the pressure and return hose of the rack
Power steering fluid is drained into a previously prepared container
Both hoses are removed from the steering rack housing
The bolt on the body above the worm gear is unscrewed
Removable bracket and dust cover
The car climbs onto the lift
The lower engine protection is removed
Removable left and right front wheel
The tips are unscrewed from the steering knuckles
Steering rods are retracted to the side
Removing the right bracket of the front stabilizer
The front part of the muffler is dismantled
The lower steering cardan is unscrewed
The steering rack goes through the right side of the car
A new or refurbished rail is being installed
The assembly is performed according to the reverse algorithm.
It is also advisable to install new tie rods and tips + anthers. This will allow you to forget about the problems with this unit of the car for a long time.
Video (click to play).
We provide a guarantee for all diagnostics, repair and replacement of the steering rack, steering rods and anthers on the Elantra. We have a wide range of new original and non-original parts from well-known world manufacturers in our warehouse. Excellent quality of work, fast terms and reasonable prices.

