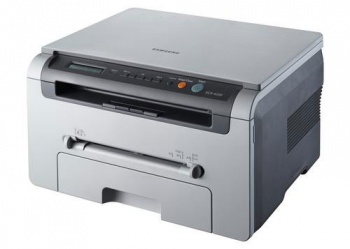
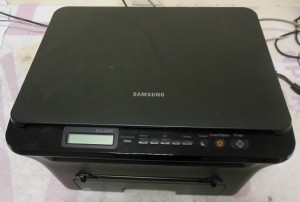
Details: samsung scx 4300 DIY repair from a real wizard for the site my.housecope.com.
Jam 0 — There is a jam in the input tray or the paper is jammed before reaching the cartridge. Pull out the input tray and remove the paper.
Jam 1 - There is a jam in the cartridge and fuser area. This often happens when the paper feed roller located above the paper tray is worn out.
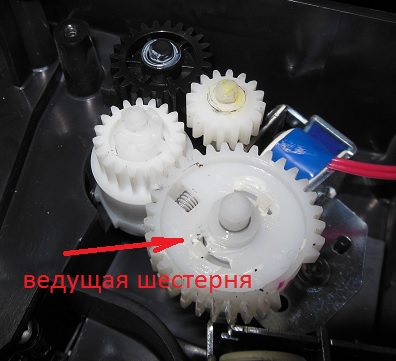
The replacement is not very difficult. It is necessary to disassemble the printer from below, remove the board, disassemble from the right side, remove the gear block, free the feed roller drive shaft to the right, replace the roller and reassemble.
It happens that Jam 1 occurs due to the solenoid when the printer prints 2 sheets. Replace or repair the solenoid.
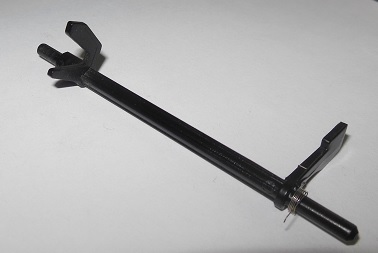
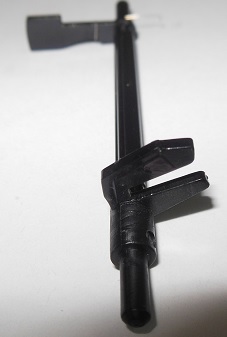
The Jam 1 Open / Close Cover message also occurs when the two-horned sensor of the paper cartridge is faulty. Which is located underneath the cartridge. There is no easy access to it. The separation angle of the two arms is very important. When changing it, an error occurs.
One horn is needed to determine the presence of a cartridge, the second is triggered when the paper passes. If the sensor is deformed, then the flag, instead of overlapping the optocoupler, goes further and causes a printer error.
Replacing the paper sensor and cartridge is not easy. To replace this sensor, you need to disassemble the printer from below: remove the side covers, disconnect the fan and limit switch, remove the main board. Then remove the block of gears, under which there is a block of 3 gears that controls the paper pick-up shaft. Next, you need to remove the triangular bracket, remove the drive gear, remove the axle with the gripper roller.
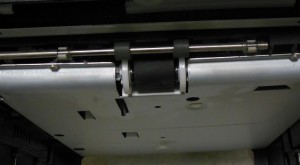
There is a two-horned sensor underneath the pick-up roller, which snaps into place. The pickup roller interferes with replacing the sensor, so it must be removed.
| Video (click to play). |
The deformed sensor needs to be replaced because it will break when straightened.
Jam 2 - A jam is coming out of the printer. Problems in the fusing unit or solenoid. Check all sensors on the printer.
By paper chewing in Samsung SCX-4300, we mean that the printer is printing, but the paper comes out of the printer wrinkled. If the Samsung SCX-4300 chews paper at the exit, the fusing unit (fuser) is usually to blame.
To eliminate chewing, you need to disassemble the stove and repair it.
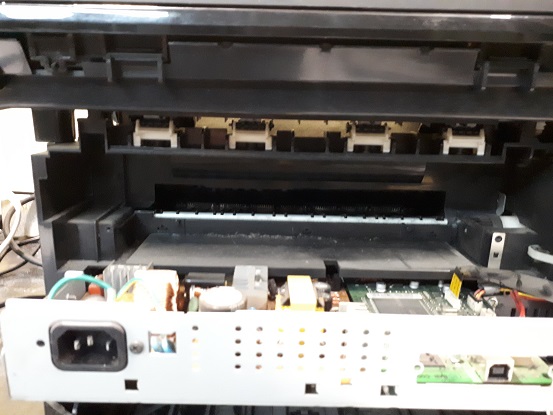
The fixing unit (stove) of the SCX-4300 is removed from the back.
Remove and clean the plastic guide.
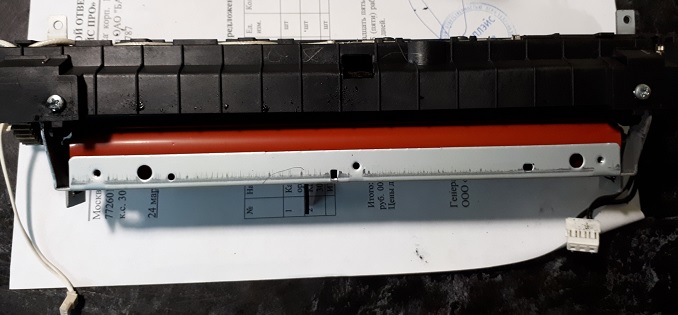
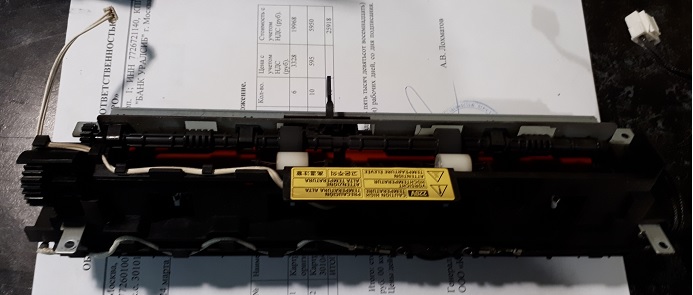
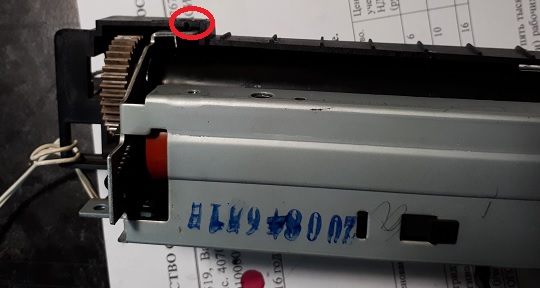
We disassemble the stove: unscrew all the screws, take out the lamp, unscrew the latches, remove the side gear.
The latches are marked with a red oval.
Thoroughly clean from toner and foreign dirt, check bushings, rubber shaft, Teflon shaft, gears, lubricate and assemble back.
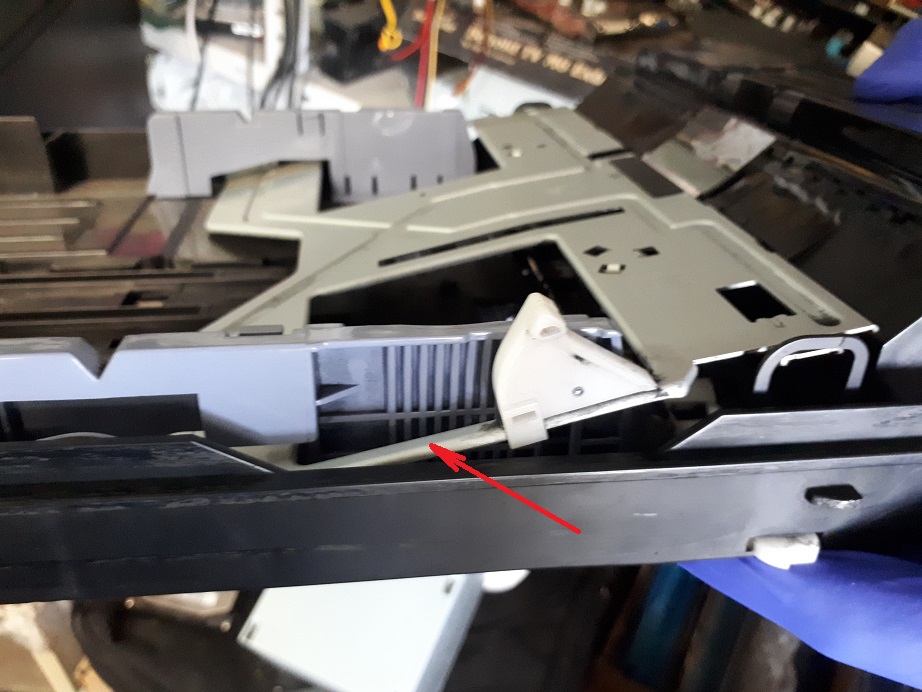
If the paper tray does not come out, the problem may be in the guide.
We disassemble the tray, straighten the iron guide.
Is your TV, radio, mobile phone or kettle broken? And you want to create a new topic about this in this forum?
First of all, think about this: imagine that your father / son / brother has an appendicitis pain and you know from the symptoms that it is just appendicitis, but there is no experience of cutting it out, as well as the tool. And you turn on your computer, access the Internet on a medical site with the question: "Help to cut out appendicitis." Do you understand the absurdity of the whole situation? Even if they answer you, it is worth considering factors such as the patient's diabetes, allergies to anesthesia and other medical nuances. I think no one does this in real life and will risk trusting the life of their loved ones with advice from the Internet.
The same is in the repair of radio equipment, although of course these are all the material benefits of modern civilization and in case of unsuccessful repairs, you can always buy a new LCD TV, cell phone, iPAD or computer.And for the repair of such equipment, at least it is necessary to have the appropriate measuring (oscilloscope, multimeter, generator, etc.) and soldering equipment (hairdryer, SMD-hot tweezers, etc.), a schematic diagram, not to mention the necessary knowledge and repair experience.
Let's consider the situation if you are a beginner / advanced radio amateur who solders all sorts of electronic gizmos and has some of the necessary tools. You create an appropriate thread on the repair forum with a short description of “patient symptoms”, ie. for example “Samsung LE40R81B TV does not turn on”. So what? Yes, there can be a lot of reasons for not switching on - from malfunctions in the power system, problems with the processor or flashing firmware in the EEPROM memory.
More advanced users can find the blackened element on the board and attach a photo to the post. However, keep in mind that you replace this radio element with the same one - it is not a fact that your equipment will work. As a rule, something caused the combustion of this element and it could “pull” a couple of other elements along with it, not to mention the fact that it is quite difficult for a non-professional to find a burned-out m / s. Plus, in modern equipment, SMD radio elements are almost universally used, soldering which with an ESPN-40 soldering iron or a Chinese 60-Watt soldering iron you risk overheating the board, peeling tracks, etc. The subsequent restoration of which will be very, very problematic.
The purpose of this post is not any PR of repair shops, but I want to convey to you that sometimes self-repair can be more expensive than taking it to a professional workshop. Although, of course, this is your money and what is better or more risky is up to you.
If you nevertheless decide that you are able to independently repair the radio equipment, then when creating a post, be sure to indicate the full name of the device, modification, year of manufacture, country of origin and other detailed information. If there is a diagram, then attach it to the post or give a link to the source. Write down how long the symptoms have been manifesting, whether there were surges in the supply voltage network, whether there was a repair before that, what was done, what was checked, voltage measurements, oscillograms, etc. From a photo of a motherboard, as a rule, there is little sense, from a photo of a motherboard taken on a mobile phone there is no sense at all. Telepaths live in other forums.
Before creating a post, be sure to use the search on the forum and on the Internet. Read the relevant topics in the subsections, perhaps your problem is typical and has already been discussed. Be sure to read the article Repair strategy
The format of your post should be as follows:
Topics with the title “Help fix the Sony TV” with the content “broken” and a couple of blurred photos of the unscrewed back cover, taken with the 7th iPhone, at night, with a resolution of 8000x6000 pixels are immediately deleted. The more information about the breakdown you put in a post, the more chances you will get a competent answer. Understand that the forum is a system of gratuitous mutual assistance in solving problems and if you are dismissive of writing your post and do not follow the above tips, then the answers to it will be appropriate, if anyone wants to answer at all. Also note that no one should answer instantly or within a day, say, no need to write after 2 hours “That no one can help”, etc. In this case, the topic will be deleted immediately.
You should make every effort to find a breakdown on your own before you get stuck and decide to go to the forum. If you outline the whole process of finding a breakdown in your topic, then the chance of getting help from a highly qualified specialist will be very great.
If you decide to take your broken equipment to the nearest workshop, but do not know where, then perhaps our online cartographic service will help you: workshops on the map (on the left, press all buttons except “Workshops”). You can leave and view user reviews for workshops.
For repairmen and workshops: you can add your services to the map.Find your object on the map from the satellite and click on it with the left mouse button. In the field “Object type:” do not forget to change to “Equipment repair”. Adding is absolutely free! All objects are checked and moderated. A discussion of the service is here.
Soldier
Group: Members
Posts: 3
User #: 6876
Registration:
13-October 12
I ask experienced craftsmen for help!
Problem:
When you turn on the printer, as you know, the following happens: the scanner is checked and warmed up. When checking the scanner, my head goes back and forth as it should, blinking in all colors, and as usual it starts to move to the initial position of readiness for scanning. but does not stop, runs away to the end, and pushes against the wall, the stepper continues to spin. that is, the belt slips. and so on forever.
The printer itself is 2009. As soon as I bought and printed the cardridge, I stitched it and refueled it, and this has continued to this day. I will tell you immediately there is no visible damage. The cable from the head is intact (it rang) the board itself without visible damage.
I turned off the printer itself, I turned off the scanner (I pulled out 4 wires of the feeding shagik from the connector). It prints, as before, everything is fine, the pages fly out as expected without problems. well, of course, he writes about the scanner error on the panel.
Tell me what to do or at least in which direction it is worth acting
There is experience in repair, but there are no printers specifically.
This instruction for resetting the "No toner, replace cartridge" error on the Samsung SCX-4300 MFP is suitable only for stitched devices.
There is a chip on the cartridge, when a certain number of pages is reached, which blocks the operation of the printer. The firmware of the Samsung SCX-4300 device allows you to disable this check of the chip on the cartridge, the number of printed pages. But, nevertheless, at some point the printer is blocked and the error "No toner, replace the cartridge" appears.
If the error occurred already on the stitched device, then you do not need to flash anything and carry it to the service. The error is reset quite simply and with your own hands. Any user can do this. Everything is done through the printer menu, the settings of the device itself are reset and the mfp continues to print after that.
- We turn on the MFP and wait until it warms up and an error occurs.
- Press the "Menu" button 10 times until the line "Service" appears on the screen.
- Click "OK".
- We go to the "Service" menu, pressing the "Right" button, we reach the line "Reset settings".
- Click "OK".
- We select the menu item "All settings".
- Click "OK".
- Pressing the "Back" key, we exit to the "Normal / Working" state of the device.
After all the manipulations, the screen should be: "100% Ready".
For reliability, restart the printer again and you can print.
You may also be interested in:
If I helped you - leave your feedback and share the site with your friends on social networks!
You can transfer any amount that you yourself deem justified. All funds will be used to pay for and renew the hosting and domain, so that the site could continue to exist and help people.
Free visit of the MFP repair technician within 3 hours from the receipt of the order.
An engineer diagnoses the Samsung SCX 4300 MFP. He will identify the cause of the malfunction, estimate the cost and time of repair.
If you decide to repair the MFP, the engineer immediately gets to work. Payment (even by bank transfer) is made after completed repairs.
If for some (any) reason you refuse to repair, you will not have to pay anything, since the exit and diagnostics in our company are absolutely free. We provide such conditions for the repair of the Samsung SCX 4300 MFP in Moscow. The Moscow region is served on a contractual and paid basis.
To the device Samsung SCX 4300 suitable cartridges:
Professional specialists of the Bestcom service center have many years of experience in the repair and maintenance of Samsung SCX-4300 copiers. The operational warehouse always has consumables and spare parts necessary to restore the functionality of your product. We are ready to provide our customers with services for the diagnosis and repair of the Samsung SCX-4300 MFP, both at the exit and in the hospital.By entrusting your printer to Bestcom engineers, you are acting wisely!
A Guarantee is provided for all types of work. Moreover, in the event of a warranty case, you do not have to take the equipment to our hospital, all problems will be eliminated by our engineers, having gone to your office, if it is impossible to fix it on the spot, we will deliver the equipment to the hospital at our own expense, for warranty repairs, and after completion works, we will deliver it back.

Prevention Samsung SCX-4300 - standard operation, the volume and frequency of which depends on the design of the device and is defined in the service documentation from the manufacturer. Prevention is not a repair procedure; it does not eliminate malfunctions caused by worn out or damaged parts, blocks, and assemblies.
Repair of copiers and mfp Samsung SCX-4300 - work to eliminate the malfunction of the apparatus with the replacement of parts and disassembly of one or more units of the apparatus.
IFIs - multifunctional device that combines fax, printer and scanner. This is extremely practical for modern offices where documents must be constantly processed, as well as for home use. If it is necessary to work exclusively with A4 sheets, then the MFP is also an extremely profitable purchase, because its cost is an order of magnitude lower than copying equipment.
Despite all the advantages of MFPs, their reliability and durability, such devices can fail. There may be a large number of reasons for this | many]: non-observance of operating rules, lack of proper care, wear and tear of consumables, factory defects, prolonged use of the product, etc.
In 90% of cases, these are malfunctions of the power supply or control module. It is dangerous to fix this problem with your own hands. Departure of the master is required.
 The printed image is blurry, not clear
In this case, the problem may be a malfunction of the paper feed mechanism or a breakdown of the optical system of the Samsung SCX-4300 MFP. To fix the problem, you need to replace the broken mechanism and clean the mirrors. But such work must be done extremely carefully, and it is better to entrust the engineer.
 "Paper Jam" in the Samsung SCX-4300 MFP
contamination of optosensors due to the use of low-quality paper and the occurrence of paper dust
breakage of the paper path recorder flag when the user incorrectly cleared the paper jam
To clean and replace the corresponding spare parts, you must call a repairman from Bestcom.
 MFP does not scan, says "scanner error"
When the MFP is turned on, it starts checking all of its blocks to go into a ready state. Testing of the scanner assembly is carried out as follows: the lamp and the optics system detect a white stripe (special reference) in order to check the efficiency of the scanning and reflectivity of the apparatus to perceive reflected light. If the optics are dirty, then the perceived brightness of the light reflected from these surfaces is reduced, which is why the MFP is unable to determine the white stripe and gives an error.
 Samsung SCX-4300 does not take paper from the tray
There can be two reasons here: failure of the paper tray, or wear of the rubber roller, which is responsible for feeding the paper. In both cases, replacement of damaged parts is necessary. It should also be noted that the paper feed roller has a specific resource for each MFP model. This information is indicated, as a rule, either on the device itself or in the technical documentation.
 Samsung SCX-4300 picks up multiple sheets from the tray
In the paper feed tray of each MFP model, there is a special separation area to slow down sheets from a bundle, because the gripper mechanism pulls in not one sheet, but several at once.However, the surface of the pad may wear off, causing the MFP to draw large quantities of paper (2-5 sheets). It is unlikely that such a problem can be prevented. The rubber from which the platform is made is a consumable material. To reduce the frequency of its replacement, you should purchase only high quality paper.
There is no definite reason for this phenomenon. The black sheet occurs due to a violation of the imaging process. As a rule, this is a breakdown of such units as a developing unit (cartridge), a high-voltage unit, a scanner. The first thing a user can do is change the cartridge. If this does not help, the repairman of the BESTCOM service center is called.
teflon shaft - heats up to a high temperature and, on contact with the paper, melts the toner and “melts” it into the paper. To prevent the paper with the image from sticking and winding on the shaft, separators are used - small “paws” that separate the paper from the Teflon shaft after thermal contact.
rubber shaft - pushes the toner paper against the Teflon roller.
Stove malfunction signs:
- The paper sheet comes out of the MFP with a characteristic rustle;
- The sheet may wrinkle (usually only one corner);
- The appearance of duplicates of an image or text to be printed;
- Paper starts to jam in the oven, while the MFP gives a Jam error;
- Vertical streaks, spots, or blur are visible in the image.
A very common stove malfunction is the breakdown of one or more separators. This causes paper to wrinkle and jam. The main reason for the breakdown is improper removal of paper jams (the user breaks the separators himself) and the ingress of foreign objects into the machine during printing (paper clips, etc.). Another malfunction is a breakdown of the heating lamp or temperature sensors. The repair will only consist of replacing them.
Functions Printer, copier, scanner
Seal
Print speed (monochrome)
Up to 18 ppm A4
(19 ppm Letter size)
First page out time (monochrome)
Less than 11 seconds (ready)
Resolution Up to 600 x 600 dpi
Emulation Samsung Printer Interface Language (SPL)
Two-sided printing -
Copying
Copy speed (monochrome)
Up to 18 copies per minute A4
(19 copies per minute in Letter size)
Resolution Up to 600 x 600 dpi
First Copy Out Time (Monochrome)
Less than 11 seconds (ready)
Zoom 50
200%
Number of copies 1-99 pages
Duplex copying -
Copy function
ID-copy, 2-up, Auto-apply, Clone, Poster copy
Scanning
Compatibility
Twain standard, WIA standard
Method Color CIS
Resolution (optical) Up to 600 x 2400 dpi
Resolution (interpolation) Up to 4800 x 4800 dpi
Paper tray
Input tray capacity and type
250-sheet cassette tray,
1-sheet bypass tray
Output capacity and type
Face-down 50-sheet tray
1 sheet, face up
Print media format
76 x 127 mm (3 x 5 inches) -
216 x 356 mm (8.5 x 14 in.)
Types of printed materials
Plain paper, thin paper, labels, postcards, thick paper, bond paper, envelopes, colored paper, letterhead
General characteristics
LCD display 2 lines x 16 characters
Memory / storage 8 MB
Operating system compatibility
Windows 2000 / XP / 2003 Server / Vista,
varieties of OS Linux, Mac OS X
Hi-Speed USB 2.0 interface
Noise level Less than 53dB (printing)
Load per month Up to 10,000 pages
Size (LxWxH)
406 x 375 x 231 mm (16 x 14.8 x 9.1 in.)
Weight 9.65 kg (21.3 lb)
Consumables
Cartridge Average cartridge yield 2,000 standard pages. (Supplied with 1,000-page cartridge). Cartridge output volumes are based on ISO / IEC 19752.
Model code MLT-D109S
Accessories
Ethernet 10/100 Base TX (external) ML-00ND
rubbed the roller and rubber band. did not help. means to change?
I wiped one side of the roller. and an elastic band. started printing. did not work. pulled out the tray, the sheet at the front of the tray is raised two centimeters.put the sheet in place, pushed the tray in, printing went, the sheet came out. but it happens that the latch of the tray does not help, then I open and close the front panel and the sheet comes out.
Thank you for the information.
just ran through the services in the city. replacement of a rubber roller in the region of 1000 rubles. but, they say, you need to look, maybe there is another problem.
they killed in another service, they say it's better, that is, it's cheaper to buy a new one and not a Samsung. so the repair will be expensive, for the reason that most likely it is not a gripper roller, but (in my own words) some kind of recorder sensor and that's where there is a flag that has broken.
I'm in a trance. can it be the same?
JC72-01231A-Rubber for a pick-up roller Samsung ML 1510/1520/1710 / SCX-4216/4100 - Pick up Roller Samsung, Xerox - Zip for laser printer repair
JC66-00037B-Heating shaft gear (teph.) ML 1210/1250/1430 / - Gears Samsung, Xerox - Zip for laser printer repair
JC73-00140A / 019N00821-Brake pad (complete) ML-1510/1710/2250/1910/2525/2580 / SCX-4216/4100/4200 / SF-56x / PE16 / 114e / Phaser 3150/3130/3120/3119 / 3115/3121 - Separation Pad
as well as - Teflon shaft drive gear - JC66-01202A
and Teflon Shaft Bushings - L JC61-00948A R JC61-00947A
Paper jam
during printing.
• Make sure the input tray is not full.
The input tray can hold up to 250 sheets
paper depending on its thickness.
• Use only the recommended paper.
• Remove the paper from the input tray, flex it
or fan to separate sheets
apart.
• Paper may stick together in wet conditions.
Simultaneous
submission of several
sheets of paper
impossible.
• The input tray might be loaded with paper from different
types. Load only one type of paper, size
and density.
• If a paper jam occurs when loading multiple sheets
paper, clear the jam. See page 9.1.
Paper does not feed
into the device.
• Remove obstacles inside the device.
• The paper is not loaded correctly. Take out the paper
from the input tray and load it correctly.
• There is too much paper in the tray. Extract excess
• The paper is too thick. Use only paper
suitable for this device. See page 3.2.
Paper jam
repeats.
• There is too much paper in the input tray. Retrieve
excess paper from the tray. For printing on special
materials, use the manual feeder.
• The paper is of the wrong type. Use
only paper suitable for this product.
See page 3.2.
• Debris of paper has accumulated inside the machine. Open up
front cover and remove any debris.
Transparencies
stick together in the area
paper exit.
Use only transparencies specially designed for
designed for laser printers. Take out
transparencies immediately after they exit the device.
Envelopes
not properly
served in
device.
Check the position of the stoppers on both sides
envelope.
Per device
not served
nutrition.
Check the power cord connection.
Check if the switch is working
and power supply.
Device
is not
printer
default.
Please select Samsung SCX-4300 Series
as the printer used
on Windows by default.
Check for the following errors.
• The front cover is not closed. - Close the front cover.
• A paper jam has occurred. - Remove the jammed paper.
• No paper loaded. - Load paper. See page 2.3.
• The toner cartridge is not installed. - Install the cartridge.
If you experience system errors while printing, contact
to the technical support service.
Not properly
connected
connective
cable between
computer
and device.
Unplug the cable and plug it in again.
Damaged
connective
cable between
computer
and device.
Connect the cable if possible
to another computer to check
it works, and print the document.
Alternatively, you can try connecting
another printer cable.
Check the printer settings
in Windows and make sure the print job is
is sent to the correct port, for example
LPT1. If your computer has several
ports, make sure the device is
connected to the specified port.
Wrong
settings
devices.
Check the printer properties and make sure
that all print parameters are correct.
Driver
printer
set
not properly.
Repair the software
printer. See section Software
security.
Device
working
not properly.
Check the message on the display
control panels to install,
a system error has occurred.
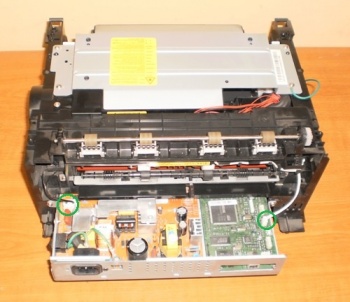
Let's start disassembling. Advice: when removing parts of the MFP one by one, lay them out on the table neatly, do not throw everything in a heap - then it will be easier to figure out what to put back for what.
1. Remove the paper tray.
2. Remove the front cover from the hinges.
3. Unscrew the four self-tapping screws on the back of the MFP.
5. Disconnect the wire, remove the back cover.
6. Remove the side covers. The upper latches are released first, then the lower ones.
7. Start removing the side covers, it is better with these latches - shown in the photo below.
8. From the left cover, disconnect the wire coming from the sensor.
8. Remove the scanner unit. Before removing the unit, disconnect the shiny ribbon and two wires coming from the scanner.
9. The scanner unit is not fixed in any way (ie not screwed on with self-tapping screws), we remove it by first lifting the front edge, then the rear.
10. Now we unscrew the four screws and remove the top cover.
11. Remove the fusing unit ("fuser", "stove"). Disconnect the two wires from the stove.
12. Unscrew the four self-tapping screws. The top two are not immediately visible, you need to look.
13. The fuser can now be removed. It can be easily removed, gently pull it towards you. Be careful not to break the tab in the middle of the stove on a part on the main board. If your task was to gain access to the stove, the disassembly can be completed, if not, we continue.
14. Next, remove the laser unit. We unscrew one self-tapping screw and remove the plug.
15. Unscrew the four self-tapping screws holding the LSU.
16. Disconnect the two wire harnesses going to the laser unit. We handle the laser unit very carefully - since this is the "heart" of the device, we do not throw it, we don’t give birth, we don’t touch the glass with dirty hands.
17. If it is necessary to repair a long warm-up and / or doubling / tripping of the print - we remove the transfer (circled in green in the photo below) the roller to replace or clean it.
18. If the machine stops picking up paper, the problem is either in the pick-up roller or in the development of the seat of the roller axle sleeve. If the pickup roller is worn out, you need to either clean it or replace it. You can clean it with alcohol acetone. I dilute sirt and acetone in a ratio of 3: 1, respectively, and carefully wipe the rubber with this solution, as if trying to loosen it - it helps for a little while if there is no new roller at hand.
If cleaning / replacing the pick-up roller does not help, the seat of the roller axle bushing may be to blame. But more on that later.
19. Remove the capture roller. Turn the device upside down, disconnect the wire coming from the fan.
20. Unscrew ten self-tapping screws (sometimes less, I came across machines after a mountain of repairmen who left 4-5 self-tapping screws here) ..
21. Unscrew two more self-tapping screws and carefully lift and slide the bottom cover towards you (if the device is located as in the picture below).
22. From the side, unscrew the six self-tapping screws holding the gearbox. Do not lose the green wire with the terminals.
23. Disconnect the wire. The gearbox often needs cleaning and lubrication. Inspect the gears - if toner has adhered to them, clean it. I use a cheap stiff bristled toothbrush for this.
24. Unscrew the three self-tapping screws. Remove the protective cover.
25. Pay attention to the location of the moving and stationary parts of the gear (circled in green). Take it off.
26. Slide the latch slightly to the right.
27. Next, moving the entire axis to the left, remove the pickup roller.
28. Now about the renovation. The feed roller is rotating and no paper is fed. You can hear it by the sounds - the video several times tries to grab the sheet, but it doesn’t suffice and the device freezes. Replacing or reading the capture roller is ineffective.This is most often due to wear on the roller axle bushing seat:
It is treated as follows: A metal plate of suitable thickness is glued to the worn-out place. Before gluing, it is necessary to process the edges of the plate from burrs, otherwise there will be a rapid wear of the axle sleeve. For these purposes, I use a worn out dispensing blade from the same SCX-4200 - and the thickness is suitable and the blade lasts for a long time :-).
29. We clean or change the gripper roller; if necessary, we repair the seat of the gripper roller axis bushing.
30. Assembly is carried out in reverse order.
Samsung SCX-4300 printer does not print
Samsung scx-4300 printer does not print, the printer blinks red.
Whistling printer Samsung SCX-4300
Good day! Such a problem. There is a Samsung SCX-4300 printer. I was lying.
Scanner MFP Samsung SCX-4300
Good time of the day! The problem is as follows. I installed firewood on the printer and.
Unknown part from Samsung scx 4300
The problem is this in the 4300 printer, this piece fell into the paper feed tray.
Firmware for Samsung scx-4300 (V1.20)
Guys, please tell me where you can get the firmware for the samsung printer.
Once there was such a problem on a Samsung of another model, the paper feed clutch was broken there. The side cover is fixed with 2 screws + latches at the top and bottom.
Added after 1 minute
This is what the clutch looks like. But it is better to remove the lid and turn it on, it will be visible from where it is bursting.
Printers and MFPs / Samsung
Samsung SCX-4300
Description Specification Reviews 30 Discussion 20
20 commentswrite a new comment
HELLO! SUCH A PROBLEM: WHEN PRINTING DOCUMENTS, ALWAYS PRINTS ONE EXTRA SHEET WITH THE FOLLOWING DATA
File:
Catalog:
Sample:
Title:
Content:
Repair MFP Samsung SCX-4300 in St. Petersburg
Repair and maintenance of the Samsung SCX-4300 MFP produced by craftsmen with many years of experience. We use only original spare parts for repairs.
The table below shows the prices for repair work of individual parts (assemblies) MFP Samsung SCX-4300... Prices are indicated for work only, excluding the cost of spare parts. The exact cost of repairs is agreed with the client after diagnostics and identification of worn-out parts and blocks, with recommendations for their replacement.
Diagnostics of other service centers or a description of the problem by the client is not a guarantee of an accurate determination of the reasons for the breakdown of the printer or mfp, but if you clearly formulate the problem, describe as accurately as possible after what actions the device failed, prepare a scan of a document with a print defect - by these actions you will significantly reduce the time required to carry out repairs. It will also help to identify cases when repairing a printer or mfp is impractical.
Departure of the engineer to diagnose the device - from 1,200 rubles.
Descriptions of the names of repair services for the Samsung SCX-4300 MFP, shown in the table above:
Diagnostics - identifying malfunctions in the operation of the device, making reports, making recommendations for the further operation of the device and replacing worn-out spare parts;
Partial disassembly maintenance - routine maintenance of the device, cleaning the rollers, cleaning the paper path from toner and dust, restoring the rollers, etc. It must be done without fail when the device gets into repair;
Complete disassembly maintenance - performance of all routine maintenance, plus cleaning and lubrication of hard-to-reach blocks (thermoblock, laser, gearbox, electronic boards);
Paper Pickup Repair - replacement of the pick-up and separation rollers, brake pads from the main trays, is necessary when paper feed defects appear (does not take paper, takes it, but does not stretch it to the end, in some cases a "jam" error appears);
Registration node repair - replacement of worn-out components of the registration unit, cleaning registration sensors, replacing registration flags, etc. These jobs are necessary if the machine incorrectly detects the paper size, the image is not printed from the beginning of the sheet, or vice versa, if the paper is jammed inside the machine, in some cases the error “jam ";
Repair of the imaging unit - work on the repair of drum cartridges, copy cartridges. Replacement of photo rolls, squeegees, charge rollers, etc. Performed if streaks appear during printing, smears along the edge of the sheet, or defects are visible on the print at a certain interval (not in all cases);
Image transfer unit repair - replacement of corotrons, transfer rollers, transfer roller bushing, etc .;
Repair of laser optics unit - cleaning the laser, replacing the laser, replacing the laser polygon, etc. It is necessary when a vertical white line appears, in some cases the device swears at the laser;
Repair of the fusing unit (stove) - replacement of thermal film, teflon roller, bushing, thermoelements and heating lamps, separation fingers, etc. Required in case of printing defects, with visible smearing, repetition of text at a certain interval, sometimes vertical stripes across the entire sheet;
Repair of the gear unit and kinematics - replacement of gears, motors, couplings, etc. It is performed when extraneous noise, crackling appears, in some cases there is no paper grab;
Exposure unit repair - scanner repair. Replacing the scanning ruler, scanner glass, etc .;
Repair of the ADF unit - repair and elimination of malfunctions of the automatic document feeder unit. Replacement of gripper and rebound rollers, brake pads, etc .;
Duplex unit repair - performed when defects appear during duplex printing, jams, etc.;
Electronics assembly repair - repair of power boards, formatting, replacement of electronic components.
| Video (click to play). |
Customization - adjusting the device, adjusting the contrast and brightness, calibration.

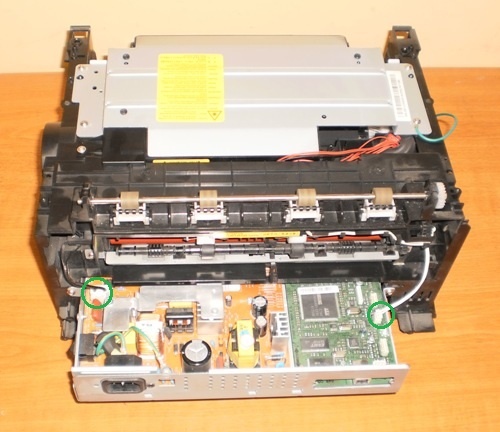
 The printed image is blurry, not clear
  "Paper Jam" in the Samsung SCX-4300 MFP
  MFP does not scan, says "scanner error"
  Samsung SCX-4300 does not take paper from the tray
  Samsung SCX-4300 picks up multiple sheets from the tray
