In detail: chevrolet lanos do-it-yourself injector repair from a real master for the site my.housecope.com.
In the last article I described the procedure for replacing the fuel pump mesh, today we will talk about cleaning the nozzles with your own hands.
I will say that there is absolutely nothing complicated here and it makes no sense to spend money on a trip to the service station. So whoever wants to do the injector cleaning procedure on his Lanos, you are welcome.
2. Two syringes, one for five cubes, the other 10 or 20, it does not matter, it will be used as a filler.
3. Power supply. I read that the injectors need power equal to about 7 volts, I took a regular battery charger, and set it to about seven volts (checked with a tester) and that's all. You can take it from the battery, but by adding a light bulb to the circuit.
4. Power on / off button. The usual, but it is desirable that, not latching, but that the power supply is closed while the button is pressed, and when it is released, the circuit breaks, this is more convenient, because power is supplied for only 1-2 seconds. Here's my variation:
5. Two small containers, I took the plastic bottles, cutting off the top.
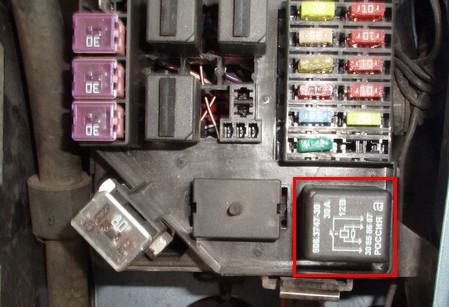
Before removing the injectors MANDATORY! we lower the pressure in the fuel system, for this we take out the relay in the fuse box in the engine compartment:
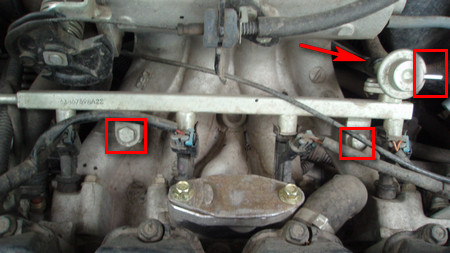
We remove the entire ramp with nozzles, for this we unscrew the two bolts securing it, the key is 12, disconnect all hoses, wires and carefully take out the whole thing:
Do not even try to remove the fuel pipe that fits directly to the rail, there is some very interesting fastener that does not lend itself, remove the hose from the fuel filter.
To remove the power wires, you need to pull up the blue corkscrew buttons and press the black "tongue":
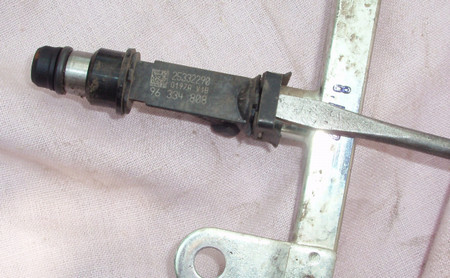
How to remove the entire ramp, remove the nozzles from it, for this you need to remove the retaining rings by prying them with a screwdriver:

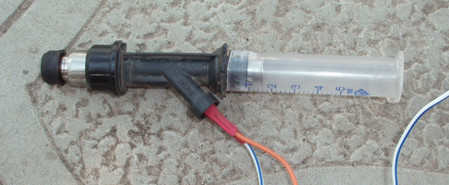
We collect the solvent into another syringe, fill our five-cube, put on the nozzle, insert the piston from the syringe, press the button, that is, we supply power to the nozzle, and at the same time press the piston, thereby squeezing out the solvent. We carry out the procedure over the prepared container.
| Video (click to play). |
As far as I know, you need to apply power for a short time, so I tried not to press for more than 1 second. So with such poklatsivaniya we throw out the whole syringe and so on two or four times. I poured a 20 cc syringe onto one nozzle. You can look more according to the circumstances, that is, the quality of the spray nozzle. If the spraying is even, then great, but if it hits to the side somewhere or some other problem, then follow the procedure until there is a uniform spray.
It is also recommended to check the resistance of the injectors with an ohmmeter. On Lanos, it should be equal to 12-14 ohms. I have some kind of crap, one had 18 ohms, the other 22 ohms. I don’t know what’s wrong with them, but I left them, while I’m not going to change them, not up to them now. It is not clear only whether they are really faulty and why then they went out of order so quickly (only a little more than 30 thousand hit) or is it necessary and what does it affect ?!
After cleaning all the nozzles, we throw them into a clean solution, let them sip again:
then we take them out, wait a couple of minutes for the solvent to evaporate and put on the O-rings and put them on the ramp, having previously lubricated the rings with a little engine oil, so that it is easier to sit in their place. We carefully put everything in its place, put the retaining rings correctly so that they do not fall off. And we install the ramp on the car.
After starting up the car for the first time, see if it is leaking anywhere, if everything has been assembled correctly.
That's actually the whole procedure for cleaning the nozzles on the Lanos. As you can see, there is nothing complicated. For money - a penny (solvent + syringes), for time - a maximum of two hours. Why pay more :).
I wish you good luck cleaning the injectors with your own hands.
How to remove and clean Chevrolet Lanos injectors. Step-by-step instruction. Cleaning nozzles Chevrolet Lanos
Flushing the injector with your own hands.
OWN HANDS: DIY injector cleaning
Flushing the injector without removing it yourself. How to flush the LAVR ML101 injection system
How to identify a malfunction of an injector nozzle
Chevrolet Lanos Chevrolet Lanos repair we fix the problem with speed
Dips when pressing the gas pedal on the injector
Unpretentious repair of Lanos or We got there)))
Daewoo Lanos does not breathe. Gas mixer repair.
HOW TO RINSE THE INJECTOR NOZZLES IN THE FIELD.
Signs of malfunctioning injectors:
- Difficulty starting the engine;
- unstable engine operation;
- the engine stalls at idle;
- increased idling speed of the crankshaft;
- the engine does not develop full power, insufficient engine throttle response;
- jerks and dips in the engine when the vehicle is moving;
- increased fuel consumption;
- increased content of CO and CH in the exhaust gases;
- glow ignition due to leaking injectors.
You will need: flat-blade screwdriver, auto-tester.
1. First check the serviceability of the injector windings. To do this, disconnect the wiring harness blocks from the injectors by sliding up their spring clips.
2. Check the resistance of the injector winding. For a working injector, it should be 12.5-13.5 ohms. If the resistance of the winding is not correct, replace the injector, as it is not repairable.
Check the nozzles according to the shape of the sprayed fuel torch and for leaks at specialized service stations, since such a check directly on the car is very fire hazardous.
3. Remove the fuel rail (see "Removing and installing the fuel rail", from 125).
5. . and remove the injector retainer.
6. Remove the injector shank from the ramp bore. Remove the remaining nozzles in the same way.
Pay attention to the marking of the nozzles. Purchase new nozzles with the same marking.
7. Each time you remove the injectors, be sure to replace the top on all injectors.
eight. . and bottom o-rings.
9. If you are installing old injectors, carefully flush their nozzles with solvent or carburetor cleaner.
It is not allowed to rinse the nozzles by dipping into the detergent composition, as this will damage their electrical part.
10. Install the injectors in the reverse order of removal. Lubricate the O-rings with engine oil before installing the injectors.
11. Having installed the injectors in the fuel rail, and the rail on the intake pipe and connecting the pipelines to the rail, start the engine and check the tightness of the pipe connection and the injector seals.
Optional equipment - Seat adjustment
Rice. 1.20. The seat adjustment is carried out as follows: - to move the front seat horizontally back and forth, pull the adjusting lever located p.
Replacing the engine oil and oil filter
The engine oil should be changed depending on the operating time and mileage of the vehicle, as engine oil loses its properties over time.In special driving conditions, for example frequent.
Cylinder head cover
1. Unscrew the oil filler cap and remove the engine cover by pushing it towards you to remove the fixing elements from the rubber pads. Install the oil filler cap to m.
We check the performance of the injectors when a malfunction is detected in the engine.
We start checking the injector control circuits by checking the integrity of the fuse F14 (15A) of the mounting block located in the passenger compartment.
Failure of fuse F14 can also be caused by faulty circuits of the generator, vehicle speed sensor, canister purge valve, EGR valve.
We replace the defective fuse with a new one, after checking if there is a short to ground in the front terminal of the fuse socket in the mounting block.
To check the power supply circuits of the injectors ("+" power supply) with the ignition off, disconnect the pads (4 pcs) of the wiring harness from the injectors.
With the ignition on ...
… We measure the voltage between terminal "1" and the "mass" of the engine for each injector.
The device should record a voltage equal to the voltage of the vehicle's on-board network.
We also check the serviceability of the injector control circuits (open or short to ground) between terminal "2" of the wiring harness block of each injector and the corresponding output of the ECU harness block for each cylinder: 1st cylinder - output "М25"; 2nd cylinder - terminal "М22"; 3rd cylinder - terminal "М24"; 4th cylinder - terminal "M11".
To check the injector winding with the ignition off, disconnect the engine control system wiring harness block from it (see Removing the fuel rail and Chevrolet Lanos injectors).
By connecting the tester probes to the injector leads ...
… Check the resistance of the winding.
In a working injector, the winding resistance should be 11.6–12.4 ohms.
To check the operation of the nozzle, the quality of the spray and the tightness of the sprayer, we remove the fuel rail (see Removing the fuel rail and Chevrolet Lanos injectors).
We connect the tip of the discharge line tube to the ramp fitting, and the tip of the drain line tube to the fuel pressure regulator nozzle.
Reinstall the fuel pump fuse.
We check each injector one by one, placing a container under it to collect fuel.
Turning on the ignition, with two wires directly supply the 12 V voltage from the battery to the injector terminals.
The operation to check the quality of fuel atomization by a nozzle is fire hazardous.
Avoid sparking when energizing the injector.
Fuel jets with a characteristic spray cone should come out of the nozzle atomizer.
Having disconnected the wires from the injector, we check if fuel is leaking through the openings of the injector nozzle.
Fuel leakage should not exceed one drop per minute.
We check other injectors in the same way.
If the electrical resistance of the injector winding is not correct, the amount of injected fuel and the spray pattern are very different from those of other injectors, or the injector is leaking - it must be replaced.
Mileage 53`000 km. At the beginning of autumn, I began to notice the uneven idling of the engine; by now, starting up and waiting for the engine to warm up to switch to gas was a big problem. Idling was completely absent! And I simply could not stand such stupidity during overclocking.
The last cleaning of the injectors was about 25-30 thousand years ago. I cleaned it at the stand at the service station last year. Then it cost me 200 (1000r) UAH. Today, the price is 300 (1200r) hryvnia. That even 200 UAH. I'm not ready to pay for cleaning, tk. for me today it is money. Once again, I had to agree with the statement that we pay for what we cannot do ourselves. Therefore, we will fill this gap today.
Preparatory work.
For me, when measuring, all 4 injectors gave the same resistance of 14.8 ohms.
The button that we will press, close the contacts and apply a short (up to 1 sec) current pulse to the injector solenoid valve. I took the RESET button from the old system manager:
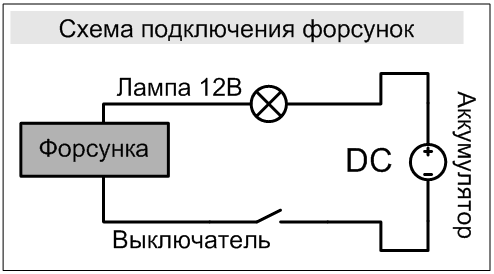
In general, the connection diagram should look like this:

Two containers, best made of glass. One for the oxidation of the nozzles, the second for the rinsing process itself. I had it cut off the bottom of a plastic beer bottle and a glass half-liter jar.
I will not describe the procedure for removing the injectors, because this can be found in any manual (eg Third Rome, p. 125). I will only point out some of the underwater stones.
I did the procedure in the morning on a cold engine, so there was no pressure in the fuel system. Whoever needs it is looking for a description of the pressure release. Let me remind you that the pressure lasts for at least 2 hours!
First of all, fold back the negative terminal and isolate it from the fire away.
To remove you need only two keys "10" and "12", thin and dexterous fingers.
You will not be able to completely remove the ramp with the nozzles, do not even try (who decides to repeat the procedure), because the fuel supply hose to the rail is secured with a very tricky clamp. And you don't need to take it off, everything is working out so well. We remove all the dirt and sand around the nozzles! Unscrew the two bolts securing the bracket on which the throttle cable and the two bolts securing the ramp itself are attached. Pull the ramp up with the nozzles, gently and slowly on both sides. When all the injectors have come out of the holes in the manifold, remove the electrical connectors and brackets that fix each injector on the ramp. Then lift the ramp with forces with your left hand as high as possible, and with your right pull each nozzle down from the ramp.
The cleaning process itself.
I apologize for the terrible pictures, I gave my digital camera for the weekend, and it is anril to achieve macro photography on the phone.
Be sure to remove the upper and lower rubber sealing rings from each nozzle, because the solvent will make "donuts" out of them twice the diameter! We examine them carefully, if they are cracked or have any defects - replace them! I have not changed, I have them in excellent condition.
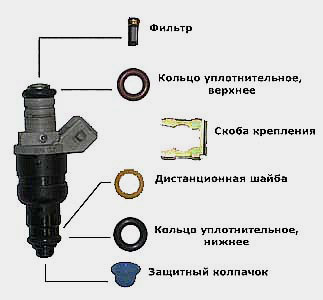
I decided to add: I didn't have protective caps on the nozzles (in the figure in blue, or maybe other colors), you might not have it either. This is so that you do not stubbornly search for them in the collector.
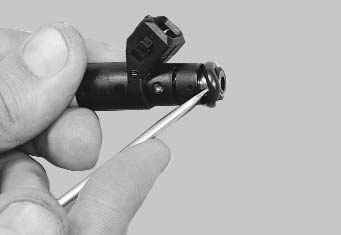

In general, the injectors looked pretty horrific:
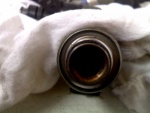

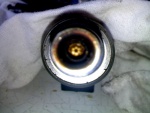

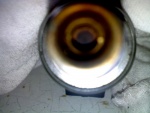

“We are bringing the nozzles to the bathhouse”.
We pour a solvent into one of our containers and lower all 4 of our nozzles into it with the part from which gasoline usually splashes:
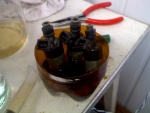

There seems to be nothing to dissolve in the nozzle itself, but I would not recommend dipping it completely headlong into the solvent.
After starting the engine for the first time, carefully check for possible gasoline leaks.
It all took me:
Withdrawal - because I also have gas injectors, then it gives me a lot of trouble and perversion - about 1 hour.
Sacrifice - 1 hour.
Cleaning - 1 hour.
Assembly - a little less than 1 hour.
"Solvent 647" - 13 UAH.
5 cubic syringe - up to 1 UAH.
About 4 hours of time, largely gone, due to inexperience and ignorance, for removal and installation.
PS: After the performed procedures + replacing the mesh in the gas tank, the idle speed came to perfect condition, the dullness disappeared. Now there are absolutely no differences when driving on gas and gasoline! : iz1:
Everyone uses this material in accordance with the curvature of their hands, the author, that is, I, DOES NOT bear responsibility for the actions of crooked hands!
Now for any skeptics who will definitely find and question the quality of the operation performed and its expediency. I would not waste 2 hours of time just writing a post if the result did not suit me in any way.
How to remove and clean Chevrolet Lanos injectors. Step-by-step instruction.Cleaning nozzles Chevrolet Lanos
Do-it-yourself rinsing of nozzles on Lanos 1.5.
Flushing nozzles on Deo Lanos
Removing injectors on Lanos 1.5. Easier than ever. Part 2
Lanos 1.6 - Solving the problem of starting and working on gasoline
Removing injectors on Lanos 1.5. Easier than ever. Part 1 introduction)))
Flushing the injector with your own hands.
HOW TO RINSE THE INJECTOR NOZZLES IN THE FIELD.
OWN HANDS: DIY injector cleaning
Every experienced car owner knows that the fuel system must always be in top condition. After all, the efficiency of the car, throttle response and smoothness of the course depend on this. Therefore, the fuel system must be maintained. During operation it is necessary:
- change the fuel filter every 10 thousand km;
- change the coarse filter (mesh in the tank) every 10-20 thousand km;
- carry out chemical flushing of nozzles (injectors) every 10-20 thousand km.
There are two main ways to flush nozzles: chemical and mechanical. Chemical flushing means cleaning fuel injectors with a special liquid. Mechanical flushing means cleaning the nozzles with ultrasound. In this article we will consider the first option (chemical), since everyone can perform this procedure.
Flushing the nozzles with cleaners is also carried out in two ways. You can flush only the nozzles, or you can assemble a simple installation for flushing the injectors without removing. Below will be considered the process of flushing the nozzles with removal.
So, to flush the nozzles with your own hands, you need the following set of tools and materials:
- socket wrench for "12";
- open-end or spanner key for "10";
- flat screwdriver;
- 5 ml medical syringes;
- aerosol carburetor or injector cleaner;
- kerosene (white spirit);
- connector for the injector (suitable from the VAZ-2110);
- any button (the doorbell button is ideal);
- wires.
First of all, it is necessary to reduce the pressure in the fuel rail. To do this, you need to remove the fuel pump relay, which is located in the fuse box under the hood. After dismantling the relay, you need to start the engine. It may not start at all, but the pressure in the line will drop. After that, you can start dismantling the injectors.
Remove the fuel hose from the filter. Next, remove the return hose, which is attached to the fuel pressure regulator. Disconnect the thin vacuum hose that is connected to the inlet receiver from the regulator.
Now you need to disconnect the electrical connectors from the injectors. Be careful not to pull the connectors by the wires! To remove the connector, lift the blue flag, press down on the tab with your finger, and pull out the connector. You may need to pry the connectors with a flat screwdriver.
For complete comfort, you can dismantle the stop bar of the accelerator cable, but you do not have to. Now remove the two bolts that secure the fuel rail. After that, you can remove the ramp together with the injectors. To do this, simply pull the ramp up.
After dismantling the ramp, the injectors can be disconnected from it. To do this, you need to remove the retaining clips - just pry them off with a flat screwdriver. After removing the clamps, the injectors can be pulled out of the ramp - they fit tightly with elastic bands. This completes the dismantling process, you can start flushing the nozzles.
It is strongly recommended to soak the nozzles in kerosene or white spirit before flushing. Depending on the amount of dirt, the nozzles should be soaked for 0.5-1 hour. This will soften any dirt and make flushing as efficient as possible. The nozzles must not be completely immersed in kerosene. It is necessary to place the nozzles vertically in a container (for example, a cut-off plastic bottle) and pour kerosene so that it hides the nozzles. It is also recommended to use a syringe to pour kerosene into the inlet openings of the nozzles. There is a mesh, which also gets dirty.
After soaking, you can start rinsing. Here you need to show your imagination. At this stage, it is necessary to ensure the supply of the carburetor cleaner to the nozzle under pressure. You can connect the spray can and the nozzle with a tube that is sold with the cleaner. You can also use a 5 ml syringe. To do this, you must cut off the lower part of the syringe. Then you need to remove the upper O-ring from the nozzle and put the syringe on it. After that, it is necessary to pour the cleaner into the resulting structure using another syringe or directly from the bottle.
In order for the nozzle to be flushed, it must be opened. To do this, you need to apply voltage to it. For these purposes, you can use a standard battery or a separate power supply. Remember that when using a battery, you must turn on a lamp of at least 21 watts in series with the nozzle.
If you use a regulated power supply, you can do without a lamp. You just need to set the voltage to about 7 volts - the injectors open perfectly at this voltage. A lamp is needed to reduce the current and protect the nozzle winding from overheating and short circuiting. Keep in mind, among other things, that the nozzle must not be opened for more than one second. The voltage must be applied in pulses, which is why the button is needed. Below are the injector connection diagrams.
So, after the electrical circuit is assembled and the supply of the cleaner to the nozzle is provided, you can start flushing. You need to simultaneously create pressure at the inlet of the nozzle and pulse power supply. The nozzle will open and allow the cleaner to flow through it. In the process, you can control the quality of the injector. The spray should be even and strong enough. In addition, the nozzle must not allow the cleaner to pass through when closed.
If you use an aerosol carburetor cleaner to clean the nozzles, remember that it has a very high pressure. Press the cylinder valve briefly. Otherwise, the connection between the cylinder and the nozzle may be broken and corrosive liquid will get into your face, which is highly undesirable. It is recommended to spray the cleaner into a transparent container to visually evaluate the process.
After flushing, put on the removed O-rings, lubricate them with clean engine oil and reassemble in the reverse order. Just in case, it is advisable to purchase new O-rings and replace them. For some injectors, rubber rings from the VAZ-2110 are suitable. Catalog numbers of "native" O-rings for Chevrolet Lanos injectors:
- 25169195 - top ring;
- 17106005 - bottom ring.
If in the process you broke the fastening brackets of the nozzles, then they can be purchased by the number:
- 96253530 - spring clip for attaching the injector to the rail.
In the description, it seems that the process is very time consuming and complex. But in fact, even the first time, this procedure will not take you more than 2 hours of time. It is recommended to carry out a similar flushing every 10-20 thousand km. However, if the flushing did not give the desired result - the nozzles do not spray well or are not airtight when closed, then only ultrasonic cleaning will help you.
There are some cars whose designers would like to erect a monument during their lifetime. These are not some kind of supercars with a construction budget of forty million dollars. No. These are the cars that we use every day, sometimes without even thinking about the genius and simplicity of their design. These cars include Volkswagen Golf, Ford Escort / Focus, Toyota Corolla. But the most replicated on our territory is the Opel Cadet. Whatever they call him, he cannot hide his cadet nature. We will talk about one of the reincarnations of the German cadet today.
General Motors managers don't get their paychecks for nothing.Once Opel became part of GM, it wasn't a Senator or a Komondor who was lifted from the company's archives. A modest, but very popular Opel Cadet. Without thinking twice, the management transfers the documentation package and the license to the Korean division, and there the guys are tenacious. He and Ford Scorpio gained the necessary experience, and in the shortest possible time made the Cadet of the 80s a bestseller of the 2000s. Without making almost any fundamental changes, the designers managed to modernize the old Opel, give it an appropriate look and equip it with injection in order to sell the car in Europe in accordance with all environmental standards.

Like any normal car, the Chevrolet Lanos needs repairs and maintenance. Do-it-yourself Chevrolet Lanos repair takes place without any particular complications, apart from some work related to precision fuel equipment and electronics. Here you cannot do without special equipment and experience. Basic maintenance works for Lanos are standard:
- replacement of oil and oil filter every 10-15 thousand km;
- replacement of the fuel filter and air filter;
- prevention of the air conditioner, if it is installed in the base;
- replacing and monitoring the condition of the timing belt;
- replacement of antifreeze every 40-50 thousand.
There are many such small works, and most of the owners carry out them on their own.

Gasoline is the curse of all injection engines that fill up at our gas stations. Despite the fact that the manufacturer gives a more loyal period to the driver for replacing the filter and pump, it is worth boldly dividing it into two. By 15 thousand, the filter is clogged tightly, and the pump already needs repair by 25-35 thousand. If you do not clean the coarse filter in time. Whatever it was, but the first signs of a dying gas pump are noises. They can and should be distinguished by their nature, since they characterize the condition of the fuel pump and filters. If the pump starts to make a lot of noise even before starting the engine, only with the ignition on, this means that the coarse filter is clogged. The intake screen is in the tank and will have to be removed and cleaned. Indirect signs of a fuel pump breakdown can be:
- heavy start;
- unstable idle speed;
- failures when changing engine operating modes;
- loss of dynamics.
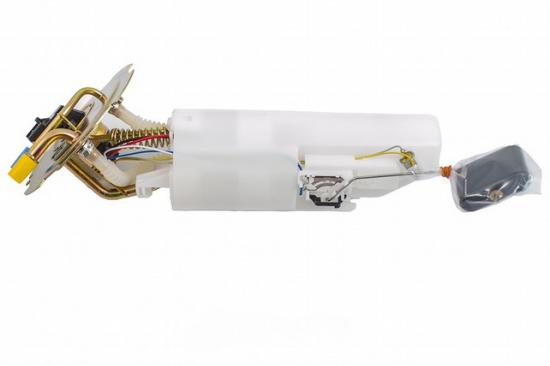
This indicates an insufficient amount of fuel for the engine to operate, but first of all, the engine control unit should notice this and give an error or, in severe cases, light the corresponding light bulb. When the pump makes noise during engine operation, depending on the nature of the noise, we can say that the pump is preparing to upset you. Also, the fine filter can put an additional load on the pump, therefore noise may occur. If, after changing the filter, the pump has not calmed down, you need to diagnose it or change it to a new one.
Car body repair is possible if the garage has the appropriate equipment and skills to use it. So, in case of any troubles with corrosion, you can always put several patches on the bottom, having previously processed the damaged area with a grinder and cleaned it to a clean metal not affected by corrosion. Also, the strengthening of the thrust pads for the C-pillars and the support bearing of the A-pillars can be attributed to bodywork. With a strong overload, sometimes cracks appear in these places, which need to be welded and primed.

Straightening and minor repairs of Lanos body panels and empennage only make sense when the damage is serious or a new wing or door cannot be found. In principle, with the supply of body parts, everything is more or less stable and you can find any piece of iron, if you had money. Preventive work on the body includes anti-corrosion treatment of the bottom and wheel arches, which are worth saying a few words separately.
The factory layer of anticorrosive mastic on the Chevrolet Lanos is about 240 microns, which is quite enough for several years of operation. But you should not miss the moment, but it is better to carry out a full anti-corrosion treatment of the bottom of the Chevrolet Lanos with special means. They are of the following types:
- wax-based;
- oil mastics;
- bituminous mastics;
- polymer mastics.
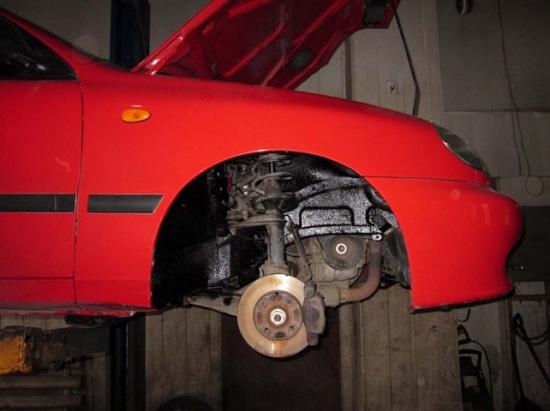
Wax and oil mastics are used mainly for interior surfaces, boxes, cavities and hidden volumes. Bituminous mastics are intended primarily for external use. They have good mechanical resistance to chips and corrosion inhibitors. The treated body will not touch the rust for another two to three years.

Lanos is a reliable and inexpensive car with average characteristics that satisfy both a city dweller and work out on medium-surface roads. With good care and timely maintenance, the Chevrolet Lanos will be your assistant for many years. Avoid dangerous pits, and good luck on the road!
The working element of modern fuel injection systems are injectors (nozzles) with a solenoid valve.
When the engine is running on even good quality fuel, the injection system (including the injectors) gradually becomes dirty. "Extraneous" chemical elements and their compounds contained in gasoline - sulfur, benzene, olefin, etc. At the injection pressure (3 atm.) And the operating temperature of the engine (80-100 ° C) turn into varnish and difficult to wash off resinous deposits. And the use of low-quality gasoline accelerates the process of clogging of the injectors, As a result, this leads to a deterioration in engine performance - its power and throttle response decrease, idle operation becomes unstable, dips occur in the acceleration mode, the toxicity of exhaust gases increases, and the service life of the lambda probe and catalyst is reduced ... A clogged nozzle decreases performance, changes the direction and shape of the spray pattern, and possibly even a complete cessation of fuel supply.
In practice, when using gasoline of European quality, the injectors practically do not require cleaning. Nevertheless, many automakers recommend changing them every 120-140 thousand km of run, regardless of the technical condition.
In the case of using fuel produced in the I territory of the CIS, the need to clean the injectors may arise already after 15-30 thousand km.
Clogging of injectors becomes noticeable with the onset of cold weather, when the volatility of gasoline worsens: problems appear with starting an cold engine, failures in its operation, etc.
There are several ways to clean the injector depending on the degree of contamination of the fuel supply system, engine wear and more. The "therapeutic" method involves filling the gas tank with a cleaning additive. A bottle of such a liquid with a capacity of 0.25-0.35 liters is designed for 60-80 liters of fuel. When the car is moving in a quiet mode, harmful deposits in the elements of the injection system gradually dissolve.
The recommended frequency of such cleaning is 3-4 thousand km. It is good for keeping the injector and the entire fuel system clean in new and low-mileage vehicles.
In vehicles with a highly contaminated injection system, such cleaning can lead to the opposite result. In this case, the washed-out dirt enters the nozzles, clogging them even more, which often necessitates their dismantling and cleaning in other ways. In addition, there is a high probability of clogging and further accelerated wear of the electric fuel pump, which gets all the dirt washed out of the tank.
You can clean the injector without removing it from the engine. For this, special installations and flushing fluids are used.Using adapter fittings, the installation is connected to the injection "line" of the motor, excluding the car's gas tank, its fuel pump, fuel filter and fuel lines from the "turnover". The running engine runs for 30-45 minutes on a mixture of gasoline and flushing fluid, which is supplied from the installation under a pressure of 3 atm. According to the technical parameters of the vehicle. The properties of the cleaning liquid are such that the degraded contaminants are "driven" through the nozzles and burned in the engine cylinders.
The quality of flushing is determined by indirect signs: restoration of stable engine operation at idle speed, decrease in CO level, etc. In many cases, this cleaning method will restore normal operation of the injector.
But heavily soiled injectors still have to be removed from the engine and cleaned separately.
Washing on the machine is convenient if it is difficult to dismantle the nozzles. To do this, it is necessary to remove some of the engine attachments (for example, remove the intake manifold). After cleaning the injectors on the engine, a certain amount of flushing liquid remains in the injector "line" and the fuel system,
‘After flushing it is recommended to drive 10-15 ei in the forced mode of the motor.
Rice. 2.52. Scheme for checking the control circuit of the fuel injectors: 1 - injector harness block; 2 - nozzles; 3 - controller (the numbering of contacts of the controller "Mikas 10.3" is given in brackets)
The best result is obtained by cleaning the dismantled injector on a special stand,
Where performance is compared. Flare shape and spray quality for each nozzle before and after flushing. The control system of the stand simulates the operation of the injectors on the engine, with the only difference that instead of fuel, a flushing liquid flows through them. The operator, by controlling the frequency of electrical oscillations of the injector valve, achieves the appearance of cavitation in the fuel supply channel - air bubbles in the liquid.
The result is effective destruction of contaminated nozzle channels and flushing
Its a strainer. The moment of occurrence of cavitation is determined visually - the fuel jet leaving the nozzle acquires a brown tint due to peeling slag. The stand also allows you to determine the change in the electrical and mechanical parameters of the injectors, on the basis of which a decision is made on the advisability of their cleaning, further use or replacement.
The performance of the nozzles is determined both before and after flushing. If, after cleaning, the performance of the nozzles is different (more than 5%), it is recommended to replace them individually or together. After flushing, it may turn out that the solenoid valve does not close completely due to wear, therefore, the nozzle “flows” at the moment there is no impulse. Ego is the cause of excessive fuel consumption, increased carbon deposits on valves and pistons, etc. This nozzle must also be replaced.
Individual cleaning of nozzles at the stand gives the maximum effect, which is much superior to the "traditional methods" - soaking in kerosene, acetone, diesel fuel, etc.
There are also installations that clean removed injectors in an ultrasonic bath. The use of this method also gives good results and allows you to restore the injectors to work.
| Video (click to play). |
A basket mesh filter made of nylon is installed in the inlet nozzle of the nozzle. In some cases, flushing on the bench does not give an effect due to clogging of the filter with the smallest insoluble inclusions, including metal dust (for example, from wear of the fuel pump parts). The design of most types of nozzles allows you to replace a clogged basket filter with a new one (you must first purchase a nozzle repair kit. It includes a new microfilter and O-rings). The old filter is removed from the nozzle using a mechanical puller.

