In detail: a hose for a vacuum cleaner do-it-yourself repair from a real master for the site my.housecope.com.
Increase font A A A
When we do the cleaning, and we use the vacuum cleaner hose as a "leash", for which we drag it, it happens that the hose breaks off near the base. No problem! Let's try to figure it out and fix it.
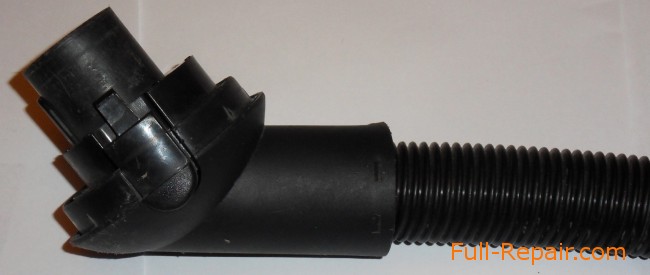
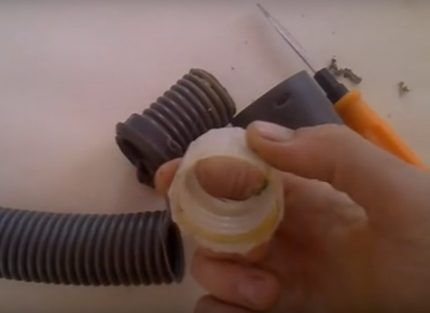
The hose itself is in the shape of a spiral and is simply screwed into the base and glued onto it.
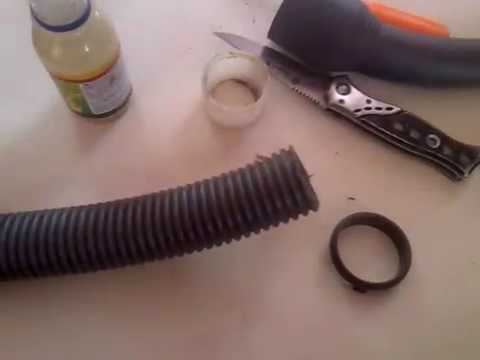
Therefore, we cut off the damaged piece of the hose, pick out the remnants from the base, clean everything well from dust and degrease it.
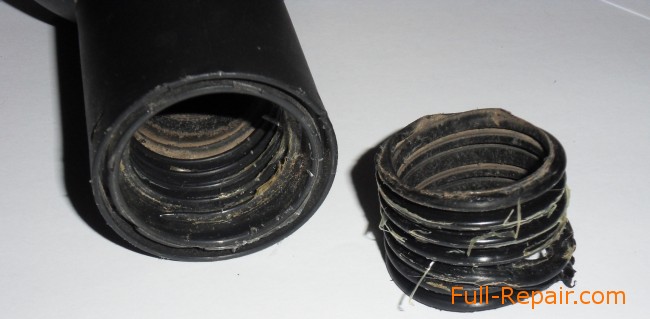
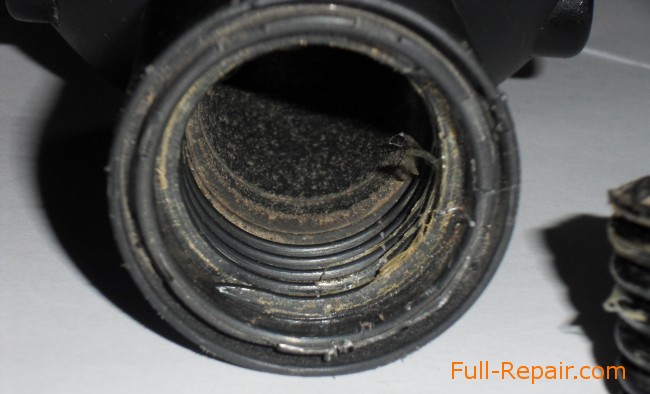
We align the end of the hose, cutting off the excess, if necessary.
Now let's try it on. We screw in the hose. I suppose there shouldn't be any problems here. Successfully checked - we grease the surfaces with glue, screw it in again and put the hose off to dry.
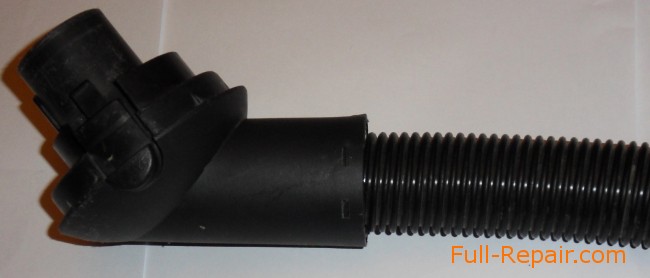
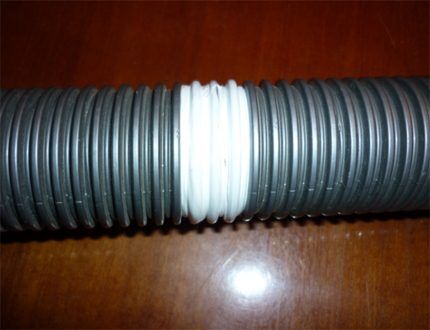
After drying, the hose is like new, maybe a little shorter.
Share the article with your friends on social networks! I would be very grateful to you.
If you have torn vacuum cleaner hose, then do not rush to throw away the vacuum cleaner and buy a new one, especially if the old vacuum cleaner is completely tired of you: excellent suction power and the engine works without interruptions. The hose usually breaks at the strongest points. folds - this is either in the place where the hose is attached directly to the vacuum cleaner itself, or in the place near the handle of the hose holder. I have seen many times how a torn hose is wrapped with duct tape or duct tape. But in this case, such repairs are usually short-lived, and it looks somewhat rough and pathetic.
The hose can be repaired by cutting off the torn part. In this case, it will be shorter by 3-5 centimeters, but it will look and work like absolutely new.
For repairs, we took a hose with a power regulator on the hose handle:
| Video (click to play). |
This hose differs from the usual one in that it uses two insulated wires as a spring, through which voltage is supplied to the switch and the power regulator (rheostat) located on the holder handle. As expected, the hose broke at the point where it was attached to the vacuum cleaner:
Since this hose is wired, it has two contacts in the form of a plug for an electrical outlet, which close the electrical network when connected to the body of the vacuum cleaner:
First, you need to disassemble the mount to access the hose wires. To do this, you need to use a Phillips screwdriver. We unscrew the two self-tapping screws on the holder mount:
On the front side of the hose holder there are round technological holes for easy removal of the fastener. With the same screwdriver, gently press into these holes inward and at the same time upward to remove the spring fastening mechanism
Thus, the mechanism of the spring fastening of the hose is slightly opened:
After that, the fork with the spring-loaded mechanism of the holder is removed:
Carefully remove the spring latch:
Next, unscrew the plastic hose guide:
Unscrew counterclockwise towards ourselves. It holds tight enough, but after a few seconds it gives in:
The wires are released, and by the same twisting, the hose itself is removed from the nozzle of the vacuum cleaner:
The plastic flexible sheath of the torn part can be easily cut with ordinary scissors:
We release the wires glued to the shell from it and cut off the excess part with side cutters:
When trimming wires, note that it is best to trim an integer number of turns (one, two, three, etc.). This is necessary so that when assembling in a natural position, the suction end of the hose is directed downward, as before, and not somewhere to the side or upward.
Next, we will use a soldering iron to solder the ends of the wires that were previously soldered to the wire - the spring, which were cut off:
Solder them again.To do this, you need to clean the new ends of the wires from insulation (you can use an ordinary construction knife):
For a better grip with solder, it is better to process the cleaned ends with rosin:
Then we solder the ends of the wires with pins to our cut part. They must not touch bare wires — pay special attention to this!
Everything is ready. Now you can reassemble what has been disassembled. When assembling, we first screw in the vacuum cleaner nozzle:
When planting wires, it is convenient to use electrical tape to fix the wires:
Also, when assembling, it is better to first install the holder with a spring fastening, and then put on the plastic hose guide, since it goes over the top of the holder:
Next, screw the screws back. That's all. We receive an updated hose. All the work took about 30-40 minutes, no more. Of course, the attachments for different brands of vacuum cleaners are different, but the principles are common to all.
A significant proportion of used household vacuum cleaners are designs where a flexible corrugated hose is used. When the device is used for cleaning a room, loads of a different nature act on the flexible hose, which does not exclude damage to this part of the vacuum cleaner, right?
You have a similar trouble, but you do not know how to fix a vacuum cleaner hose with your own hands? We will help you figure it out - the article discusses options for damage to the vacuum cleaner hoses and methods for eliminating such problems.
Most corrugated hoses for cleaning equipment are made of flexible material (polypropylene).
The tube is usually no more than 1.5 meters in length. Due to the corrugated surface, the accessory has the ability to stretch within a small range.
One end of the elastic tubing ends with a short piece of rigid plastic tubing. This part is a connection link with an extension rod or directly with the working attachment of the vacuum cleaner.
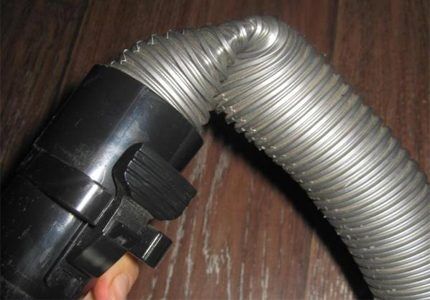
The opposite end part of the hose is equipped with a short nozzle-lock, by means of which a lock connection is formed with the vacuum cleaner module. This nipple-lock is in fact also a continuation of the corrugated tube.
The practice of using vacuum cleaners notes that it is along the lines of the joint of the elastic corrugation with the end rigid elements that rupture most often occurs.
Meanwhile, the formation of even a small burst of the hose leads to a significant loss of the efficiency of the harvesting equipment.
Cracks, tears, punctures on the body of the vacuum cleaner hose can appear for various reasons. However, the main reason, of course, should be considered incorrect use - the handling of this part.
What actions of the user lead to the appearance of defects on the corrugated tube body? Take a closer look:
- Towing the vacuum cleaner from place to place through a hose.
- Bending the tube at unacceptable angles during cleaning.
- Careless use when cleaning sharp-edged objects.
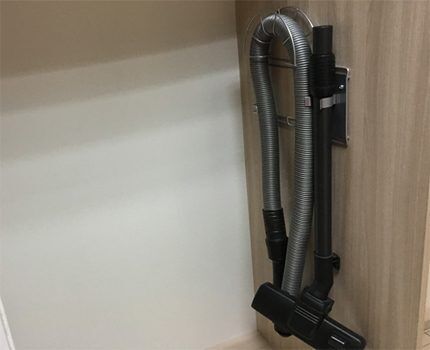
- Storage not according to instructions.
The natural reason for the formation of defects should also be considered the expiration of the product's life, wear, and poor quality of the material.
Towing the vacuum cleaner from place to place by pulling the device by the working hose is a fairly frequent practice.
At the same time, many owners of vacuum cleaners are doing such "tricks" completely unaware of the future consequences. Meanwhile, the instruction for any vacuum cleaner clearly states - you can't do this!
Bending of the pipeline at an unacceptable angle can occur when the owner of the vacuum cleaner, in the heat of cleaning, seeks to reach areas that are theoretically unattainable in terms of the operational and technical parameters of the cleaning equipment.
Several times such attempts can end quite successfully. However, the strength of the material in relation to unacceptable loads is not unlimited. Therefore, at the most inopportune moment, the pipeline will simply burst in the place where there was an unacceptable bend.
Cleaning can be carried out in different conditions. For example, when cleaning furniture, the frame of which has metal parts with sharp edges. If in such conditions to manipulate the hose carelessly, there are all prerequisites for the appearance of cuts on the body of the corrugation.
Finally, the rules for storing cleaning equipment, specifically described in the instructions for the vacuum cleaner, cannot be violated either, since a violation here is one of the reasons for a malfunction of the vacuum cleaner hose.
So, storing the device together with accessories, or separately accessories, at temperatures below the recommended one leads to a decrease in the strength of the corrugated tube material.
Sudden temperature changes, loaded state, unacceptable kinks are also critical for the hose material.
If the flexible arm of the vacuum cleaner is damaged, this is not a reason for deciding on a change in household appliances.
As user experience shows, it is quite possible to bring a defective corrugated hose of a vacuum cleaner into a normal working form. And it's pretty easy to do it yourself. Let's consider the options.
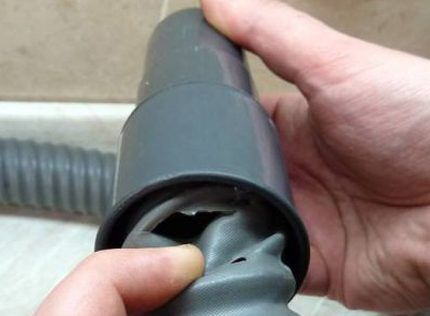
Most often, ruptures are formed at the junction of the flexible hose with hard plastic end fittings.
It does not matter in which part the gust was formed - at the point of connection of the tube under the rod or at the point of connection of the branch pipe-lock. The repair principle is the same in both cases.
For repairs in such cases, you will need a single tool - a sharp knife.
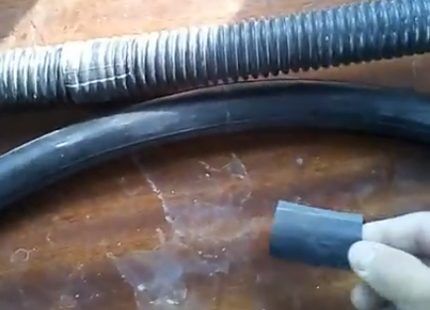
- Cut the hose evenly slightly away from the burst.
- Carefully remove the residual corrugation material from the inside of the end piece.
- Seal the cleaned inner area with sealant.
- Carefully screw the end piece onto the cut end of the hose.
As a rule, the end plastic parts have a helical landing track inside.
Therefore, the exactly cut off part of the corrugation is well screwed into the inner area of the end switch, and due to the coating of the "thread" with a sealant, the connection is tight and strong enough.
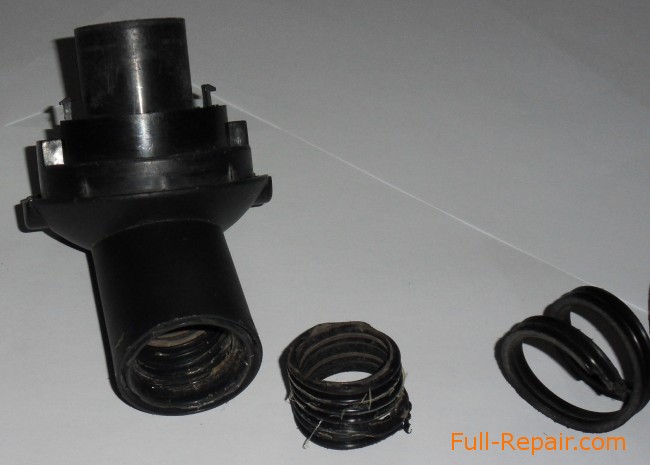
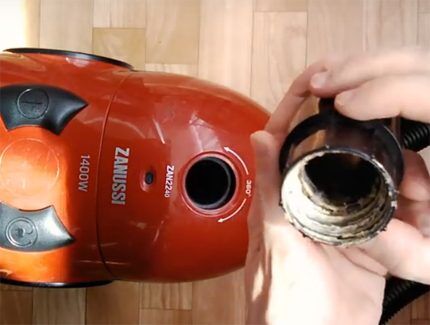
Many modern vacuum cleaners, for example, from Samsung, are equipped with hose assemblies with collapsible end fittings. Inside which "sits" a nylon bushing with a thread, into which the end of the hose is screwed. The nylon bushing is fixed inside the end piece branch pipe with an annular plug with clamps.
The principle of repairing such assemblies is similar. You only need to squeeze the clamps, remove the annular plug and the nylon bushing with a torn piece of hose.
Then remove the torn part from the bushing, cut the hose, screw the nylon bushing onto the cut end and assemble everything in the reverse order.
Such defects usually appear as a result of damage by mechanical hard objects and often through the fault of the owner of the equipment. Moreover, damage can take the form of cuts, tears, punctures.
Here, a rather practical and effective way to restore the performance of the vacuum cleaner hose corrugation is to use a piece of a bicycle rubber tube as a repair material.
- Exactly (perpendicularly) cut the damaged segment of the corrugation.
- It is good to clean (degrease) the ends on the cuts.
- Take a single piece of a bicycle tube, 80-100 mm long.
- Place a piece of the camera on any of the corrugation segments and stretch a little further than the cut.
- Apply Moment-type glue to the ends of the cuts and connect the hose sections.
- Treat the surface of the corrugation in the area of the joint with universal glue.
- Pull a piece of the camera in the opposite direction along the hose until the rubber is completely covered by the connection.
The rubber of the bicycle tube has good stretching properties, so it is not difficult to pull through the hose.
At the same time, a slightly smaller diameter of the chamber makes it possible to obtain a fairly tight fit of the hose corrugation at the connection point. The applied adhesive enhances the tensile strength.
In this way, a neat connection is obtained, which practically does not violate the elastic properties of the corrugation.
There is one more technique, more complicated than the methods noted above, but the quality result can be obtained at the factory level.
We are talking about a thermal method for restoring a defective vacuum cleaner hose using a heat-shrinkable tube and a hair dryer.
It should be noted: in this option, there is no need to cut (shorten) the hose, which has its advantages. The instruction for the production of works is as follows:
- Choose a heat-shrinkable tube according to the color and size of the corrugation diameter.
- Disassemble and dismantle the end piece on the whole part of the hose.
- Put a heat-shrinkable tube through the released end and stretch to the place of the break.
- Cover the damaged area with a heat-shrink tubing with a margin of several centimeters on both edges.
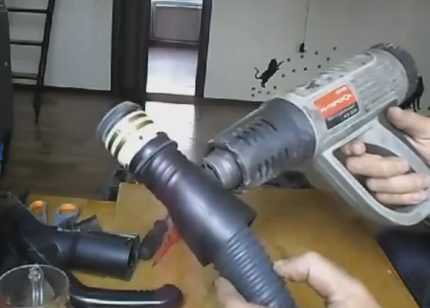
- Heat up the heat shrinkage with a construction hairdryer, gradually moving the tool along the entire length of the patch.
This method is also good for repairing punctures and cracks in any part of the corrugated pipe.
Another question is that a hair dryer or a similar tool is a rather specific technique and may not always be at hand.
Another, rather complicated from a technical point of view, business is the repair of a vacuum hose, the design of which contains a commutation electric line.
A similar system is usually used on accessories with a handle with an airflow control panel, such as the Samsung SC6573.
The complexity of the repair lies in the fact that to eliminate the break, it is required to cut off the defective piece, and along with it, it is inevitably necessary to cut the commutation line, consisting of two conductors. The cut wire is subsequently re-soldered to the working contacts.
In this case, the instruction is as follows:
- Dismantle the housing of the nipple-lock.
- Unscrew the nipple from the hose counterclockwise.
- Cut off the defective part, taking into account the sufficient length of the wires.
- Solder the contact pins onto the conductors.
- Assemble the body of the nipple-lock.
Bursts on such systems can also appear on the opposite side, at the junction of the hose with the control handle. Also, there may be a defect only in wire breakage without destroying the hose.
In such a state of affairs, the repair becomes even more complicated, since it is necessary to solve the problem of restoring the operability of the contact mechanism of the communication line.
Quite often, the owners of vacuum cleaners resort to the simplest methods of repairing the hose when a gust, puncture or crack forms. To carry out repairs, they usually use scotch tape, insulating or plumbing tape.
In principle, these measures of a temporary nature, taken for the duration of operation before replacing the corrugation with a new one, are permissible, but from the point of view of the continuation of the effective operation of the equipment, this is not the best option.
If, nevertheless, it is decided to apply one of the simple methods, in any case it is recommended to adhere to the standard instructions:
- Be sure to clean the area of the tape or tape overlay.
- It is advisable to degrease the area to be repaired using suitable means.
- Apply the tape tightly and evenly according to the “turn by turn” principle in at least two layers.
- It is desirable to fix the end of the tape with glue.
If you follow these instructions, a temporary patch at the place of the break can serve for a long time. But the status "temporary" does not change from this.
In the video below, the wizard will demonstrate how to repair a hose containing a communication line inside:
Repairing the hose of a vacuum cleaner often does not cause any particular difficulties for the user. The main criteria for the production of self-repairing the hose is the ability to hold a locksmith tool in your hands and, accordingly, a creative impulse to perform repair work. Without both, the quality of the repair is not guaranteed.
On our website information will be collected on the solution of seemingly hopeless situations that arise in you, or may arise, in your everyday life at home.
All information consists of practical advice and examples on possible solutions to a particular issue at home with your own hands.
We will develop gradually, so new sections or headings will appear as materials are written.
Good luck!
Home radio - dedicated to amateur radio. The most interesting and practical circuits of devices for the home will be collected here. A series of articles on the basics of electronics for beginner radio amateurs is planned.
Electrician - given detailed installation and schematic diagrams concerning electrical engineering. You will understand that there are times when it is not necessary to call an electrician. You can solve most of the questions yourself.
Radio and Electrics for beginners - all information in the section will be completely devoted to novice electricians and radio amateurs.
Satellite - describes the principle of operation and configuration of satellite television and the Internet
Computer - You will learn that it is not such a terrible beast, and that you can always cope with it.
We repair ourselves - illustrative examples are given for the repair of household items: remote control, mouse, iron, chair, etc.
Homemade recipes - this is a "tasty" section, and it is completely devoted to culinary.
miscellanea - a large section covering a wide range of topics. These are hobbies, hobbies, useful advice, etc.
Useful little things - in this section you will find useful tips that can help you in solving everyday problems.
For home gamer - the section is entirely devoted to computer games and everything connected with them.
Works of readers - the section will publish articles, works, recipes, games, advice from readers related to the topic of home life.
Dear visitors!
My first book on electrical capacitors, dedicated to novice radio amateurs.
By purchasing this book, you will answer almost all questions related to capacitors that arise at the first stage of radio amateurism.
Dear visitors!
The site contains my second book on magnetic starters.
By purchasing this book, you no longer have to look for information about magnetic starters. Everything that is required for their maintenance and operation, you will find in this book.
Dear visitors!
The third video for the article How to solve Sudoku has been released. The video shows how to solve a difficult Sudoku.

