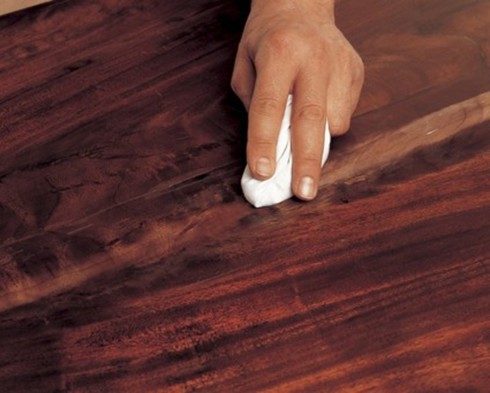
In detail: old doors do-it-yourself interior repair from a real master for the site my.housecope.com.
Doors play an important role in interior design. There are many different models in stores, but high-quality ones cost a lot of money, and you usually don't want to look at cheap ones. There is a good option - to update the old doors with your own hands. There are many techniques, and not the most difficult ones, that allow you to fix the situation for little money.
Whichever way you choose to update the old interior door, you will need to carry out a number of preparatory work. Usually old painted specimens are going to decorate. Painting is usually amateur, so there are more than enough irregularities, sagging and other small defects. All of them need to be aligned.
We remove the door leaf from the hinges, put it on a flat surface. You can - on the trestle or table. We take wood putty (even if they are made of chipboard or plywood) and we cover all holes, chips and depressions with it. After drying, proceed to the next stage - grinding.
We buy wood putty
We take sandpaper with a coarse grain and a fine one. We process, achieving a flat surface. If you work by hand, it takes a lot of time and effort. With a hand sander, work moves faster. If further painting is planned, we try to achieve the most even surface. If you plan to decorate with wallpaper, fabric, self-adhesive film, you may not bring it to the ideal, but it should be exactly.
Hand sanding takes a long time
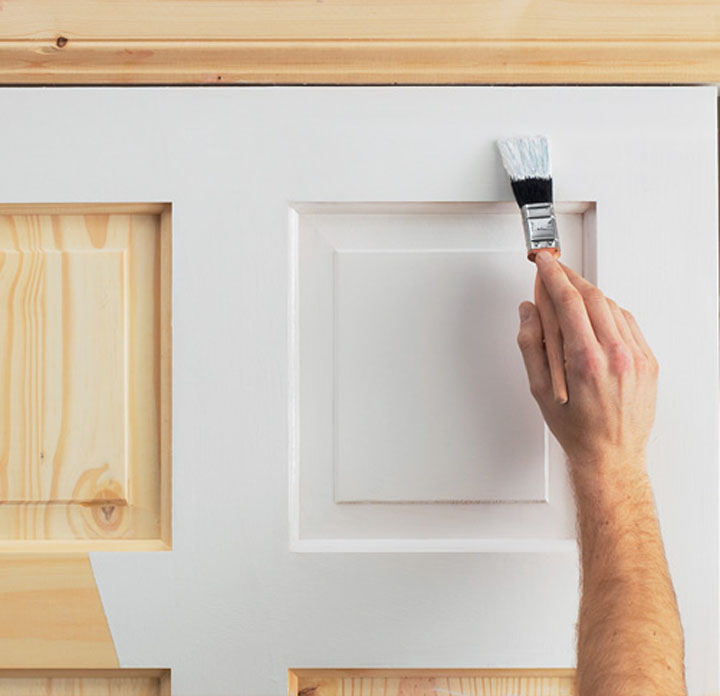
Next, remove the dust, wash off the remnants with water and diluted dishwashing detergent. We dry it. Further actions depend on the selected update method. If you are going to glue any kind of fabric or wallpaper, you can prime the surface (with liquid diluted glue or a special primer). After the primer has dried, you can glue the chosen type of decor or apply paint. By the way, if you are going to paint the doors, the paint must be of the same type, which was before, otherwise you will have to remove everything to a clean base, and this is very difficult.
| Video (click to play). |
The easiest and most affordable way to make old doors attractive is to use wallpaper. They do not have to be in tune with the walls, although this option is not excluded. First, we prepare the canvas as described above, and then you can start finishing.
The procedure for wallpapering doors is as follows:
- dilute wallpaper glue according to the instructions on the pack;
- we apply to the door leaf;
- glue the wallpaper, carefully monitoring the removal of bubbles (using a rubber roller or plastic spatula);
- trim the edges with a wallpaper knife and a flat metal strip (it is fashionable to use a large spatula);
- wait for the wallpaper to dry.
Wallpapering old doors is a good way to get new ones out of old
Then you can continue decorating already on top of the wallpaper or leave it as it is. Some options for how you can update old doors with different types of wallpaper are described below.
Modern photo printing allows you to transfer volumetric images to paper. It will turn out very nicely. And you can print any image of your choice. In general, any. Usually advertising agencies are involved in photo printing, sometimes printing houses. Go there, explaining what you need (have a USB flash drive with the selected pattern and the exact dimensions of the canvas on which you want to print the image). Having received the required image, we glue it on the door according to the method. described above.
Only three options for a door with photo wallpaper
If you stick foam or polyurethane moldings, sockets on plain wallpaper, the style will completely change. Doors of this type are suitable for classic interiors or rooms; when using a colorful background and another form of moldings (with rounds), they can be decorated in the Provence style.
The work is no different from the sequence described above. We take the prepared doors with a leveled surface, spread it with glue, glue the wallpaper.
Updating old doors with wallpaper
It is not difficult to achieve good results by leveling the panels with a rubber roller, but a certain amount of small air bubbles remains. To remove them, they take a special plastic spatula (they are in any hardware store), and they are finally removed from the center to the edges. Also, this spatula is used to iron the wallpaper joint, if any. It is quite possible to achieve the fact that the joint will not be visible.
We expel the remaining air, after drying, we glue decorative elements on the door
Cut the edges of the wallpaper with a wallpaper knife. This should be done until the wallpaper has softened from the glue, otherwise they can then "reach" for the blade and break. We leave to dry. After 12 hours or in a day - depending on the temperature and humidity in the room - you can continue decorating the old door.
Gently, with a simple pencil, we apply the markup. When everything is drawn, measure the required length of the pieces of molding with a tape measure. Cut off, saw the edges at an angle of 45 °. We take a suitable glue (PVA can be used) and carefully spread the back surface of the cut elements, glue them according to the markings, and leave to dry.
Stylish new doors from old
By the same principle, you can update old doors so that the style will be different. Several examples in the photo gallery.
If you are interested in design things, you can try turning it into an art object. The good news is that you don’t need to cook it; bumps and bumps will disappear under the design.
These are what doors were and what they can be made
The decorating process begins with the manufacture of papier-mâché. Take egg trays, spray with water, knead with your fist, trying to level the surface. In the process, they will tear, this is normal and even good - we need small pieces. These almost flat fragments, on liquid nails or using a glue gun, are glued to the surface in random order.
How to create decorative elements for the door
Next, we glue any trash with an interesting structure, unusual or ordinary shape. In our case, there was an old knitted string bag. It was cut into small pieces and also glued.
We glue the decor on old doors
Lids, rings, a small perfume bottle, a small non-working computer mouse, the remains of a mosaic, everything that comes to hand are used. There will be a lot of trash, you can collect it ahead of time.
The process of decorating the old door in full swing
When most of the surface is "decorated", we take acrylic silver paint in cans (2 pieces are needed) and paint over the decor well. When choosing a paint, it is better to take an expensive one, in particular a German one, so that it does not pour out in sweat.
Forging effect, interesting option
A romantic or "cheerful" door design can be done using decoupage. For work you will need:
- napkins with a suitable pattern;
- PVA glue (about 200 ml);
- natural bristle brush;
- acrylic lacquer.
Preparing the canvas, as described earlier. We prime and paint in a suitable color. After the paint has dried, we start decorating. We take a pack of napkins we liked, separate the top layer, which is with a picture.
Separate the top layer of napkins with a pattern, tear them lengthwise into two parts
Tear napkins with a pattern lengthwise into three strips. We tear, we do not cut. We want a slightly jagged edge. Two stripes on one side get an even edge, we put them to one side. We break the middle part into squares. The best option if they are 3-4 cm on a side.
We take glue, a brush, a small container. In it we mix PVA with water in equal proportions.
Next, we proceed to decorate the door with our own hands. We take a strip with an even edge, apply it to the area to be decorated (in this case, this is the center of the door leaf). Dip the brush in glue, with it we begin to smooth the fragment in different directions. Wrinkles are formed, but this is just not bad - a more textured finish will turn out, so you don't really need to align them. When wet, wipes are very delicate and elastic, remember this when working, act carefully.
We work carefully with a brush dipped in PVA
Gradually make a frame with one smooth edge. The second turns out to be carelessly torn.
We make a frame on the door from napkins
Next, fill in the middle with squares. The technique is the same.
DIY door decor is almost finished
When the entire surface is filled, we leave it for a day - we wait until the PVA dries. Next, take an acrylic varnish and cover our decor with a soft brush. To prevent it from smelling, we take a water-based varnish. It is a little more expensive, but it doesn't have a headache.
This is what happens after the varnish dries.
The beauty of decoupage is that we get beautiful things at low cost.
Perhaps the easiest way is to update old doors with self-adhesive. All you need:
- the film itself,
- a spray bottle containing soap and water;
- plastic spatula or soft rag;
- sharp knife (wallpaper can be used).
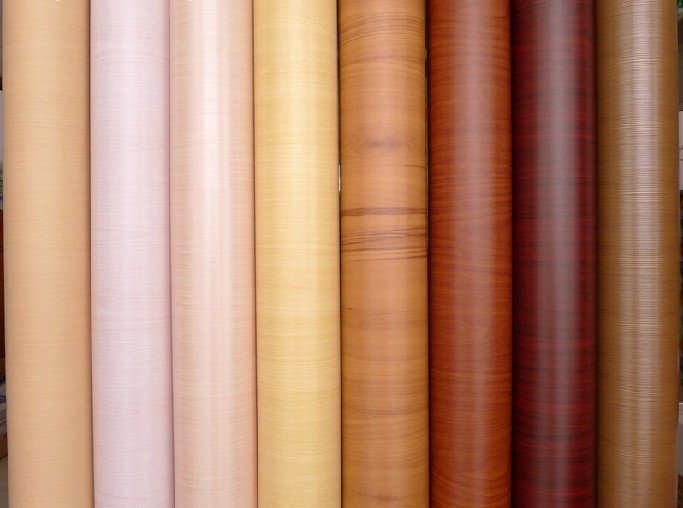
This film is available in different versions - there is a single-color matte or glossy, there is a single-color one with holographic patterns, wood-like, there are even special doors for pasting with printed photographs.
Part of the range of self-adhesive films
Regardless of the type of film, it is glued in the same way. In this case, they decided to update the old doors using the option with photo printing. One moment: before pasting, we remove handles, latches and other door accessories.
For the decor to be of high quality, the door surface must be clean, even and smooth. If you sanded it before doing this, try gluing on a small piece of film. If it sticks well, everything is fine. If it doesn't "stick", the doors will have to be primed and then painted or varnished to create a smooth surface.
We take a spray bottle and evenly wet the surface of the door.
We shave the film, remove the protective layer from one of the corners, and spray it. So, wetting, we separate the protective paper from the upper part along the entire width of the film.
Separate the paper backing on the upper corner, moisten the film with water
You should get a strip 15-20 cm wide. Do not remove any more so that the film does not stick to the canvas. We apply the peeled-off part to the upper edge of the door leaf (or the area to be decorated), it quickly sticks. Try to immediately apply it evenly, but the position can be corrected - for this we wetted the surface so that the film could be moved. If you pull it, it moves a little.
We apply the film to the upper edge of the door leaf and smooth it, removing air
After making sure that the canvas lies flat, take a plastic spatula (for wallpaper) and smooth the surface with it, moving from the center to the edges. The task is to remove all the air. Since the surface is wet, it is not difficult - water displaces air.
The rest is simple. We pull down the protective paper, peeling off the strip, glue it and so on - to the very bottom of the door. If you have glued the upper part for a long time, the lower one may dry out, therefore periodically check if the doors are dry, and spray again if necessary.
After the entire film is glued, cut off the excess at the edges with a sharp knife. All that remains after this is to install the fittings.
This is how old doors can be refurbished with photo-printed film.
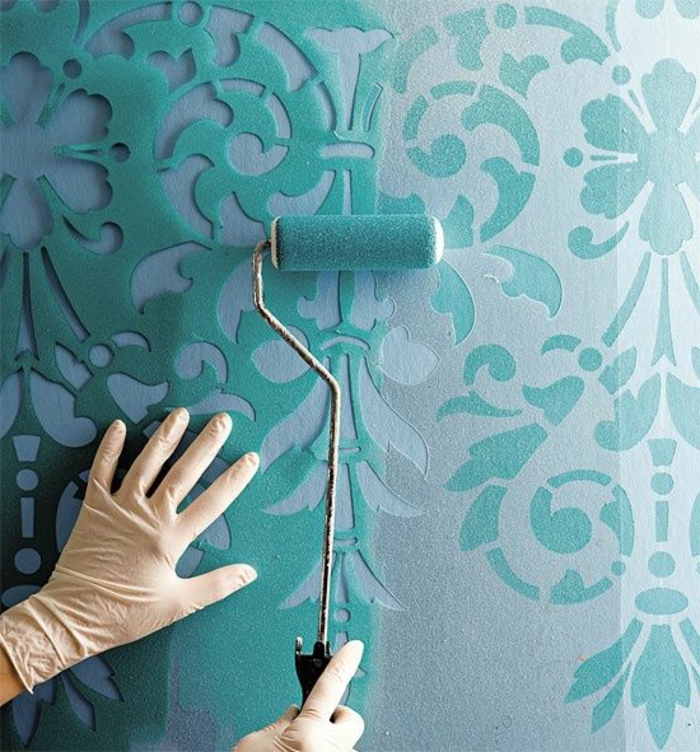
Old doors can be renovated with applied drawings. The only pity is that not everyone has artistic talents.But in this case, the problem is solved with the help of stencils. You can draw them yourself, or you can find the image you like, print it on thick paper, cut out the drawing with a sharp knife, leaving jumpers in places. So the stencil is ready.
The disadvantage of a paper stencil is that it does not last long. If you need a "long-playing", you need to transfer it to a transparent dense film. In more detail, the technology for cutting a stencil for door decoration is shown in the video.
The drawing can be anything. Both geometric and floral, stylized images of animals, birds, cartoon characters are popular.
Here are some options for small stencils
But they can be on the entire area of the door leaf. It all depends on the style of the room and your desire.
The same technique can be used to decorate doors with glass. Many old doors have a regular glass insert. In order not to spend money on a patterned one, you can apply the pattern yourself.
Stencil on the door glass
One of the options for photo wallpaper on the door
Drawings with holographic effect
Colors can be "funny"
The combination of thin and thick stripes gives a three-dimensional effect
Option for those who can draw - writing on the door
You can use a map instead of wallpaper
Two-color rhombuses - not boring doors
Door decor option for a classic interior
It is quite expensive to change old doors to new ones, since the interior doors to the toilet and the bathroom are mainly made in the same style, that is, if you change, then all at once.
Therefore, we offer 4 master classes on how you can update wooden doors with your own hands with photos and detailed instructions. And not just paint, but implement interesting design solutions!
The simplest and easiest upgrade method is to make beautiful geometric door stickers... To do this, you need a self-adhesive film, preferably contrasting with the color of the door.
- Make a preliminary marking of the pattern on the surface with a pencil.
- Stick the film and press and rub the air under the film with a rag.
- This method does not require removing the door leaf from the hinges; it can also be done in an upright position.
ATTENTION: Please do not cover the doors completely with a foil to match the structure of the tree! It looks awful and old-fashioned! Better take a single color film and geometry.
You can paste over the doors with a single-color film under chalk drawing, it is not cheap, but it looks impressive. And change the inscriptions every day!
Also, this method is not laborious and requires a minimum of costs! You can paint the interior doors in absolutely any color! Here's how to do it in detail. But painting requires the removal of doors with a hinge.
- Any for interior and interior woodwork, water-based and acrylic-based - it is absolutely odorless! You don't need alkyd paint!
- Take matterather than glossy. Glossy will highlight all the irregularities on your surface.
- Paint in a bottle - the danger is that if you paint for the first time, you are unlikely to paint exactly! Also, if you are going to paint right in the apartment, keep in mind that it "flies" in all directions. Therefore, beginners are better off starting with regular paint and a roller.
- Solid and even doors - only wide roller! We paint in 2-3 layers with a very thin coating.
- If the doors are with panels, then first we paint all the grooves with a thin brush, and then we make a full cover with a roller.
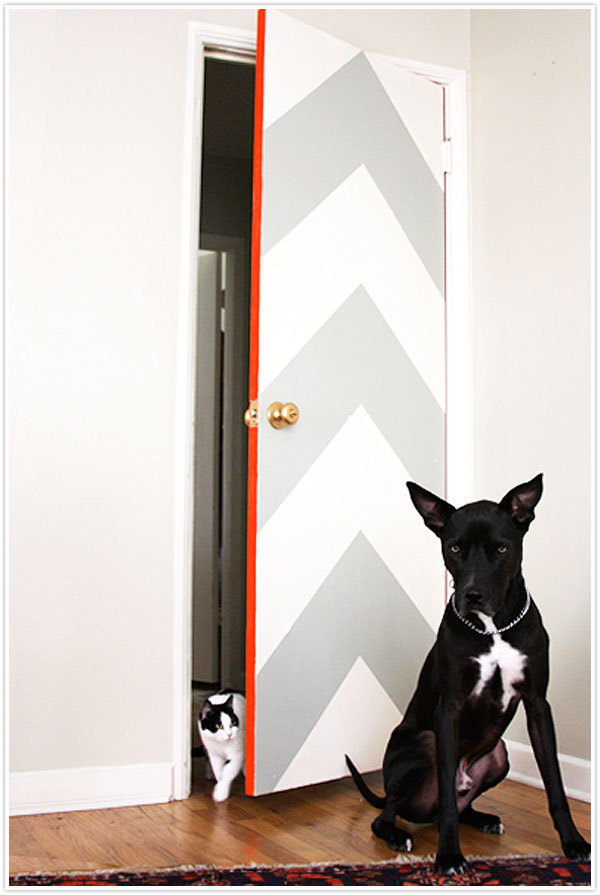
A door with embossed overhead strips looks much more original and interesting than an ordinary flat one. Making these changes is pretty simple and doesn't take long. For the money, the cost is only slightly more than just painting, and significantly cheaper than buying a new door.
 Necessary materials:
- Door
• Overhead wooden planks
• Roulette
• Long ruler and building angle
• Pencil
• Saw - Miter box
• Liquid nails or other wood glue
• Scotch - Paint (white here)
• Building level (not necessary, but will help a lot to check how evenly you install the overhead planks)
Step 1: paint the door. First you need to repaint the old wooden door in your chosen color, in this case white. Leave to dry.
Step 2: outline the location of the planks
On top of the dried paint, you need to mark the fastening of the overhead wooden planks. To do this, draw lines with a pencil (not pressing hard on it) and a ruler to get perpendicular lines, use a building corner.
In this case, the drawing consists of two rectangles located one above the other.
Any, even the most expensive and high-quality interior doors can become unusable. The door leaf can fade, crack, or just get bored. In any case, now it will not be difficult to replace the old door with a completely new one. But this may not always be really expedient and necessary. There are cases when it will not be possible to replace them or it will be problematic, for example, the door has non-standard dimensions or there is no necessary funds to buy a new door. One way or another, there is always an alternative option, because there are many ways how you can update any door with your own hands.
There are many methods of restoration, but regardless of the choice, you first need to prepare the tools that will be needed in the process of carrying out the work.
- Building hair dryer;
- Plane;
- Spatulas;
- Sanding machine;
- Sandpaper.
In order to find out how to properly update your old interior door, you need to familiarize yourself with the stages of the work.
At the first stage, the door is processed and cleaned from the old coating. This will need to be done regardless of what type of finish will be used in the future.
To begin with, remove the door from its hinges and put it on a place specially prepared for this. The place for restoration should be comfortable, well lit and ventilated. This is very important to ensure comfort during work and compliance with safety measures.
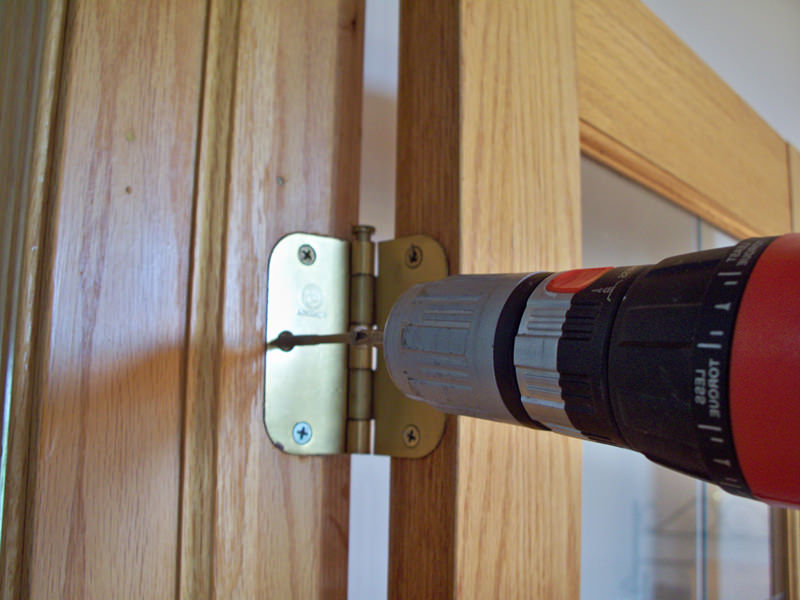
Then it is necessary to remove all handles, locks, latches from the door. If there are glass inserts, then carefully remove them. Only after all unnecessary has been removed, you can begin to remove the old door covering.
In order to easily remove the old layer of paint, the surface of the door is thoroughly heated with a construction hairdryer. And only when it softens the paint is removed with a spatula. Having cleared the door of old paint, you can proceed to patching up the cracks and scratches that have formed. For these purposes, there are special varnishes and putties for wood or ordinary putty.
After the door leaf dries well, it is necessary to plaster and grind it. To give the surface the desired shade and protect it from moisture, the door leaf can be coated with linseed oil. After all these procedures, you can insert the glass (if there was one) and continue further updating the canvas.
Lacquered doors require special attention. The initial recovery is the same as described above, except for one point. It is necessary to carefully approach the purchase of putty. Since the varnish is transparent, everything under it will be visible. The color of the interior door can be changed with varnish or stain.
Interior laminated or veneered doors must not be painted. For their restoration, completely different methods are used.
Doors with this finish can be easily brought back to life with a special wax crayon. It is first heated, and then all cracks and scratches are treated with it. The most important thing is to choose the tone of the pencil to match the color of the door, if done correctly, then after polishing the place treated with a pencil, the color will not stand out and will become almost invisible.
There are no other ways to update the door yourself. Any restoration, partial or complete, is based on the methods described above. If everything is done correctly and accurately, any old door will heal a new life.
At the second stage, it is necessary to decide what type of decor will be used in the future.
The easiest way to update an old door is to paint it in a single color. Before you start painting, you must first seal the glass in the door with molar tape so as not to accidentally stain them. The door leaf is painted in two layers and if the budget allows, it is best to use latex or acrylic paint. They are more expensive than regular paint, but much more convenient to use. Their plus is that they do not smell, dry quickly and are easily washed off the skin.
In order to make the interior door more expressive, there is a special technique for highlighting embossed contours. To highlight the contours, you can use different color schemes, the main thing is that they are combined with each other and look beautiful.
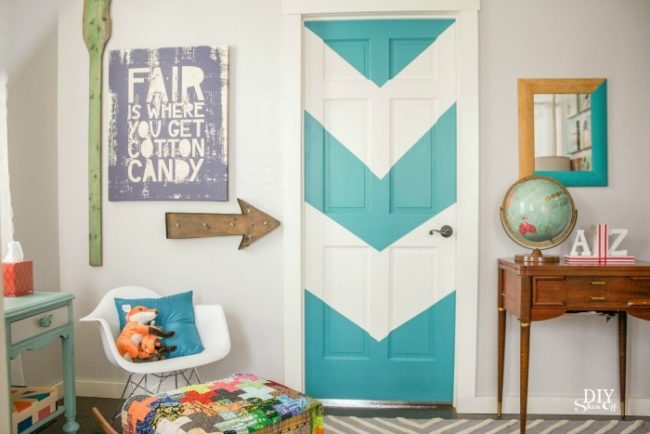
You can go further and paint the door in several colors, make a composition of geometric shapes or stripes.
For those who do not have special artist skills, there is an excellent option for how to update interior doors. It consists in using ready-made stencil paper. But you need to keep in mind that for this type of decor, only a door without a relief is suitable. In hardware stores there is a huge selection of stencils, anyone will find something to their liking.
Working with stencil paper is very easy. This does not require any special knowledge. You just need to press the prepared stencil tightly to the door leaf and apply paint to it. The paint is applied with a roller or spray.
This type of decoration is one of the simplest and most inexpensive.
Unlike the options for how to update the interior doors proposed above, this type of decor is not suitable for everyone. And all because for it it is necessary at least minimally to be able to draw beautifully and handle brushes. Without such skills, you can only ruin everything by making an absurd drawing.
Beautiful art painting always looks luxurious. To make your door stylish and original, you only need a set of paints and good imagination. The drawing can be absolutely any, there are no restrictions, the color is also chosen to taste, and, of course, it is necessary that it be combined with the rest of the interior.
If you have children and you are renovating a children's room, then you can simply invite the child to decorate his door himself. You can entrust such an important matter from both sides at once, or paint the outer part of the door at your discretion. In any case, children's imagination will quickly do its job. The result of such creativity is a beautiful children's drawing that will delight any adult.
Another original option for updating an old door is to create an unusual texture on it. An example would be creating a wooden surface or getting an antique effect. It is very easy to achieve such an effect; it is enough to purchase ready-made paints in a special store that will repeat the surface of a tree, canvas or a slate board. You will also need a sponge from the materials, with its help you can get a spotty surface and "steel wool".
You can update the interior door without the help of paints. Wall murals will be an original and beautiful option.
Wall murals are able to transform any surface; on the interior door they will look very beautiful and original. The most important thing is to choose the right drawing and not be mistaken with the color.
It is best, of course, to buy special wallpaper, which are designed for pasting an interior door.The drawing on the door will appear more complete and appropriate to the place. If you have not found a suitable pattern, then you can order custom-made photo wallpaper with any pattern you are interested in.
A very important nuance when pasting is that the door surface must be perfectly clean and smooth. Otherwise, all the flaws will simply be visible after pasting. It is most convenient to use PVA glue, it is quite reliable and time-tested.
The only drawback of such a finish will be a bright image, which will constantly be conspicuous, so it can quickly get bored. In addition, the constant contact of hands with the surface of the wallpaper can quickly ruin the surface, making it unattractive. But this is not scary, because changing the wallpaper will not be difficult.
Once upon a time, this lining option was very popular. Now he also has his fans. Most of them are in Europe and America. It is best, of course, not to glue the entire door over. It will not look very pretty, so you need to get creative and decorate part of the door with paint.
Surface preparation must be carried out the same as in the case of photo wallpaper. But it must be remembered that the wallpaper wears out quickly and loses its appearance, and can also come off at the edges. The advantage of this finish is its low price.
This is a very homey and delicate type of door decoration. The end result is fun and cute. It is used quite often, but it also has its drawbacks. The fabric can be any, the most important thing is that it is not thin, otherwise the glue will be visible through it. Also, the selected fabric must be well processed so that the threads do not come out in the future and spoil the entire appearance of the door.
In order to tackle this type of decoration, you must first learn how to make beautiful compositions from shreds. If there are glass inserts, then they can be decorated with curtains. They are fixed on a fishing line or small nails.
Lamination will help give the door a fresh look and restore its former characteristics. If you try, you can get an elegant and beautiful interior door.
Lamination of a door at home consists in pasting it with a self-adhesive film. But everything is not so simple: before you start doing anything, you should familiarize yourself with the technology of work.
First you need to carefully process the surface of the door leaf. It should be free of cracks, scratches and old paint residues. The entire surface must be flat and smooth, otherwise the film will simply repeat all the potholes and only ruin everything. That is why special attention is paid to cleaning the door.
When the surface is cleaned and processed, it is washed from dust, degreased and only then proceeded to lamination.
Working with film should not be underestimated. It sticks quickly and firmly, so there is no room for error, otherwise the surface will turn out to be bubbly and uneven. To prevent this from happening, the film must not be completely removed from the protective paper. Do this slowly, gradually sticking on a piece and removing excess air.

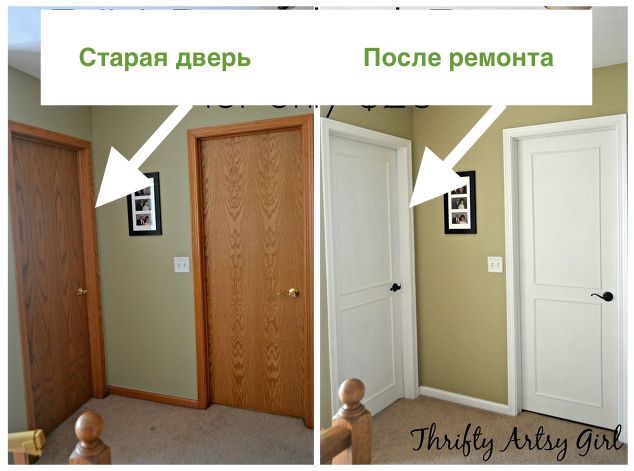 Necessary materials: