In detail: a washing machine, an automatic eyelid, do-it-yourself repair from a real master for the site my.housecope.com.
- Unscrew the two screws securing the cover to the case;
- Remove the cover by sliding it back and then lifting it up.
- - Remove the five screws securing the cover to the body;
- - Tilt the cover 90 ° in relation to the body and release it from the slots.
Turn the panel fixing screws 90 ° to the left and remove it.
- By pressing the button for opening the hatch door, open the hatch;
- Using pliers, remove the clamps with which the hatch seal is attached to the front panel (Fig. 1);
Rice. one. Removing the hatch door seal
- Separate the hatch seal from the front panel;
- Unscrew the two screws that secure the hatch door lock to the front panel (pos. b in fig. one);
- Remove the lower decorative panel;
- Unscrew the screws with which the front panel is attached to the machine body (Fig. 2);
Rice. 2. Front panel fixing screws
- By sliding the front panel down, separate it from the machine body (Fig. 3).
Rice. 3... Removing the front panel
- By pressing the button for opening the hatch door, open the hatch;
- Unscrew the two screws that secure the hatch door to the hinge.
- Remove the hatch door;
- Insert the slot of a flat screwdriver into the gap from the hinge side and remove the inner rim from the clamps fixing it.
- Remove the hatch door and inner rim;
- Remove the two screws on the inner rim;
- Remove the latch clip from the axle on the inner rim of the door.
- Remove the hatch door;
- Remove the clamp with which the hatch seal is attached to the front panel;
- Remove the hatch seal;
Unscrew the two screws that secure the hinge to the front panel (pos. With in fig. one).
Remove both handles by pulling them towards you (when reassembling, pay attention to the position of the thermostat axis).
| Video (click to play). |
- Pull out the detergent hopper;
- By clicking on the siphon, the bunker is completely removed;
- Turning the hopper over, remove the panel by pressing the fixing latches with a screwdriver.
- Remove the detergent hopper;
- Remove the handles of the thermostat and spacecraft;
- Unscrew the screw fixing the control panel (pos. a, rice. 4);
- Remove the control panel from the clamps securing it to the carrier panel.
Rice. 4. Control panel fixing screw
- Remove the top cover and control panel;
- Unscrew the screws securing the detergent dispenser, disconnect the electrical wires suitable for the carrier panel;
- Unscrew the 6 screws securing the carrier panel to the body and remove the panel.
- Remove the top cover and detergent hopper;
- Remove the handles of the thermostat and spacecraft;
- Remove the control panel;
- Unscrew the screw on the spacecraft axis (Fig. 5);
- Pulling the cam towards itself, remove it from the axis (Fig. 6);
Rice. 6. Dismantling of spacecraft
- Unscrew the two screws that fasten the spacecraft to the carrier panel (pos. A, fig. 6);
- Turning the spacecraft, one by one they remove the wires from it.
- Remove the top cover and detergent hopper;
- Remove the handles of the thermostat and spacecraft;
- Remove the control panel;
- Unscrew the two screws with which the thermostat is attached to the support panel;
- Remove the screw that secures the wiring harness. Removing the clamps from the tourniquet releases the capillary tube. Remove the thermostat flask from the nest in the tank (pos. a, rice. 7).
Rice. 7. Mounting the heating element and the thermostat flask
- Remove the front panel;
- Remove the screw that secures the wiring harness;
- Unscrew the screw that secures the level switch (pos. B in Fig. 8);
Rice. eight. Level switch and hatch door lock
- Disconnect the wires from the level switch;
- Turn the level switch 90 ° and remove it from the bracket.
- Remove the top cover and detergent hopper;
- Remove the handles of the thermostat and spacecraft;
- Remove the control panel;
- Remove button covers;
- Remove the buttons from the sockets on the front panel carrier;
- Disconnect the wires.
(When reassembling, the scales are inserted into the latches and turned so that the recess in the rear lower part of the scales is directed downward. In this case, the thermostat or KA knob is turned so that the slot on the handle is directed upward. Pay attention to the correct installation of the scales.)
- Remove the top cover;
- Disconnect the wires from the EMC filter;
- Unscrew two screws in the plastic box located at the rear wall of the machine case, which secure the noise suppression filter;
- Remove the filter by loosening the M8 pin.
- Remove the top cover;
- Disconnect the wires from the EC;
- Move back the clamp on the EC hose and remove the hose;
- Pressing with a screwdriver on the latch that secures the valve to the machine body, turn the EC counterclockwise and remove it.
- By pressing the button for opening the hatch door, open the hatch;
- Remove the clamp with which the hatch seal is fastened to the front panel, and separate the seal (Fig. 1);
- Unscrew the two screws with which the lock is attached to the machine body (pos. a, rice. one);
- Remove the front panel;
- Remove the cable from the lock (pos. A, fig. 8);
- Remove the lock from the socket;
- Disconnect the wires.
- Remove the top cover and front panel;
- Remove the clamp fastening the sleeve, along which the lock wire passes;
- Pulling downwards, pull together the cable sleeve. Detach the cable from the lock;
- Squeeze out the plastic latches of the lock and pull out the cable.
- Remove the front panel;
- Disconnect the wires (pos. B, fig. 7);
- Loosen the M6 bolt and remove the heating element from the tank cover (pos. With, rice. 7).
(When re-installing the heating element, make sure that it falls into the fixing bracket.)
- Remove the front panel;
- Disconnect the wires (pos. A, fig. 9);
- Disconnect the hose from the tank and the drain hose (pos. C, fig. 9);
- Unscrew the screw that secures the pump to the machine body (pos. And, Fig. 9);
- Turning the pump, remove it.
Rice. 9. Removing the drain pump
- Remove the front panel;
- Remove the thermostat flask from the tank lid;
- Carefully (without using tools) remove the thermostat bulb seal from the hole in the tank lid (pos. a, rice. 7);
(When reassembling, make sure that the seal fits properly in the hole in the tank lid.)
- Remove the front panel;
- Loosen the tightening of the fastening clamp;
- Carefully (without the use of tools) remove the hatch seal.
(When reassembling, make sure that the holes for the seal are on the bottom of the tank lid.)
- Remove the front panel;
- Having wrung out the wire fastening clamp, remove the tube from the connection of the detergent dispenser;
- Gently (without using tools) pull out the tube.
- Remove the front and decorative panels and the top cover;
- Remove the pressure take-off tube from the level switch;
- Remove the clamp securing the water supply pipe to the tank nozzle;
- Remove the spring clamp from the pump nozzle and cut the plastic clamp securing the water supply pipe to the tank;
- Remove the water supply tube.
Before reinstalling the belt, clean the pulley from dirt.
- Remove the back cover and drive belt (fig. 10);
- Unscrew the bolt securing the pulley to the tank shaft (pos. B, Fig. 10);
- Remove the pulley from the shaft.
Do not reuse the bolt securing the pulley to the drum shaft. When assembling the machine, it is necessary to replace the bolt with a new one.
Rice. 10. Removing the drive belt
- Remove the back cover and drive belt (fig. 10);
- Remove the power connector from the electric motor;
- Unscrew the bolt securing the electric motor to the tank;
- Remove the electric motor from the shock-absorbing suspension.
- Disconnect the power cord;
- Remove the terminal box cover by pressing the latches on both sides (Fig. 11);
- Loosen the screw securing the power cord;
- Remove the screw securing the ground wire;
- Unscrew the terminal screws and disconnect the power cord.
Rice. eleven... Removing the terminal box cover
- Remove the front panel;
- Unscrew the fastening screws and remove the counterweight;
- Remove the 12 clips holding the front tank cover and remove the cover.
- Remove the front panel;
- Remove the lower counterweight, heating element and thermostat flask;
- Remove the clamps from the tank cover;
- Remove the tank cap and put it horizontally with the seal facing up;
- Remove the seal.
(When reassembling, the seam of the seal must line up with the tank cap mounting piece.)
- Remove the back cover;
- Remove the finger from the shock absorber attachment to the tank by pressing the latches on the sharp end of the pin (pos. A, Fig. 12);
- Remove the finger from the shock absorber attachment to the washing machine body (Fig. 12).
Rice. 12. Shock absorber mount
- Remove the front panel;
- Having wrung out the fastening clamp on the inlet of the drain pump, slide it back (pos. With, rice. 9);
- Remove the drain hose from the pump;
- Remove the drain hose fasteners on the back of the machine body;
Attention: there is residual water in the hose.
- Remove the drain hose from the front of the washing machine.
The article was prepared based on the materials of the "Repair and Service" magazine
Repair of automatic washing machines is a rather complicated process and requires high qualifications, if it is difficult for you to carry out the repair yourself - contact the repair service in Moscow
All the best, write
The masters claim that the VEKO machines are equipped with not very high-quality parts, which include a management board, a temperature sensor, and a relay. The repair of such machines does not always justify itself, and the consumer is forced to purchase a new washing machine. But sometimes the problems are not too serious, it is quite possible to eliminate them on our own. So it is worthwhile to deal with typical failures and understand how the repair of Beko washing machines is carried out.
Professional repairmen of washing machines can, after observing the working equipment, name a unit or element that has failed or will soon break down and will require repair. Everything is simple - problems have begun with a washing machine, you immediately need to call a specialist and a workshop so that he can identify the cause and, with a successful combination of circumstances, carry out repairs on the spot. It seems that everything is easy and simple, and there is no headache. And such an act in some situations fully justifies itself.
But there is one caveat - a call to the master's house will cost you a tidy sum. It often happens that paying for repair services is more expensive than purchasing a new automatic washing machine. It is a shame to pay money in this case, especially when there is no opportunity to quickly make a new purchase. But there is one way out - to carry out the repair with your own hands. True, you will have to correctly determine the failure, and the main signs of breakdowns will help in this:
- there is no water heating, or it heats up very much, violating the set temperature regime;
- water enters the tank for a long time, or does not drain at all;
- the door does not close tightly, which does not allow starting the washing process;
- after the process, the waste water does not go into the sewer, the machine hums strongly;
- when the drum rotates, a strong grinding, clanging and other extraneous noises are heard;
- not a single program starts, because after switching on, all the lights on the panel blink. The second option - the program can be exposed, but not activated;
- the washing machine from the start button does not turn on;
- the display shows an error code.
If you notice that the washing process takes place in cold water, violating the set program, you can suspect a breakdown of the heating element or the control board.A similar conclusion is reached when water overheats, practically reaching its boiling point. Most likely, the whole problem is in the board, but the heating element also needs to be checked.
After starting the program, water should begin to flow into the tub for washing, and the intensity of this process depends on the set program. But when you do not visually observe the water in the tank, and the drum rotates with dry things, or after a while the machine simply “freezes”, then you should look for one of the following reasons:
- there is no water in the water supply;
- clogging of the filter located at the base of the intake hose;
- the water intake valve has failed;
- breakdown of the control unit.
The BEKO machine is designed in such a way that it will never start washing until the door is closed tightly and a special sensor-blocker sends the required signal to the control board. If the hatch does not close at all, or it seems to be closed, but the wash has not started, it is necessary to inspect the blockage. It may have broken down and cannot hold the door. The second problem is the sensor itself. If it's all about the latch, try pushing lightly on the hatch and try to activate the wash program.
When the washing process is completed, the machine must drain the dirty water and draw in fresh water in order to rinse. This process is accompanied by a hum produced by the drain pump. The water is drained out quickly enough, then the machine takes in a new amount of liquid. But if some time has passed, and the washing machine has not drained the waste water and "hangs", or the pump hums, but the water does not come off, then problems should be looked for in:
- water drain pump;
- a board responsible for managing processes;
- a blockage in the drain hose or sewer pipe.
When the washing machine emits a characteristic clang, rattle and knock during operation, it is quite possible that the bearings are out of order, or a foreign object has got into the tank, getting stuck between it and the drum. In this case, the machine should be turned off immediately and all measures should be taken to fix the problem.
The SMA may not turn on at all, or it blinks with all the lights, and turning it on again does not give a positive result. In this case, the problems may be related to:
- breakage of the starting button of the machine;
- failure of the management block;
- a break in the power cord.
The best option is when the washing machine not only refuses to work, but gives out a certain error code. With its help, you can immediately understand what the problem is.
Let's figure out how to repair Beko washing machines on our own.
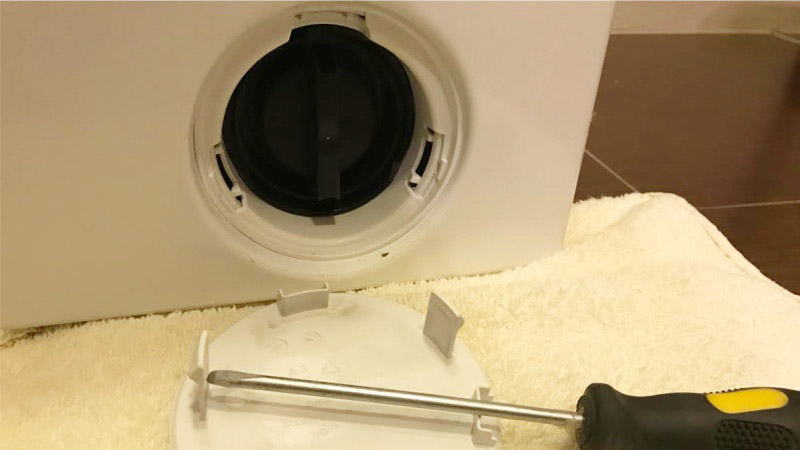
You should be aware that after washing on a machine, the waste water is not clean and transparent. To prevent various small debris and dirt from clogging the pump, a special filter is installed in front of it, which in most cases becomes clogged. The main task is to find this element, which is usually located at the bottom of the machine, under a small hatch or panel.
Further actions should take place in the following sequence:
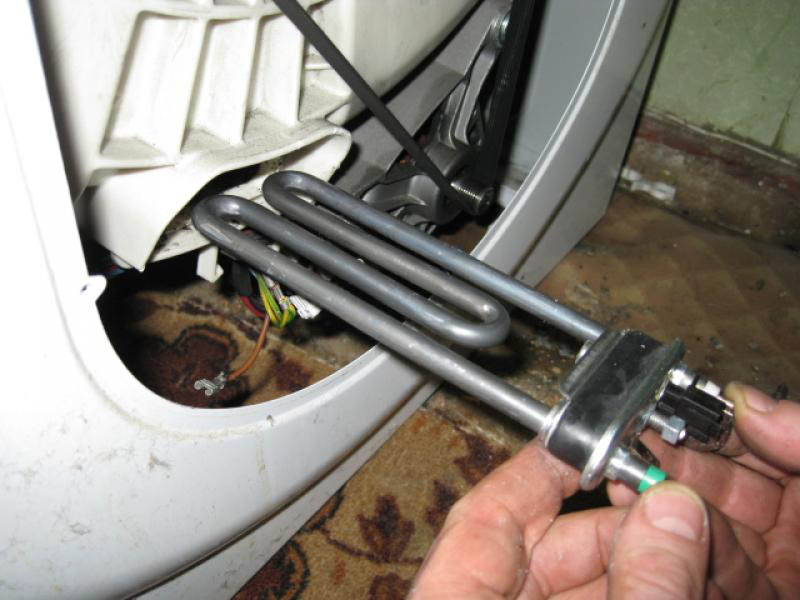
To cope with such a failure, you will have to partially disassemble the washing machine again. But first, it should be noted that in all machines, the thermoelectric heater is among the weakest units. People call it a simple word - heating element. The mineral components in the pipes under the influence of hot water begin to crystallize and accumulate on the heater with ordinary scale. Plaque does not allow heat to pass to the water, so the heating element burns out. But if the water in the pipes is soft, and scale does not appear, or you use special means, then the heating element is still able to burn out, since it has its own working resource.
In order to be sure exactly what happened to the heating element, you need to get to it. The peculiarity is that in different models it is located both in the front and in the back. For the first case, the actions are as follows:
- the front panel of the machine is removed. But first it is necessary to remove the cuff from the door.You must act carefully so as not to damage it;
- in front of you there will be two contacts with wiring connected to them, which must be disconnected;
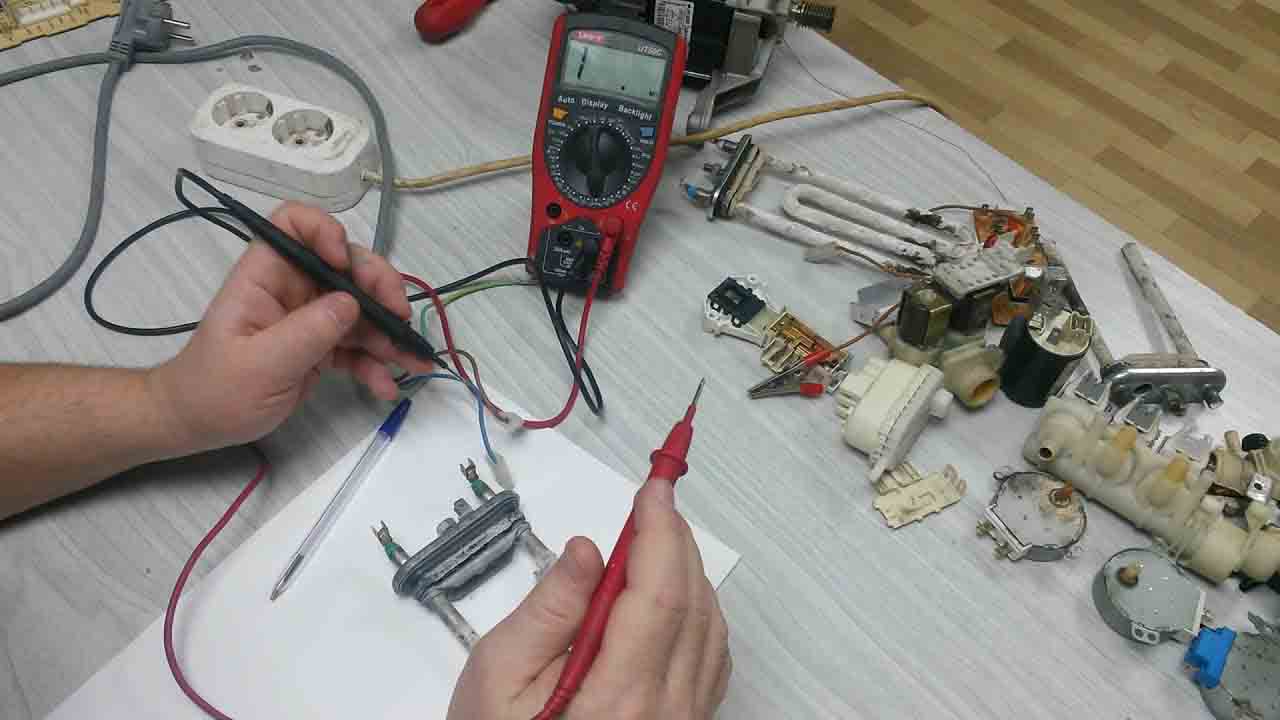
- using a tester, you need to check the resistance. At the norm, its value will be from 25 to 30 ohms. In other cases, we can confidently assume that the heating element has failed;
- unscrew the nut holding the heating element under the drum from the bolt, carefully pull out the heating element;
- we clean the place for its installation from plaque and accumulated debris;
- we install a new analogue, connect the wires.
If the heating device is working properly, check the temperature sensor located under the top panel.
- unscrew the screws and remove the top panel;
- the sensor is dismantled along with the detergent tray and the control panel, since all this creates interference in order to get to the element of interest to us;
- having opened access to the sensor, it is necessary to disconnect all wires from it;
- check the resistance. Normally, it should be 4.7 kOhm;
- the sensor must be held in a container with warm water - the resistance indicator should decrease. Otherwise, the element must be replaced;
- the new sensor is installed in place, all work is carried out in reverse order.
- DIY electrical and electronics repair.
If you have special knowledge and the necessary experience in the repair of electrical appliances, then you can eliminate contact breakage or terminal oxidation rather quickly. All that is required is the electrical wiring diagram of the machine, which can be found in the instruction manual.
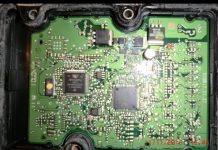
But with electronics, not everything is so simple. Repairing or replacing the management board requires specialized knowledge and experience. Considering the cost of a new module, you should not try to repair it yourself. It is better in this case to invite a master who will do everything himself.
- Vibration of the washing machine.
During the operation of the unit for washing things, in particular - during the spinning cycle, the machine gives out a strong vibration, starts "jumping" in different directions. Pay attention to how much laundry is loaded. Vibration is possible if the maximum rate is exceeded. Another recommendation is to check how correctly the support legs of the MCA are set. They are leveled so that the apparatus does not wobble. Experts advise using special stands when installing the machine.
As a result, we can conclude that the BEKO washing machine is quite reliable, but it is also capable of breaking. Calling a foreman can be quite expensive, so you need to try to carry out the repair work yourself.
Be aware that if you are a user of a Beko washing machine with a maximum load of five kilograms, then all its faults will be similar to models designed for three kilograms of things. And in order for the machine to work flawlessly for a long time, we recommend that you carefully study the requirements of the operating instructions and follow all of its rules.

